2 Best DIY Air Dry Clay Recipes {No Bake Salt Dough Alternative}
We tested popular DIY air dry clay recipes to find the best homemade clay for craft projects! Comparisons of baking soda clay vs glue and cornstarch clay, with tips and tricks on how to make strong and durable air dry clay!
I am currently addicted to homemade air dry clay! It is such a fun crafting material (as good as salt dough, in different ways!) for kids and adults. It takes only a few minutes to make, using easy to find non-toxic ingredients most of us already have!
After testing a bunch of recipes, we selected two of our favorite air dry clay recipes (the second recipe is the most fail proof! ) to share with you today! We will start with the recipes, followed by comparisons and additional tips and tricks, and some fun and beautiful air dry clay project ideas.

This is Part 1 of our DIY air dry clay series. Here are Part 2 and 3:
*Some resources in article are affiliate links. Full disclosure here.
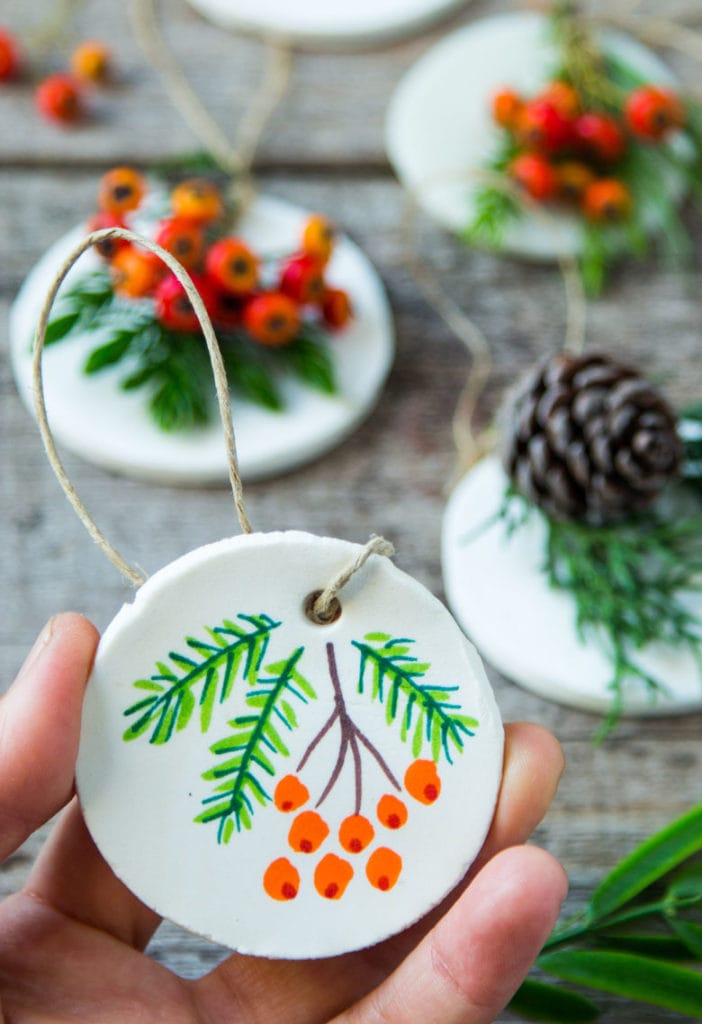
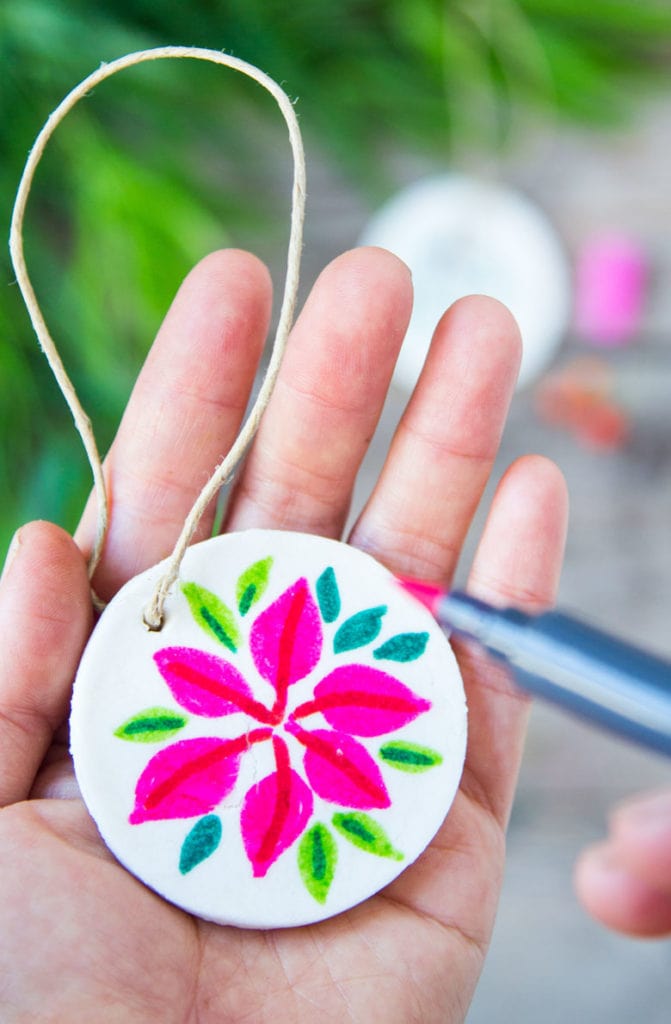
Part 2: how to make DIY clay and salt dough ornaments.
Part 3: how to decorate beautiful air dry clay and salt dough Christmas ornaments. You will love them! 🙂
This is a no-bake alternative to salt dough. However, salt dough is more forgiving and less prone to cracking. If you want a great recipe made with all purpose flour and salt, check out our tests of best salt dough recipes here!
Which recipe is the #1 winner?
For a fail-proof crack-proof clay, or a modeling clay that can take more details, definitely try the second recipe: glue and corn starch clay. It is also very strong and durable when it air dries thoroughly.
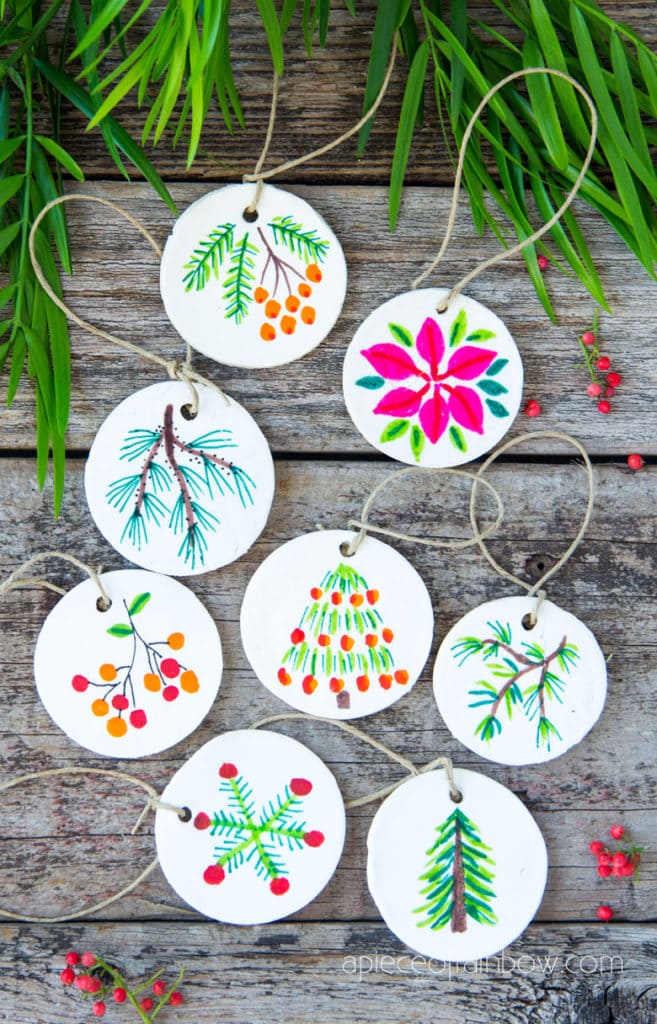
The best things about the first baking soda clay is that it dries to a beautiful opaque white, shrinks less while drying, and looks amazing decorated with watercolors or brush markers. However, it is prone to cracking. Read the helpful tips in the FAQ section at the end on how to minimize cracks.
Make it portable
Baking soda and cornstarch air dry clay recipe

- 1 cup cornstarch
- 2 cups baking soda
- 1.5 cup cold water. ( You can also add food coloring to both recipes to make colored air dry clay.)
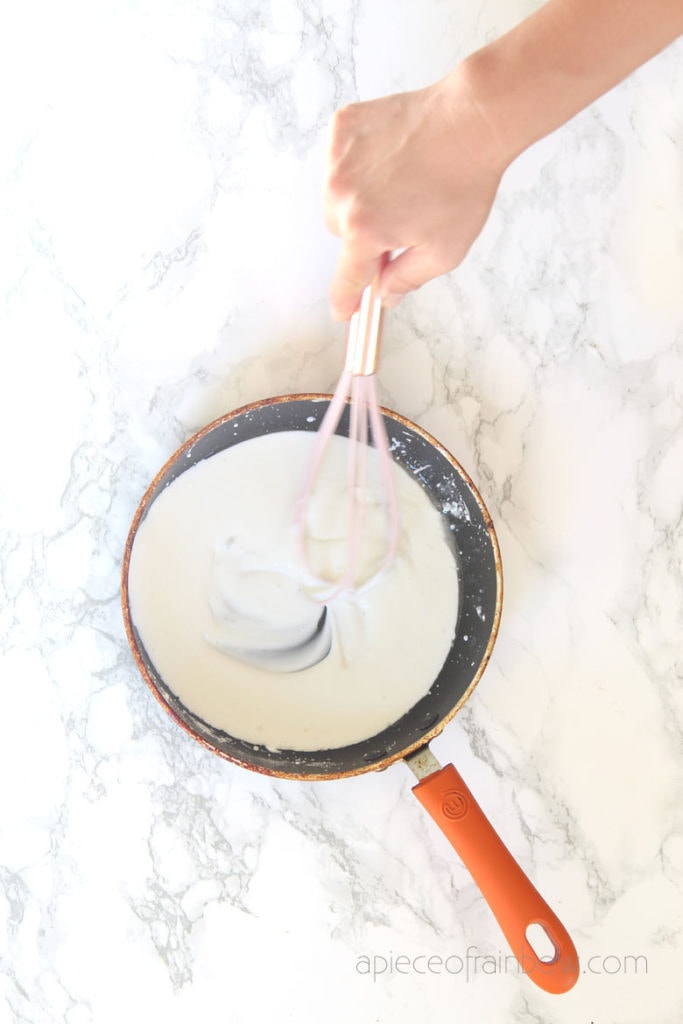
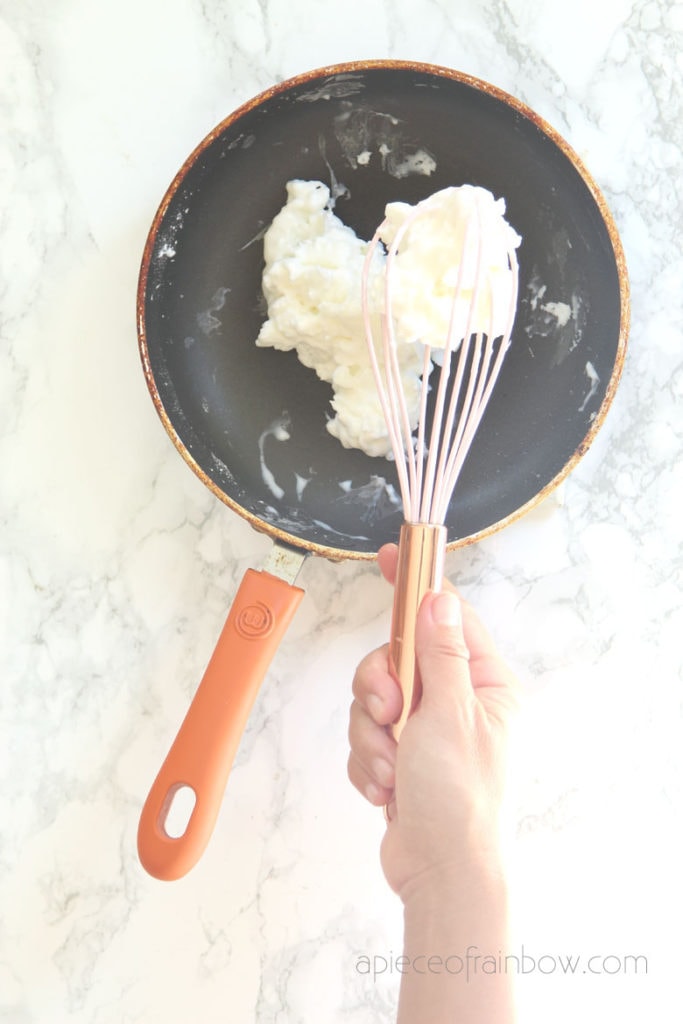
Stir all 3 ingredients together in a non stick pot, put the pot on medium or low heat, cook for a few minutes.
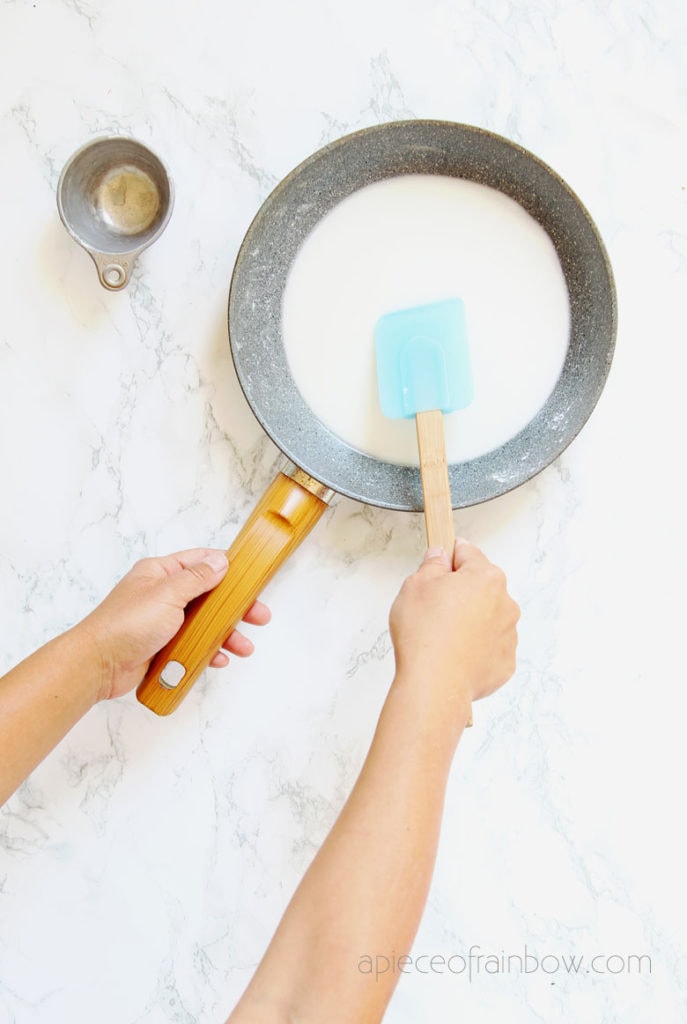
The mixture will change from a soft paste to a consistency of mashed potatoes.
IMPORTANT tip:
Turn off the heat or remove the pan from the burner as soon as the mixture pulls away from the pan, especially if it’s electric stove.
Transfer the dough to a container and keep covered while it cools. Now your baking soda air dry clay is ready to use! Read the helpful tips in the FAQ section at the end on how to minimize cracks.
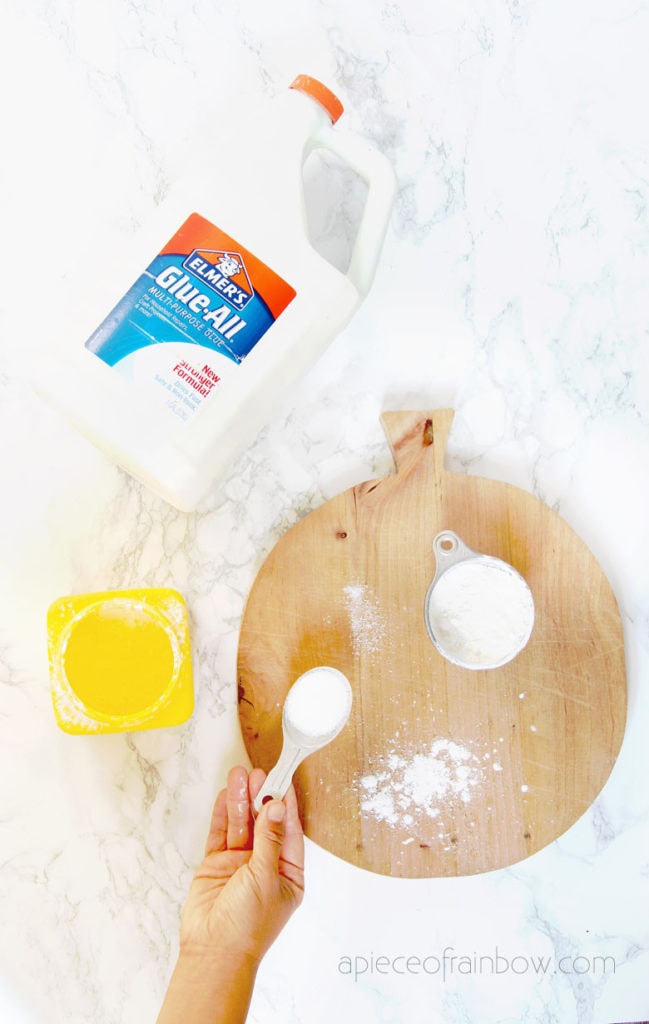
Glue and cornstarch air dry porcelain clay recipe
- 1 cup cornstarch
- 1 cup Elmers glue or any white craft glue
- 1 tablespoon white vinegar or lemon juice as a preservative
- 1 tablespoon mineral oil ( you can also use vegetable oil) which creates a smooth silky texture
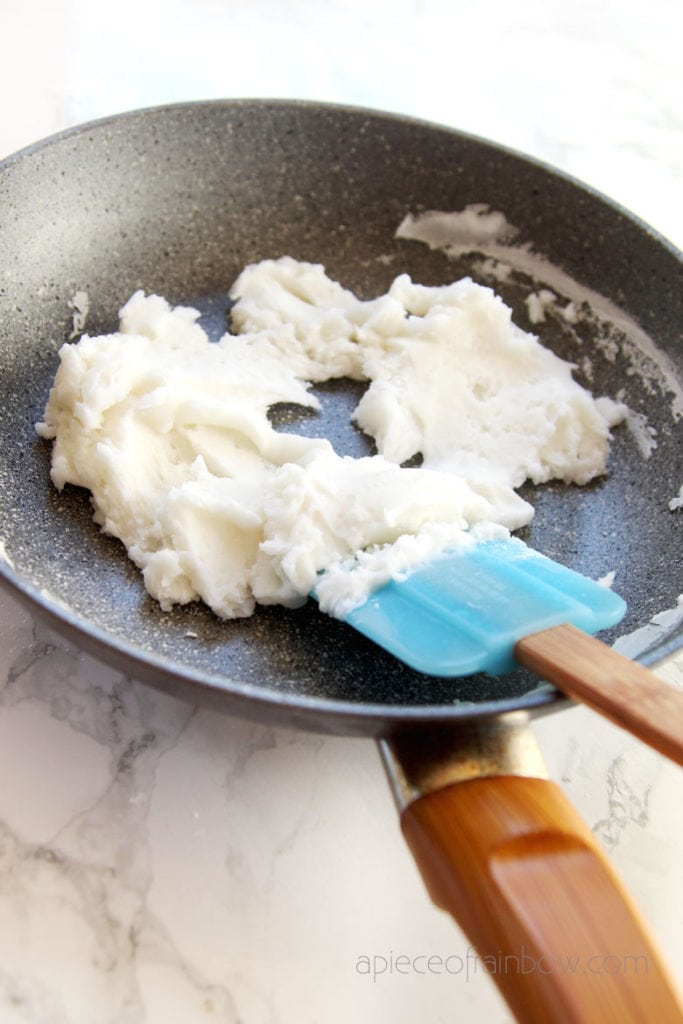
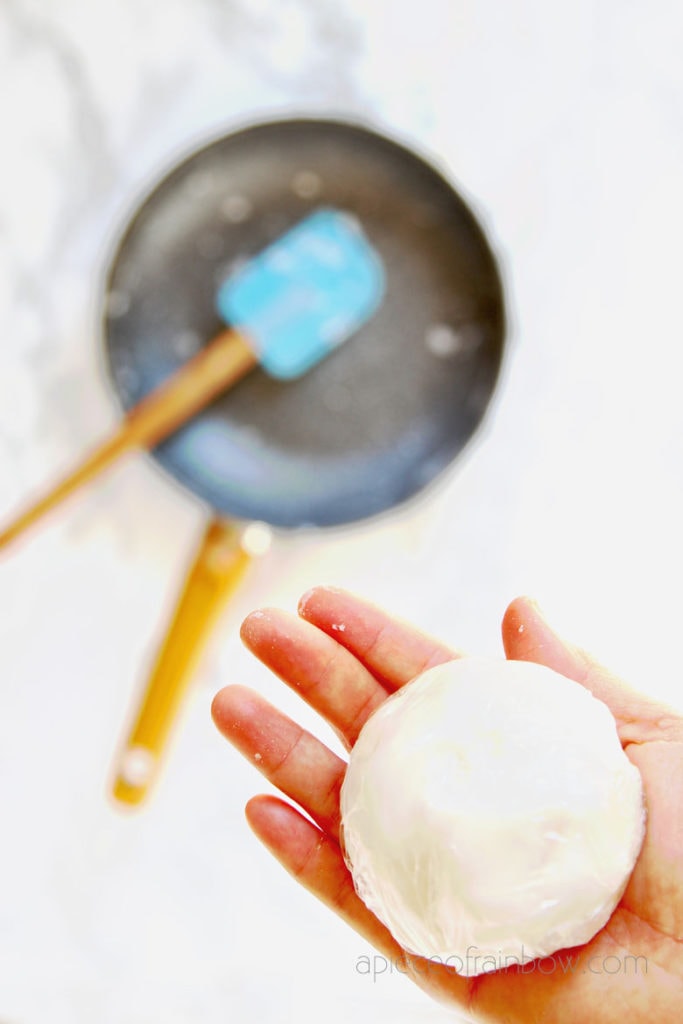
Mix everything together in a non stick pan and cook or low or medium heat as described in the baking soda clay recipe above. The only difference is that the mixture will start to look like cottage cheese with little lumps. That’s when you would remove it from the heat.
Don’t over-cook this dough. It is almost fail proof, but over cooking will turn your dough hard and leathery! Remove the pan from the burner as soon as the mixture pulls away from the pan, especially if it’s electric stove.
I have seen instructions to cook the mixture in the microwave, but I prefer stove top because everything cooks more evenly and it is easier to see when the mixture is ready.
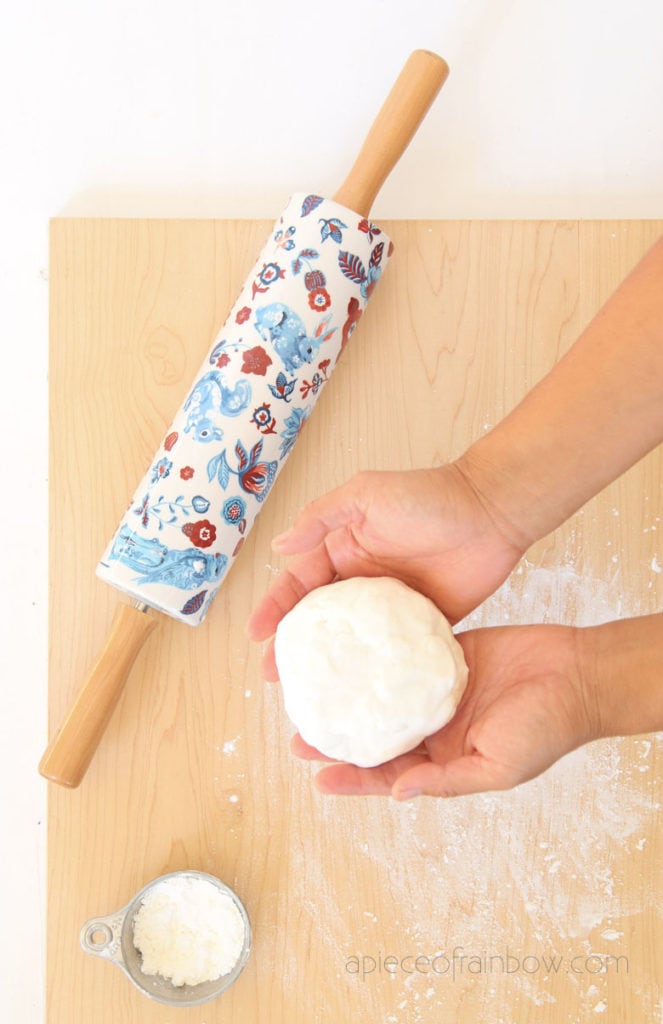
This dough is more sticky than baking soda dough. Have plenty of corn starch for dusting and rolling.
How to use homemade air dry clay
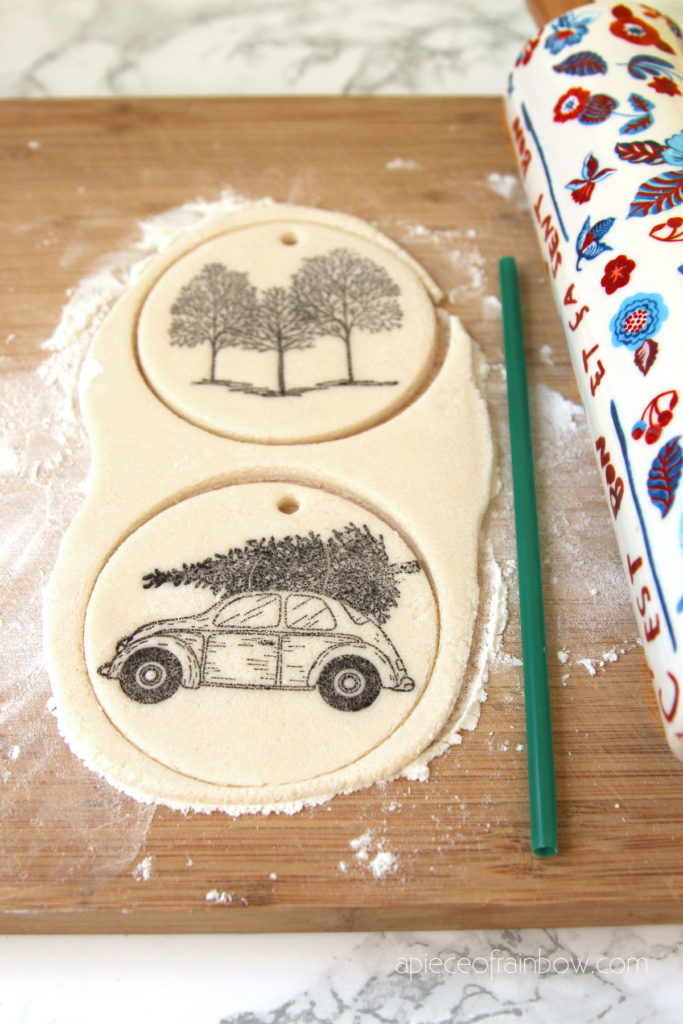
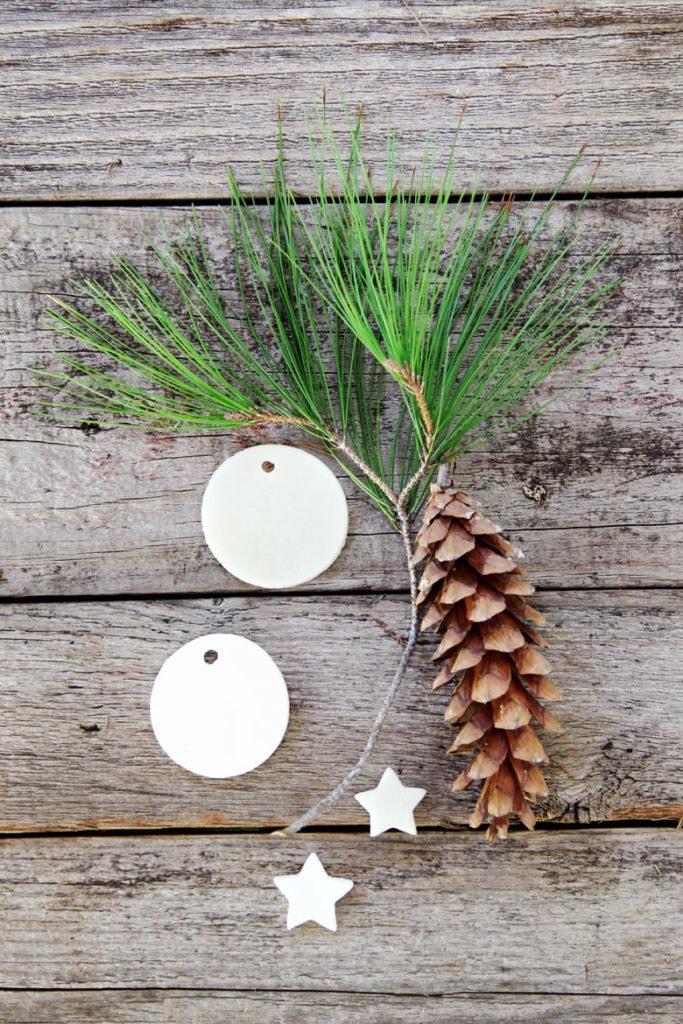
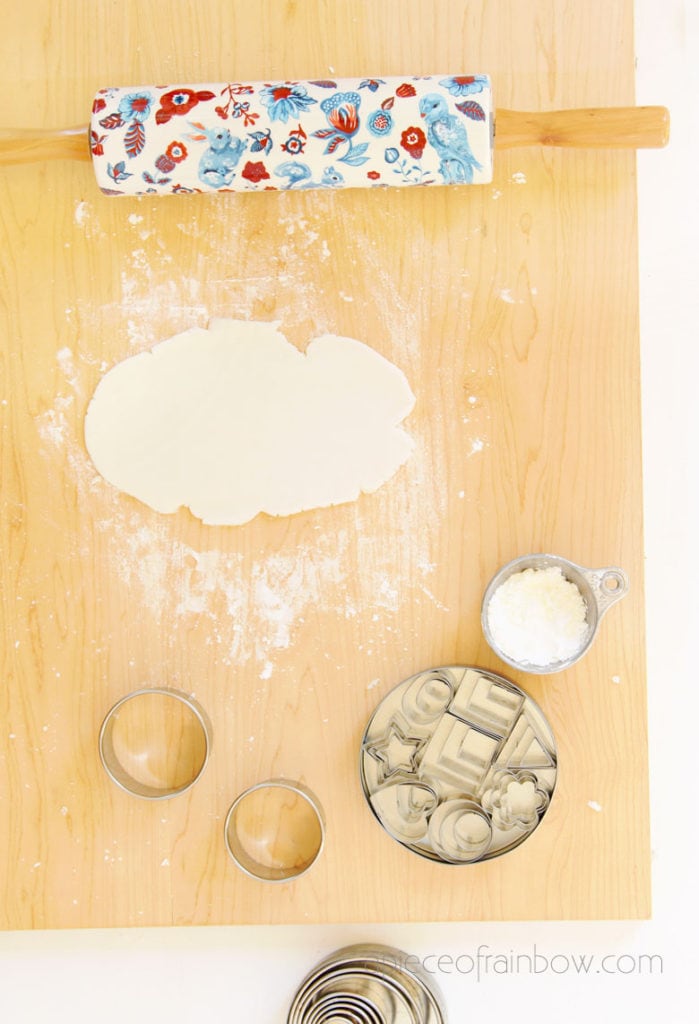
Here’s our detailed tutorial on how to make the ornaments and the star garland. You can use cookie cutters and a rolling pin: mini cookie cutters like these are great for adding interesting details and making mini stars, round cutters ( I used this set) and Christmas cookie cutters are great for ornaments. And LED fairy lights for the star garland.
These two homemade air dry clay have very different characteristics which we will compare in the next section below.
You can use homemade clay just like play dough. Always Keep the extra portion well wrapped when not using. You can store the clay in the fridge for 1-2 weeks.
I will share more details and tips on how to roll the clay and make different ornaments in an upcoming tutorial, so stay tuned! 🙂
So which air dry clay recipe should you choose? Let’s look at some comparisons of these two popular recipes.
Baking soda clay pros and cons
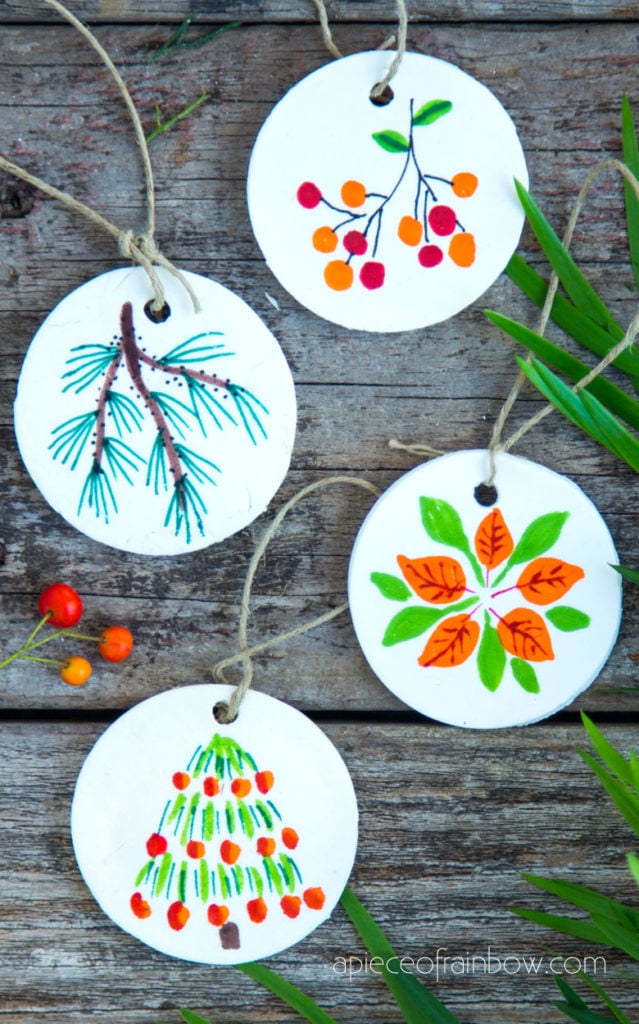
Pros: I love the simplicity of the 3-ingredient Baking soda clay! It dries beautifully to a white clay texture and looks gorgeous painted with watercolor or other paints and markers. (Tutorial coming soon!)
Cons: it is more fragile and not as suitable for detailed designs as the glue and cornstarch clay. The clay can crack if drying too fast. It is best to dry it slowly away from sun and heat for the first 24 hours.
Other things to consider: As an air drying clay, it is not as durable as the glue clay. However, it becomes quite strong if you bake it at 170 to 200 degree Fahrenheit for about 30 minutes, after it dries in room temperature for 1-2 days (to prevent cracking ).
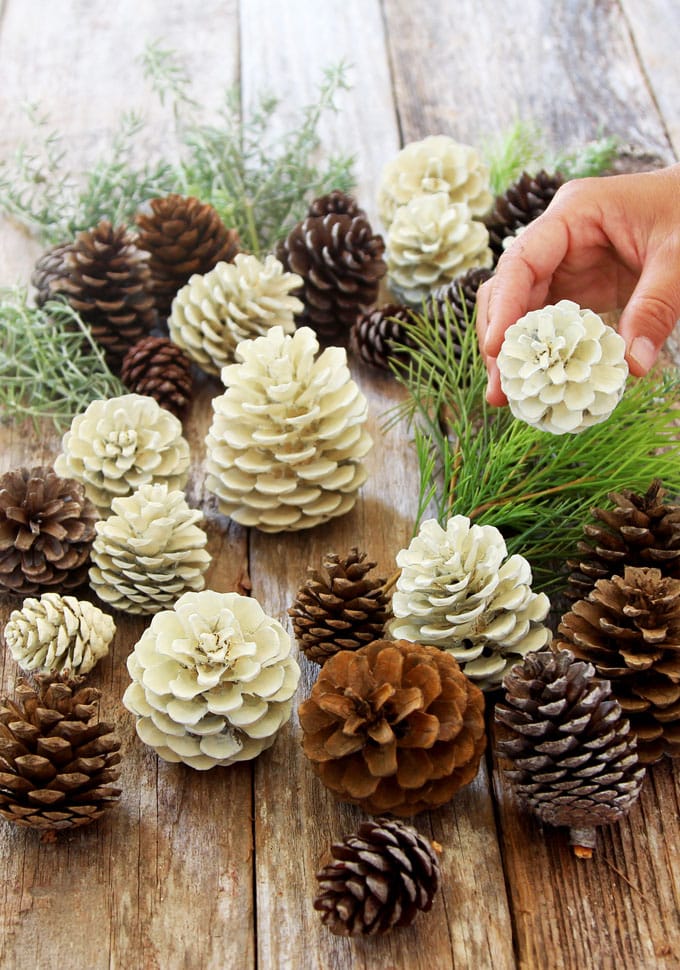
You may also love: how to make “bleached” pine cones without using bleach, perfect for farmhouse and holiday easy decor!
Glue and cornstarch clay pros and cons
Pros: This homemade clay is fail-proof! It feels like play dough and silky porcelain clay. Because it is more pliable and stretchy, you can roll the clay dough thinner, and create more intricate details like mini house ornaments with tiny windows.

It does not crack, and is quite strong and durable after it air dries for about 5 days. Baking does not improve the strength of this clay.
Cons: Requires more ingredients to make. As it dries, it shrinks a bit especially on the edges and becomes more translucent ivory white vs pure white.
Other things to consider: The image below shows the difference between the two types of clay after they are dried. You can see the baking soda clay pieces on the left are more opaque white.
If you like the pure white look of baking soda clay, you can add a tablespoon of white acrylic or craft paint after this clay cooks and knead it into the dough.
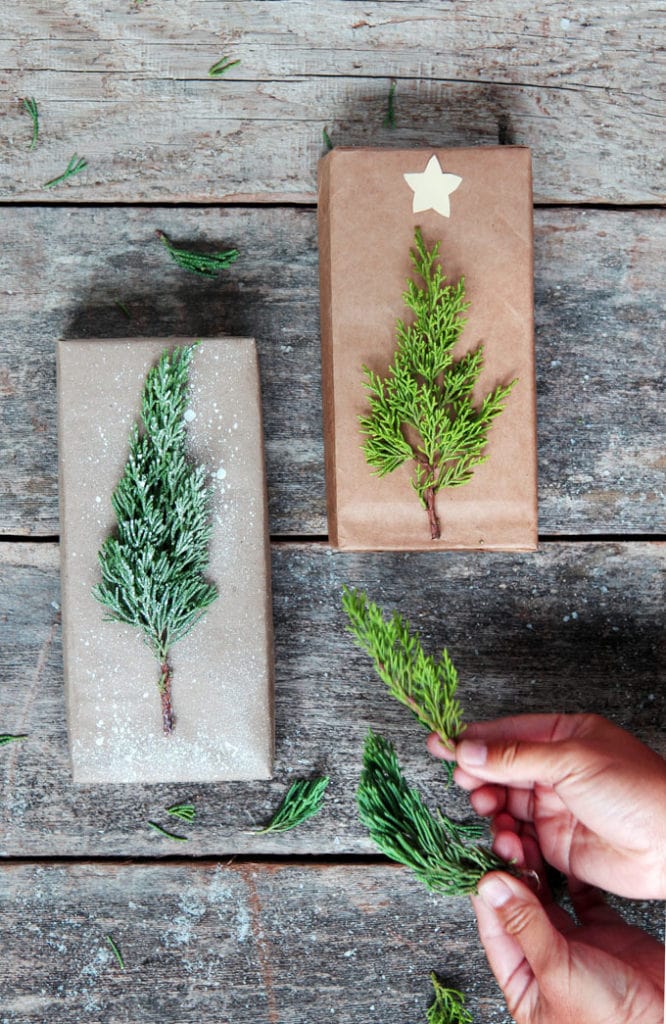
Wouldn’t these homemade clay ornaments look gorgeous on your DIY gift wrapping? Tutorial here!
FAQ about DIY air dry clay
How to prevent baking soda clay ornaments from cracking?
Baking soda air dry clay (recipe here) is beautiful and so fun to make, but sometimes it can crack while drying.
To prevent cracking, the short answer is to cook it thoroughly, and dry it slowly.
Make sure you measure the ingredients accurately, cook it thoroughly, roll it to thickness of 1/4″ to 1/8″, and let it dry slowly during the first 1-2 days. Flip the pieces gently every few hours to ensure even drying.
If your dough is sticky, it is likely to be undercooked or have too much water, which can lead to cracking.
Baking soda clay can be finicky, but The glue and cornstarch clay is almost fail proof! It never cracks, and does not need baking to become quite strong and durable. so that can be a good alternative.
Is homemade air dry clay strong and durable?
The glue and cornstarch clay becomes very hard and durable after air drying for about 5-7 days. The baking soda clay air dries to the hardness of a cracker or cookie. If you bake it at 200 degree for about 30 minutes, it becomes quite strong.
Can I bake DIY air dry clay in the oven?
You don’t need to bake the glue and cornstarch clay. It may puff up or bubble a bit if you do.
Baking soda clay can benefit from baking. see question above.

Does homemade air dry clay crack?
The great thing about the glue and cornstarch clay is that it almost never cracks! Baking soda clay can crack a little while drying.
To prevent cracking, make sure you measure the ingredients precisely, let the clay cook thoroughly, and let the pieces dry slowly away from sun and heat for the first 2-3 days, unless you are baking it.
See more in this tutorial: how to make Christmas ornaments and lighted star garland using homemade clay !

What can I use instead of cornstarch?
Some people are allergic to cornstarch. You can substitute with tapioca starch, or rice flour. Sticky glutenous rice flour (easy to find at asian markets) works great too.
How long does air dry clay keep?
If you wrap them tightly in plastic wrap, they can last for 2 weeks or even longer in the fridge.
Magical DIY Hanging Mason Jar Lights (Easiest Ever)
How to Make a Wreath : 25 Best Ideas & Tutorials
Make Stained Glass Mosaic Wall Light

48 Best Easy DIY Halloween Outdoor Decorations
21 Creative Stay-at-Home Activities for Kids & Family
Weave a Boho T-shirt Rag Rug With Easy DIY Loom

Make A $344 Flower Wreath For $15

Beautiful Fast & Easy DIY Pinecone Wreath (Improved Version)
Beautiful DIY Fall Wreath in 10 Minutes {So Easy!}
How to Make Beautiful Rag Rug {& DIY T-shirt Yarn}

Anthropologie Knock Off $0 DIY Galvanized Zinc Vase
5 Minute DIY Snow Frosted Mason Jar Decorations {Magical!}
Happy creating! See you next week!


I want to make the cornstarch and glue recipe. But can I use watercolors on them? If so, would I paint the ornaments before or after they dry?
hi Karen, yes, and you would paint them after drying. 🙂
Hi
I tried the baking powder clay but when I added the water it started fizzing and rising.Did I do something wrong or is that how it was supposed to be.
Please keep in touch with me
hi Nicole! baking powder is different from baking soda, which is what we need to use here! 🙂
Thanks so much for this!
I had been using a tapioca starch, white rice flour, Mod Podge (with a pinch of gum Arabic) recipe to make a non-toxic (near-food grade) mortar for preschoolers to make mosaics. The biggest drawback was always the drying time, but things like Sculpey are very expensive, and the kind of mortars adults use are what I wanted to stay away from, since there’s always the one kid who wants to see if it chews like gum.
The idea of cooking the stuff stove-top has been great! holds a shape better before it is dry, and if I bake it for a short time on 250F (15 minutes)– these are about 1/2 cm deep– it will not be completely dry, but will dry in an afternoon, and be ready to go home at the end of the day if we make the projects in the morning. We don’t have any problems with peeling, cracking, or bubbling because we don’t bake them to full hardness, just cut the drying time by about 70%.
I make the starch-baking soda recipe, then the flour-Mod Podge (as my glue), with the small amount of gum Arabic, and knead them together. You get something more like caulk than clay, but this is the idea for mosaics.
They look great. I use the glossy Mod Podge, which is toned down by the other ingredients, and looks perfect. It makes a nice white, with a subtle luster. You can’t tell from the quality of the materials that these are preschool projects.
thank you so much Rivkah for sharing these great tips and ideas! happy crafting! 🙂
For the Australians, cornflour and cornstarch are not the same thing. I found the following online:
“In the US maize is used to make cornflour but in Australia, it is made from wheat which is why it often reads “wheaten cornflour”.”
Hi,
I made flowers from my first batch of cornstarch/glue recipe and they turned out really well. From my 2nd batch, I made a small, slightly deep decorative plate. After the first few days, the plate developed cracks, which increased and then broke into several pieces by the time the plate dried completely. Where could I have gone wrong?
hi! i think that overcooking could cause the dough to be a bit too dry and prone to cracking. maybe try a salt dough, which can be more forgiving- https://www.apieceofrainbow.com/best-salt-dough-recipe/
Hi has anyone tried baby powder instead of cornstarch? Baby oil instead of mineral oil? Only asking bc that’s what I have on hand. Can’t drive due to disabilities. And I feel like it would be rude to ask someone to go to the store for me or take me to the store for two items. Somebody takes me to the store weekly but I don’t want to wait a whole week as I would love to try this out with my four little ones.
hi! yes you can use baby oil for sure! not sure about baby powder, but you can use white flour instead! 🙂
HI! I made a ton of the cornstarch/glue ornaments and they are seriously curling as they dry. I’ve been trying to flip them regularly but I feel like they just will not be flat when they are done. Do you have any experience with them curling? Mine have only been drying for two days.
hi Alana! sorry for the late reply! mine only had minimal curling in the first few hours. they may flatten out as they dry more. i am not sure why this was happening, maybe the dough is a bit too wet?
Hello, i tried cornstarch & baking soda one. It turns out pretty good. But after some week it Slowly melts away and becomes soft.It also contains fungus
What can i do to prevent this. Please help me 🙁
it sounds like high humidity. were they exposed to rain or kept in a humid environment? ours are still in great shape after almost 2 years! we just keep them in a paper box in the closet.
I tried the cornstarch & glue clay today, but Australian readers should be aware that it doesn’t seem to work at all with our cornstarch. I used Woolworths brand cornstarch and Officeworks PVA glue, but it was extremely runny even after it cooled. I tried sifting more cornstarch over it and kneading it in until it stuck together (I must have used at least another half to one cup more cornstarch) but even when it came together as a thick dough, anything I made out of it seems to droop out of shape, or stick to the surface it’s drying on. I’ll keep trying and update if I can get anything to work, but as it is, I think that our cornstarch must be made differently to the US type and not behave and react in the same way.
hi! that’s so odd! i haven’t heard this problem before. maybe try using flour instead of corn starch and see if that may work?
Good news! I managed to get the clay to work – but it took about 300-350g (roughly 2.5 cups) of Australian cornflour. I had to knead it in with my hands. But it made a really nice, smooth, pale ivory coloured dough in the end, and I was able to make very small shapes easily. They have dried nice and hard with little cracking, and pass the bounce test on my table without breaking. The dough was much less sticky and messy than commercial air dry clay too. Thank you for the recipe!
Interesting to note that I’ve experienced this issue with cornflour in food cooking, too – both my favourite chicken soup and my Gran’s cheese fondue need vastly more cornflour than the recipe says. This is using various different brands, too. Very odd!
thank you so much for sharing your experiences! 🙂 so glad it worked!
Hi, I am Australian and this recipe worked for me using general Coles brand cornflour and Elmers white glue. I think the issue you encountered may have been the brand of glue rather than the cornflour. Elmers seems to be the best for crafting including slime making I’ve found. I needed to knead a little bit of cornflour in at the end for rolling and cutting purposes as it was sticky but it definitely came together in a ball and wasn’t runny. Give the Elmers glue a try!
thank you so much Michelle for sharing your helpful tips from Australia! have a wonderful holiday season! 🙂
Hi!
I was trying out the glue and cornstarch clay, and after cooking it, it was rubbery. Did I overcook it? Any suggestions on how to fix it into a smooth consistency? I tried adding more glue but then the result was a very stretchy dough with uneven surface.
Hi Amulya! it sounds like the clay was a little overcooked. I would remove the pan from the burner as soon as the mixture pulls away from the pan, especially if it’s electric stove. 🙂
Hi there ,i want to make the constarch+glue clay
i want to ask is it okay to use water on the clay?
hi! after it dries, yes, small amount of water is ok, i would not soak them for a long time. 🙂
Is there a diy clay that can be used outside?
hi Doris, if the clay is going to be exposed to the rain, i would use concrete or cement instead. 🙂
Hi. I’m trying to make shapes out of salt dough or similar that can later be easily broken apart by hand. They will have little pieces of paper with printed messages on them (kinda like a fortune cookie, but not hollow) so they need to be something that can be broken apart without too much difficulty. I tried with a basic salt dough but as expected, it was far too hard to break apart easily. Will the baking soda recipe potentially work for this, as long as it is not baked? Or will it still be hard enough that it won’t be easy to break apart after drying completely? Do you have any ideas? Thanks so much!
Hi Mark! The 1st no-glue recipe might be just what you are looking for. It drys hard but breaks apart kind of like peanut brittle. 🙂
I made the glue clay and it seems to be melting …??? it isn’t hot but it is flattening out while drying…what did I do wrong?
h tina! it sounds like you might need a little more starch vs glue, so the “clay” is less soft. i would let the ones you made dry, and those can still be very durable once dried! 🙂
Hello! I feel like this is a bit of a silly question, but i’ve never used air dry clay before let alone made my own! this sounds super interesting and i’m excited to see where this goes! ..i was wondering if you could throw this on a wheel? i didn’t think so because there’s usually water included, but i was wondering. 🙂 thank you!
hi Tia! not silly at all! the “clay” in both recipes are much softer than pottery clay! you might be able to use paper clay on the wheel, recipes here 🙂 – https://www.apieceofrainbow.com/paper-mache-clay/
Love the glue/cornstarch recipe, this is my 2nd batch. I had old wood glue and used that. My wood glue was a bit dry so I added more vinegar, so I could get the mixture smooth before cooking. 1st batch, I made Thomas the Train’s face which went on grandsons toy I made. This batch I going to use for his hand and foot print, wall hanging. Shrinks some but is so, so durable. Thanks for this great recipe
hi pat! so happy to hear that! thank you for sharing your wonderful experience!! 🙂
Hi Amanda,
Which clay would you advice for detailed flower Gummi or silicone molds, I want to do some to stick on a wooden commode? I have to glue it the commode and then let it dry there.
If you have advices for me please do write them down.
Thank you providing so much information and illustrated details.
Best wishes
hi Maha, definitely the glue dough! i would test a few small pieces on a scrap wood to make sure the glue you use to attach the clay pieces to the wood works well! 🙂
Hi, can I possibly use this as a planter (outside pot with plastic pot inside) if I seal it?
if it’s an indoor planter, then yes 🙂 make sure it’s completely dry, and the plastic pot does not have drain holes or leak water!
I tried the cornstarch and baking soda recipe but it cracked after drying 🙁
the glue one is almost 100% fail proof, the one without glue has to be dried more slowly on the first day. 🙂
Hi…. So ii want to make some gifts for my friends with this clay. I was wondering how long would the completely air dried finished product last? Like would the gift last a long time or turn bad after some time?
hi jade! if you keep them dry and stored indoors, they can last many years! 🙂
Is the glue recipe is good for Sculpture making? Will it withstand minute details? What if it shrinks more.. is there anything we can do to reduce shrinking?
hi! you can create lots of details with the glue clay. i would test a small batch to decide if it’s good for your project due to small shrinkage 🙂
Can I bake the glue dough ones to speed up the dry time? I see instructions for baking the plain baking soda clay, but not for the glue clay… Obviously, I’ve procrastinated terribly on making Christmas hand prints for the grandparents, and 5 days dry time is a bit too long for us! 😉
hi Marika, yes you can, just make sure the temperature is not too high! 🙂
Hi Amanda!
I did the baking soda recipe. I let them air dry for two days. Can I now put in the oven for 30 minutes so they can finish the dry process and hard more?
Thanks!
hi! yes you can! just make sure the temperature is not too high, at around 180 F! 🙂
Hi! I’m excited to try this! Would it be ok to use “Cleaning vinegar” ?
if the ingredient is just vinegar then yes! 🙂
Hi! Can you use mod podge instead of the elmers glue for the glue recipe?
Thanks!
hi! yes you can use mod podge here. 🙂
hi i don’t have baking soda at home so i was wondering if there’s a substitute that i can you and if there is will it dry the same
hi! you can just use all cornstarch and glue 🙂
Can you use colored elmers glue or glitter glue?
yes you can! 🙂
Hi Ananda, which recipe would you say is stronger out of the two? I tried the one without the glue today and made some hanging Christmas decs. It’s been a couple of hours and I went to test to see how strong they were and one crumbled in my hands! They have hardened slightly but I thought they’d be stronger than this. Will they harden if I leave them to dry for longer or would you say it’s best to use the one with glue? Thanks!
hi lizzie! yes the glue one is much stronger without baking. the baking soda one gets much stronger after drying for a few days, and even stronger if you bake them at low temp like 170 farenheit for an hour. 🙂
Hi Ananda, thanks so much for the recipe, I used it and the ornaments came out beautifully and were air drying with a few cracks. After day 2, I decided to bake them but they ended up turning brown but I think I know why. Is the 200 degrees in Fahrenheit or Celsius cos I set the oven too 200’C
hi Rujeko! oh i am so sorry it is Fahrenheit! i always try to remember to add Fahrenheit but must have forgotten this time. just added. i sincerely apologize and will do a better job specifying in future! 🙂
I have been running crafternoons at our church and really enjoyed your tutorial. thank you, so much, I have linked to your article. from my blogpost. Looking forward to trying some of your other crafts as well.
hi ,l want to make the starch one , I need to know should we spray it with preservative to prevent mold formation?
if it’s dried thoroughly, there is no need for preservatives. 🙂
I use a cooked cornstarch/water/baking soda recipe that uses 2 T of glue beaten in after cooking. I make dollhouse miniatures; this is particularly good for baked goods like bread–dusted with brown pastels to looked baked/toasted, mashed potatoes, and potatoes! It can be painted after being dried, too!
that sounds really nice! thank you Kathy for sharing! i need to keep making more fun things with these! 🙂
Hey Guys,
I’m trying out the glue recipe. how long should I let it sit after I put it in the bowl?? Thanks
you can use it as soon as it is cool enough to touch! 🙂
Hi Amanda. I wanted to make a keepsake with my baby’s handprint. Can I use either of these methods? Will the dough be able to preserve a clear imprint?
hi rubai, the glue dough is better for retaining more details. happy crafting! 🙂
Hi!
I would just like to make sure, do you mean 200 degrees in Fahrenheit or Celsius?
I’m European, so we use the Celsius system. 🙂 I just thought 200 Celsius sounds really high…
Thanks for the recipe, I will try these soon!
hi johanna, it’s fahrenheit ! 🙂 happy crafting!
I would like to make a coin Bank using a jar as the base. I would like to use the glue recipe but afraid since it shrinks as it dries so it may not work. Also, do you have to seal these after they are painted? Thank you so much.
hi gigi! i used acrylic paint and they held up great without sealing. are you making a 3D piece? it does not shrink too much, maybe 5% to 10% at most. have fun! 🙂
I made the cornstarch and soda clay and it is very crumbly, can I re-cook it and add more ingredients to make it more like dough? I made it yesterday and didn’t end up using it so I put it in a sealed container and I don’t want to throw it away..
hi krista, yes i would add more glue and starch to it. the glue dough is much more forgiving! 🙂
I’m so happy that I’ve found your post. I want to make some Easter decorations with homemade clay and I was looking for the corn starch and baking soda clay recipe (I’ve tried a couple of years ago but I forgot how to make it). But now I think the glue and starch dough is a better fit for my project. I can’t wait to test it out today!
thank you paula! yes the glue dough is definitely easier. have fun crafting! 🙂
When do you paint the clay before it drys of after
after the clay dries! 🙂
Hi. I was wanting to make some batches of the glue and cornstarch clay as presents for the children in my class for the end of the year presents.. We are in Australia, so it is quite warm here and we break for our summer break at the end of the week.. I was hoping to make it and then store it in the fridge until I give it to them. How long will it last in the fridge and have you had any experience in using wax wraps to keep it fresh as we are also trying to be as waste free as possible. Thank you.
hi maxine, it can keep in the fridge for at least a week. if you wrap it as tight as possible , a wax cloth or wax paper should be fine. happy holidays! 🙂
This homemade clay looks fantastic! I am making it this week with our kids, so excited!
thanks Olivia! it is so much fun to make! happy crafting! 🙂
I so love this…great idea to make package toppers! I made a batch of the baking soda and cornstarch clay and it’s still kind of sticky – can I add more of one of the powders after it is cooked?
hi christine, yes you can knead in either some corn starch or baking soda and let it rest for a few hours before rolling and cutting to minimize cracks! 🙂
Thank you. How beautiful to follow a simple recipe. I love to add the glue for noncrack finishes. So much joy these recipes bring for children and I every time!
thank you Lulu for sharing your wonderful experience! 🙂