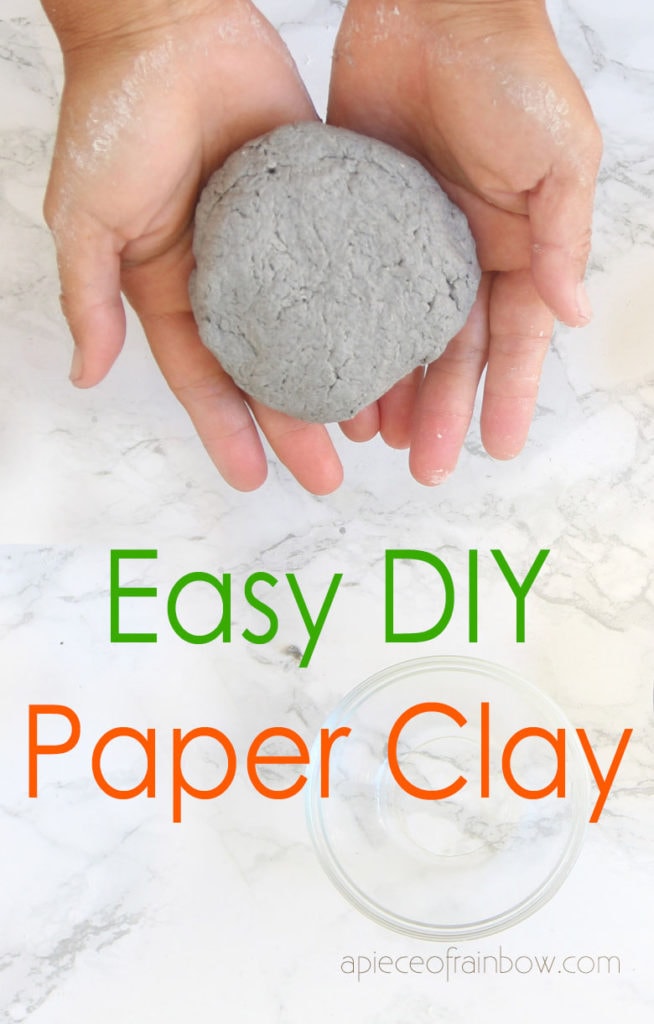
Easy DIY Paper Mache Clay : 4 Best Recipes!
4 Best DIY paper mache clay recipes for home decor & kids crafts! Easy to make with pulp, flour paste, or glue, some without joint compound.
What is the difference between paper mache and paper clay? Paper mache ( aka Papier Mâché ) usually refers to layering strips of paper dipped in glue or paper mache paste ( a flour mixture of 1 part flour mixed with 2 parts water) over a mold or structure.
Paper clay (aka paper mache clay) is a mixture of paper pulp with a few simple ingredients like flour or school glue. It works very much like clay and dries very hard.
Paper clay is less time consuming to use than adding layers of paper mache, therefore great for projects that require more thickness or sculpture details.
*Some resources in article are affiliate links. Full disclosure here.
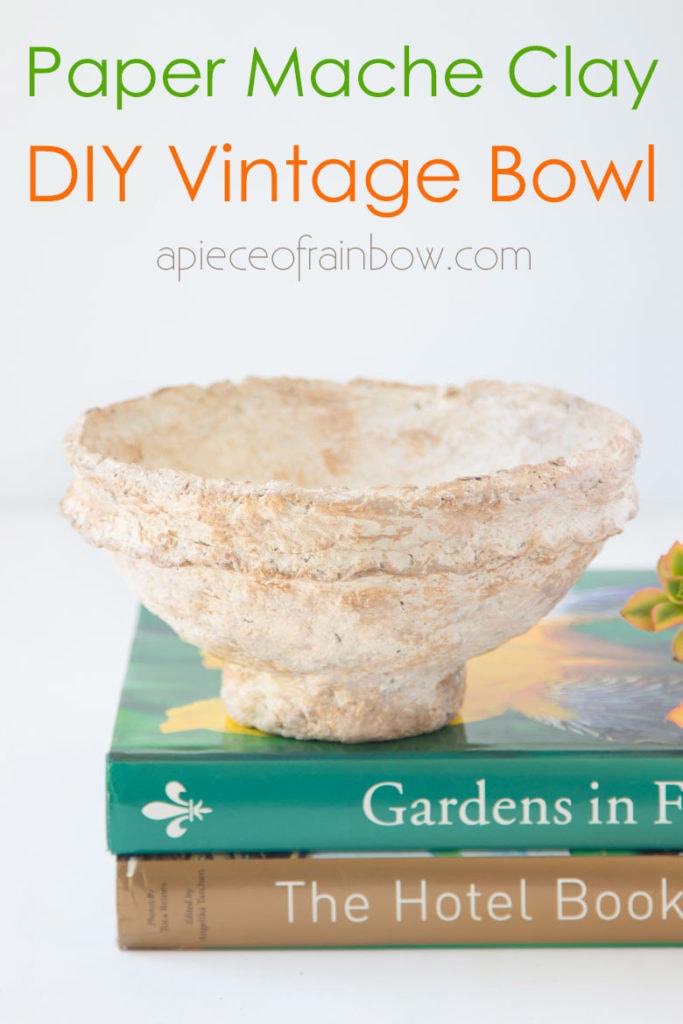
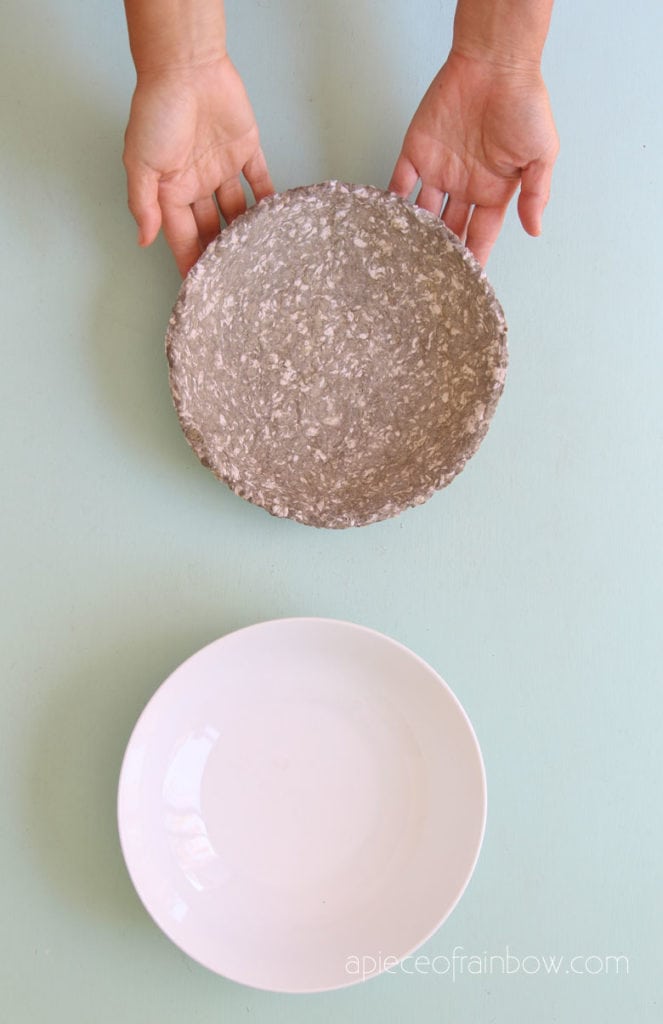
For example, in the photo above you can see our DIY vintage paper clay bowl tutorial here! Most paper-mache bowls are thin walls made of newspaper strip layers over a balloon. If you want something like a hand made clay bowl, paper mache clay is a better choice.
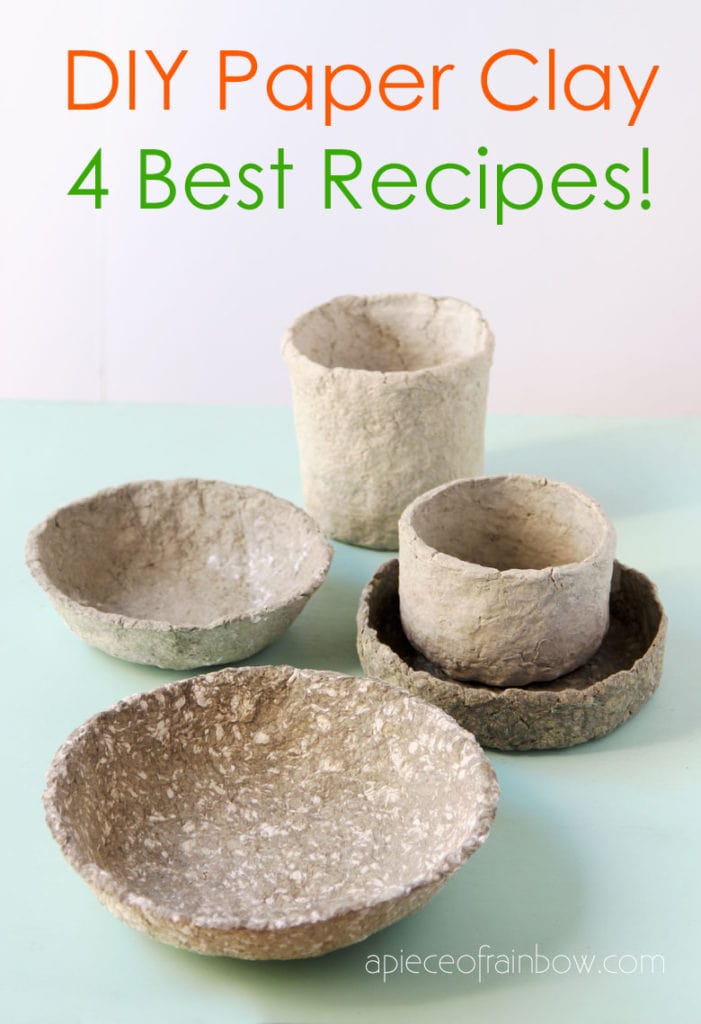
There are many different recipes for homemade paper clay. These 4 recipes worked really well, and 3 of them are made without joint compound. Let’s look at the pros and cons of each. SPOILER: recipe number 2 and 3 are my favorite! 🙂 Check out this video tutorial or skip to recipes below!
You can buy pre-made paper clay such as CelluClay which comes in a dry powder to be mixed with water, and Creative Paperclay which is already moistened into clay form and much finer like actual clay. But homemade paper clay is easy and fun to make.
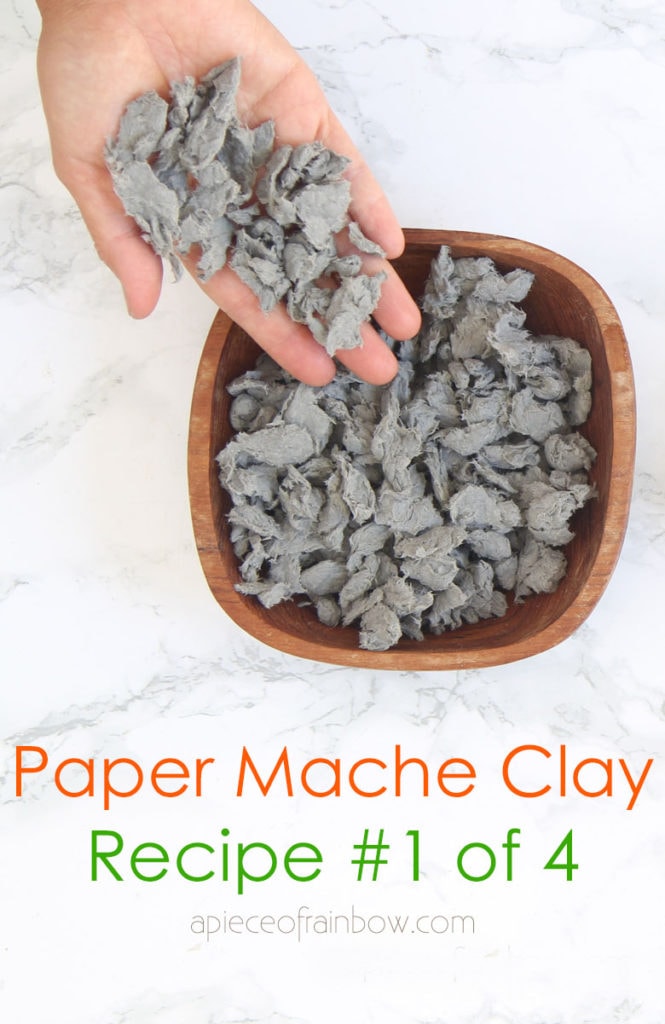
To make paper mache clay from scratch, all recipes start with paper pulp.
How much paper do you need to make paper clay?
Paper clay recipes are much more forgiving than baking recipes!
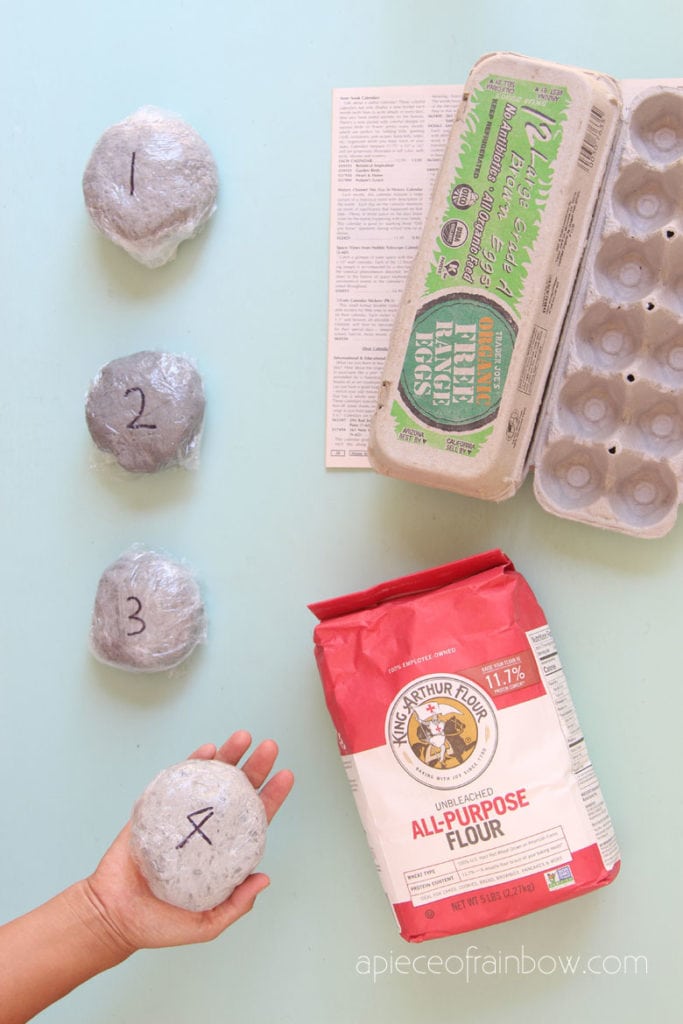
You will need 3 cups ( 400 to 500 grams) of squeezed but still damp paper pulp to make about 4 to 5 cups of paper mache clay. We will use this measurement in the recipes here. You can adjust it to the size of your project.
To make 3 cups of squeezed paper pulp, you will need ONE of the following:
- 1/2 a roll or about 100 grams of toilet paper (the easiest to turn into paper pulp)
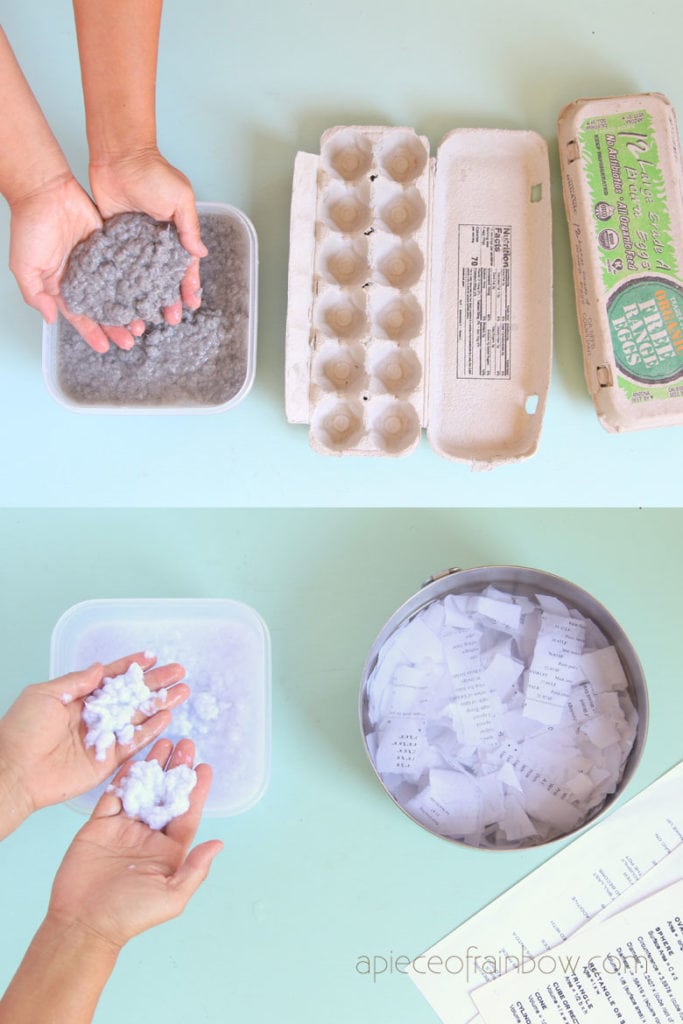
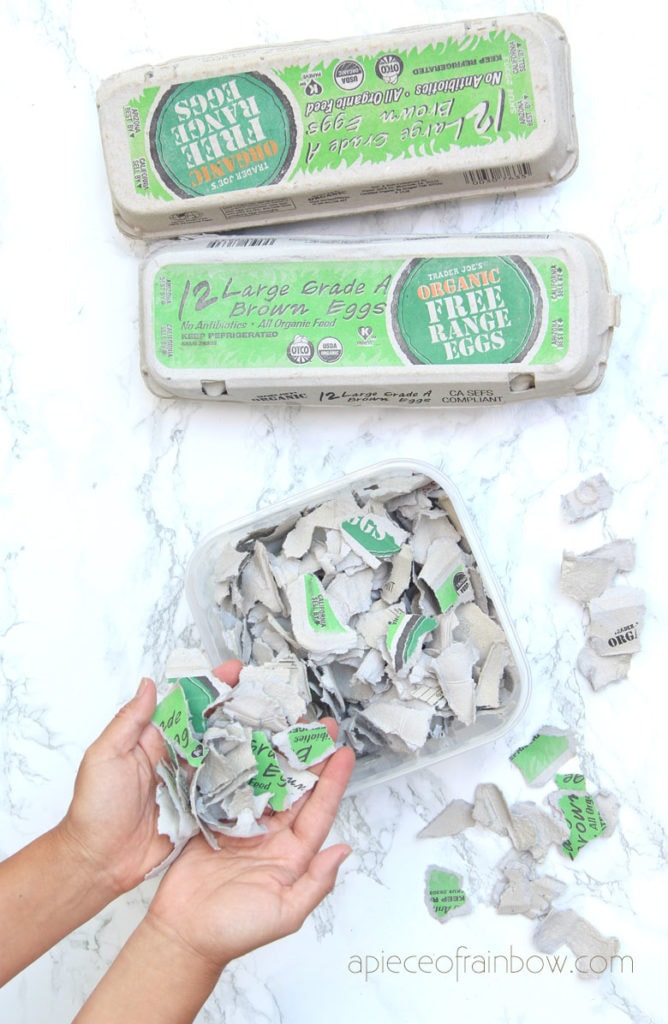
- 2 one-dozen egg cartons. 20 sheets of 8.5 x 11 letter size office paper
- 40 sheets of letter size newsprint paper such as phone book pages.
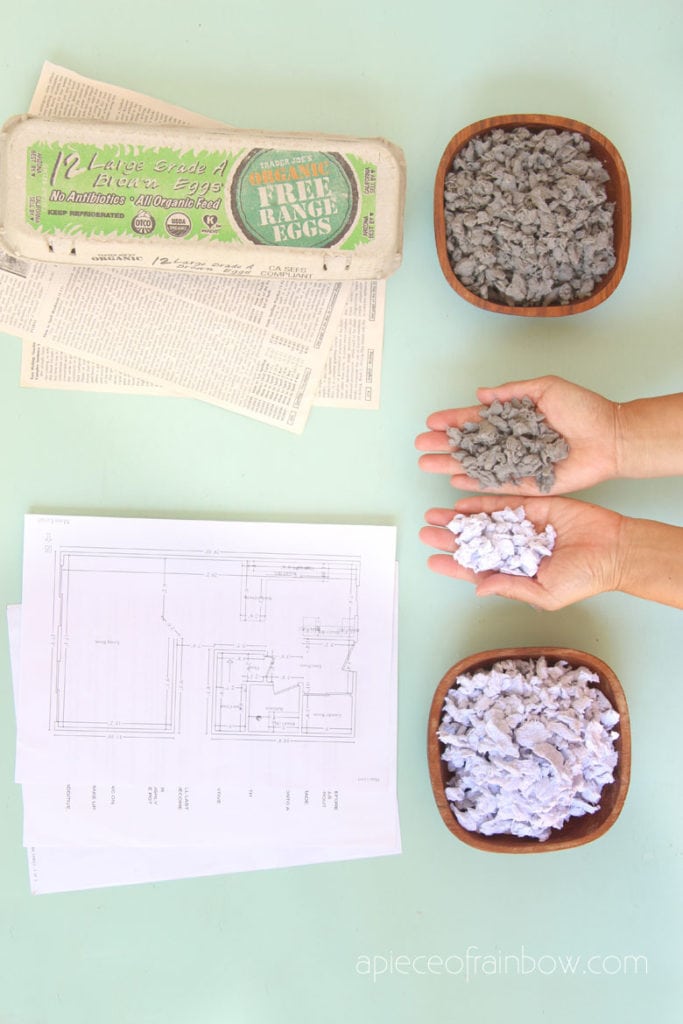
How to make paper pulp
If you are using toilet paper, just soak it in water for an hour and tear the paper into tiny pieces of pulp.
Other types of paper or egg carton will need a little more work. First tear them into small pieces or cut them into paper strips and put the piece in a bowl. Fill the bowl with water until all the paper pieces are completely submerged in the water.
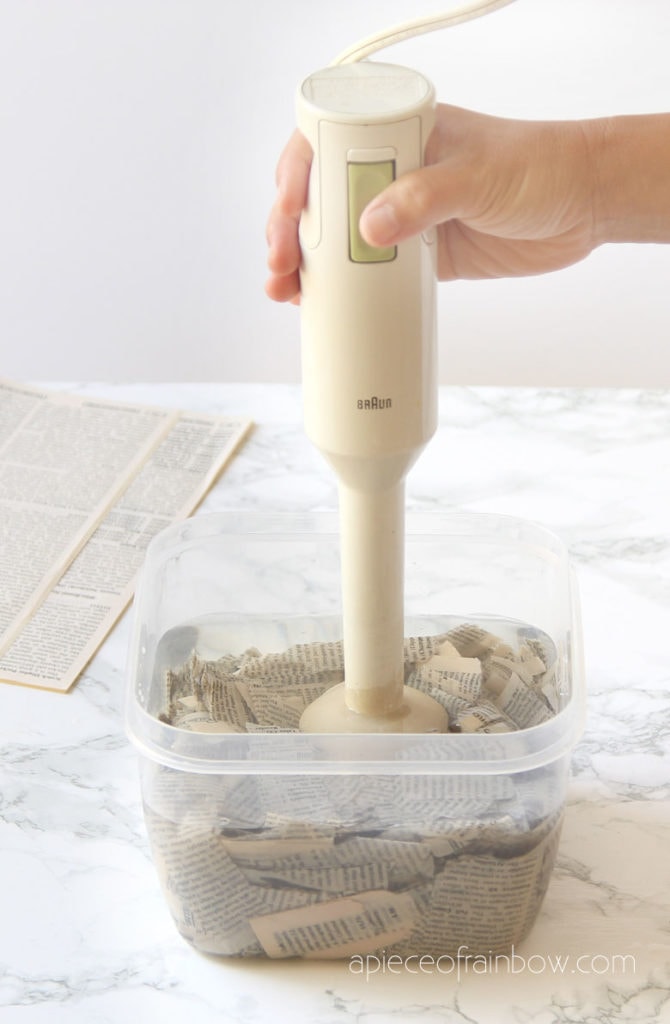
Let paper strips and / or egg carton pieces soak for at least an hour. Use an immersion hand blender or a regular blender (mush faster) and blend the paper into pulp. You may need to add extra water to make it easier to blend, because the pulp can thicken a lot as it blends.
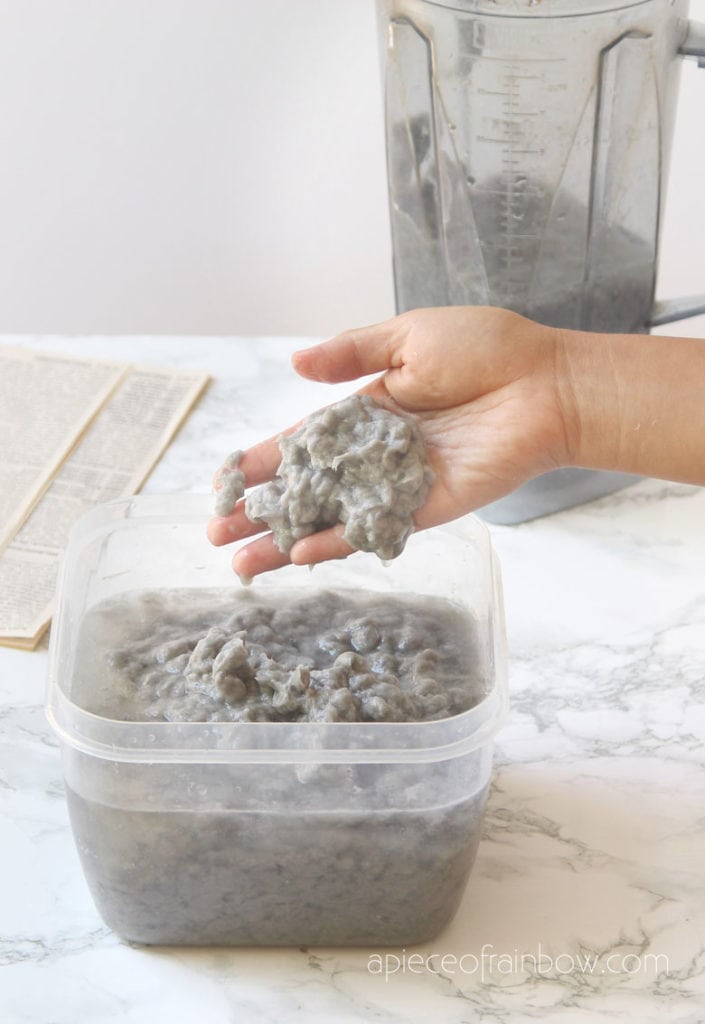
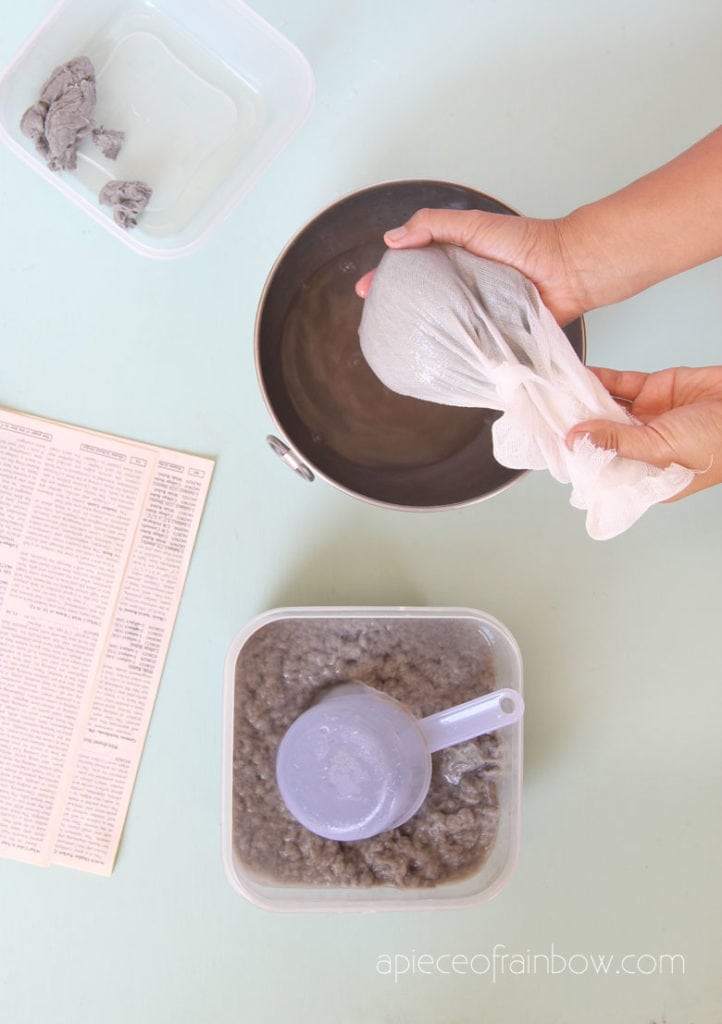
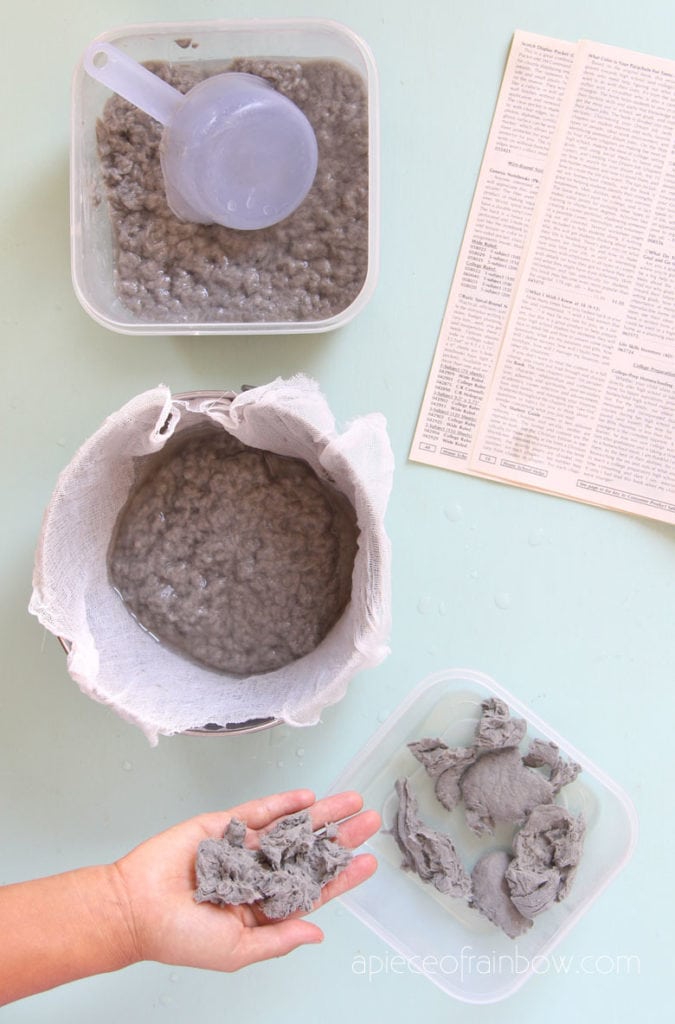
Next scoop the paper pulp into a piece of thin fabric such as cheesecloth.
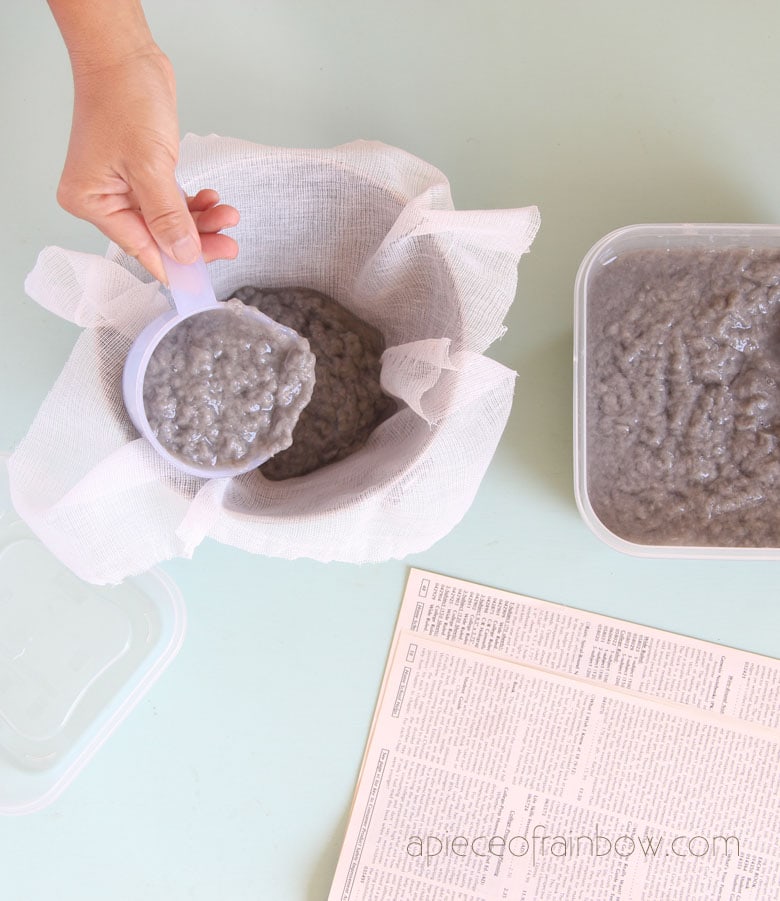
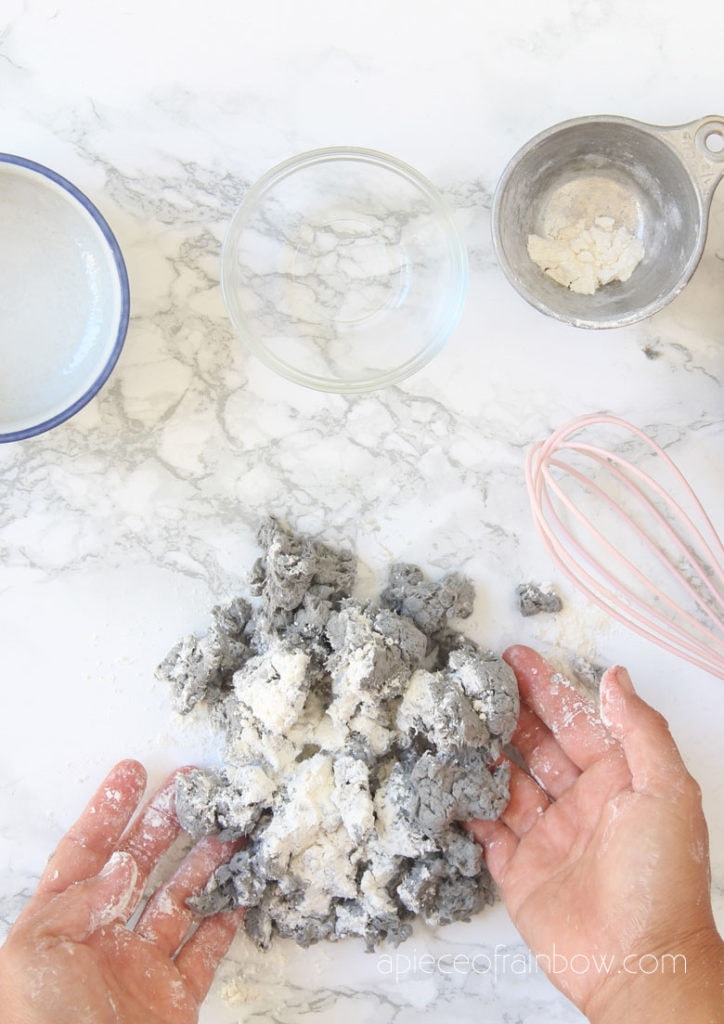
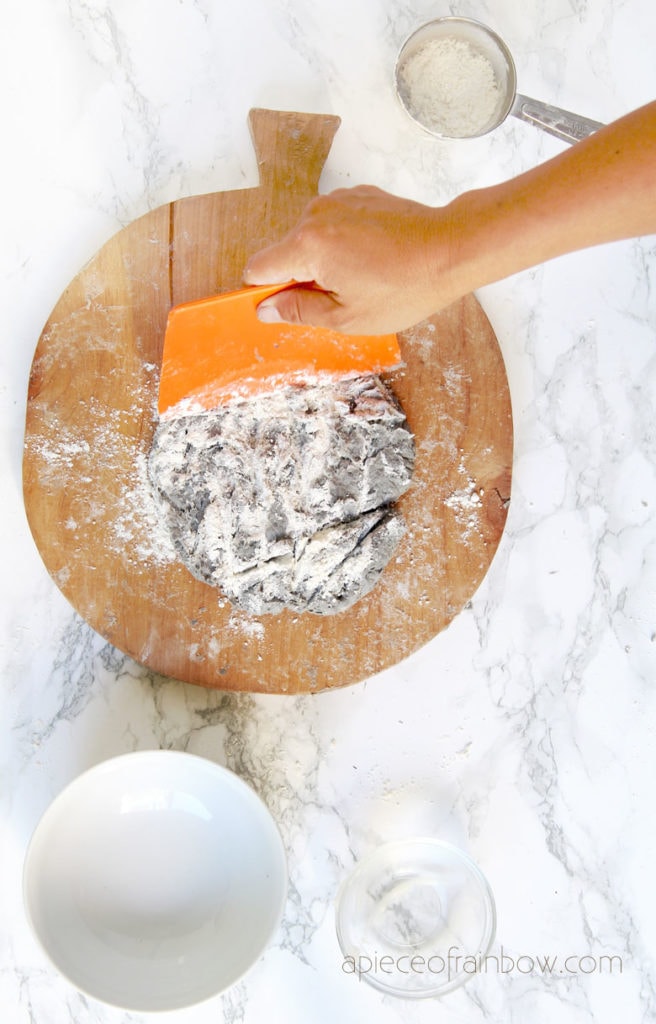
TIP: I have learned that it’s better to not squeeze too hard because when the paper pulp is too dense it is very hard to mix the paper clay dough later! Just strain the paper pulp and squeeze out most of the water, but the pulp should be easy to break up into smaller pieces.
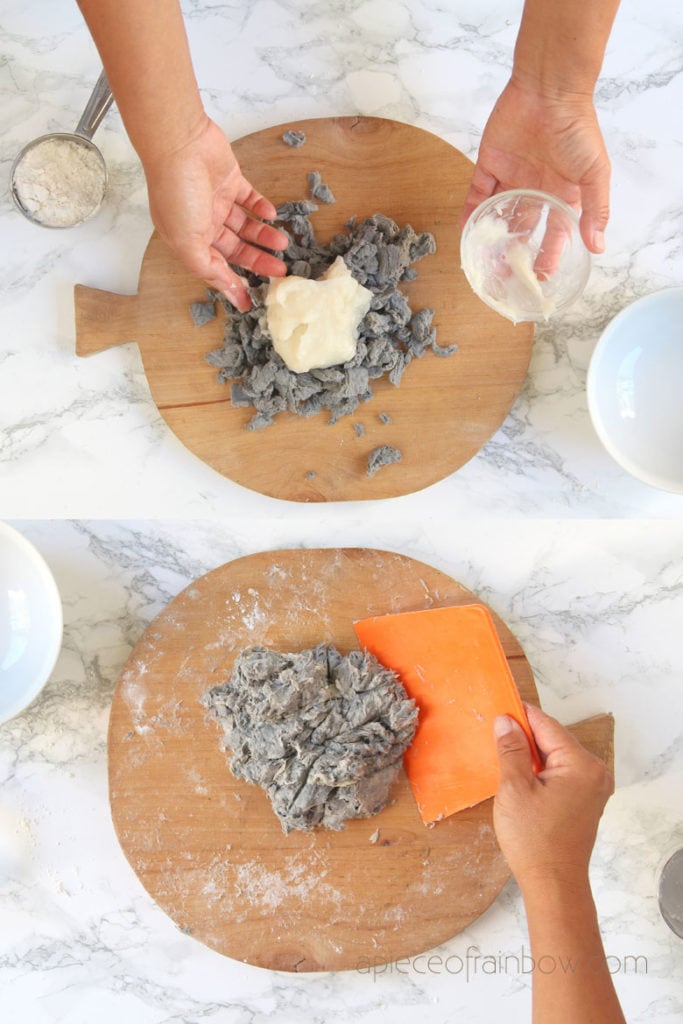
Now we are ready to make paper mache clay. Before we start, here’s a very helpful trick: get a dough scraper like this, and it will be so much easier to mix the paper clay dough and break up the little lumps of paper pulp with this simple tool! I figured this out the hard way so you don’t have to! 🙂
Paper mache clay recipe 1: paper pulp + flour
This recipe is the easiest to make. The dried paper clay is quite strong and durable. Although the paper clay from recipes 2, 3 and 4 is even stronger.
Ingredients:
- 3 cups (400 to 500 grams) damp paper pulp
- 2 cups flour (240 grams) , 1/2 cup water (112 grams)
- 1 tablespoon of salt (20 grams) or vinegar (as a preservative)

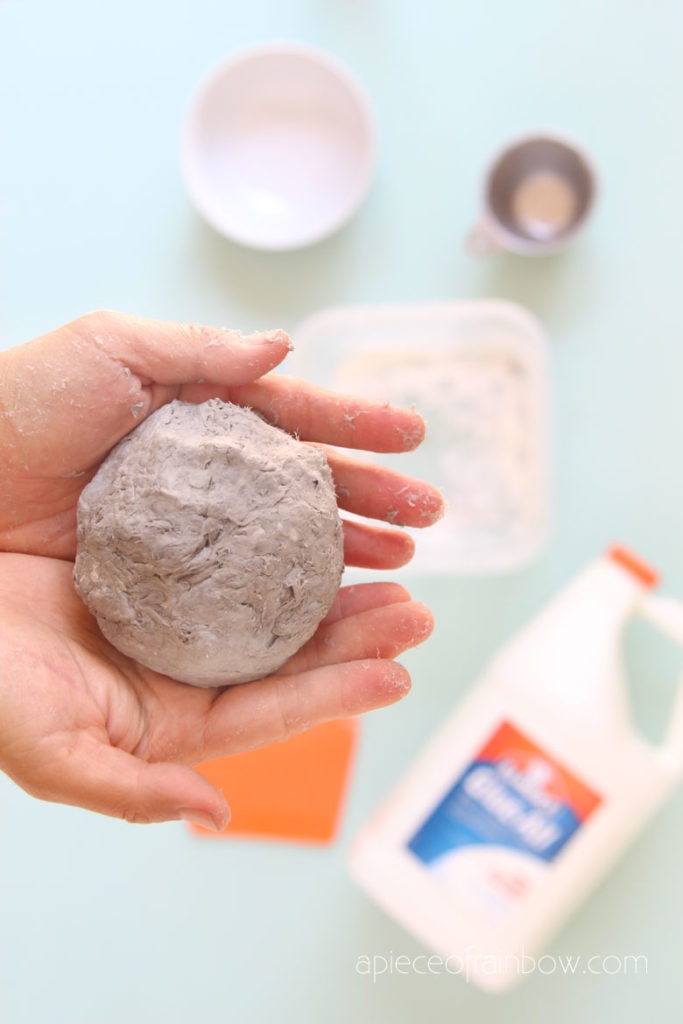
Mix 1 cup of flour with 1/2 cup of water and the salt or vinegar into a batter, add to paper pulp and knead until everything is well mixed together. You will still have little lumps of paper pulp, but try to break up the lumps as much as possible.
Add the rest of the flour in stages as you knead the paper clay dough. If the dough feels too wet and sticky, add more flour until it reaches a nice consistency like play dough.
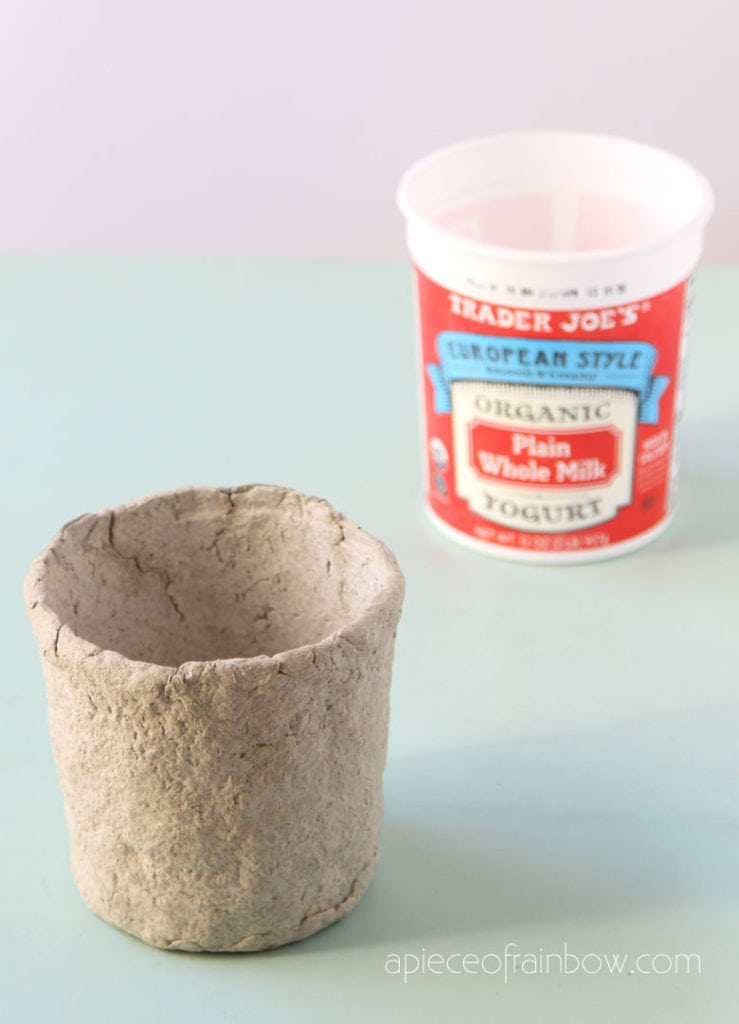
This paper mache clay pot above is made with recipe 1. It is a little more fragile to work with compared to the other 3 recipes. But it becomes quite strong after the paper clay dries completely.
Paper mache clay recipe 2: paper pulp, flour, and glue
I love this recipe and recipe 3. They are my favorite because the ingredients are all very simple, non-toxic and kids friendly. The dried paper clay is super strong.
Ingredients:
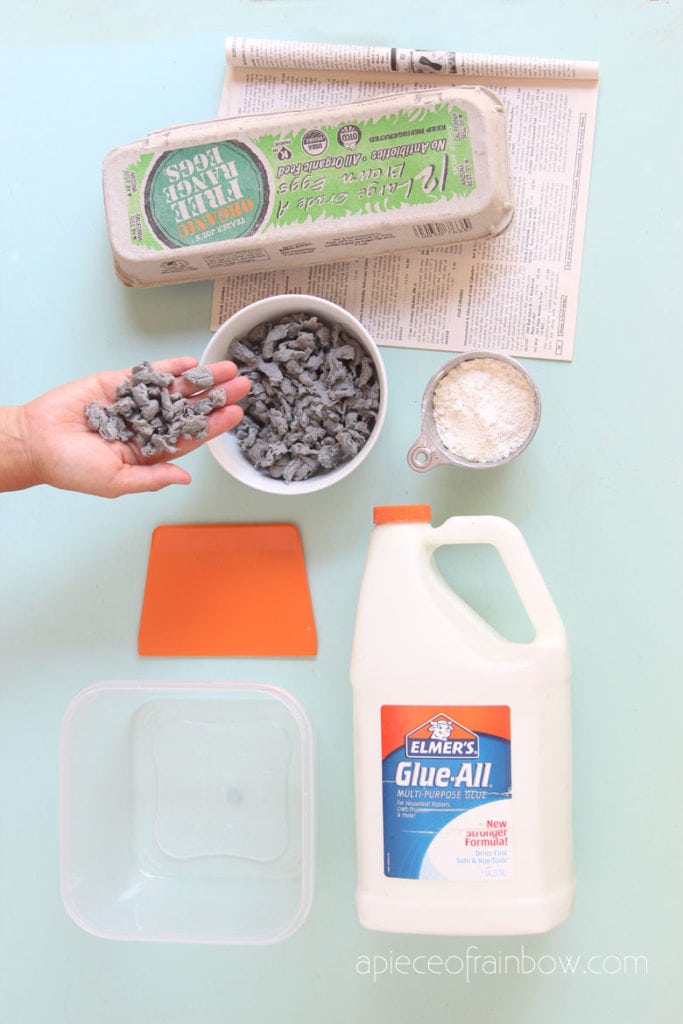
- 3 cups (400 to 500 grams) damp paper pulp
- 1 cup(120 grams) flour, 1 cup(300 grams) glue
- 1 tablespoon salt or vinegar (as a preservative)
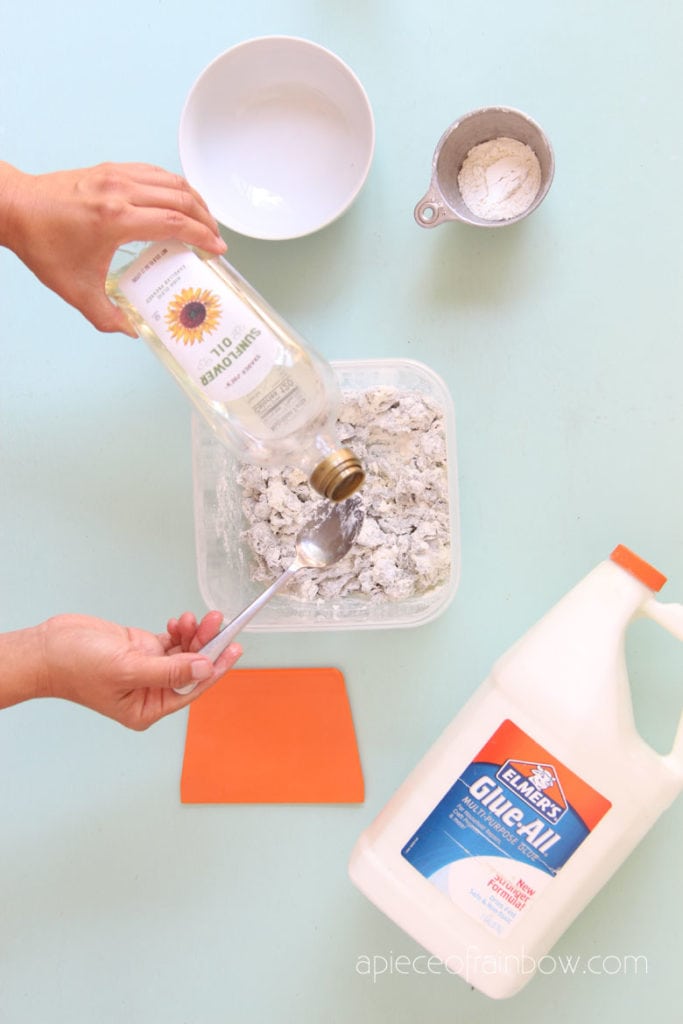
- 2 tablespoons vegetable or mineral oil (to make the dough smooth and less sticky)
Mix all the ingredients together. Use the dough scraper to break up the lumps as much as possible. It is so much easier than mixing the sticky dough just with our hands! 🙂
If the dough feels too wet, add more flour until it reaches a nice consistency like play dough.
Paper mache clay recipe 3: paper pulp and cooked flour paste
Like recipe 2, this is also my favorite recipe. The only difference is instead of glue, we are using a cooked flour paste here, which is basically homemade glue. 🙂
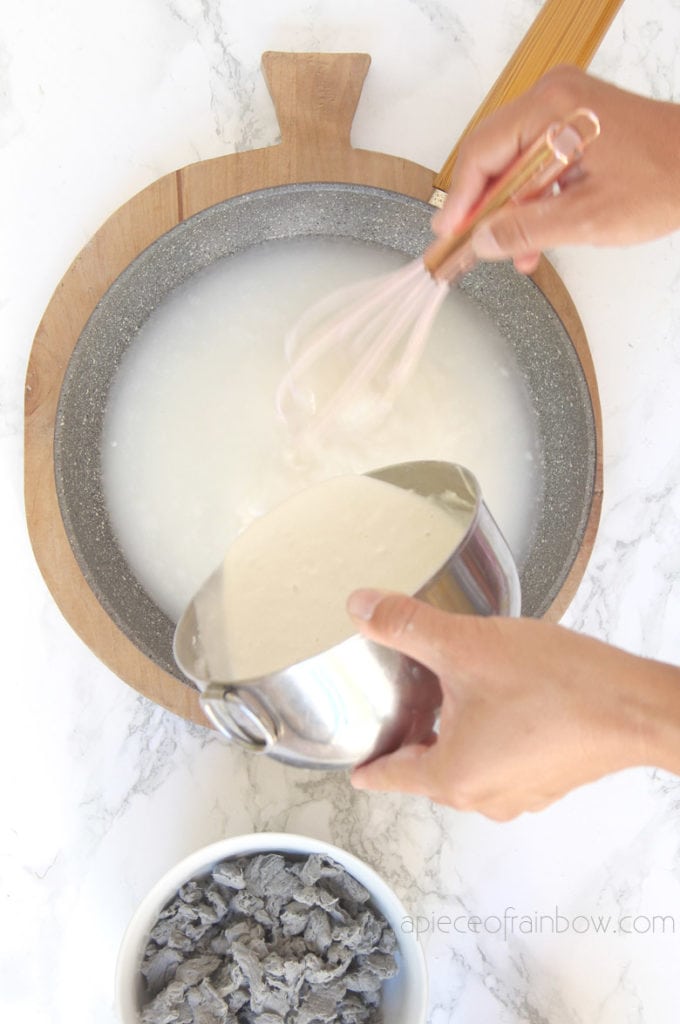
To make the cook flour paste glue, mix 1/2 cup flour with 1 cup cold water in a saucepan until there are no lumps. Heat the mixture on the stove. Turn the heat to low as soon as it boils. Keep stirring as the mixture thickens to the consistency of mayonnaise. Remove from heat, let cool and store the flour paste glue in a sealed container.
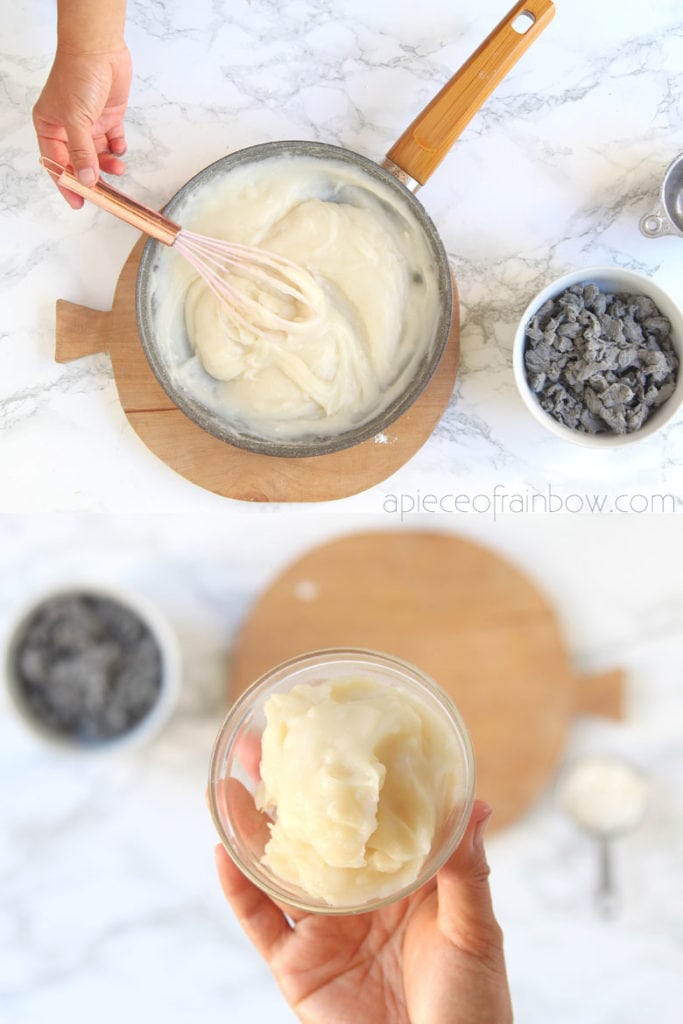
Next, gather all the ingredients in recipe 2 except for the glue.
Replace the 1 cup glue in recipe 2 with 1 cup flour paste we just made, and follow the rest of recipe 2 to make the paper mache clay dough.
Again instead of kneading the sticky dough, I find it much easier to use a dough scraper to break up the lumps. Check out the video tutorial at the beginning to see it in action. 🙂
Paper mache clay recipe 4: with joint compound
This recipe originally came from Jonni at Ultimate Paper Mache. Jonni likes to use toilet paper because the pulp is smoother and easier to mix, with the addition of joint compound which makes the paper clay extra smooth and great for fine details in paper mache sculptures.
Above is Jonni’s fabulous video tutorial. You can see more of her wonderful paper mache projects on her website and YouTube channel.
Ingredients:
(I have seen variations of this recipe with more or less joint compound, flour, etc. It is quite forgiving and you can experiment with slightly different proportions.)
3 cups (400 to 500 grams) damp paper pulp, 1 cup(120 grams) flour, 1 cup(300 grams) glue, 1 1/2 cup (500 to 600 grams) pre-mixed joint compound, 2 tablespoons vegetable or mineral oil (to make the dough smooth and less sticky)
Mix all the ingredients together. Use the dough scraper or a hand mixer to break up the lumps as much as possible until everything is nicely incorporated. As in all the recipes, you can always add more flour if the dough feels too wet, and add water or glue if the dough feels too dry.
How long can you store homemade paper clay dough?
You can store your homemade paper clay dough in the fridge, wrapped airtight in plastic wrap or plastic bag for 2 to 3 weeks. You can also store the paper mache clay dough in the freezer for much longer.
Comparison of the 4 recipes
The paper mache clay recipes 1, 2 and 3 are made without joint compound, and very safe to use on craft projects for kids. Recipe 1 is the most simple to mix and pretty strong when dried. The main difference is that paper mache made with glue (or cooked flour glue) is stronger than paper mache made with just a water and flour mixture.
Recipe 2, 3, and 4 are stronger when the clay dries, because the addition of glue or cooked flour paste.
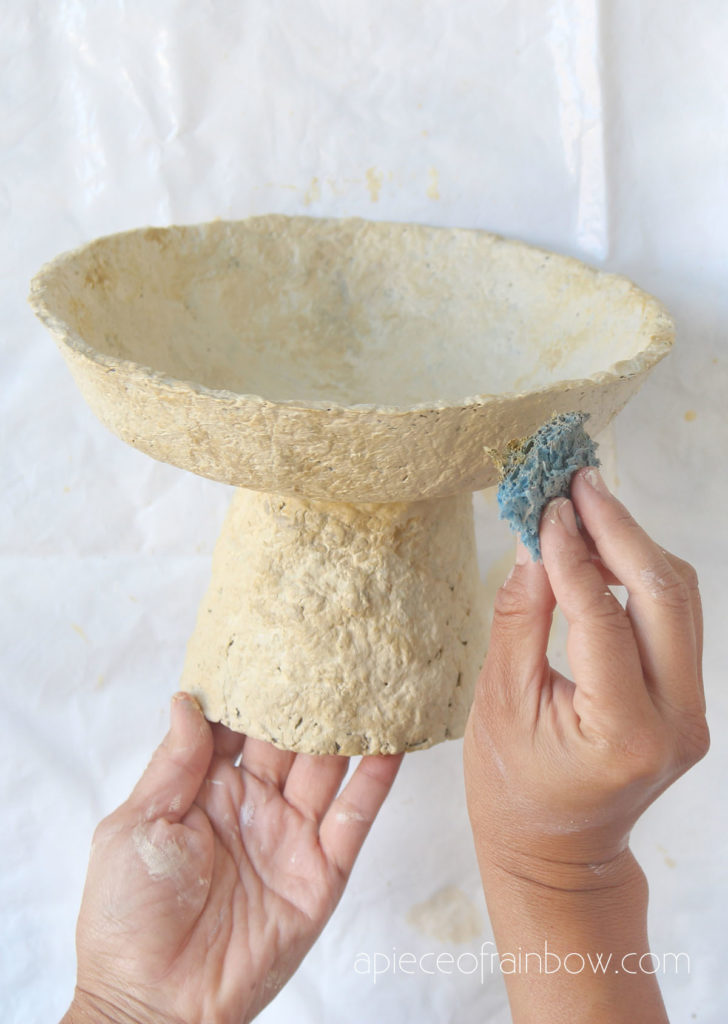
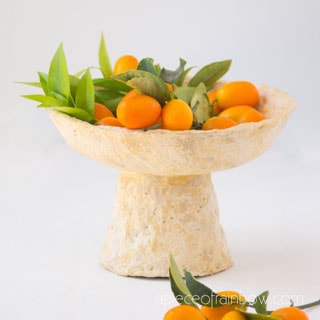
The test piece above is made with recipe 3. It is super durable, and dries very hard with no cracks. This paper mache clay pedestal bowl below (tutorial here) is also made with recipe 3!
Recipe 4 has joint compound, which produces a very smooth paper clay great for detailed work. The con is that not everyone can get premixed joint compound, and there are debates about the safety of its ingredients.
Personally I really like recipe 2 and 3, and can’t wait to show you some projects I am making! 🙂
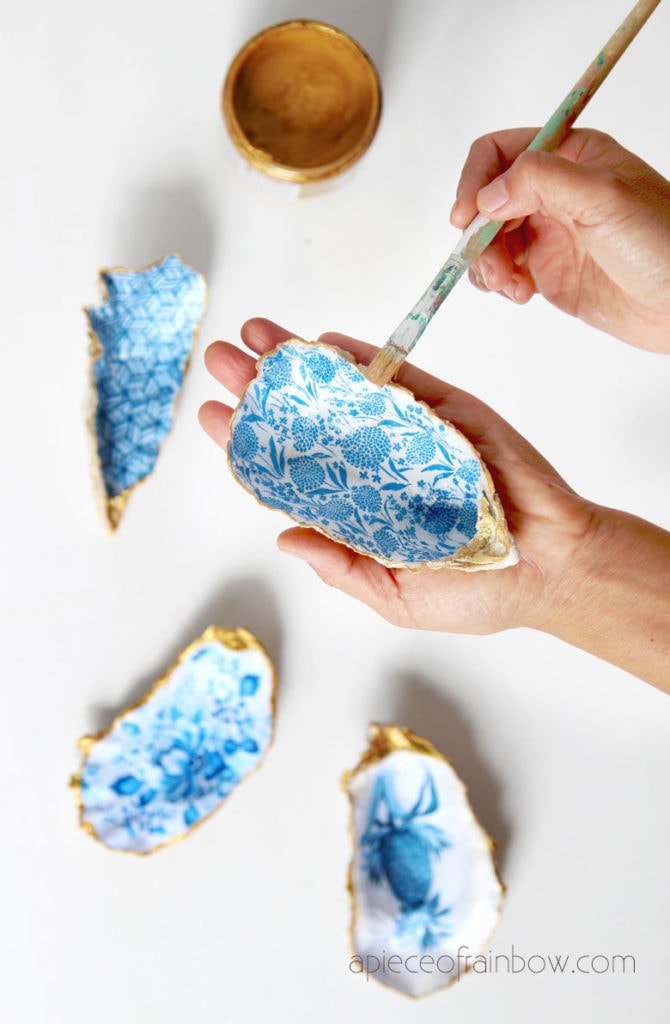
Love paper and glue? You will love these super easy Anthropologie inspired DIY oyster shell dishes with free designs for you to download!
Happy Creating, see you soon!
5 Minute Bubble Painting Hydrangea Flowers

Spring Trees Watercolor Painting with… Crumpled Paper!
DIY Happy Mother’s Day Card with Pop Up Flower
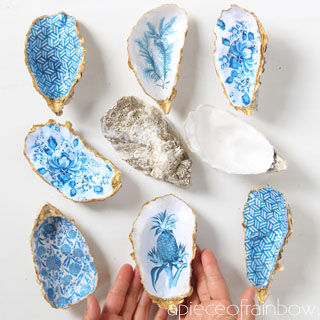
Anthropologie Style DIY Oyster Shell Trinket Dish
30 Minute Beautiful Watercolor Flower Painting Tutorial
20+ Best Watercolor Flowers Tutorials & Videos
DIY Paper Mache Clay Pedestal Bowl
12 Easy Watercolor Leaves Painting Tutorials

Anthropologie Knock Off $0 DIY Galvanized Zinc Vase
45 Amazing Christmas Paper Crafts & Decorations

Easy $1 DIY Paper Christmas Star Tree Topper in 10 Minutes


Hi, love your recipes thank you so much for sharing. I wanted your advice I am making a body neck bust waist can I use a mannequin for the mould and add the recipe 2 all over it to dry and cut it from one side to open it? Or what do u suggest to get a body out of paper?
hi! yes that’s how i would do it! 🙂 maybe use plastic wrap first so it’s easier to peel off later
I am planning on using this in a silicon mold about the size of a head. Since I only have the one mold and I need several copies, could I pop this in a low oven for a bit? Just enough to get it out of the mold and hold up. I can let them dry for a week after unmolding, but I can’t wait a week between each one if it has to air dry in the mold.
hi Kris! yes you can dry them in the oven with low heat for sure! in case they crack, you can use some more paper clay to patch a little 🙂
Can any of the mixtures be used for making a fairy house that will be kept outside? Is there a special preparation to make it more waterproof? (And thanks for coming up with these recipes!)
hi Phyllis, i have not tested this, but have seen people using a layer of Thin-Set Mortar / cement over the finished paper clay project, then adding 2-3 coats of exterior paint or outdoor polyurethane after the cement dries. 🙂
Hey, I’m using the paper clay to add details to this paper mache mask that I’m working on, and I was wondering if I use recipe 3, could I use some of the paper clay, and store some in a close container for later use? or would doing this ruin the paper clay ?
hi Anneth! yes you can store the paper clay in the fridge for 1-2 weeks, or in the freezer for longer. 🙂
Hi what can I use besides mineral oil ?
hi Susan, you can skip the oil. it’s just to make the clay less sticky. 🙂
Thank you for this. I am asking if you make recipe 3 and replace the glue with the cooked flour paste, do you still need to add the flour separately from recipe 2. You said that the cooked glue paste would only replace the glue from recipe 2
Thanks..
hi Ashley, yes you still need to add the flour separately from recipe 2. you are using the cooked glue paste as glue. 🙂
Thinking about doing paper clay with my 5/6 grade class. I have 16 students. Which recipe do you suggest? How much do I need to increase the recipe?
Thanks!
hi Jamie! i would use recipe 2 which is easy and very durable. each recipe makes about 4-5 cups of clay, so you can decide how many cups you might need. have fun!! 🙂
I am going to be attempting to create a fake cave that is approx. 8’x8’x7′ (LxWxH) and I have decided to go with paper Mache for the walls inside and out (this will not be exposed to the elements).
I will be using the cooked flour recipe with single ply 1000 sheet toilet paper (such as Scotts Brand)…and am wondering approximately how many rolls this project will require?
My plan is to shape the “cave” using 23 gauge 1/4″ chicken wire covered with some sort of gauze maybe plaster cloth before applying the first few coats of paper mache smoothly then allowing those layers to dry and then applying a crinkled layer of paper mache finishing up with a coat of polyurethane or some similar protective coating.
Do you have any additional input that may lead me to a more successful outcome?
It may sound somewhat silly but it is going to be a meditation cave for myself.
hi Lisa! sounds like a good ideas! 🙂 hard to estimate but i think about 5 rolls should be enough. i would just do it in layers, improvise and add more layers until you are happy with the look. make sure it’s super dry before sealing. might need 2-3 coats of polyurethane!
Hi Ananda!
I’m looking to start a project that’s essentially creating a (somewhat intricate) pattern in relief on a large board (think cheap commercial mass production art) I’ve upcycled.
Do you think the paper clay from recipe 2 or 3 will ‘stick’ well enough to the board? I do intend to smooth the edges as I apply the clay, but I’m worried that it might crack/ separate as it dries, or over time.
Thank you!
hi Kylie! sounds like a fun project! if the surface of the board is a material that works well with glue then yes. it might also be helpful brush a little extra glue before add the paper clay elements. this clay does not crack. there’s always ways to fill with putty, or reinforce with hot glue later if a random piece cracks or falls off. 🙂
I have a project in my mind that I’m trying to figure out how to execute. I ultimately need a “globe” shape but I want it to end up with lot of “holes” through which air and light can pass. And I do not intend to use a “globe” that is closed at the bottom in my project; I need more of an upside down bowl that looks like 80% of a “globe”. I’m planning to permanently glue molded Baroque lace elements onto the surface of the “globe” such that the elements connect with one another in a cohesive pattern. I can use hot glue and a cake decorating silicon mold to make the lace elements, and I can glue the various elements together with more hot glue as I assemble the design on the curved surface of the “globe”. Then I want to remove the parts of the “globe” that aren’t needed to support the interconnected lace elements. I’m thinking I can cut the paper mache with an Exacto knife where it doesn’t support a lace element and remove the debris through the open bottom of the decorated “globe”, Is this a good plan or should I be thinking of the “globe” as a totally destructible intermediate step, and count on the just the hot glue bonds between the lace elements to support the final airy product? If I took that second approach, I guess I’d need to soak the whole assembly in water until I could get the paper mache to dissolve, Any advice on which plan is likely to get better results would be appreciated.
hi Cheryl! i would use your idea #1, but maybe you could add the lace designs before the sphere is dry, so it’s much easier to cut out the holes, and just let the designs dry with the rest of the mache.
another idea which might work is to press the paper clay into the molds, then dry those pieces on a sphere mold in sections, the assemble / glue together the dried sections. 🙂
Thank you very much. I had a question. When you described the types of paper and amounts on the second option I believe you said two egg cartons/ 20 peices of paper. Was that meaning combined? Or were those two different options
hi Ashley! they are two different options 🙂
Hello! I am working on a giant paintbrush,and I just wanna know how long this will take to dry?
]]]hi! if all sides are exposed to air and in a] warm dry place, it takes 3-7 days depending on thickness 🙂
Hi Ananda,
I want to make paper mache ears to attached to a paper mask, so I need them to not be heavy. Do these recipes create heavy mache?
hi Tina! these are super light when they dry! recipe 4 is heavier, but the others are ligh. :)t, and you can make them quite thin because they are very strong! 🙂
hi,
I wanted to create a package from paper mache, I wanted to ask if it could work? and if I want to refine it after its dries I can smooth it with glass paper? which recipe is best for that?
hi Sharon! do you mean package like a gift box? those might be best to use the paper strips dipped in glue method! 🙂
Hi! Which one of your recipes do you suggest if we want to make a brick of paper clay, or a gift box? 🙂
hi!either 2 or 3, they both work well, just depends on if you want to make flour paste or use glue. 🙂
Thank you so much Ananda! Really appreciated 🙂
Merci pour cette recette et ce tuto, c’est super !
I have always wanted to try paper mache clay. Love what you made and thanks for the detailed recipes!
Hi! Im planning to use paper clay again to design my walls. I used flour paste and added some cornstarch because I thought it would make it stronger but it ended up as a smelly work during the drying process. The smell lasted for 2 days because it is a large project. Do you think if I only use flour only as a paste this time, it will not end up as what I did before?
hi Marian! the flour paper clay does have a smell too, but i didn’t find it unpleasant! i think flour is super strong without cornstarch! would love to see what you are creating!! 🙂
Thank you for responding! Maybe being harder to break will slow them down a little. I imagine him and his squad smashing everything very quickly
Hello, I am creating a “smash room” for my nephew’s birthday and just wondering if paper clay objects would work for that. He’s 9 so the items in the room need to be breakable without breaking him.
hi Kendall, yes it should work. 🙂 although this paper clay is super strong and pretty hard to break!