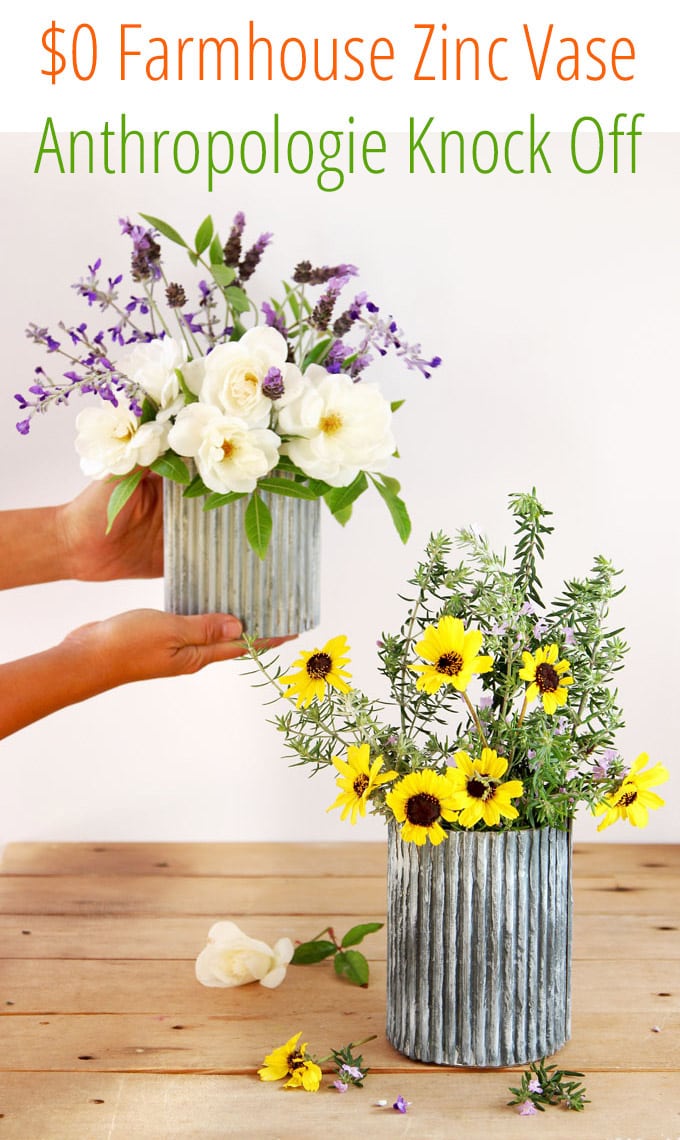
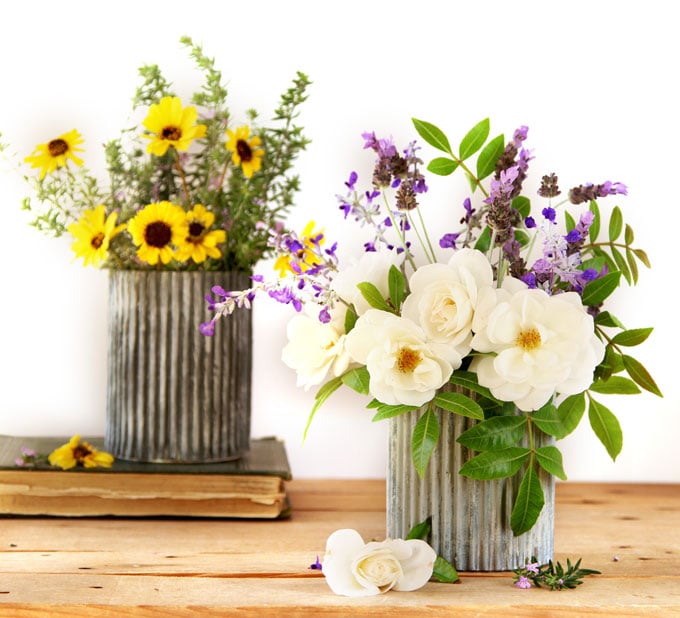
Anthropologie Knock Off $0 DIY Galvanized Zinc Vase
You know it’s time for another Anthropologie knock off when that beautiful ridged galvanized zinc vase at Anthropologie is no longer available!
You probably have seen similar vintage galvanized zinc vases in gorgeous home decor books and antique stores. These ridged metal vases and pots have such a natural antique patina that is perfect for farmhouse and vintage inspired decorations.
Today I am going to share with you how to make an Anthropologie knock off galvanized zinc vase or pot from free and recycled materials without using any special tools!
Are you ready to guess what these vintage farmhouse style “zinc vases” are made of? 🙂

*Some resources in article are affiliate links. Full disclosure here.
Materials and tools to make an Anthropologie Knock Off galvanized zinc vase:
You can make these “zinc vases” for pretty much free! You only need a tiny bit of paint ( I will share more about the painting technique in Step 2 using this metallic silver paint, and some black and white acrylic or craft paints ), a little glue, some corrugated cardboard, and recycled cans or jars.
If you want to skip the DIY and buy these vases, I just saw some on Amazon, here are the 5″ tall vases, and here are the 7″ tall vases.
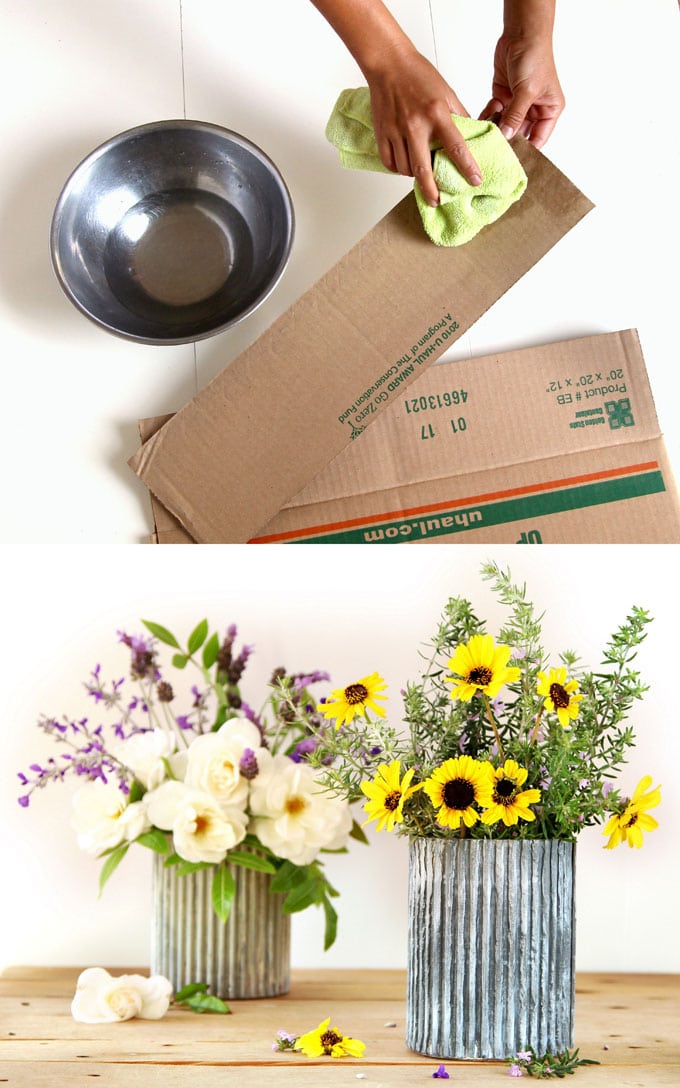
Step 1: cut and peel cardboard
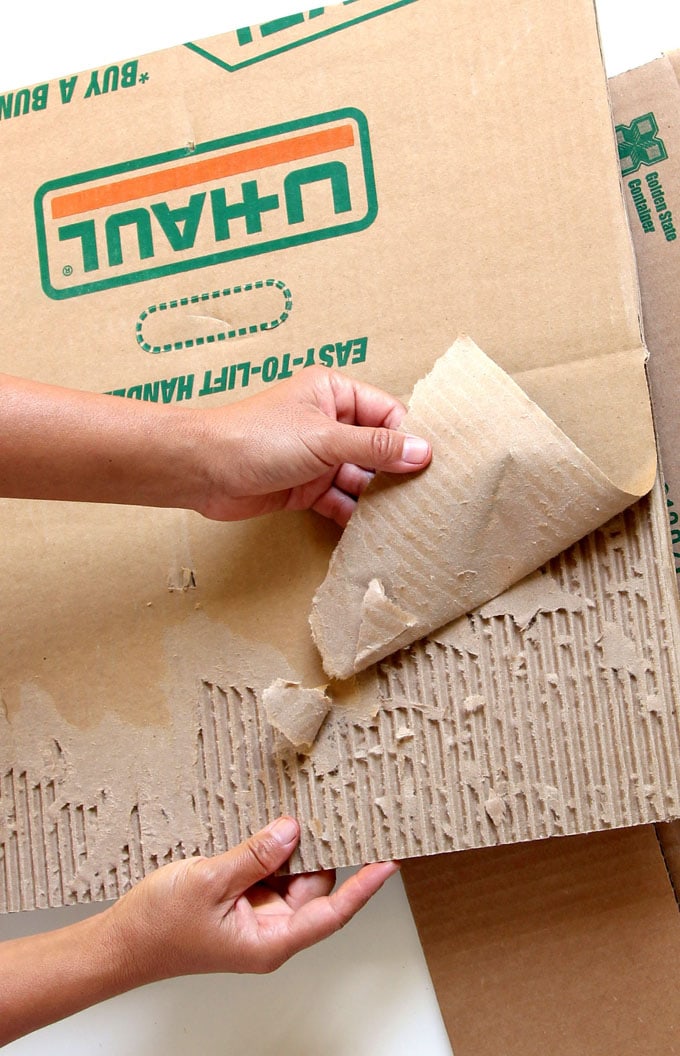
As you can see the corrugation in the cardboard has the ridged look we want for our faux galvanized zinc vase. However, when you try to peel one side of the paper off, there are all these little torn pieces that will take FOREVER to clean up! ( See photo above)
The good news is, I found a MUCH better and easier way to do this!
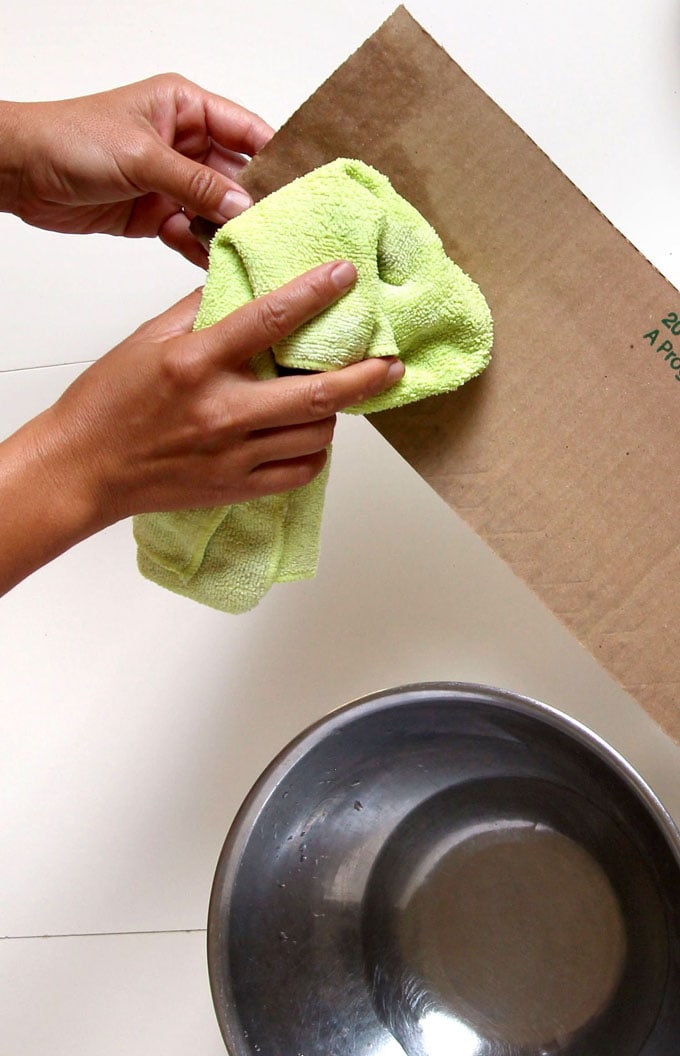
Measure around the container you will be using. If you are using the 28 oz cans like I am doing here, cut the cardboard to at least 15″ long by 5.5″ tall. You can make them taller too.
Use a damp cloth and wipe one side of the cardboard surface, wait 30 seconds, and peel the damp layer off.
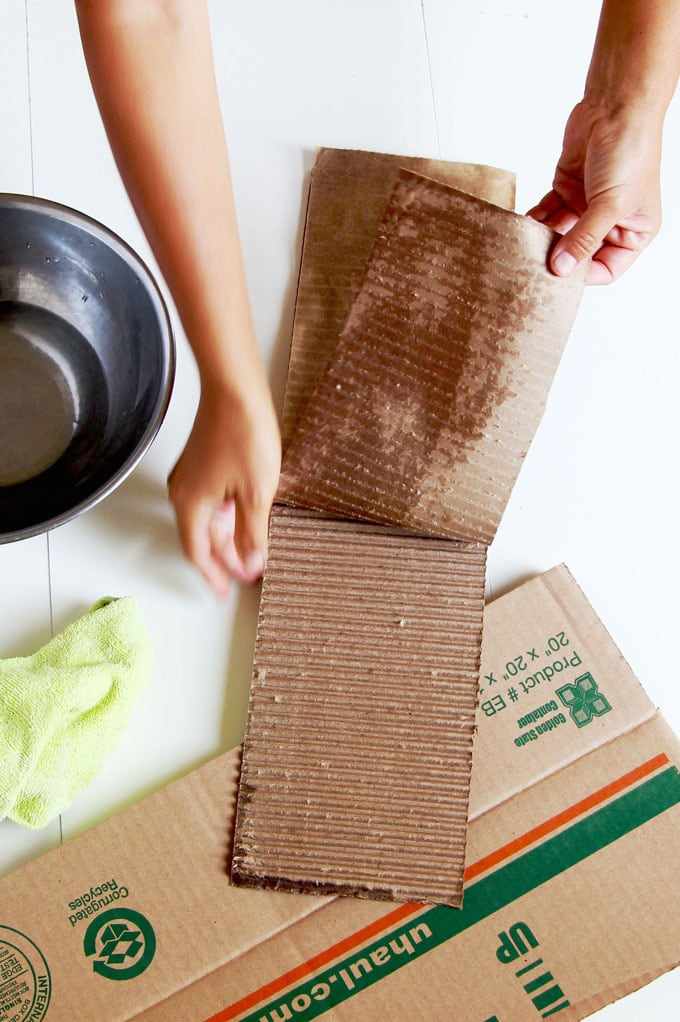
See how clean it peels off, and it takes no time at all! We only need to peel one side of the cardboard.
Now we are ready for the next step.
More farmhouse and super easy DIYs you may also love:
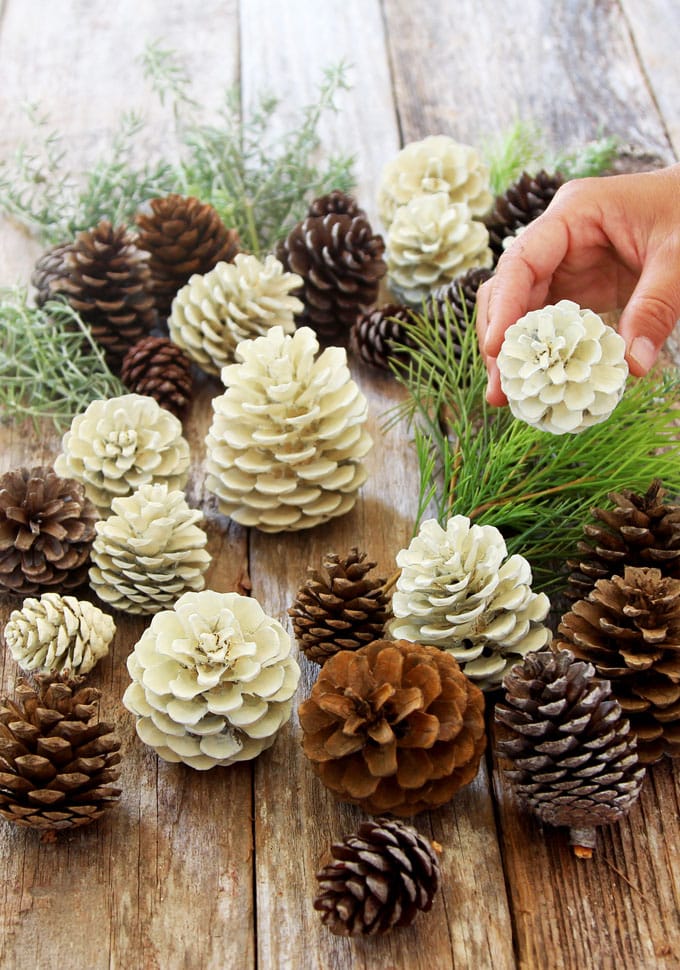
Make “bleached pinecones” without using any bleach!
Step 2: paint the cardboard
There are many color variations when you look at aged zinc metal. I made different shades of gray colors by blending white acrylic or craft paint with a little bit of black .
Below are 2 color variations I made you can use as a starting point.
Variation 1: pale color aged zinc vase ( light gray base layer, silver top layer )
Variation 2: Dark color aged zinc vase ( dark gray base layer, light gray mid layer, silver top layer )
Let’s use the pale color one as an example to show the process.
The base layer of paint below looks white, but it’s actually a mixture of white acrylic or craft paint with a tiny bit of black to create a pale gray.
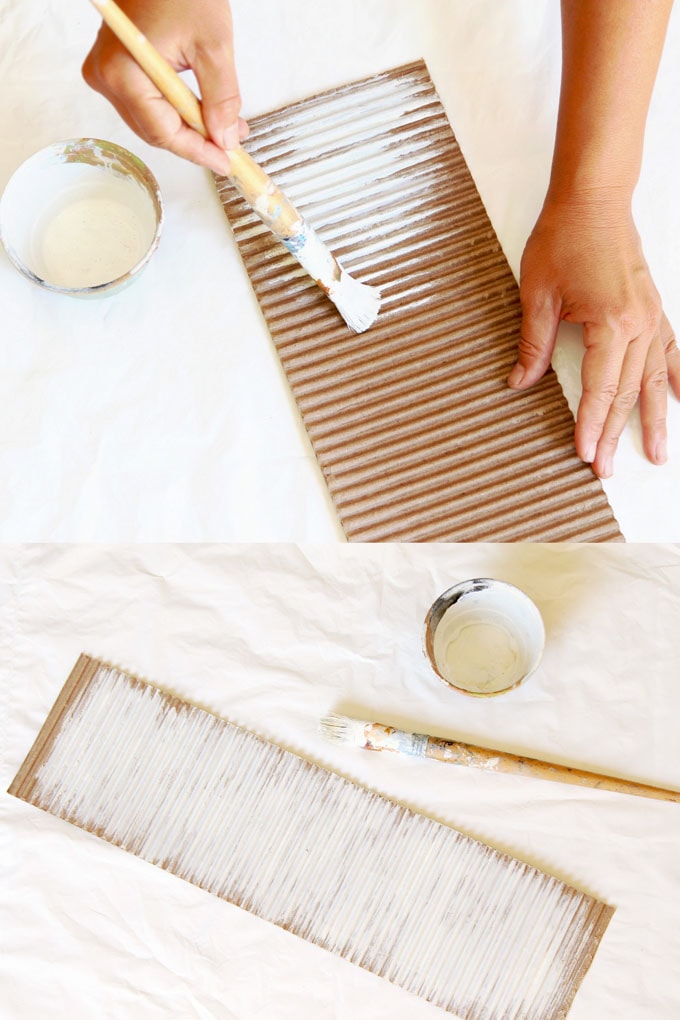
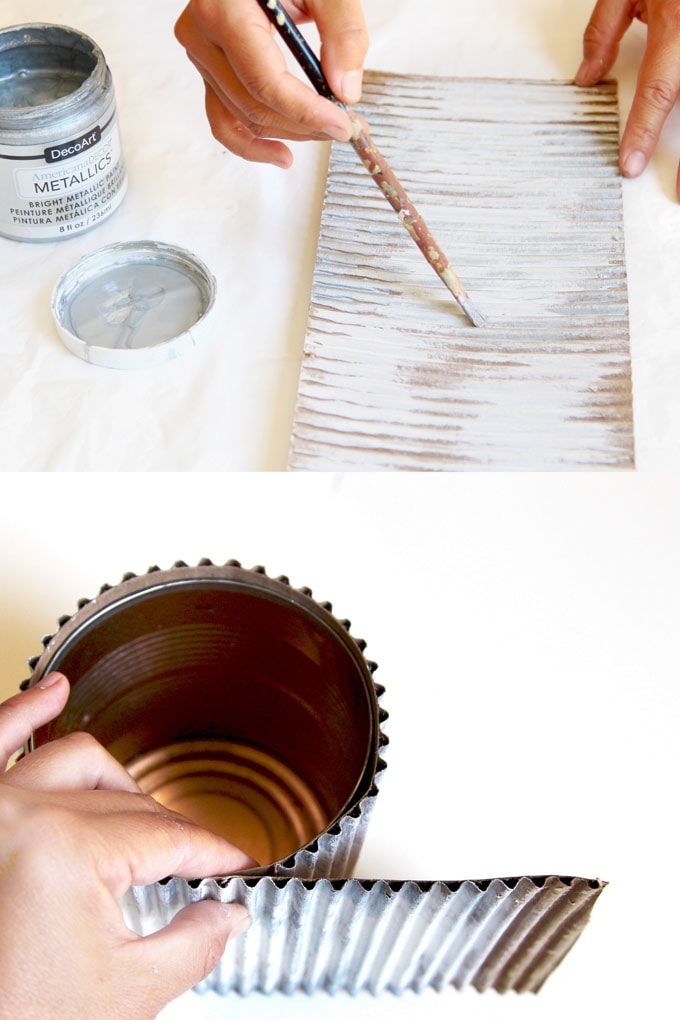
After the base layer dries, take a dry brush and paint strokes of silver in random places.
That’s it! Just a two step painting process! Measure the cardboard around the vase and make sure you have painted more than enough to go around the can or jar inside.
To create the darker variation, use more black in the base layer to create a darker gray first, then add random strokes of lighter gray and a touch of silver at the end.
IMPORTANT: always let the base layer dry, and use a very dry brush to paint the top layers!
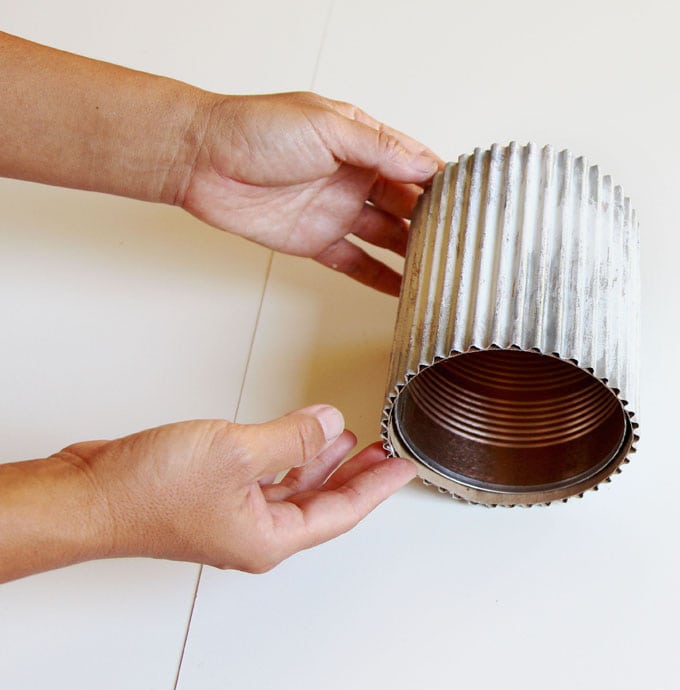
Step 3: assemble the Anthropologie knock-off “galvanized zinc vase”
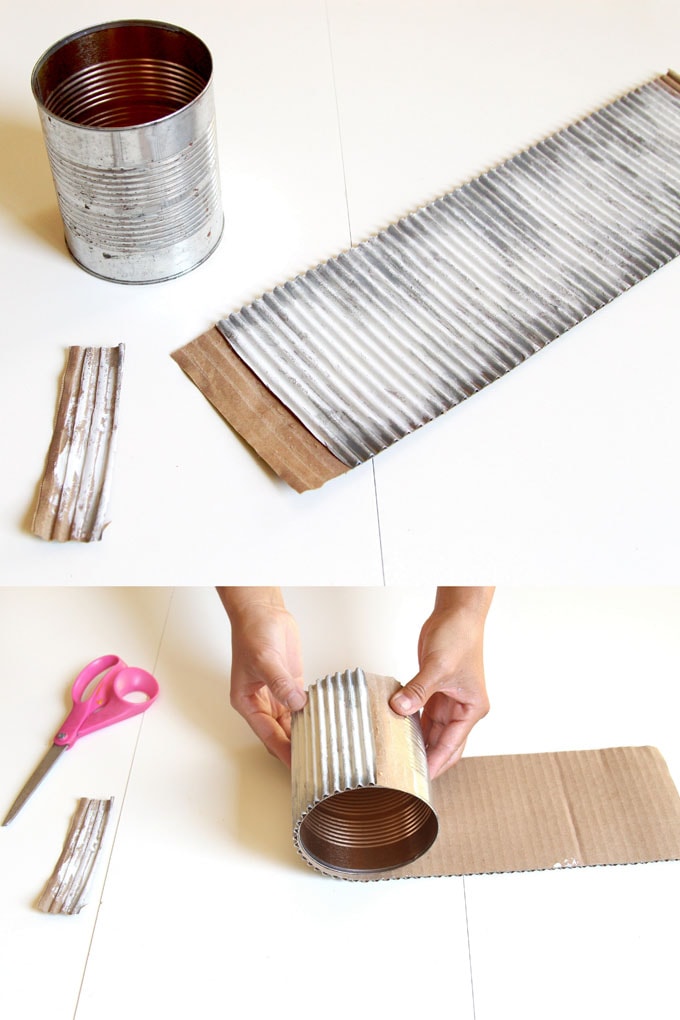
Measure around the can, mark and cut off about 1″ wide part of the corrugated layer on the extra area, and glue the flat paper part to close the cylinder shape.
You can leave the back side of the cardboard blank, or paint it with silver or gray. The paint will give the cardboard extra protection from water spills.
The cardboard cylinders can slide off the cans and be stored flat.
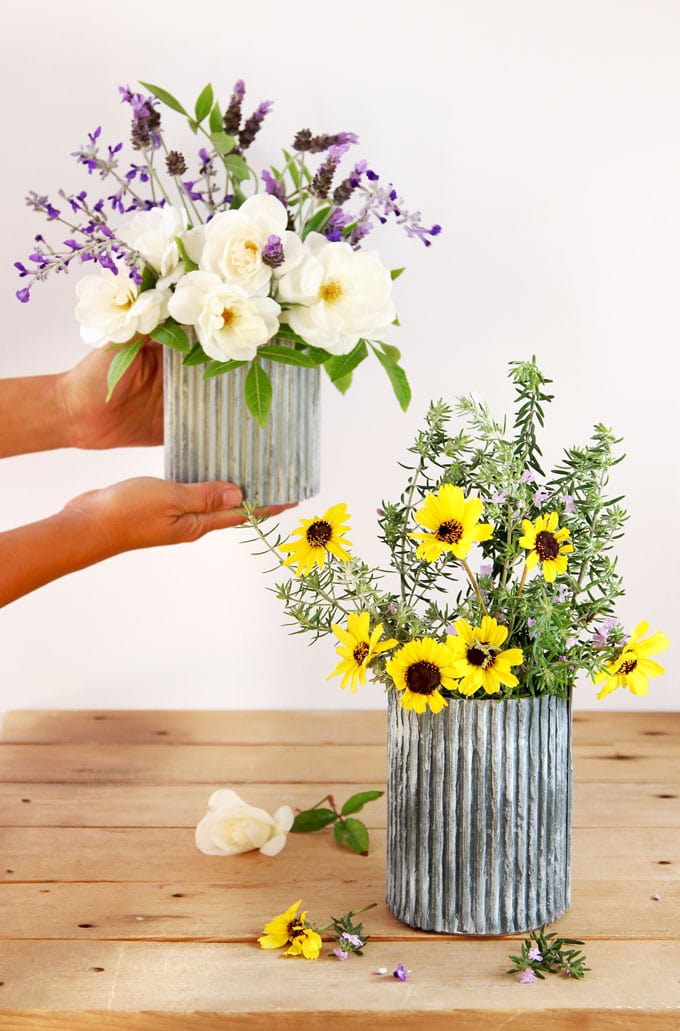
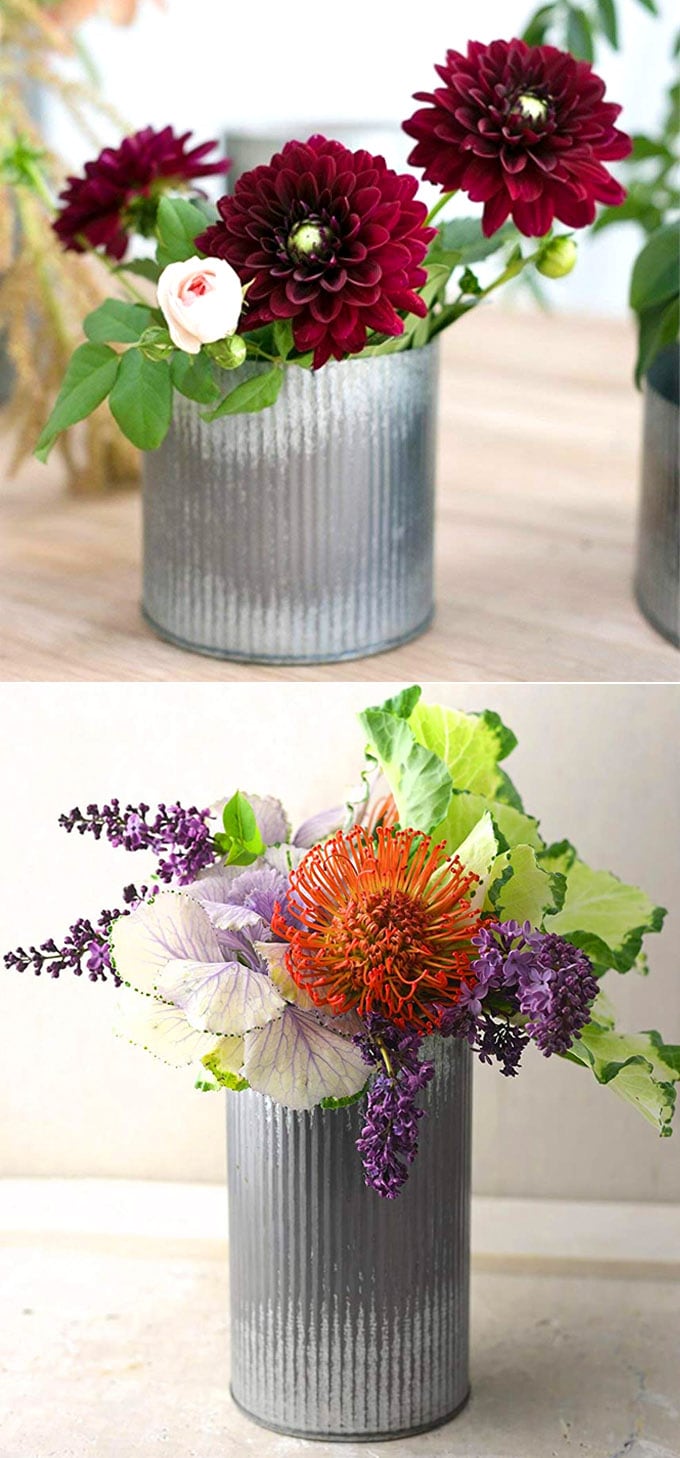
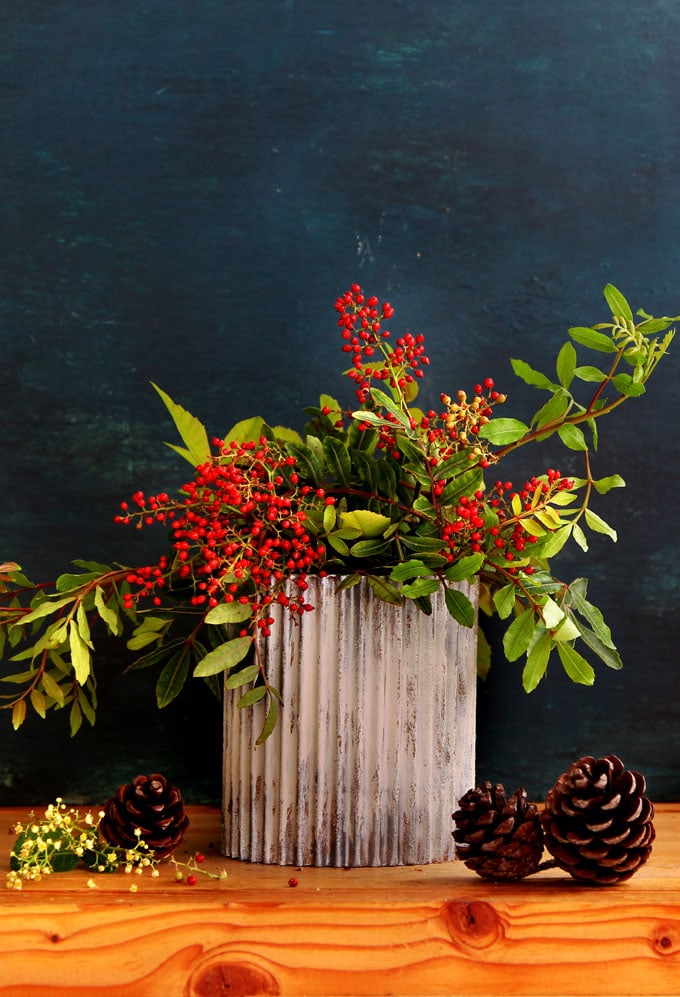
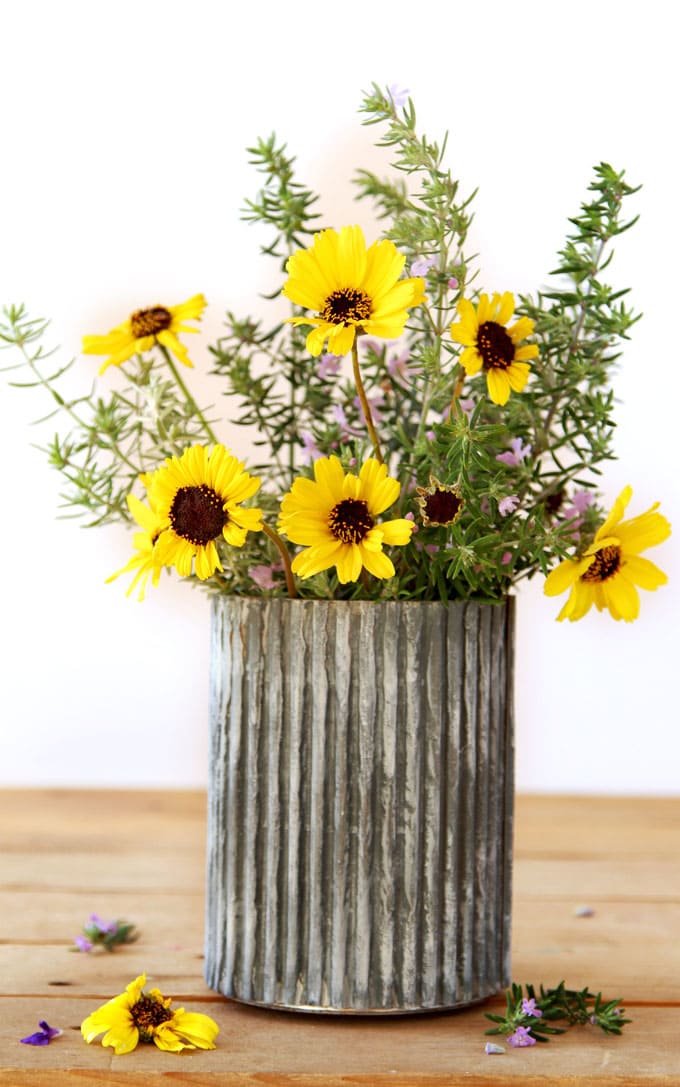
They would look great for year round decor, don’t you think? From spring roses and lavender, to fall marigolds and winter berries, everything looks pretty in an “aged zinc vase”.
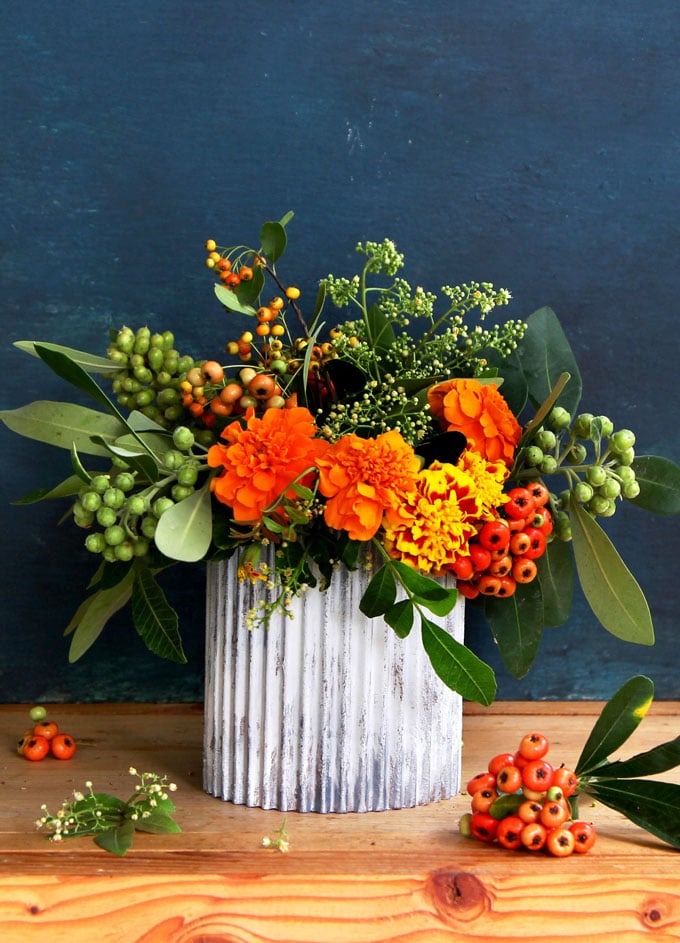
I used all fresh flowers here, but artificial foliage would look nice too!
Our reader Nina sent this GREAT idea, I can’t wait to try it, thank you Nina! “I first make special ‘structure’ paint to paint the corrugated cardboard. Take regular acrylic craft paint. Mix this with baking soda (not baking powder), which can be found in the supermarket with baking products. You will then get a somewhat thicker paste-like paint. This will be a bit grainy and vintage drying. I made a rust color myself and painted it with some shadow paint after it had dried. Indistinguishable from a really rusty tin. I’m also going to make the zinc version.”
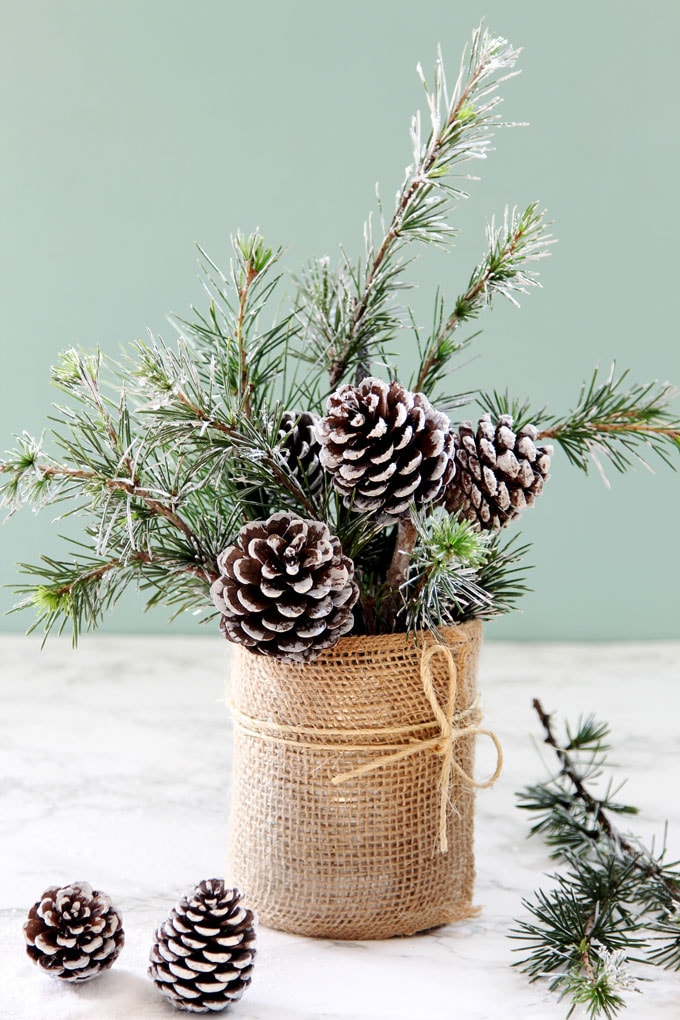
Here’s another easy decor DIY you can also make for almost free! Snowy pine tree DIY table centerpiece decorations. Tutorial here –
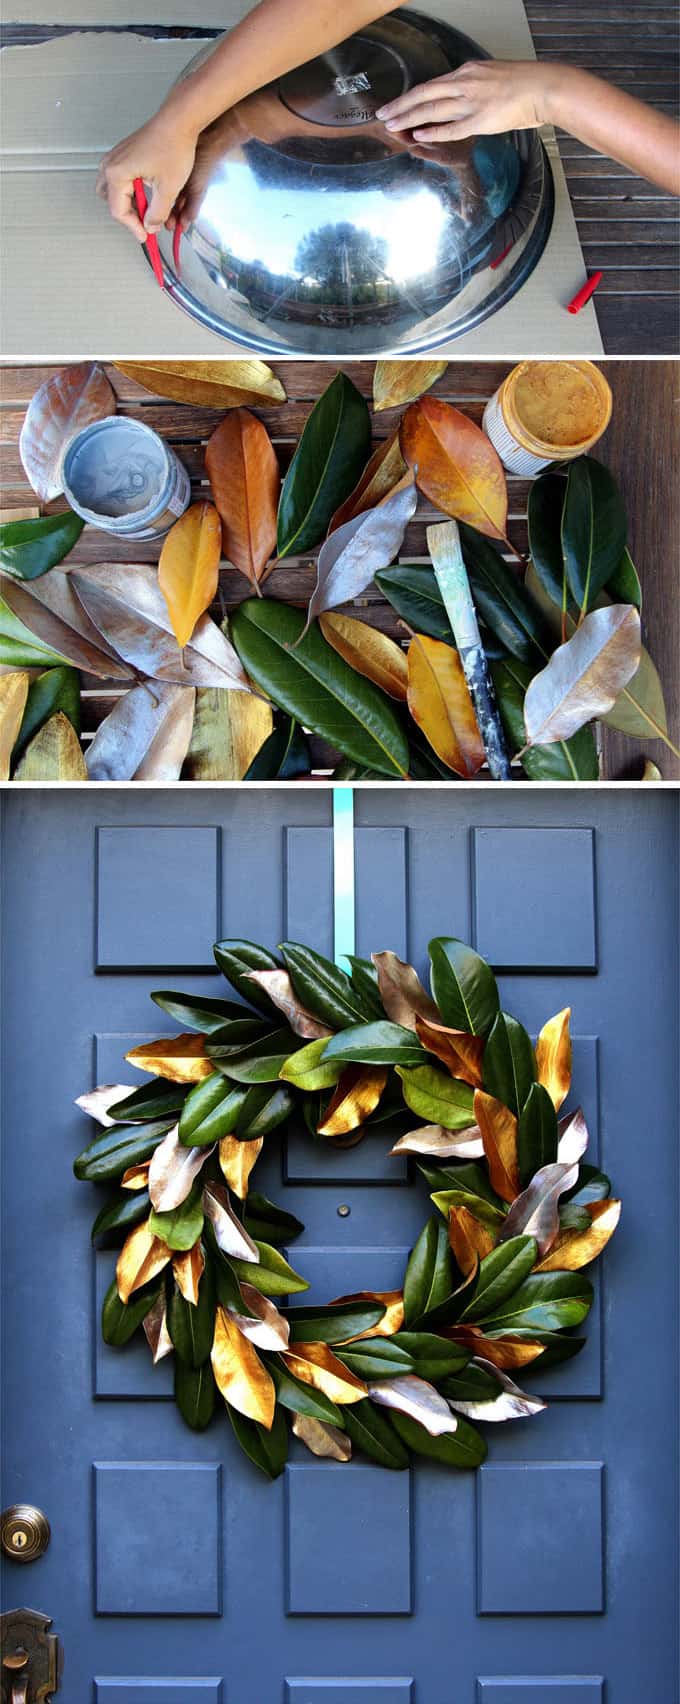
And another creative use of cardboard: make this easy, free, and stylish DIY magnolia wreath!
Happy creating! See you soon!


Ik maak eerst speciale ‘structuur’ verf om het golfkarton mee te beschilderen. Neem gewone acrylhobbyverf. Meng dit met baking soda” (geen bakpoeder), in de supermarkt bij de bakproducten te vinden. je krijgt dan een wat dikkere pasta achtige verf. Dit wordt wat korrelig en vintage opdrogend. Heb zelf een roestkleur gemaakt en na opdrogen met wat schaduwverf bewerkt. Niet te onderscheden van een echt roestig blik. Ik ga ook de zinken versie een keer maken.
hi Nina! i love our idea, it’s such a great tip i’m going to add it to the end of my post with a big thank you! 🙂
Great idea to repurpose all my Amazon boxes‼️
yes! happy crafting Sherry! 🙂
Great project; great tutorial. I t hink in this economy we can all use some “cheap” projects that look impressive! Thanx!
thank you so much Kathy! i also like it when there’s no pressure of ruining something i just bought! 🙂
Love this! Gonna try covering concrete tubes with the cardboard for taller pedestals.
oh i love your idea!! feel free tag us on instagram if you post a photo! 🙂
بسیار زیبا ⚘
You can also use corrugated 12” x 12” scrapbook paper! Much easier to work with than cardboard!
didn’t know about corrugated scrapbook paper! thank you so much kiki for the great tip! 🙂
You decorate it beautifully, I love flowers and the vase looks great.
Oh love the idea for using the cardboard to create those vases! Very creative way to recycle cardobard boxes!
They look great! Will definitely do this one! I love zinc. You are so very clever!
thank you jauquetta! happy decorating! 🙂
I love these so much! Awesome job!
thank you so much karen! 🙂
The galvanized zinc knock off was so clever! Great tutorial!
Thanks!
Smiles, alice
thank you alice! 🙂