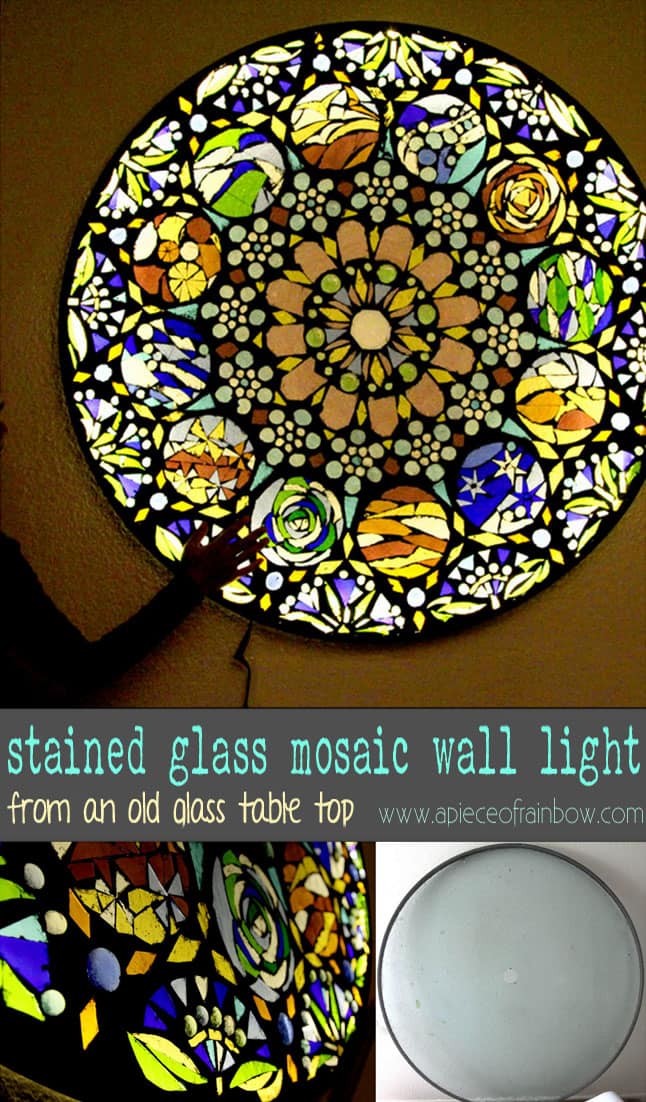
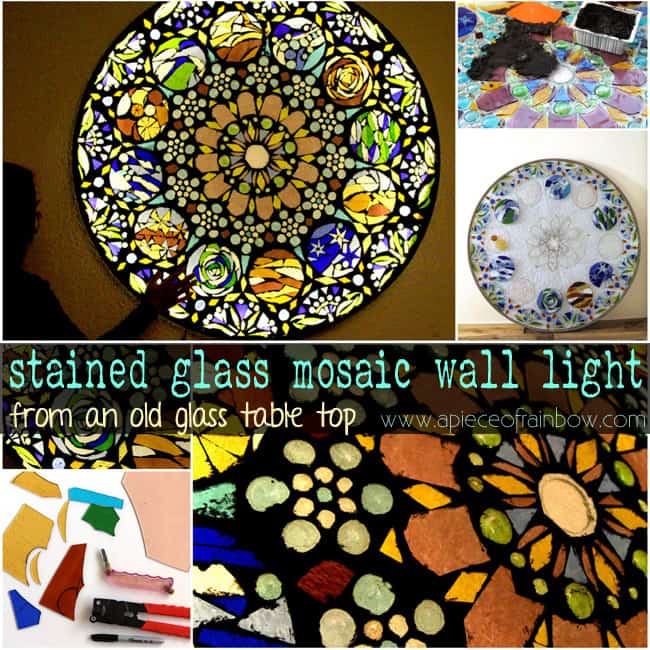
Make Stained Glass Mosaic Wall Light
To start this wonderful year off, I want to share with you a very special project – a surprise birthday gift I made for my dear hubby Jeff!
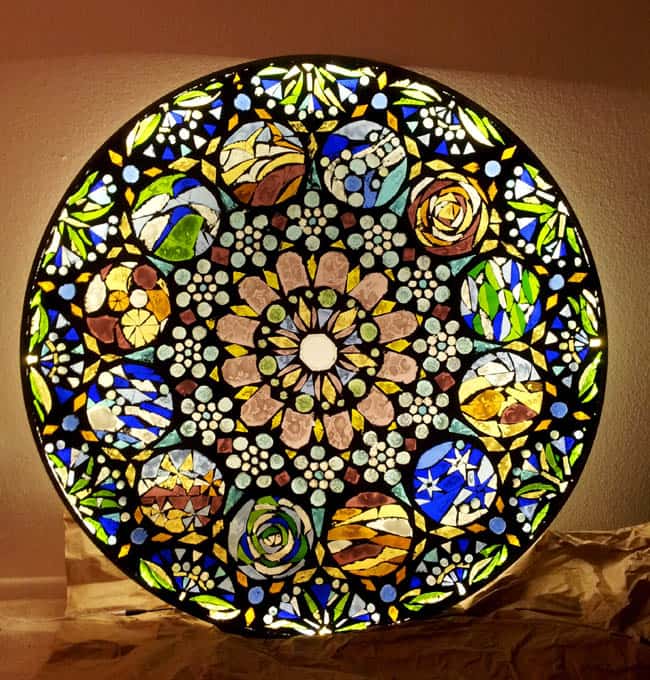
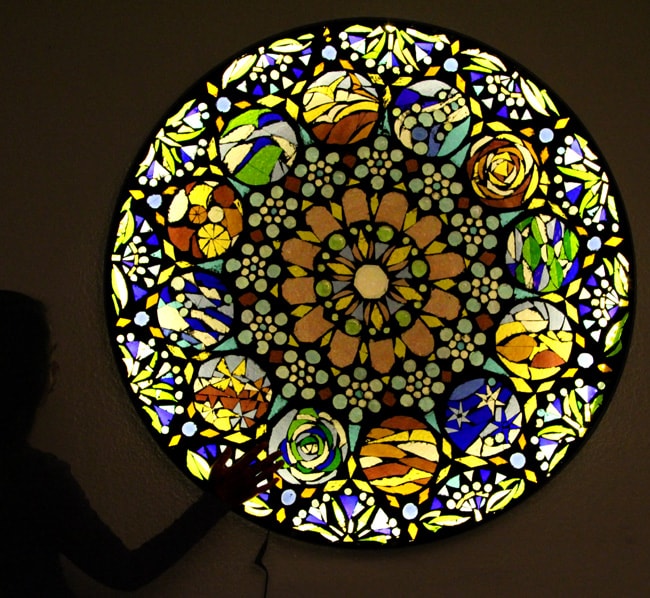
There are some things money can’t buy, such as love, or the south rose window of Notre Dame. This stained glass mosaic is inspired by love, and that glorious rose window.
I have long dreamed of making something with stained glass for our home , but was intimidated to try this new medium. When Jeff told me he had to take 2 trips the month before his birthday, I saw a perfect golden opportunity: a gorgeous SURPRISE gift as motivation(can still buy one if I fail), and days of not having to hide my work in progress!
Take a deep breath – “Do or do not, there is no try!”
*Some resources in article are affiliate links. Full disclosure here.
And NO you don’t have to start your first stained glass mosaic DIY with a huge 42″ table top! It is truly fun and rewarding. Check out the process in detail, so you can start with even a simple piece, it will be so pretty!!
The magical geometry of a rose window:

An entire book can be written on the geometry of a rose window. There’s such elegance and beauty in the process. It’s a study of how the “many” are created from the “One”.
In this rose window, the underlying geometry is a 12 pointed star, generated from simple forms of square and circles.
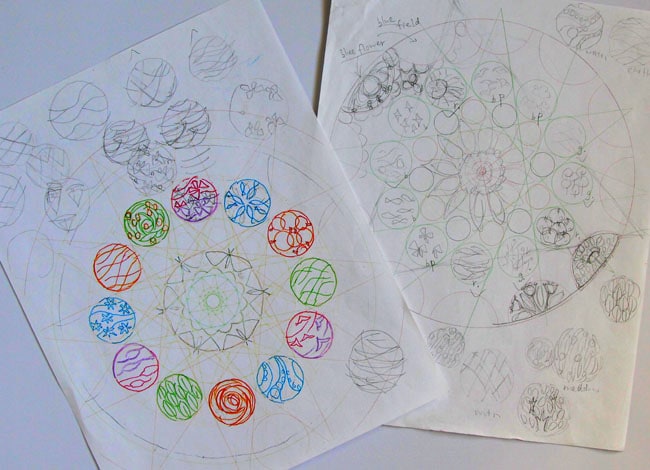
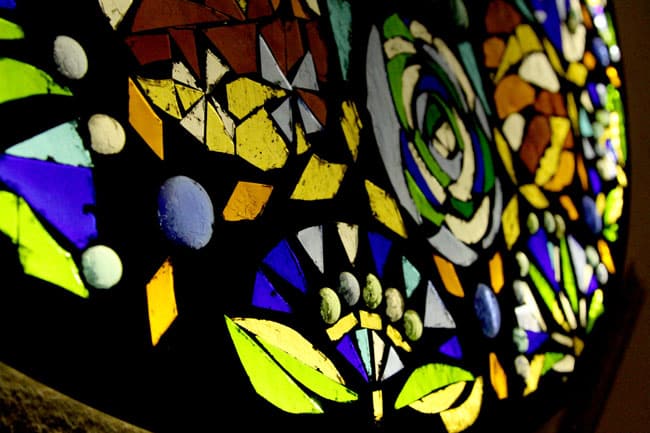
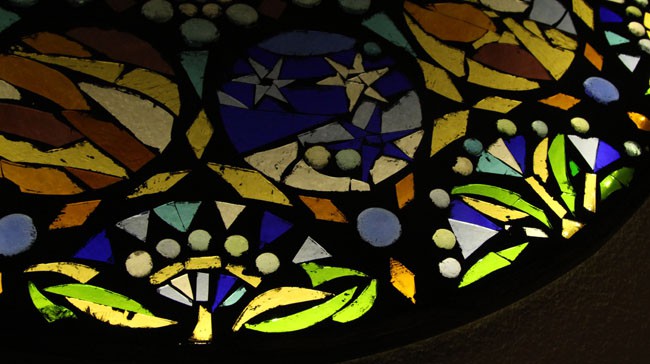
I adapted the geometry, and incorporated images of those simple and sweet moments in our life together, such as hiking in mountains and forests, watching sunset by the ocean, growing a garden, picking fruits at orchards, etc.
The design process also helps me to decide on the colors, so I don’t walk around like a lost soul in a stained glass store!
Materials and tools:
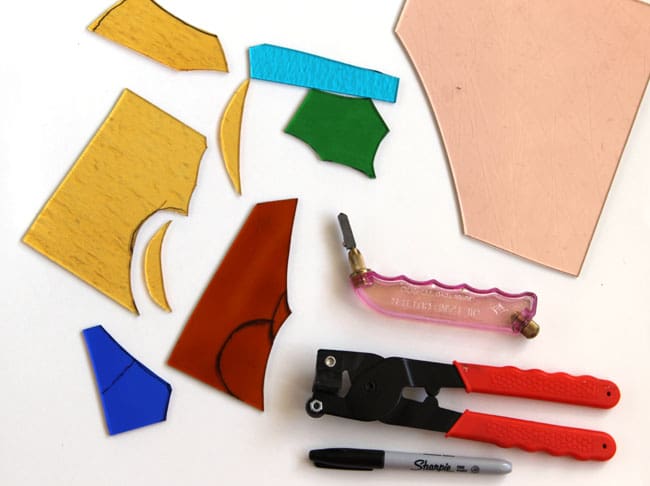
Stained glass mosaic requires fewer tools and materials than stained glass. But MOST important are these 3 safety tips-goggles, gloves, and don’t rub your eyes!!!
- eye goggles: glass shards can fly around when you are cutting, so DO NOT BEGIN UNLESS YOU ARE WEARING GOGGLES!!
- gloves: any gloves that fit snugly. They serve 2 purposes: 1. Protect our hands. 2. Our hands can get tiny bits of glass, we are much less likely to rub our eyes by habit with gloves + goggles on!
- stained glass and glass wafers: find a local shop so you can see the colors in person. Sometime they will have scraps for a really good deal. Glass wafers are available online and in florist supply stores.
- Weldbond Adhesive. It’s non toxic, dries clear, and works great for glass on glass!
- cutter: I started with a $5 Red Devil DIY Glass Cutter, since it’s my first glass project, and i was not sure if I would use it a lot. After the first day, I realized how fun it was, and how FAR FAR behind I was, I ran out and got a Toyo Pistol Grip Glass Cutter The first one cuts fine, especially with more practice, but the Toyo one cuts like… BUTTER
- Tile and Glass Cutting Pliers . Once you score a cut line, it breaks the glass very easily.
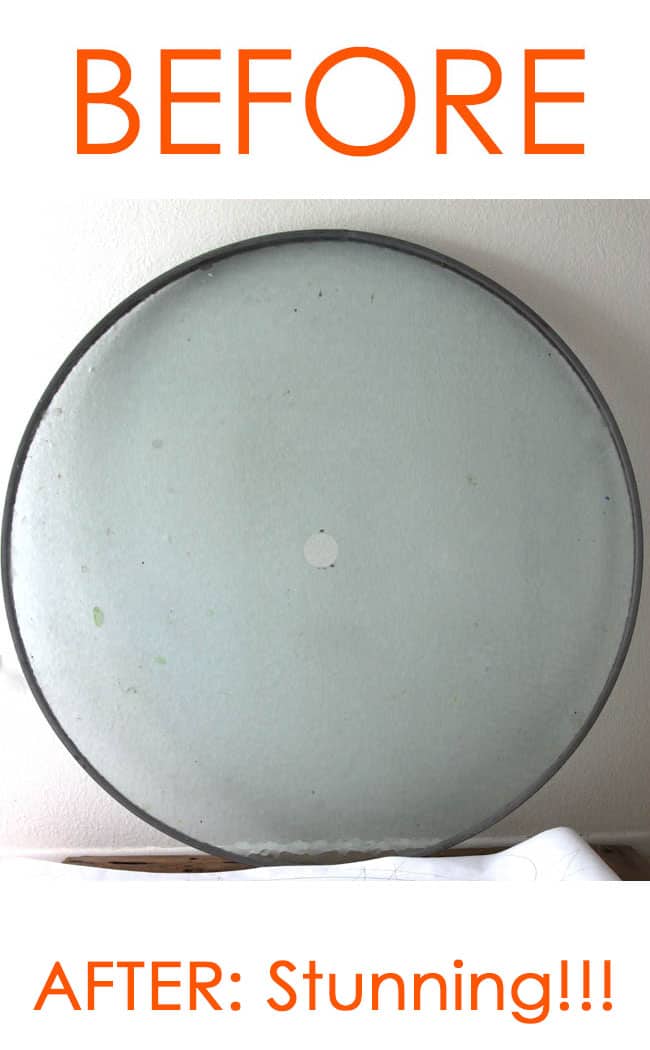
- base: here we have an old glass table top, but any glass object you want to mosaic would work, as long as the surface is smooth. For curved surfaces, the stained glass pieces will need to be smaller.
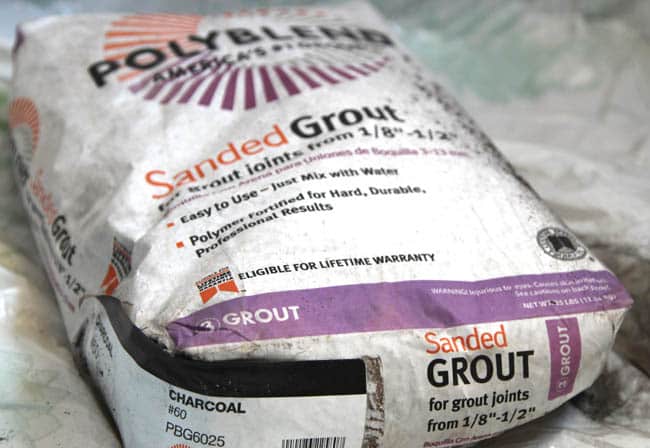
- grout: please remember to use sanded grout! Black contrasts nicely with the colored glass. And plastic containers, rubber gloves, rags, for mixing and applying grout.
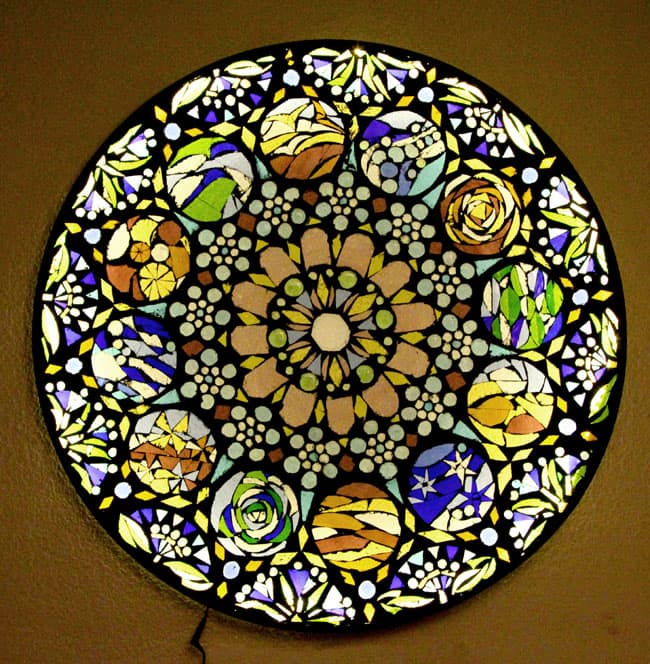
- To back light this I used Warm White LED Light Strip
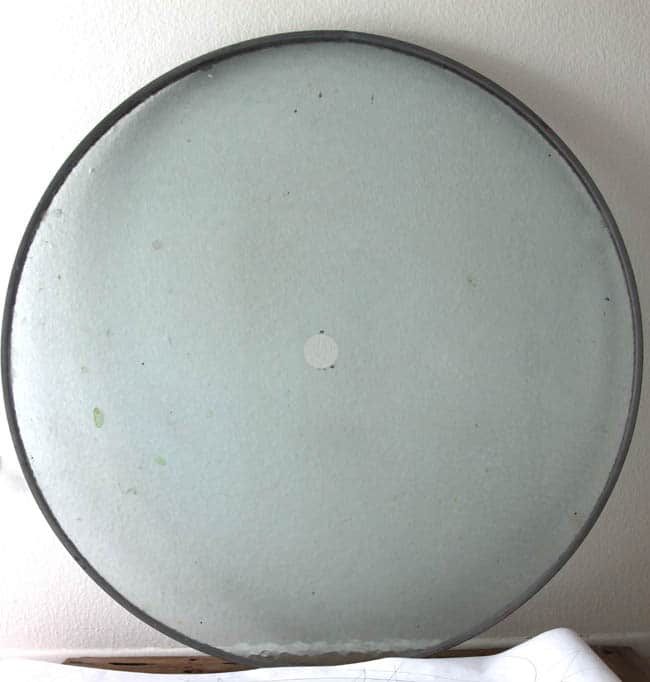
We used to have a glass table that isn’t super gorgeous, so the base went to metal scrap yard when we moved, and I kept the glass top. It has a metal ring around it, perfect for this project!
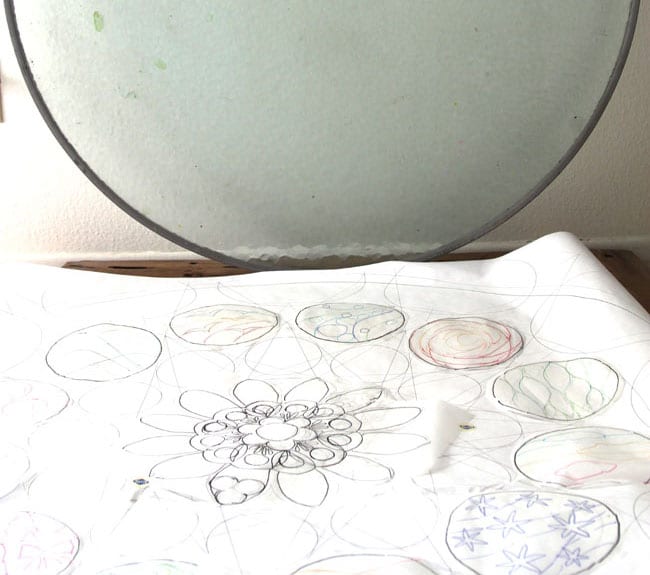
I printed a 1:1 scale drawing at a blueprint store, and taped it to the back of the table as a guide. Now it’s time to cut and glue!
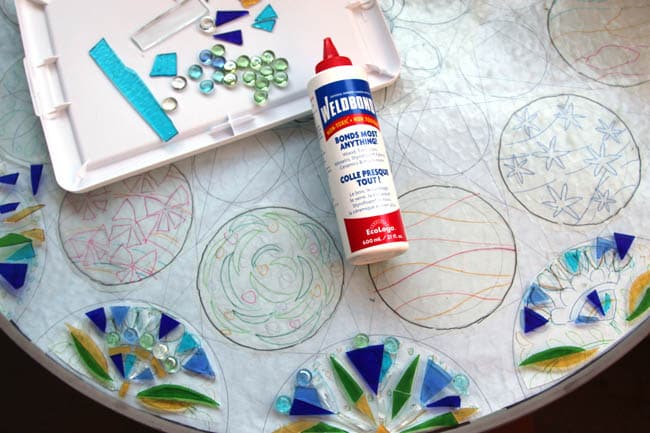
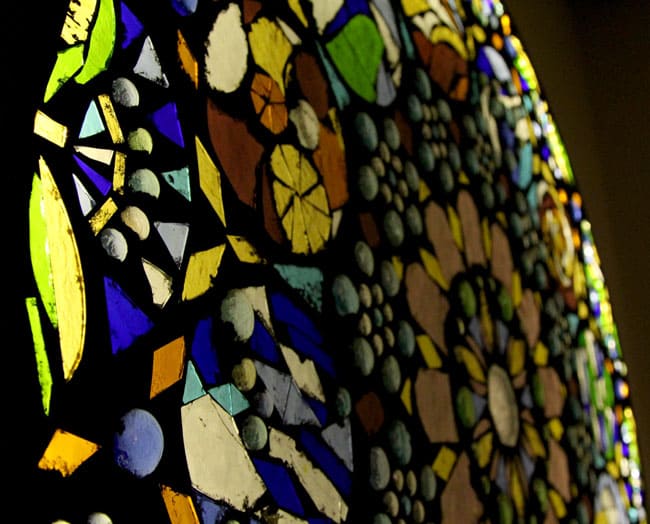
The process is simple: draw a shape you need on the glass with a maker, score the cut line with a glass cutter, then break the piece off with the pliers. Straight lines are the easiest. Curved lines may need to be done in steps with more gradual curve in each step. Apply a little glue on the piece and press it onto the base glass surface.
Remember- goggles, gloves, and don’t rub your eyes!!! I worked outside so it’s easy to sweep up the glass shards.
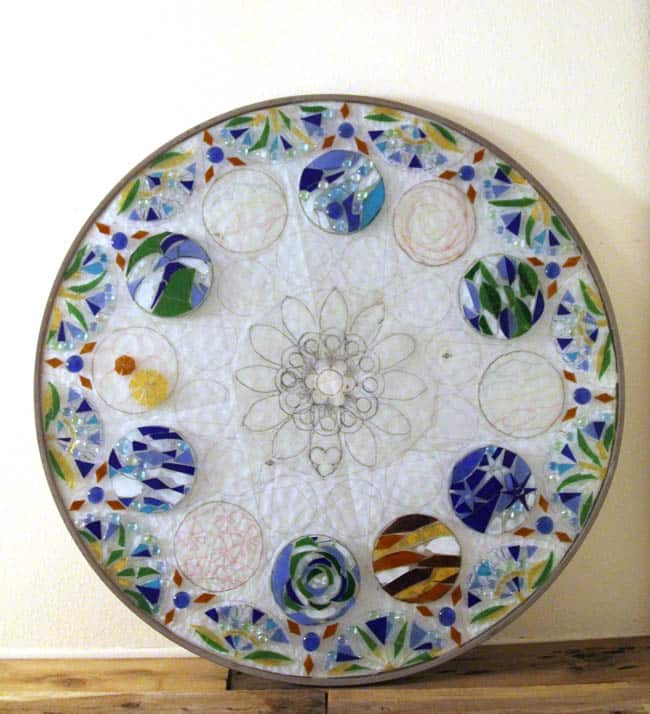
I thought 30 hours are plenty, but this 42″ table top took me about 60 hours to finish! When Jeff got back from his first trip, I hid this big thing at the back of my closet, and started working full speed again as soon as he left for the second trip! Lessons learned: always double the time you think you need!
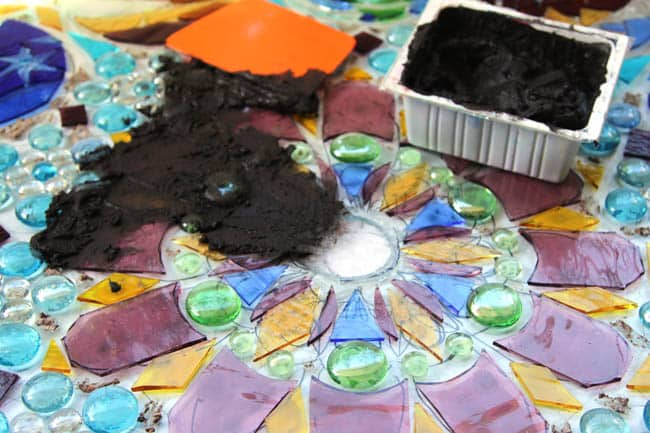
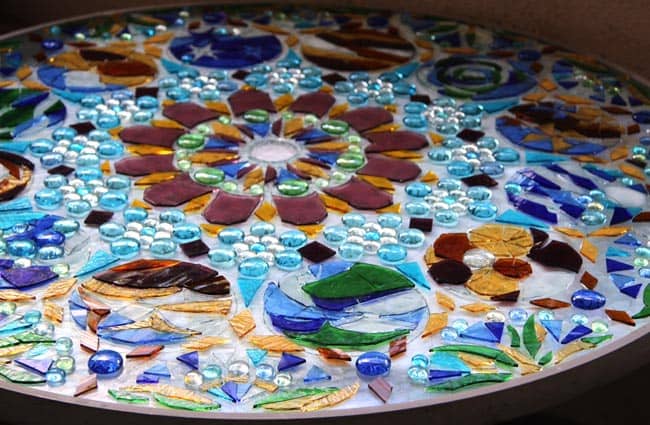
When all the pieces are glued in place, mix up the grout per specs on the bag, and apply it. Mix a small batch at a time. I used a dough scraper and rags to help packing the grout into the gaps between the pieces. Wear gloves!!!
After the grout dries a bit, like 30 minutes on a cool day, 15 minutes in hot sun, wipe off the excess grout with a DRY rag. A wet rug may loosen the grout and cause it to fall out.

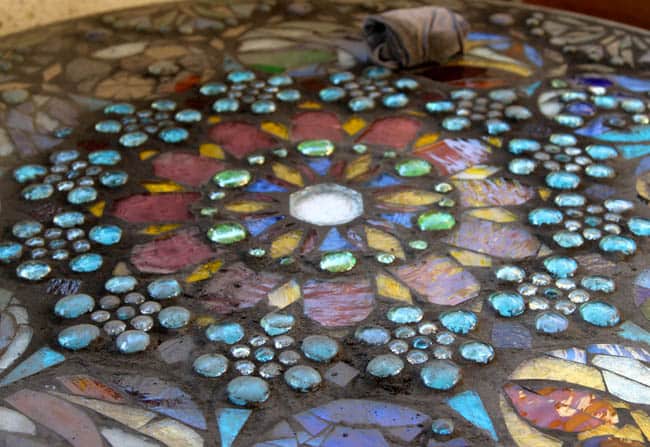
There will be a thin film of grout on the surface of the glass. No worries. Wait a few more hours and clean it a few times with a damp rag.
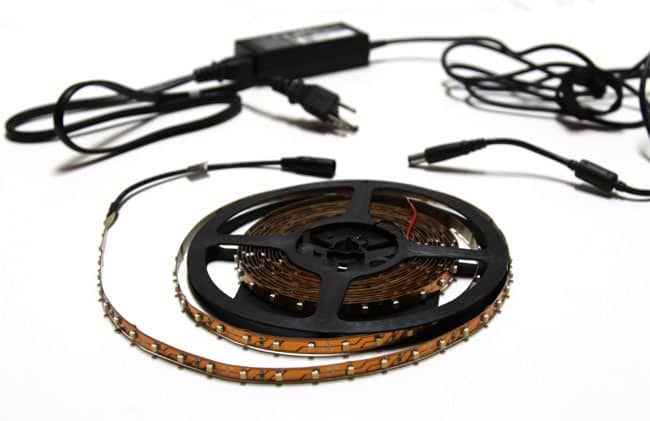
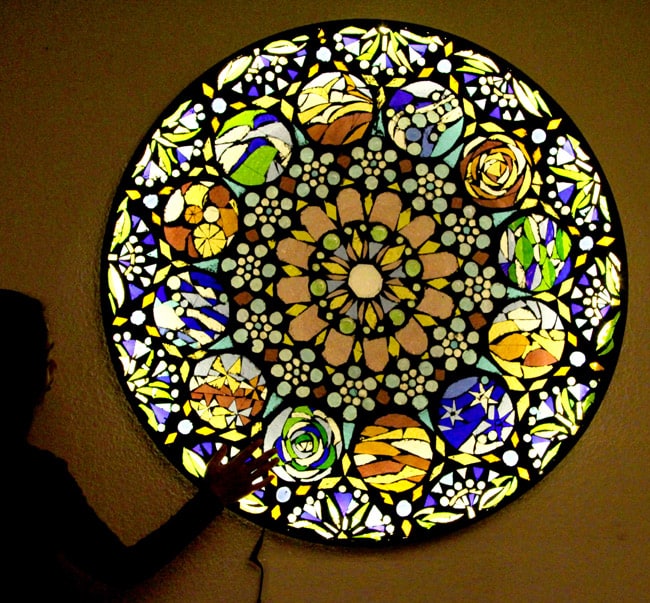
To back light this I used Warm White LED Light Strip. The light strip adheres to the inside of the metal rim around the glass, add power and test it, super easy!
BTW, the glue will continue to dry and becomes totally clear over a few months!
BTW, I finished it and rolled this 75lb surprise into the closet 10 minutes before Jeff got home! Whew!
Of course he LOVED it, but there’s more work to do, for Jeff – “Honey, I don’t deal with gravity, you will hang this up, would you? xoxo”
With Quakehold Picture Hook secured into studs, and metal wire and hangers attached to the frame of the glass with J-B Weld Epoxy , it’s up! YAY!

Here are 3 important tips if you would like to make stained glass mosaic-
- Safety first- always wear goggles, gloves, and don’t rub your eyes while cutting glass!!!
- Work in an area that’s easy to clean up the glass shards
- Use sanded grout. The pieces of cut glass are the “aggregates” that hold the grout in place. Therefore, don’t leave large gaps (over 1″) as the grout could fall out.
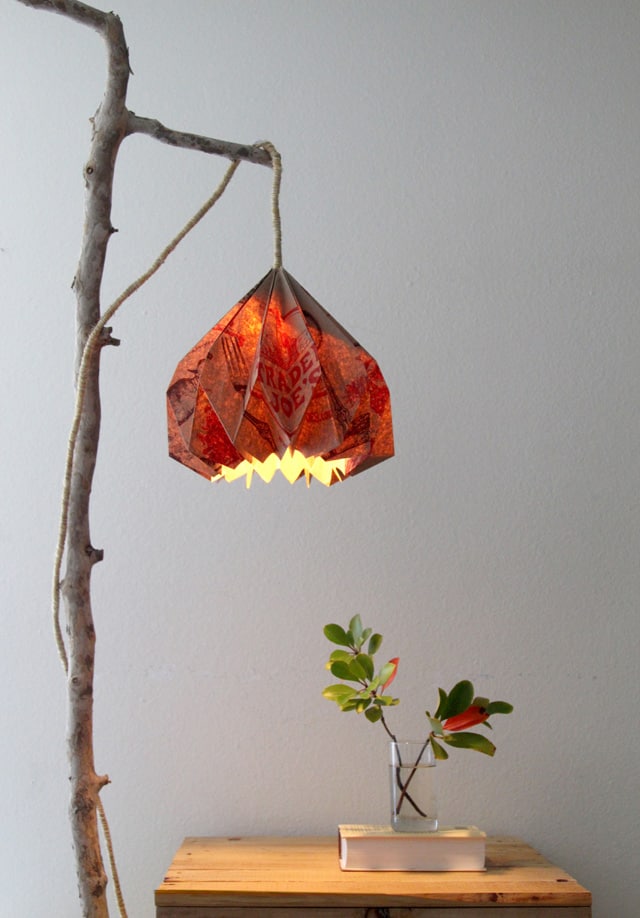
If you love the magic of light and the idea of re-purposing, check out these ideas on reusing old glass, or this pendant lamp made with … grocery bag!

Wish everyone a wonderful 2015!! Happy creating!!


Gorgeous! Now I know what to do with the glass door I removed from an antique china hutch we have. Been gathering dust for a couple of years because it was too pretty to waste. This is perfect!
thank you Michael! it’s always nice to give something a new life! 🙂
Wonderful work and what a great gift! Congratulations and happy birthday to your spouse.
thank you Michele for your sweet comment and b-day wishes! 🙂
I am simply amazed at your intricate design! You must have retained a lot more from Geometry class than I did! LOL Congratulations on your beautiful and unique masterpiece! (& bravo for the Yoda quote!) 😁
thank you Dianne! 🙂 so glad you enjoyed this DIY and my FAV quote!! 🙂
Simply stunning. Thank you for sharing this with us.
thank you Sherie! so happy you enjoyed this! 🙂
How did you cover the hole in the middle
hi Kim, i cut a piece of glass slightly larger that the hole and glue it over. 🙂
Beautiful work! Question – why sanded grout? I’m not sure I understand this choice. Would love to hear your perspective. I’m finishing some of my own glass on glass mosaics and haven’t decided how I will grout yet. Also waiting for the air bubbles to come out of the glue 🙂
hi Rachel! Unsanded grout should be used in joints that are less than 1/8-inch-wide, and sanded grout should be used for joints wider than 1/8 inch because it resists shrinkage and cracking. i chose sanded because some of the joints here are bigger, and the sand isn’t really coarse enough to cause scratches. happy crafting!! 🙂
WOW! Ananda, it beautiful and it’s inspired me to do my own thing with two smaller glass top tables that I use on my front porch! Instead of doing the art on top of the glass, I want to do it under the glass and keep using them as tables! I may do them “Beachy, as I live on a River in NC, USA. Using shells and beach glass and even some small pieces of driftwood! Instead of the grout, I think I will use beach sand and a liquid laytex pour! Like some people do with the old windows!
that sounds beautiful Bobbi! happy crafting! send us a picture of the finished table if you’d like! 🙂
How did you keep the grout from seeping under the glass pieces? When you glued the pieces down, did you use small dots of glue or glue over the entire back of the piece?
Thank you.
Your backlit project is beautiful.
hi JoAnn, thank you! 🙂 the glue pretty much spreads the entire piece when you press it down, and grout is thick so it doesn’t spread much.
Hello, Ananda great wall light. Are you selling them? If you do where I can buy them? Do you sheep to Europe?
Thank you for your answer.
hi jackob, thank you! 🙂 i don’t sell anything here, but i think you will find wonderful stained glass artists in europe!
I have only just submitted my email address to subscribe to your newsletter. I have a LONGGGG history of being creative and crafty… I have due to events a few years ago, not had as much inspiration, or incentive to delve into the arts and crafts that I so truly love.
By chance, I saw a link on Facebook to one of your projects and found that I just could not help but click on it, and from there click on so many other craft projects that you have posted here. Thank ever so very much for sharing your beautiful work, and offering the inspiration that is like coming home for me.
Once I have a place of my own again, I definitely intend to delve into the wonders of the World of Creative Arts and Crafts again.
Bless you and may you and yours have a fantastic New Year.
thank you vyncent! it is not always easy but totally worth it to nurture your creative passions! wish you a wonderful 2017! =)
hey ananda….glass mosaic is just amazing…. i just wanted to know what is the diameter of the base glass
hi aiswarya! it’s 42″ diameter =)
Ovo je stvarno najbolji članak kojeg sam video u poslednje vrijeme u vezi vitraža. Pošto mi dolazimo iz Slovenije i se isto tako bavimo vitražima, bio bih zahvalan, ako bi možda našli vrijeme, da pogledate i naš članak vezi vitraža (za slovenačke kupce) , jer me stvarno zanima vaše mišljenje. Isto tako bi vas namolio ako imate želju, da kao gost na našoj stranici objavite jedno svoje dijelo vezi vitraža, jer sam siguran, da bi naši internet visitori, želeli pored našeg dijela, videti i druge umjetnike kako prave ove vitraže. Puno vam hvala. LP Matija iz Slovenije
your work is beautiful!! thank you for visiting!! =)
Do you think this could be done on smaller scale with Plexiglas as the base? Would everything stick?
yes the glue works great! =)
Ananda, this stained glass mosaic is absolutely stunning. I came across your piece while researching my stained glass table top project. I had a couple of quick questions, if you don’t mind. Was the old glass tabletop that you used smooth or did you have to prep it so the glass pieces sat flat? Did the new edge formed by the grout and stained glass edges protrude outside of the frame, or did you have to make adjustments inside the metal frame to accommodate the new thickness? Finally, the lighting that you used, the link kept returning me to the “a piece of rainbow” webpage, not somewhere where I could get details about what exactly it is and where to buy it. I am making a side table 20″ circle with a college logo on it and a cool background design. I would love to have the lights underneath it, as i think it would make it a cool conversation piece and add mood lighting. Thanks to you, the whole project will be so much nicer! Steph P.S. I’m sold on the black grout now too!
hi stephanie! thanks for letting me know =) there was a plugin on my site that’s causing the link problem, all fixed now! =)
the glass was not perfectly smooth, but the glue worked great and no prep needed. i tapered the grout to meet the frame at the edge, about 1.4 thick there. hope that helps! have fun!!
i saw this project a couple of months ago and knew I wanted to give it a go as well! I kept looking for a table top that was not expensive. Tonight on my walk with the dog I found one laying by the road next to the recycle bin! I was soooo excited! I rolled it several blocks home. My room mate thought I was nuts until I shared your post! I have books and books on Rose Windows as my digital art is based on these beautiful windows! I have boxes of glass scraps I was given a few months ago. I can’t wait to get started! All I need now is the glass cutter, nippers, safety goggles, and glue! Yippee!
wow that is just awesome lisa!! if you can roll that thing for several blocks, then the hardest work is done already! =) have fun ! xo
and gloves.
This is so fantastic. HOLY COW!!! I would have never imagined, and the time and work that must have gone into this is just overwhelming to me. Lol I love it so much!! The before and after is just fascinating.
Ananda, project after project you continue wow-ing me! This is adorable, what a great surprise for your hubby!
Absolutely to die for!!! I will never look at some old glass top table again without thinking of your clever idea. I will try this but on a smaller scale to start. Thank you so very much for sharing.
amazing and inspirational. Can the piece be used outside and will it withstand below freezing temperatures? Could you adhere the glass to the underside of the table to achieve the same look allowing you to have the top remain flat to use as a table?
thank you cindy!
i would not risk to leave it outside in freezing temp, but the idea to adhere the glass to the underside can work for sure! =)
Love this. I’ve done several stained glass windows, and my question to you is: What made you decide to grout it?
hi! leaded glass does not need grout, this one is mosaic which needs grout between the gaps =)
Hi! Hate to be redundant but this is breath taking! Absolutely gorgeous. Great job!
Question about hanging it though. You said you used “metal wire and hangers attached to the frame of the glass”… was the frame already attached to the glass or was this something you added? And if added, do you have more detail?
I have a very large piece of glass that I want to do something similar but have no idea how to hang it or create any kind of hanger for it (or frame). Any details or ideas?
thank you julie! the frame was part of the glass table top. it’s a thick rim. for your glass i would consider building a wood frame for it, which will protect the edges, and make it easier and safer to hang! =)
why do you use the weldbond glue instead of perhaps clear silicone? How does the weldbond glue still hold on the glass pieces when dry? Does it have enough grip and viscosity to hold it? just curious., You did a very beautiful job by the way.
hi sheryl, the weldbond worked great for glass on glass, dries totally clear, and very strong. easier than silicone imo =)
Just beautiful! I saw this in Hometalk and just had to find out more about your blog. I am your newest follower and I am looking forward to exploring your other projects…. Candy
thank you for joining us candy! =)
Oh SO beautiful! I’d love to try it, but am concerned about coming up with the specific design. Are there sources (books, videos, etc.) For beginners? Maybe try just a flower first? I really don’t know how to start to find an easy design. I’m not very good at creating on my own.
Patterns for glass work can be found, I’d try Amazon. Look up stained glass books.
i agree with mary, amazon has pattern books, try dover pattern as key words! =)
I love this and admire your work. You created a beautiful piece that will give much viewing pleasure. I am regretting that I gave away a glass top not long ago as I had no vision for it’s use!
thank you nancy! they are always easy to find at yard sales! =)
Your imagination is awesome! 🙂
This looks SO beautiful. Love it.
That’s so pretty! I saw a video on reddit where someone was cutting stained glass under water with regular scissors – have you tried that? just wondering if it actually works!
Great party trick, whilst it does work the glass will be be very rough, will possibly have lots of fine fractures, it’s terribly times consuming, your sissors can now go in the bin, oh and grab a box of bandaids. In the time it will take to cut 1 piece you could have cut 15. Akin to chopping wood with a hammer and screwdriver
i don’t think it sounds like a good technique! use good hand tools listed here, it’s easier and safer! 🙂
Oh wow, I’ll never look at a glass table top the same again! What an awesome repurpose – its stunning and I want one. I’ve always wanted some stain glass above the door in our front entry…this post just made that dream possible. Pinning it! You did a gorgeous job – love it!
Wow that is very beautiful!! 🙂 Awesome job!
Wow that is so incredible.
WOW! This looks absolutely fabulous! And so professional!
xo,
Kelly
http://asideofsweet.com
this is beautiful!
I am here from Funky Junk’s site and I am typing with my jaw on the floor. BEAUTIFUL piece, what an awesome present! I am also blown away by the fact that you accomplished this lovely piece in secret and under time constraints. I am pinning this for inspiration. Thanks for your helpful tips. I will look at glass table tops with a different view/mind set.
thank you dear susan! it was lots of fun hiding this one! =)
this is BEAUTIFUL!
oh wow this is so gorgeous and such a lovely and personal touch present.
This is pretty darn amazing and it looks great! I’m super impressed with the time and effort you put into this. I’ve always wanted my own stained glass window and now that I have a step-by-step tutorial, I supposed I should just make my own!
try it erin! i mean, do it! xx
I am blown away by the complexity and beauty of this piece! You are a great artist and I have so inspired that you took on this huge project by yourself with no experience- truly incredible! This is so gorgeous!! I think I will put “make a stained glass piece” on my crafts bucket list!
thank you lily for your kind words!! xx
This is awesome. Thanks for sharing!
thank you sarah! =)
Wow that looks like an intense DIY project, but it looks really beautiful!
thank you esther! xo
Woah this is so cool! An epic DIY! Maybe I’ll have the courage to make it one day 😛
do it melissa! i was scared to start this… =)
Absolutely beautiful!!! Great job!
thank you kimberly! =)
In response to Cherie’s comment – it IS stunningly beautiful and there are no words to describe the beauty of this work!!! I have seen it up close and personal “in the flesh”.
Ananda – you are an amazing artist…..
oh thank you ann for visiting!!! happy new year!! xo
My jaw is on my lap! This is seriously the most beautiful and creative thing I have seen in many years. YOU are a home run, Ananda.
La Verne@hopeandsalvage
you are so kind la verne! thank you and happy new year! xx
This is absolutely beautiful! Wow! What a great tutorial! 🙂
thank you breanna! =)
There are no words i can use to describe how utterly gorgeous that is. I bet it looks stunning in the flesh
thank you dear cherie! happy 2015!
Wow. What a great idea. That is beautiful and I bet a real conversation piece. I love stained glass, and although I’ve never made anything with it I would love to do this!!
thank you jeanine! the mosaic is a lot easier that leaded glass!
I LOVE Stained glass so much! Your turned out so beautiful. I don’t think I have the patience to make one but it looks like so much fun <3
thank you angelic! xo
Feliz año nuevo!!!
It looks great!!! Awesome really!!! Keep on learning and showing us!!!
Besos
thank you sofie! feliz ano nuevo!! =)
Hello Ananda ,
what a great job !
best wishes for the new year,
Uwe
thank you uwe! wish you a super fabulous new year!!! xx
waw!!!!!!!!!!!!!!!!!!!!!!!!!!!!!!!!!!!!!!!!!!!!!!!!!!!!!!!!!!