DIY Vintage Paper Mache Bowls: $150 Decor for $5
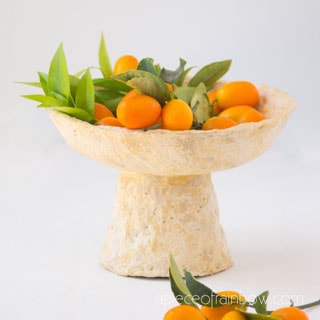
Make vintage paper mache bowls from easy DIY paper clay! Beautiful handmade crafts, great for primitive, boho, farmhouse & modern home decor!
I have been in love with vintage paper mache bowls ever since I saw them in nice home decor stores. Whether you love farmhouse or modern style, their primitive and handmade beauty makes them such great decor pieces on a coffee table or a shelf, pretty much anywhere in any room!
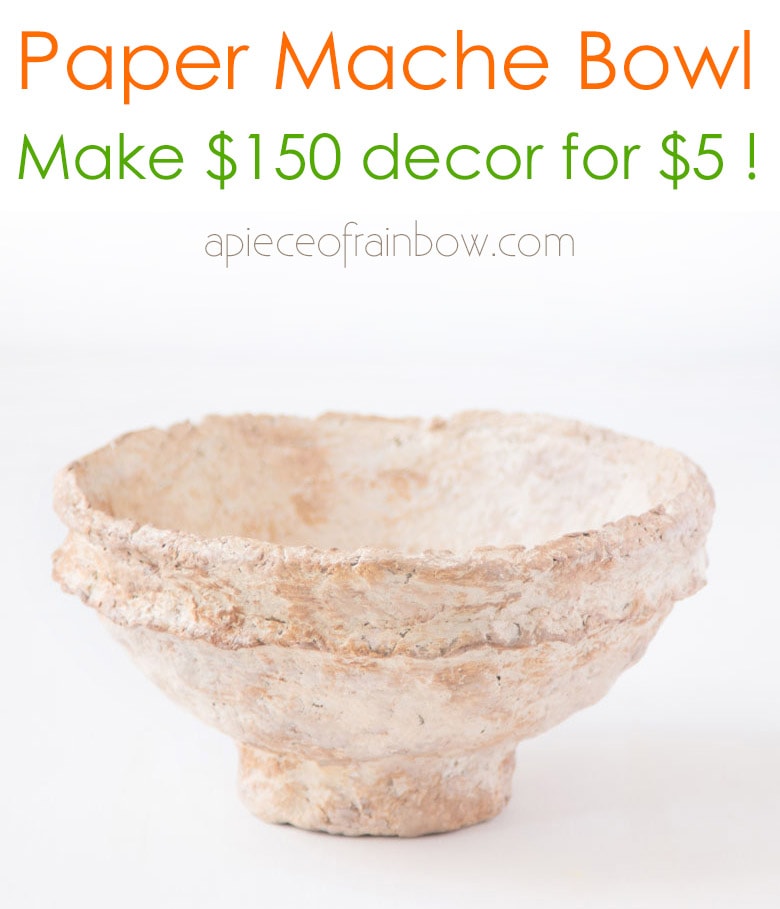
These vintage paper mache bowls look like they are made of French limestone or aged terracotta. They usually come from France or Turkey, and you can buy them from places such as Wayfair and Restoration Hardware for about $150 each.
Since I love DIY, I have been tempted to make these vintage paper mache bowls forever. Finally I did it! Isn’t it lovely? It’s actually much easier than I thought and costs less than $5 to make. Just follow this tutorial with video, and have fun! 🙂
Make it portable
*Some resources in article are affiliate links. Full disclosure here.
Materials to make vintage paper mache bowls

You will need 4 to 5 cups of paper clay to make a bowl 8” to 10” in diameter. You can buy paper clay (aka paper mache clay) or make it from scratch.
If you want to make paper mache clay, here’s our detailed tutorial with 4 recipes! I used recipe 3, but both recipe 3 and recipe 2 are very good choices because they are very strong when dried, and they only require a few simple ingredients such as paper, flour, glue or homemade flour paste. The paper mache clay can be made in advance and stored in the fridge or freezer until ready to use.

If you want to buy paper clay, here are a couple of good choices. CelluClay comes in a dry powder to be mixed with water. Creative Paperclay is already moistened into clay form and much finer like actual clay.

I also used acrylic paint in these colors to finish the bowl: buttermilk , brown, and grey. These 2 oz paints will be enough to cover many paper mache bowls!
Step 1: make vintage paper mache bowls with paper clay

First we need a bowl with a nice shape as mold, and some plastic wrap to cover the bowl tightly. This will make it much easier to take our paper mache bowl off the mold later, and avoid damaging the bowl in case it is not completely dry. You will need 4 to 5 cups of paper clay to make a bowl 8” to 10” in diameter.
Take a piece of paper clay, shape it into a flat piece a little thicker than 1/4”, and start covering the surface of the mold.

When you add the next piece, overlap some of the edges of the previous piece, and smooth out the joints just like how you work with clay.
Repeat this process until the basic bowl shape is complete.
Step 2: how to make decorative details with paper mache clay.

I wanted to replicate the vintage paper mache bowls I liked, you can totally get creative and make your own decorative touches.
Shape the bottom rim of the bowl with a few pieces of long rectangular paper clay pieces formed in a circle. I made them about 1/2” thick and 1” tall. Try your best to center this circle on the bottom of the bowl.
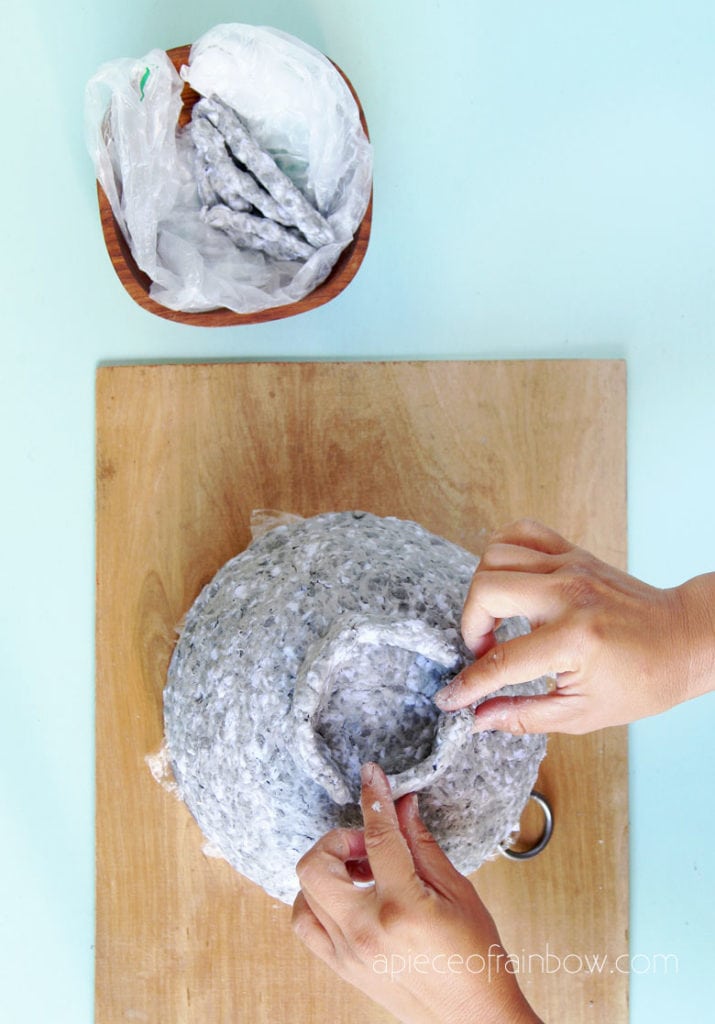
To make the decorative trim near the top of the bowl, roll a few pencil size pieces of paper mache clay, and press them onto the bowl all the way around.
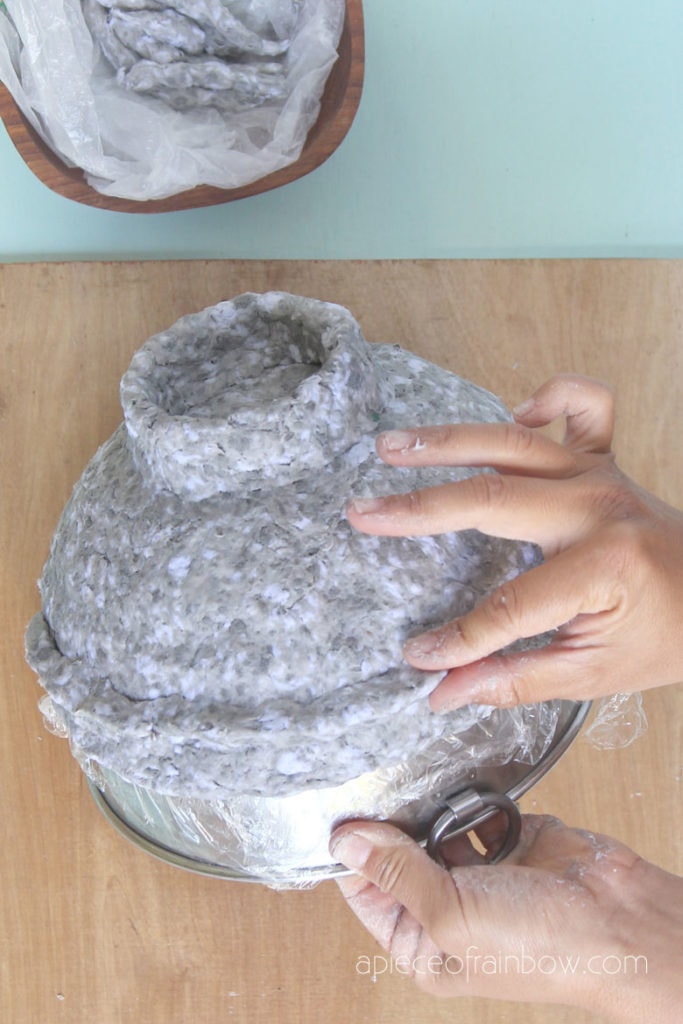
Let the paper mache bowl dry on the mold for 2 to 4 days. When the outside of the bowl feels quite dry, carefully lift the bowl with the plastic wrap off the mold. Flip the bowl over, peel off the plastic wrap, and let the inside of the bowl dry thoroughly.
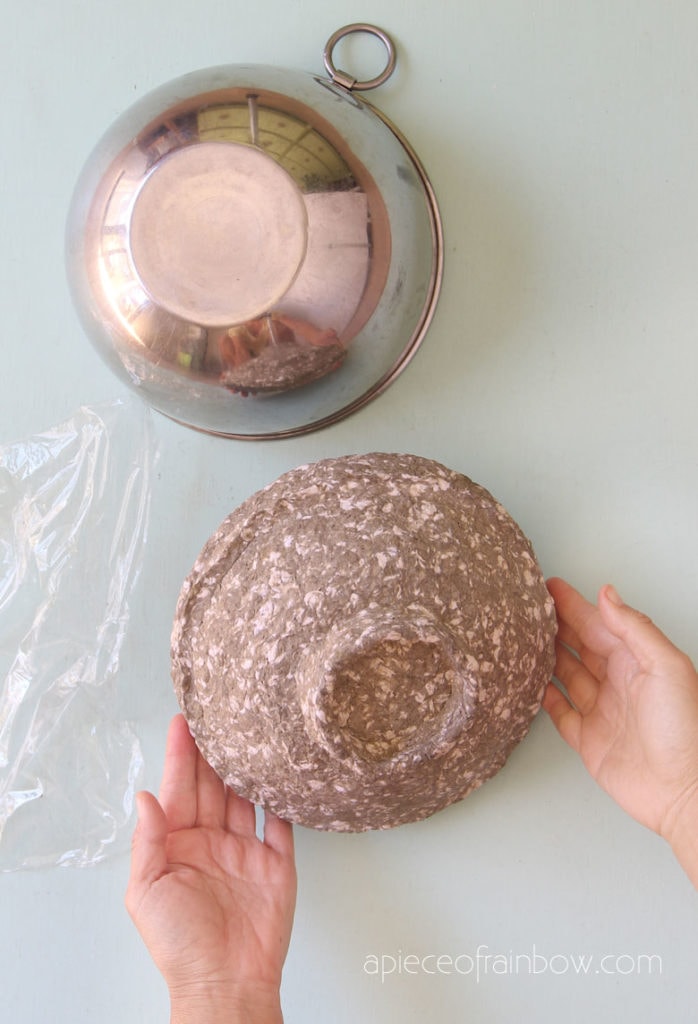
Step 3: paint vintage paper mache bowls
I will share with you some tips and tricks to create the vintage weathered limestone look easily. The best part is, you can always paint over the bowl anytime if you are not totally happy with the look, or just want to change the colors to a different tone!

Start with a base color. For this bowl I mixed the buttermilk ivory white paint ( you can mix a little yellow with white if you don’t have this color) with a tiny bit of brown and gray to get a neutral base color which looks like aged stone.

Paint the entire paper mache bowl with 1 to 2 coat of the base color and let it dry.
To create a distressed look with deeper colors, take a small piece of sponge, dip it into a little bit of the brown color and dab gently onto the paper mache bowl in random spots.
Repeat the same with the gray color. You can also mix the brown, gray, and white to get infinite shades of in-between colors and add them to random spots on the bowl to make it look like naturally aged stone.

This step was super quick, easy and effective. It only took me a couple of minutes, but made such a big difference, don’t you think? 🙂
Helpful tip: because we are the artists here, it is easy to feel unsure and overwork a piece. It’s a good idea to step back and look at your piece, or show it to someone who hasn’t been staring at it like you did.

I showed it to hubby and asked: “Does this look ok?” Not knowing what I was trying to achieve, he said: “It’s nice! It looks like Ancient Greek relics.” Woohoo! Mission accomplished!
Do I need to seal the paper mache bowl? Can I waterproof paper mache?
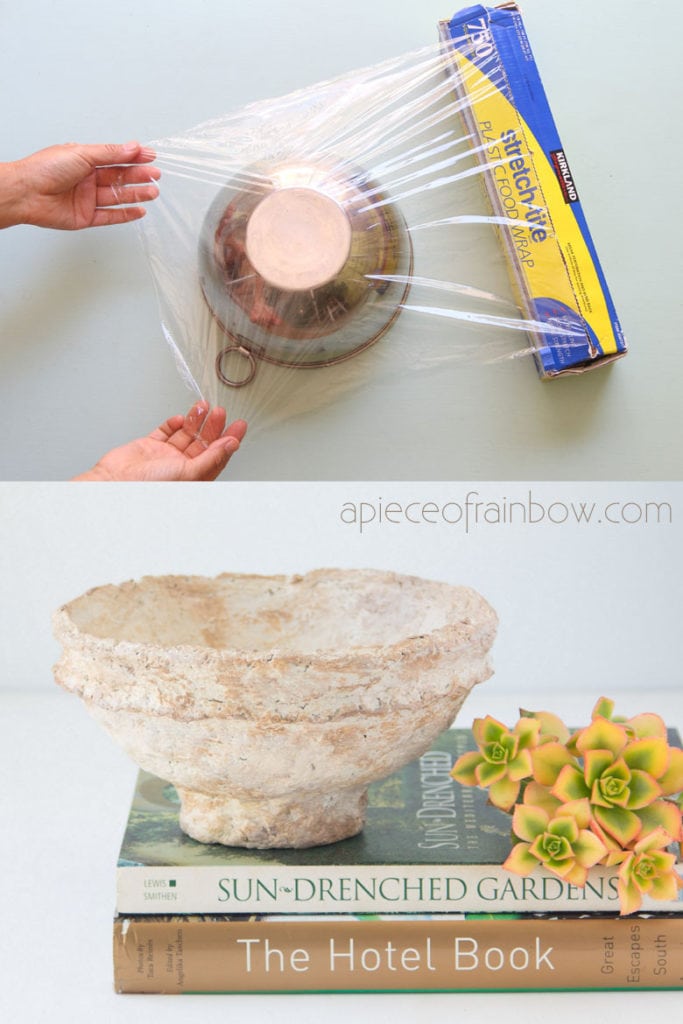
First, the paper mache bowl can be made water-resistant, but it is not water proof even after painting and sealing. Only use it to hold dry objects and display it in dry areas. For example, faux succulents are beautiful and perfect for our paper mache clay bowl!
If you use latex or acrylic paint which is water resistant, you do not need to seal the bowl. If you want to seal paper mache for extra protection, you can use an acrylic spray.

I have seen people waterproof outdoor paper mache sculptures using Waterproof glue, Thin-set mortar-mache, exterior house paint, and / or multiple coats of polyurethane. It is complicated, and I am not sure about how effective these methods are.
I would definitely make this bowl or more projects with paper mache clay again! It such a fun way to create one of a kind home decor and unique gifts to share.



Absolutely Beautiful!!! Can’t wait to get started making one . I have a passion for creativity, your bowl is stunning, thank you for sharing ❤️
Wow!! Your bowl is gorgeous! It really does look like an artifact you’d find in Greece or Rome! Unbelievably, I’ve never made paper mache, but that’s not going to be true much longer! Your instructions are so clear and easy to follow that I’m making this my next fun project. One question: how much newspaper do I need for a bowl approximately the same size as the one you made? We don’t subscribe to a daily newspaper, so I will need to either buy one or ask my neighbors to save theirs for me.
Thanks in advance and kudos for your great bowl!
hi Delanie, thank you so much! You will need about 8 sheets of newspaper if it’s the size of New York Times! Happy crafting! 🙂