Anthropologie Style DIY Oyster Shell Trinket Dish
Turn an oyster shell into beautiful trinket dish, paper clip holder, catch all tray, jewelry dish & ring holder. Great handmade gift for mom, and anyone who loves unique home decor and crafts!
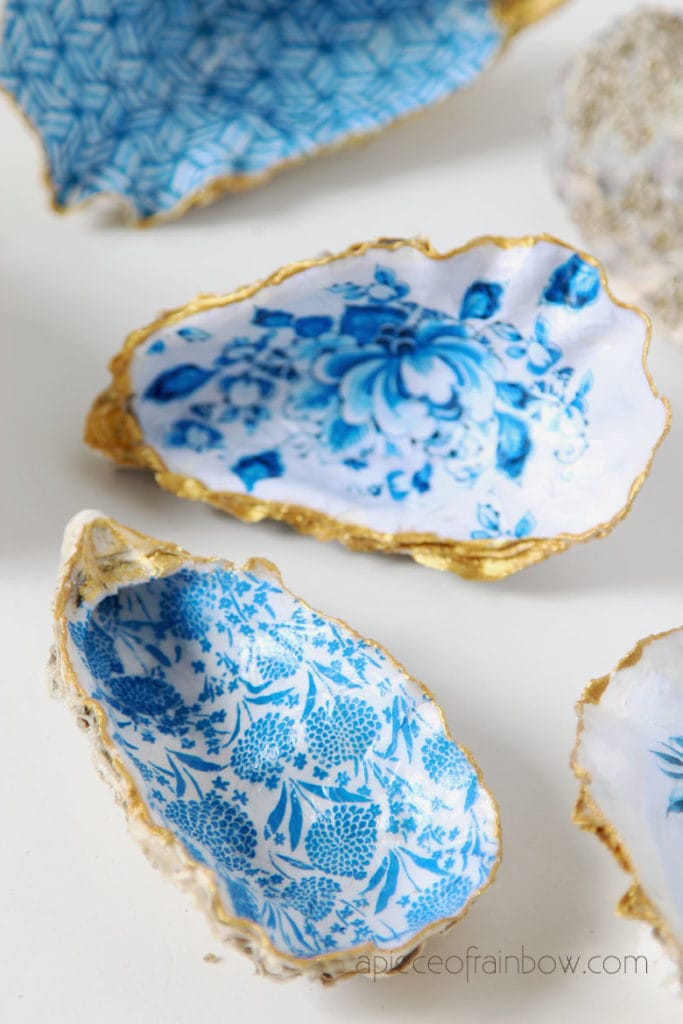
These oyster shell jewelry and trinket dishes are so Anthropologie in style! You know those gorgeous dishes with unique hand painted designs and metallic gold details?
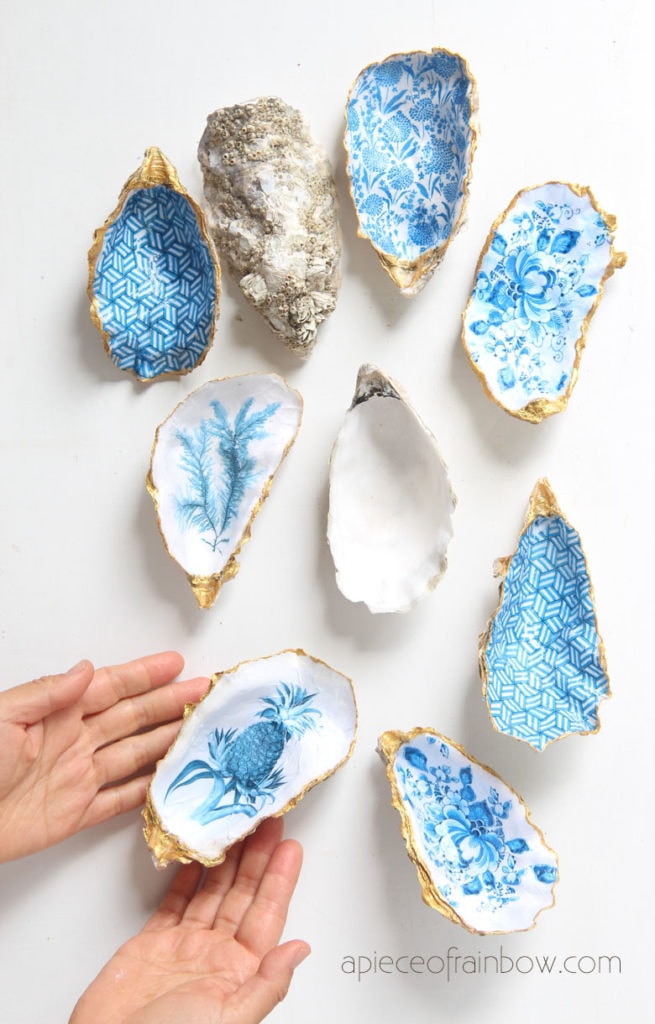
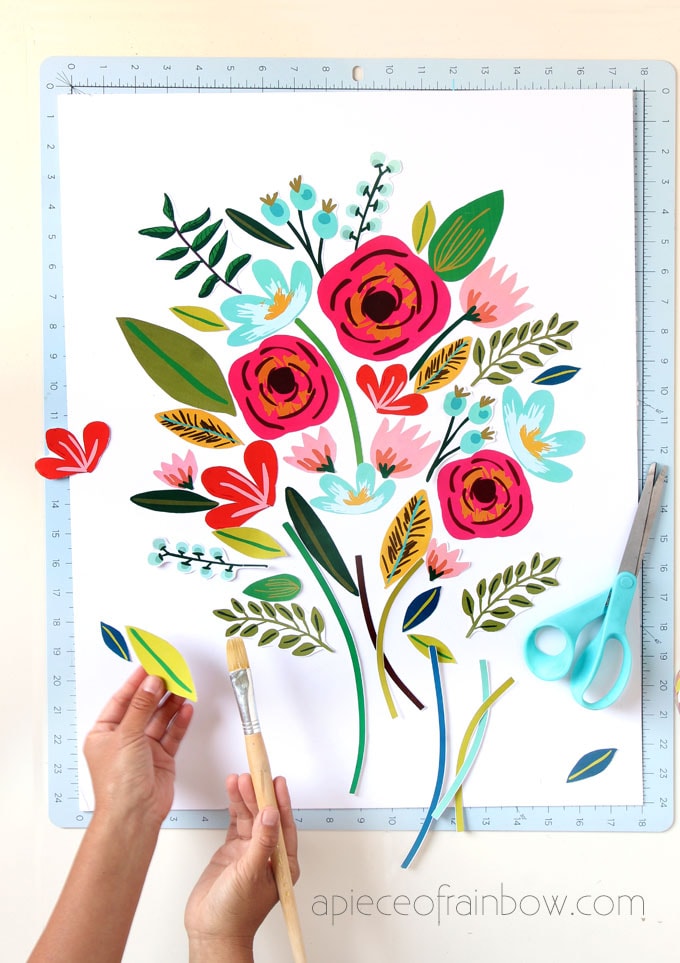
I chose some of my favorite timeless designs for these oyster shell jewelry dishes: Delft pottery, romantic chinoiserie, and vintage illustrations. I will share them as free downloads at the end!
These trinket dishes / ring holders would look so pretty as coastal home decor in a beach house. They would also be such a beautiful gift for people who love vintage, Anthropologie, and bohemian style decorations!

*Some resources in article are affiliate links. Full disclosure here.
Our reader Kathy just shared such a wonderful idea: “…make simple pierced earrings using thrifted/flea market/clearance beads. These shells would make a great container to give them as a gift!” Thank you Kathy! 🙂
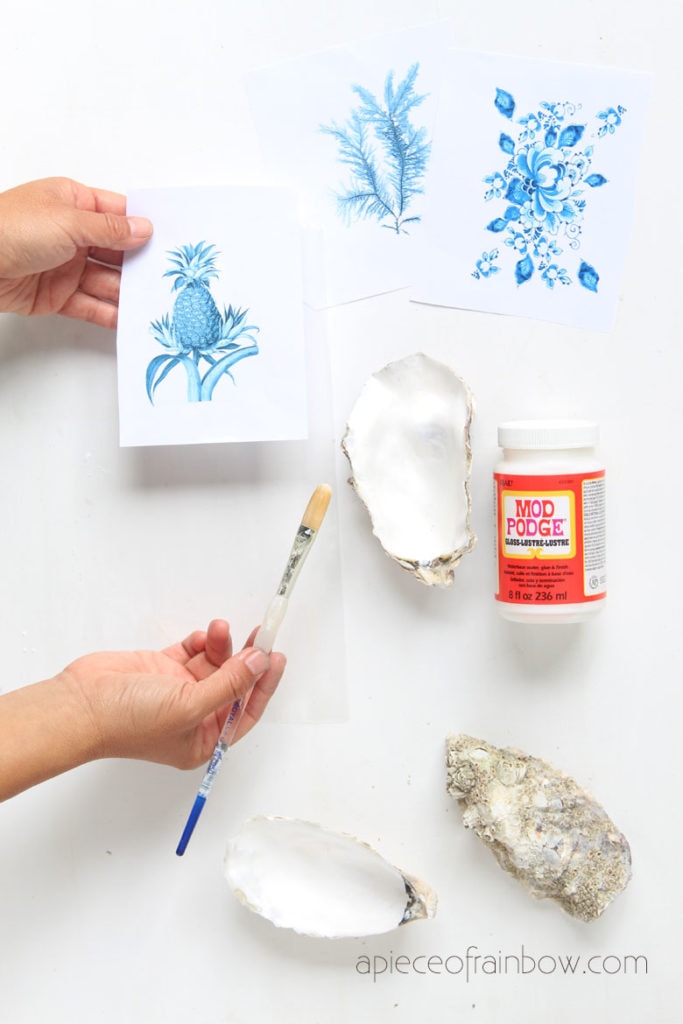
Materials and tools to make trinket dish from oyster shell
- “Where can I get oyster shells?” You can get large oyster shells on Amazon , Craigslist, and from seafood markets & restaurants.
- gloss Mod Podge (or any clear decoupage glue) and a soft brush
- printed napkins, tissue or regular copy paper to print your favorite designs ( You can download our free designs at the end!) See Step 1 for pros and cons of each option. These two sellers on amazon offer quite a few nice napkin designs: here and here
- optional: gold acrylic paint to paint the edges, white acrylic paint to cover darker spots in shells
One important thing about oyster shells: oyster shell is the best, most natural material used to rebuild oyster reefs. We can use a small amount for crafts, and bring extra shells to local oyster shell recycling where they reuse this ecologically important byproduct and keep them out of landfills. 🙂
Check out the video tutorial or skip to written tutorial below!
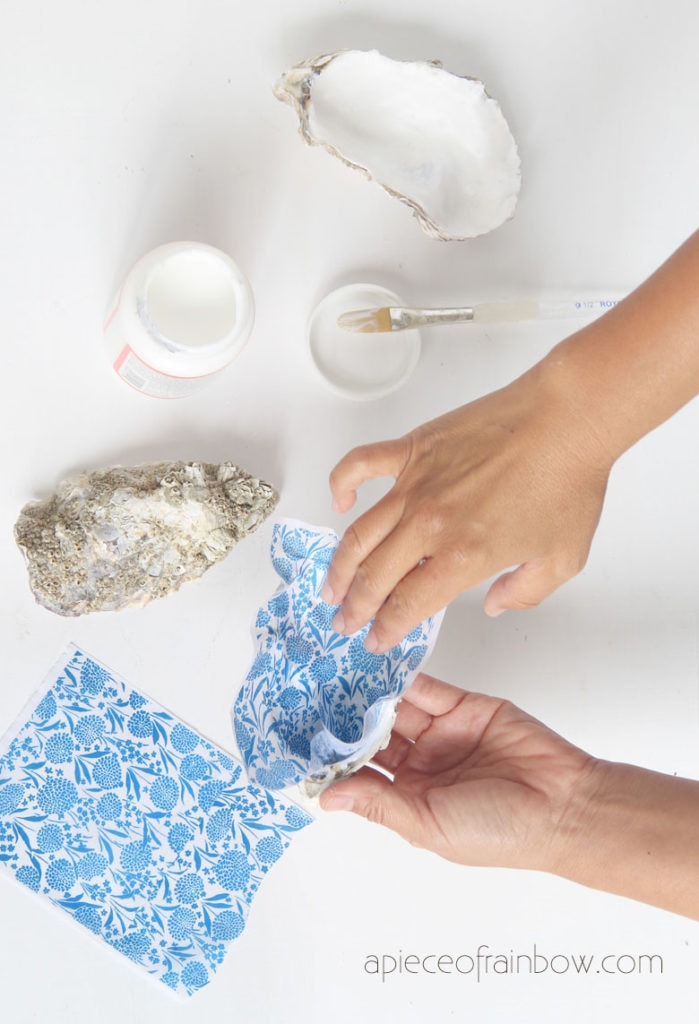
Step 1: prepare oyster shells and designs for trinket dish

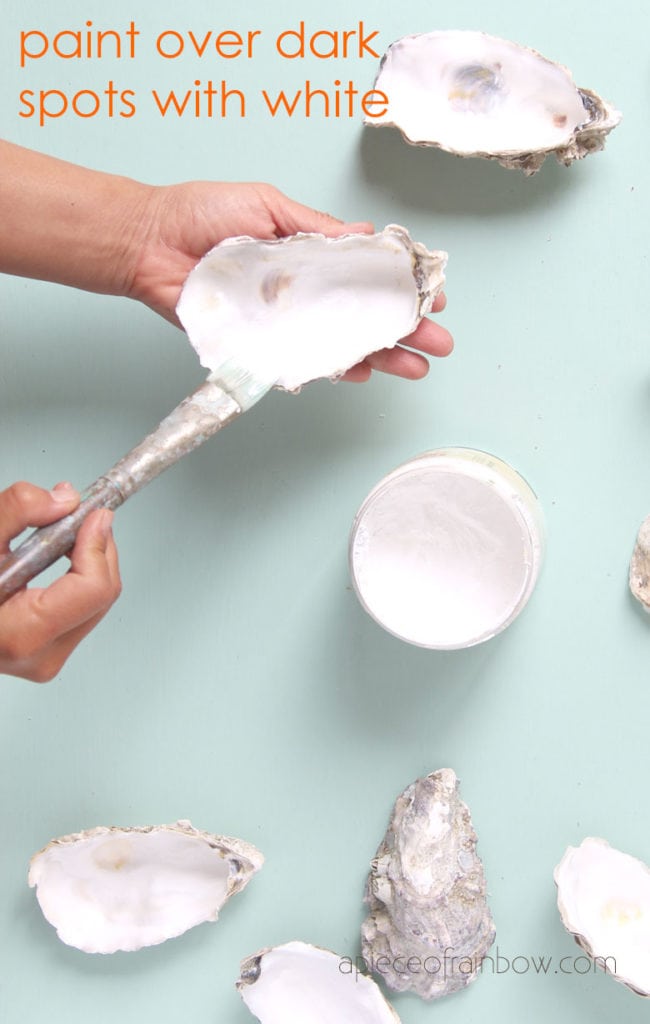
Make sure your oyster shells are clean. If your shells have darker spots on the interior surface, it is helpful to give them a coat of white acrylic paint, especially if you are using napkins or tissue paper later. Let the paint dry before the next step.
If you are using printed napkins, they are usually double layered. Peel off the back layer which does not have the designs.
If you are printing your own designs or our free designs here, it is important to know the pros and cons of using tissue paper vs regular copy paper.
It is much easier to print on regular paper. The paper is also more durable and less likely to tear in the process. The small downside here is that when we decoupage a flat piece of paper onto a curved surface, the creases we get are a bit more visible than using tissue paper or napkins.
Printing on tissue paper can be challenging. You must fold the edges over and tape them to a piece of regular paper. I still find it causing printer jam half of the time. So my preferences are either to use office printing paper to print designs, or buy already printed tissue or napkins.
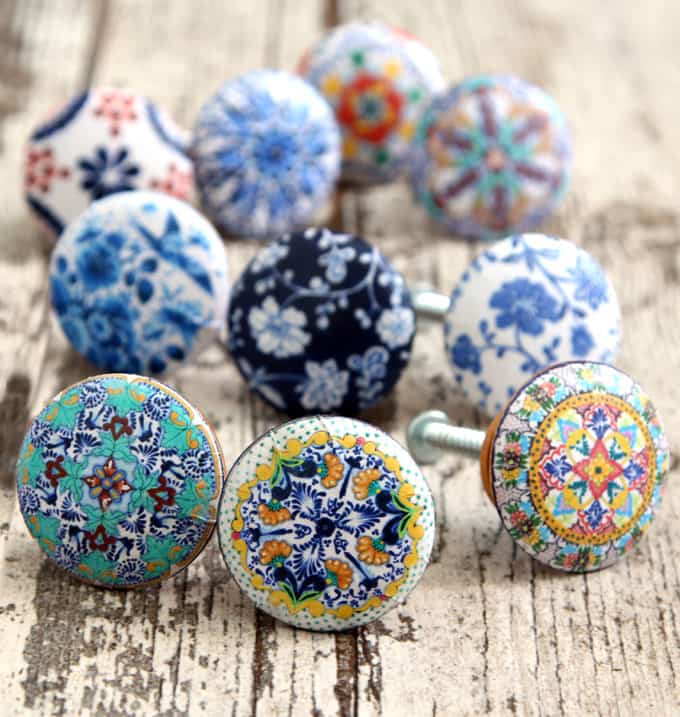
You may also love: DIY Anthropologie style knobs in 5 minutes for $1!
Step 2: decoupage the oyster shell trinket dish
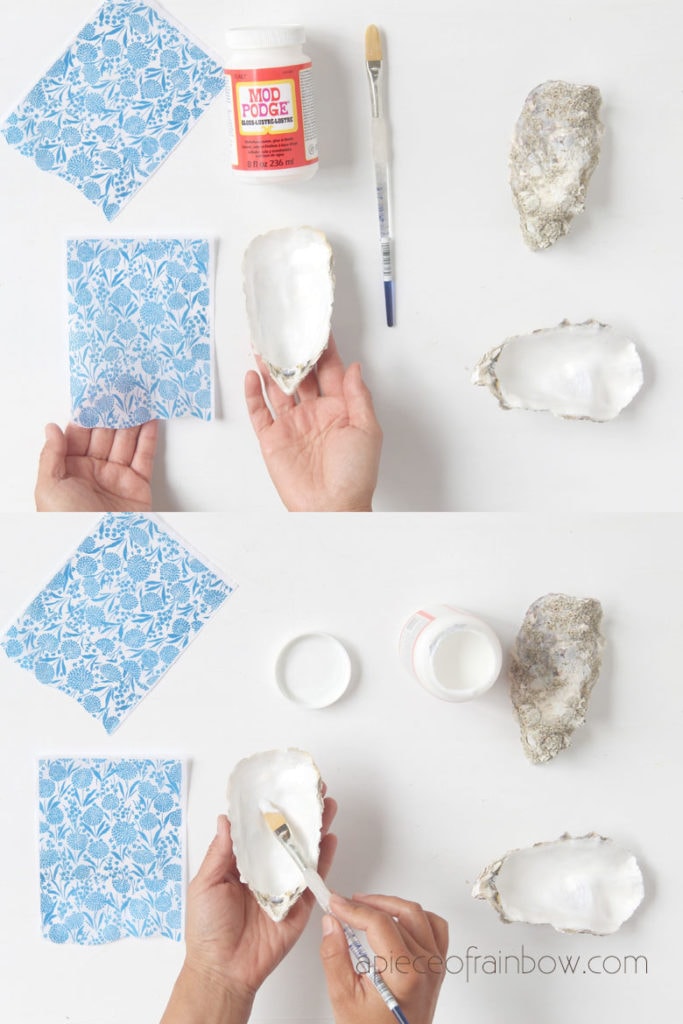
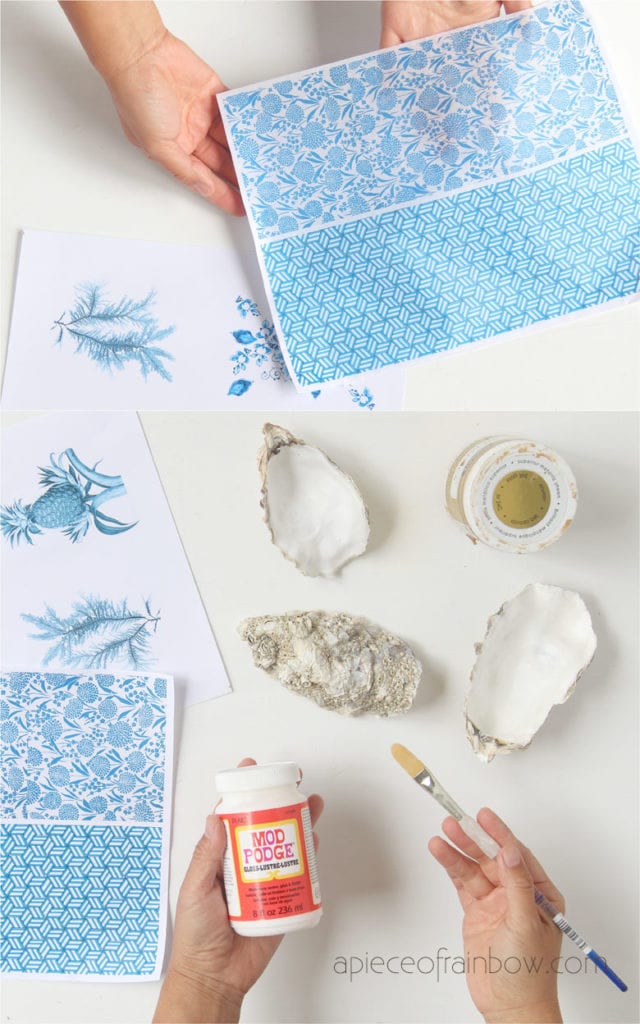
Cut your piece of design on paper a bit larger than the oyster shell.
If you are using copy paper, brush the back side with Mod Podge to soften the paper a little. Skip this if you are using tissue or napkin.
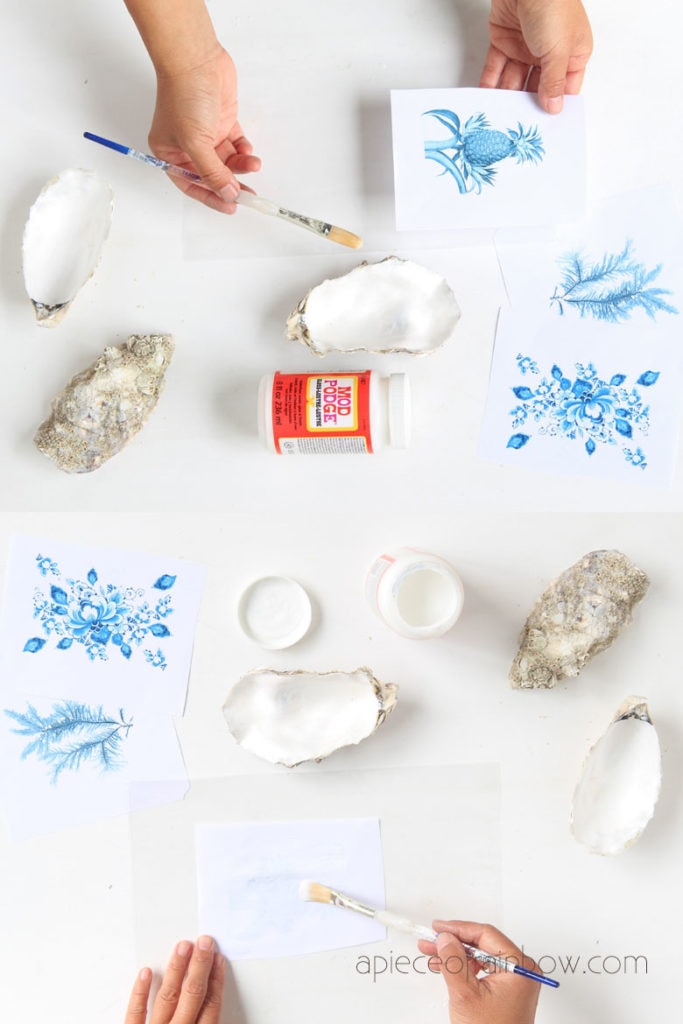
Brush a coat of Mod Podge on the inside surface of an oyster shell. Now starting from one spot on the inside shell surface , lay the paper or napkin on the spot, and gently press the paper down little by little until it covers the entire surface.
I found that a gentle tapping motion works really well and minimizes paper tearing. See video tutorial for more clarification.
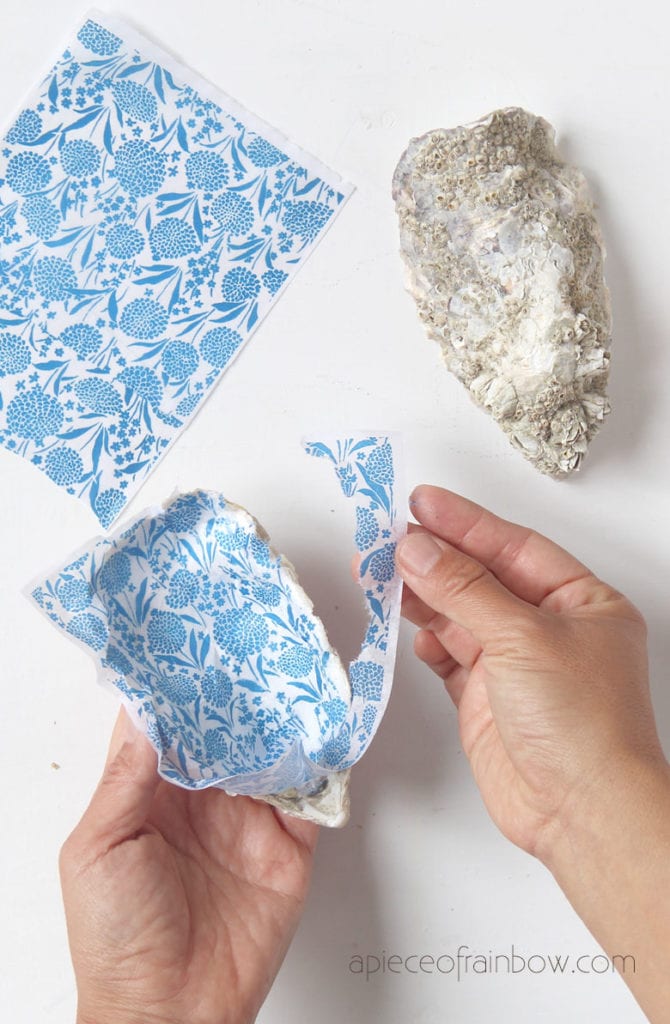
While the paper is still wet, carefully tear off the excess paper around the edges.
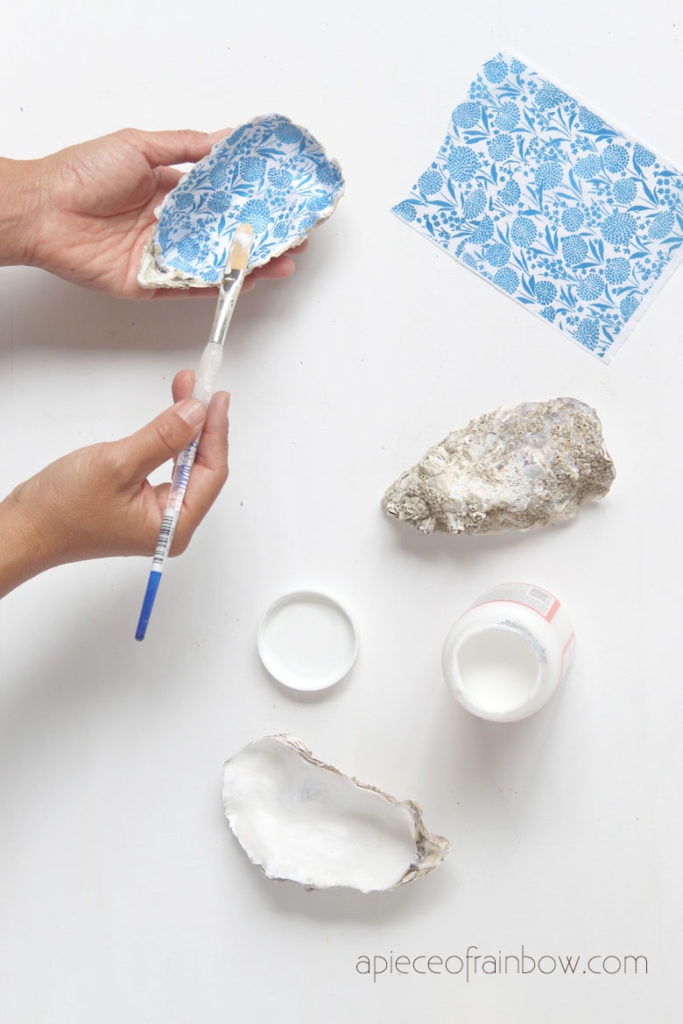
Brush a generous coat of Mod Podge over the entire decoupaged surface. This will create a water resistant surface and make the trinket dish more durable.
You may also love: Easy DIY wall at for less than $10!
Step 3: finishing touches
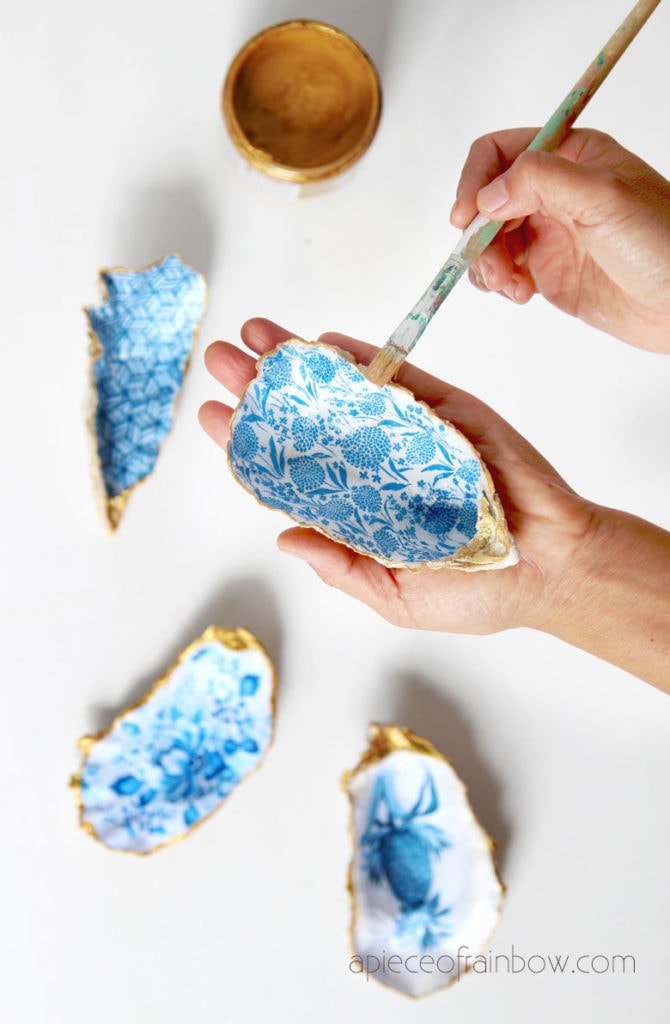
After the Mod Podge is dry, you will have a beautiful trinket or jewelry ring dish with a glossy finish. Here’s an optional step if you want to add a beautiful gold edge to the trinket or ring dish:
Take some gold acrylic paint – I used this one – and dab along the edges all the way around.
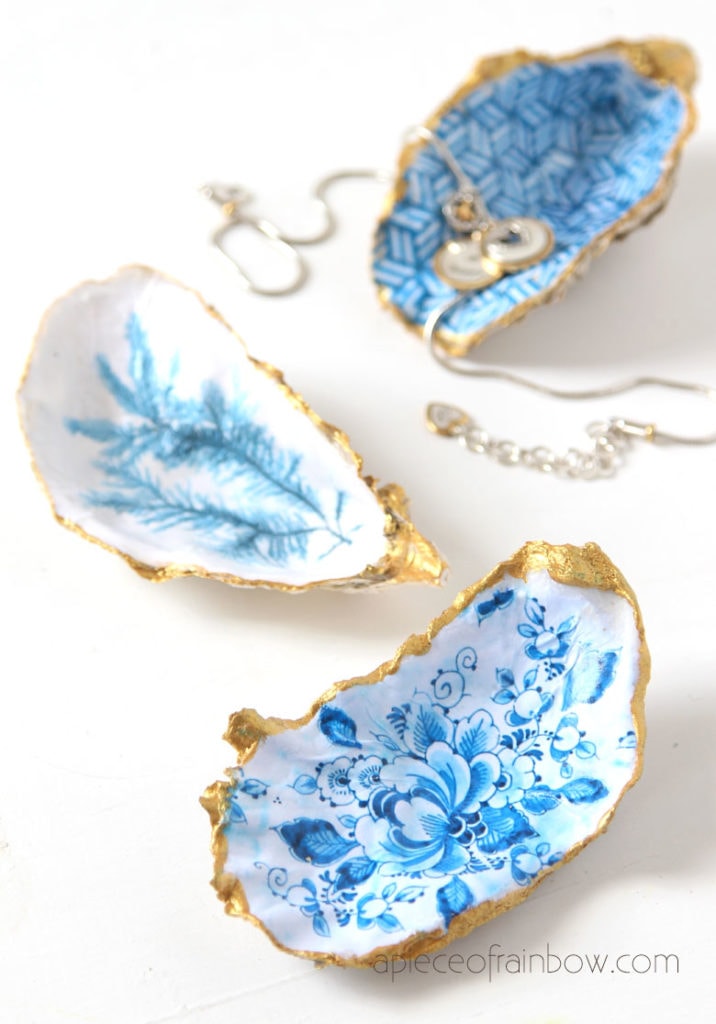
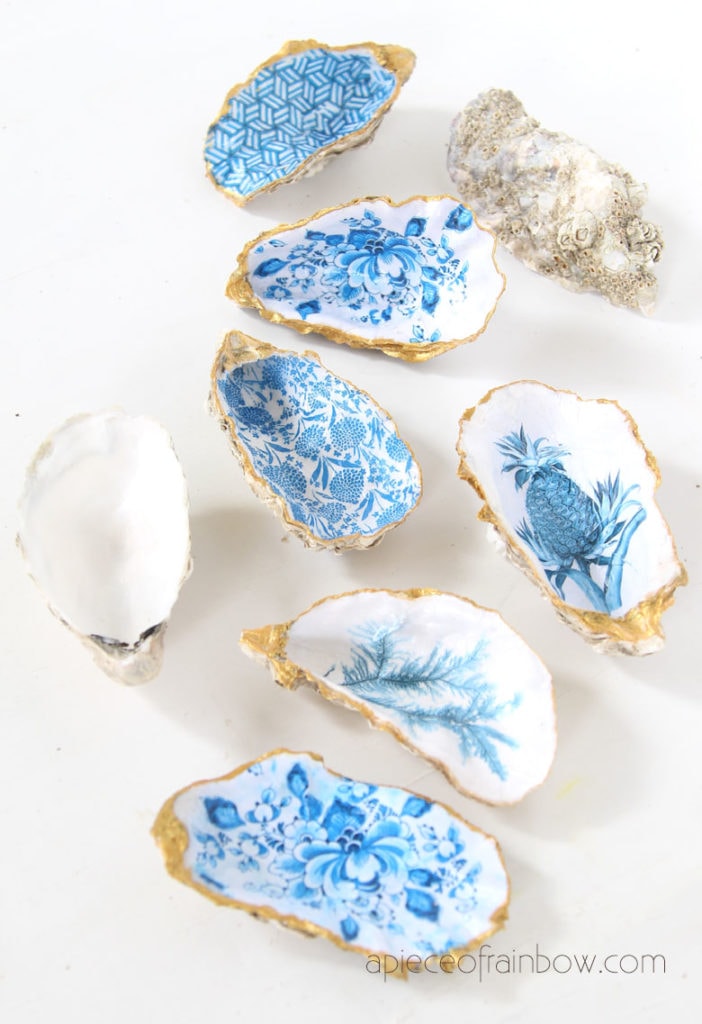
That is it! Pretty easy right? Each oyster shell trinket dish looks like a hand painted ceramic dish in an unique organic shape with luscious gold edges.
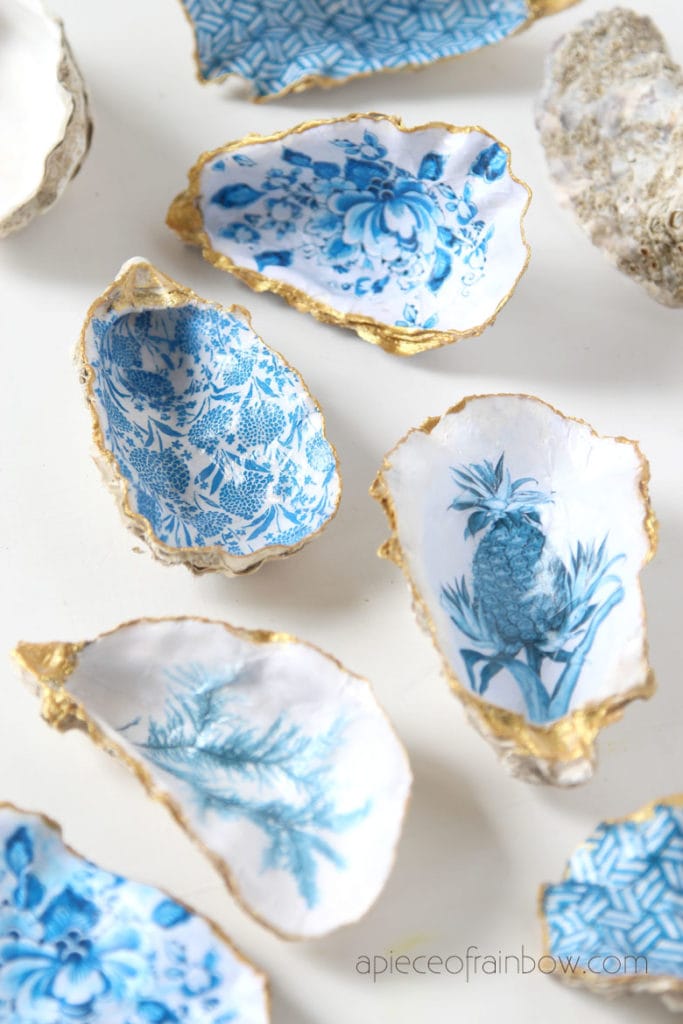
As you can see I was having too much fun and it was hard to stop! I made quite a few of them in no time, and I can already think of many friends and family members who would love them as gifts!
Download free designs & templates for this project.
If you are already a subscriber, you can download all past and future free goodies on our subscribers downloads page! The link is always in our weekly newsletter and in the welcome email when you sign up!
Easy DIY Solar Fountain in 1 Hour {with Pond Water Plants}
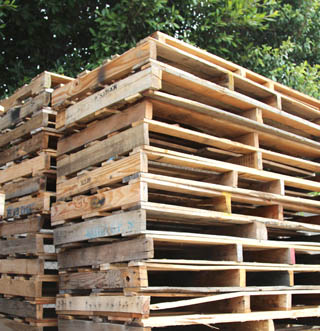
DIY Wood Pallets Ideas, Tips & Projects: An Ultimate Guide
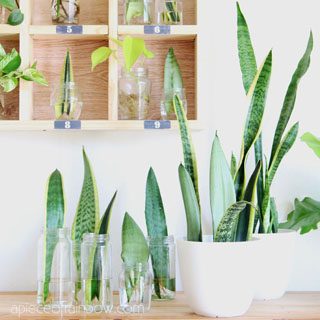
Snake Plant Care & 5 Amazing Benefits of Sansevieria
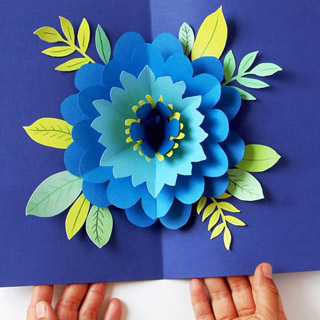
DIY Happy Mother’s Day Card with Pop Up Flower
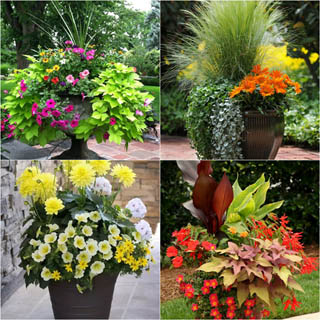
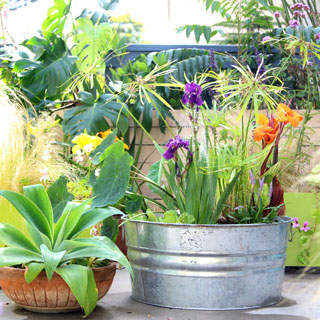
24 Stunning Container Garden Planting Ideas
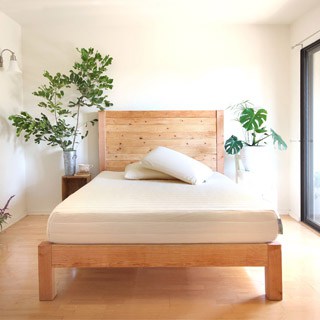
DIY Bed Frame & Wood Headboard ($1500 Look for $200!)
Happy creating! See you soon!


Is there any way to obtain the download images before the weekly newsletter is posted? I have subscribed and need the images soon, but I am not sure whether I can get them before the newsletter is posted, or which day of the week it is distributed on. Can you offer any advice?
Hi Amelie, the welcome email has link to all downloads 🙂
Love this article and would like to download some of the beautiful images you mentioned. TY in advance!
hi Linda! link to all downloads in weekly newsletter 🙂
I am in awe of people who have a great talent for crafts.
Hello
I have subscribed many times for your downloads . I have not received anything yet from you . I ve looked in all folders . I would be grateful to hear from you if there is a problem .
hi beatrice! sorry for the late reply! a red button in the weekly newsletter (check promotions in gmail!) take you to a page with all downloads 🙂
I like the oyster design ideas and the color.
Your oyster shells are beautiful. I have seen some that have a round stand attached to them to help the oyster shells sit up. Do you use those? If so, what are they called so I can order some to complete my oyster shell jewelry holders?
Thank you
thank you Darlene! 🙂 i looked up “specimen display stand” on amazon and found lots of interesting options here – https://amzn.to/3EA3rIh
i love this idea. but where can i see the video tutorial for
Anthropologie Style DIY Oyster Shell Trinket Dish
hi! it’s in the article a couple of paragraphs after materials list 🙂
Hi, thanks for the instructions, i made several and love them. In the past for other projects that i wanted to print on tissue paper, i simply used a light coat of a spray adhesive on a piece of regular printer paper, lightly attached a piece of white tissue paper, run it thru the printer and then peel off the tissue and it usually works pretty well, no tears etc, worth a try. 🙂
thank you SO much Carrie for sharing this tip! i am definitely going to try that!! it would be so awesome to be able to print on tissue paper easily! 🙂
Over the last several years, I have enjoyed making simple pierced earrings using thrifted/flea market/clearance beads. These shells would make a great container to give them as a gift!
hi Kathy! LOVE this idea! i am going to add your idea to the article! happy summer!! 🙂
I love this project!! I have an inkjet printer. Will the ModPodge cause the ink to run?
hi! not at all! just don’t keep going over damp areas too many times! 🙂
What a brilliant idea Ananda! I had so many oyster shells and I gave them because I didn’t know what to do with them. I’m looking forward for the summer now to collect some! 😃
awesome! 🙂 happy crafting Peter!
I am try to sign up your newsletter and free downloads for the shell designs
hi Shirley! please check your promotions folder. there should be a welcome email with a button to all downloads! 🙂
I absolutely love your weekly messages. The creative side of my brain craves the quiet
Space to create and be happy with your tutorials.
Would you be able to screenshot how to make your videos work? The ads seem to be moving so quickly that I can’t figure out how to make the video work. Also I have been receiving your emails for years but I don’t see where the download is to create the projects. Any help you could provide would be wonderful! Thank you
hi Michele! thank you SO much! 🙂 the video will show a skip vs stay choice after the first 15-30 seconds. if you tap “stay” it won’t move to the next video.
the link to a page with ALL downloads is always in the weekly newsletter, a red button towards the bottom!
A truly beautiful DIY that’s also easy!. Thanks for sharing the free patterns!
I didn’t receive the patterns by email.
hi heidi! link to all downloads page is in our welcome email AND weekly newsletters. let us know if you haven’t gotten any of them
! 🙂
I thought there were ceramic ornaments, so pretty! Thank you for sharing the tutorial!
Hi I was wondering if you could add any kind gloss after you finish your product? Also did you paint the back of the shell or anything like that?
hi! the back of the shells are not painted. you don’t really need more finishes because of the high gloss mod podge! 🙂
Hi, I really like all your work. You’re very creative.
I would have wanted to stay longer but I really get dizzy with so many things moving on your page.
I know this ads means money.
Thank you for the ideas.
hi rollie! thank you for letting us know! we do try to keep less ads and unobtrusive ads, you can also close any video ads that are playing. we will try to review and improve on this as well! 🙂
Hi there! This is an awesome project. Where do I get the templates of the blue printed paper?
hi! it’s in our subscribers library, link included in weekly newsletter 🙂
What a gorgeous and creative idea! As a conservation biologist, I appreciate your aside on the importance of recycling shells for rebuilding oyster reefs 🙂
I’ll be including one of these gorgeous trinket dishes with a copy of The Big Oyster to one of my friends obsessed with NYC history. Thank you so much for the incredible tutorial!
hi Christine! yes we all have to do our part for the environment 🙂 have fun, and happy holidays!! 🙂
Hello! I love this idea. Do you think this kind of tissue paper would work? The gold foil tropical leaves
https://www.amazon.com/WRAPAHOLIC-Gift-Wrapping-Tissue-Paper/dp/B0871WL54N/ref=sr_1_10?dchild=1&keywords=gift%2Btissue%2Bpineapple&sr=8-10&th=1
yes i think it would be beautiful! just make sure the size of the pattern(not too big or too small) fits the size of the shells nicely!
Hello Anada!
I started painting these last year, I loved the ones I found on Pinterest, the monochromatic colors of blues, greens and the pinkish reds in the Chinoiserie designs were just beautiful! I totally agree about using the paper napkins vs. printer paper…it looks so much more delicate using the thinner delicate napkin layer than hard paper. My problem was trying to find these napkins. I searched for weeks to find some of the really cool designs I was finding on Etsy and Pinterest, to no avail. Amazon is fine, but still no bueno, for the beautiful designs shown on those two websites. I’m almost sure they used some sort of svg files. I love yours, but once again trying to print vs napkin, really just isn’t cutting it for me. I really wish I could find a site that sells these paper napkins. I did make some really pretty colorful ones, and I did find a few blue and white. But kept running into the same issue of wanting those stinking designs that I just can’t seem to find online. Use to be able to walk into like Tuesday Morning and find really pretty napkins, but now days that’s been slim too. I’d be happy to pay higher if I could find what I’m looking for, even looking over at the UK , I couldn’t? I really enjoy this project and plan on making some with Holidays especially Christmas themes, I’ve already picked up those napkins.
hi lisa! these two sellers on amazon has quite a few nice napkin designs: https://amzn.to/2FQRC4o and https://amzn.to/33InaBQ , hope you find what you like! 🙂
I was looking for some cute napkins, too, and couldn’t seem to find any around that time either. There may be more out now with Thanksgiving and Christmas coming up. How about a really thin, cheap wrapping paper? It’s not as thick as copy paper, but would be thicker than tissue paper.
hi Stephanie, yes thin wrapping paper should work beautifully! love the idea! 🙂
Try tattoo paper. It is not cheap but I save for some designs that I really love. Jan
Beautiful! But I can’t download the floral designs. Help!
hi! did you get our welcome email after subscribing?
Hi I can’t get the downloads either and subscribed twice…
hi Natalia! did you get the welcome email (in spam maybe)?
This was such a great idea and so easy! One thing I ran into is that the tops are a little tacky. I put Mod Poge on the shell. Tapped the napkin down then brush a thin layer on the top. Too much Mod Poge maybe?
Can’t wait to try the door knobs next!!
hi lisa! i am wondering if it may have to do with humidity? it’s dry here so we never experienced the mod podge being tacky, but i have heard from another reader saying that. or maybe just let it cure for a while. fresh paint can feel tacky for weeks! 🙂
Never thought to use oyster shells like this… Yours turned out gorgeous. One thing I have never seen mentioned on any of the blogs about Modge Podge uses is the insides of envelopes. I use them for many things(Covering old notebooks or Pringles or other type boxes)with their many patterns and even occasionally red or green linings. I am getting tons of them in the mail these days with people asking for donations! You could even use them with the larger type seashells.
Thanks for the great tips!
that’s a great idea Nancy! the patterns could be really nice 🙂 thank you so much for sharing!!
Hello signed up for your newsletter three times to download your beautiful designs. No response for signup of email nor link for download. Can you please send directly to me?
hi! did you check promotions folder in gmail?
LOVE these oyster shells!!!
Thanks for sharing this simple craft that looks so elegant.
thank you Julie! happy crafting! 🙂
Hi! I signed up with my email but didn’t receive anything — have been trying to download these designs for a few days now! any advice?
hi! did you get our welcome email or newsletter in the junk folder perhaps? or try one more time if there might be miss spelling?
These are really fun and easy to make. The shells from your Amazon link were delivered quickly.
thank you so much Marla for the feedback! hapy crafting! 🙂
Looking forward to seeing some of the great art ideals. Maxine
Lovely ideas! You could get around the copier paper issue by printing onto wax freezer paper and transferring it onto white tissue paper
thank you Sue! that is a great idea! 🙂
I absolutely love the oyster shell dishes! I plan to make several for gifts. I was worried, however, about the bottom of the shell that is very rough might scratch the piece of furniture it was resting on. Do you have any suggestions? A small piece of felt or a couple of small, clear cabinet door bumpers perhaps?
Thank you for so many wonderful ideas.
hi bernie! thank you so much! 🙂 you can use felt or clear bumpers, you can also coat the backside with a couple of layers of clear glue, which will soften any sharp edges. happy creating!
I was thinking, watching the tutorial, that it would be pretty to paint the back with gold spray paint you could even use mod Podge first to make them less rough, but it would make the whole shell look like a piece of jewelry.
that would be very pretty! thank you Carol for sharing this lovely idea!
I use sand paper on shells to smooth out rough spots but i also like your idea of the clear cab door bumpers…it could steady them if the shell rocks too.
sand paper is a great idea! thank you Molly for sharing! 🙂
I love this! And now I know what I’m making my daughter-in-law for her birthday! Thanks for the great idea!
thank you marilyn! stay well and happy crafting! 🙂
Wow! These oyster shell dishes are stunning! I am going to make a few for friends who would LOVE them as ring dish! Thank you!
thank you gina! happy creating! 🙂
In the past, I’ve glued some pearl beads on the bottom side of oyster shell. It gives them a very pretty and organic appearance while also leveling them.Me
thank you Mel for sharing this great idea! 🙂