DIY Niche Shelf: Old Bathroom Medicine Cabinet Makeover
Transform an old medicine cabinet into a modern boho farmhouse niche shelf! Easy home improvement DIY, bathroom remodel & makeover idea!
Many people love a medicine cabinet in the bathroom. However, I couldn’t wait to get rid of ours since the day we moved in! Here are my reasons:
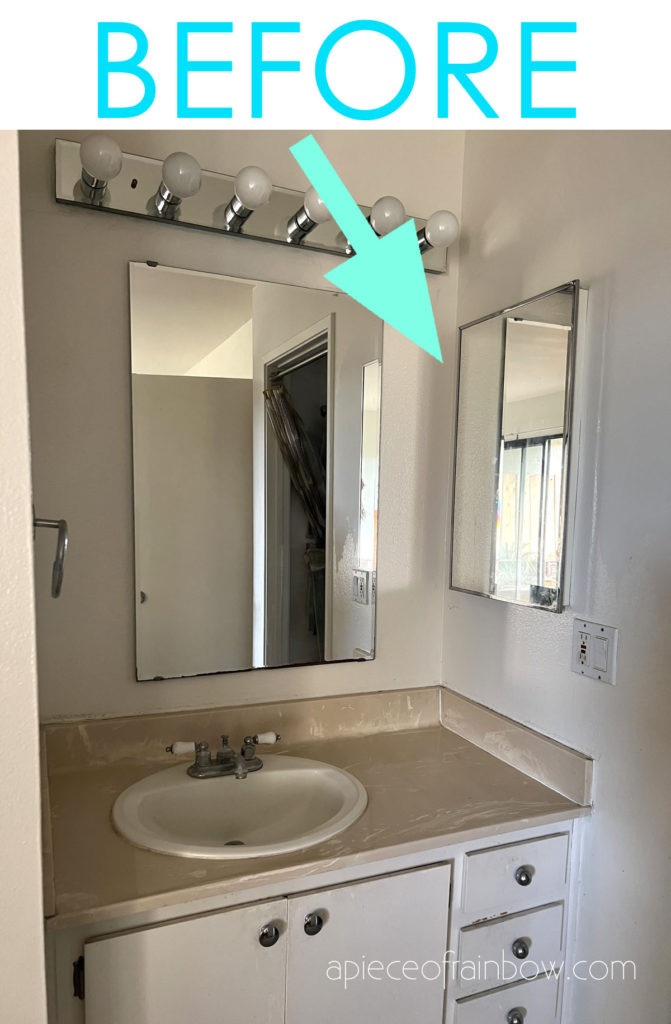
Our medicine cabinet looks super dated. It takes up a really visible and accessible space. We don’t need to store our barely used medicine in this space. In fact, it would be much better to have an open shelf , which would also make our small vanity countertop less cluttered.
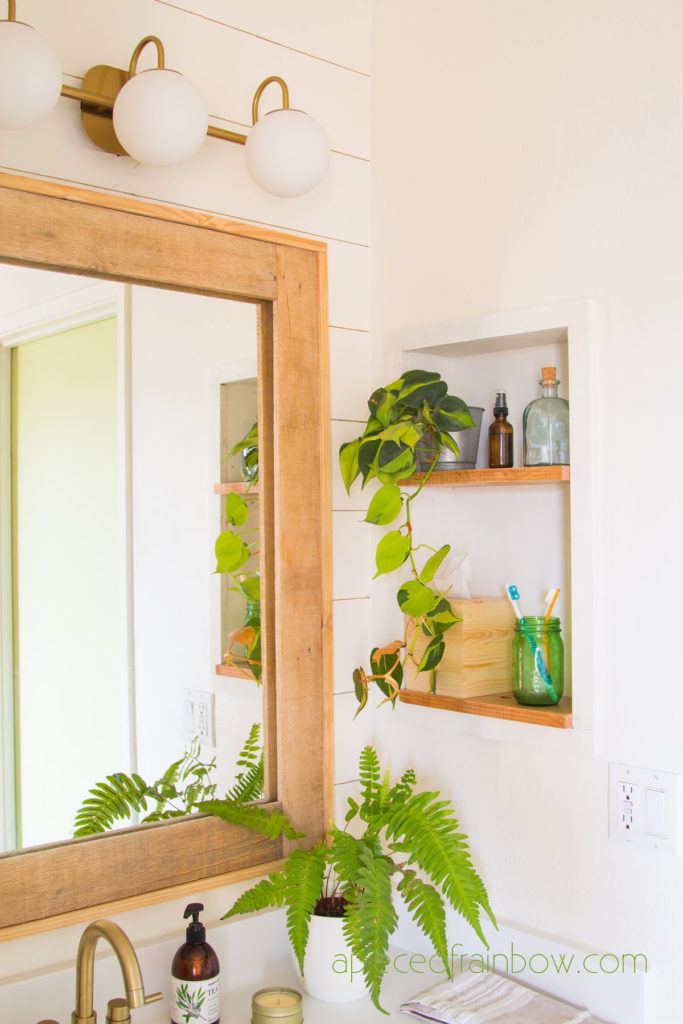
And, I just love niche shelves! They are charming, functional, and fun to decorate anytime! In this tutorial, I will share with you how to remove an old medicine cabinet, and transform the space into a niche shelf. It is so easy and so worth it!
*Some resources in article are affiliate links. Full disclosure here.
Check out the video tutorial (with a little surprise) or skip to written tutorial below!
Materials and tools to make a niche shelf
- Wood and saw to cut wood: 1/2” or 3/8” thick plywood for the sides and back(if needed), 2x6s for the shelves, and 1x2s for the trim. You can use the photos as a guide to adjust the measurements to a niche.
- Wood screws, brad nails, a drill, and sand paper.
- Paint, water based polyurethane to protect the wood shelves
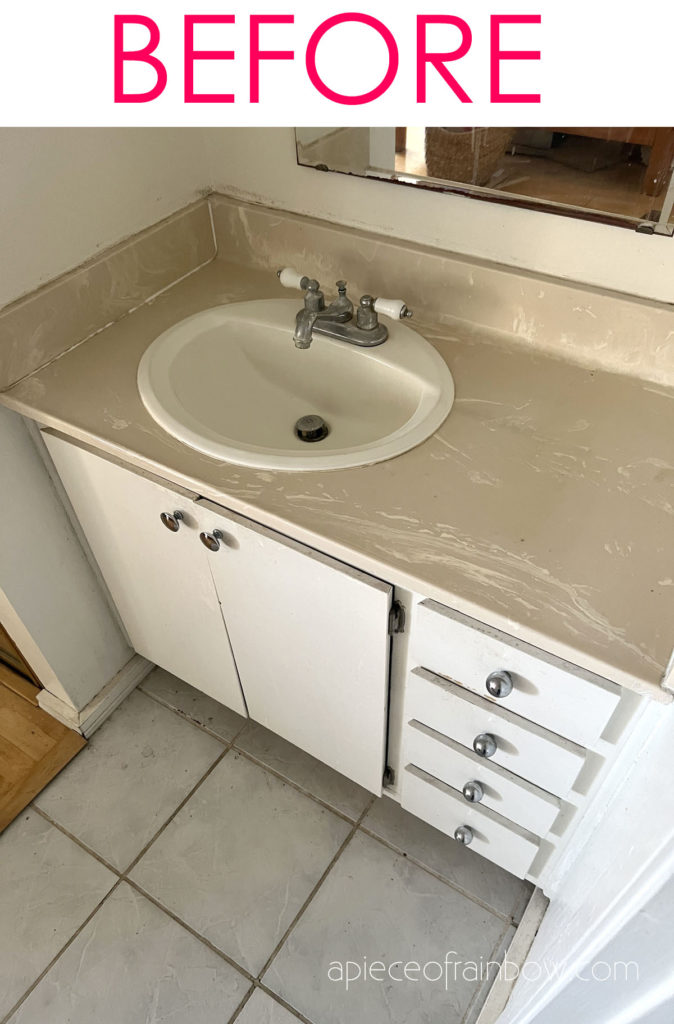
We will add more tutorials in our DIY bathroom remodel / makeover series, and here’s our tutorial on how to paint an old vanity countertop: so easy and such a dramatic transformation!
Step 1: remove medicine cabinet
It very easy to remove a medicine cabinet. Inside each medicine cabinet , you will see small screw holes on the sides where the cabinet is screwed onto the studs. Remove all the screws, and take out the cabinet.
You can donate old medicine cabinet on Craigslist or to places like Habitat for Humanity. We put our cabinet outside before donating it, and a bird found it fascinating. Just have to share the clip in the video tutorial above! 🙂
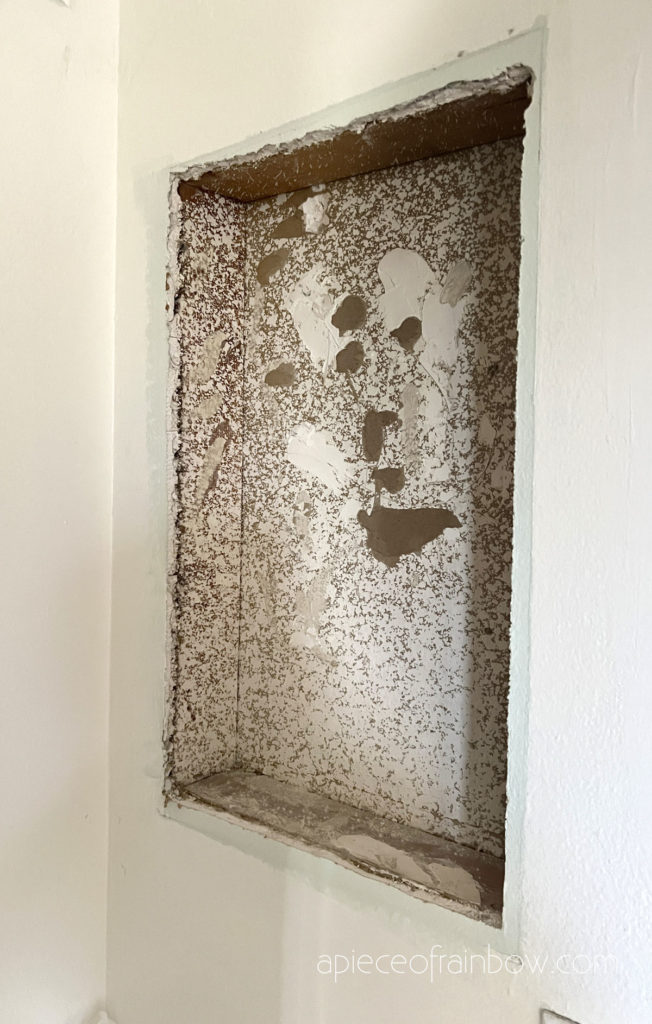
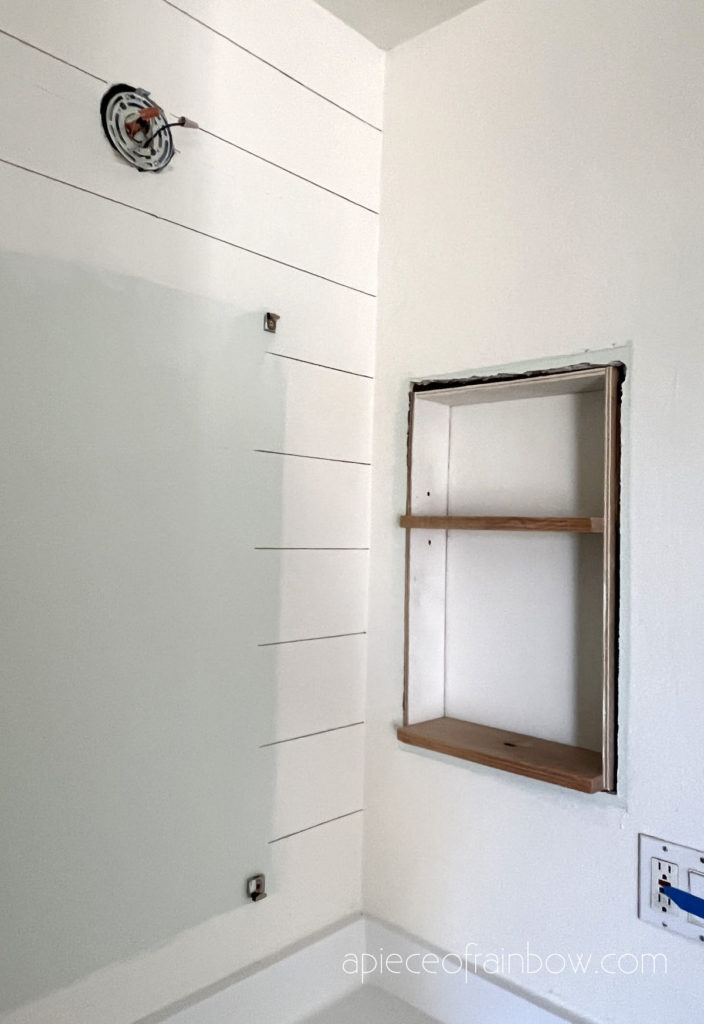
Step 2: prep the niche
Clean the niche and scrape off and blobs of drywall mud on the studs.
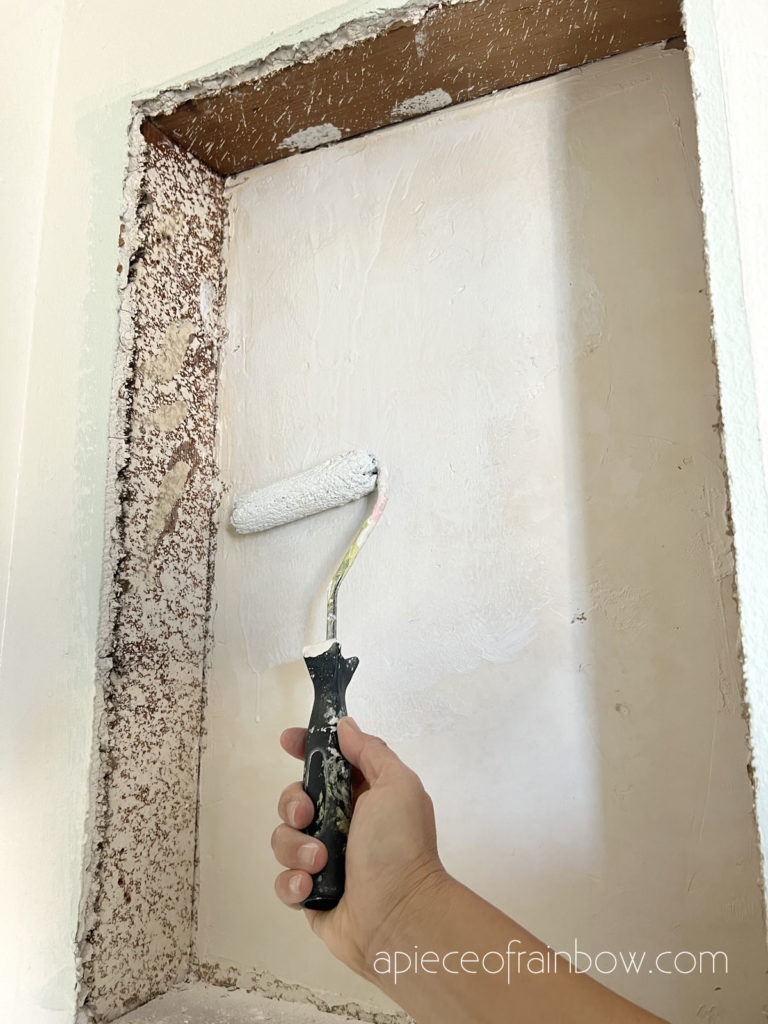
You can build a back piece for your niche shelf. We decided to clean up the drywall in the back, give it a smooth finish, paint it, build the sides with the shelves, then add the trim at the end.
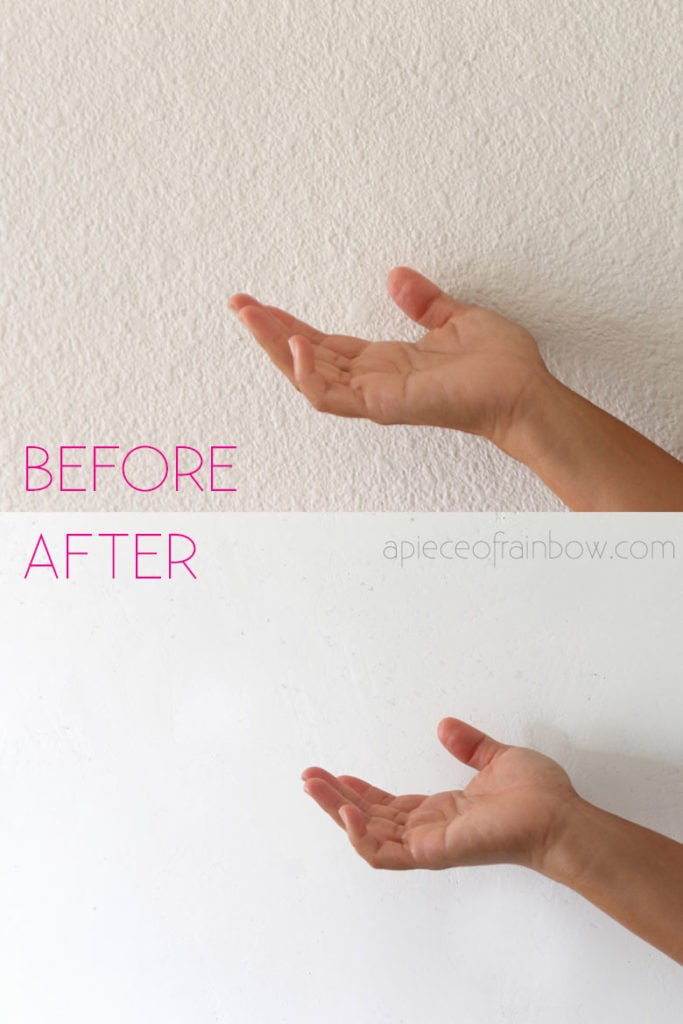
Here’s a tutorial with video on how to smooth finish a drywall.
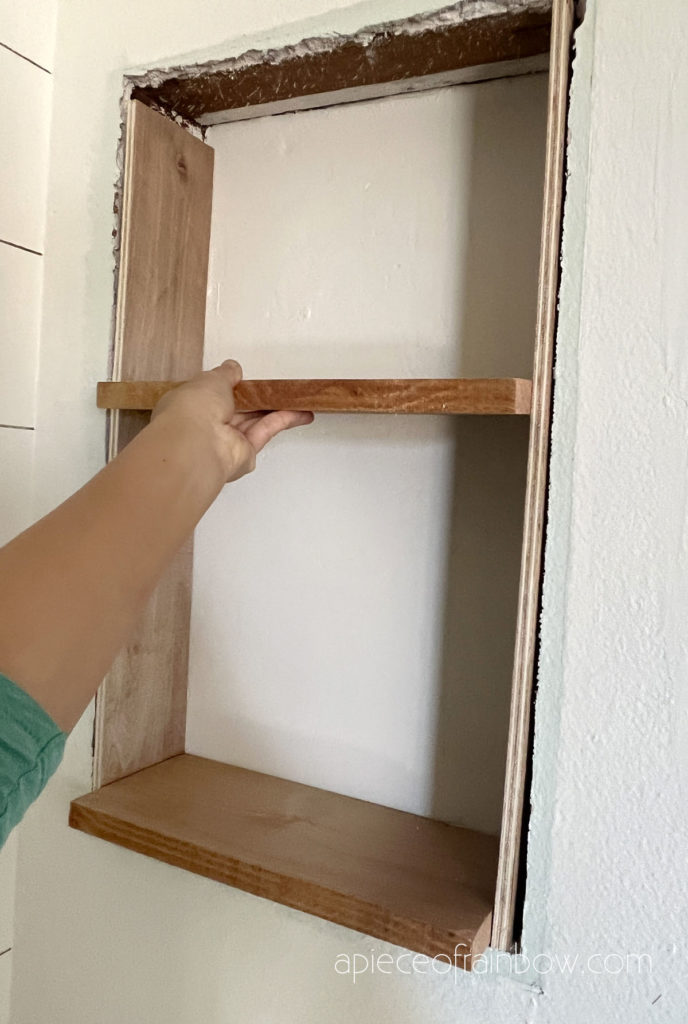
Step 3: how to build a niche shelf
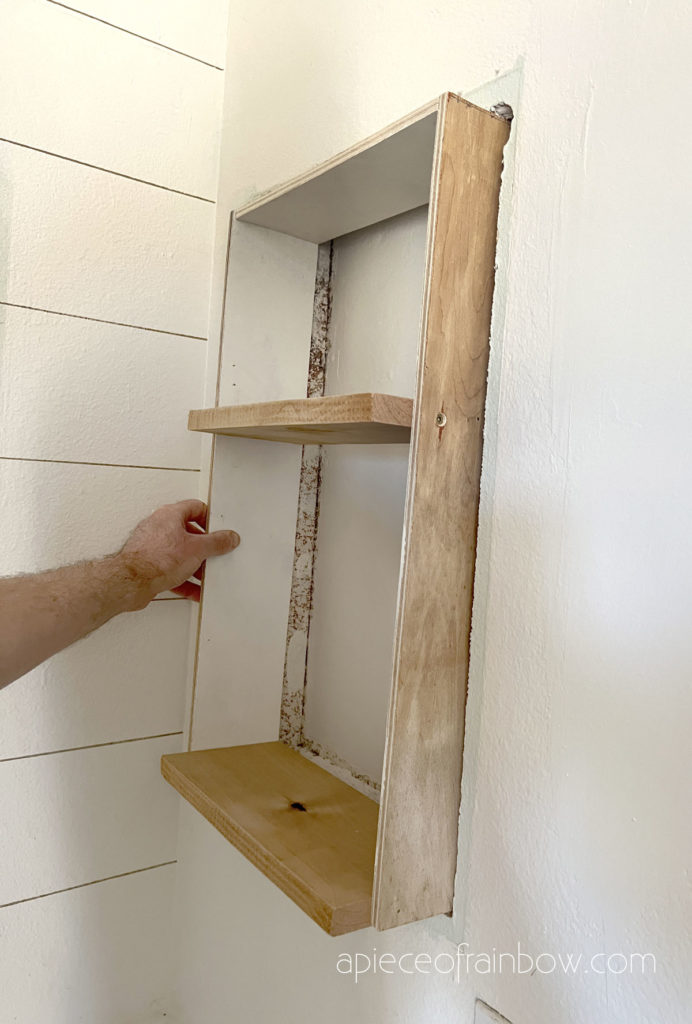
In this case, we are just building an open frame with 2 shelves. You can add a back piece if needed. Measure the depth of the niche, and cut plywood sides at a width equal to the depth of the niche.
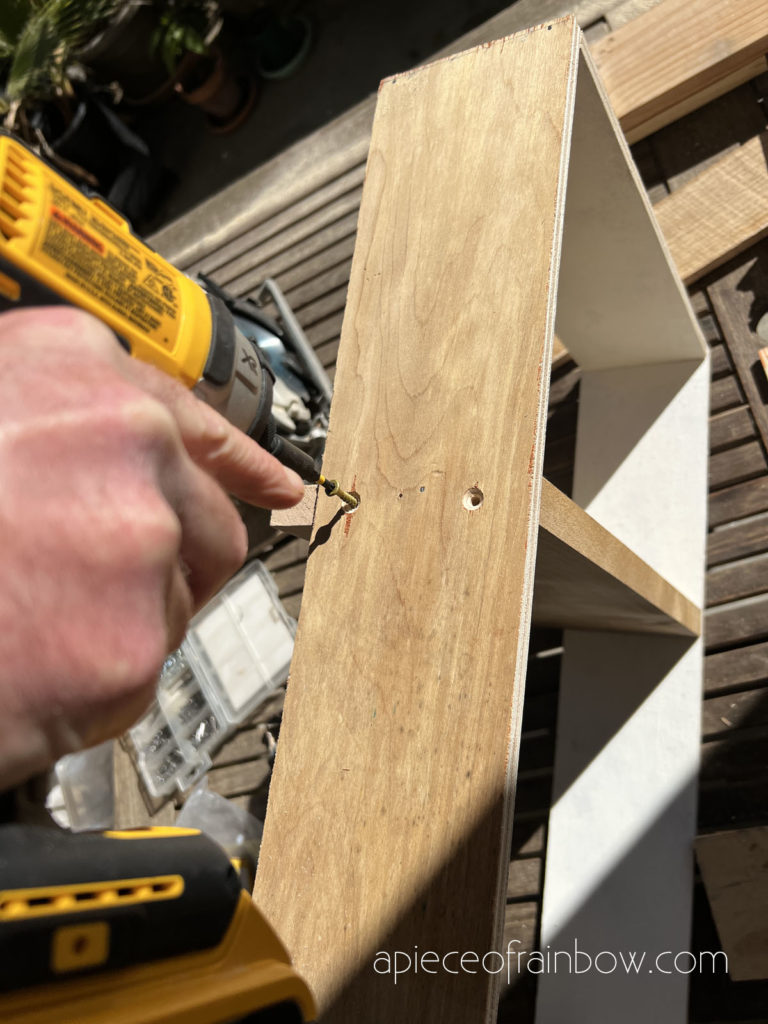
Cut the plywood again to the lengths that fit the height and width of the niche. It’s a good idea to leave about 1/8” space on the top and to one side, because a super tight fit would be hard to assemble later.
Sand all the cut edges. Screw or nail the niche shelf frame together, and test the fit inside the niche. Make any adjustments if needed.
Check the measurements of the shelves, and cut the shelves to fit inside the frame.
Next, paint the sides on the niche shelf white. You can also paint the wood shelves.
If you want to leave the wood natural, you can use 3 coats of water based polyurethane to protect the wood from water, stain, etc.
Once the paint and finishes are dry, screw the shelves onto the frame, and screw the frame to the wood studs in the wall.
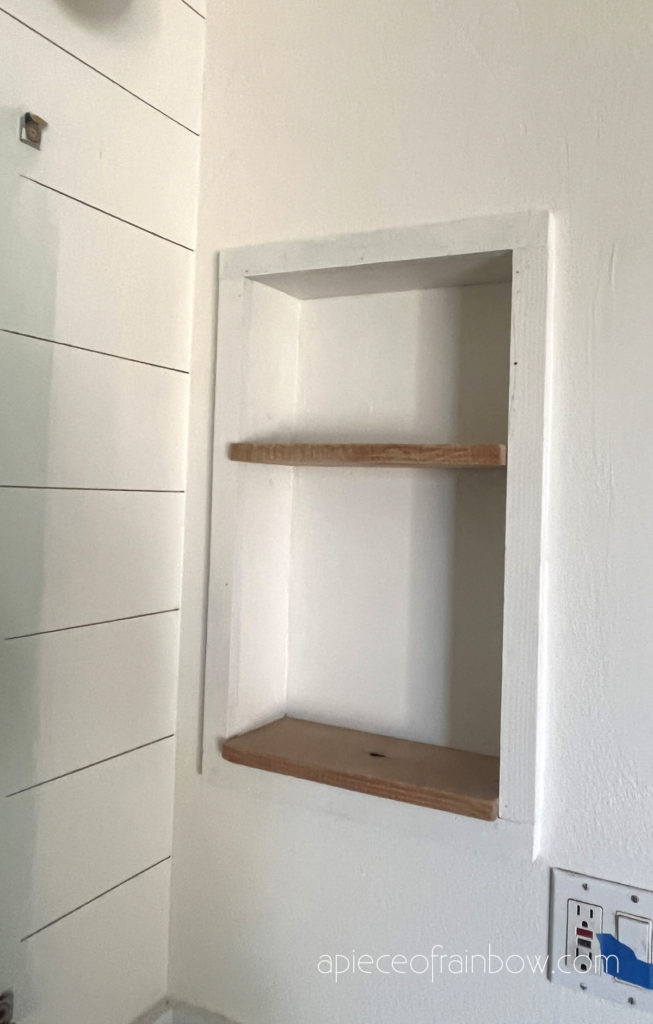
Step 4: add trim to the niche shelf
As you can see the cut drywall edges and the are not that attractive. Our final step is to add 1×2 trim all around the niche shelf to make everything look nice and finished.
We measured, cut, and painted the 1×2 wood, and used brad nails to secure them in place.
An open shelf is so much fun to decorate. In addition to the practical things for a bathroom, you can put plants, flowers, potpourri, essential oil diffuser or candles to make your bathroom vanity feel fresh and happy!
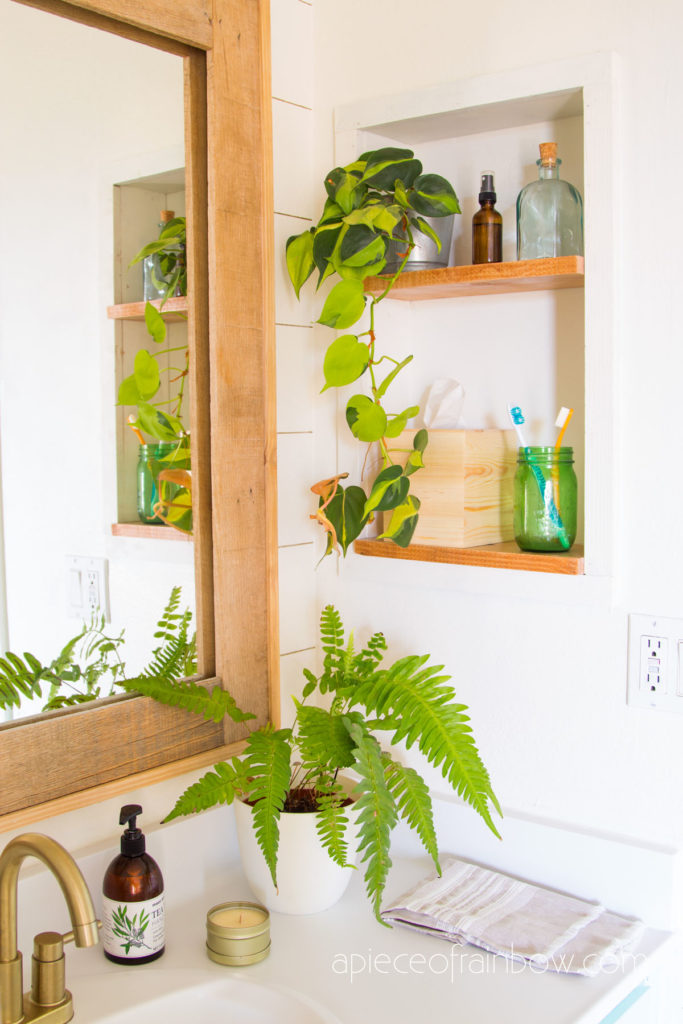
We like it so much more than the old medicine cabinets. The medicine can just go in a shoe box in the closet somewhere. 🙂
You may also love: Anthropologie inspired DIY Oyster shell trinket dish
Love home improvement ideas? Check out our IKEA kitchen remodel series here!
Happy creating! See you soon! 🙂


I’m new at diy and do not yet have the tools or skills for the woodwork. Would my local hardware store be able to make all these cuts for me when I go buy the wood or is there maybe a different material you could suggest that won’t require any power tools. Thanks!
hi Jessica, homedepot does cut wood for you if you have the exact measurements 🙂 i have seen people using cardboard to make niche shelves, which i may try in future. look it up on youtube! 🙂
Hi your bathroom is so pretty wondering about your wall is it wallpaper it looks like shiplap .
Hi Luz, it’s sharpie-drawn shiplap! 🙂 i’m posting tutorials soon!
Thanks, this is really informative! I have the same sink/mirror/medicine cabinet layout and the sticky-out medicine cabinet makes it feel claustrophobic. Now I have some great ideas on how to make it better. 🙂
What color are your white walls specifically?
Sherwin Williams “whitetail” 🙂
I love your bath mirror! Did you make that as well? I would love to see a DIY tutorial!
hi Alissa! thank you! 🙂 yes it’s a DIY, tutorial coming soon!
wow, this looks so beautiful. I just love this. thanks for sharing this article.
where is the video tutorial? I really need it as well as the written.
hi Loretta! if you can’t open the video tutorial at the beginning, there’s one towards the end of the post! 🙂