DIY Paper Mache Clay Pedestal Bowl
DIY pedestal bowl with easy paper mache clay recipe & painted vintage limestone finish. Beautiful boho farmhouse home decor & crafts idea!
Here comes part 3 of our DIY paper mache clay series! After comparing 4 best paper mache clay recipes , and making a vintage paper mache bowl, we have a new decor and craft project to share with you!

In this tutorial we will share how to make a pedestal bowl and paint it with a vintage and Mediterranean aged limestone finish, using ready made or DIY paper mache clay and simple tools you already have.
When it comes to functional home decor, the pedestal bowl is always one of the favorites on the list. You can make your bowl in any favorite style from Anthropologie boho to modern, French country, and farmhouse!
Check out the video tutorial or skip to written tutorial below
*Some resources in article are affiliate links. Full disclosure here.
Materials to make paper mache clay pedestal bowl
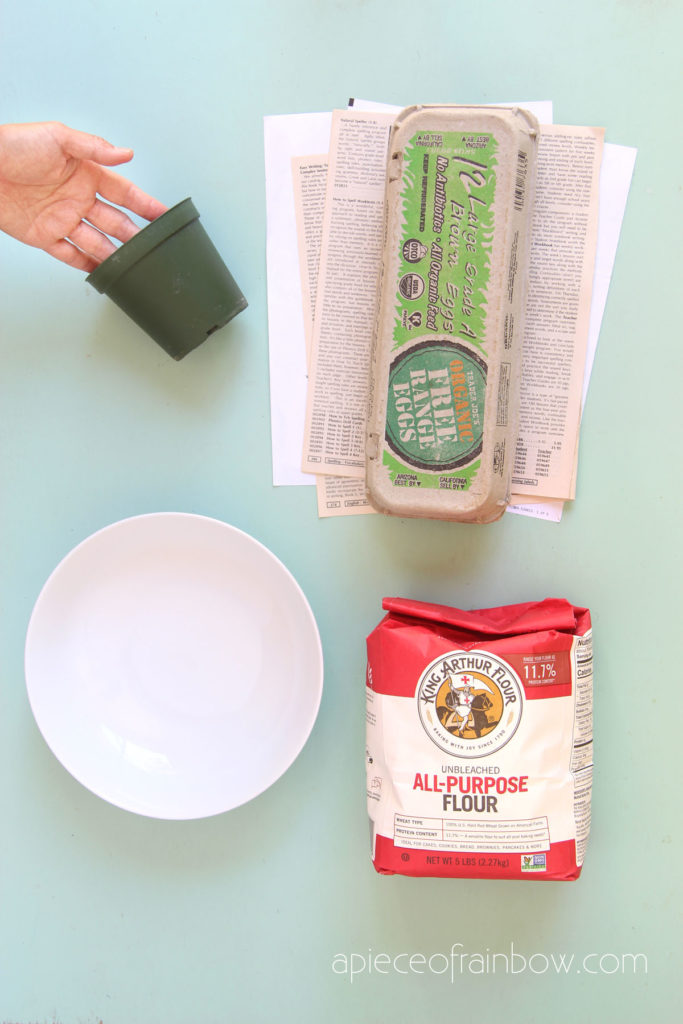
You will need 4 to 5 cups of paper clay to make a bowl about 8” in diameter. you can buy paper clay (aka paper mache clay) or make it from scratch.
Here are a couple of good choices for ready-made paper clay. CelluClay comes in a dry powder to be mixed with water. Creative Paperclay is already moistened into clay form and much finer like actual clay.
To make paper mache clay, all you need are some paper or egg cartons, flour, and glue(optional). Here’s our detailed tutorial with 4 recipes! The paper mache clay can be made in advance and stored in the fridge or freezer until ready to use.
I used recipe 3, but both recipe 3 and recipe 2 are very good choices because they are very strong when dried, and they only require a few simple ingredients.
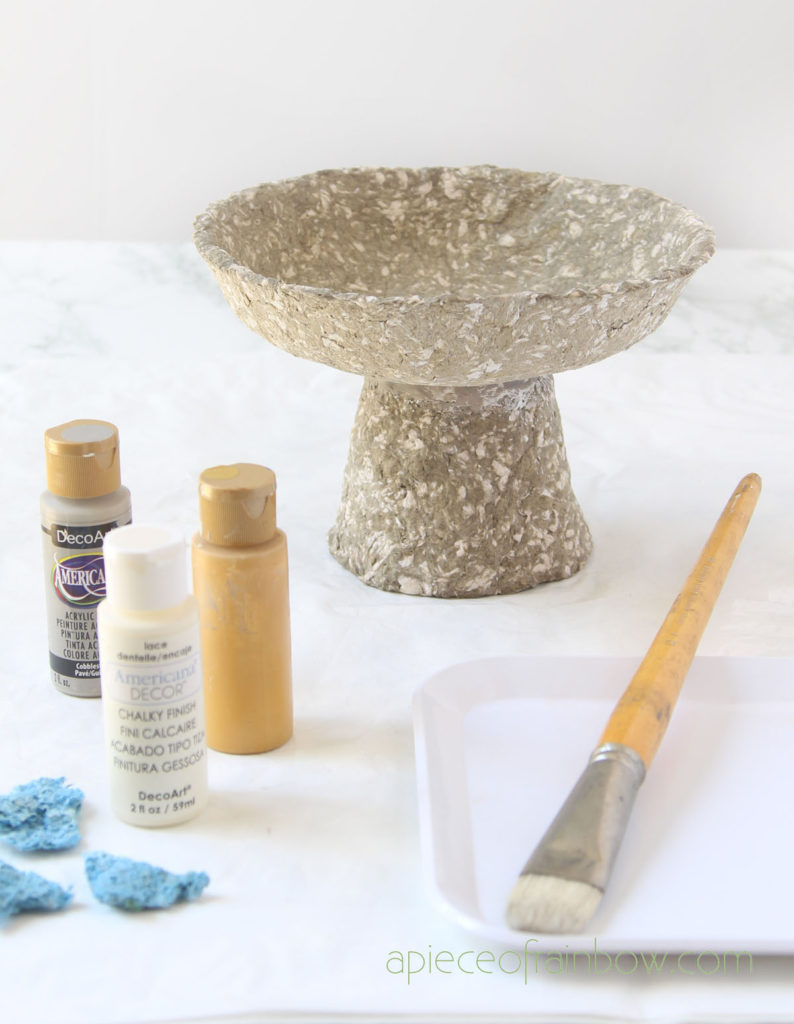
I also used acrylic paints in these colors to finish the bowl: yellow ochre, buttermilk , and grey. These 2 oz paints will be enough to cover many paper mache bowls!
Step 1: make pedestal bowl with paper mache clay
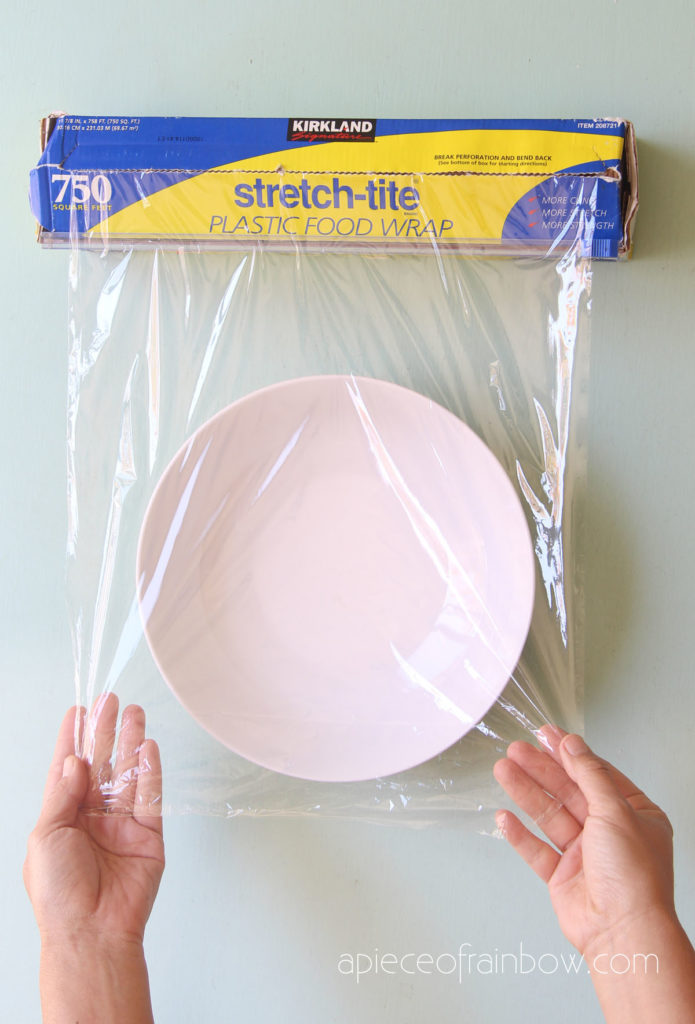
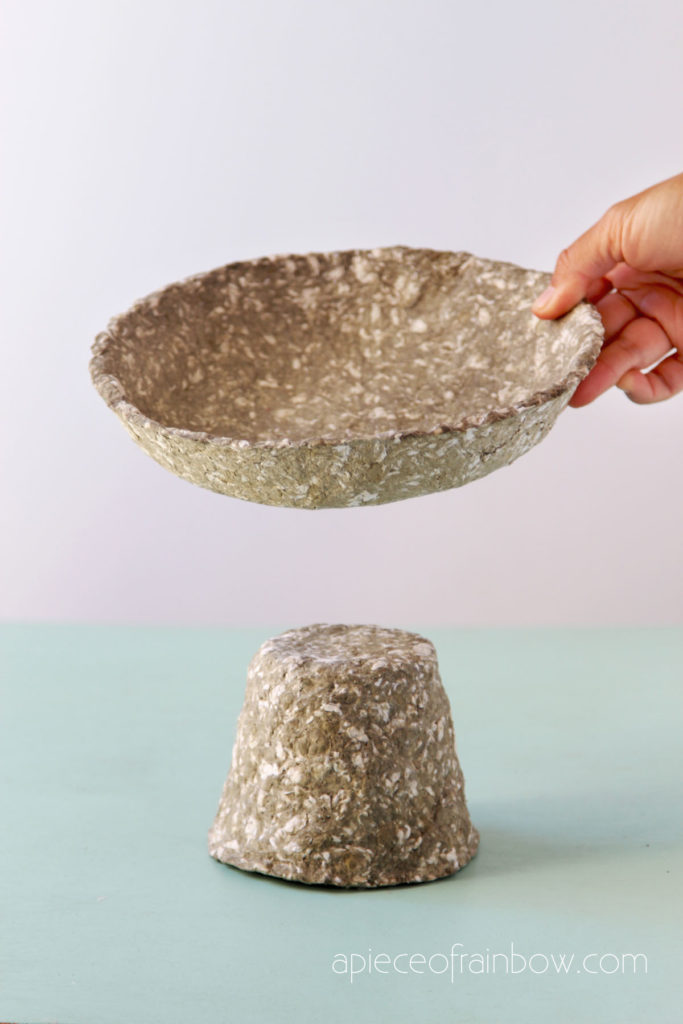
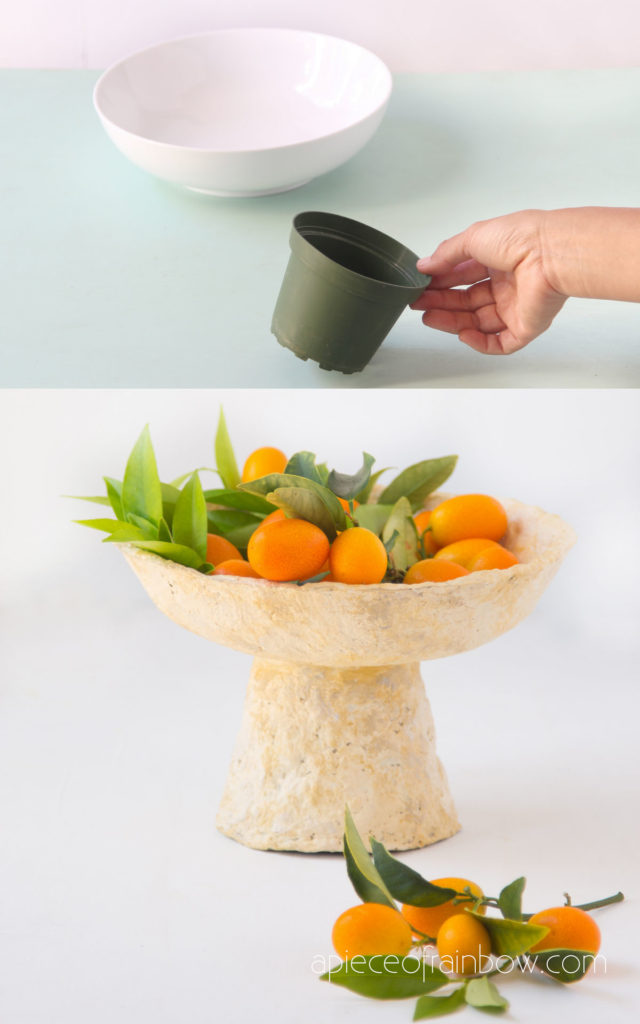
First find a shallow bowl and a tapered flower pot as molds for the top and bottom parts of a pedestal bowl, and some plastic wrap to line the inside or outside of the molds. This will make it much easier to take our paper mache bowl off the mold later, and avoid damaging the bowl in case it is not completely dry.
You will need 4 to 5 cups of paper clay to make a pedestal bowl around 8” in diameter.
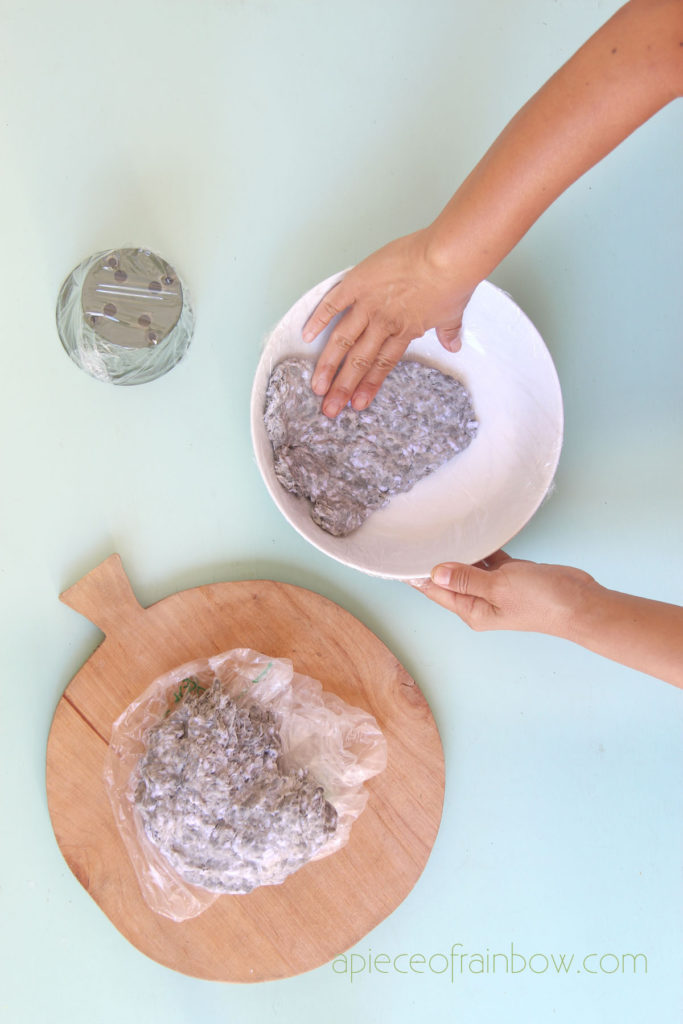
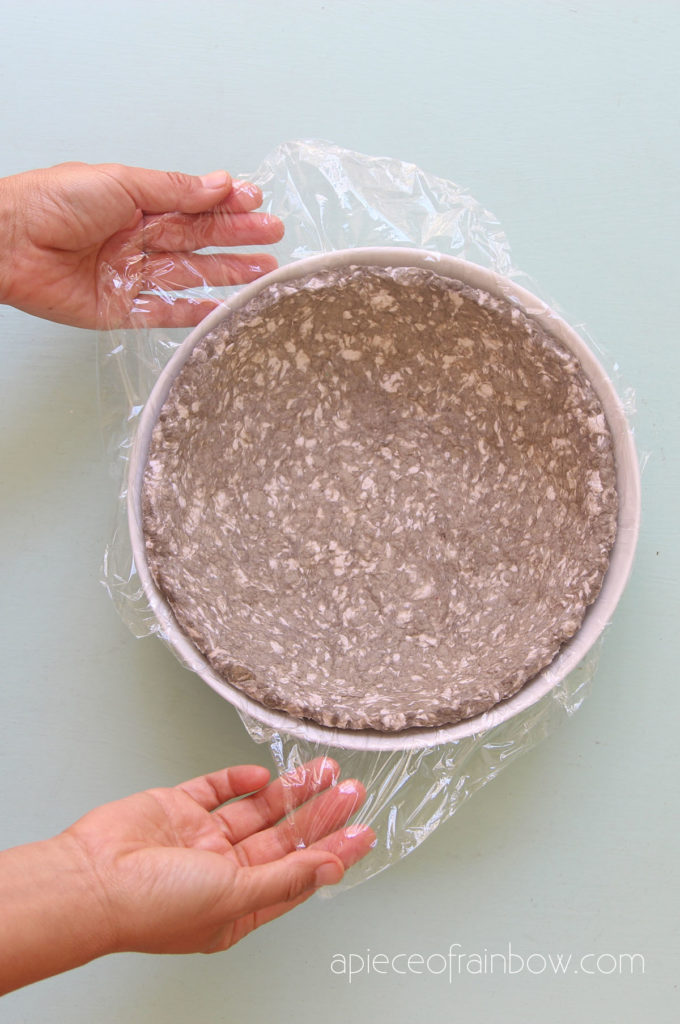
You can cover either the inside or the outside of a mold, depending on the size and shape of the molds. In this example, we will cover the inside of a ceramic dish, and the outside of a plastic pot.
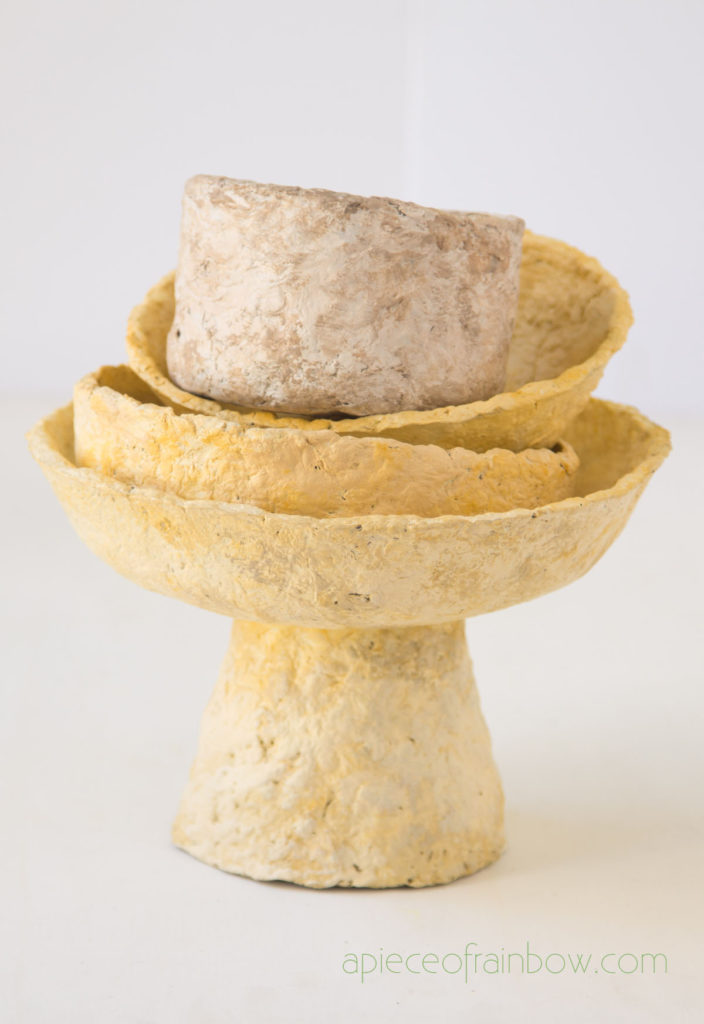
Take a piece of paper clay, shape it into a flat piece a little thicker than 1/4”, and start covering the surface of the mold.
When you add the next piece, overlap some of the edges of the previous piece, press and smooth out the joints just like how you work with clay.
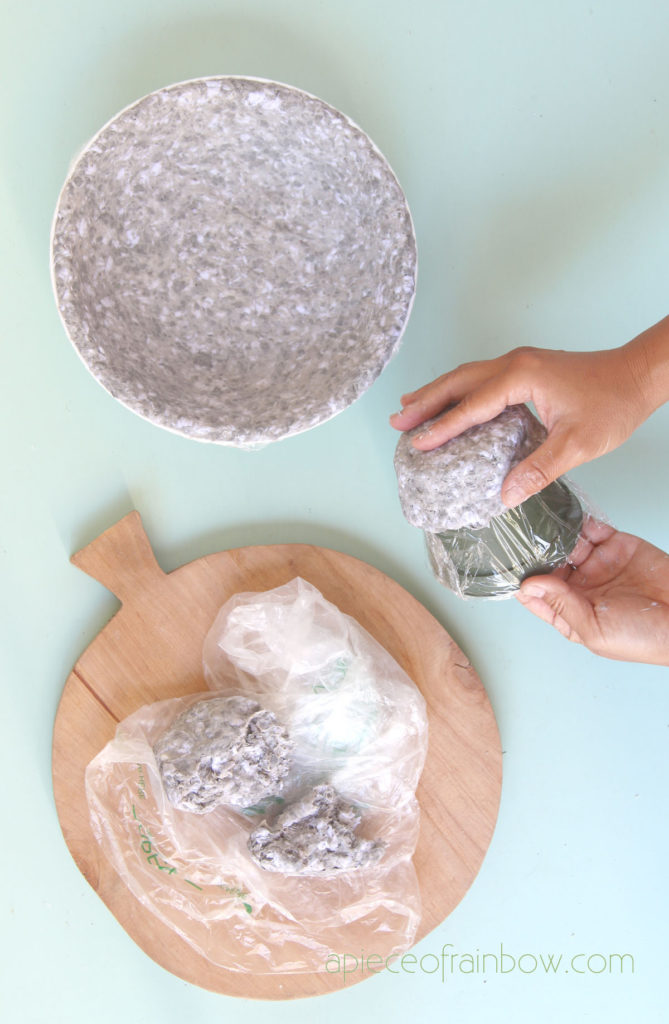
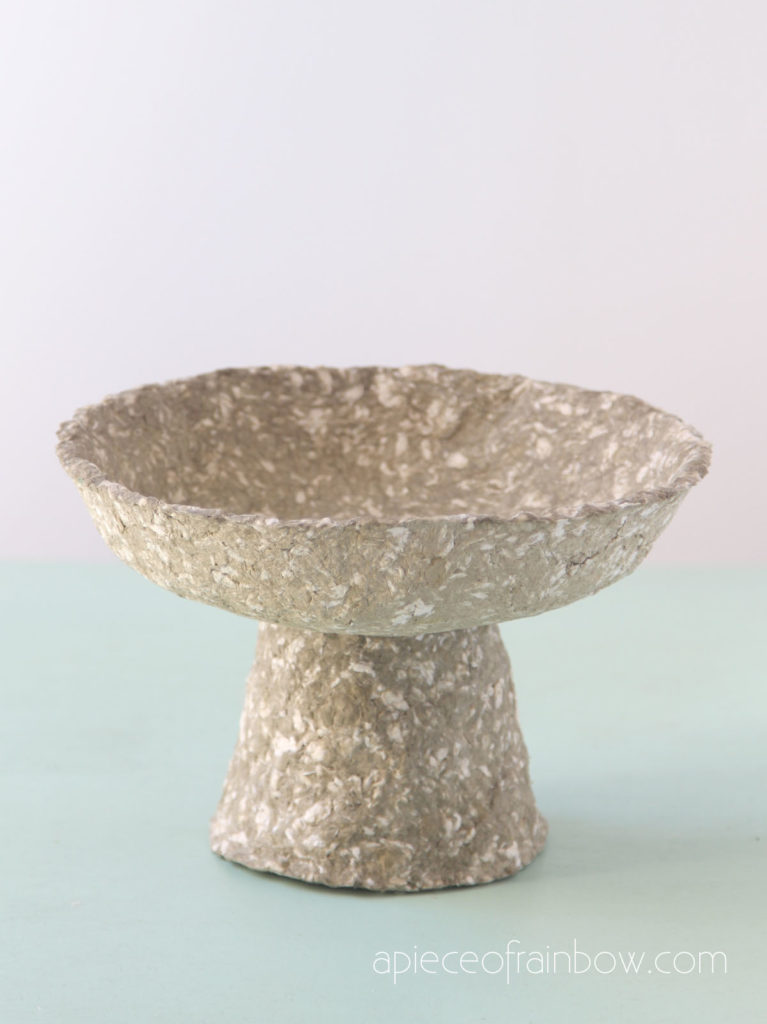
Repeat this process until the bowl shape and the base is complete. We will glue these two pieces together after each piece dries.
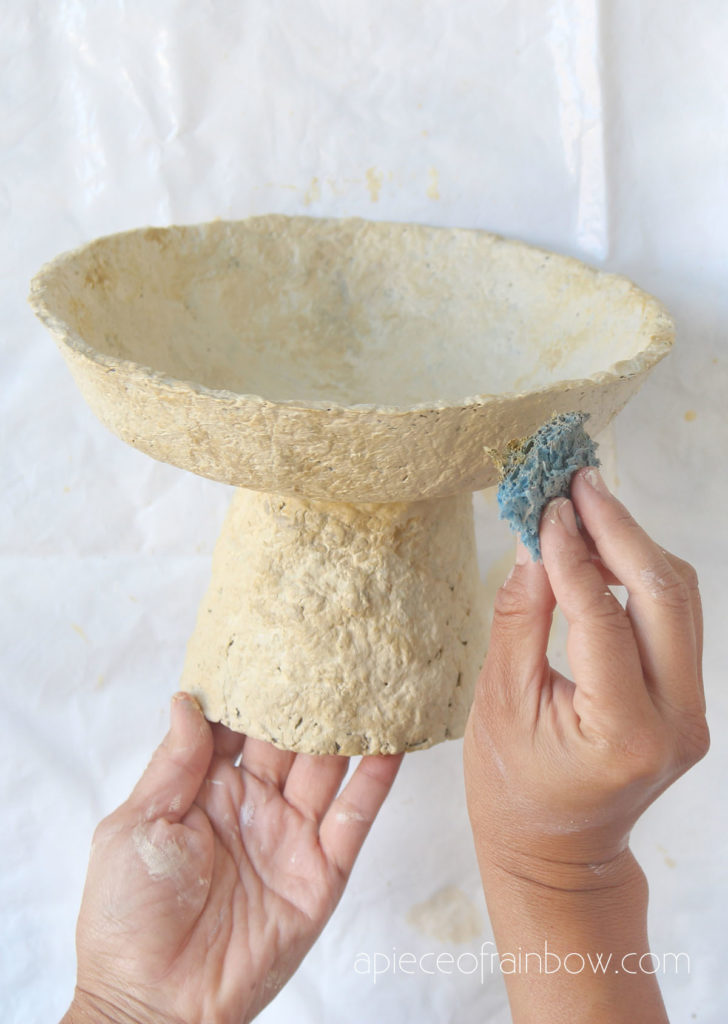
Step 2: glue the bowl and the base together
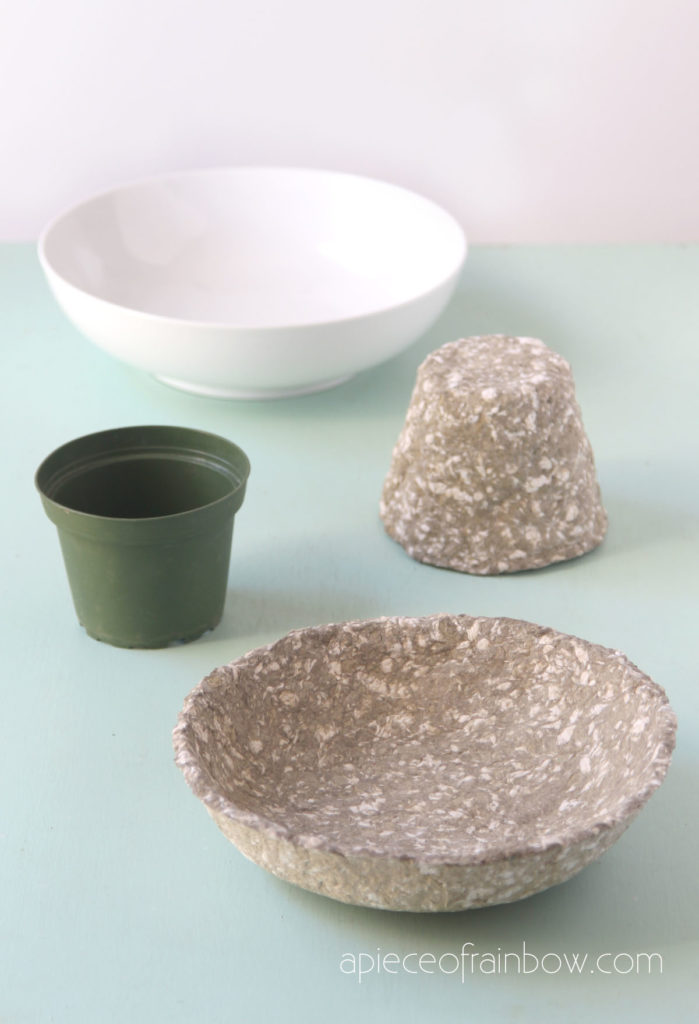
Let the paper mache bowl and base dry on the molds for 2 days. Then carefully lift the them with the plastic wrap off the molds. peel off the plastic wrap, and let the inside of each piece dry thoroughly.
Center the pieces and glue the base to the bowl using a craft glue like Elmers.
Step 3: paint vintage limestone finish on pedestal bowl
Here are some tips and tricks to create the vintage weathered limestone look easily. The best part is, you can always paint over the bowl anytime if you are not totally happy with the look, or just want to change the colors to a different tone.
Start with a base color. For this paper mache bowl I mixed the yellow ochre, buttermilk , and a touch of grey to get a warm base color which looks like aged limestone with a subtle gold tint.
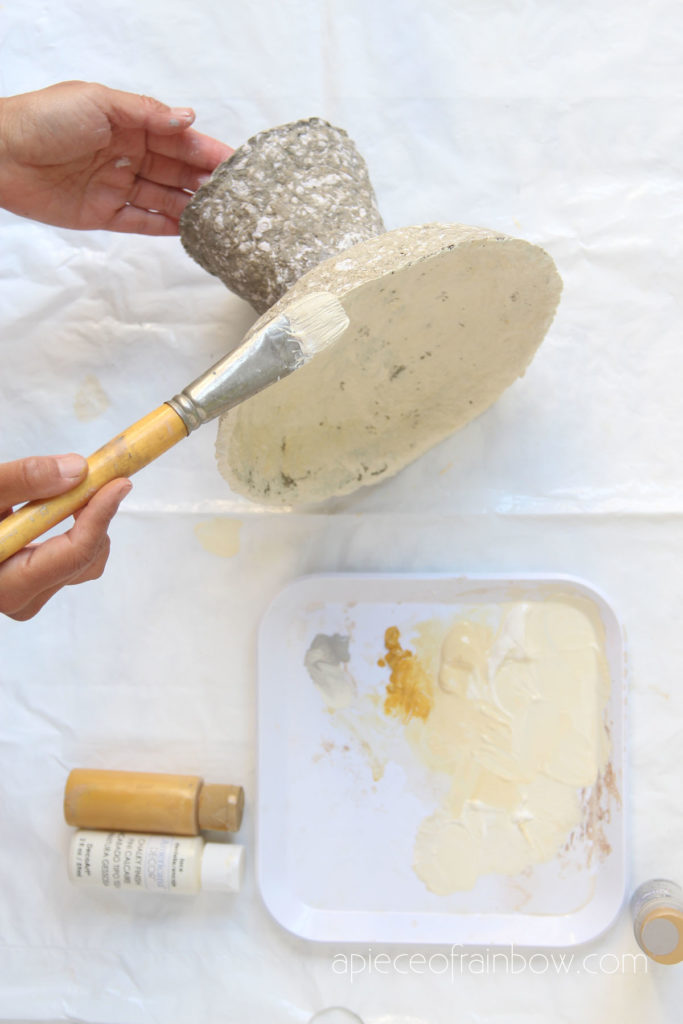
Don’t mix the colors 100%, this way you will have a natural variation on the base coat.
Paint the entire paper clay pedestal bowl with 1 to 2 coat of the base color and let it dry.
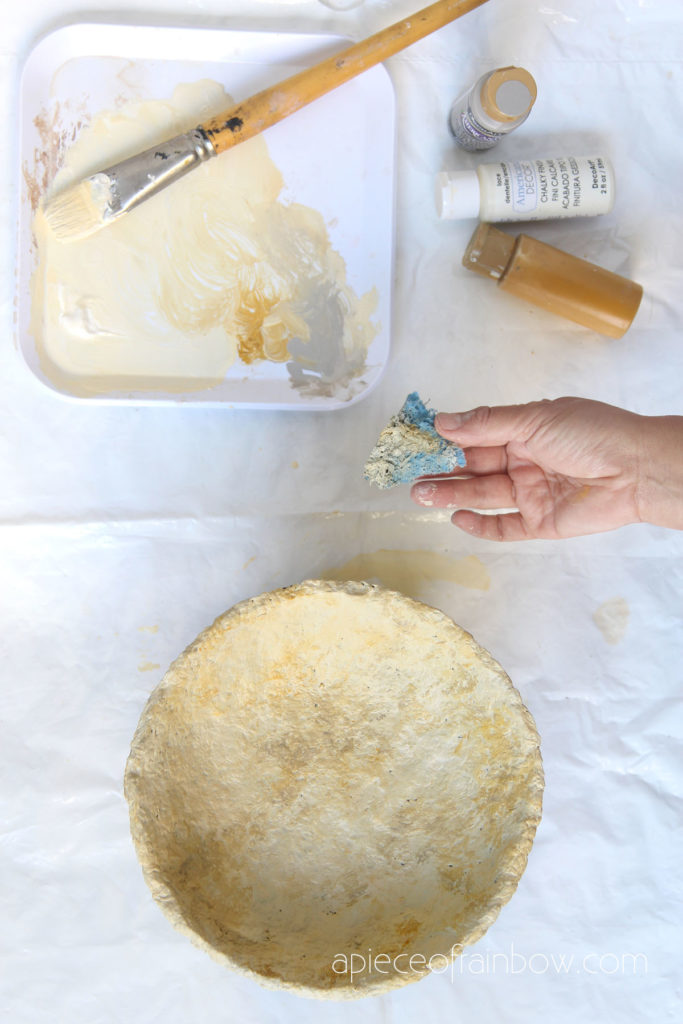
To create a distressed look with deeper colors, take a small piece of sponge, dip it into a little bit of the brown and dab gently onto the paper mache bowl in random spots.
Repeat the same with the gray and the yellow ochre colors. You can also mix the any of these colors to get infinite shades of in-between colors and add them to random spots on the bowl to make it look more natural.
This step was super quick, easy and effective. It only took a couple of minutes. Now we have a vintage French limestone pedestal bowl!
Do I need to seal and waterproof the paper mache bowl?

Paper mache clay can be made water-resistant, but it is not water proof even after painting and sealing.
If you use latex or acrylic paint which is water resistant, you do not need to seal the bowl. If you want to seal paper mache for extra protection, you can use an acrylic spray or water based polyurethane.
I have seen people waterproofing outdoor paper mache sculptures using Waterproof glue, cement based products , exterior house paint, and / or multiple coats of polyurethane. It is not 100% guaranteed how effective these methods are.
I think paper mache clay is such a fun and versatile material to craft with, and to create one of a kind home decor and unique gifts.

You may also love: $2 easy faux leather basket made from a surprise material!
Happy creating! See you soon!


Thanks for sharing such a nice post. Really liked it creativity. Keep it up
I’m excited to try this! As you were pressing the clay into the sides of the bowl, I wondered what it might look like to have some kind of shallow designs indented into the sides…wouldn’t want it to look too symmetrical and couldn’t be too deep, but might be fun to play around with.
Also, a question: is there any reason not to paint the pedestal and bowl before gluing them together? Seems like they would be easier to handle before they’re joined. Could you do that and just leave the areas that will be joined unpainted? Or is there a reason not to do this that I’m missing?
Thanks for all your great projects — only problem is that just watching your demonstrations makes me feel as though I’m already being creative, then I realize that if I want the product I have to follow the process!
thank you Suzanne! i also like to just watch creative videos by others! 🙂 yes you can press designs into the sides, and you can totally paint the pedestal and bowl before gluing!
I never have received the template for the blue Mother’s Day card.
hi Marilyn! do you see a red button in the welcome email or our weekly newsletter(out on sundays)? it takes you to all downloads! 🙂
I love that sunny yellow that you painted your bowl; here in Maine, I am in dire need of SUNNY! My spring wreathe is NOT enough! Nice clear tutorial!
hi Kathy! happy March! spring will be coming soon! 🙂 i used to live in boston and remember how magical spring is in that part of the country! xo