Easy $1 DIY Paper Christmas Star Tree Topper in 10 Minutes
How to make $1 beautiful paper Christmas star tree topper. Easy DIY decoration tutorial & crafts idea for modern, boho, farmhouse home decor.
There’s something undeniably magical about stars. They’ve been guiding travelers, inspiring dreamers, and brightening our skies since forever. But come Christmas time, they take on an even more special role, becoming a symbol of hope, joy, and festive celebration.
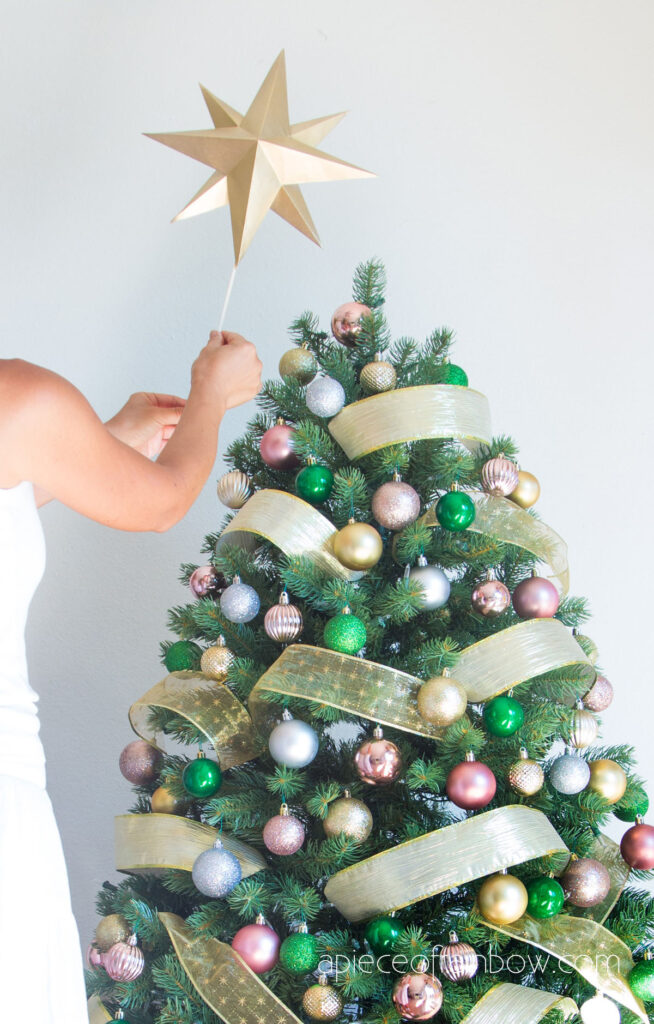
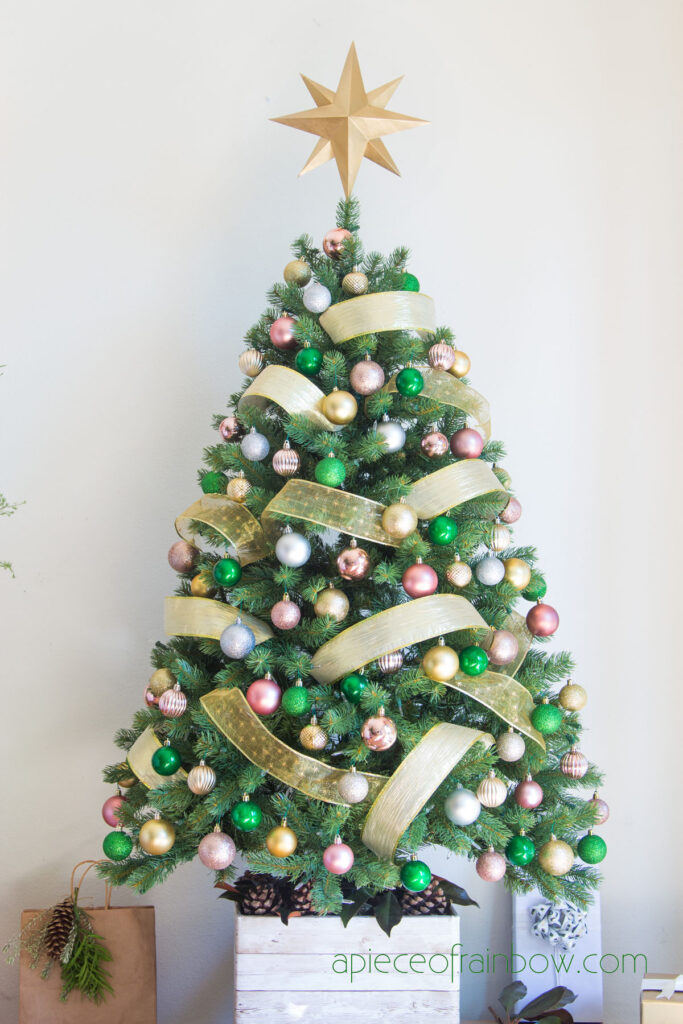
Ready to sprinkle some handmade magic onto your festive season? Imagine strolling into a room and seeing this stunning Christmas tree. Your eyes immediately dart to the top – and there it is, a handmade, shiny tree topper that is the perfect finishing touch on your beautifully decorated Christmas tree.
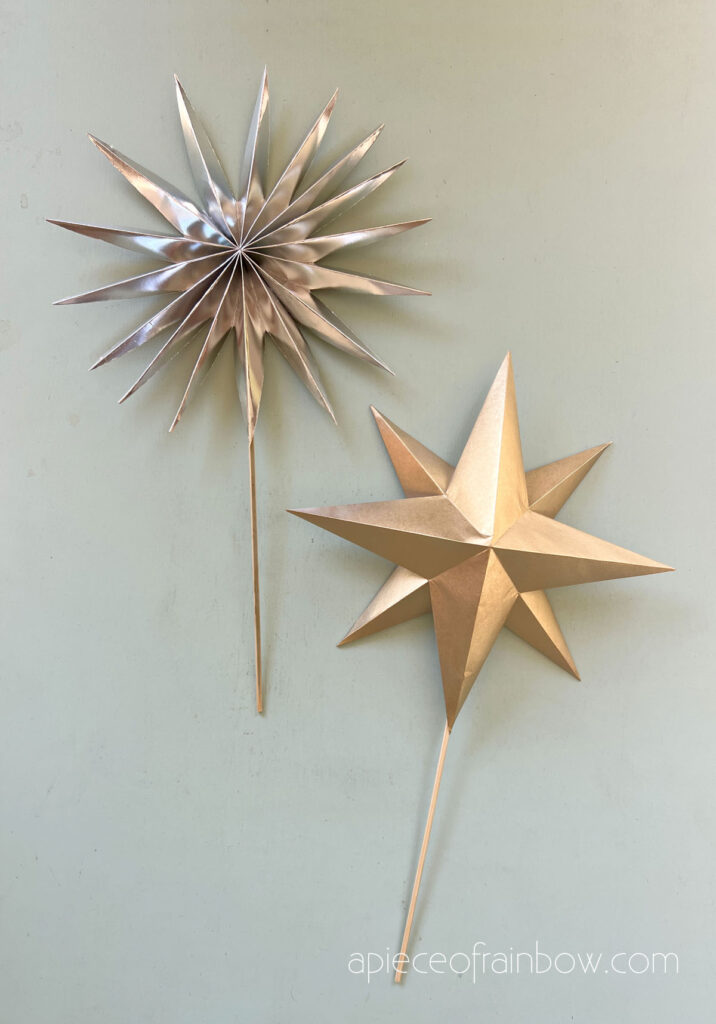
Determined to figure out an easy way to make a 3d Christmas star tree topper, I played around with different ideas, and this 8-pointed paper star is one of my favorite. All you need are paper, scissors and a few other basic materials.
*Some resources in article are affiliate links. Full disclosure here.
We also have a really easy silver 3D paper star tutorial here, and a few more Christmas ideas you may love:
- 25 beautiful Christmas tree ribbon decor ideas
- 48 best Christmas tree decorating ideas
- $5 easy DIY elevated Christmas tree box stand
Check out the video tutorial or skip to written tutorial below
Materials and tools to make paper Christmas star tree topper:
- 2 square sheets of paper or card stock. Regular office paper or lightweight card stock is a breeze to fold, and you can always jazz it up with spray paint later! Or, go bold from the get-go with colored paper or metallic card stock.
- Scissors, craft glue or glue sticks, and if you’re using card stock, something sturdy like a ruler for those sharp creases. Hot glue and long bamboo skewer to attach the Christmas tree topper
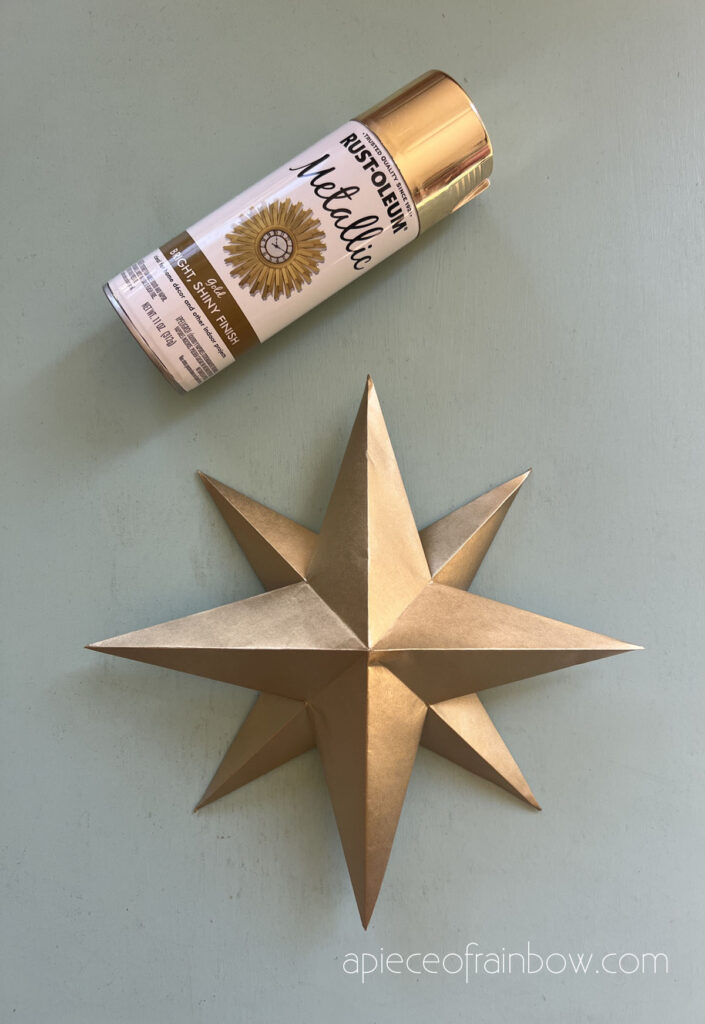
- Spray paint: after using a bunch of gold spray paint, this one is my favorite, not too yellow, just the perfect elegant gold color. Silver is also a great versatile choice.
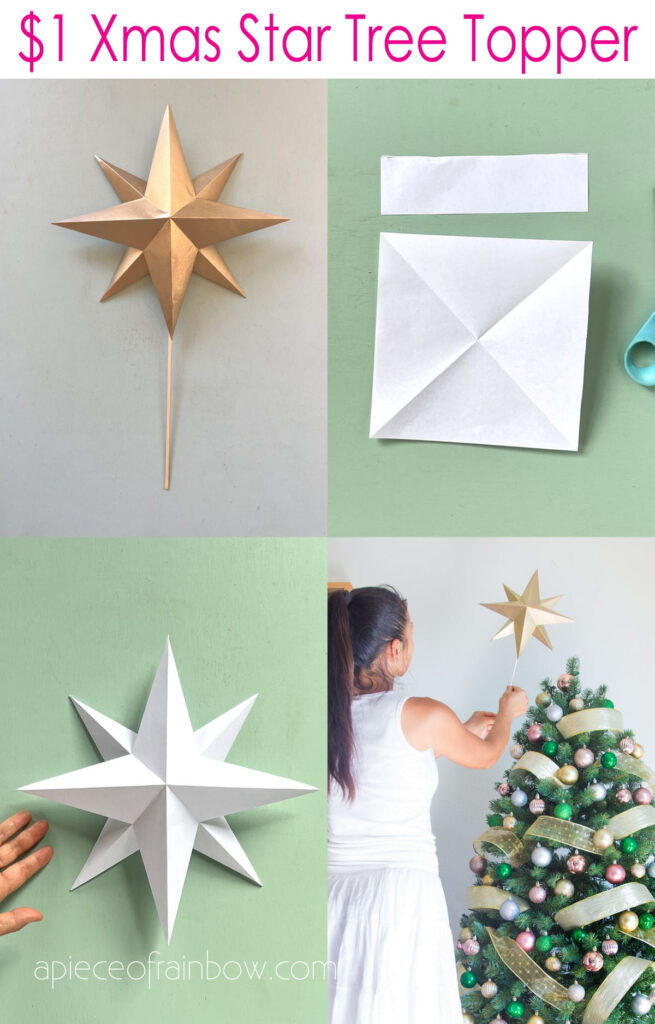
Step 1: Fold paper star before cutting
Begin by folding your square paper horizontally. Make a neat crease. For card stock, get that ruler out and get the crease super sharp. Go vertical next – another fold, another crease.

Now, channel your inner origami lover. Fold diagonally, unfold, and then fold the other diagonal.
Step 2: Cut and glue paper star points
On the horizontal and vertical creases, mark the 1/4 points and make some cuts. Fold those newly freed “wings” towards each other like they’re coming in for a cozy hug. They’ll form a triangle. Stick them together with some glue.

Little insider tip: Want super pointy star spikes? Overlap those wings more. For a gentler vibe, like I went for, don’t overlap them entirely. Just ensure you keep the overlapping consistent for all spikes to get that star symmetry.
Step 3: Assemble paper Christmas star tree topper
Craft another 4-pointed paper star just like in steps 1 and 2. You can make them the same size, or make the second paper star slightly smaller. I trimmed the paper just a bit smaller than the first sheet to make the second star a bit smaller.

Once you’ve got two 4-pointed stars, it’s bonding time! Glue them back-to-back, or front to back, like I did.
Put a small dab of glue on each of the four joining point, and carefully set the bigger star on top of the slightly smaller one. Now you have a beautiful 8-pointed paper Christmas star.
Step 4: Spray paint the paper Christmas star tree topper
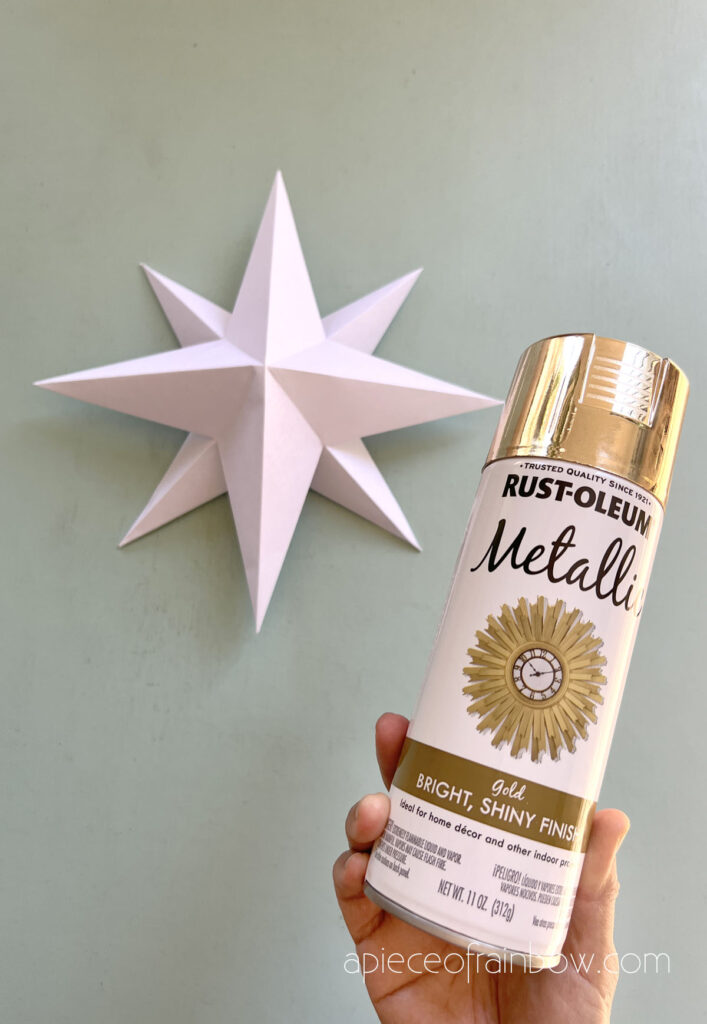
Spray paint the paper Christmas star tree topper with metallic gold. I have tried several gold spray paints, and this gold spray paint is my favorite.
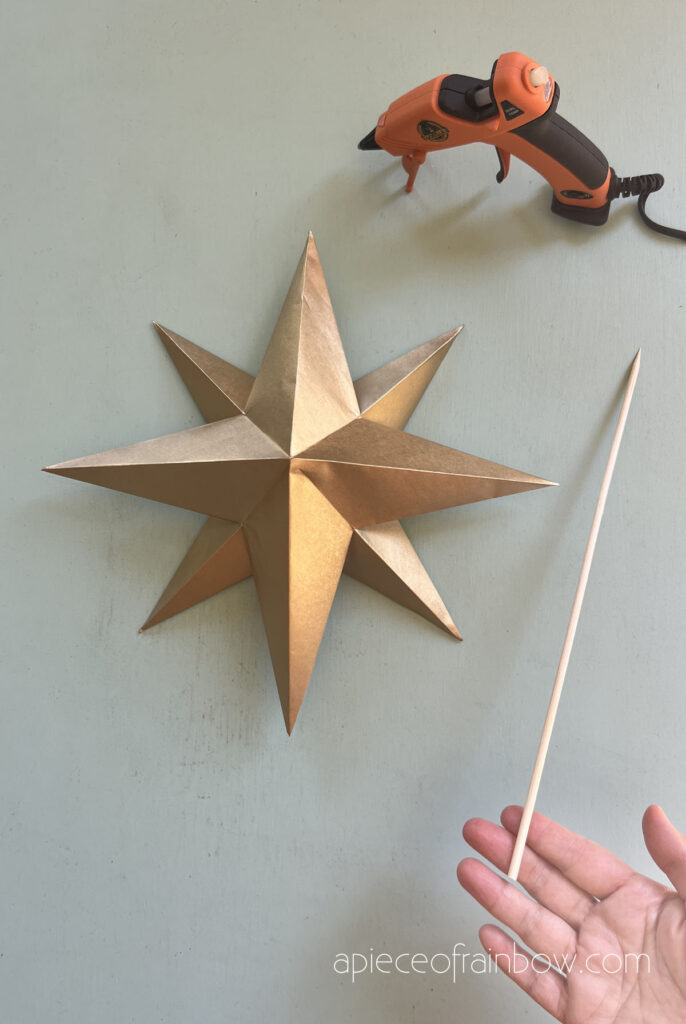
I used hot glue to attach a stick or long bamboo skewer to the back of Christmas star tree topper, then secured it to the top of our Christmas tree with some thin wires.

Whether you are decorating your Christmas tree in traditional red and green, or modern pink and gold, this paper Christmas star tree topper with its elegant golden glow will look beautiful and magical in any color scheme.
There are many more creative ways to use this paper star. Assemble multiple stars in varying sizes and colors to create a constellation. Hang them from strings to craft a whimsical garland or scatter them around your space for a magical ambiance. Let your imagination run wild—the possibilities are as endless as the cosmos itself!
You may also love:
- 48 best DIY pine cone crafts and decor for Christmas and beyond
- 27 beautiful DIY Christmas table decorations and centerpieces
- 50+ easy DIY Christmas outdoor decoration ideas
Happy decorating! See you soon!


