DIY Winter Village & Red Car Christmas Tree Ornaments
How to make easy winter village & red car Christmas tree ornaments with recycled cans. Beautiful DIY decorations & crafts inspired by vintage, farmhouse, & Anthropologie style!
Before you recycle that tuna can, raisin can, or small cookie tin, take a look at these beautiful DIY Christmas ornaments!
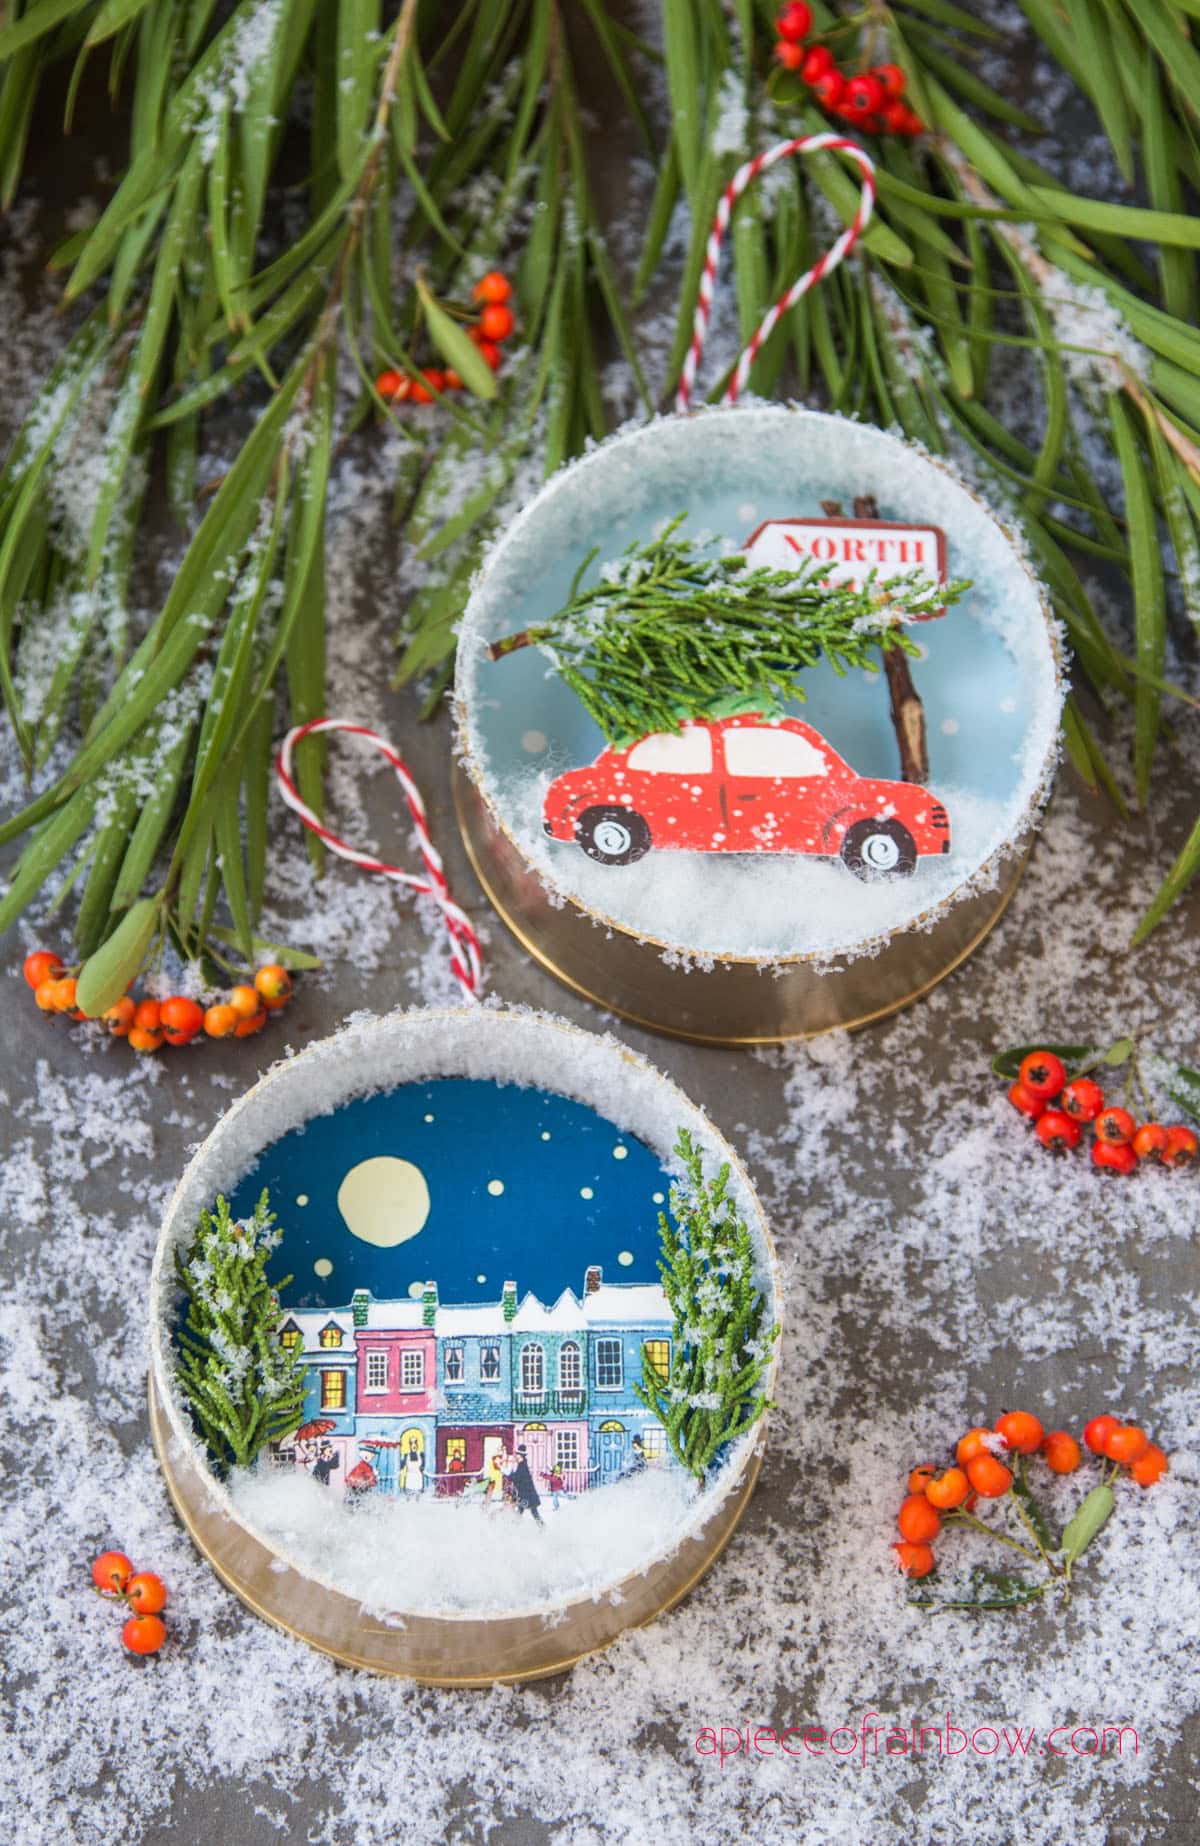
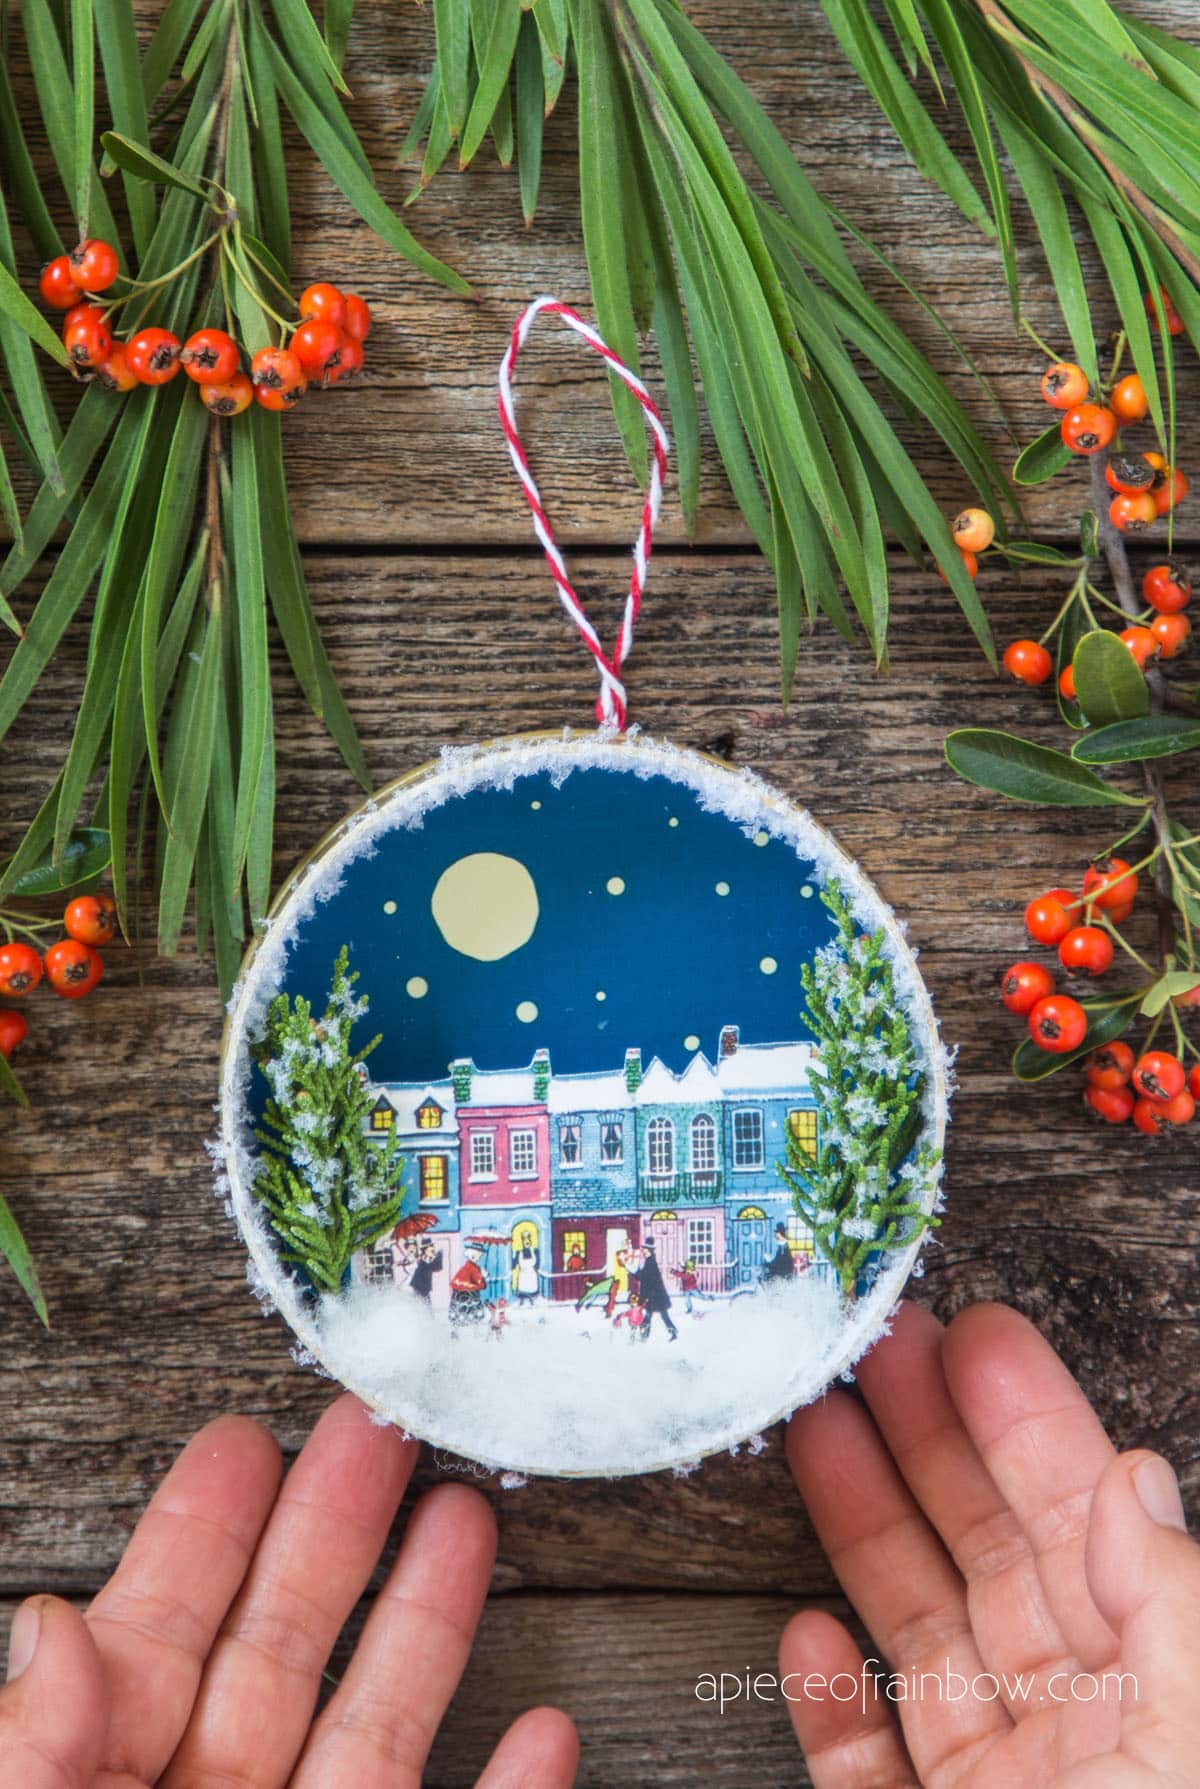
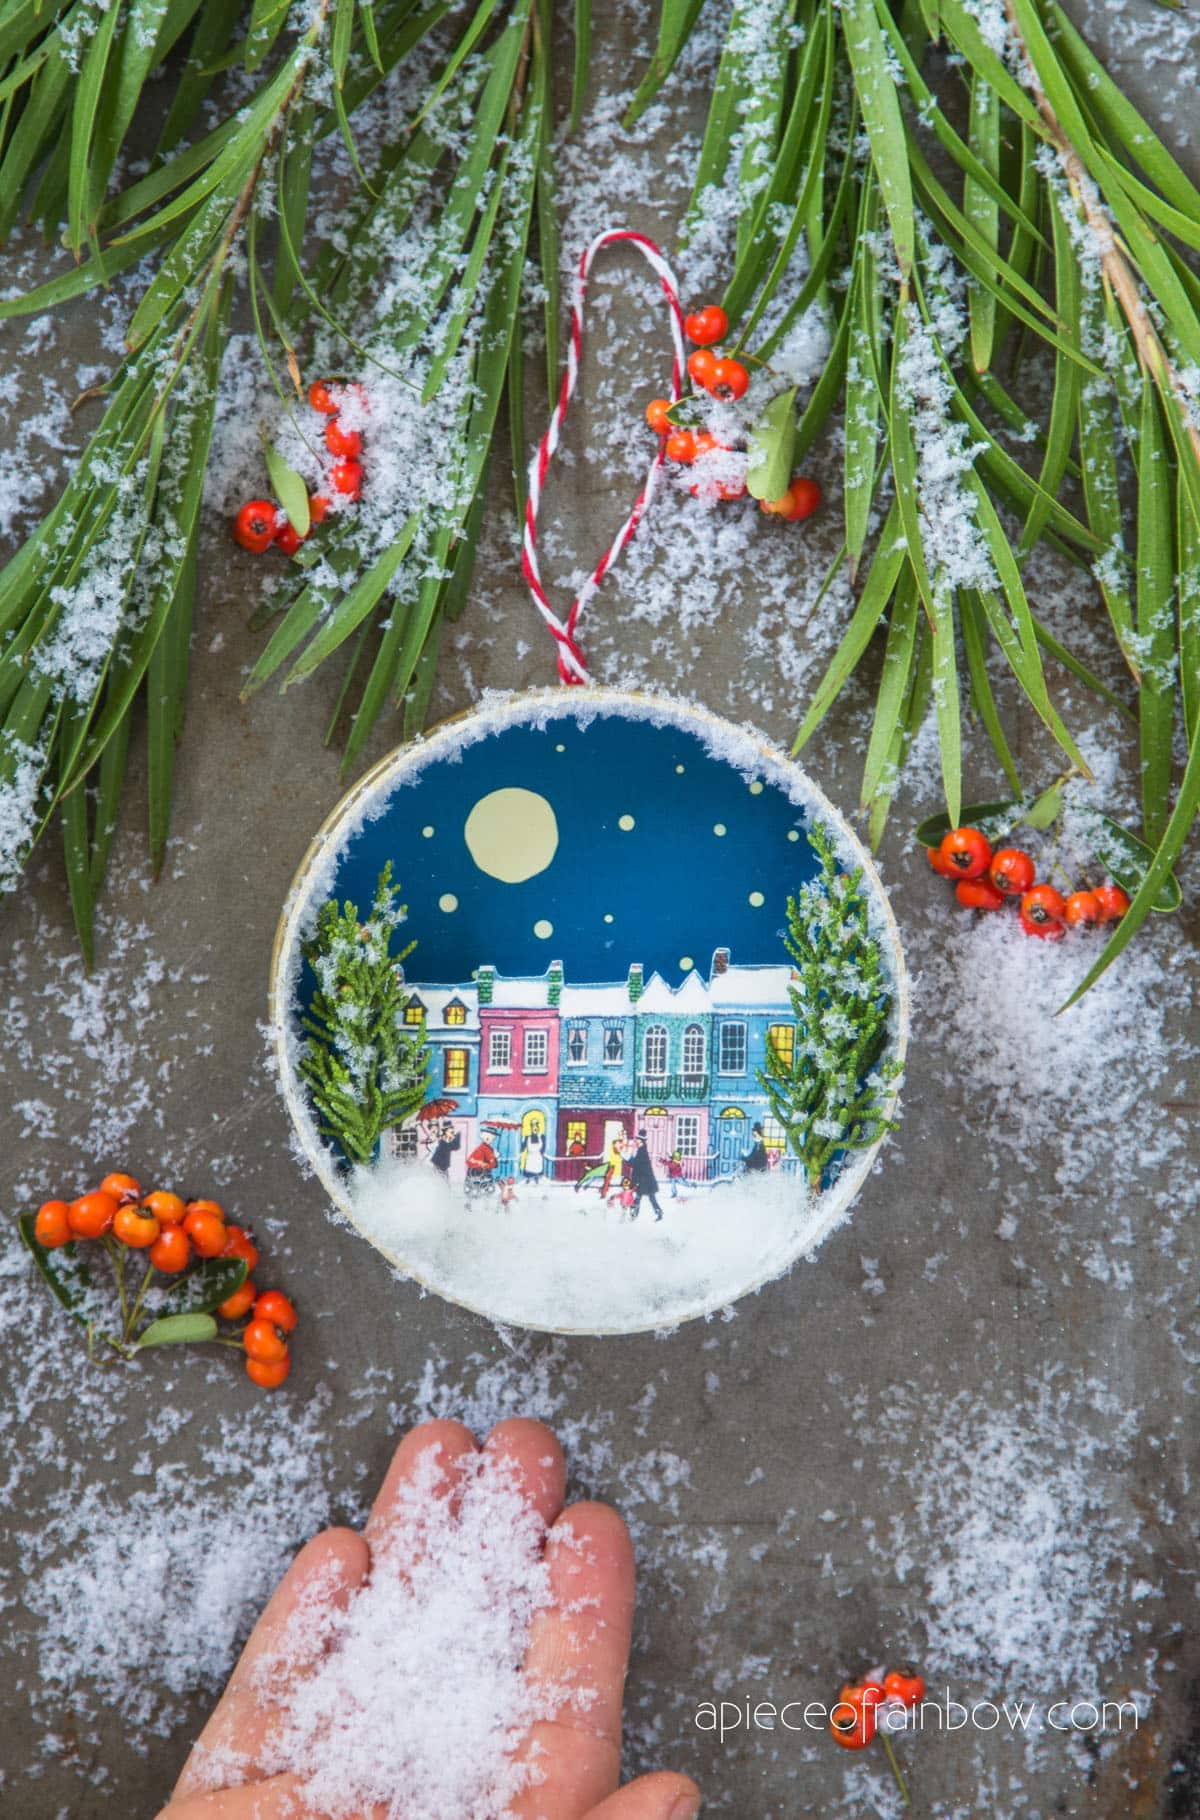
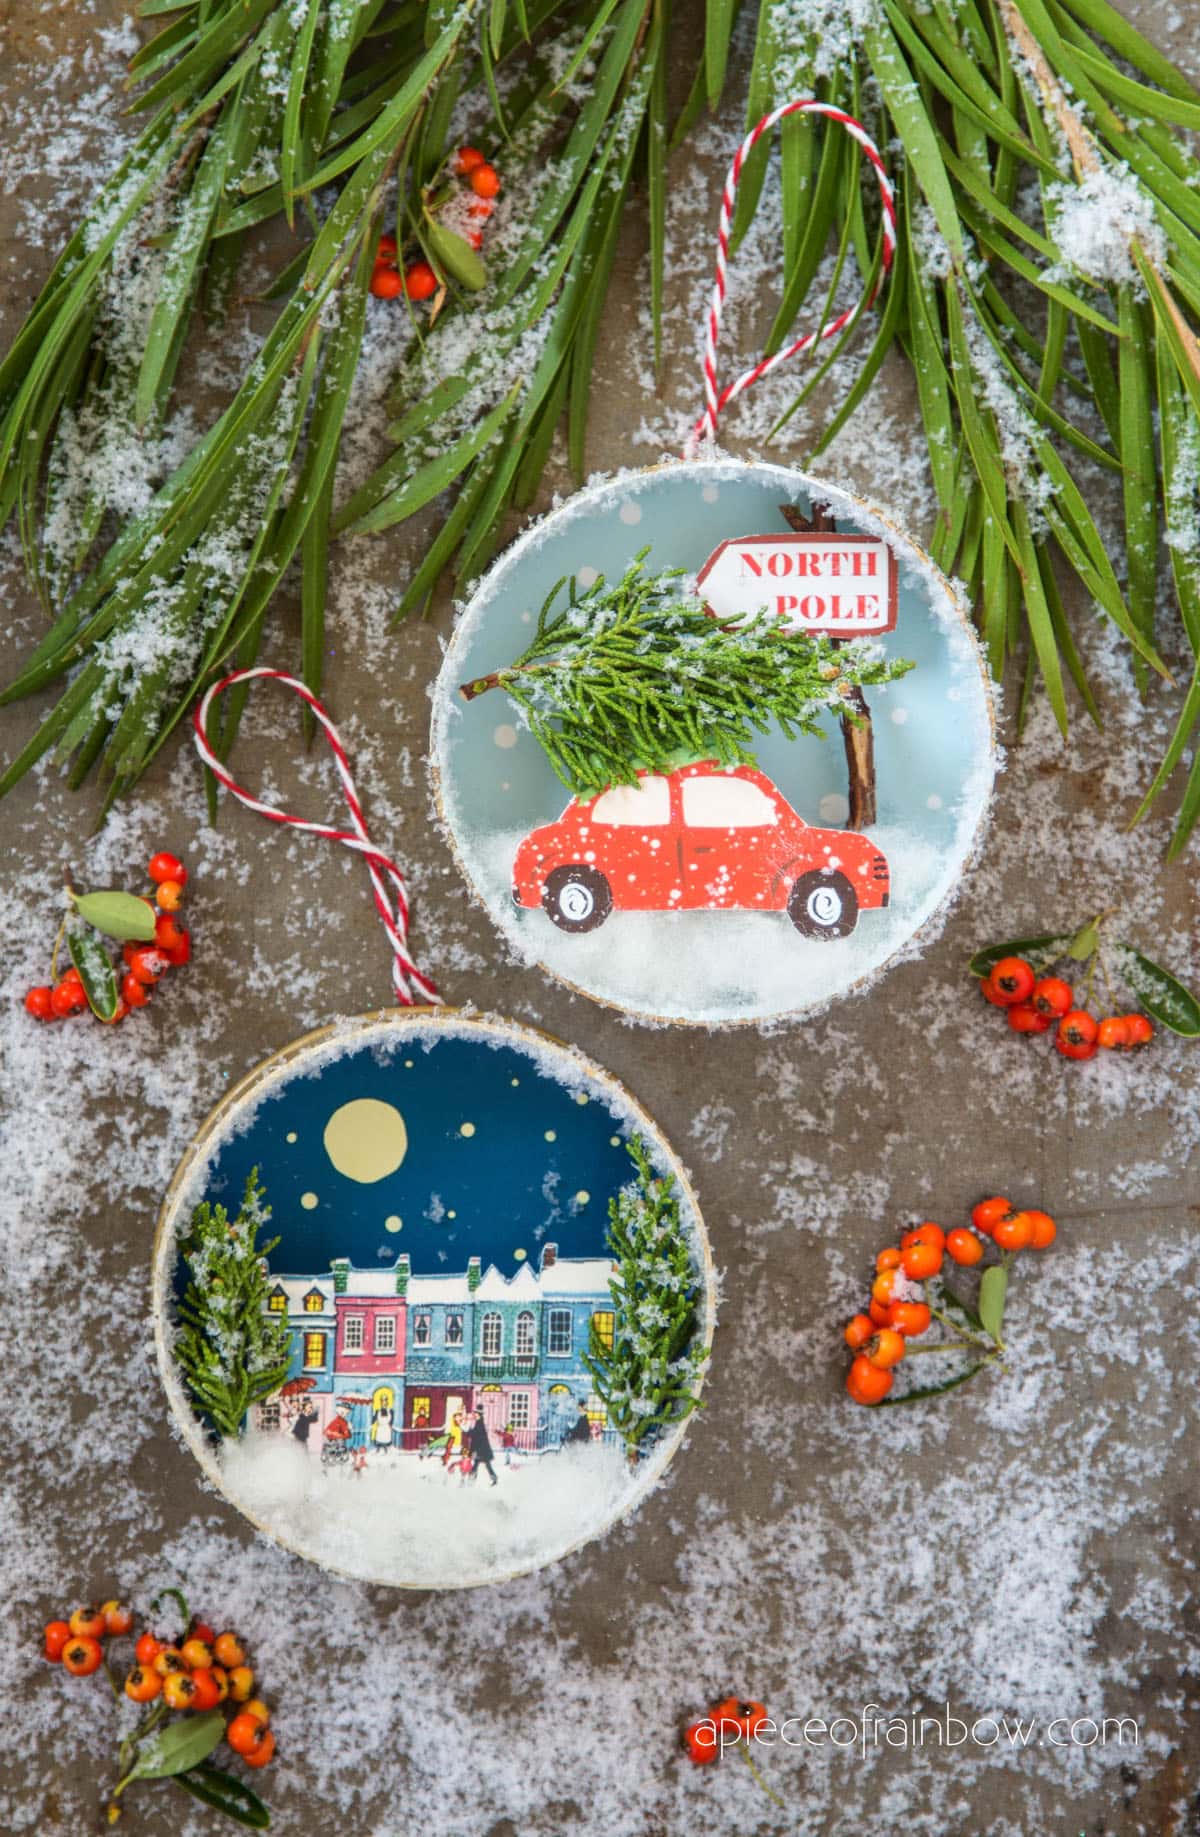
You can create a whole magical world inside a little can saved from the recycle bin! Imagine a red car with Christmas tree on top, coming home from Santa’s North Pole. How about a winter wonderland of little houses and Christmas villages under a sky full of stars?
This is my first time making Christmas tree ornaments from recycled cans. I am really happy with how they turned out! I will share with you all the designs and templates as free downloads so you can make your own easily. This would be a really fun Christmas craft idea for kids as well!
*Some resources in article are affiliate links. Full disclosure here.
Check out the video tutorial or skip to written tutorial below:
Materials and tools to make winter village & red car Christmas tree ornaments
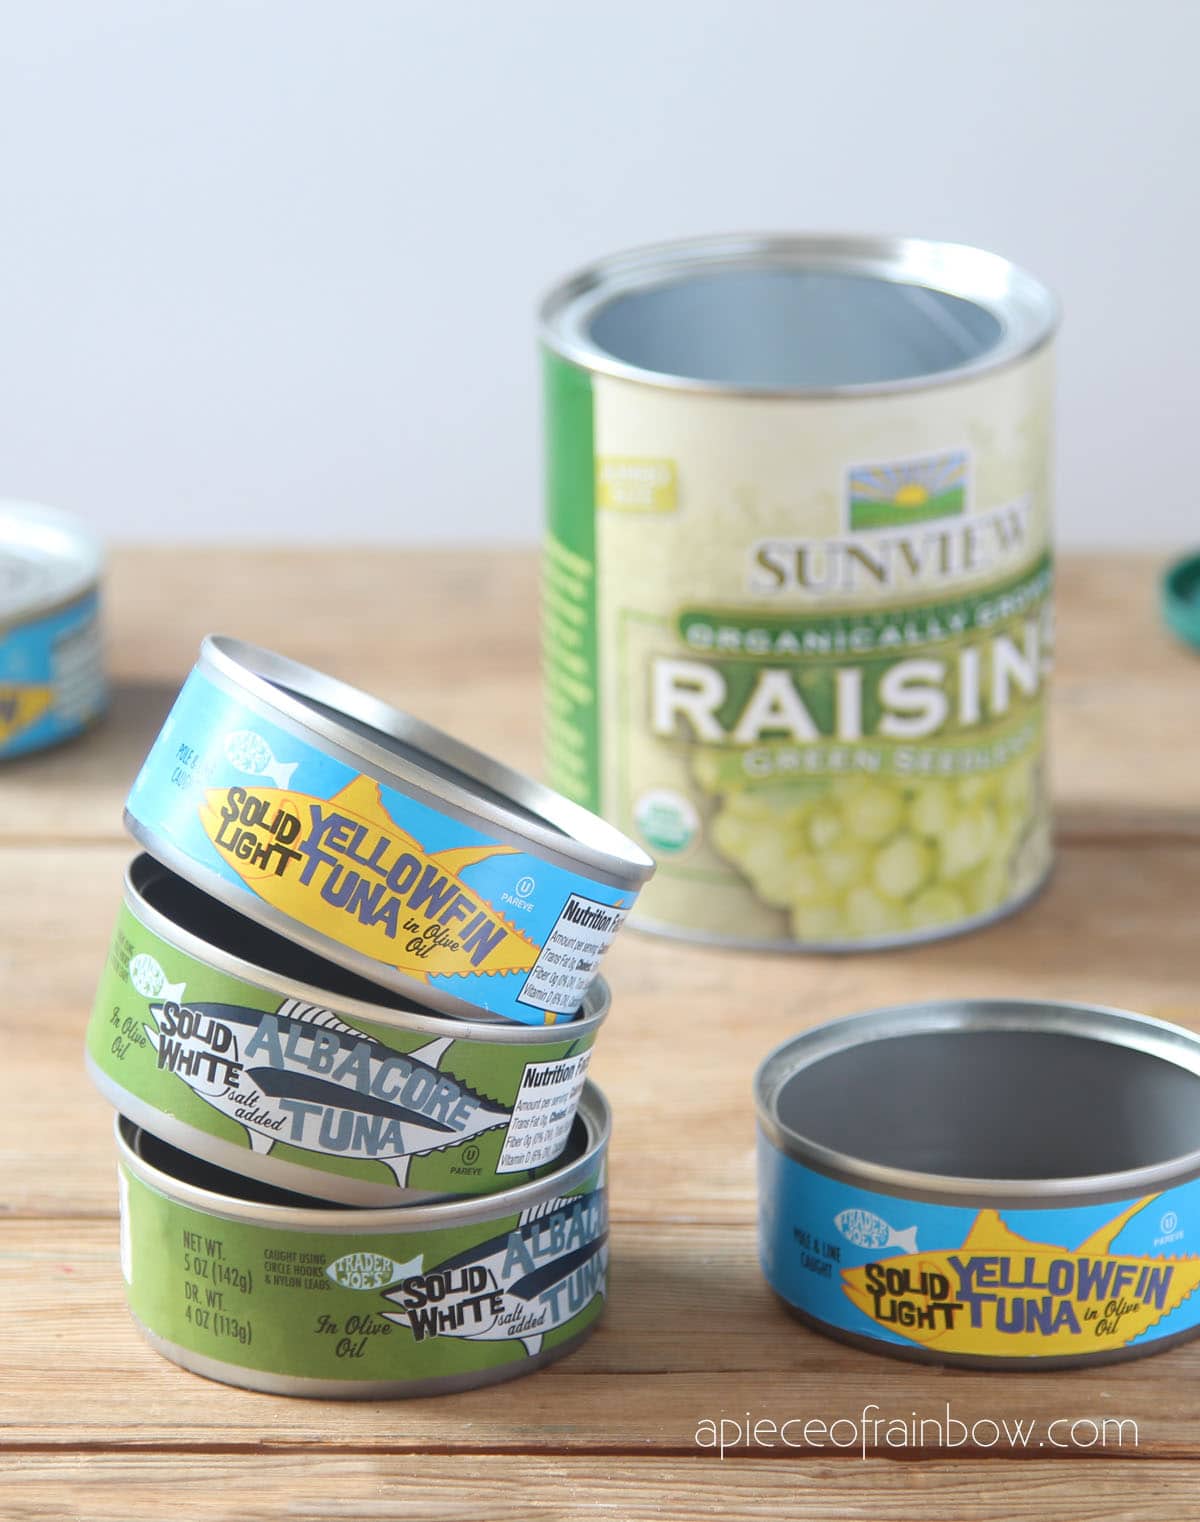
- Tuna cans (sand the sharp edges first!) , raisin cans, small tins, or similar. Optional: gold spray paint to paint the cans.
- Glue or Mod Podge to add sparkling glitter or faux snow to the cans. Hot glue gun and glue sticks.
- Card stock to print the free designs:here’s my go-to card stock for many projects.
Step 1: prepare cans and print free templates & designs

If you are already one of our awesome subscribers 🙂 you can find the link to our free goodies library in the weekly newsletter. If not, you can subscribe here for free and get all the creative templates and printables in the welcome email!
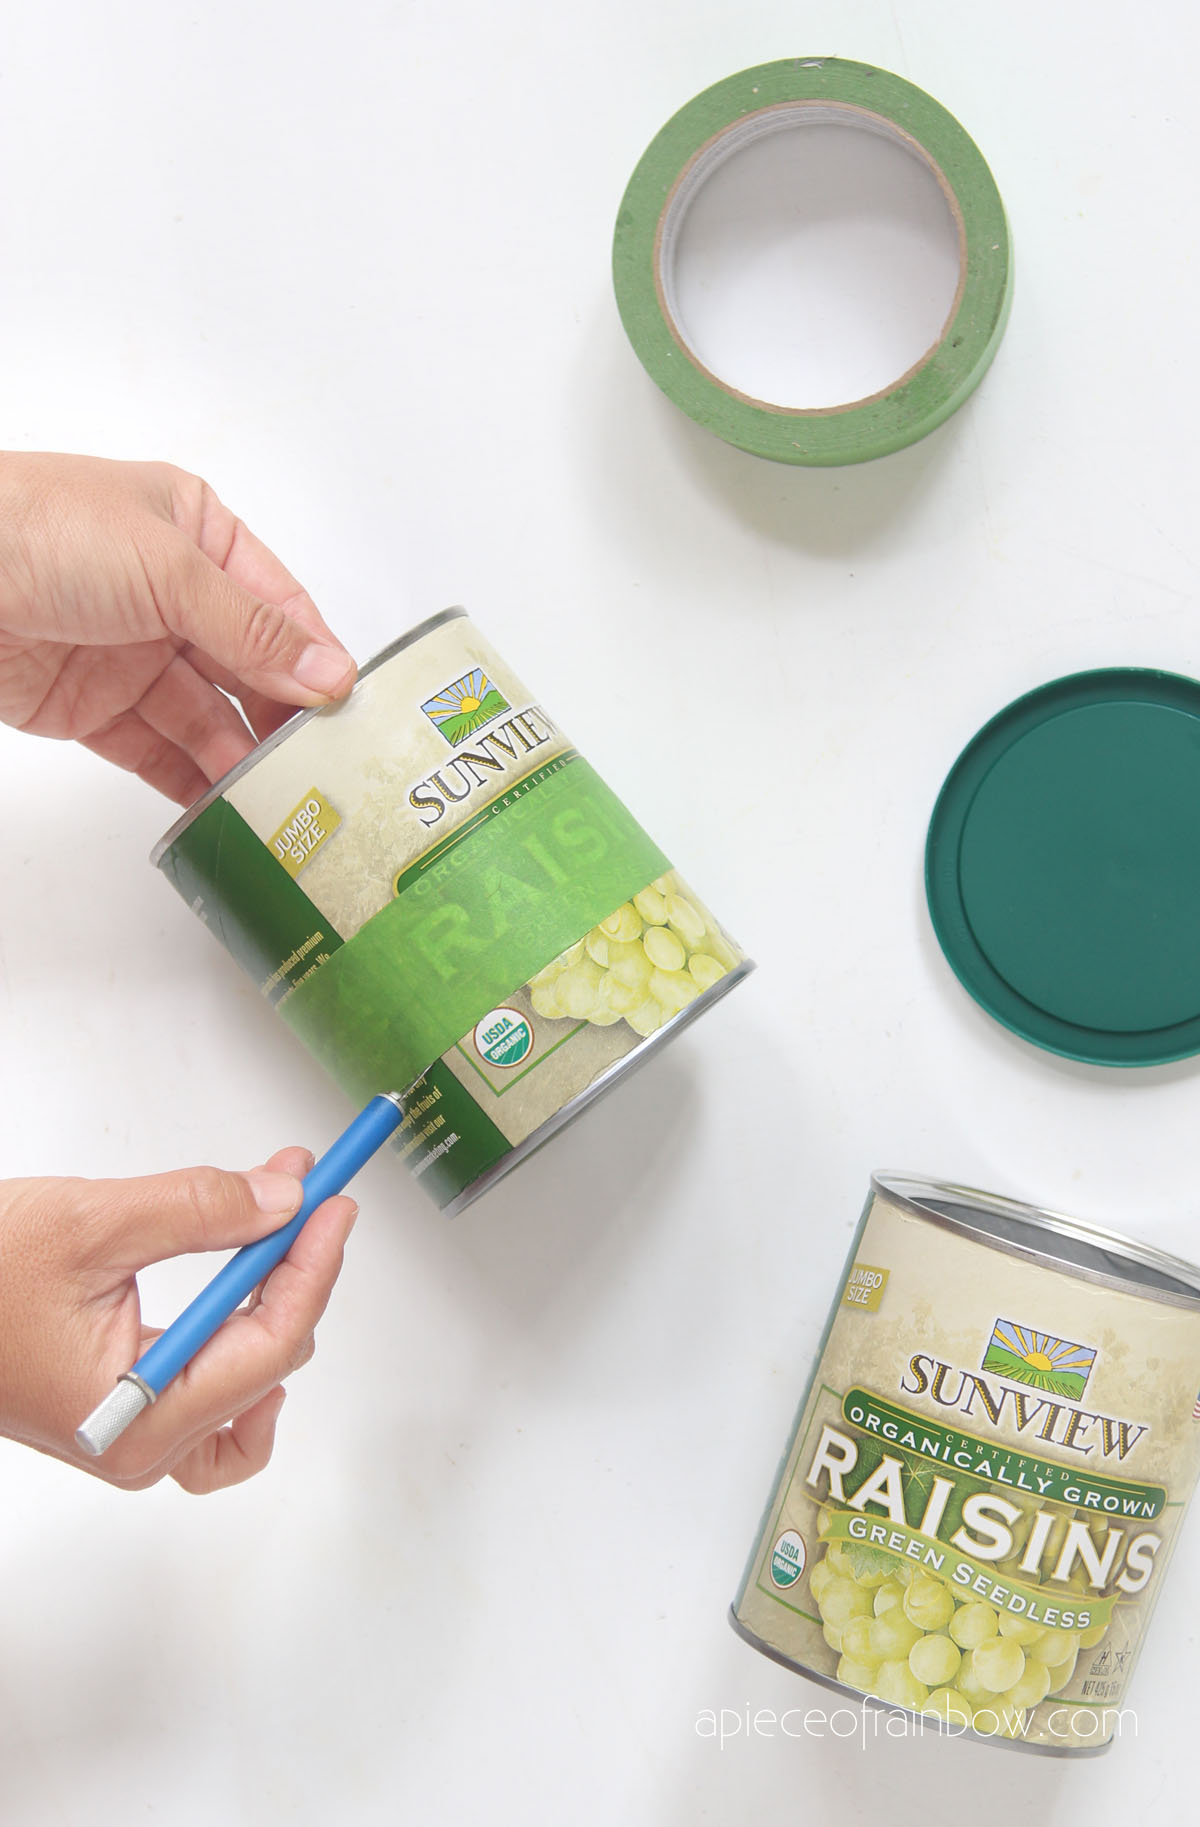
You can use tuna cans ( IMPORTANT: sand the sharp edges first!) , raisin cans, or similar: I am using raisin cans in this tutorial since they are slightly bigger (4” diameter vs 3” tuna cans) and easier to show the details.
I made the free elements and backgrounds for both 3” and 4” cans. Just look at the descriptions on each page of the pdf when you are ready to print. I used this card stock.
The raisin cans are made of cardboard and very easy to cut. Use tape to mark a depth of about 1.5”, and cut the can with a craft knife. You can make several ornaments from one raisin can. Just cut more 1.5” rings and glue cardboard circle to the bottom of each ring.

You can use glitter or spray paint to make the outside of each can look nice, or wrap them with paper or ribbon.

Cut and attach the background to the inside of each can using double sided tape or glue.
Step 2: add snow inside cans

If you are using white snow or glitter to finish the inside of the cans, you can also paint the inside with a quick base coat of white paint first.

Brush glue or Mod Podge on the inside and outer rim edges of the cans, and sprinkle artificial snow or Epsom salt to coat the surface and edges evenly. Shake off the excess on a piece of paper which you can save and reuse in future. I used this snow flurry which looks just like fresh snow!
Step 3: make winter village Christmas ornament
Now that we have our cans ready with the backgrounds, it’s time to have some more fun!
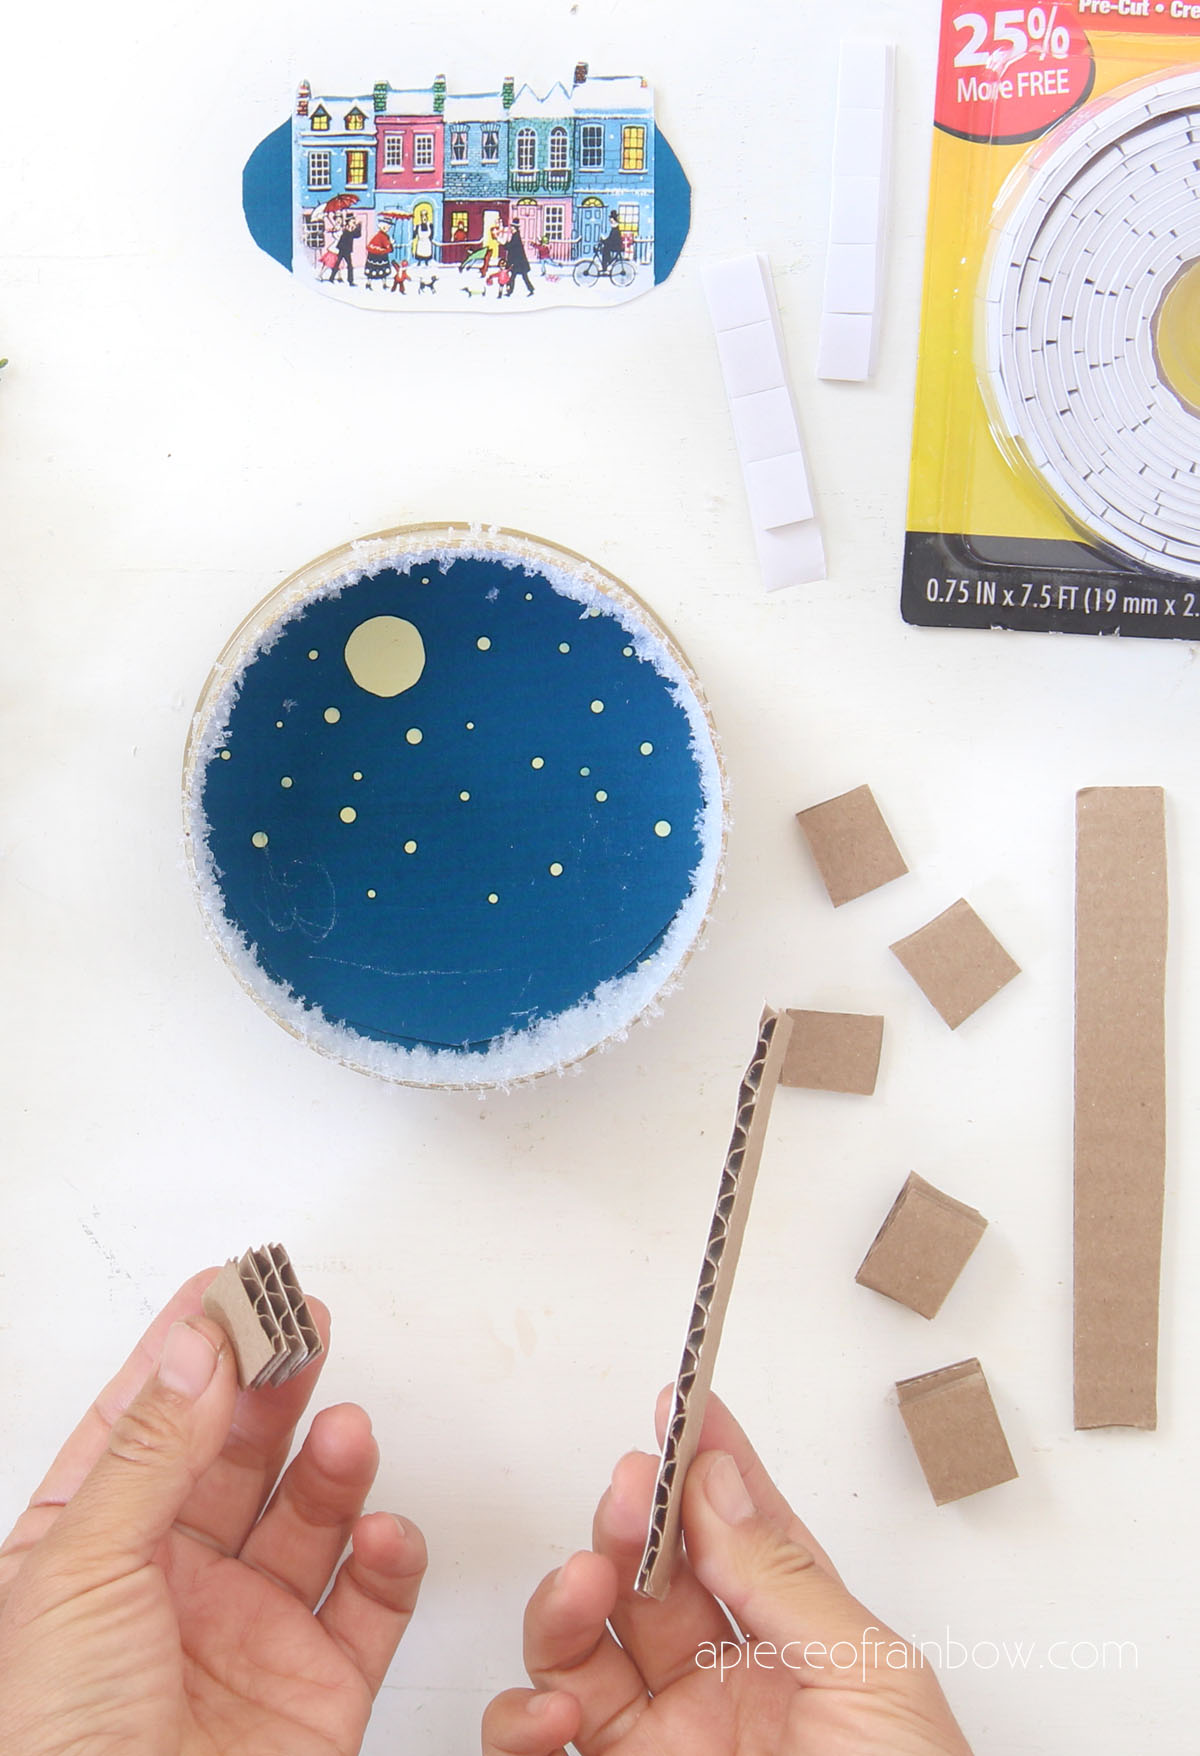
Cut out the Christmas village silhouette with some extra background color on each side.
Make 3 cardboard stacks by gluing 4 small piece of cardboard together so we can lift up the image to create depth.

Since I was experimenting with a new idea here, I used some double sided mounting tape here to attach the cardboard stacks to the background and the Christmas village cutout, so I can shift the image if I make a mistake. You can use glue, hot glue or double sided tape for this step.
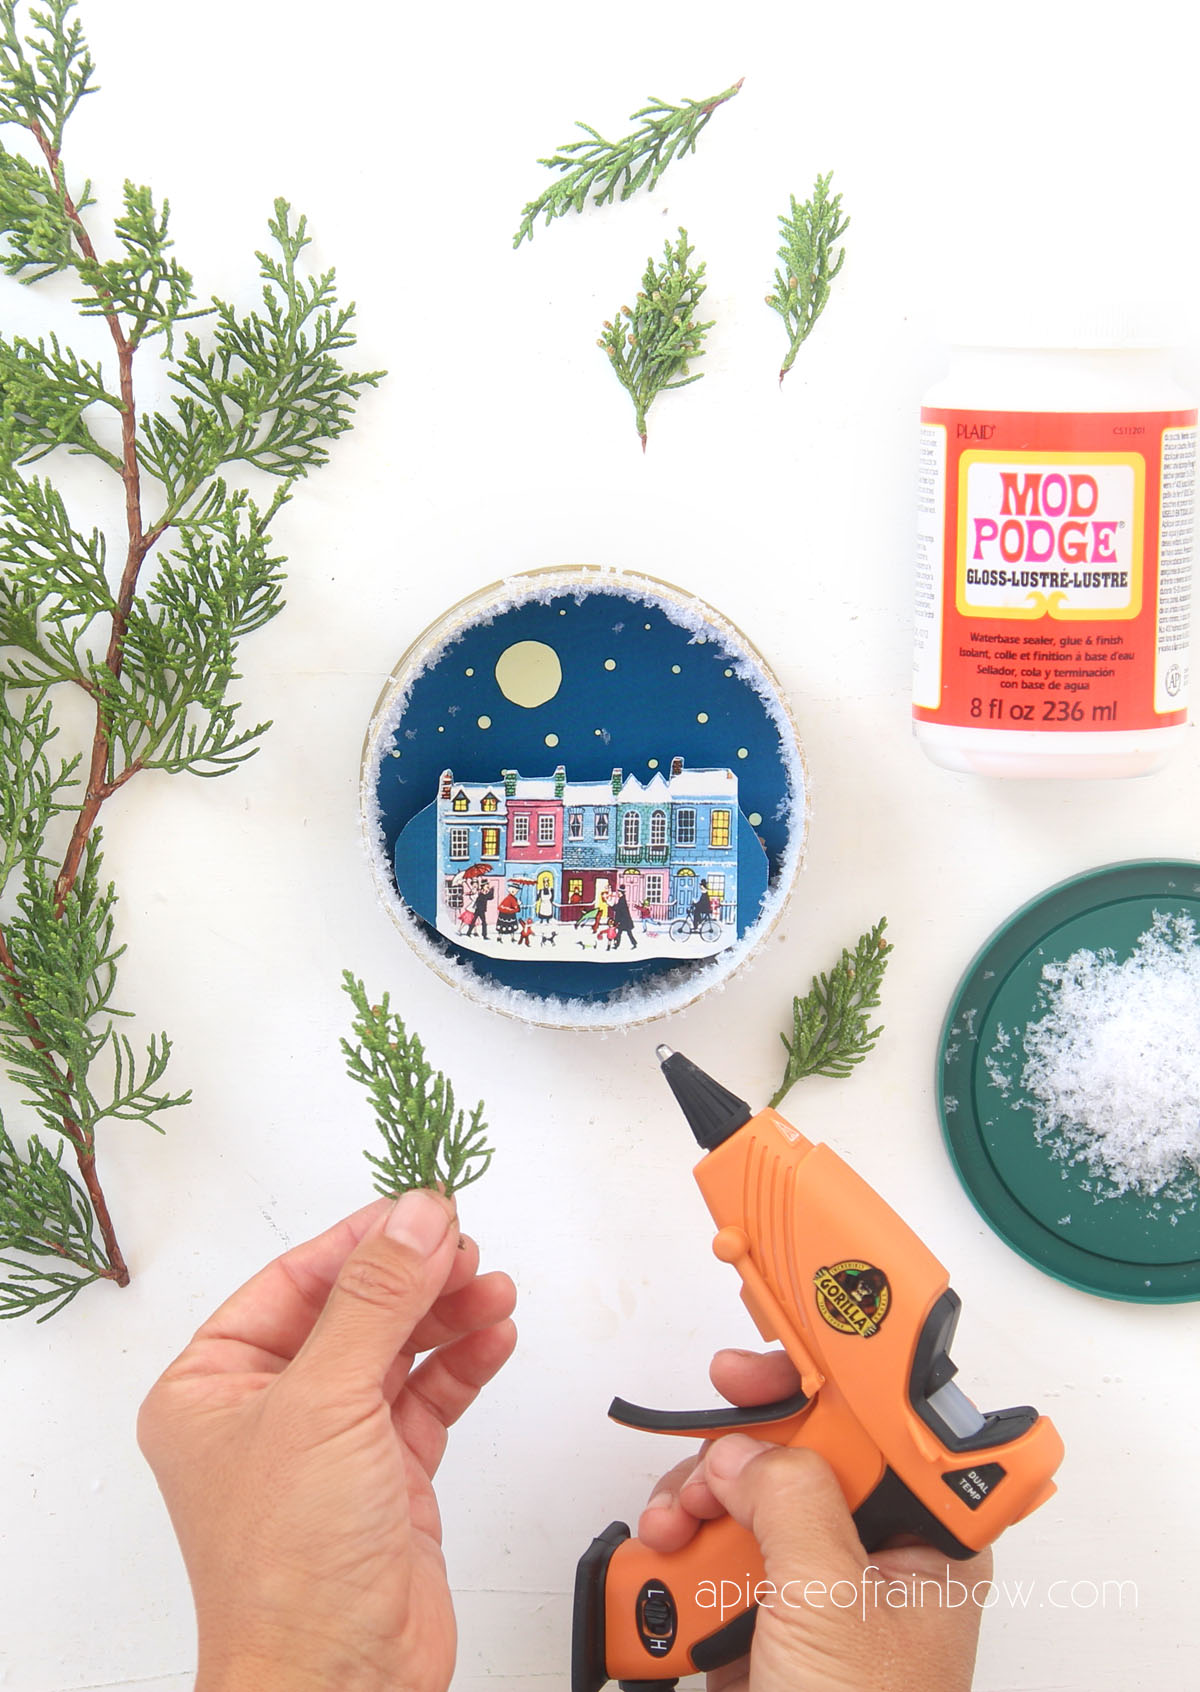
Next, use hot glue to add two mini Christmas trees on each side. Brush a little glue on each tree and sprinkle a little snow on them if you’d like. I used real cypress, but you can also use mini bottle brush trees like these.
Take a little piece of polyfill or cotton ball at the bottom to complete the winter snow scene.

Doesn’t this remind you of an enchanting Christmas village night with magical lights and everything glistening in the white snow?
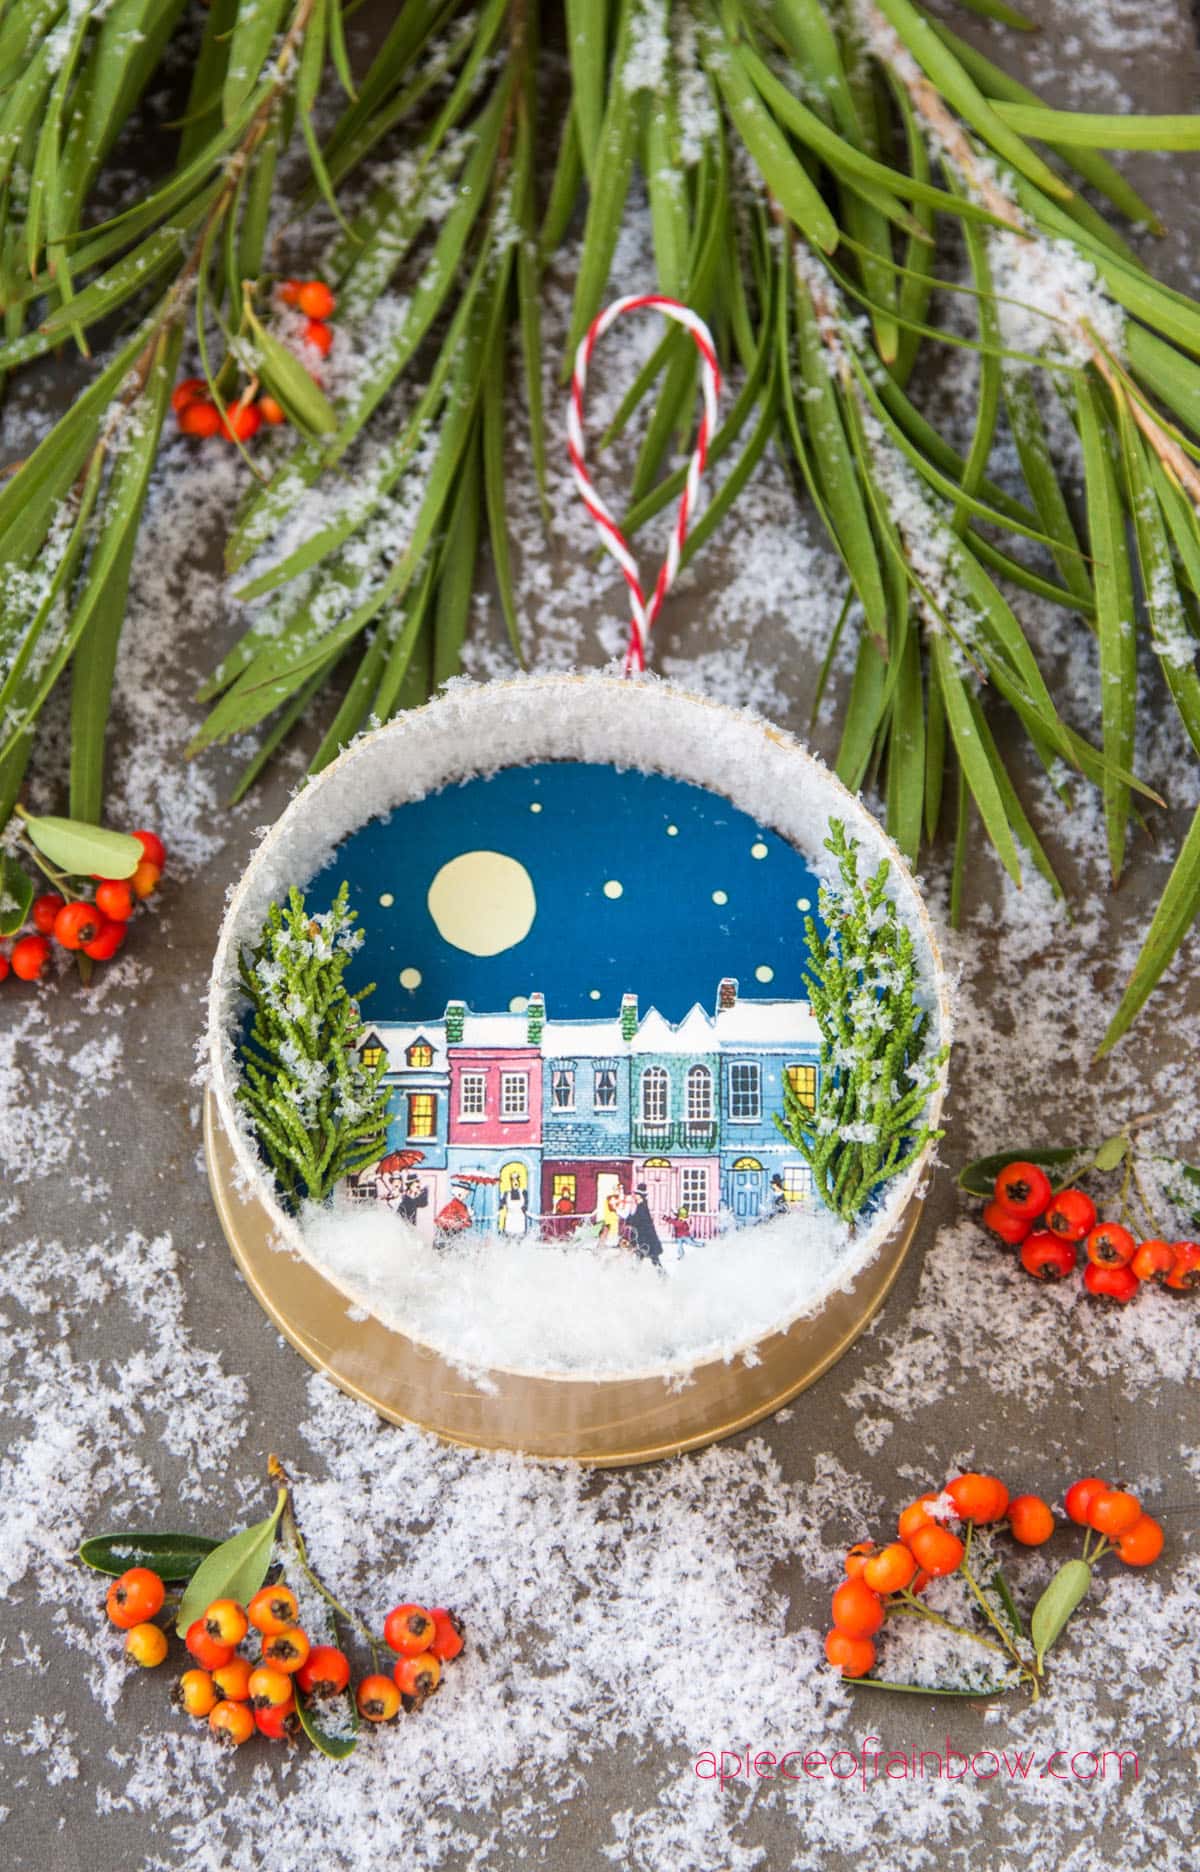
Glue a piece of ribbon or twine to complete your Christmas village ornament!
Step 4: make red car Christmas tree ornament
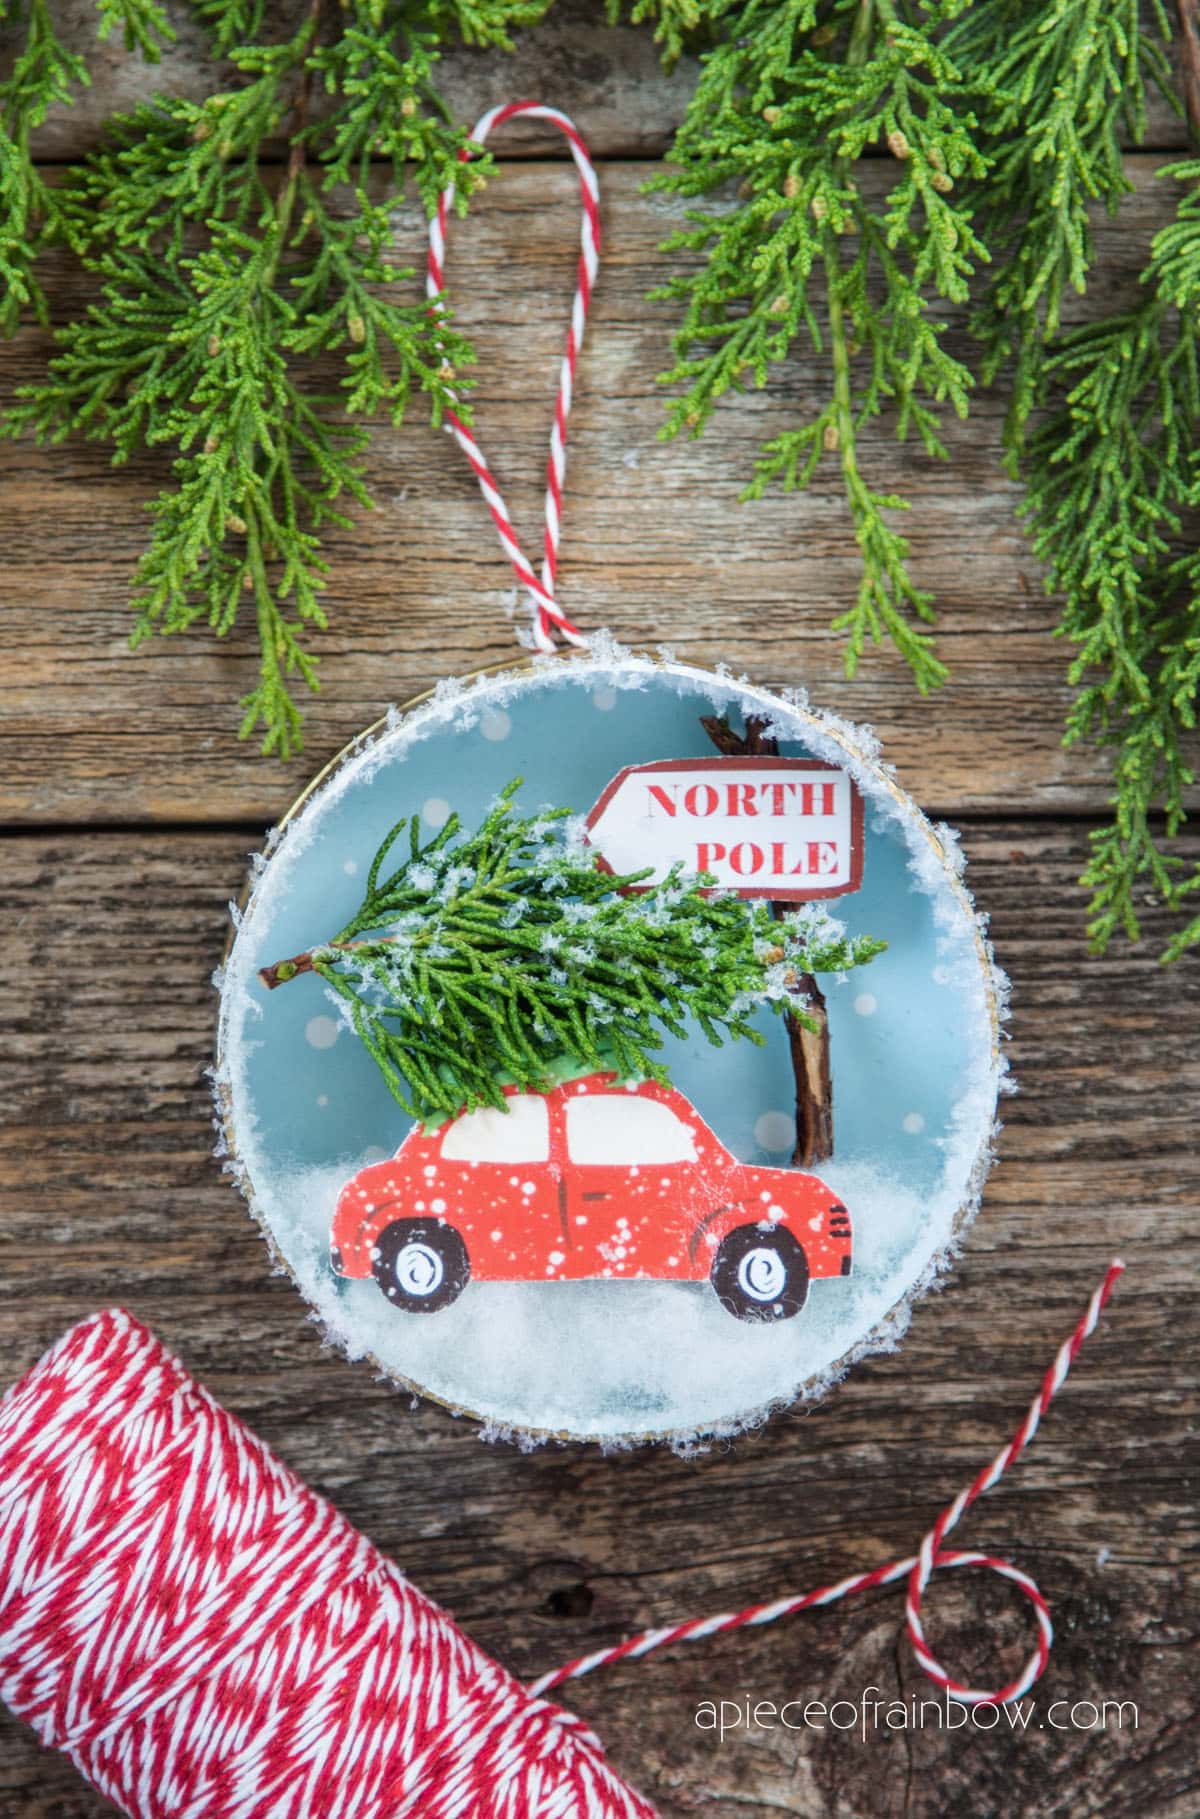
This red car Christmas tree ornament uses cardboard stacks of different thickness to create more layers and dimensions.
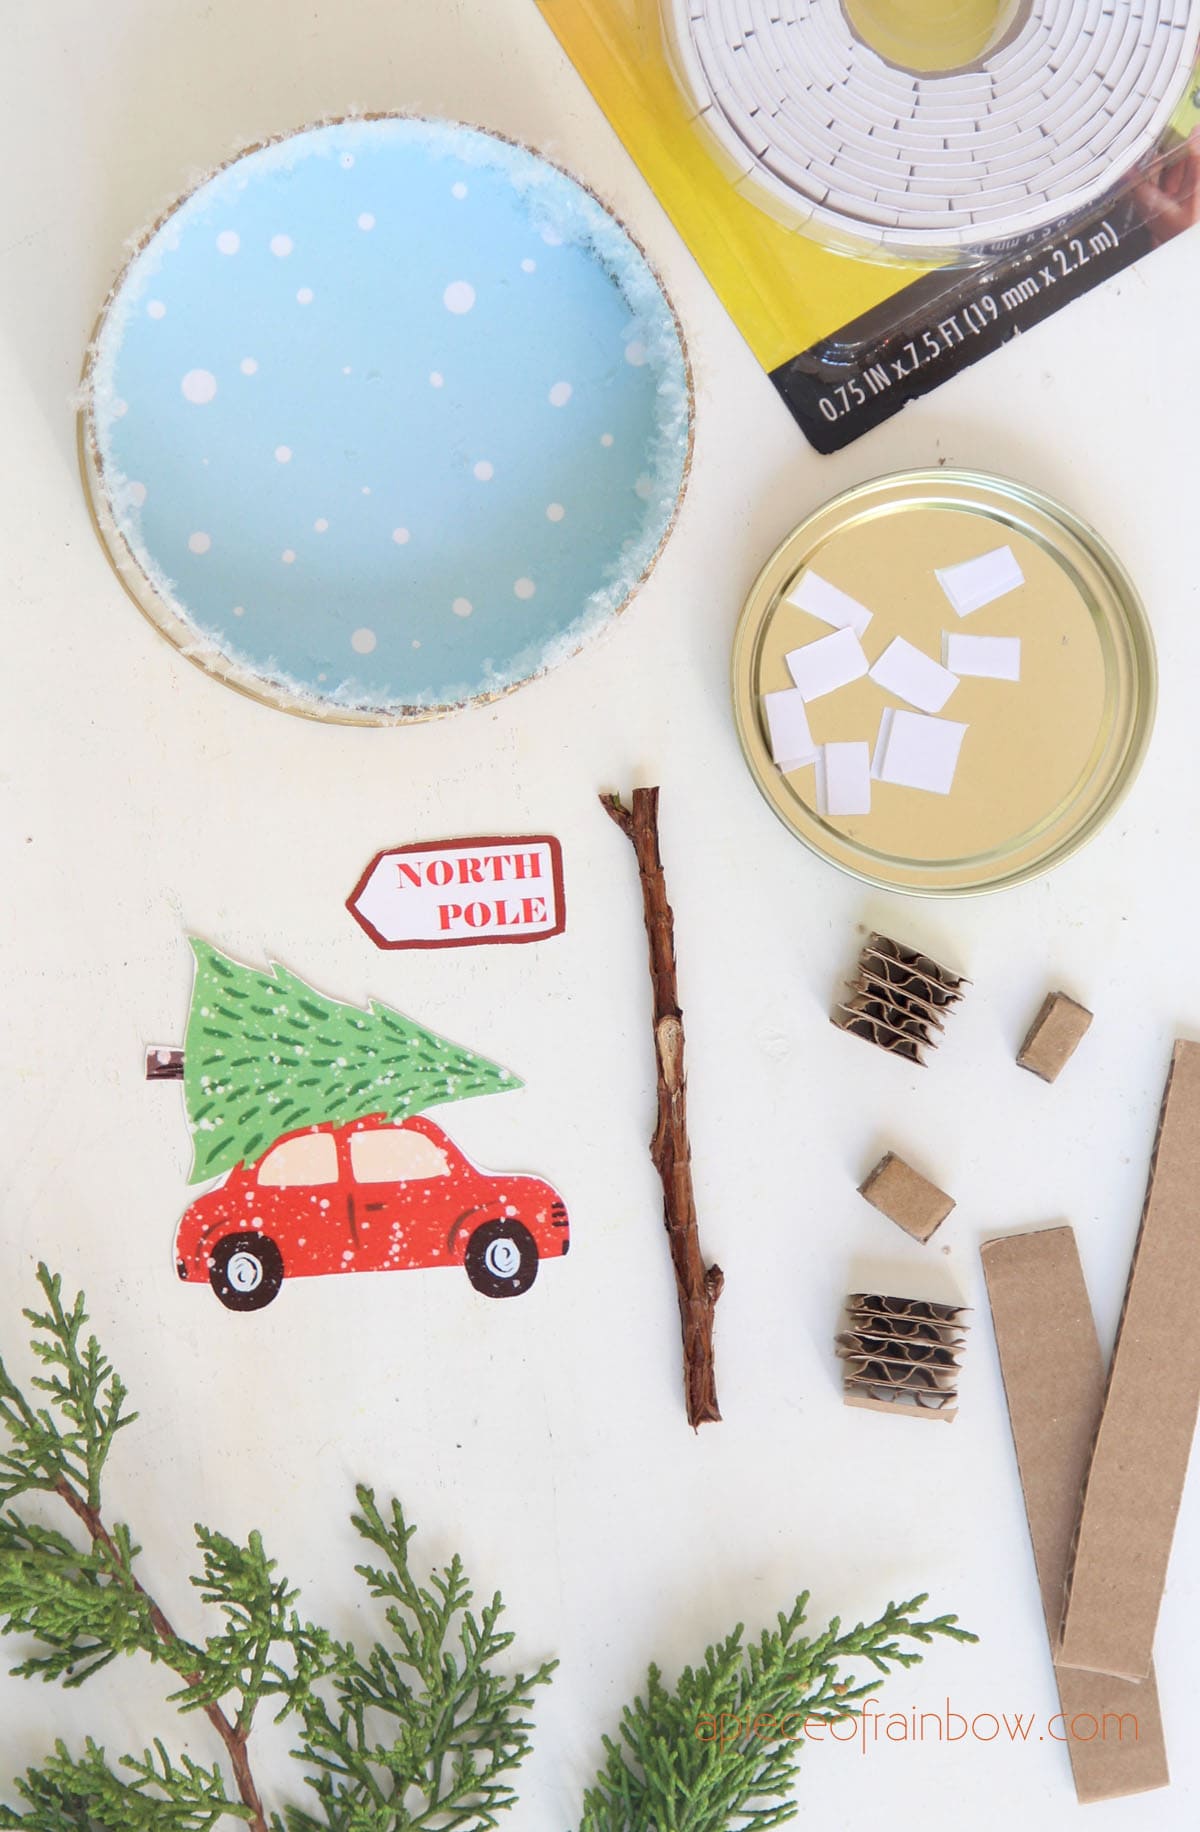
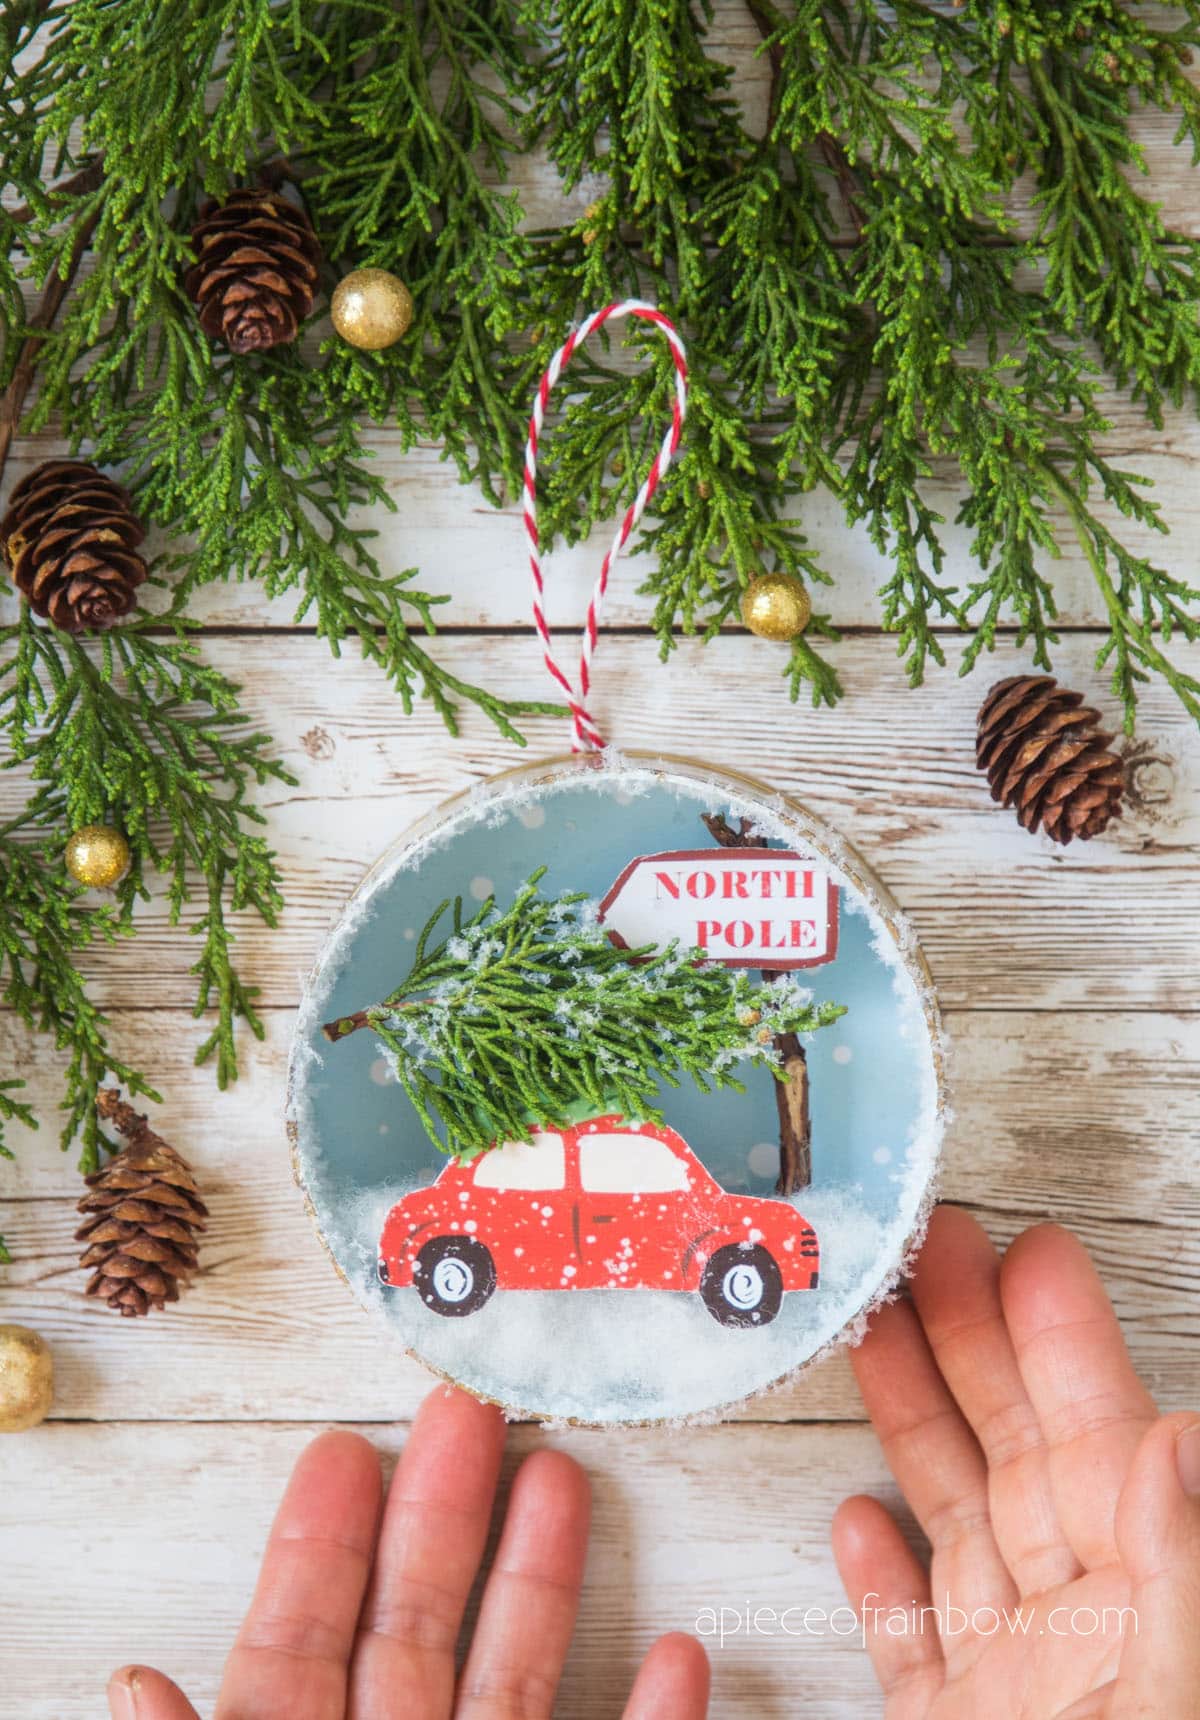
I made this drawing of a red car with Christmas tree on top, and a north pole sign which has been on my wish list forever! First, cut the North Pole sign and glue it to a little twig.
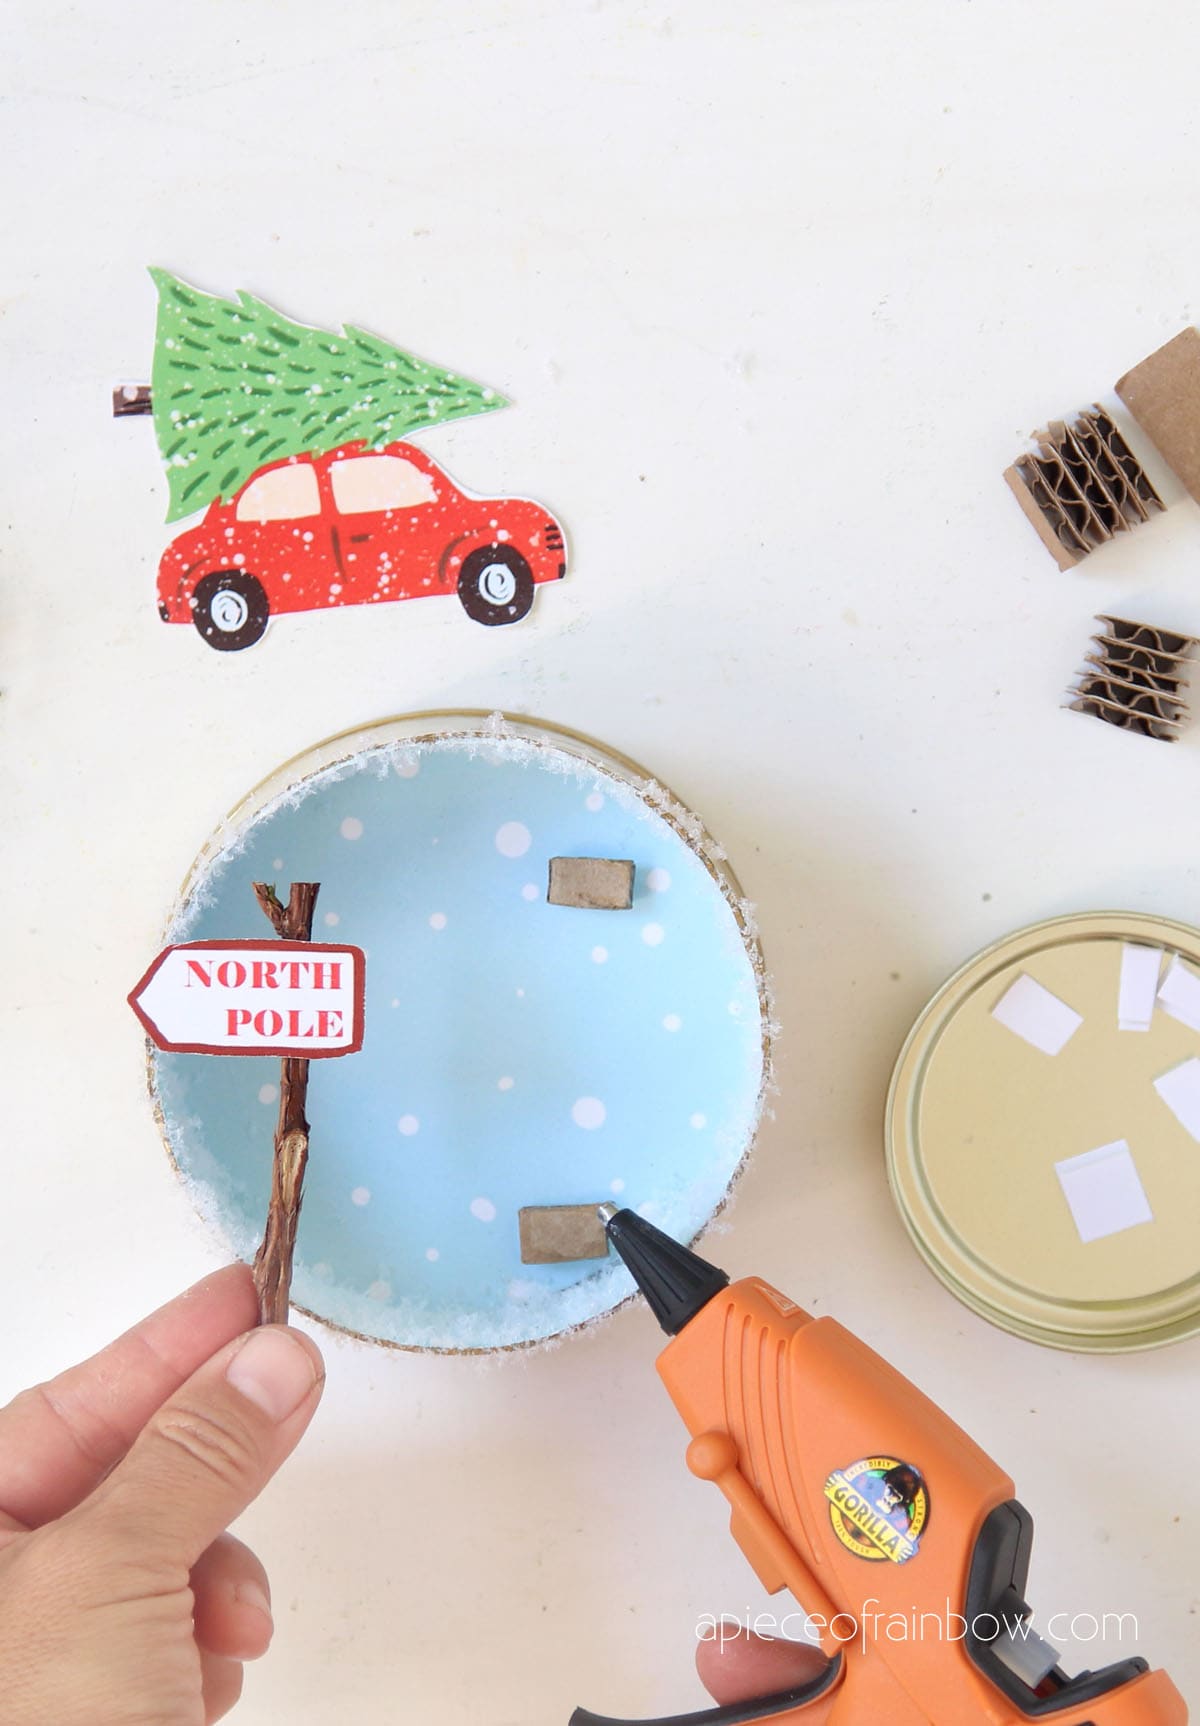
Make two shorter cardboard stacks (2 layers) and use hot glue to attach the sign to them.
Then attach the red car and Christmas tree cutout to taller cardboard stacks (4 layers )so we have different depth inside the ornament.
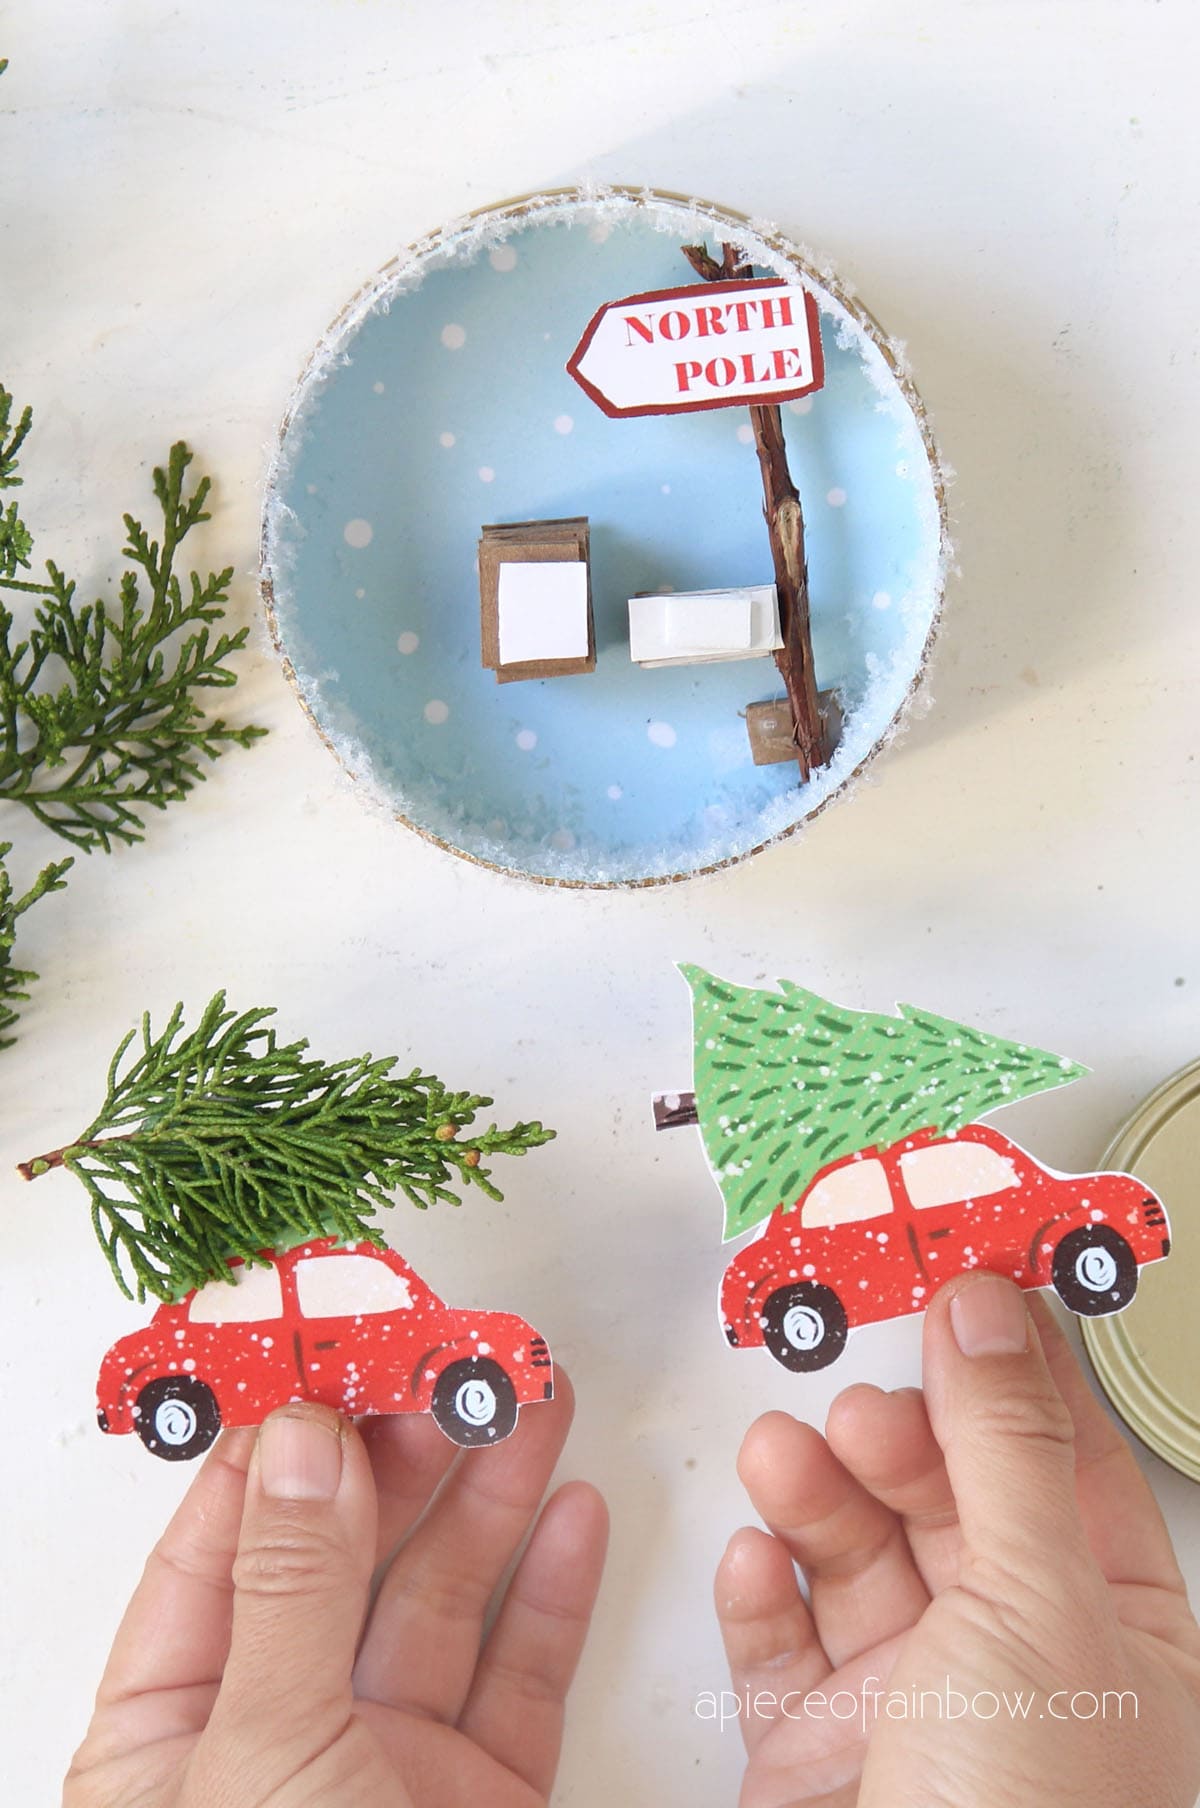
You can use the ready made image in our free templates, or hot glue a mini Christmas tree to the top of the red car to cover the paper tree.

I used a real piece of Cypress, like the one in this fun Christmas gift wrapping tutorial!
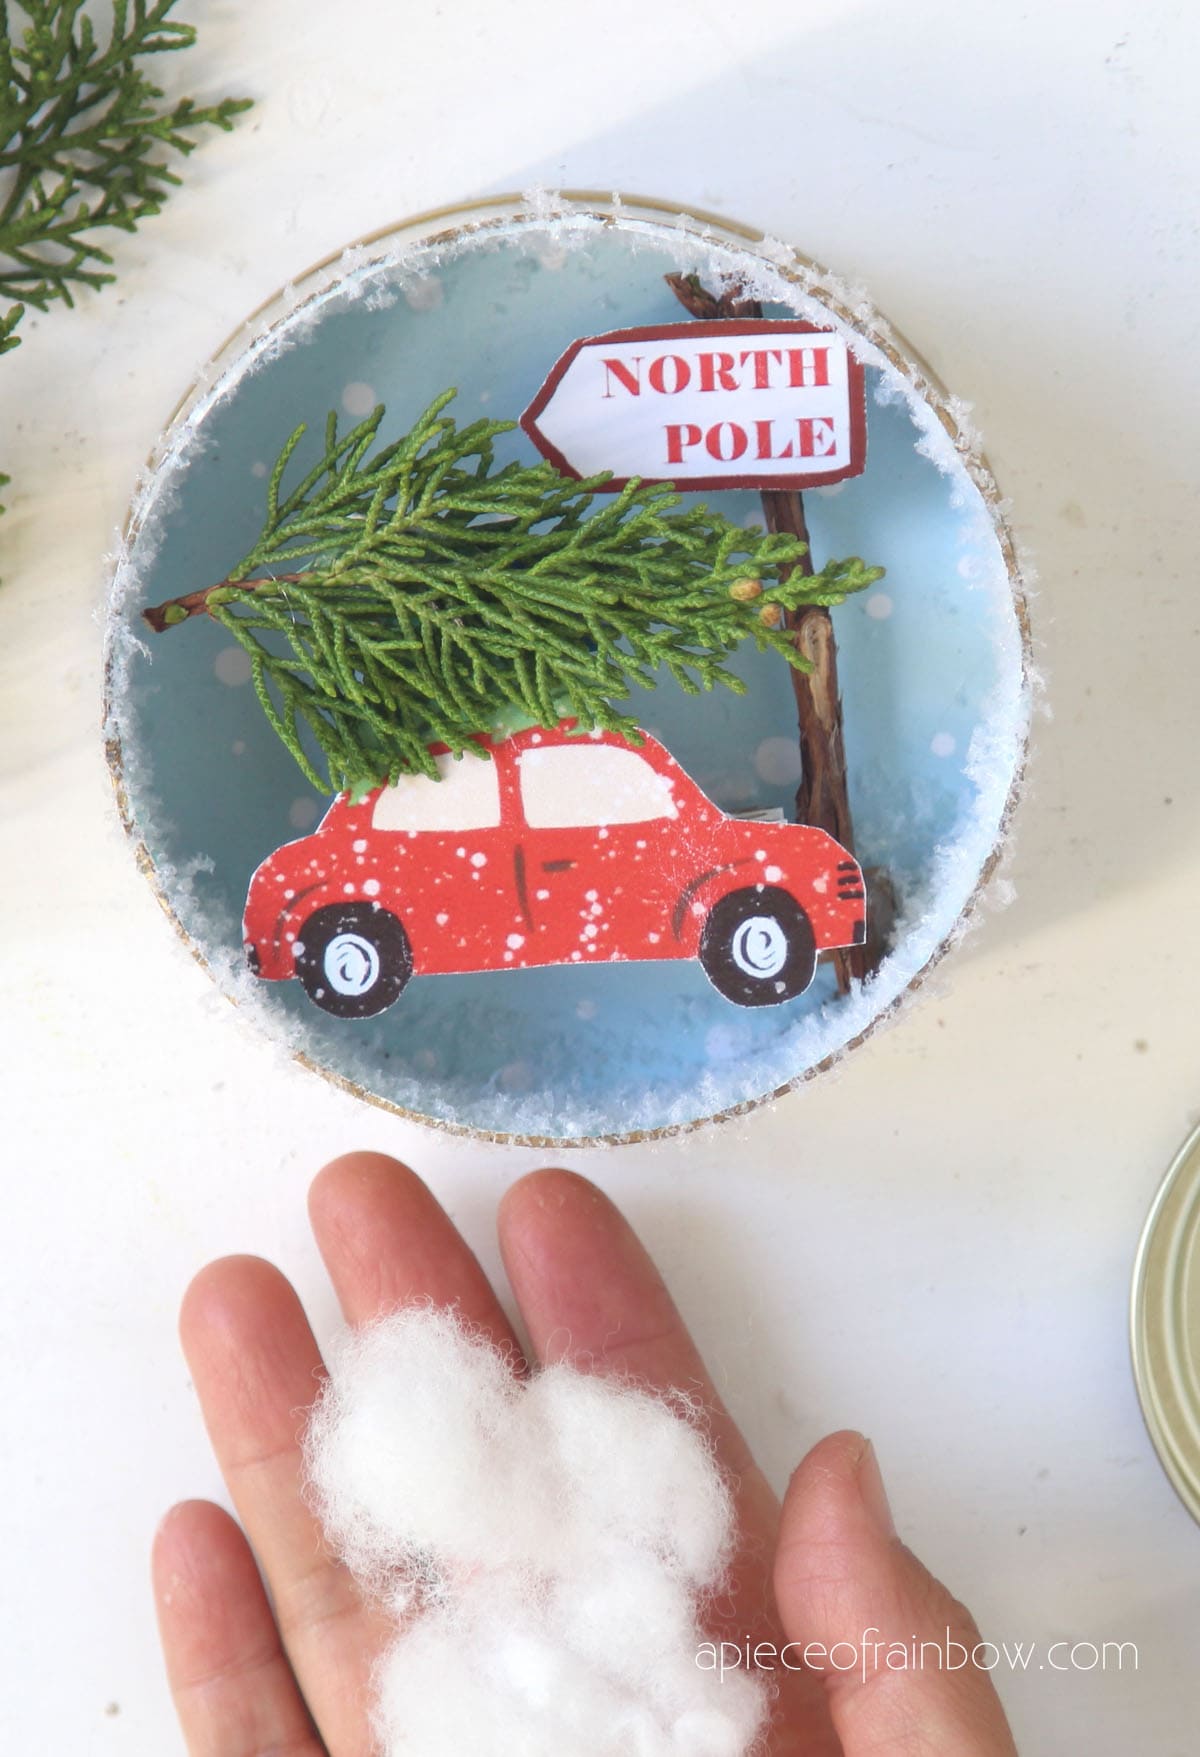
Use a little piece of polyfill or cotton ball to fill the gap at the bottom to complete our winter wonderland.
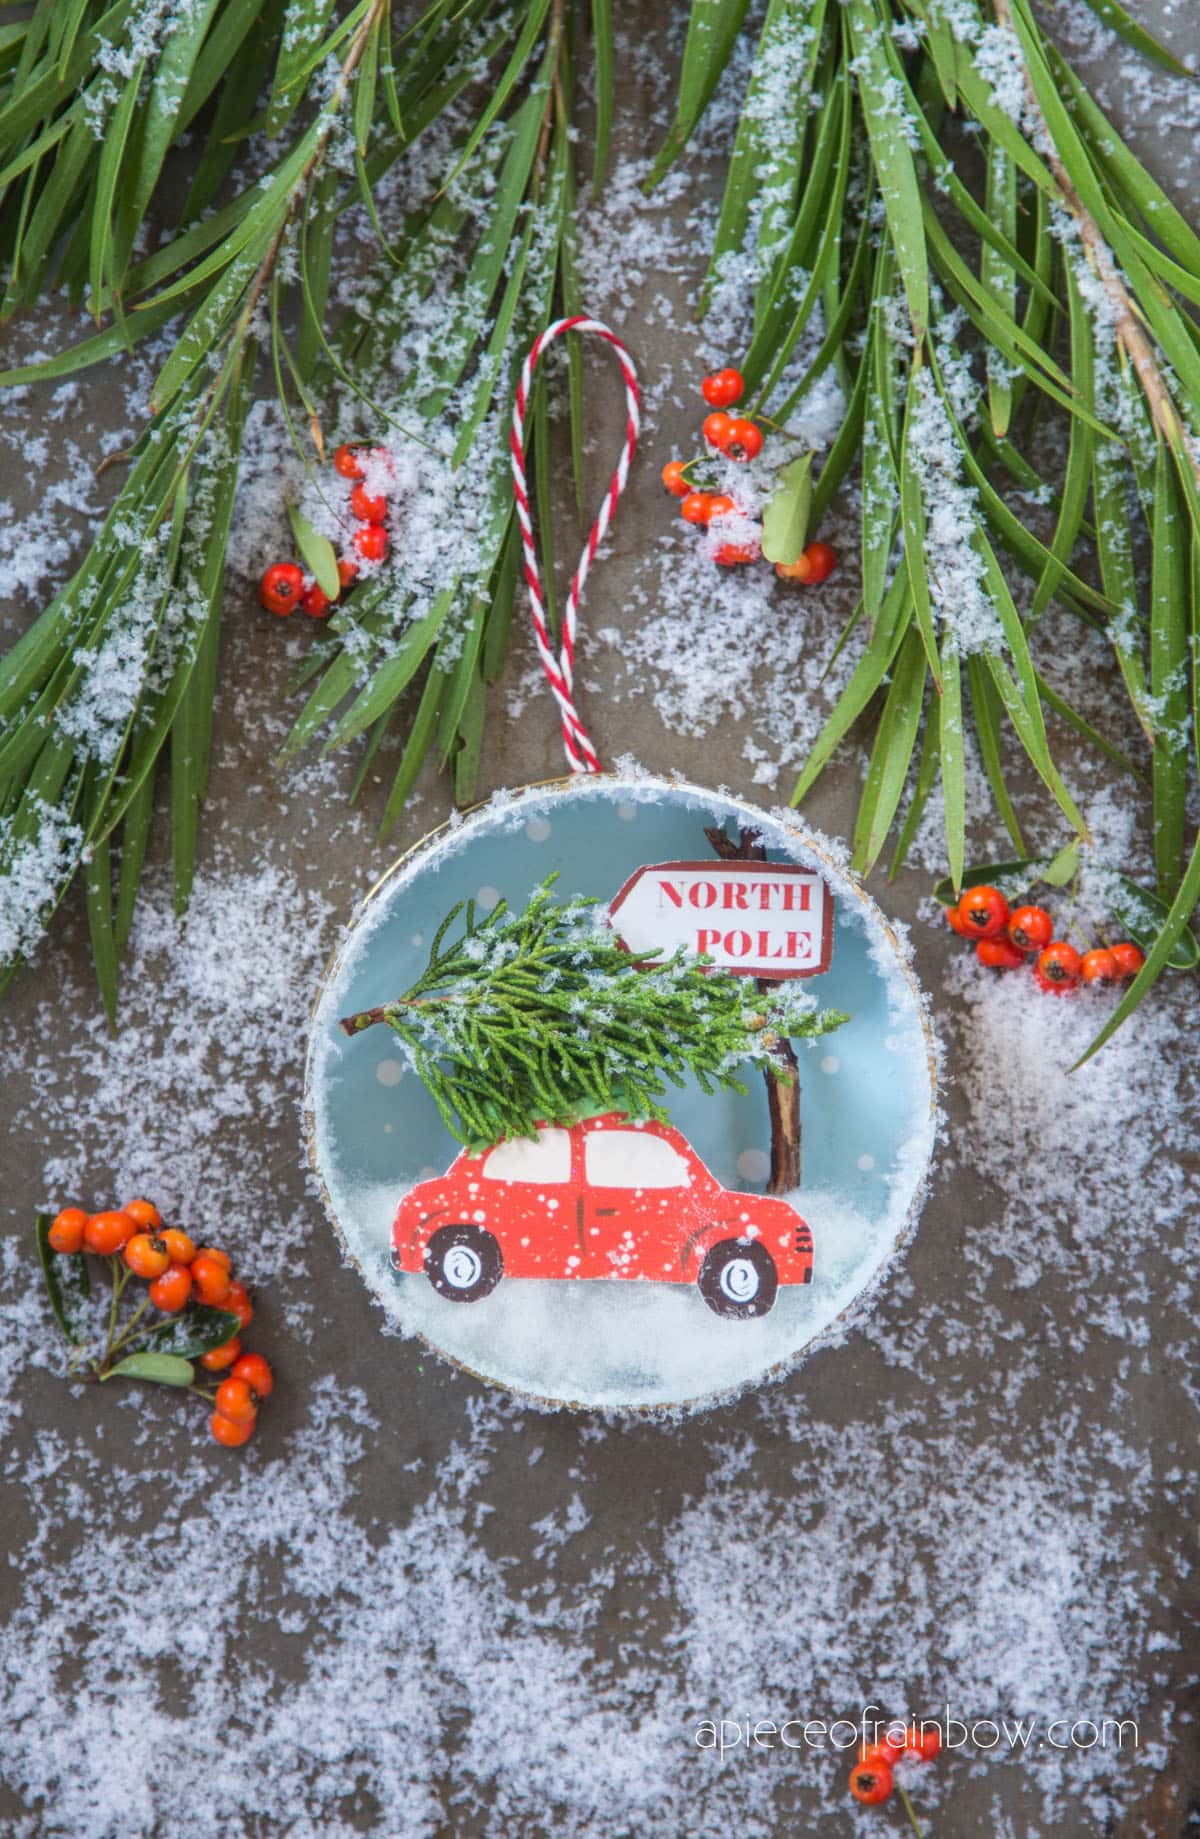
These recycled can Christmas ornaments also make wonderful magnets to decorate your fridge with. Just put a piece of small magnet on the fridge, and place the can right on top.
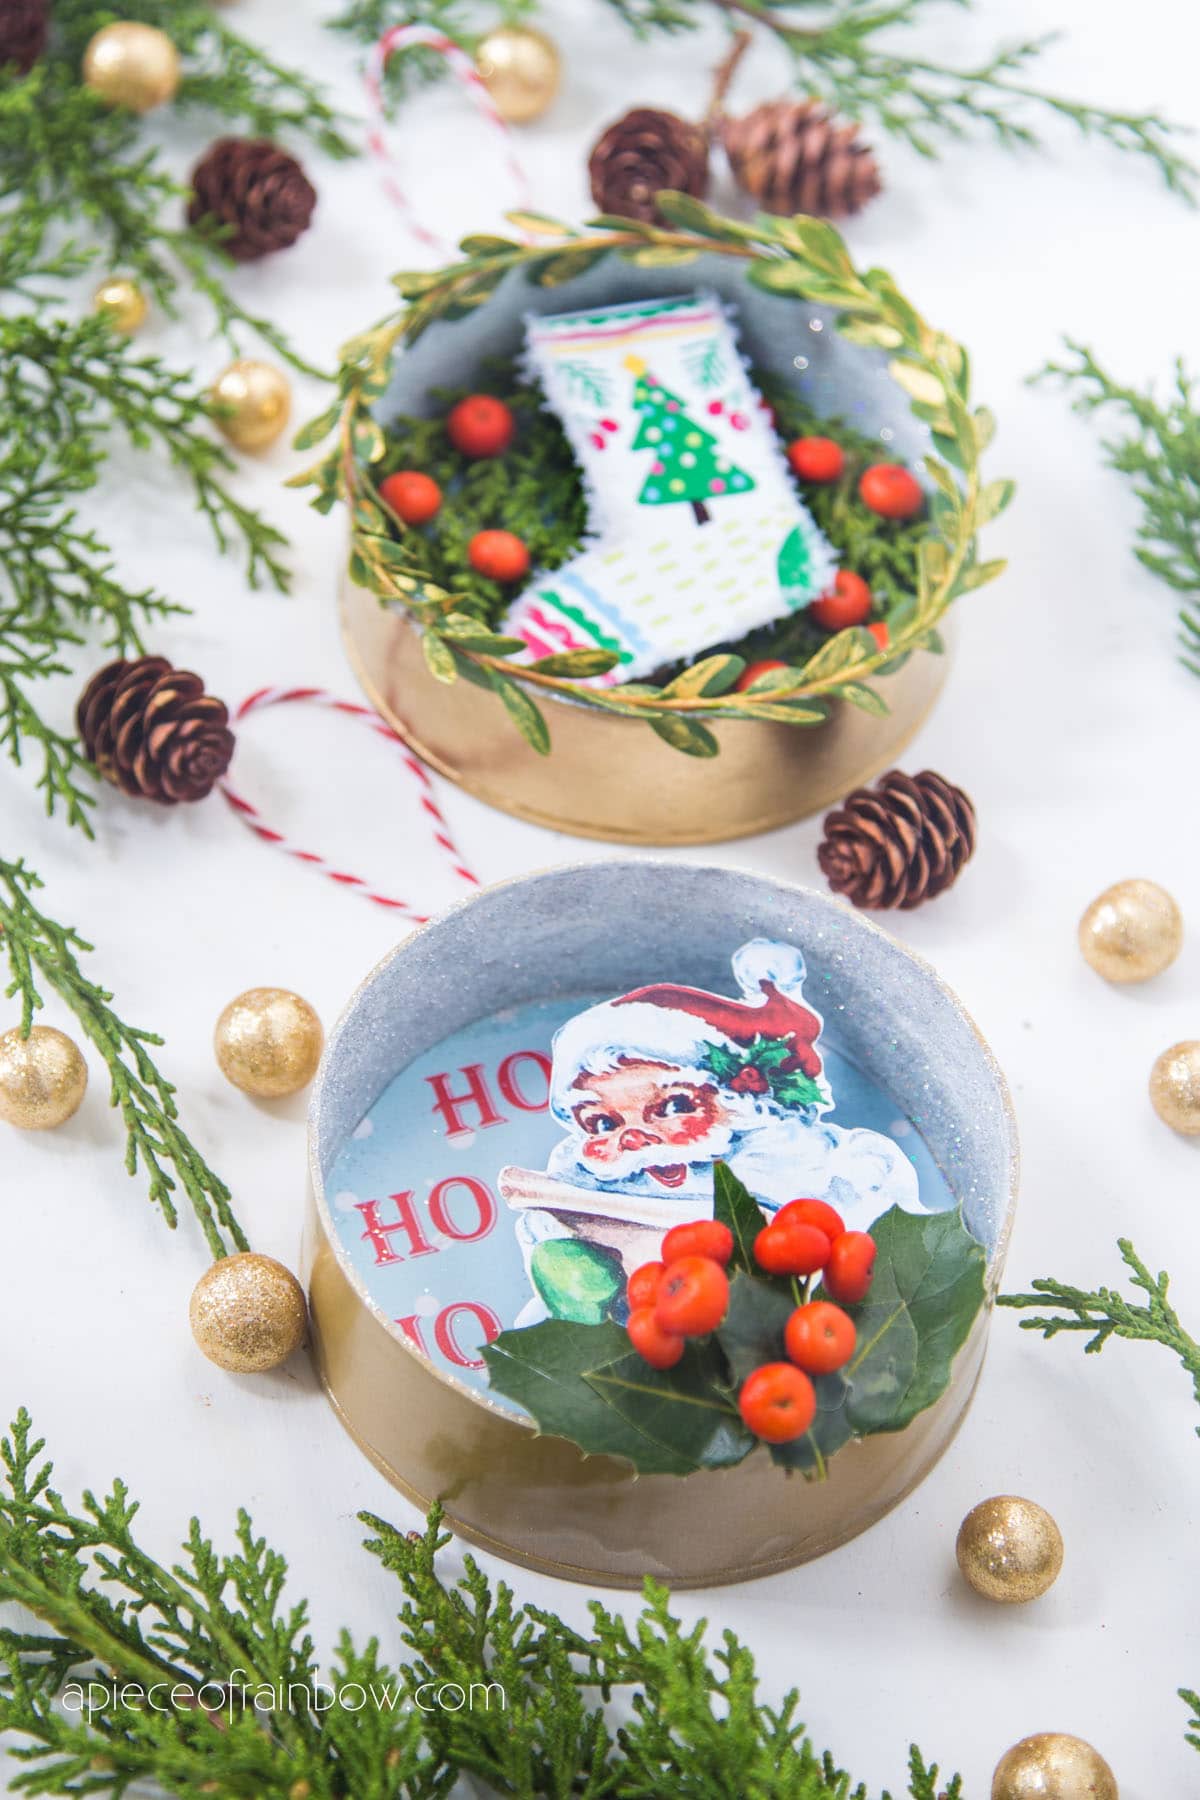
If you love this set, you will also love our DIY Santa and stockings vintage Christmas ornaments!
In case you missed the video tutorial at the beginning, here it is again!
More Christmas decorations and crafts ideas you may love:

These DIY snow frosted mason jar lights are such easy and enchanting Christmas decorations!

Easy homemade baking soda air dry clay and gorgeous ornaments you can make!
Happy creating! See you soon!


I like all of the Christmas ornaments. Brillian idea. Thank you for sharing your wonderful craft..
Deirdre
thank you Deirdre! 🙂
Wow!!! Everything is so beautiful. Great ideas. Thank you ever so much!!!!
thank you Janey for sharing the fun with us! 🙂
I made these with used tape rolls, I just glued a cardboard backing and covered the outside with a festive paper! Thanks for the inspiration!
great idea Maria!! thank you for sharing & happy holiday season! 🙂
Thank you. These will make great neighbor gifts. I love them all.
thank you Judy! happy crafting! 🙂
I keep the lids from the frozen orange juice cans. It is easy to put a hole in the top and decorate them.
so many things we can re-use! i really like your idea Wanda! 🙂
Ornaments are adorable and easy to make.
hi Joyce! yes we really liked how these turned out! 🙂