Snowy DIY Mason Jar Centerpieces {5-Minute $1 Decorations}
These enchanting snowy DIY mason jar centerpieces are one of the easiest winter and Christmas mason jar crafts ever. They are perfect for holidays and beautiful enough for winter wedding decorations.
Everyone loves mason jars, snow covered pine cones, fresh fragrant conifers, and candles. When we blend these timeless favorites together, we end up with something so beautiful and magical: these snowy DIY mason jar centerpieces that only take 5 minutes and $1 to make!
Look at these mini magical winter wonderland with sparkly snow and warm candle light. They might just become your new favorite winter crafts and Thanksgiving / Christmas decorations!
Materials and tools to make snowy DIY mason jar centerpieces:
*Some resources in article are affiliate links. Full disclosure here.
- mason jars or any recycled glass jars. The “snow” is something you already have, see step 1 for the secret! 🙂
- hemp twine or jute twine
- mod podge ( I used the original matte version) or any craft glue like Elmers glue, that dries clear
- white votive candles . These LED candles are great too. At 1.5″ diameter, they would fit inside most glass jar openings
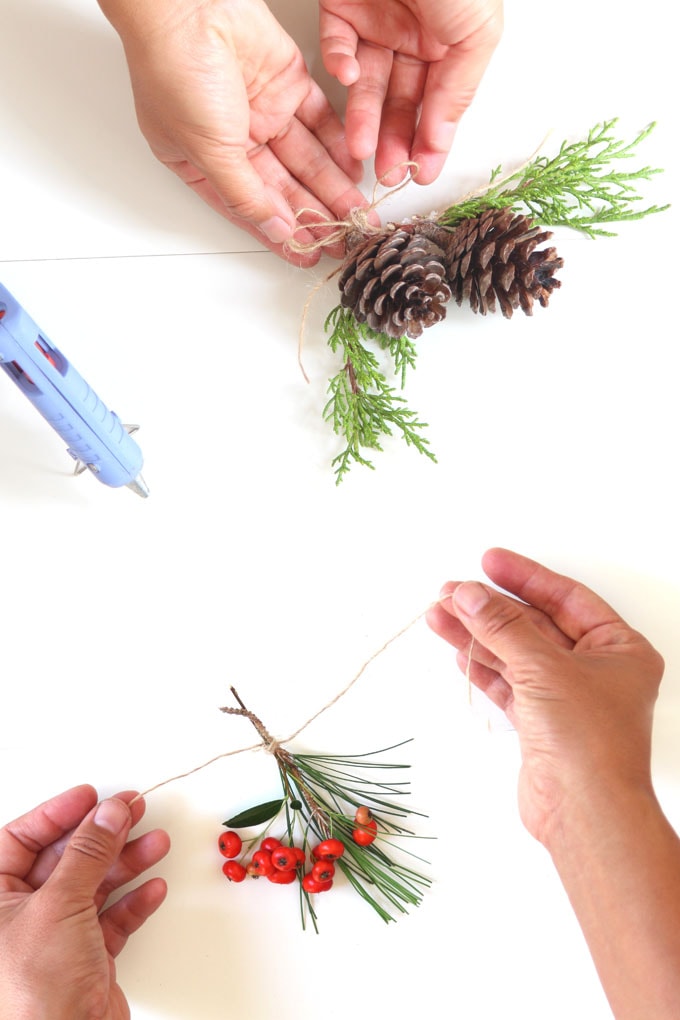
You will also need some natural or artificial elements such as pine cones, berries, and conifer cuttings. They are easy to gather on a nature walk. I made some super easy and fun DIY snow covered pine cones, branches, and berries from these cuttings, detailed tutorial here!
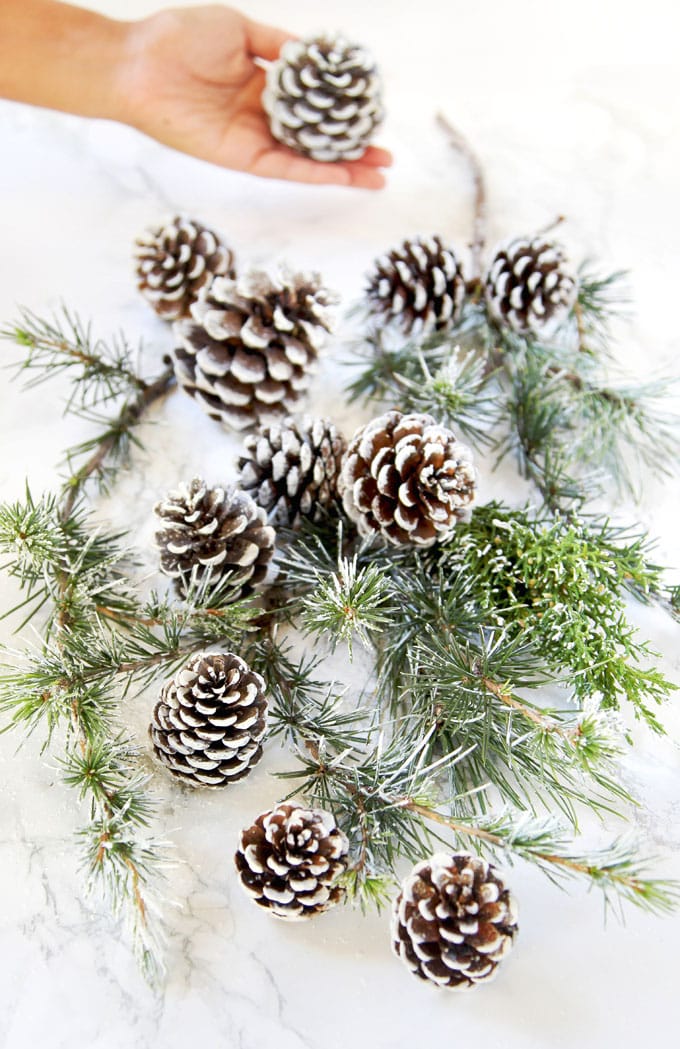
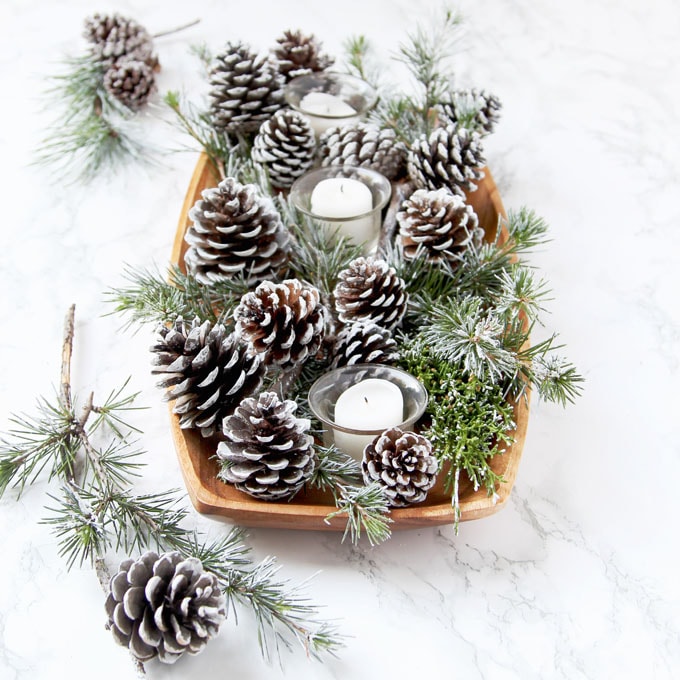
DIY snow covered pine cones and branches!
Check out the snowy DIY mason jar centerpieces video tutorial below, or skip to step by step written tutorial.
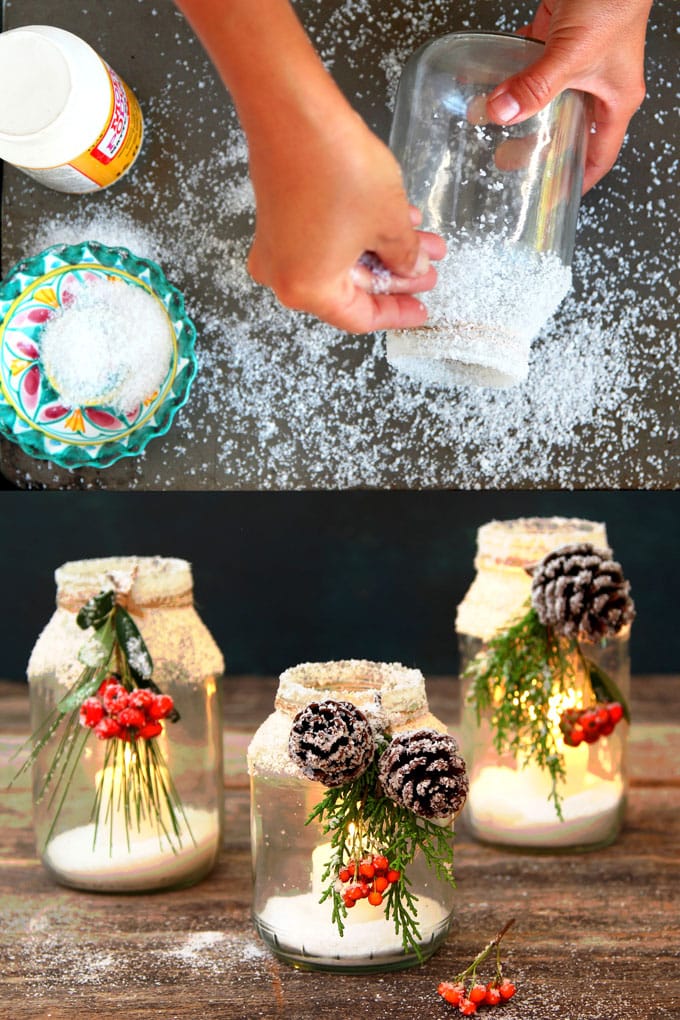
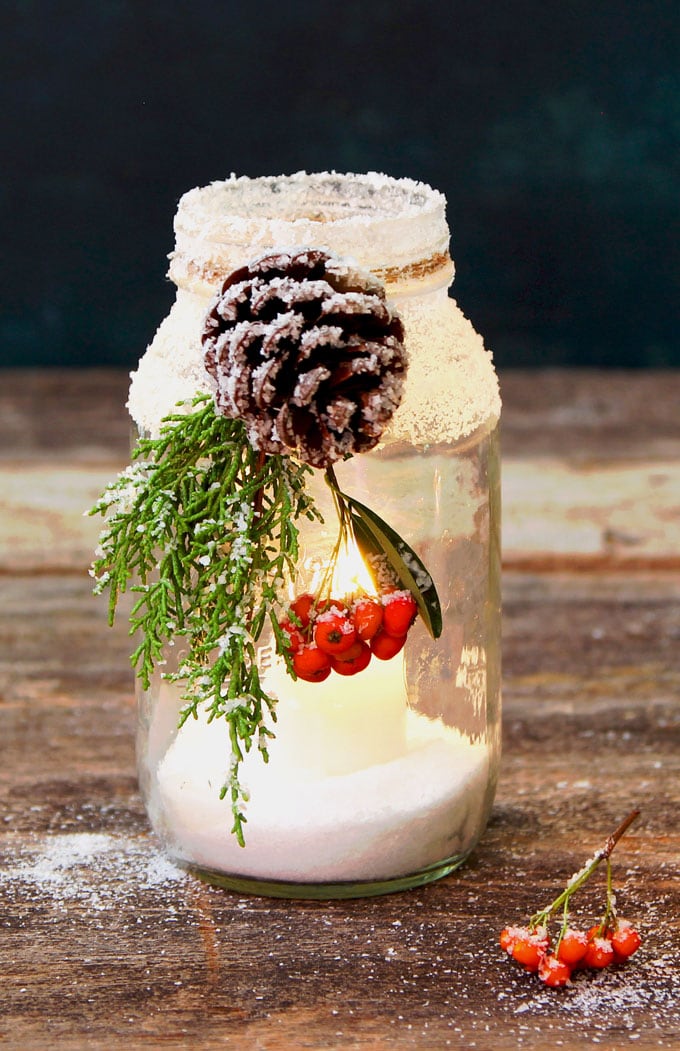
Step 1: add snow to mason jars
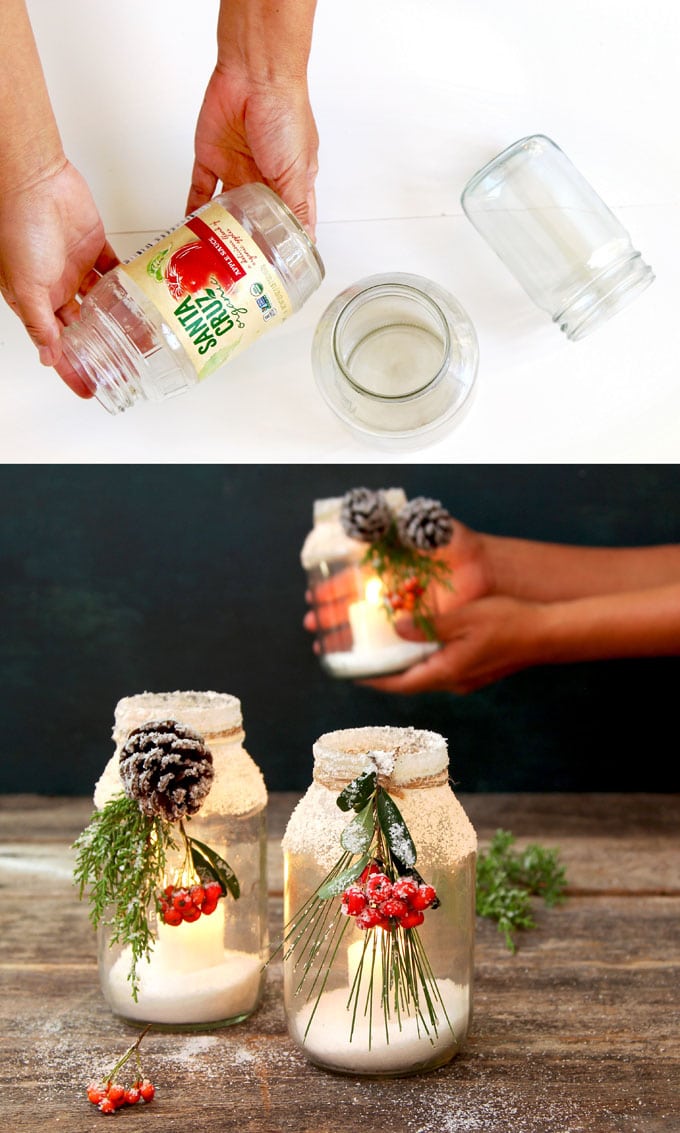
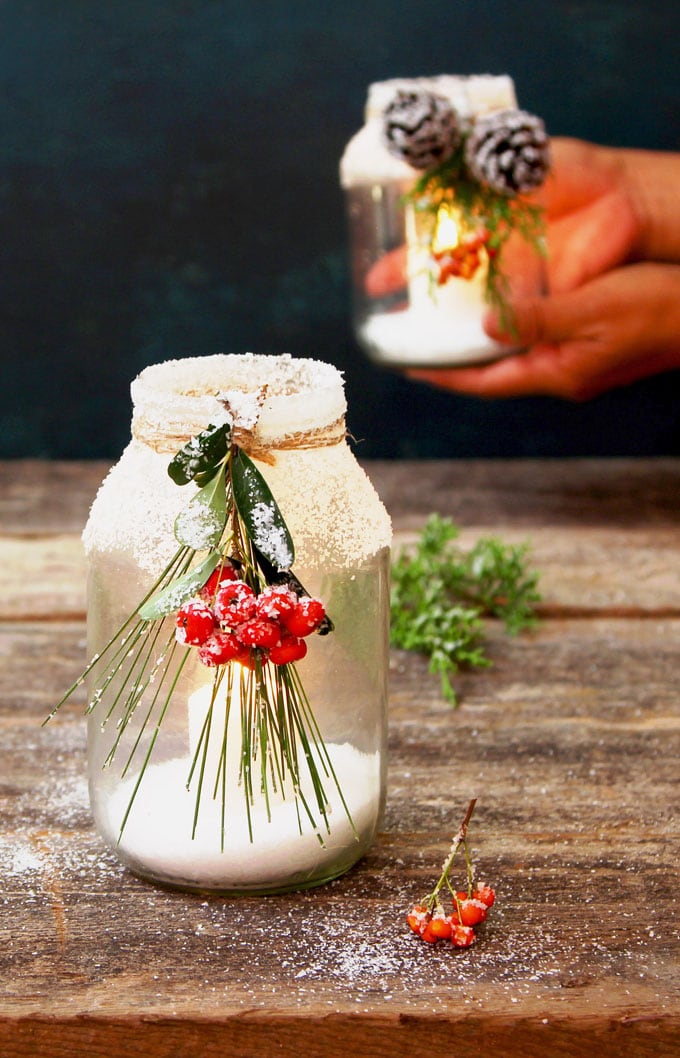
In this variation of snowy DIY mason jar centerpieces, I wanted to make it look like snow had just fallen onto the jars, so I added snow to the top half of the jar, leaving the bottom half clear so the candles are visible.
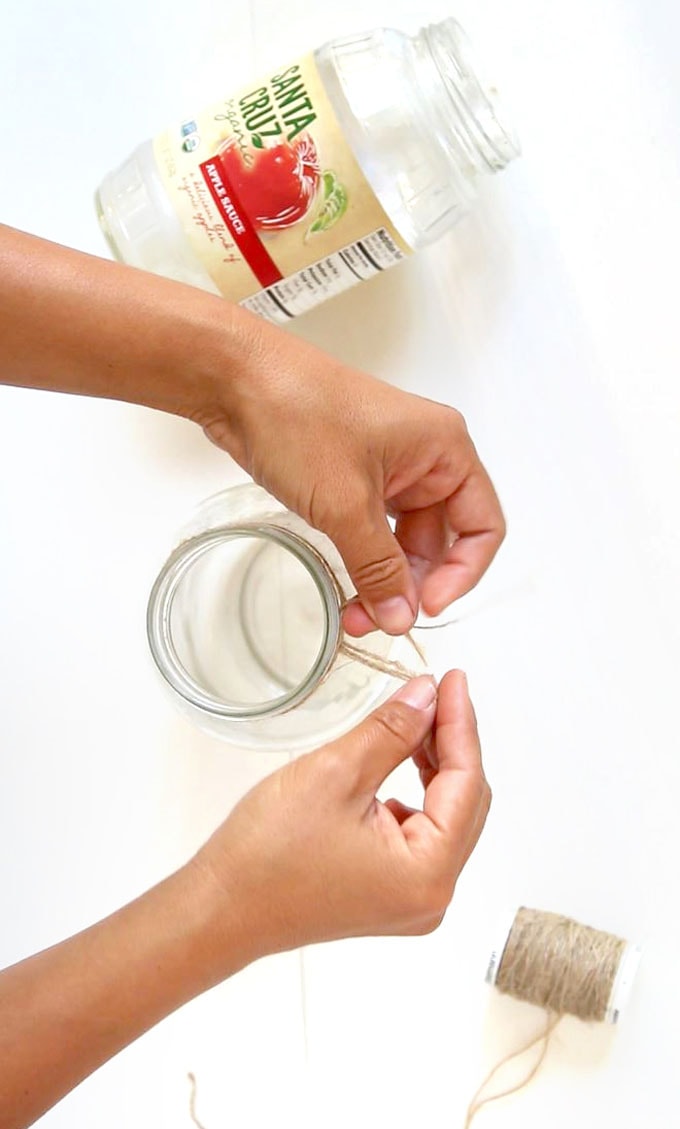
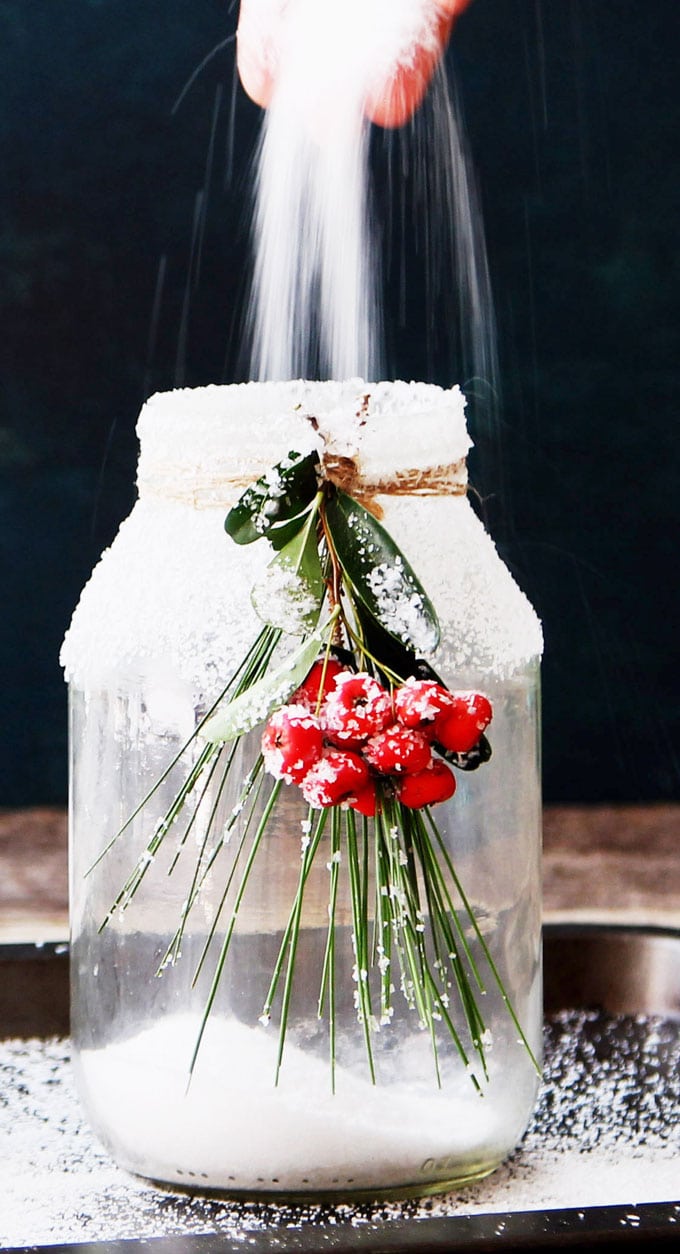
Wrap some jute or hemp twine around the rim of each jar. This provides a good spot to glue the embellishments later.
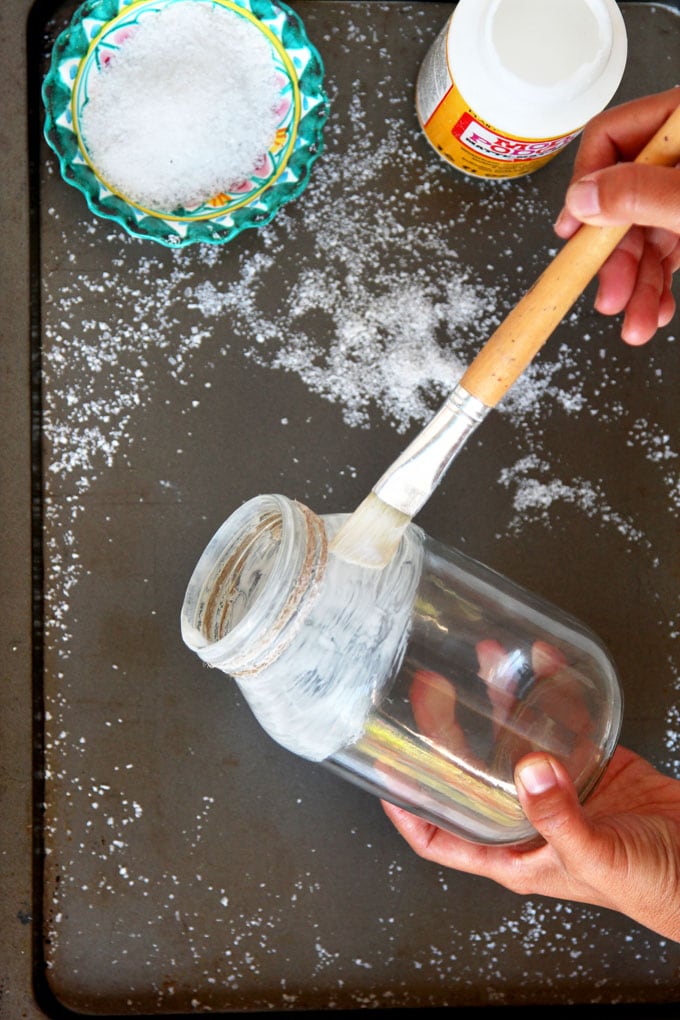
The key to success here is to work quickly so you can apply the “snow” before the glue starts to dry. Coat the top surface of the mason jar and twine with a generous coat of glue or Mod Podge, so there are no dry spots, and no dripping glue either.
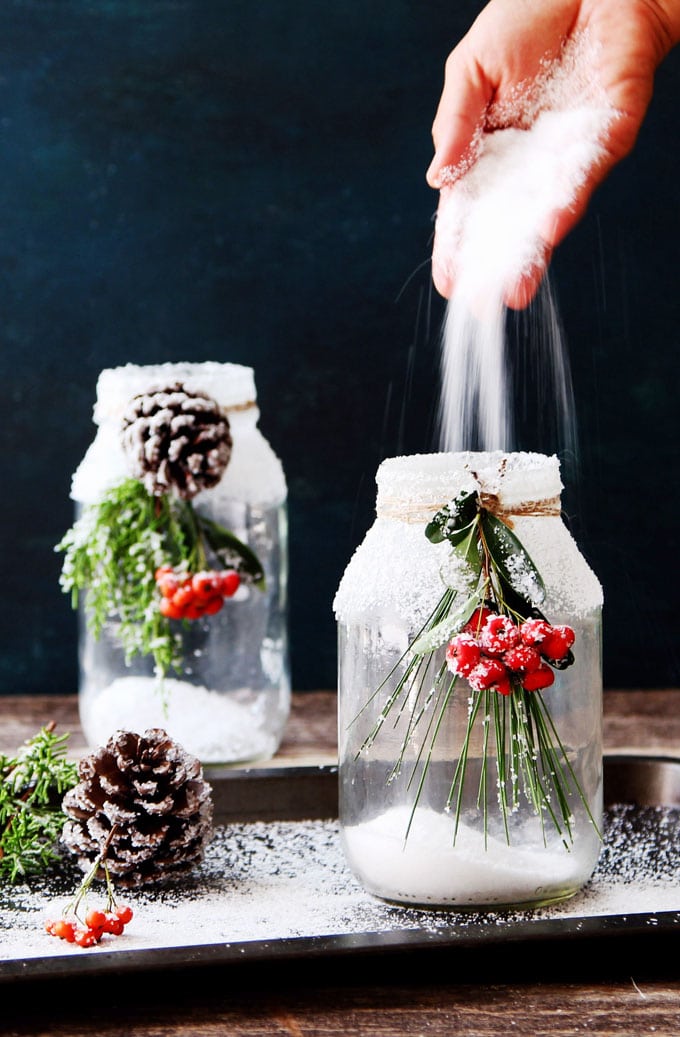
The snow is in your kitchen! You can use regular salt or kosher salt. We used Morton Coarse Kosher Salt here because the larger flakes look beautiful as snow.
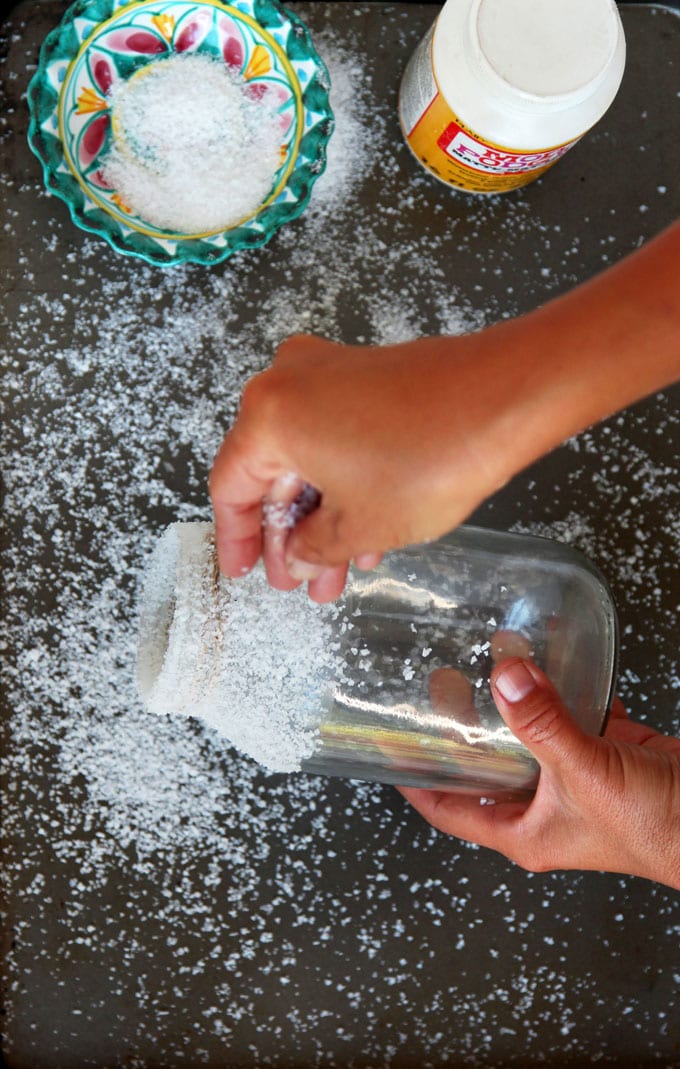
Take a handful of salt, sprinkle onto the glue coated surface as you rotate the jar. Don’t touch the glue and salt coated surface.
When you finish, set the jar aside to dry. It will take only 10-20 minutes in a warm place. Once the jars are dried, gently brush off the excess salt on the surface, you will still have plenty left firmly glued to the jar.
Step 2: add embellishments to your snowy DIY mason jar centerpieces
Warp some twine around the rim of each jar. This provides a good spot to glue the embellishments.
I found it much easier to tie sprigs of berries and /or conifer cuttings into a bundle with hemp or jute twine first, then glue the bundle to the twine wrapped around the rim of the jars.
Here’s the detailed tutorial on how to make snow covered pine cones and branches. It is so easy, you can do it in less than 5 minutes! You can use the techniques on real or artificial greens.
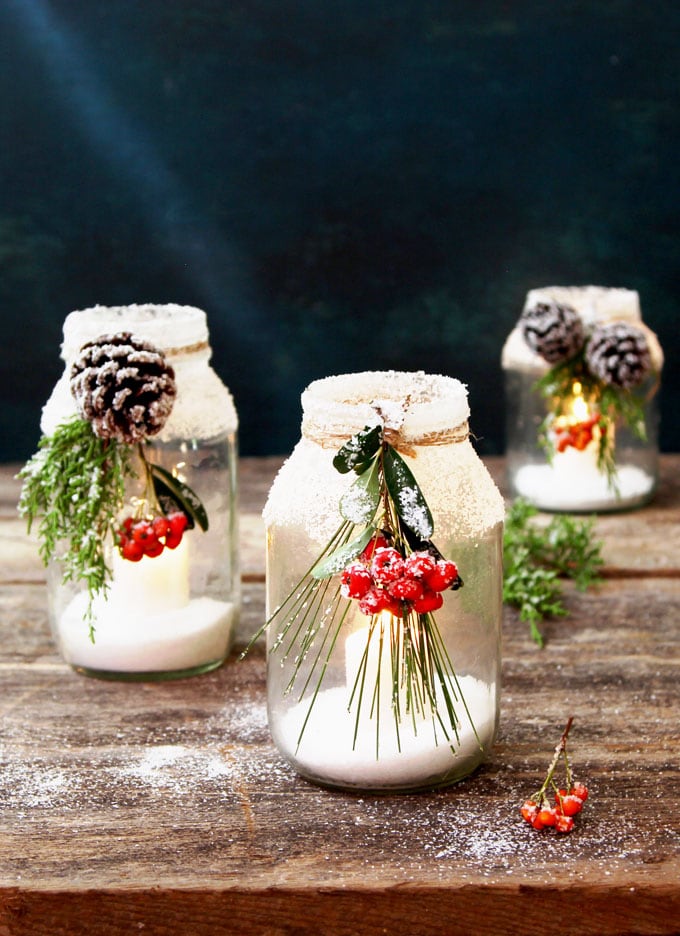
Step 3: add candles to your snowy DIY mason jar centerpieces
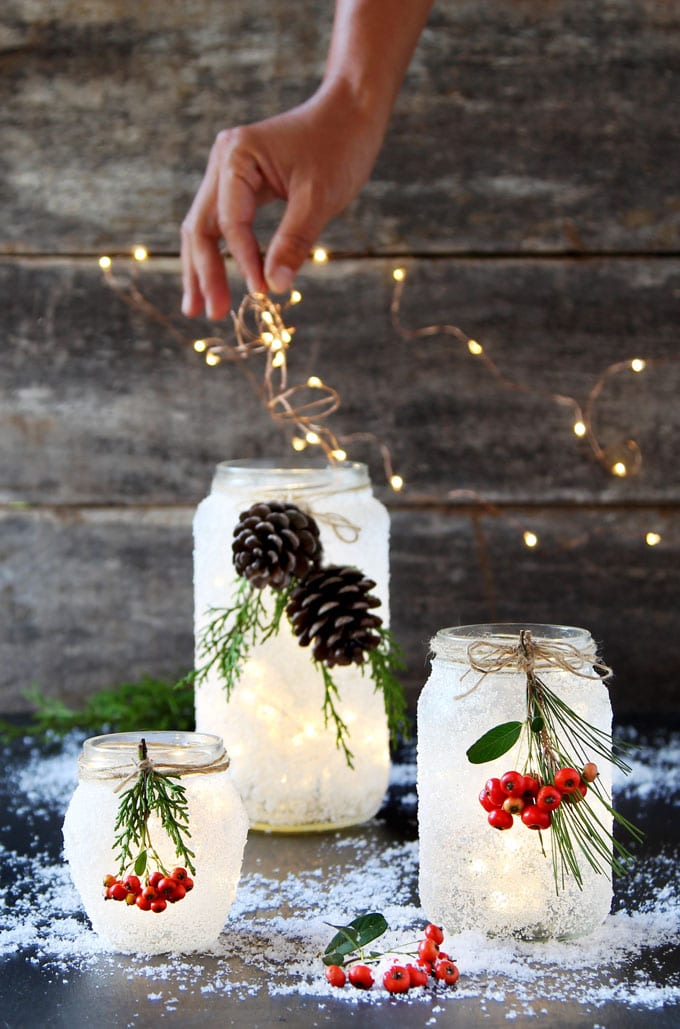
Add a handful of “snow” (salt!)into each jar, now they truly look like winter wonderland Christmas centerpieces!

To create some magical glow, add a white votive candle in each mason jar, You can use LED candles like these 1.5″ ones or real votive candles.
We used white votive candles and a pair of long handle tweezers to drop the candles into the jars. You can also use chopsticks if you are good at those.
I could totally see these elegant pine cone and greens DIY mason jar centerpieces as gorgeous winter wedding centerpieces, or farmhouse style table decorations for a dinner gathering.
Here’s another equally easy and beautiful DIY Thanksgiving and Christmas centerpiece you can make for almost free, tutorial here.
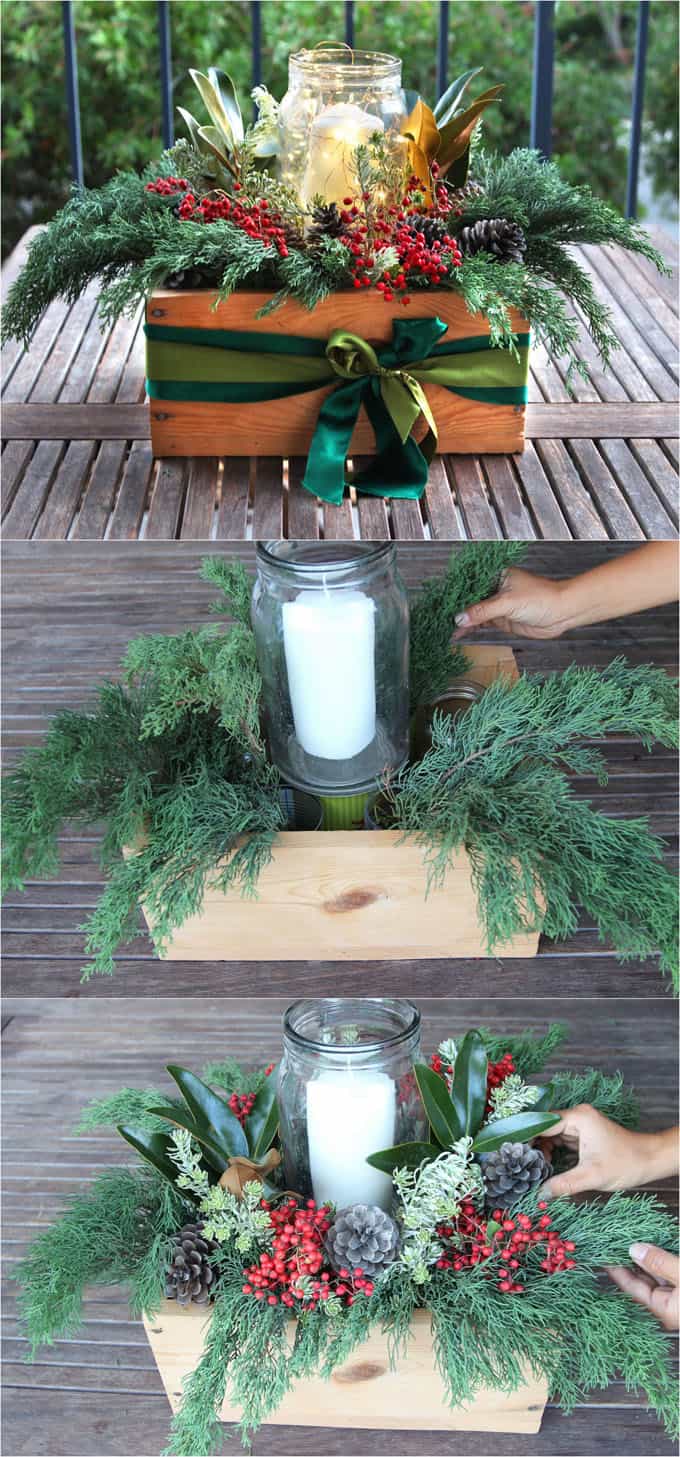
10 minute DIY Thanksgiving and Christmas centerpiece tutorial.
The mason jars with red berries are so festive, perfect for Thanksgiving and Christmas decorations. You can also use faux greens and berries to decorate them.
The fresh greens will last for weeks if you use cedar or cypress. The fresh berries will look great for 1-2 weeks depending on the species. Holly berries can for last quite a while.

Here’s a variation of the Christmas mason jar crafts using string lights inside: DIY frosted winter and Christmas mason jar decorations, tutorial here!
DIY frosted winter and Christmas mason jar decorations in 5 minutes!
Another festive Christmas craft you may love: a DIY Christmas Candy Cane Wreath made with a Free Material you will never guess! 🙂

Happy creating! See you soon!


Really beautiful ideas۔ I never has snowfall in my city but I really liked these snowy jars will must try to craft these۔
thank you Razia! 🙂 same here, no snow, so these are extra fun for us to make! 🙂
by the way these are beautiful tfs..i like much better than the epsom salt ones
i see you answered one question about the salt coming off..so it should last over the christmas holidays?..i thinking about doing as gifts..ty for reply
hi gail! yes just put a nice coat of glue on, shake off some excess salt when it dries ( you can reapply more glue and salt in bare spots) , it should hold up great!
Ma in italiano non è possibile avere i prodotti usati ?
yes you can use any craft glue that dries clear! 🙂
Will the salt keep coming off when touched or moved?
99% will stay on. maybe a speck of salt here and there would come off if there were not enough glue! 🙂
these are beautiful ❤️❤️❤️
it’s the snow in the inside as same as the outside ? could you substitute Epsom salt instead…
yes same, and yes Epsom salt works too! 🙂
Love these ideas and I am going to try some this year with my granddaughter.
just great ideas