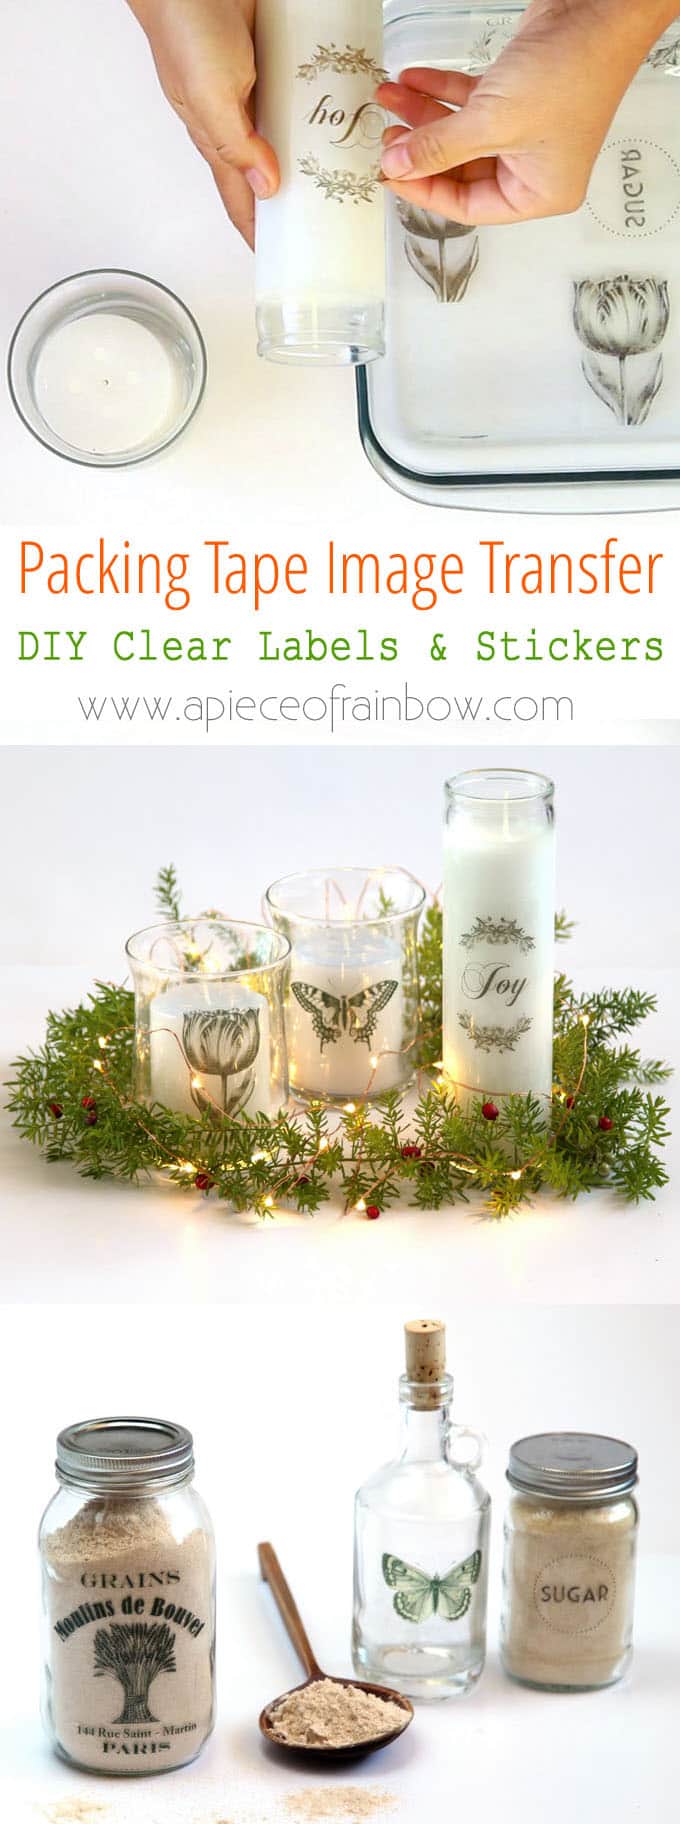
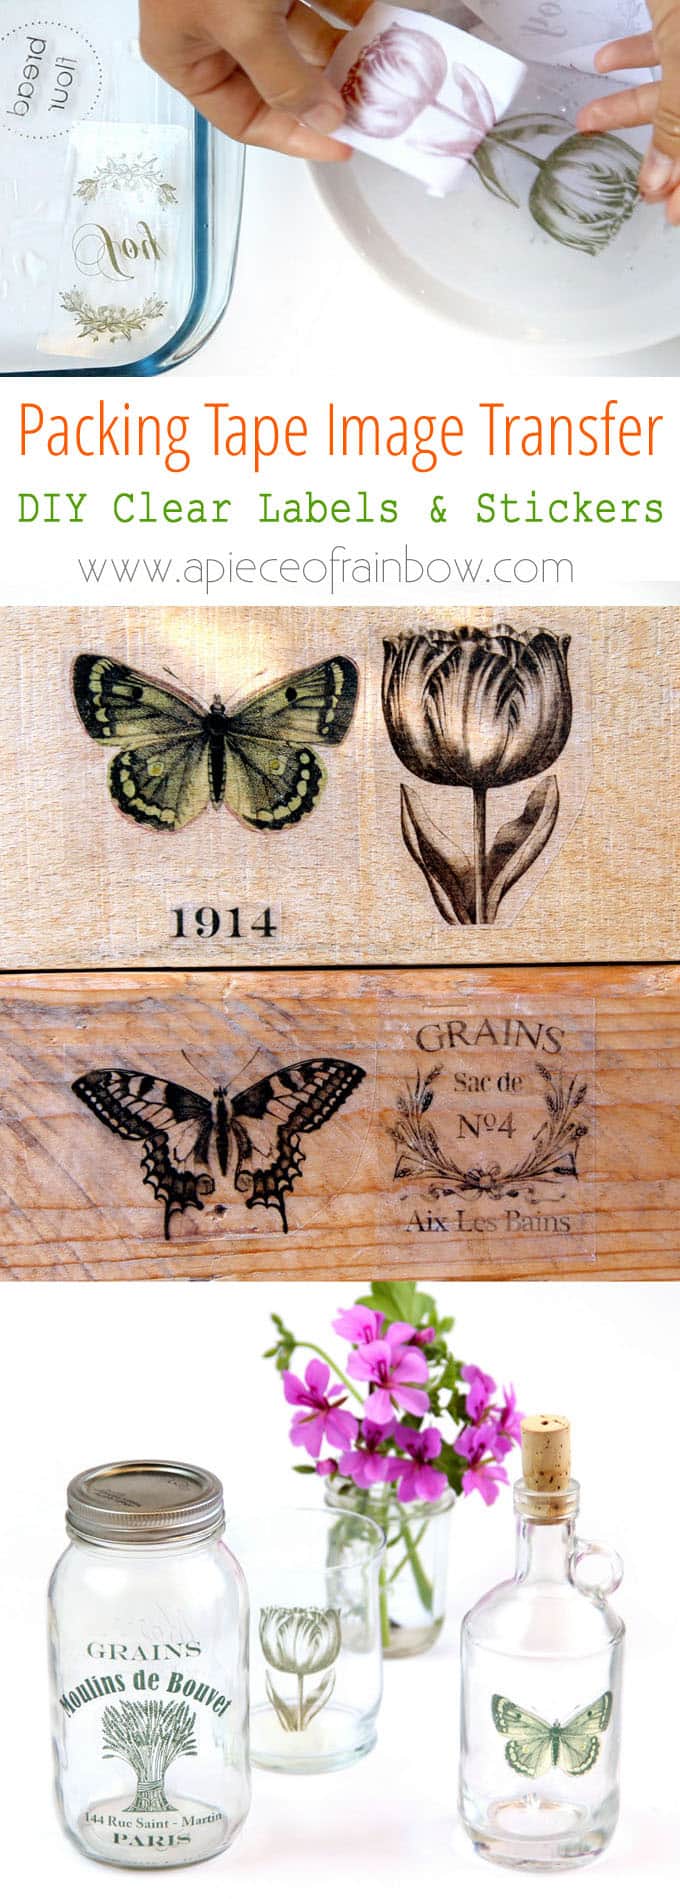
Packing Tape Image Transfer & DIY Clear Labels
( UPDATE: some of you sent questions about colored image transfers, or why their previous projects were cloudy or not sticking. I have 5 super helpful tips for you at the end!!)
Quiz: what can you use packing tape for, besides packing?

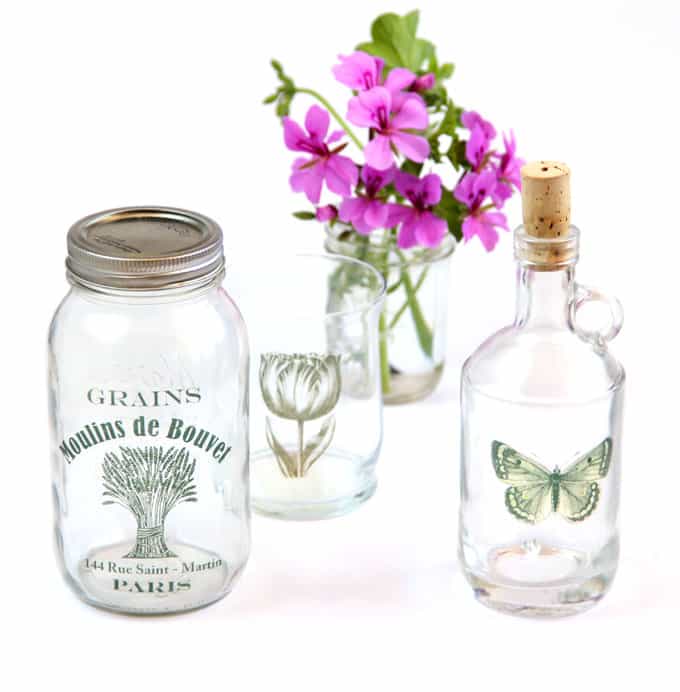
So excited to share with you today a really cool image transfer technique on how to turn packing tape into great looking clear labels and stickers!
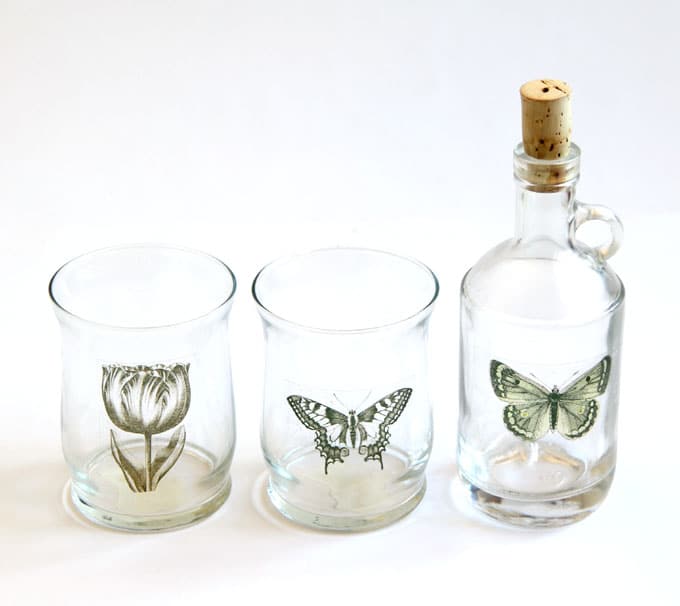
Just think about all the ways you could use these beautiful stickers: pantry labels, gift tags, decorative touches on glass, wood or metal objects…
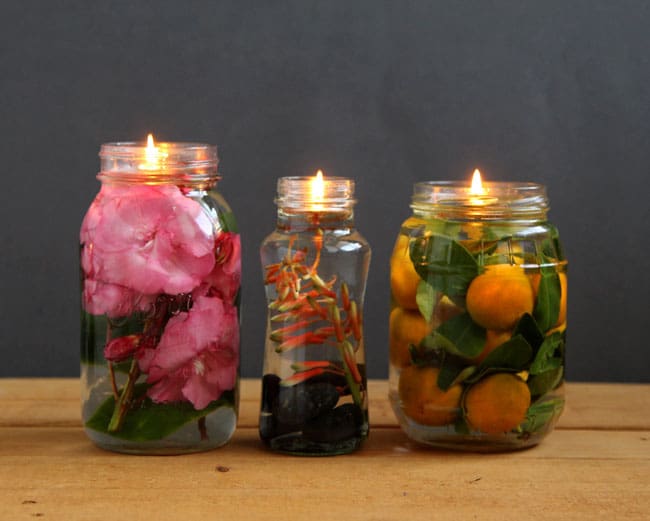
UPDATE: we just created another variation of this project on how to make photo candles, plus a video tutorial!
*Some resources in article are affiliate links. Full disclosure here.
Today’s packing tape image transfer is a bit different. The images will be transferred onto the packing tape which can be used just like a clear sticker, with your own custom designs!
All the lovely vintage images used in this post are from the Graphics Fairy. Thank you Karen! ( Some of the helpful resources are affiliate links. Full disclosure here. )
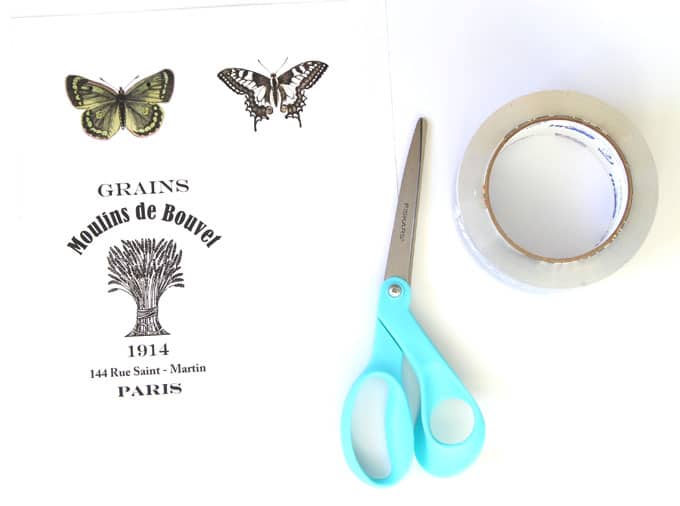
Materials and tools:
- Packing tape. I tested different brands and the heavier duty ones gave much better results than thin tape. I used the Duck brand tape like these here.
- inkjet printer and standard office paper
- scissors
- NOTE: there are actually printable clear label sheets you can use to make labels. The purpose of this project is that packing tape is easier to find in many parts of the world, and it is just a quick way to make some fun stickers!
Step 1:
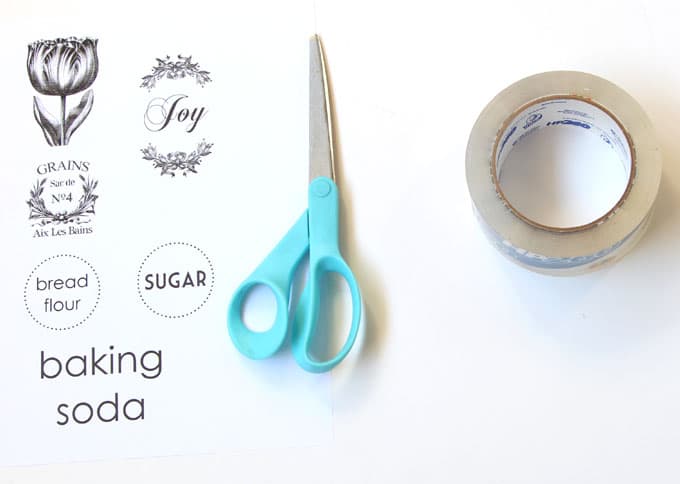
Print images on paper. Take into consideration the width of the tape,
I will show you a trick at the end on how to make larger labels!
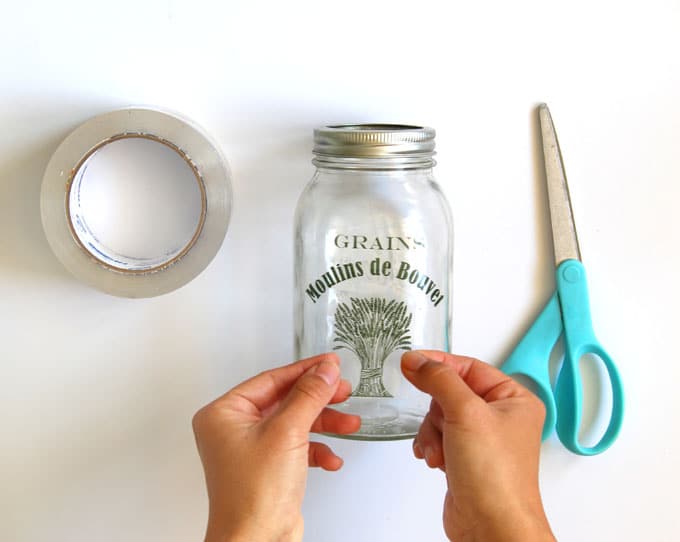
Step 2:
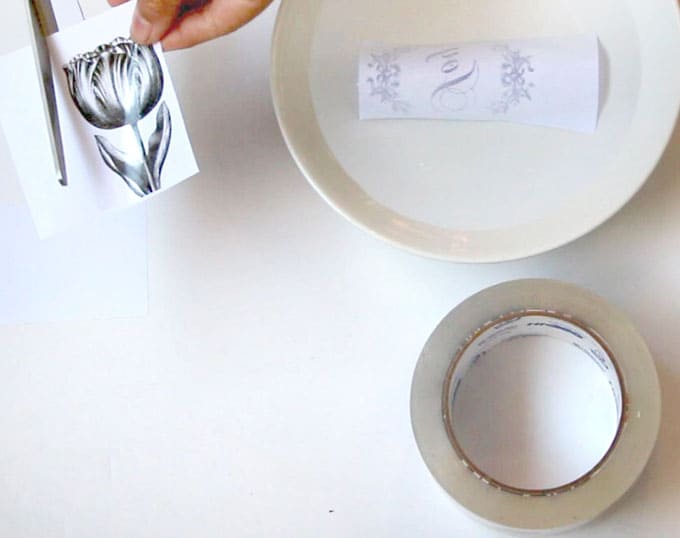
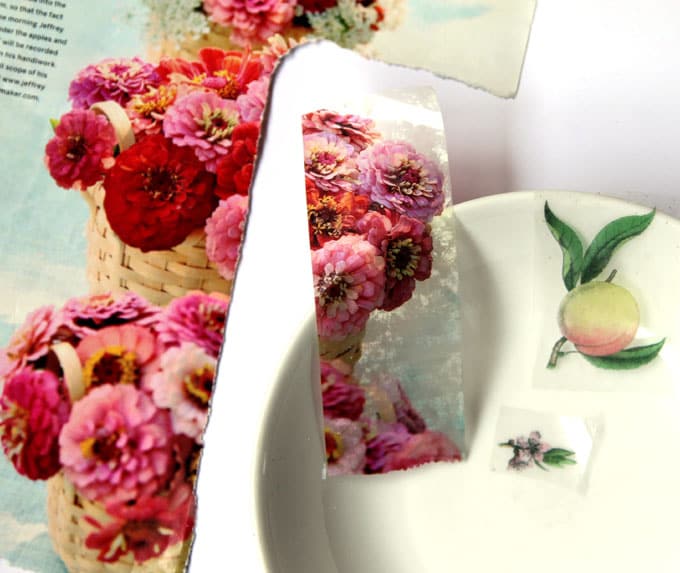
Take a piece of tape, press the sticky side onto an image, center the packing tape over it evenly and press. Then cut out the section.
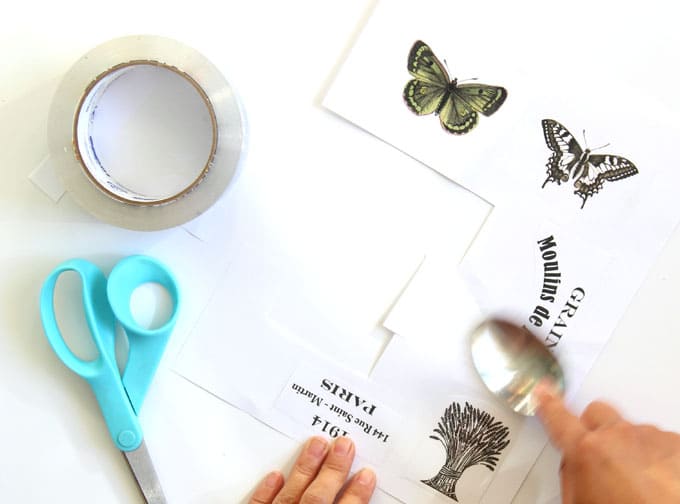
Here’s a REALLY IMPORTANT part of the image transfer process: burnish the piece using the back of a spoon and make sure to cover all the printed areas. The more pressure you can apply to the tape and image the better result you will get!
Step 3:
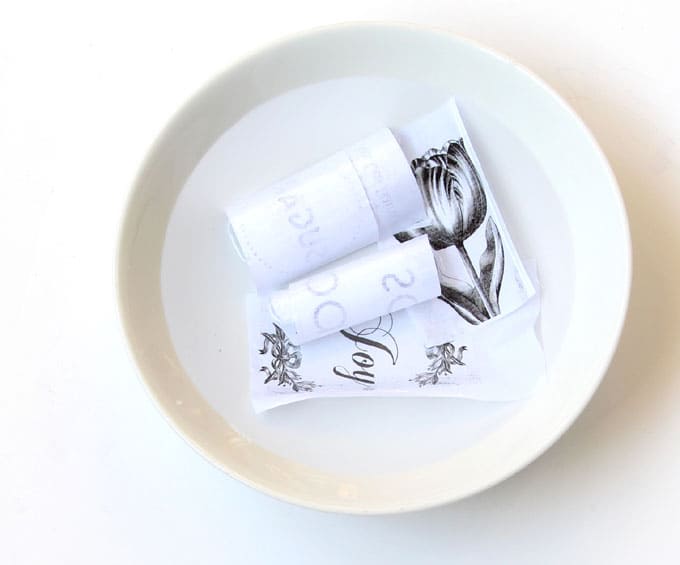
Drop the piece into a bowl of room temp water. Let them soak for at least 5 minutes.
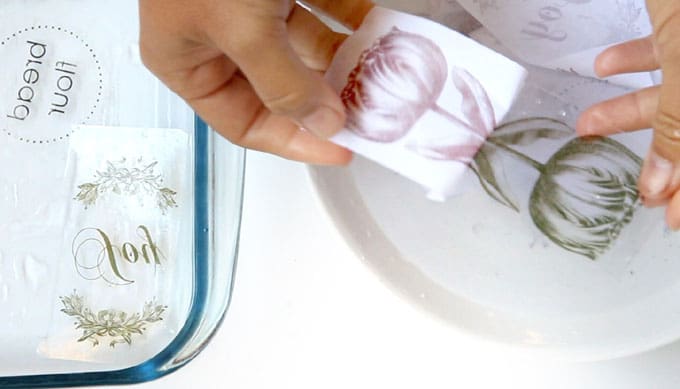
I find it much easier to let them soak for an hour. Then the paper just peel of really easily, leaving you with a beautiful image on the packing tape!
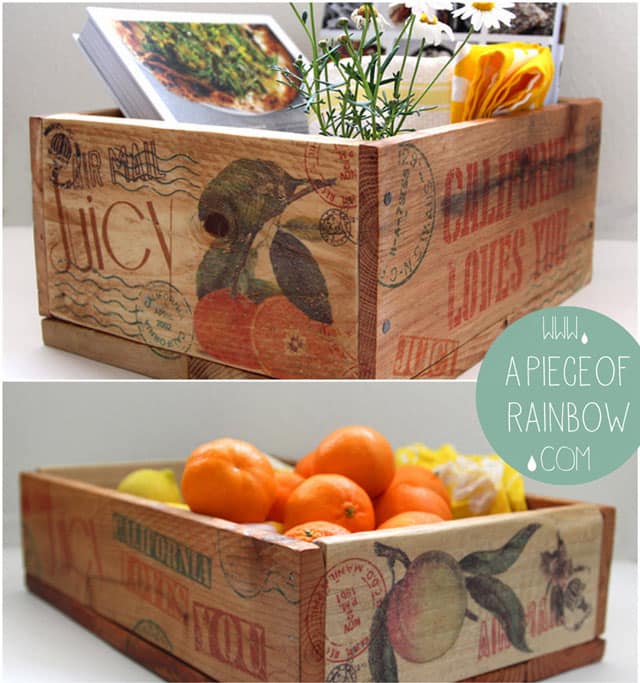
You may also love this image transfer project that has become a reader favorite: here’s the tutorial on how to transfer images to wood and make vintage-inspired pallet crates.
Step 4:
Use these pieces just like a sticker.
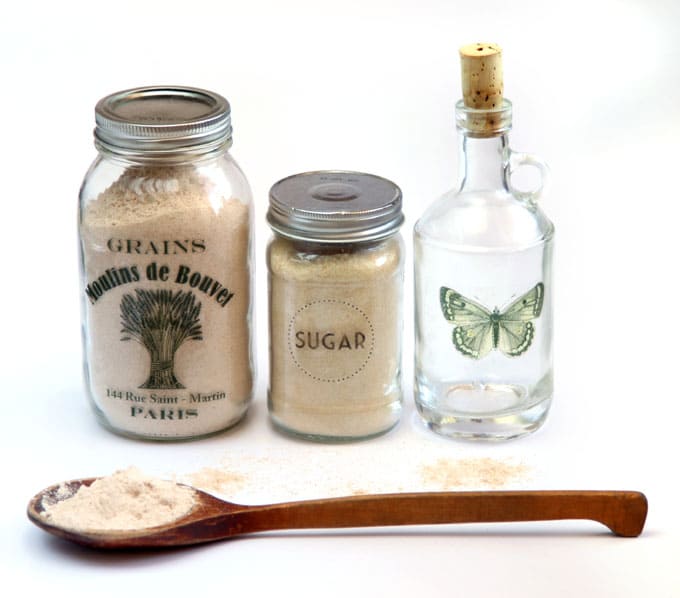
These stickers not only look great on glass, but also on wood!

So what happens when you want a larger sticker, like the gorgeous grain sack label on the big jar above?
I have tried overlapping the tape, and did not like how it looked.
As you can see, although each of the butterflies will fit on a piece of tape, the large grain sack label won’t.
Here’s a trick to work around the limitations.
Cut the larger design into smaller pieces, apply tape on each piece. After you make the smaller labels, assemble them back together into the original design.
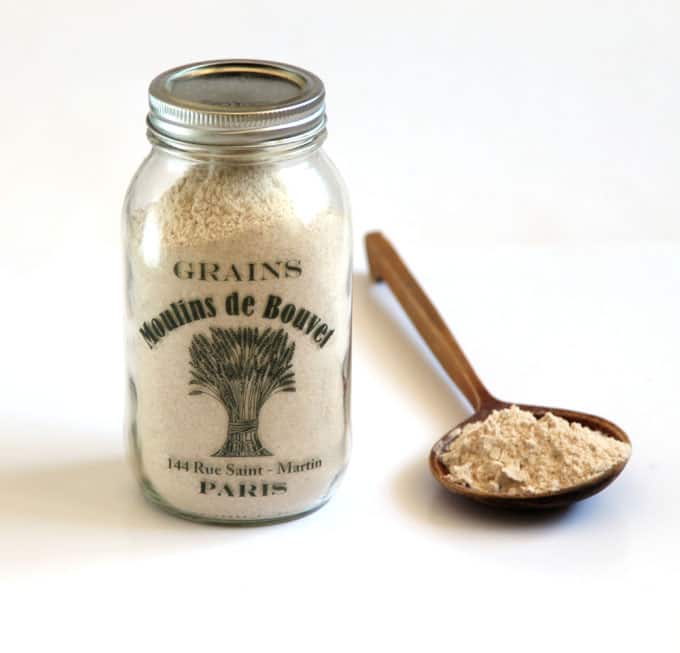
Doesn’t this clear label ( or “these labels” ) look gorgeous on a jar of whole wheat flour? Can’t even tell it was pieced together!
Here are a few tips to help you get the best results.
I have mentioned some of them earlier, but it is worth mentioning again:
- I tested different brands of tape and the heavier duty ones gave much better results than thin tape, which can lose the stickiness and get cloudy . A reader also shared that the packing tape from post office loses stickiness. I used the Duck brand tape like these here.
- Color images will transfer using the same method. Magazines will transfer also! However, the magazine paper will cause the tape to lose the stickiness no matter which kind of tape you use!
- Burnish the piece using as much pressure as you can apply to the tape and image. You will get much better image transfer this way!
- Images with lots of contrasts, such pen and ink drawings will look better than images with subtle shades, such as the photo of a forest.
- Soaking the tape and paper longer, about one hour, will make it easier to peel, and the stickers will look cleaner.
Store any extra stickers by sandwiching them between parchment paper or wax paper and they will stay sticky until you are ready to use them.
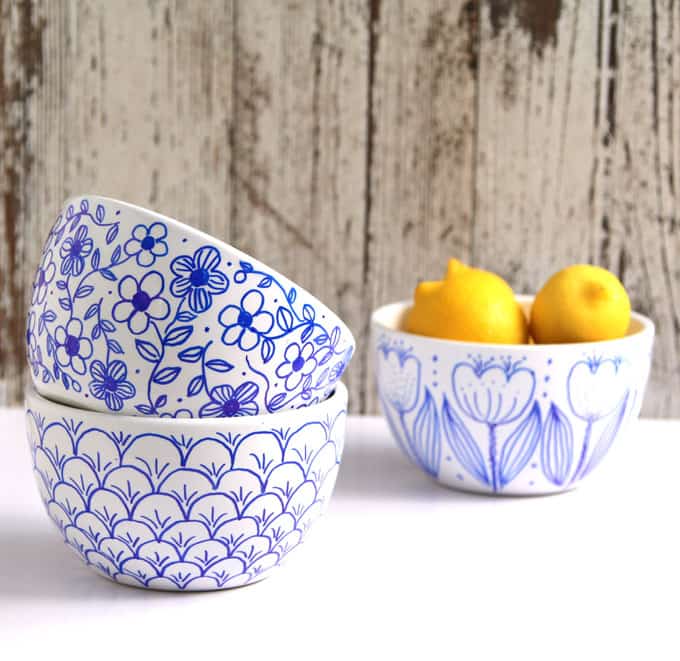
Related article: How to make beautiful no-bake Sharpie art bowls.
Make gorgeous mason jar oil lanterns in 2 minutes!
Happy creating!


Do you let the tape dry after transferring the image before adhering to glass?
Hi Julie, yes let the tape dry so there’s no water between tape and glass 🙂
Do you leave the tape and image on the glass after adhering or do you peel the tape off of the image after adhering to glass and the image stays on??
hi Julie! you leave the tape and image on the glass. however, i love the idea you mentioned, and will be exploring that possibility 🙂
I don’t have anything showing in my wekly email to print any of these beautiful printables, what i’m i doing wrong? Thank you
hi April! our newsletter ends up in promotions folder a lot! maybe check there?
I received a wall decor for Christmas but I did not want to use it in my house. If you have seen those “Our Family practices kindness, shares, etc.” then you know what I am talking about. I had the idea of changing the word “Family” to “Class” and using it in my PreK classroom. So I painted over “our family”, added something to make it crackle, and followed the instructions. I soaked the print in warm water for 10 minutes and it came off easily. I am very pleased witht the result! I can think of so many projects I can do in my classroom that won’t cost me a whole lot at all.
Thank you so much for sharing this.
thank you so much Joan for sharing your creative ideas! 🙂 happy new year!!
These are so cool! I love what you did to the wood boxes!
I use scotch tape and don’t even really rub it at all my printer is really old it uses a toner drum i also use running hot warm water no fussing around
great to know ! thank you so much for sharing these tips!! 🙂
I’m the worst crafter I need really simple and easy tricks I saw this on youtube witha lady this is what she did printed what she wanted on plain paper took and laid the tape across the printed section cut it out or down put it in warm water about twenty minutes(here is where i couldn’t wait i run hot water over it for maybe a minute you can tell when the paper is throughly wet then just rubbed it off.) then she just apply it to the glass candle all done (i don’t know about her’s but mine was not sticky but stuck tight to the glass candle also peeled up nice to reposition it.)
cold water has worked pretty easily for us, but i will give hot water a try! thank you so much Susan!! 🙂
Sounds like you have a lazerjet printer. Inkjet would melt away when put in water. If so, you should update your tutorial as the two printer types are very different. I have a lazerjet and I’m excited to try this!
hi lauren! i actually used inkjet in this project,it worked great. now i am testing this on our new laser printer this month! 🙂
Great tutorial! The stickers worked perfectly! Thanks!
Does it need to be original inkjet cartridges or do cheaper ones work too? I tried it and the ink just bled then rubbed off when I peeled the paper back 😔 perhaps I did it wrong.
hi Yvette, i would think any ink should work. maybe try a piece of magazine print, and see if it’s the tape that caused it?
Greate post. I am making lots of your creative DIY crafts and decor on this blog. it is SO helpful atthis time when everyone has to stay home!
This method is very helpful to all .Thank you soo much.
hi,
i read on another site describing packing tape transfers that you need to use a laser printer because the ink needs to sit upon the paper and not be absorbed by the paper making it impossible to transfer. i only have and ink printer so was disappointed but then i found your article that says to use a ink printer. so, i’ll still give it a go.
thanks
hi michelle, inkjet definitely works! i haven’t tried laser prints yet. 🙂
Hey There, That’s an awesome DIY. I want to try it. Just wondering does the image need to be freshly printed for good results or we can do with any image from books and all?
yes both, the section on transfering magazine paper (at the end) will give you more details on the differences! 🙂
Normally I do not comment on blogs, but I would like to say that this tutorial is great! We made some really cute clear labels for our pantry! Thank you!
Why do I seem to have a problem that no one does. I am using Scotch heavy duty packing tape, an ink jet printer, and regular printer paper, but when I put it in the water the packing tape comes apart from the paper within 30 seconds even after I’ve carefully rubbed the image to the tape. It only leaves a faint picture and not the dark ones I see everywhere online. What am I doing wrong?
hi! did you rub it with LOTS of pressure using a metal spoon? if the pressure isn’t enough, it would not transfer 🙂
Does newspaper images or is the paper too thick?
Aaaa I just realized how wrong I worded that. Here’s what i’m trying to say:
Would this work if I used one of my drawings (not printed)? I tried this yesterday on a printed picture, and it turned out really good, but my printer is kinda broken and rarely works, so it’d be nice to be able to use my own stuff.
hi! i think you can give it a try, and if not, just photo copy your drawing the use the packing tape on the copies! 🙂
Thank you for sharing with us, I love your technique! Works wonderful for us, we always need labels for our canning. Kind regards Edward
Can I leave the stickers soaking overnight?
it might change the sticky tape, i wouldn’t do it 🙂
I used the backing sheet of a sticker paper and fed that through a printer printing my design on it. Then immediately placed the tape on the design. (be careful not to smudge the ink as it doesn’t stick to the backing sheet) The tape picked up the ink design cleanly and I have no paper stuck on the tape to tear away! No soaking needed!! I’m realllly happy with the result!!
thank you so much twinkle for sharing your great idea! i need to try that, it sounds wonderful! 🙂
can I use this sticker on fabric for a halloween costume? thanks!
hi alexandra, i think you might need a more sticky one for fabric, but test a small piece, it may work for a quick use like this 🙂
FOR THOSE OF YOU HAVING PROBLEMS WITH THE TAPE, there is another alternative. Print out the pattern, or cut from a magazine or other printed material, and coat it with clear acrylic paint. Let this dry and cover it with another coat, then another. Until you think the picture has a good enough thickness to survive as a flexible sheet in the water bath. Then let it soak until the paper can be sloughed off, like the above. This sheet with the imprint on it can then be placed onto your wood box or whatever, and the whole area painted with clear acrylic. Thus the pattern in embedded into the wood; the acrylic forms a molecular bond with the wood which will then last, like, forever! If a base coat of clear acrylic is painted onto glass, and the image then placed onto that, the same bond should occur. Again, cover the jar or glass with another covering coat.
hi linda, thank you SO much for sharing this great technique! i am going to try it next! 🙂
Hello, this is a cool DIY, but I was wondering if the quality of the tape has some effect on whether the ink gets transferred to it? I tried it multiple times but the ink didn’t get onto the tape.
hi lois, yes i found that some tapes get better results. i linked to the one we used here 🙂
You got a really useful blog. I have been here reading for about an hour. I am a newbie and your success is very much an inspiration for me.
Hi-ya… Where did you get the pictures that you used to transfer??? Looking for vintage type prints… Thanks… And I’ve already gone to graphic ferry…
graphics fairy, and a couple of places where i bought those stamps, sorry i can’t remember which site though! =)
Could this work on a wine glass?
it is more challenging because the tape adheres better on a straight surface such as a cylinder than on a sphere.
Question…I do not own a printer, is there any other way to do the designs? Such as pics from a newspaper or magazine? Anything?? Thank you!
yes, page 2 of this is all about using magazine photos! 🙂
I’ve tried this several times now. My letters come out looking washed out. Do you have any suggestions for making the letters stay dark?
maybe try print on a different dark level?
I have an Espson printer and hubby uses an HP….tried both on regular paper but the ink comes off and the DUCK packing tape isn’t sticky any more !!! What am I doing wrong?
hi rene! the sticky side of the tape will have a slightly different texture after this process, and i wonder if you might be rubbing off too much..
Hi Amanda,would you believe I spelled my name wrong !!!! Renée…two ‘e’ –
by ‘rubbing off too much” you mean when I burnish?
I rub enough so there are no bubbles in between paper/tape….I’m thinking more on the lines of ink cartridge…
pretty disappointed since I had already downloaded a few printables (some colored and others black/white) and I have just completed some ‘sea glass paint’ on a few jars and vases where they would have looked great. I’ll look some more but thanks for the good tips…must be my machines!
hi! =) just to clarify: “i think you might be rubbing off too much paper” after the soaking step, not before
I’ve tried this a few times and it didn’t work… I’m getting super light letters. But I think I know why. I need to put ALL my weight into a metal spoon while burnishing!!!! Live and learn on the scrap paper till I get it right! Thank you for sharing this DIY!
hi Charlotte! changing the printer setting to print darker may also help. =)
I used heavy duty packing tape. Duck brand.
the sticky side of the tape will have a slightly different texture after this process, and i wonder if you might be rubbing off too much…. the burnishing should just take a minute. =)
So once the paper is removed, it shouldn’t automatically be clear? It will become clear once it dries?
I had burnished the image, soaked it for about and hour, and peeled the paper off, but the tape it self looked fogged/cloudy not clear, like the images you have. So I kept rubbing it, and the image came off, but the tape remained cloudy looking.
yes, the tape looks less cloudy when dried, especially when it’s put on the glass. try rub less and it should work 🙂
Hi,
How long should I burnish the image? I did it for a good 5 minutes, soak it in the water for about an hour. Then when I went to remove the paper from the tape, image also came off. It did not look anything like the images you have above. Any idea what could be the reason for that?
Thanks
hi! which kind of tape did you use?
I am using the heavy duty packing tape. Duck brand.
This is a great idea but cannot get the sharp image like you?
hi carol, i think if you select images with lots of contrast and clear drawings / lines, it would look a lot sharper! also be sure to burnish every part of the image. =)
I’ve been so eager to try this for my cooking oil bottles. I just barely finished and the ink transferred surprisingly well. The tape I used was “EZ Start” by Duck brand. So far, the stickiness is still good. The only problem is: when burnishing the tape with a spoon, it seemed to scratch a wax-like film off of the tape which left it cloudy. I put as much pressure as I could on it (maybe too much?). I’m going to try again, but, this time I’m going to rub on the PAPER side when burnishing to see if it preserves the clarity and shine of the tape. I’ll keep you posted!! 🙂
thank you keri for sharing your observations! please let us know! =)
Hi I have a question how do you make the stickers with a sticky note? Please let me know if I’m doing it wrong for future preferences.
hi jamie, not sure i understand what you are referring to by “sticky note”. paper note? please clarify 🙂
I found your blog from doing a search, One thing no one is mentioning when doing these DIY’s rather it’s a blog, or a You Tube video, is will these be washable? – I’m talking hand washing. I want to print out 2 pictures of cats that belong to my boyfriends mother and adhere them to a coffee mug for her for Valentines Day. But I need the mug to be usable and able to be hand washed without it peeling off like store stickers(price tags, bar codes etc) do. His mother is up in age, but very particular she tells everyone for every holiday ” Do not get me anything I won’t use it, I”ll just put it in the bedroom” – she literally has a bedroom packed full of items people have bought her for many different holidays through out the years. She gave me a Hand held steamer to use that had never been removed from the box , that one of her daughters bought her over 14 years ago LOL …… But I have her figured out, if it’s something she will actually use then it won’t go into “The Room”… So I always buy her a jar of Coffee, coffee filters, envelopes, stamps, and letter writing paper (She still writes letters to her friends and family out of state – she does not use a computer doesn’t even know how to turn one on.) SO I know if I make her a coffee mug with her kitties on it she’ll use it 😀
But none of these tutorials ever state if they can be washed and if the “sticker” will stay on, or is it just going to peel right off and just be a plain clear glass mug that she won’t use lol
hi kelli, yes it can be hand washed for sure! the key is have the least amount of air bubbles, which means choosing a mug more like a cylinder or tapered cylinder (straight sides), instead of a sphere shape ( hard to keep the sticker flat on all sides. 🙂
Do you have any diy for tranfer to glass reverse image without leaving the tape on ? I really do not want to use vinyl for my project.
hi carmela, i have not seen any image transfer to glass method that is not some form of sticker or decal. an alternative would be these glass paints that can be baked in a home oven, which will stay on the glass.
I read all the posts looking for this answer, but nobody mentioned it. I used a photo that had a lot of background color, so when all was said and done, the tape was no longer sticky after drying. My question is, can I use Elmers glue on the tape to make it adhere to a candle. Will the Elmers glue break down when the candle is lit. I tried it and it is sticking to the candle jar, but I’m concerned that the picture will fall off when the candle was lit.
hi martha, i would use double sides tape or clear tape to hold it. if it’s on a candle holder, it should be fine because the sides of a candle does not get very hot. =)
Absolutely love this project. It will be awesome for Christmas!!! Thanks so much for all the tips too.
Does scotch tape work?
great question. i have not tried it, because the tape is so small. i think the image will transfer, not sure about if it would still be sticky. =)
So is there any risk of a colour transfer on the stickers? I wanted to decorate my laptop with them but I’m wary about it for fear of the colour transferring onto the laptop.
hi sahil, i don’t think it would. but to be safe for this purpose i would buy printer sticker sheets (i linked to them in post) because the print side is not the sticky side. 🙂
love,love,love this! it really works! thank you for your easy to follow instructions.
How cool is this technique??? Omg…..im just blown away…i never knew how to transfer the image….thank you so much!!!
I read you used an Inkjet but a lot of people say only use laser printer. Does it honestly matter?
hi rebecca, i think both methods works! 🙂
This is really cool!!! Love the end results. The prints look so professional and happening.. Your choice of artwork is also amazing. I too need to try this.
I love this craft idea, but I’m a little nervous about the possibility of the labels falling off while washing. And was wondering if a layer of mod podge would help secure the sticker?
hi donna, i am not sure if modpodge would help on glass, if you try it, let us know! the labels are fine with hand washing, as long as they don’t have any air bubbles underneath. =)
Hello everyone so I’ve read a lot of comments regarding issues with the cloudiness and non stick of the tape I suggest to try using a distilled water from a store -keep it room temp -instead of your tap water, every region has different types of minerals in our water due to how your area treats it -if you have a higher iron or lead count I could see how the result would differ from person to person when doing all the steps in the same way with the same products just a thought ????
Do you happen to know if this works with a laser printer instead of an ink jet printer?
hi melissa, i have not tried it but i did try printed magazine pages, it worked, although the stickiness is lost. =)
I did with LaserJet, it came out well
You said you prefer Duck tape brand but there are may types of Duck tape – for instance commercial grade and high grade performance. Which one do you prefer to use?
the HD high performance one is what i used! =)
I am using heavy duty packaging tape. I’ve burnished it, and got the image to stick to the tape well, and I can remove all the paper… however, any part of the tape that had color on it is not sticky anymore, and any part that had white (which is clear on the tape after you rub it off) is sticky. It’s like the embedded ink isn’t sticky anymore.
that’s what i noticed too Kate! which is why i think line drawings / illustrations work better (if we want to makes stickers) than photos or magazine paper =)
It definitely works better with line drawings/illustrations. I’ve tried it both ways and had more success with line drawings.
Can you use the sticky back laminating sheets to make larger stickers?
hi kami, that’s an interesting idea, i have not tried it, so can’t say much! =) however, there are printable clear label sheets you can use , which might be easier! =)
What sort of paper did you use? I tried it with some cheap tape and even with overnight soaking it wouldn’t come off, it just shredded. I tried again with clear duck tape and it has mostly worked but the bits that I burnished still have some bits of paper stuck. If I rub it under water I can get most the paper off but this also removes a lot of the ink.
just regular copy paper. i have some tips at the end of the post about tapes!
Could you put these on glass Christmas balls?
if the “sticker” is very small, yes. it’s hard to keep it flat on a sphere.
I don’t know if you mentioned this or not. Are we talking ink jet, or laser printer? Or do you think it matters?
i think both will work!
MY inkjet did not work, but my laser printer did.
Just one more quick question.
When I peel off the paper, do I wait for the tape to dry then put it on or can I put it on wet ?
the tape should be dry. =)
I love the packing tape stickers! I have a question though: Ok, so your saying to place the sticky side of the tape onto the picture and then burnish what side, the back of the paper or the back of the tape? Doesn’t the tape loose its stickiness after being soaked in water? Then lastly, when you peel the tape from the picture, doesn’t the paper leave traces of paper on the tape, how does just the image stay and not the paper stick to the tape?
hi joann,
you can burnish either side, i did the tape side, it’s the pressure that does the work. the tape stays sticky, and the ink is embedded in the tape – check out the tips at the end about different brands and more details! =)
Are these dishwasher safe? Will it work with a laser printer?
laser printer should work. like other labels, it may not hold up well in a dishwasher =)
I tried mine with Laser printer it came out well. Thank you for DIY tips
thank you so much Grace for sharing!! =)
Almost every DIY that has to do with this concept states you must use a Laser jet printer or it will not work properly. as a laser jet printer ”burns” the image into the paper (not really burn but I can’t think of a different word to use) , if you notice when you spill water on text you’ve printed with a laser jet it doesn’t end up smearing, like it does with inkjets. inkjets use liquid ink, and it doesn’t really ”burn”into the paper so they say it won’t work properly with inkjets, and most I’ve seen done with inkjet is very dull and not a nice bold dark black color like the laser ones. But I’m not going out to buy an laser jet, I plan on trying it with my inkjet even though all the other say it won’t work right
i use an inkjet, it works just fine! 🙂
So, the tape is not removed from the item, once you put it in place correct? the tape itself remains?
yes! 🙂
Can we use Gold or Silver, metallic images ?
I don’t think metalic would transfer as clearly, but it’s worth a try! 🙂
How can I do this wonderful idea,just in time for Christmas without an inkjet printer? I have a deskjet printer.Any ideas> I love your post,and how easy it is to follow.Thank you for sharing!!
That should work! Happy crafting! 🙂
Beth, a deskjet IS an inkjet printer!
I tried this and it worked just okay. Not everything transferred but I can still use the item. I will continue to practice and hope I can use it for several ideas down the road. I bought the heavy duty tape…rubbed like crazy with the spoon but just didn’t get the image transfer completely. But I like the idea and will continue to hone my skills. Thank you for such a clear and helpful post.
I can never thank you enough for all your wonderful idea’s You are showing this old crafter, 75 year old, all these neat great idea’s that I never dreamed possible. I can’t wait to gather all my craft misc. to try them. Thank you and God Bless.
tfs!!! I have always hesitated to try this, thinking the adhesive would not survive such a soaking! But you’ve proven me wrong! I also appreciate all the extra tips . those are above & beyond!
Omg what am i doing wrong? I follow all the steps but taking off the tape my words are very light and not dark! I used a credit card, popsicle stick and the round end of a marker. Still words come out light? Please tell me what i doing wrong! Yes im using heavy hd packing tape! Thanks in advance?
try a metal spoon and put all the pressure you can on a hard surface! it makes a big diffrence!
Confused. Won’t the tape stick to whatever you are lying it on while “burnishing” /presssing?
the printed image is on the sticky side of tape =)
What am I doing wrong? The image did not transfer to the tape and the paper did not want to come off the tape. I soaked it almost an hour and there was no stickiness left on the tape. I used a roll of tape I purchased at the Post Office. I want this to work because I have so many projects I can apply this to.
hi rebecca, did you put lots of pressure when burnishing? the only other reason could be the tape because i got different results with different brand tapes. try the one i listed!
I did put a lot of pressure when burnishing and I purchased the duck brand tape. I found that regular copy paper will not transfer the image so I used presentation paper. The image transfers good with this type paper; however, the image is cloudy where it should be clear and there is no stickiness to the tape.I’ve tried five minutes, one hour, lukewarm water, warmer water and still end up with the same results.
hi rebecca, i have tried using the duck brand tape with magazine paper and it loses stickiness ( see update on color transfer in post). i wonder if presentation paper has a similar coating? i just used regular copy paper with GREAT results in both b&w and color images! let me know if you figure it out! =)
If you don’t mind me weighing in on this post, I made the decals today, burnished them well, and soaked them for almost two hours. I rinsed them under the faucet, and it FELT clean. They were cloudy when they were wet; however, cleared up nicely when they dried. Unfortunately, there was STILL paper residue. They are fine as pantry labels; however, unacceptable for a project you may want to sell or give as a gift. You’ll get 5 stars from me if you can provide me with a sure fire way to get rid of all the paper residue. They adhere adequately; however, not anywhere near as well as virgin tape. You might want to use an acrylic seal if you want them permanent.
hi yasmina, thank you for sharing! i do agree that if you want to sell these, i would get clear labels made just for printers and print them. this is a fun and useful craft, but it’s not “perfect ” like commercial label. 🙂
What a great idea. Will put stickers on every glass jar I find now!!
Wow!!!!
This is amazing.. i was looking at getting the silhouette cameo but now im not. amazing!! thank you for sharing. Have made my day 🙂
Thank you, thank you, thank you! Always wanted a clear description of this technique!!!
hi grace, just saw your gorgeous mirrors and left a comment =)
i updated the 5 tips with more details. happy crafting! =)
Can you a color image?
yes! i will add an example, thank you! =)
All I can say is wow!! What a great idea I never would have thought!! Thank u can’t wait to try!!
Such an adorable DIY’ So cute!
xo
Morgan
http://www.liliesandlambs.com
I’m so glad to see you reprising this technique because I have a question. I don’t know if I’m just being dense about the process, but when I’ve tried this there is nothing sticky on the back of the tape after I finish and therefore no way to affix the unsticky “sticker” to anything. What am I doing wrong?
Hi teddee, i tested different tape and the heavier ones listed in the materials gave much better results than thin tape, which can lose the stickiness and get cloudy 🙂
This is so freaking brilliant and I love the designs you did. Super cute.
I probably missed a big step so excuse me if I’m tripping down the stairs with this question. If you soak the paper/tape in water doesn’t that keep the sticky on the tape from adhering once it’s gotten wet? Especially on wood projects. OK, I’m all set for wagging fingers, but I haven’t done this project because of this question so would love to know where I am going wrong in my thinking.
hi linda, you will be amazed how sticky it stays after the water dries! 🙂 it works just like a sticker!
I think i missed a step as well. After you remove it from the water then what, are you leaving it on the tape? Are you sticking the tape onto the glass? Do you modge podge it it to keep it secure?
After removing it from the water , peel off the paper, let dry and use it as a sticker. no mod podge needed =)
Ahh, you forgot to let us know to let the tape dry, I was wondering this too! Wasn’t sure if I should let it dry before or after removing the paper, or before or after placing the label on my glass jar. Suggest adding this step in the step by step! 🙂
thank you michelle! i will 🙂
looking forward to trying this Image Transfer.
I love this hack. I’m moving and just bought these clear jars for my pantry. This will be a cute way to label them.
What an awesome DIY! This is perfect in time for the holidays! We can make some really unique gifts.
When the paper is removed from the tape, is not the tackiness on the tape (from the non image area
) eliminated ?
it’s only the ink that is embedded on the tape! =)
I tried it and one lost the stickiness and the sticker was cloudy, not transparent.
hi ginger, i tested different tape and the heavier ones listed in the materials gave much better results than thin tape, which can lose the stickiness and get cloudy 🙂
I couldn’t wait to try this. I got the right tape, etc, but I’ve been trying for hours but every time there’s a layer of paper that sticks to the tape. I can’t get it to com off clear. What’s wrong?
hi jackie! the paper comes off easily if i soak it for an hour. sometimes there are little bits of paper left, which can be rubbed off while submerged in water. =)
Thanks for the reply, but I tried that. I’m having a whole layer of paper remain every time. I’ve tried for several time periods, from 10-75 mins. I’ve tried different types of paper, tape, different variations in water temp, etc. When I try to rub the remaining paper off the ink comes off too. I really love your results, but I can’t figure it!
Thanks again for any more suggestions.
hi jackie! the sticky side of the tape will have a slightly different texture after this process, and i wonder if you might be referring to that as paper left on the tape? let it dry and see if it is sticky. if yes, then it is just a bit of change in texture =)
Thank you for the tutorial! I saw tape transfer in one of those “five minute DIY” videos on Facebook and it looked fascinating. I’m honestly thinking thru different ideas for it but I plan on using this for studying by copying notes into a binder so the pencil can’t smear and make the words illegible. Also I want to make gifts for people by transferring books for people on to prettier paper by buying two cheap copies of the books and transferring each page!
I’m really excited to try your suggestions because I found that must tutorials only say to let the paper to sit long enough for it to get wet, maybe a couple seconds, so maybe closer to an hour will give me better results! Also I also found that packing tape used for mailing things doesn’t give a good result and I’m excited to try a higher quality tape for it. I also bought laminating sheets to try, as I figured that would allow me to place multiple images on one sheet without worrying about tape overlay.
these are SOO cool!! I love what you did to the wood boxes, SO cute!
Wow that’s amazing never thought you could do that! Your mason jars look so pretty now!
I’ve. been waiting for someone to ask what is the baking soda for” it is listed as one of the ingredient but not mentioned as to how it is used.
where did it say baking soda here?
Oh, I get it……baking soda is not one of the ingredients it’s a label example.
I was wondering the same thing!
How long does this stay, like does it wash off with soap? I love this idea!!! I noticed that you did all your images in black and white do colors not transfer as well?
It stays sticky just like a clear sticker, stays on when washed. color will transfer also 🙂
Does it have to be that kind of printer would it work to a picture from like a coloring book just not colored
yes it would work on book pages. i would test to make sure it is still sticky because some paper would cause it to lose stickiness.