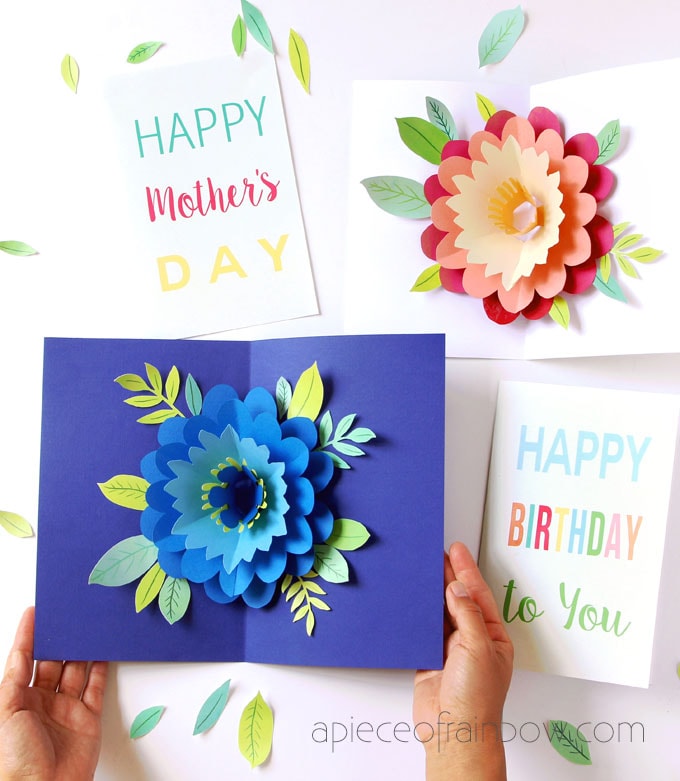
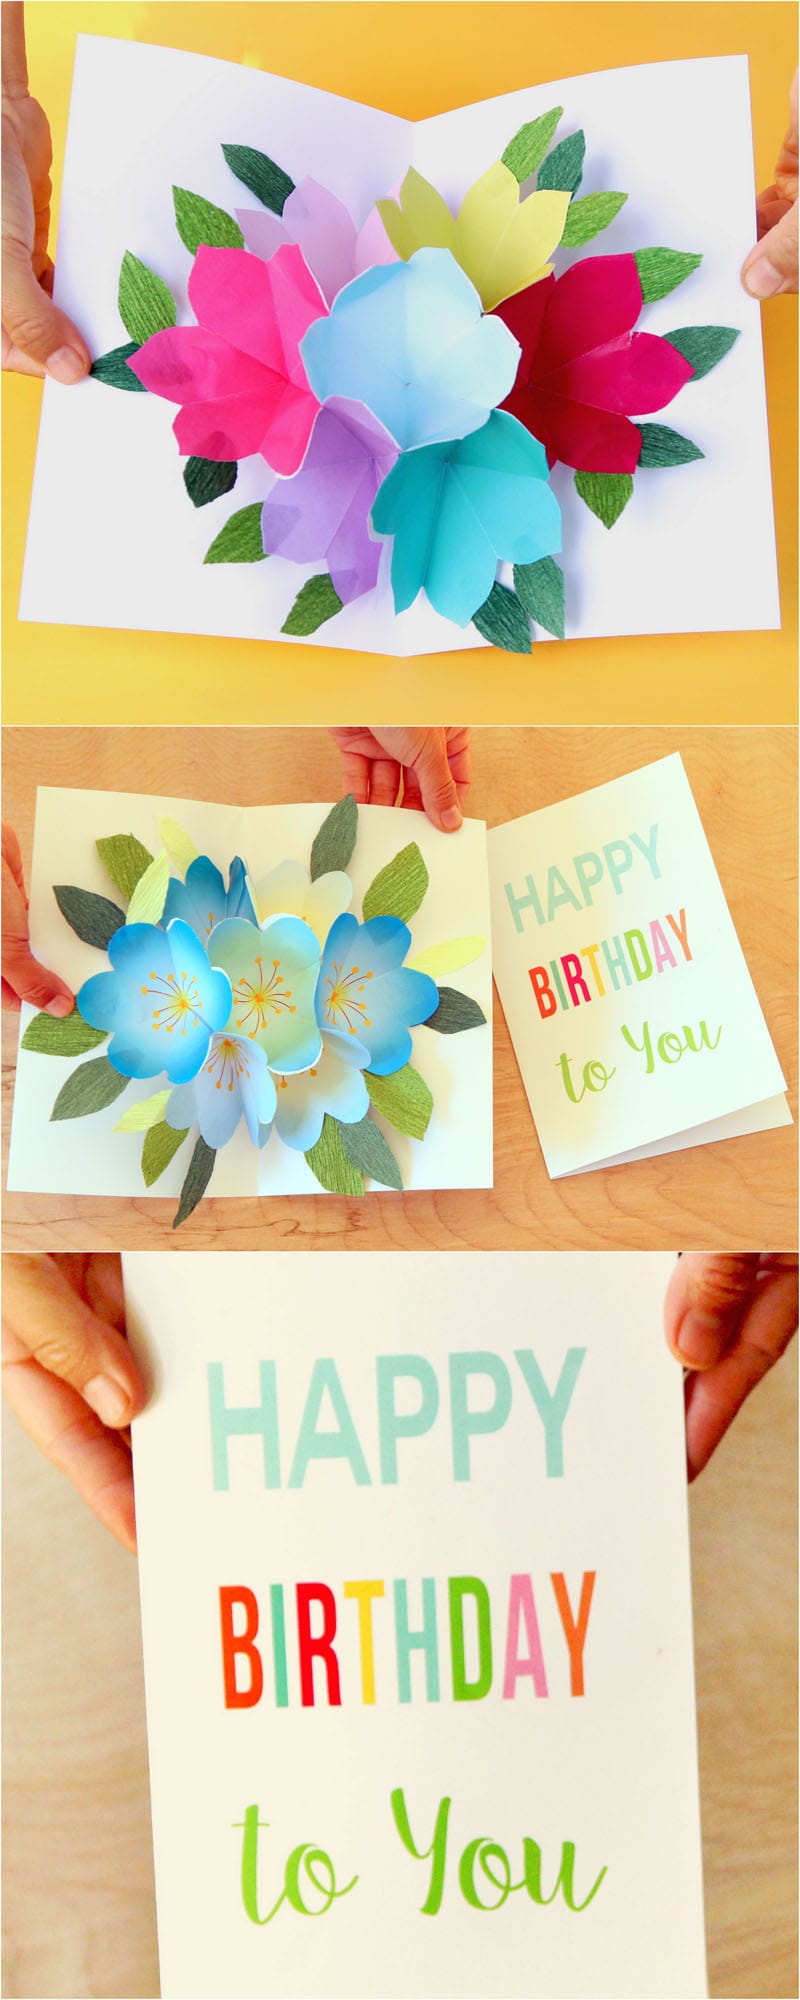
Free Printable Happy Birthday Card with Pop Up Bouquet
Here comes a gorgeous Happy Birthday Card perfect for him or her!
After multiple designs, and asking hubby ” Hey, does this still look too girly?” and getting a solid “Yes”, I finally arrived at a cover design that is good-looking and universal to both of us, whew!
You can make this easy and free printable birthday card in less than an hour. Oh, and the best part: a big bouquet pops right out when your loved one opens it. 🙂

Who doesn’t love a handmade birthday card with a beautiful 3D bouquet hidden inside? I also made a Mother’s Day Card with a different bouquet design you can download later as well.
If this is your first pop-up card, don’t miss the helpful tips at the end of the 3-step tutorial!
UPDATE: I just designed a new set of pop up Happy Birthday and Mother’s Day cards that are easier and FAIL PROOF! Tutorial here!
New templates and tutorial here!
Related: Big set of free printable floral greeting cards.

Free printable floral greeting cards.
Materials & tools for this DIY Happy Birthday card :
( Some of the helpful resources are affiliate links. Full disclosure here. )
- Neenah Paper Exact Index 110 lb (200 gsm) 8.5″x11″ Cardstock or any similar or heavier weight cardstock to print the card cover ( free printable download at the end )
- a printer, standard 8.5×11 office paper for the pop up flowers, you can also use these 6″ square origami paper that comes in many colors, or these.
- scissors, glue
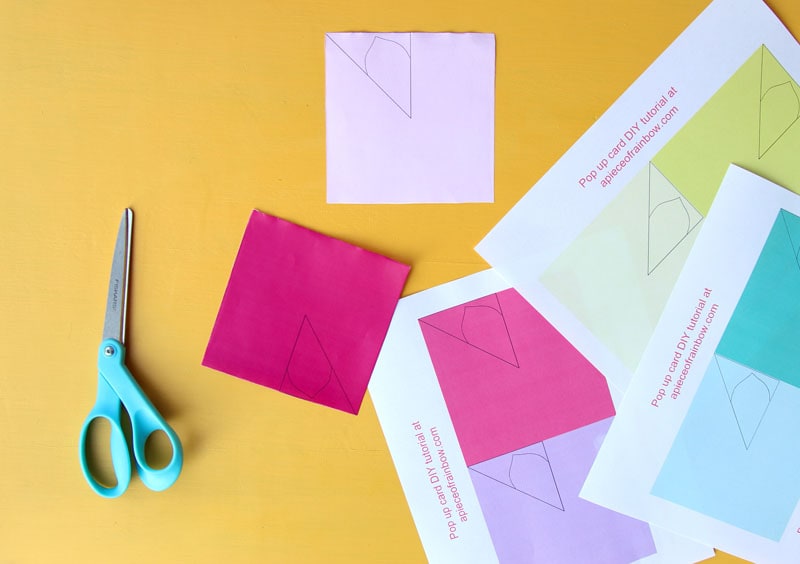
Step 1: Make 7 flowers in 7 minutes
Begin with seven 5-inch squares of paper. You can print and cut from our free printable downloads at the end, or use these 6″ square origami paper that comes in many colors, or these.
Fold a 5″ square into quarters. Now we have a small square. Fold the small square diagonally to forming a triangle. Make sure to have the petal template visible as you fold, and cut out the petal shape. Not sure you got it? Check out the quick video tutorial below!
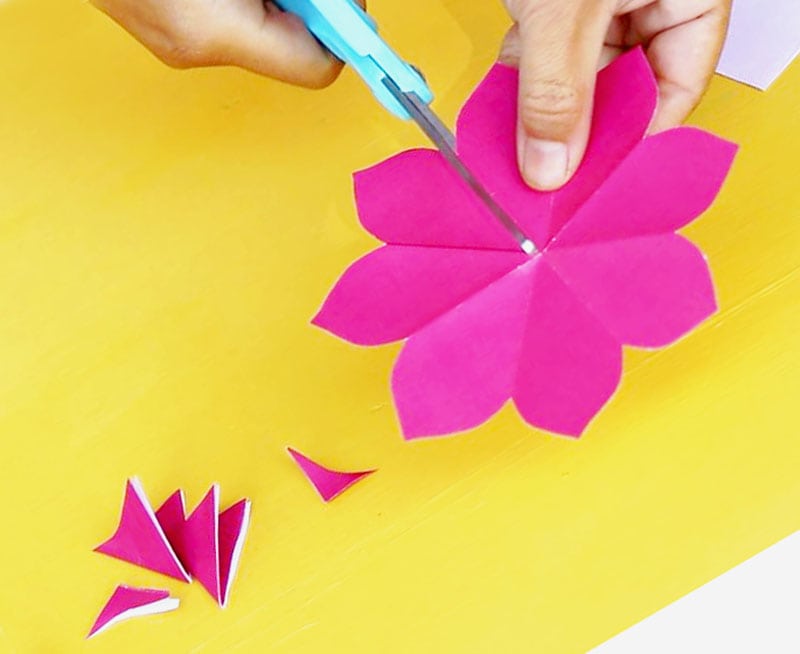
Unfold the paper to reveal the 8-petal flower that lays flat. Cut away 1 petal from flower, overlap and glue the adjacent 2 petals to form a 6-petal flower in 3D. Make 6 more flowers with other squares.
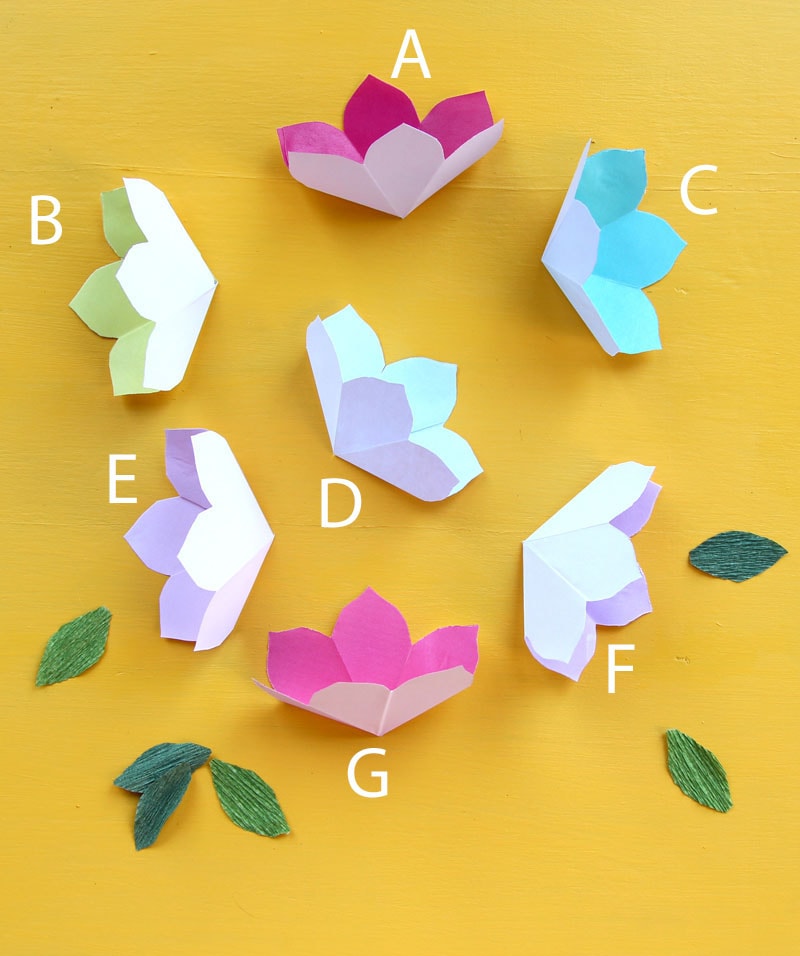
Step 2: Glue flowers together
Start with flower A: glue flowers B and C to A so that each overlap a petal with A as shown below.

Then glue flower D to A, B, and C with a dab of glue on each as shown below, and in video.

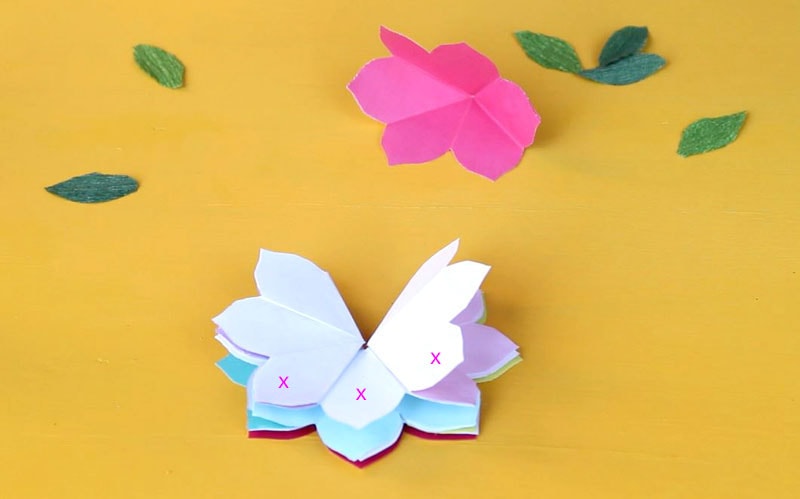
Glue flowers E and F to the stack to overlap B and C. IMPORTANT: only put glue on the petals marked with “x” in image above when gluing flowers E and F to B, C, and D.
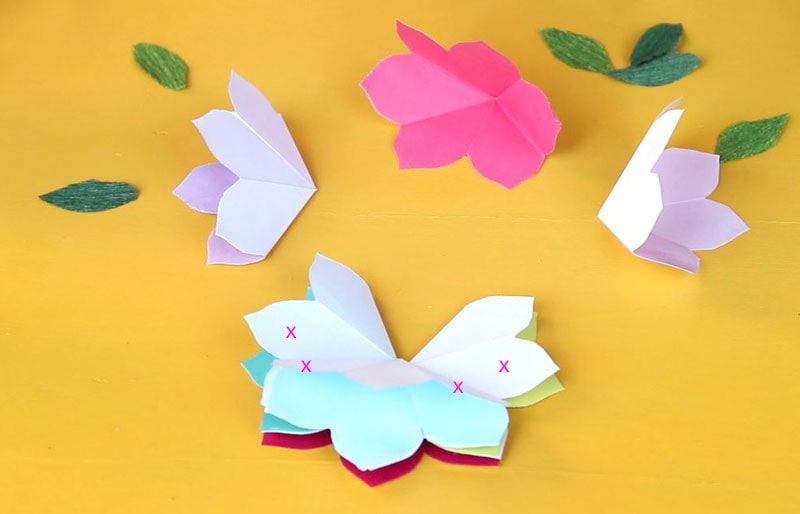
Add flower G to the top, overlapping D. Put a little glue on each “x” marked petal as shown below.
Optional: cut out some leaves from green paper, and glue them to the flowers. You can use mixed colors construction paper or this lovely cardstock with different shades of greens.
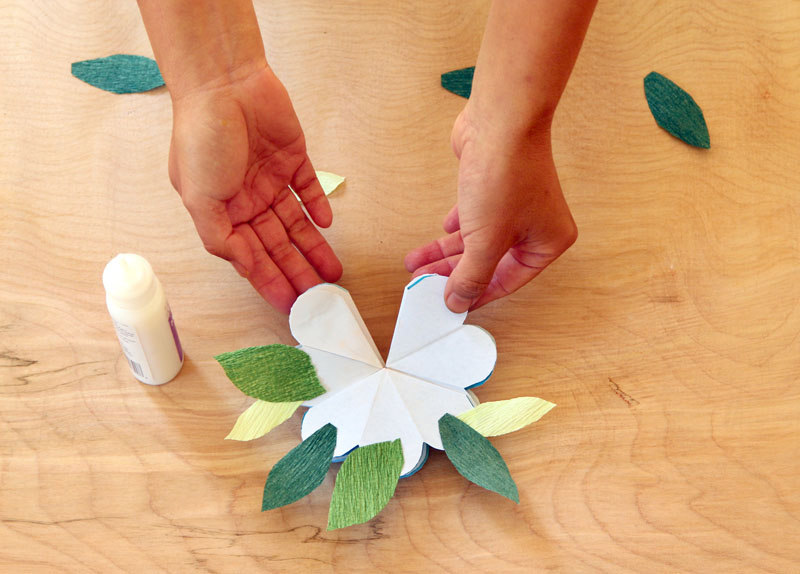
I used crepe paper from these DIY Cherry blossom branches.

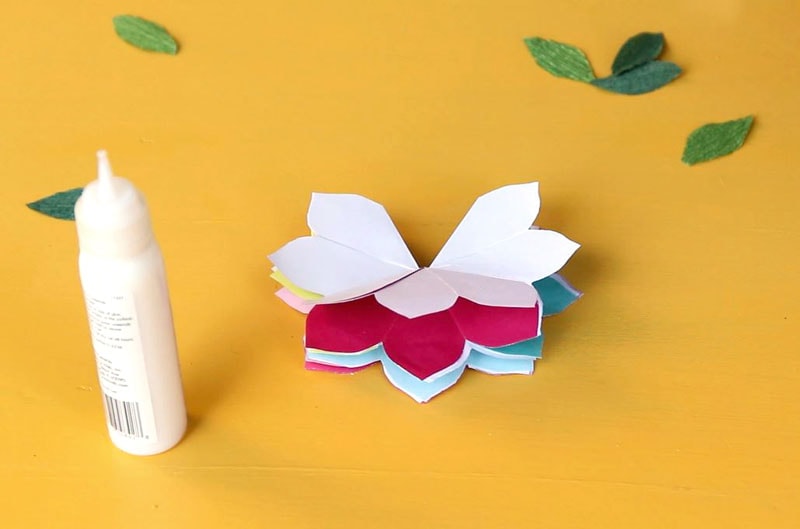
Check to see if you did it correctly: flowers A, D, & G are centered and aligned, and flowers B, C, E, & F are symmetrically glued to the sides.
Final step:
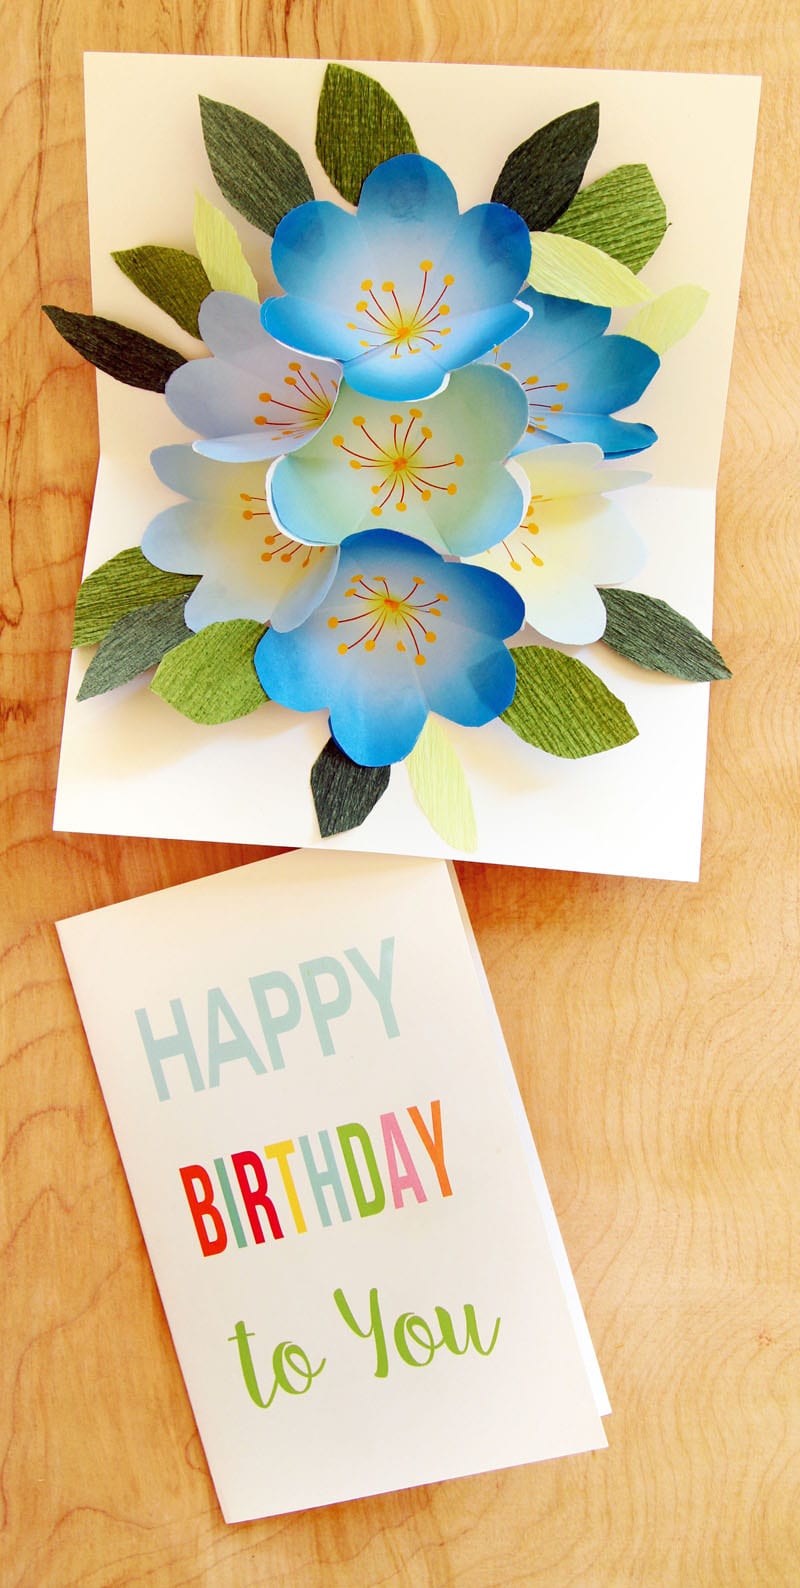
You can create your own designs or print the free happy birthday card (download at the end ) on a piece of 8.5″x11″ Cardstock . Fold it in half.

Place the glued stack of flowers inside the card as shown. Place a little bit of glue only on the very center petal of flower A , close card, and press firmly to adhere. Open card and repeat on the other side of card with a dot of glue only on the very center petal of flower G.
Now the magical part: a bouquet just opened!
I also made a set of blue flowers for the DIY Mother’s Day Card here, which you can download to mix and match with your handmade happy birthday card!
Helpful tips for a successful pop-up birthday card:
- Use thick cardstock for the cover, and thin regular paper for the flowers. Thin paper makes the pop-up bouquet work more easily.
- You don’t need to cover an entire petal with glue. Using just a dab of glue on the top center part of each petal will also the pop-up bouquet open more smoothly.
- If you just bought some really fancy designer paper for this project, and you have never made the pop up card before, it would be very helpful to make one quickly from scrap paper for practice. ( I made a mistake on my first try! )
Downloads for this printable pop-up Happy Birthday card:
Download the card cover, and pop-up flowers here. Click to bring up the pdf, and right click “save” to save. If you have trouble downloading, send this post to friends so they can download and email to you! (Due to thousands of downloads happening on this site, we can’t personally email files, hope you understand! ???? )
Download the free printable Happy Mother’s day card designs here!
You may also love: Free printable dimensional flower paper lanterns!

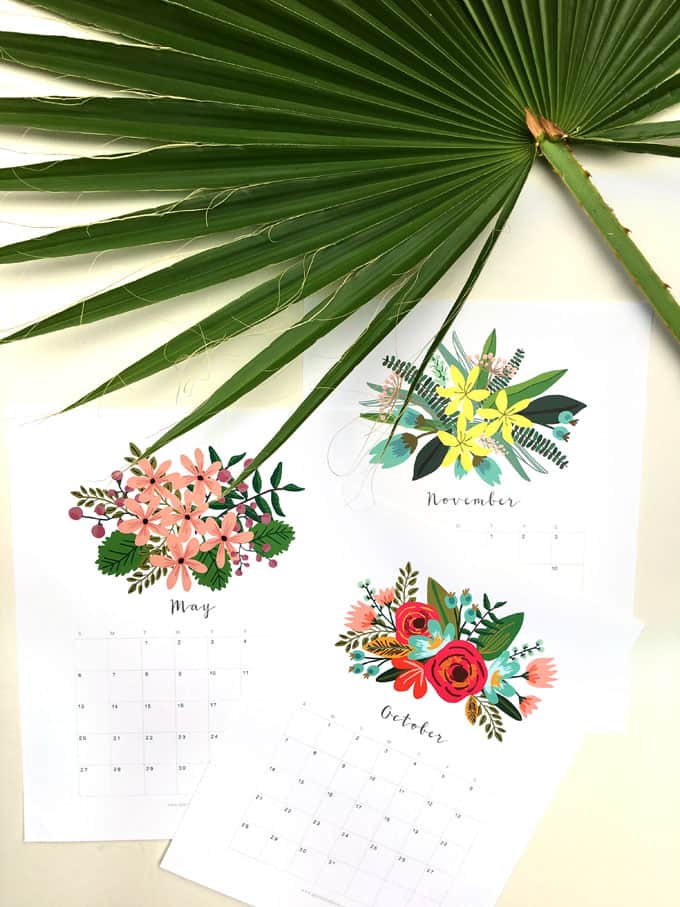
Beautiful floral 2018 ( or the latest) monthly calendar and planner: free printables!
Happy creating!


OMGOSH!! Making a sample right now! Having made other 3D things I changed something up that seemed to work well…..I didn’t cut out an entire pedal. On one side I cut on the fold line. On the other die I left myself a small piece of the cut out pedal. Put glue on that tab and glued it to the back of the next pedal. Seems to have worked well. Just a thought.
Kinda funny….my sister asked me just yesterday for a fancy floral card! Can’t wait to make one for her!!!
Thank you SO much for this!!!
hi elizabeth, thank you so much for sharing! i would love to see more in detail what you did to make it easier! please dm on our instagram or email us a photo if you have time! 🙂
I do crafts with our church’s children group and all crafts have to be service types so this year we are making all the mothers in our church one of these wonderful pop up mother’s day cards. The kids ages range from kindergarten to fifth grade and all of them are having such fun with the flowers. Thank you so much for your awesome ideas and for sharing them with us. When we get a bunch of them done I will send a pic. Any age can make these flowers, boys and girls. We need 150 to 175 cards so we have our work cut out for us but everyone is eager to get going! Have a wonder Mother’s Day!
hi eileen! thank you so much for sharing this! 🙂 just a little tip: i mentioned this in the helpful tips section too, practice one and the next one will be so much easier! my first one wasn’t opening as nicely so don’t be discouraged if that happens to you! 🙂
You are amazing! Thank you for all of the wonderful projects!!
Gorgeous cards!! Definitely making it for my brother’s birthday! Great job and thanks for the tips.
This is such a fun card! I bet my boys would love to make something like this. I’ll have to remember it for my mom’s birthday to have them make for her.
Hey Amanda,
I love your blog so much! You are incredibly creative. I used to make similar cards when I was in school & completely stopped as an adult. But these are fun at any age and I’m going to use this tutorial for sure.
Thank you! 🙂
Omg there are so beautiful. Thanks for the tutorial. I have to make these next time. So worth it.
These are adorable! I absolutely love the flower pop out. I have never made a card before, I would love to try this.
They really are cute. Sorry to go off topic of your post…but I have tried to send you a message via email…but it would not go through. I also tried sending you a message on a old post….but it has been about 5 days and it is still ‘awaiting moderation’?
So my question has to do with your whitewashing post. You had one in that post that was ceramic tiles to look like wood. I would LOVE more information on that if possible. I have the ‘worst’ looking tiles in my kitchen and dining room and I believe this could be the solution. I tried to hit the source button…but it did not give me anything. I am looking as to what type of paint to use, what procedure would I take to do this, how will it hold up in such a high traffic area…etc. I am REALLY scared and nervous to take the plunge and do it…because not much I do turns out…usually everything I do is a ‘fail’. So all the information and details I can get would really help me and hopefully put some of my self doubts to rest. Thanks in advance for any information you can give me.
hi laura, i replied to you there! 🙂 feel free to reply in that post if you have more questions
here’s a copy- hi laura! that was a sample tile i got a few years ago and no longer made. if you google ” white distressed wood porcelain tile” there are many great choices to buy!! 🙂
Oooooh this is just amazing! I would love to be on the receiving side of this card but I guess I will try to make one and hope the recipient is appreciative. This is definitely a card of love.