DIY Strawberry Tower With Reservoir! (& 5 Lessons from last year’s failure)
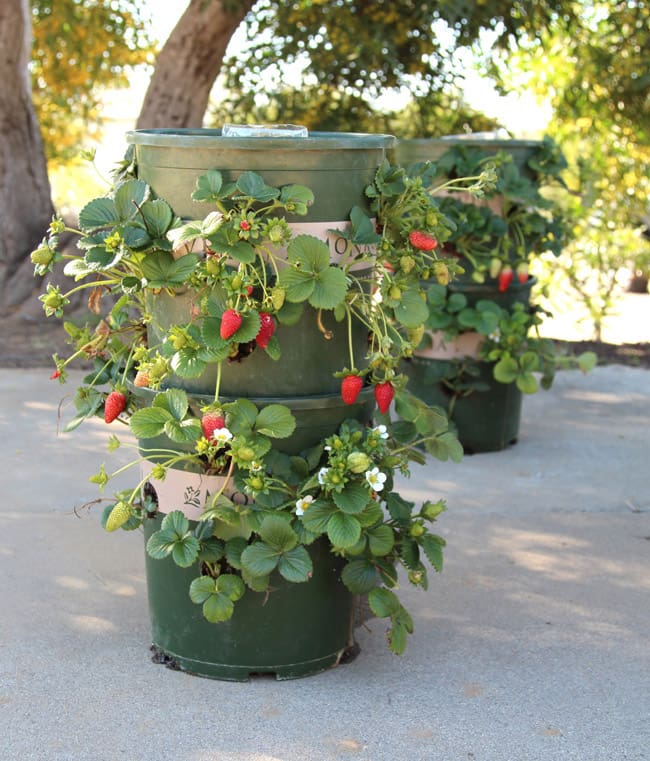
I simply can’t wait for all the berries to turn red to share this with you – an easy DIY strawberry tower with a built-in reservoir! Bonus: everyone can make this strawberry planter with recycled materials and grow strawberries in small spaces like a patio or balcony!
A strawberry tower is a super space saving vertical strawberry planter, that is perfect for small space gardens.
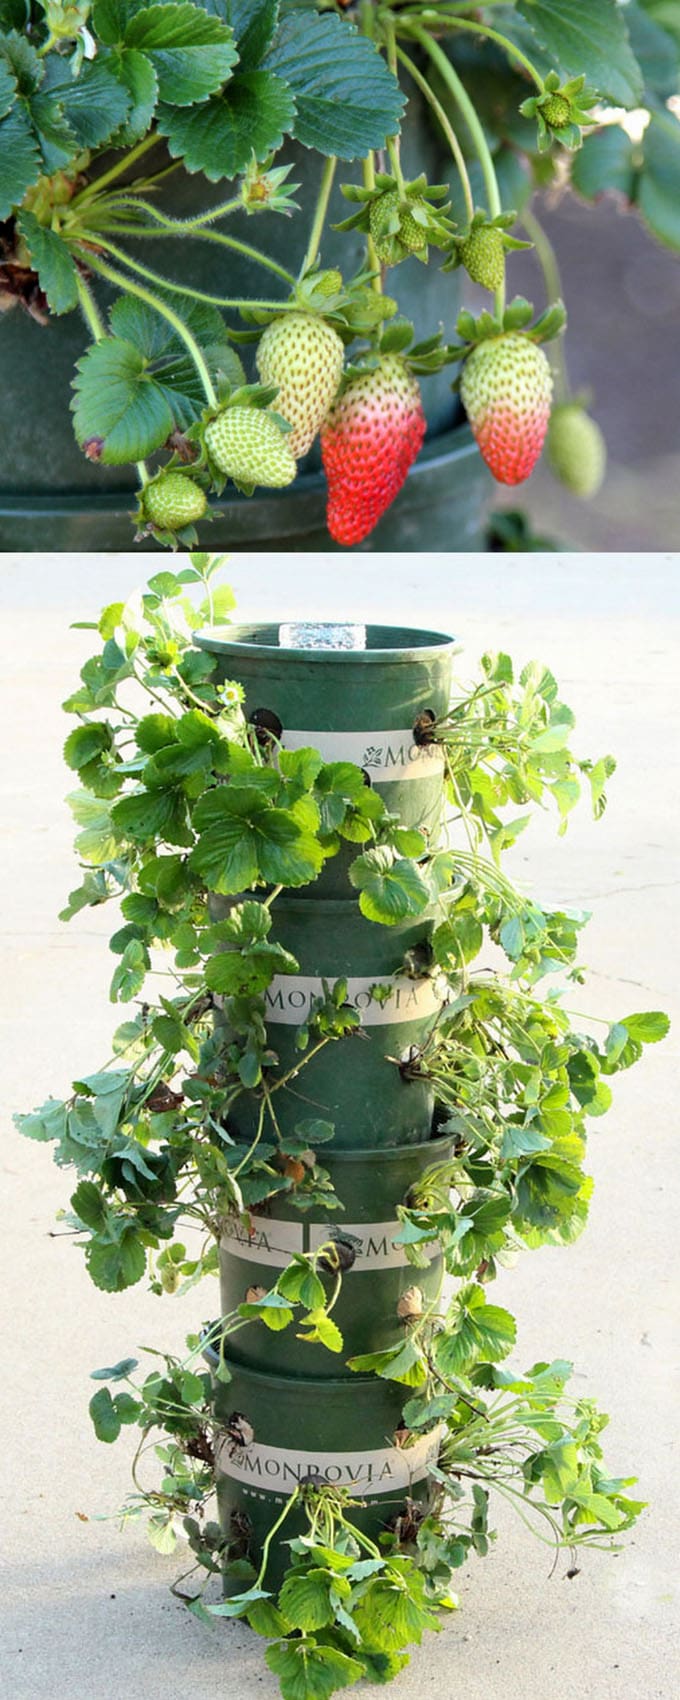
Last year we came up with this idea of a DIY strawberry planter tower LOADED with berries, made one, and it FAILED! This year we made some big improvements on our towering strawberry planter. It worked so well that we already got strawberries, in February!
I am going to share with you everything we have learned so that you can build a strawberry tower with success, and a big harvest…
*Some resources in article are affiliate links. Full disclosure here.
Materials and tools to make a DIY strawberry tower:
( Some of the helpful resources are affiliate links. Full disclosure here. )
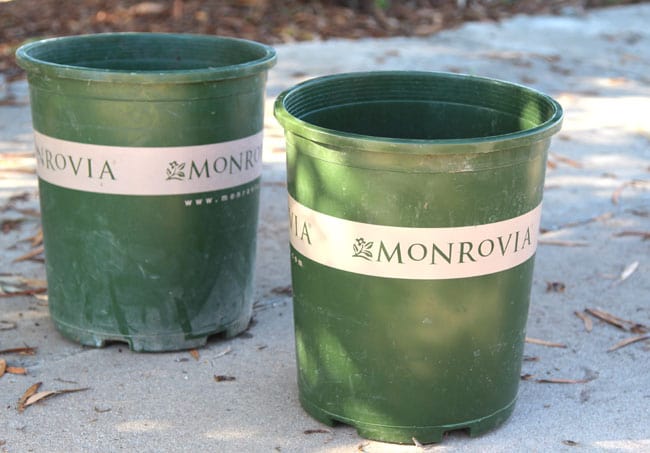
- 5 gallon plastic nursery pots: they measure about 11″ diameter by 13″h. Find sturdy ones with drain holes on the bottom. If the drain holes are on the side, punch a few holes on the bottom. Buckets will work too!
- a Milwaukee 1.25″ Hole Saw and a drill
- 1 liter plastic water bottle, and a sharp tool to punch holes. Only the top pot in the strawberry planter needs a reservoir. The bottle should be about the same height as the pot.
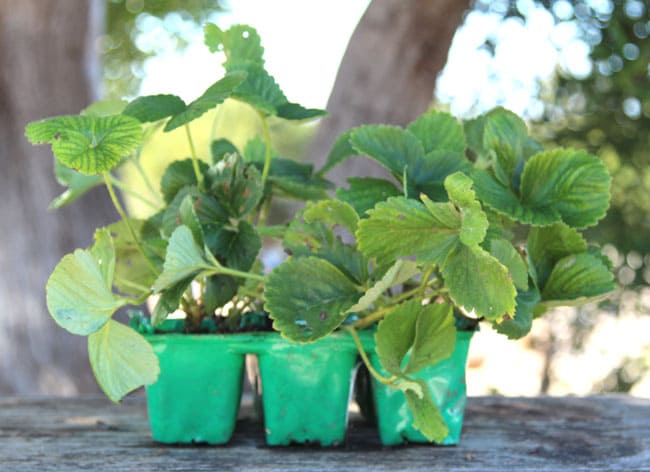
- good potting soil, we added 1/3 of worm castings and compost. And strawberry seedlings.
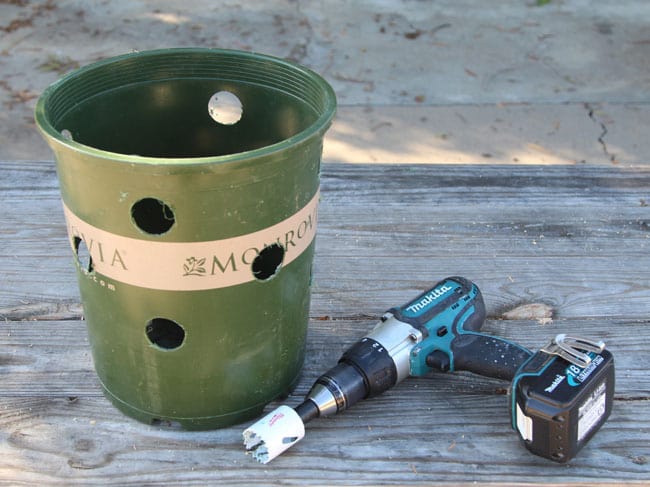
Step 1: cut holes on the strawberry planter
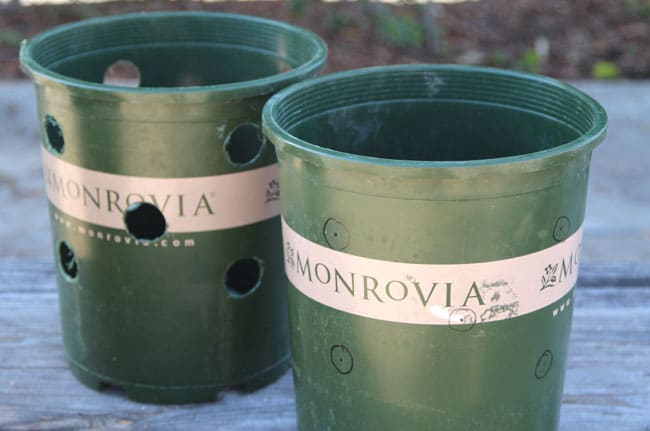
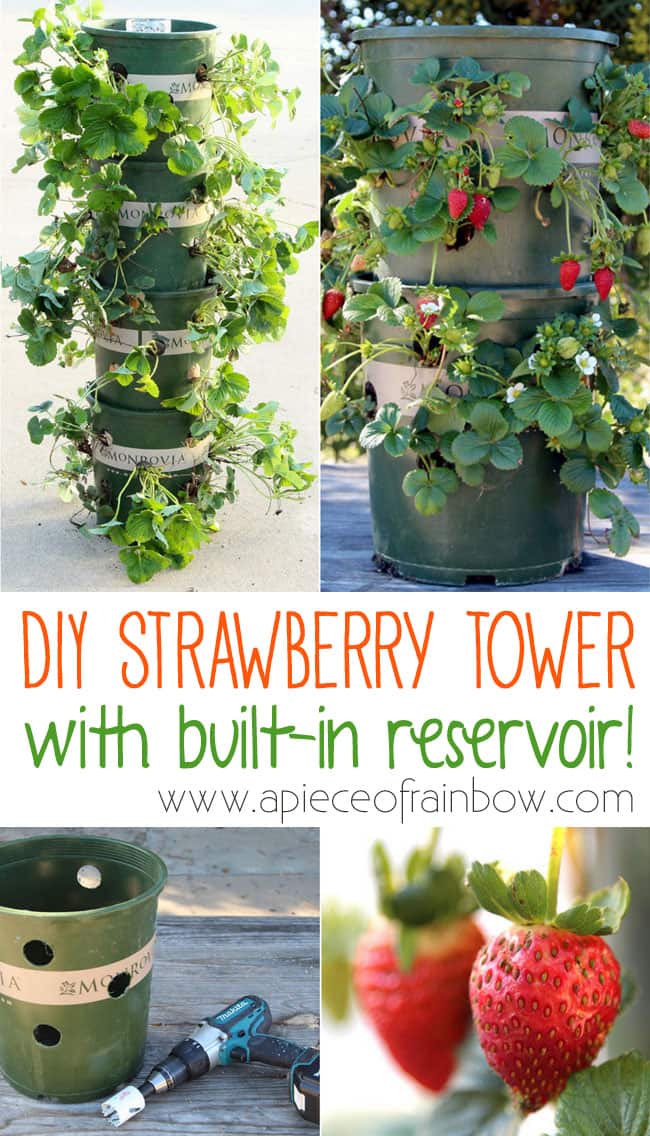
Draw 12 equally spaced holes on the side of each pot like shown in the photo above, and drill the holes with the Milwaukee 1.25″ Hole Saw attached to a drill.
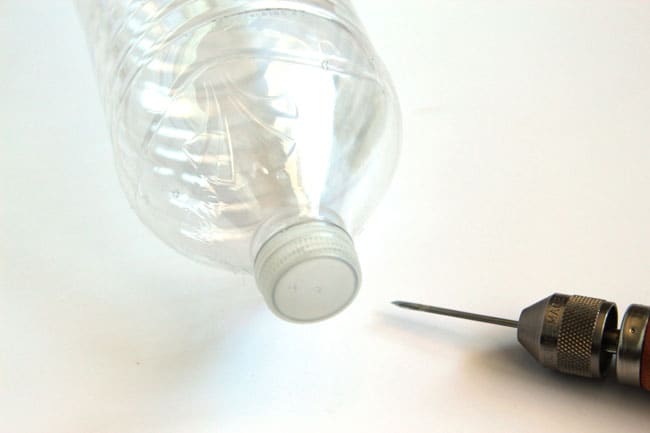
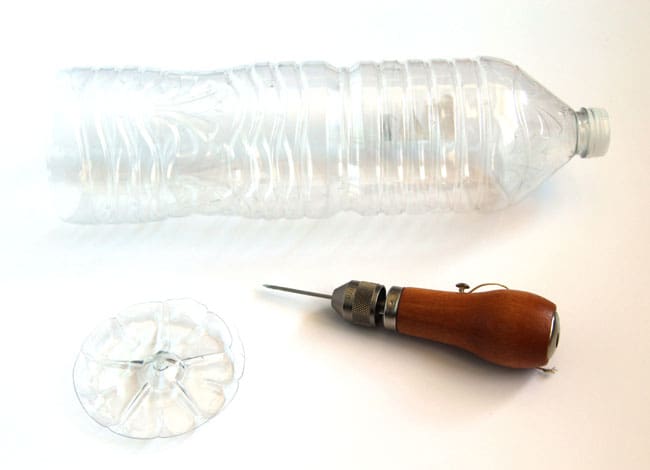
Step 2: add reservoir to the strawberry planter
Prepare the reservoir by cutting of the bottom off the water bottle, and poke some holes on the cap and on the sides all the way to the top. Leave the cap screwed on tightly. This will allow the water to seep through all the holes slowly. The design is inspired by the ingenious use of ollas in irrigation.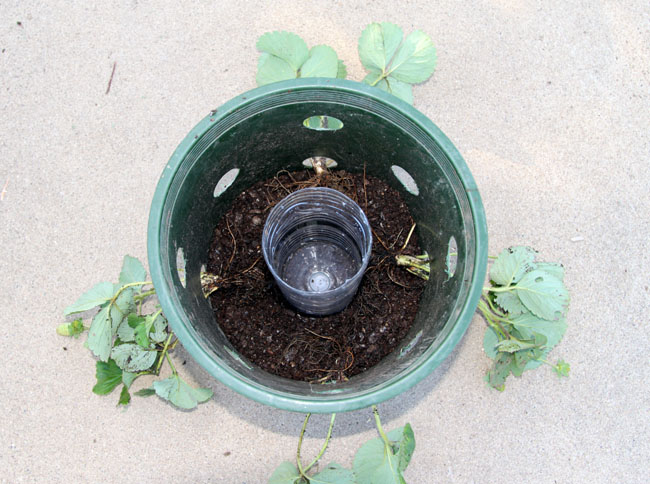
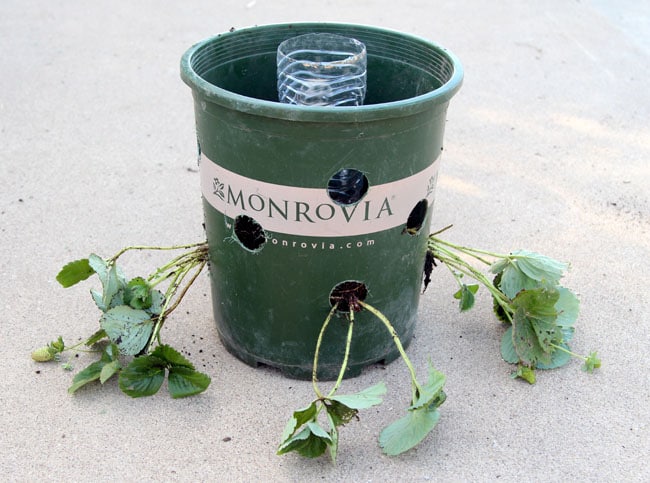
Place our reservoir in the center of a pot, again, only the top pot in a stacked strawberry tower needs a reservoir.
Step 3: add soil and strawberry seedlings to the DIY strawberry tower
Do it slowly, starting with soil and plants at the bottom. When reaching the top pf the strawberry planter, add a layer of rocks or pebbles at the top of the pot to hold the soil in when we water. (One of the reasons we failed to grow great strawberries last year was because soil were washed away! More on that at the end.)
Repeat with the lower pots, leaving out the bottle reservoir and the rocks. Now we can stack our strawberry tower together!
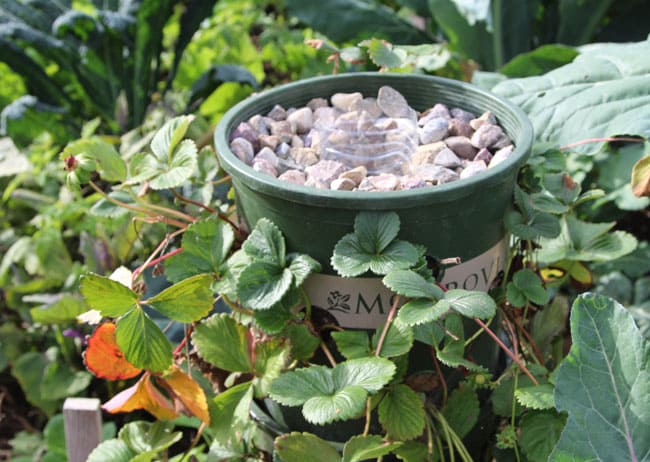
We wanted to be able to move the strawberry tower in the garden, so we did not have a center pole through the pots for stability. We ended up dividing this tall tower into 2 shorter ones. Still super space saving- 48 plants in less than 2 square feet!
For the first week, leave the strawberry tower in dappled shade and water a lot, so the plants can recover from transplant shock. (Something I forgot to do!)
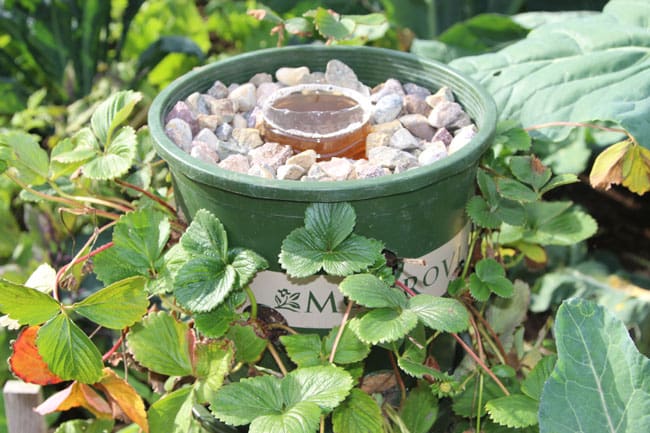
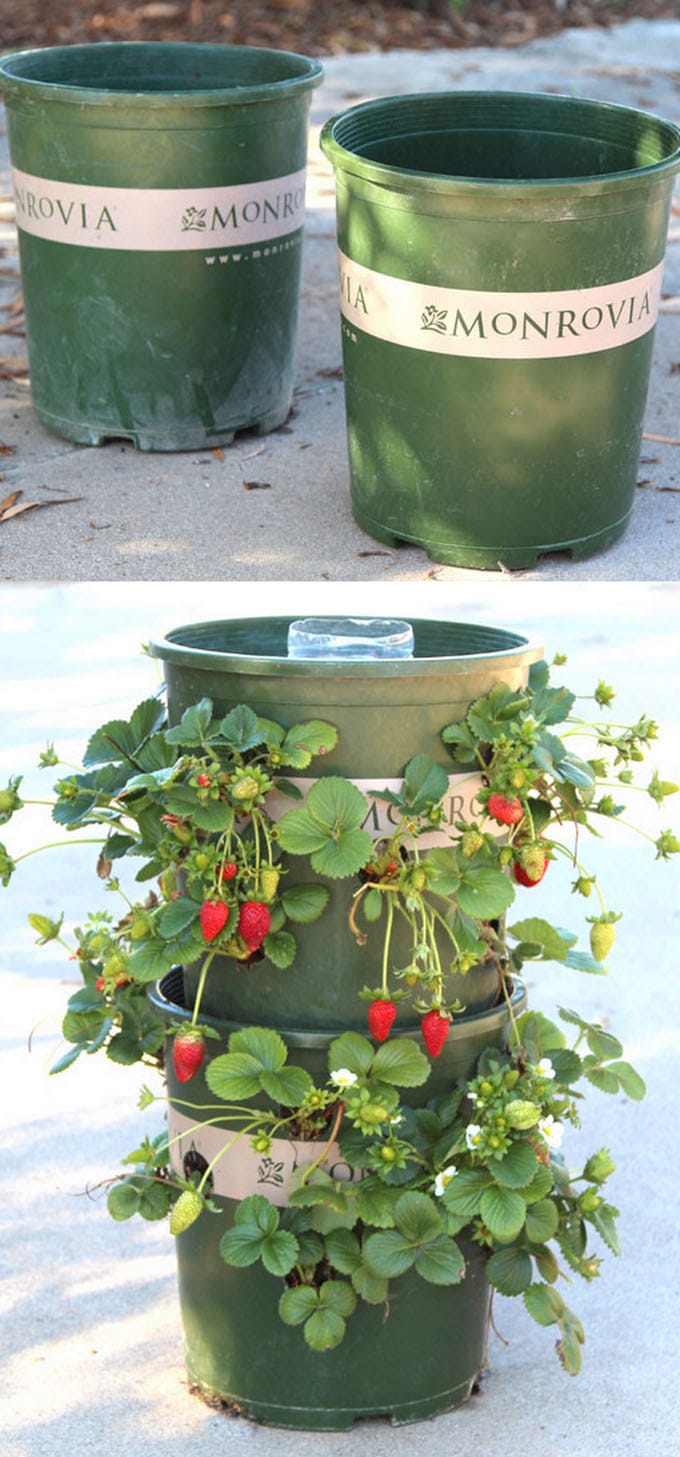
Water with compost tea every few weeks will keep the plants happy. We built this about 1.5 months ago, and now it’s fruiting profusely!
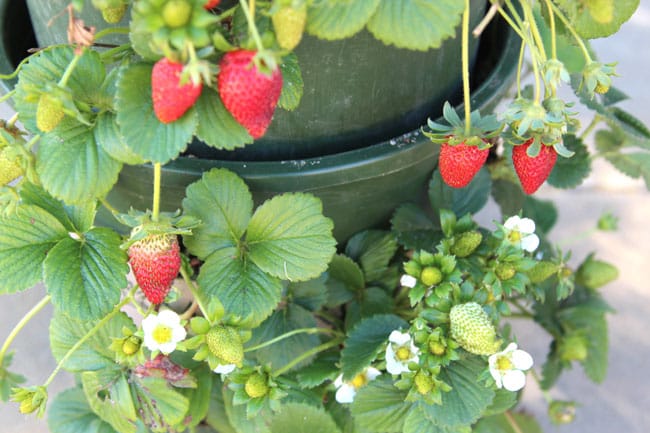
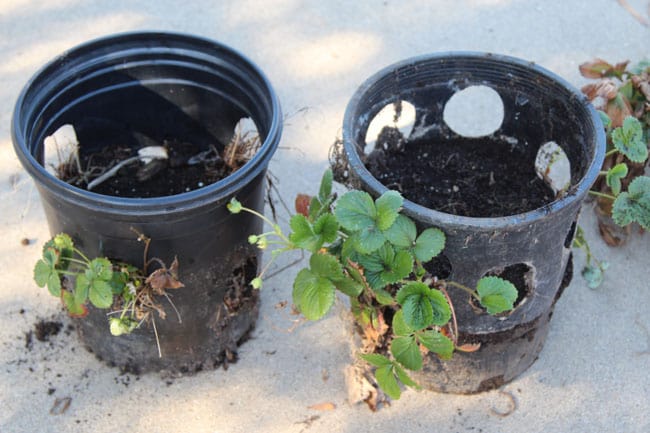
Here are a few tips and lessons we learned from last year’s failed DIY strawberry tower ( see above photo )
- We did not use a reservoir, nor rocks on top of the strawberry planter, so the soil would get dry quickly, and when we water, the soil was washing away instead of soaking up the water. Add a reservoir and rocks on top has made all the difference.
- The cut holes should be no larger than 1.25″. Otherwise, soil will fall out when watering.
- Rotate the pots every 1-2 weeks so all the plants can get some sun.
- This strawberry planter is a very compact system to grow strawberries, which are heavy feeders. Fill the reservoir with diluted fish emulsion(if you don’t mind the smell), compost tea or worm tea every 1-2 weeks to give the plants some extra nutrients.
- If one of the seedlings don’t make it, wait till the others send out runners, then tuck the runners into those empty spots. They will root very easily.
Happy gardening! And feel free to share ideas for improvements in the comment section!
A few similar posts in case you missed them: How to start seeds in 1/3 time with 300% more success-

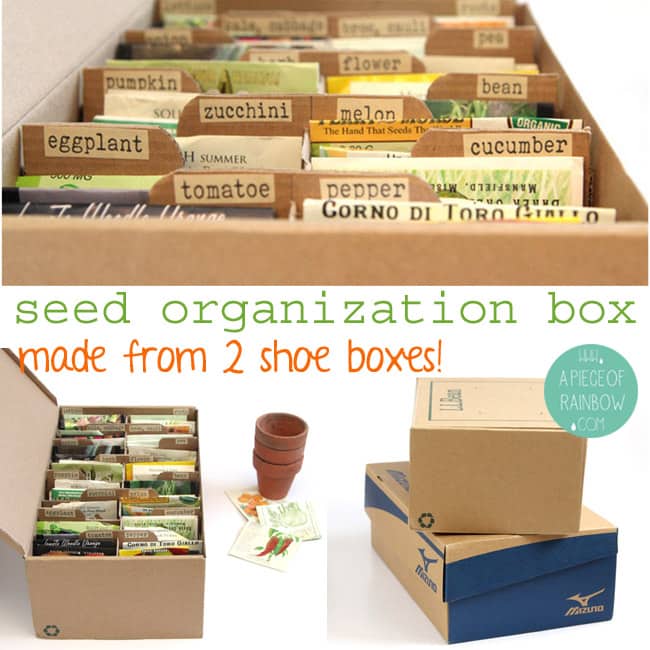
Make a seed box from 2 shoe boxes!
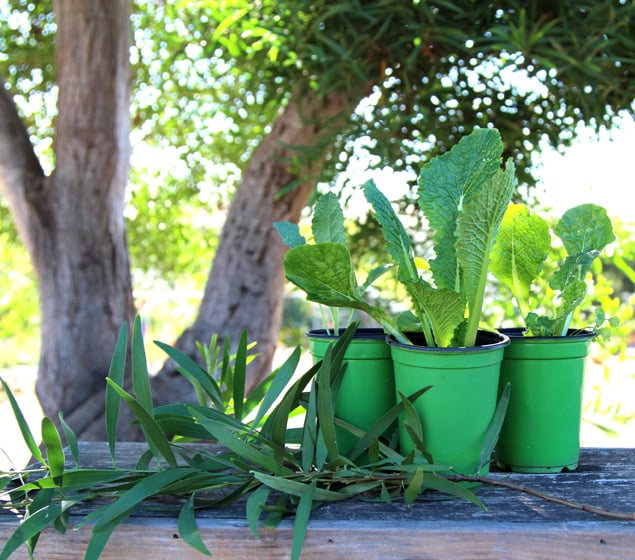
And a simple trick to help your seedlings establish quickly in the garden-
Happy planting! See you soon!


Very interesting and educational for a baginner gardener.
thank you Maisabel for sharing the gardening fun with us here! 🙂
Hi there! I’m definitely going to try this. I think you said in the first week to water well. Do you mean taking the stack apart and then watering each bucket? I always tend to overwatered so just want to make sure. Thanks!
hi Sam! you can certainly do that, or just water more often. the reason is plants tend to need more frequent water when being transplanted, especially if the weather is hot and dry! 🙂
This is so great. I will be doing my strawberries this way for sure. I have one question. There is a lid in between each pail? Right. To hold the top pail.
hi Roni, here each pot just sits directly on soil, no lid needed 🙂
Don’t have a drill so cut three sided “squares” and folded the flap out on the bottom to support the plants
I shoved the roots into the holes from the outside. Should have placed the plant inside the pot then thread the leaves out through the holes.
Plants in the bottom bucket were touching the patio so I elevated the whole tower on bricks.
such a great idea! wish you a great harvest! 🙂
Hello Ananda! We live in Massachusetts. What should we do with the tower when strawberry season is over and the cold is coming? Thanks!
hi donna! if you lookup “overwinter strawberries” there are lots of good info. 🙂 i find that strawberry plants need refreshing every year or two to stay productive. so i would just plant new ones (you can root the runners to grow new plants!)
What a great idea! I am definitely going to try this in the future.
thank you Heather! happy gardening! 🙂
This is awesome. What if you do not have seedlings but you have a actual strawberry plant already in a 1 gallon pot. Can I replant it in the top pot so the runners will have a place to go in the lower pots/holes? I just don’t know what to do about the water bottle, how I should add it if I already have a strawberry plant in a pot?! Hope that makes sense. :/
hi Chris! if you live in an area with regular weekly rain, then you don’t need the water bottle, just rain and hand watering is enough. if you live in a dry area, you can add a saucer to the bottom of the pot and start with just 1 pot, this way the water soaks in better. 🙂
Hi there, wondering what variety(ies) of strawberry should be used for this?
Thanks in advance!
hi nicole, any variety that is productive in your local climate should be good! nurseries usually carry such varieties. 🙂
I was just wondering did you have problems when making the holes with the plastic cracking or breaking? I was told at the hardwood store that that that type of saw was not good with plastic because this.
hi Tanya, we did not have any problems cutting holes in these pots 🙂 they might be thinking about PVC which is thicker and more brittle.
Thank So much. I am looking forward to trying this out.
Great info and making plans using some old 5 gallon pickle buckets from work. The price is right…free!!
https://bobwellsnursery.com/product/allstar-strawberry-plantsorder-in-multiples-of-25-ie-25-50-75-100-etc/
Do you think that AllStars could work in the stacked configuration even though Bob Wells recommends 2-3 ft spacing?
Also, south central Texas heat is brutal. Would you recommend partial shade under a shade cloth (40% is what I have) or keep in full sun and just rotate and water a bunch?
hi jeff! this is definitely an intensive growing system for small spaces, normally strawberries need more space in between, so use super rich soil! you can start them in more shade, then set them up in a way they would be shaded in early afternoon but still get morning sun! 🙂
I’m thinking 1/2 moons instead of circles then just bend them down for the plant to rest on and help keep soil in
that is a great idea Vicky!! thank you for sharing! 🙂
Thanks for the strawberry tower idea. Was wondering if this would work for up north? I live in Canada and the winter gets very cold in the winter. Will the strawberries survive in the pots?
hi penny, strawberry plants are cold hardy, but can be damaged if it gets too cold. you could un-stack the planters, apply thick mulch, or move them to a protected area like a porch or greenhouse. hope that helps! 🙂
I was reading in another DIY Strawberry tower post where they had great success but the strawberry plants did not do as well the following year. Did you notice this as well? Or did your strawberry plants produced fruit abundantly every year? Thanks. 🙂
hi jackie, most container planted strawberries need to be refreshed with new plants and rich soil every 1-2 years, because older plants stops being productive. in the garden, older plants set out runners that become new productive plants. =)
Thank you!
Thanks for sharing! Any strawberry varieties you prefer? We are also in southern california and i’m wondering if it’s too late this year to start from seeds?
hi meghan, you can start strawberry seeds anytime in SoCal, but if you can find Albion ( our fav) or other strawberry plants, they send out runners, which would be a lot faster than seeds!
We have wild berries growing in our yard but before they even get ripe the birds are taking them. How do you keep the birds from stealing your berries?
hi! one way to do it is to pro up sticks or tomato cages, and put bird netting over them =)
I am wanting to start my garden next spring and I’m trying to learn all I need to know. This is perfect for strawberries! Thank you for the tutorial. Very helpful. I wonder if this will work for other berries? i.e. blackberries and raspberries? Maybe even grapes?
hi kim! grapes, blackberries and raspberries all grow into big plants, so they won’t work here! but you can grow small edibles like lettuce! =)
Thank you so much for sharing this great idea…….
I have gotten too old to do much by way of gardening but love this idea about the strawberries. Will sure give it a try. Loved all the comments too. Read all of um. Thanks again.
peggy you just added the 101th comment =)
one is never too old to garden, right? =)
excelente idea para tener las mejores fresas de la temporada, voy iniciar mi siembra,gracias Ananda
happy gardening!! =)
I wonder if this would work for herbs. I want to try to grow them in the house during the winter so I have fresh herbs all year round. I have the pots, I don’t like to throw things out! I think I’ll give it a try! I may spray paint the pots first so it looks nice inside the house. Thanks for the idea and all your insights!
Hi amy, you can use this method or any types of containers to grow herbs 🙂 The key to successful indoor herb garden is really good light! Happy growing! 🙂
Thanks for the fantastic idea! Two questions: about how many strawberries did you get from each pot? And how often/how much did you water? 1 bottle full daily?
thank you pam! on dry hot days 1 bottle full daily at least. i did not record how many berries, but definitely more berries if the plants don’t dry out!
Terima kasih atas tips, mau dicoba dulu resepnya
Another good idea..use those rolling wooden plant pot movers placed under the bottom buckets so you can easily spin/move them around to get the sun (probably will work best on cement,patio, or pavers.
Going to try this come spring!
that’s a great idea colleen! thank you for sharing! 🙂
Hi! I’m wondering if you have tried or know anyone who has tried planting things other than strawberries. I would like to do your tutorial! And am just curious.
i think because it is an intensive planting system, smaller plants tend to do better, such as lettuce, spinach, vs broccoli or tomato 🙂
My strawberry plot needs cutting bag and this looks like a great way to get a really good crop. Is it too late to plant it up now. Should I wait until spring?
hi cherie! if they can be protected from very cold temperature ( mild winter, greenhouse…) then yes! xo
This is so impressive. Unfortunately the Summer has drawn to a close here but I’ll have to bookmark this post for next Summer!
I’m in TX and put this together today….I am so excited to get some strawberries… hoping it isn’t too hot already. Thank you so much for sharing your brilliant idea. Also loved reading all the comments.
I’m super excited about this. I have two questions: 1) did you pinch the flowers off the strawberries year 1 so they would produce more, or did you have good luck without doing that? 2) did you do this a second year, and how did it go? (how did you store the plants to keep them alive but hibernating through winter? did you use the same soil? etc.)
I’m getting ready to try this with bare root strawberry plants. Hopefully it will still work out — they are so much cheaper to buy. 🙂
hi sara! they are already producing at year 2. our climate is warm, winter is in 60s! =) i do think after 2 years i would root more runners to refresh.
I think a good addition to this would be creating a tiny fairy garden on the top tier around the reservoir. And maybe gluing nice pebbles to the entire outside of the pot would add a nice touch. Thanks for the inspiration 🙂
cool ideas! thank you for sharing tiffany! =)
This is so awesome thanks for sharing I will definitely give this a try
I have wanted to buy a strawberry tower for awhile but they are so expensive. I love this idea! I bought 5 buckets and the 1.25 home drill for $25. I can’t wait to put this together.
THANKS A MILLION FOR SHARING AND PUBLISHING THIS GREAT PROJECT!
a bountiful garden to you jerome! =)
Another bonus could be to shift the water reserve over a bit to make room for a worm tower. See permacutlurenews.com and search on the site for worm tower, but it is just a plastic pipe with holes in the bottom half which goes into the soil to cover and you throw your kitchen scraps in. Keep compost worms ( not earth worms, though I dare say they will turn up) like red rigglers and the like, to munch the scraps up quickly and you will have constant worm juice feeding your strawberries. A plastic cap on top keeps it moist and smell free.
i definitely LOVE the idea of a worm tower! thank you Ilse for sharing and happy gardening!! =)
We go away a lot, so we love wicking beds. If you also had a bigger water reserve at the bottom that can’t evaporate for when you go away for water to wicker up, I wonder how many towers high it would wicker up. Might have to cut some of the bottom of the higher flower pots out for the wicking action to work better. I like the idea that the strawberries fill the sides so there is no moisture loss and the rocks at the top mulching it.
Thank you for sharing your idea and experiences (and also tipps). I will build this tomorrow because my strawberries grow like weed in the garden. So I will have a lot of plants for a strawberry tower.
Regards from Austria!
thank you and happy gardening!! =)
Hi Ananda — Great idea!!! With the reservoir bottle, how long can the plants go between waterings (like, if I’m out of town on vacation)? Would a larger bottle mean a longer period between waterings? Thanks!
hi michael, the reservoir helps with deep watering, it can extend days between watering to about 4 days, but if you live in a very hot and sunny climate, i would try to shade the pots for a few days! =)
Hello Ananda,
So what do you think about the fall and when winter comes can I grow the strawberries inside? Maybe in my kitchen window? I’m in Kansas it’s been in the 70s but it has been in the low 60s and in the mornings it can be in the 40s. I do have my strawberries in my garden right now they are nice and green but they have not produce any strawberries yet. Oh wait I did get one. That was in Apri I do believe. Do you have any suggestions on how I can help my plant produce some strawberries?
hi gayle! strawberries need lots of light. i would create some cold frame or greenhouse to extend the season. i have seen them thriving in an unheated greenhouse in colder months- here are some simple ones you can check out http://www.apieceofrainbow.com/21-amazing-diy-greenhouses/
Is the 1 bottle enough water for 2 buckets? I have a small balcony and need to stack this 2 buckets high but I am worried the 1 bottle wouldn’t be enough water for the 2 buckets.
yes it works great for our hot SoCal weather! just water more often!
I am going to put this on my deck so the deer don’t get them before I do. Will also put a couple in my garden but build a cage around them…deer again.
Ola Adorei seu site, qual tipo de terra e adubação que você usou? comprei umas mudas mais nao sei qual a melhor adubação.
hi tiago! organic liquid fertilizers are the best, such as fish emulsion, compost tea (soak compost in a mesh bag), etc. =)
This is great! I’m bookmarking this!
http://www.thetravelingdyosa.com
Just finished spraying the pots for my installation and intend cutting the holes tomorrow, but by my eye in the photos above, the holes look larger than 1.25″ (maybe 2″?); are your holes 1.25″ and its just a trick of the photo, or did you cut them larger, but think that a smaller hole would be better.
definitely no more than 1.25″! that’s why we failed last year! =)
I tried this in NJ this year and it is doing great! I made a few changes; I spray painted the pots in vibrant colors and used a pvc pipe with holes to run thru all pots, also used a piece of rebar to stabilize and anchor to a permanent spot in my front garden. I will cover with burlap for the winter. Looks great and I started a trend in my area.
that’s awesome Sandra!! 🙂
I am preparing tower with 2 buckets, 20 litres.
Do I have to drill holes to bottom for both buckets, also lowest bucket ?
hi jori, yes, you will need drain holes to bottom on all buckets =)
Ananda, I follow everyone else’s comments about thanking you for sharing your ideas. Question about the top bucket, should there be more holes in the bottom of that bucket so water can more readily transfer to the lower bucket?
hi don, each of the buckets should have at least 2-3 drain holes lager than 1/2 diameter , which is plenty. hope that helps! 🙂
When you stack the buckets what keeps them from mashing the plants and dirt?
Looks great!!! I think I’ll have try!!! Thank you for the idea!
Hi Ananda – great tutorial with helpful pix. I am going to give this a go, but always wonder about the use of plastic bottles for reservoirs due to BPA & Tritan concerns. Maybe a clay pot with rocks over the drainage holes? Not sure if the water would disperse efficiently, esp at the top. Any thoughts? Thanks!
Hi lesli, that is such a great idea!! maybe seal the bottom so water seeps through slowly! =)
Good idea, thanks! Happy gardening!
i just did this today! I grew my own alpine strawberry varieties from seed, used 4 5-gal lowes buckets, thick/dense screen, and assembled. I didn’t use a Reservoir because I have so many plants per bucket but I do have pea gravel on top. Not sure that I’ll be stacking them though, they seem a little too heavy to be sitting on each other. Thanks for the idea!
I so want to do this! I have containers like this already : ) so my questions are these… Where’s a good place to get the seedlings & what is the price range? Also I saw there are ever bearing plants, would those work well? And when you have to replant them in two years does that mean replacing the plants with new ones or just repotting? Thanks!
So I built one tower this weekend with 6 plants so I could see if it works before going crazy and the water seems to just all drain out at once. I had a Monrovia container just like the pictures so there are already 6 holes in the bottom and I punched a bunch of small holes in my water bottle and all of the water drains out in a matter of seconds. I used potting soil but do you think it is too loose? I hand packed it down as I filled the pot.
hi barrett! the water will flow slower if you reduce the size of the holes on your water bottle and the # of holes on the lower part of the bottle. when the soil is more hydrated the water will flow out slower too. thank you for the question, i will add these details to the post ! =)
I am going to try and replace the bottle with one with less holes. The holes are pretty tiny already but I will adjust and see if that works better. I’m so excited about growing my first fruit plant ever!
Thanks.
you can test the water flow before putting it in! =) and don’t forget rich soil! good luck!! =)
di you water through the reservoir too or is that just for the added nutrients mentioned?
we water through that also so it soaks it! =)
I love the strawberry tower and want to try it. Is there someway I can print it up for reference? Sorry, I’m kind of old school!
hi elaine, i think you can copy the whole text & pics, then paste it into word =)
What to do with the runners? Also, do the plants need to be replaced every 2 years, since productivity deminishs.
hi maggie, the runners can be tucked into the openings to root more plants. it’s a good idea to replant every 2 years, so the soil can be replenished with more nutrients too! =)
I am going to plant my cucumbers and watermelon, cantolope, and see if it works like the strawberries, thanks
hi pamela! i think lettuce will do well, or other small root veggies. melons are heavy feeders, so if you try this, make sure to feed them a lot!
We live in zone 5…can you over-winter these towers?
hi kat, zone 5 is cold! bringing them inside would work though!
Will the strawberries come back, traditional ground planted ones will in chicago
they do here in san diego, may need winter protection in chicago…
I’m confused. How do the bottom plants get watered if you only put the water bottle in the to pot?
each pot has drain holes on bottom so water can travel down! =)
We struggled with our strawberries last year and I’ve seen a lot of tower options. We may have to try this for this year!
!Show off! Now i’m hungry…
What a great tutorial Ananda! Your strawberries look amazing and they look happy in their new home! I love it! Pinned!
thank you my dear friend!! xoxo
How did you rotate; you only have a resevoir in the top pot so that one must always be the top pot. Also How long did these produce strawberries. Should I move them to a cooler spot as it gets hotter to prolong their fruit bearing time?
Thanks!
hi donna, by rotate i meant spn the pots so they all get sun =) i would leave the plants where it’s hot because the berries taste so much better!
Great tutorial! Thank you for sharing!
Brandon | Saws and Scraps
Ahhhhhh!! Brilliant!! We are renting so this means we can have strawberries {a lot of them} with out tearing up the yard!!
Such a fantastic DIY Ananda! I will definitely bookmark this! I love that you utilized items that are normally found at home. And the plant containers that usually comes from the store can now be recycled as such, instead of throwing them away. Very clever! Love it!
Hello Ananda ,
this is a great idea !
Like your ideas!
greetings
Uwe
Great visuals! I need visuals when doing DIY turtorials. Strawberries are my favorite, btw 🙂
I have so many of these plastic containers sitting in my garage that I could make several of these!
Hi Ananda. First of all, thank you for your tutorial on germinating seeds – I tried it and it worked. Rocket, dill, pumpkin, peas and watermelon seedlings have made an appearance and have been potted- so fingers crossed, they shall bear fruit:) The strawberry tower looks good. Enjoy the deliciousness. xx
wooo arti, i bet your can grow much sweeter watermelons than we can here on the coast!! xo
What a great project, I love strawberries.
thanks karissa! =)
We just bought a house with a yard, so I’m excited to start a garden. I will be doing this for sure!
that’s so exciting!! happy growing!!
This is SO SMART! It will definitely keep the berries from spreading all over my yard! Thanks for sharing! 🙂
thank you suz! =)
What an awesome idea! I think that this poor little plant would die where I’m at right now… much too cold! I would love to have a garden one day though and this would be a great addition to it!
thank you tori! xx
Ahh strawberries are my favorite! This looks awesome. I need some more outdoor space so I can utilize these tips!
xoxo
Lee Anne
http://lifeinatx.com/
this only needs 2sqft! =)
wow that so awsome !! and pretty i wana try to make this .
thank you jazmine! =)
great ideas for strawberries and other plants. I use dripping irrigation instead; with a 2 litter soda bottle filled with water, a shoe lace inside the water bottle and pointed to the bucket will drip for about 24 hours and there is no loss of soil.
that’s a great idea Luis! thank you so much for sharing! by the way we are planning our trip to Costa Rica right now 🙂
I tried the dripping method last year while on holiday and it didn’t work for me at all. Almost all my plants died in the pots 🙁
I put a thick shoelace/rope in a pint jar and buried the other end in the soil. Have had great results ever since. The jar is kept with a dish to cover the top to keep the water from evaporating.
thank you so much judith for sharing your great tips! 🙂
Do you put the rope all the way down to the bottom of the tower or only in the top?
What are the buckets stacked on? Is it just on top of the dirt, or is it on the lids?
SUCH a great idea!! Need to try this!