DIY Personalized Farmhouse Christmas Pillow with Cricut Maker!
Make a Pottery Barn farmhouse style monogrammed Christmas pillow as personalized gift and unique decor! Free design patterns and tutorial on how to cut and layer multiple color iron on vinyl using Cricut Maker and EasyPress!
Are you looking for personalized Christmas gifts and decor ideas? You will love this farmhouse monogrammed wreath Christmas pillow! We are thrilled with how it turned out: it would make such a beautiful and unique gift for anyone who loves holiday decorating!

Here’s something totally unexpected: the Cricut foil iron on vinyl we used for this Christmas pillow looks magical in different lighting and from different angles! The metallic colors are much richer and more subtle, almost like shimmering Christmas ornaments in a tree!
In this new tutorial we will share with you the SVG design we made for our monogrammed Christmas pillow case as a free gift, and how to use the layering technique to create a multi colored iron on vinyl design using Cricut maker and Easy Press.

*Some resources in article are affiliate links. Full disclosure here.
Materials and tools to make farmhouse monogrammed Christmas pillow:
This is a sponsored conversation written by me on behalf of Cricut. The opinions and text are all mine.
Some of the helpful resources are affiliate links. Full disclosure here.
- Throw pillow case: I love the idea of seasonal decor you can change out, vs storing big pillows. You can find plain cotton or linen pillow cases like this set, this 2-pc set, or this 4-pc set, and throw pillow inserts here. You can also make pillow cases very easily, tutorial here.
- Cricut Maker or Cricut Explore, the weeding tool, and the standard grip cutting mat.
- Cricut Foil Iron on vinyl: I used this set. Cricut EasyPress 2, or an iron.

Step one: prepare pillow case and designs
If you are new to Cricut , here are a couple of very helpful tutorials on making your first project using Cricut Maker or Explore, and how to use Cricut Easy press with iron on vinyl.
Iron your throw pillow case flat, and make sure the surface is clean. We made our envelope pillow case using canvas drop cloth or soft canvas fabric. Here’s the easy tutorial. You can also purchase this 2-pc set, or this 4-pc set, and throw pillow inserts here.

Adjust the designs according to the pillow size. Most throw pillows are 12″ to 24″. Our design is based on an 18″ throw pillow, and the wreath measures 14″ from left to right.
Cricut Design Space will separate different colors onto different cutting mats. We used red for the flowers and ribbon, gold for the monogram letter, and green for the leaves.
You may notice that we used two different greens. If you are using the foil iron on, it actually will have such an interesting variation even with the same color, that it is as beautiful and much easier to use just one green that comes with this set!
Step 2: cut vinyl
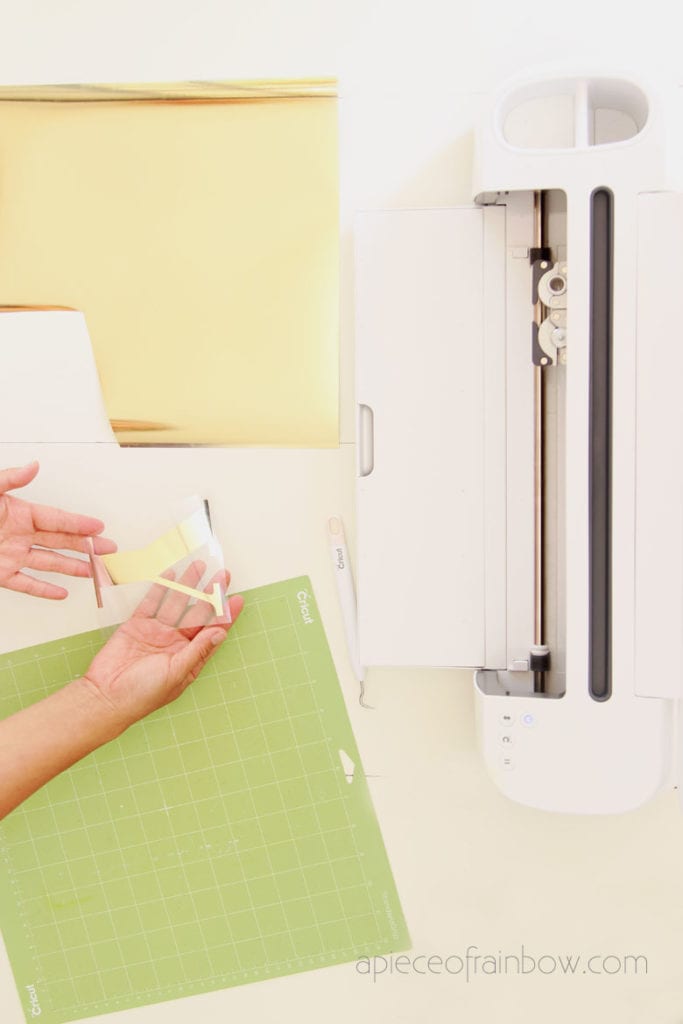
Here’s the recommended steps to cut the vinyl sheets. When you choose the material “iron on vinyl” in Design Space, you will be reminded to mirror the image: very important especially when you are cutting letters or numbers.
Place the vinyl with the color and shiny side onto the medium grip mat.

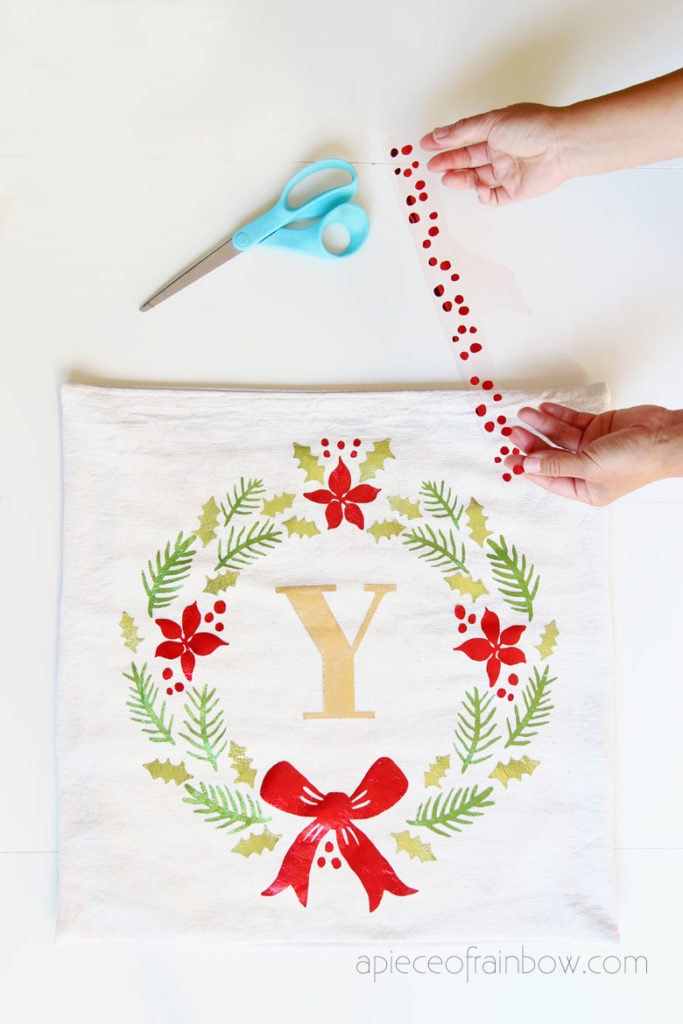
Cut the green wreath on one sheet, the red flowers, dots’ and ribbon on the second sheet, and the monogram letter on the gold vinyl sheet.
Important tip: the difference between the attach vs weld functions in Cricut Design Space .

We will be using the attach function a lot in this project, which groups the elements together and maintains their placements.
For example, we made two attached groups of the green wreath : the right half and the left half, so they can fit on the same 12″x12″ sheet. We can cut them in the middle and arrange them on the pillow case later.

For the red sheet of vinyl, attach the red ribbon, dots and flowers. Move the ribbon up a bit to fit on the sheet if you need to.
After each of the vinyl designs are cut and weeded, we are ready to iron them!
Step 3: iron vinyl onto the Christmas pillow case

Use this Cricut interactive Quick Reference Guide to find the right settings based on your vinyl and pillow case materials.
Because we are creating a multi color design, we will need to iron the vinyl in layers. I didn’t do it the most efficient way because I am new to this process. Here’s what I would do in future, it would only take two layers:
First iron on the green leafy wreath layer to establish the frame. Next the monogram letter and the red flowers dots and ribbon.

You can improvise which colors or layers to iron first, here is The most important thing to remember:
Never let your iron or Easy press touch unprotected vinyl. As you add new layers, always protect previous layers with a sheet of film that you peeled off from iron on vinyl materials.

Preheat Cricut EasyPress to recommended temperature in this Guide . Place EasyPress mat or clean towel inside pillow case. Preheat pillow case for 10 seconds.
Place iron-on vinyl face down, film side up on the pillow cover, then cover with Cricut EasyPress and apply firm pressure for 5 seconds.

Set Cricut EasyPress in its Safety Base. Remove the protective from the foil vinyl when it has cooled enough to be just warm to the touch. This is called a warm peel.
The adhesive will not be completely set yet. As you apply more heat with each additional layer, the adhesive for all layers will properly set.

Repeat for all the remaining layers except for the top layer. Try to keep your layering to 2-3 layers for easier and better results. Remember to protect previous layers with a sheet of film.
When adding the top layer, apply firm pressure with the Cricut EasyPress for 15 seconds. Turn the pillow case inside out, press for another 15 seconds.

Helpful tips and FAQ:
Safety tip: very important!
Be very careful when working with a hot iron or EasyPress. Never leave it plugged in unattended. Follow safety practices and always return Cricut EasyPress to its Safety Base when not in use.

What temperature and how long should I press my iron-on material?
Everyday Iron-on, glitter vinyl, and foil vinyl as well as base material all require different settings. Use this Cricut interactive Quick Reference Guide to find the right settings based on your choice of vinyl and pillow case materials.

Download SVG file for this Christmas pillow here.
If you are new to the process, check out our detailed tutorial on how to upload SVG files in Cricut Design Space, and use them with your Cricut cutting machine!
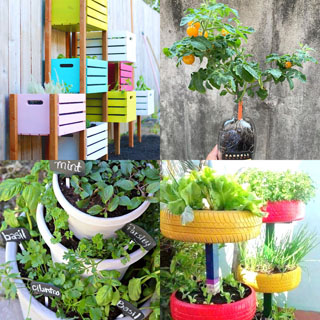
If you try these DIY / decor / garden / craft projects, tag us on Instagram at @apieceofrainbow, we would love to see what you create!

Important tips for the layering technique:
Never let your iron or Easy press touch unprotected vinyl. As you add new layers, always protect previous layers with a sheet of film that you peeled off from iron on vinyl materials.
Here’s a very helpful guide by Cricut on the layering technique for different vinyl materials.


25 Inspiring Vegetable Garden Design Ideas
Easy DIY Solar Fountain in 1 Hour {with Pond Water Plants}

20 Best Vegetables for Container Gardening
5 Minute Bubble Painting Hydrangea Flowers
35 Creative Container Vegetable Garden Ideas
DIY Wood Pallets Ideas, Tips & Projects: An Ultimate Guide
Happy creating!
