Christmas Tree Napkin Folding in 2 Minutes
2D & 3D Christmas tree napkin folding in 2 minutes! Best Christmas table setting decoration ideas & easy holiday crafts for kids & family!
The most magical time of year is here again! While you are busy finishing up your beautiful Christmas tree and outdoor decorations, why not make your Christmas table settings extra festive as well?

In addition to some super easy and no cost DIY Christmas centerpiece you can make , this easy Christmas napkin folding idea will really bring some holiday cheer to any style table settings and decorations.
Let’s transform a simple napkin into an impressive little Christmas tree in just 2 minutes! We will also share some creative variations such as a 3D standing napkin Christmas tree, and topping it with a star-shaped name card for an even more personal touch.
*Some resources in article are affiliate links. Full disclosure here.
Video tutorial: Christmas tree napkin folding
Materials for Christmas tree napkin folding

- The napkins you use should be perfectly square: we used these 20″ x 20″ green cotton napkins, but any color paper or cloth square napkins 16″ or bigger will work great.
- Optional: gold card stock or paper to make Christmas stars. ( Some readers asked about this: we got these super cute gold flatware from Amazon. )
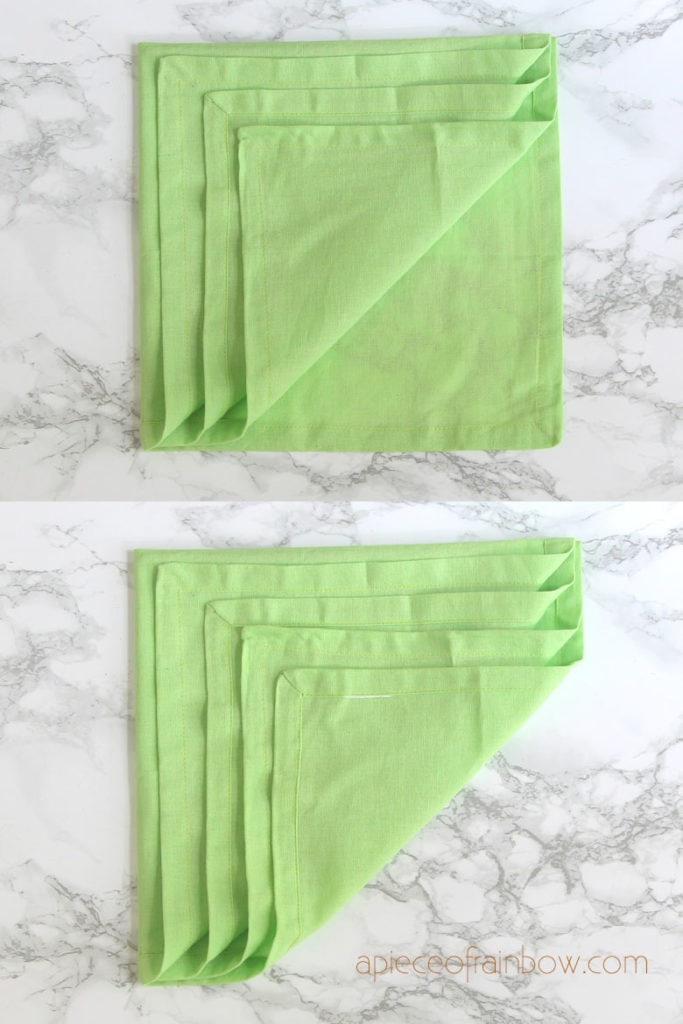
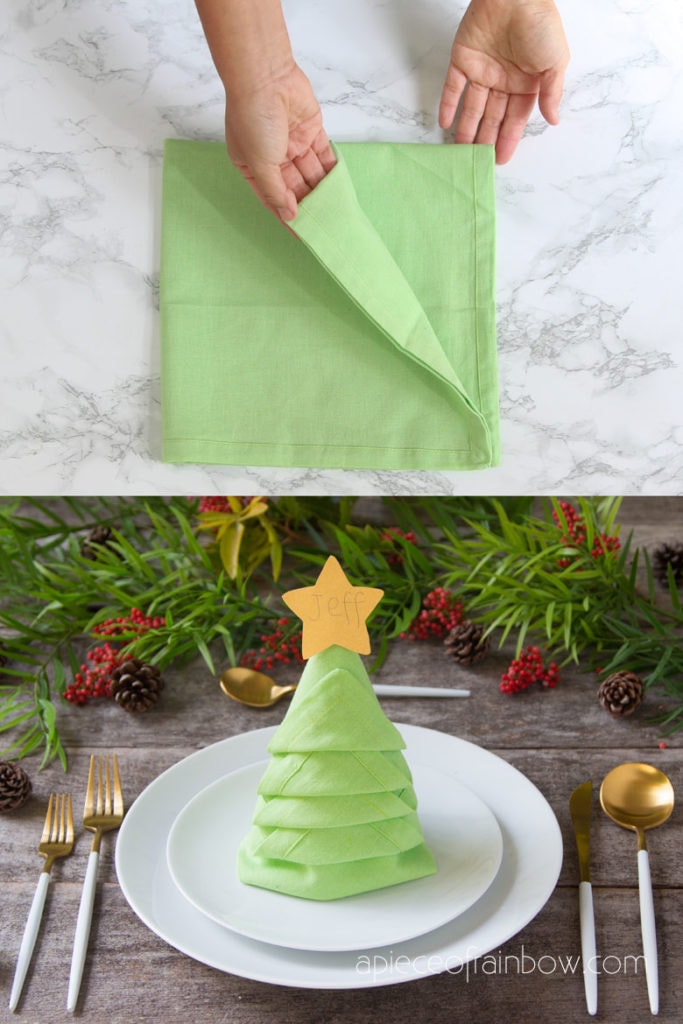
Step 1: Fold the napkin into a quarter square
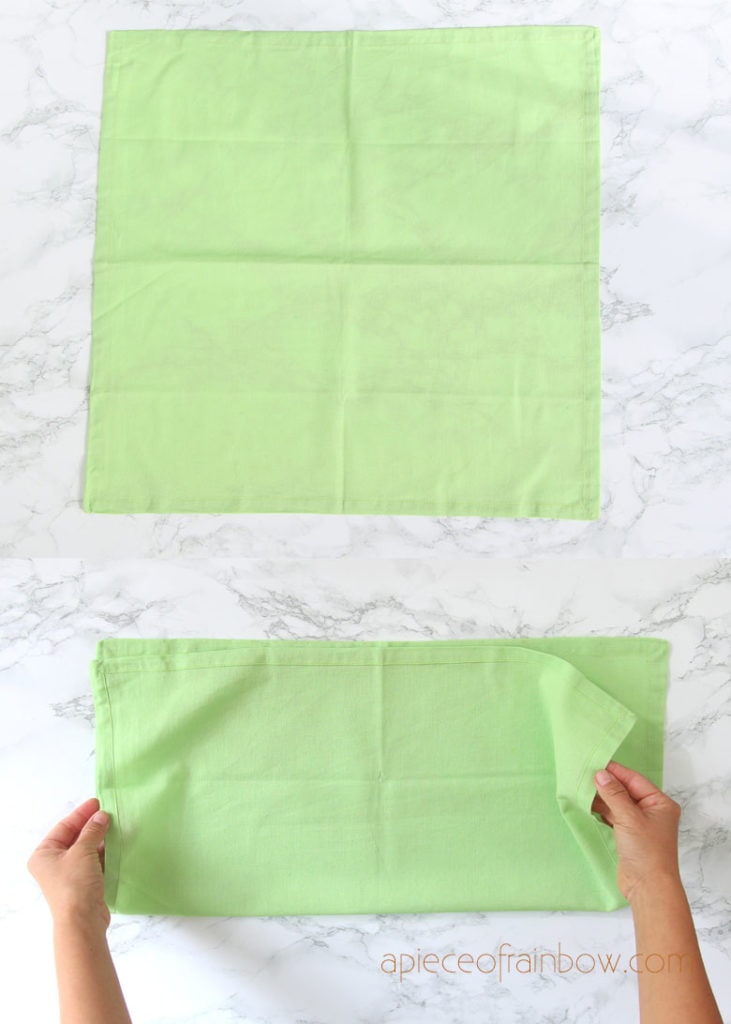
You can iron the napkin first, but it is not necessary if your napkin does not have too many creases.
Fold the napkin in half into a rectangle, then in half again into a square that is 1/4 the size of the napkin.
Make sure the corners are all lining up with each other.
You may also love: Easy DIY farmhouse tabletop Christmas tree for $1!

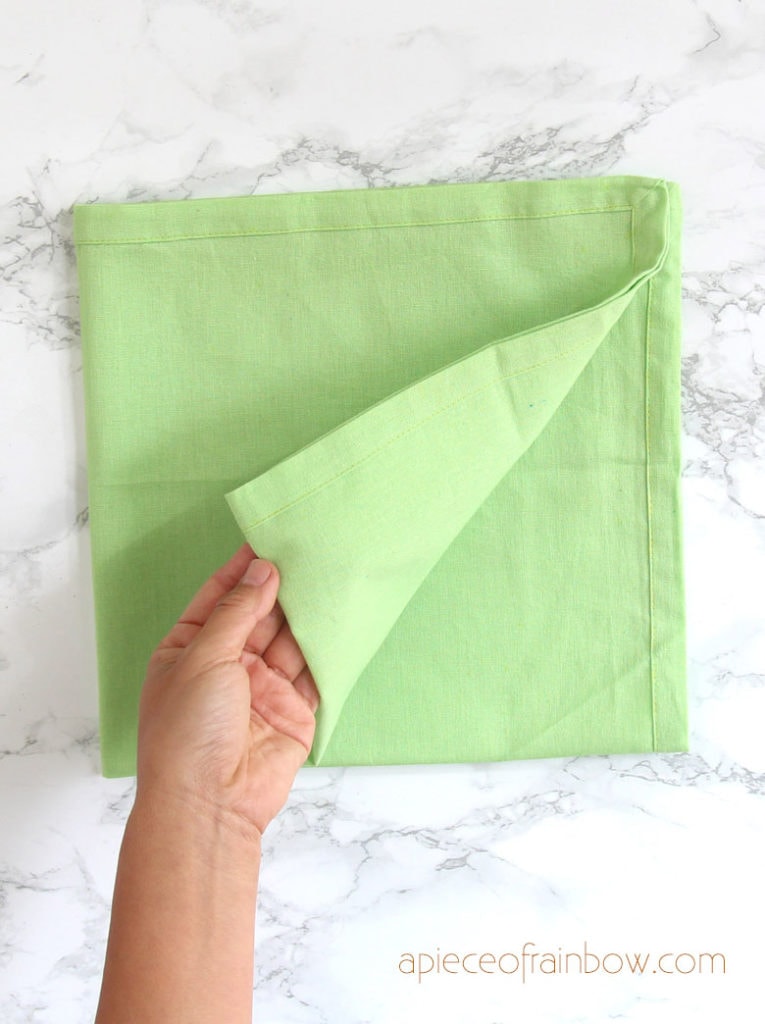
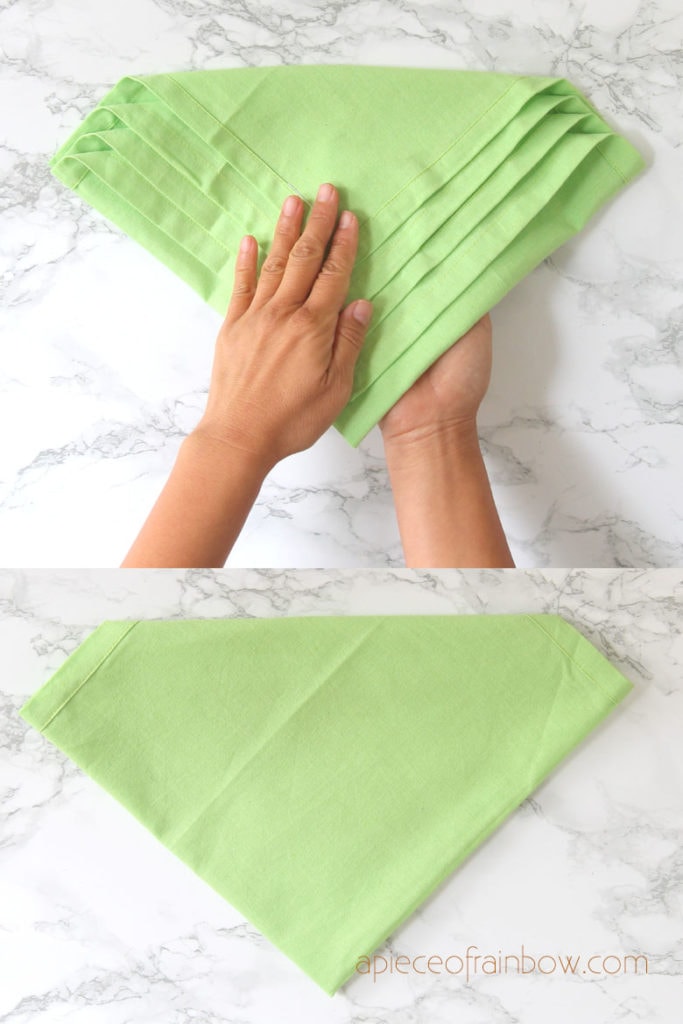
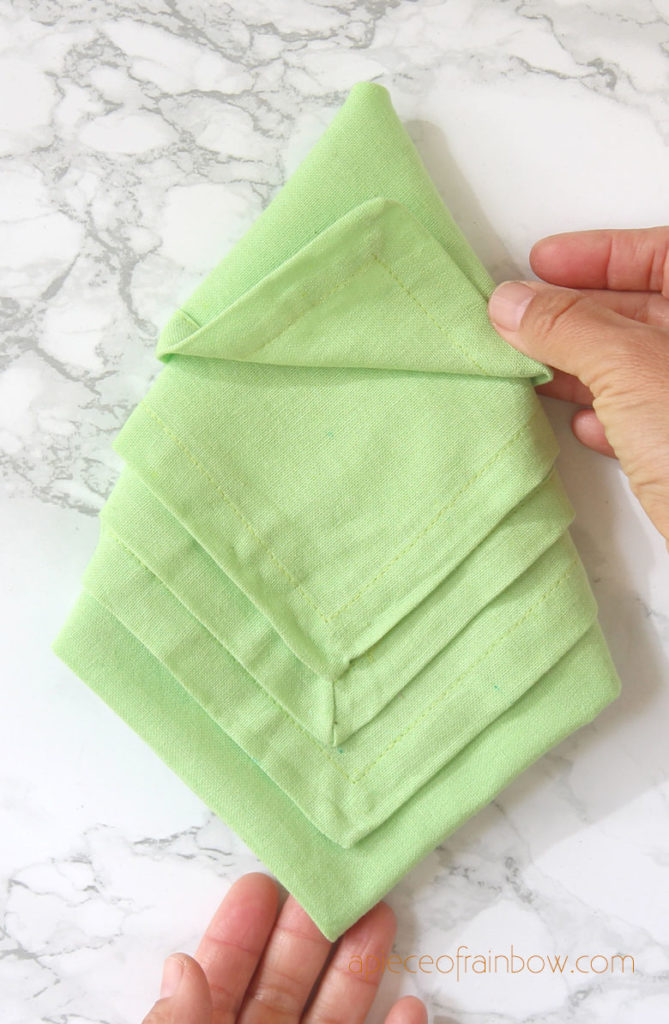
Step 2: Fold the Corners Up one layer at a time
Start by folding each piece of square over diagonally.
Stagger the corners to create layered folds. Make sure all the sides are parallel and staggered at about 1″ apart.
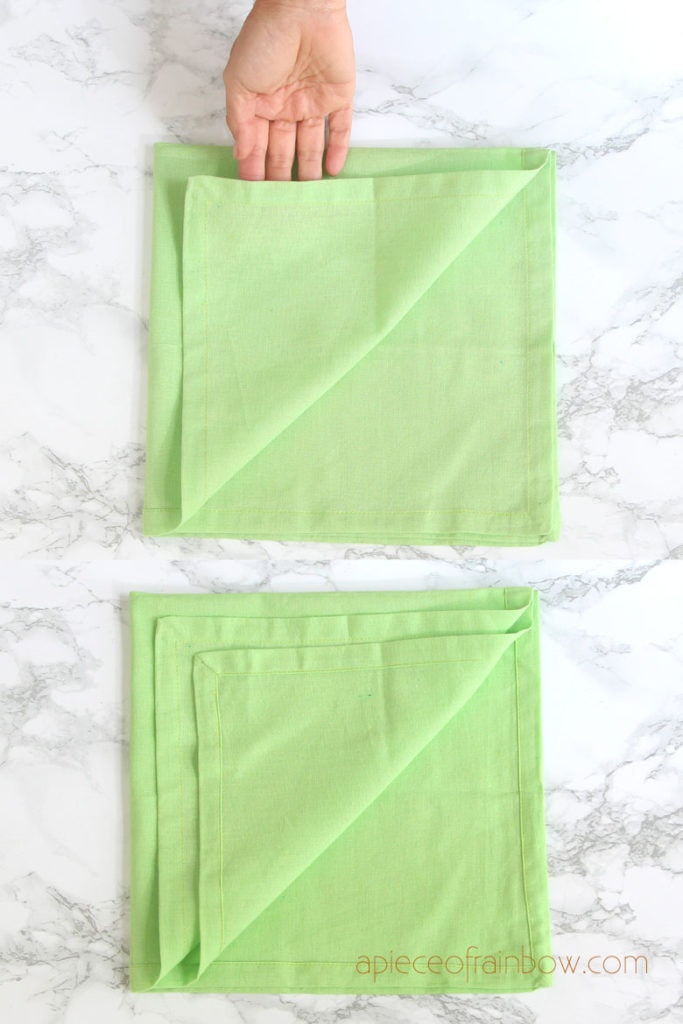
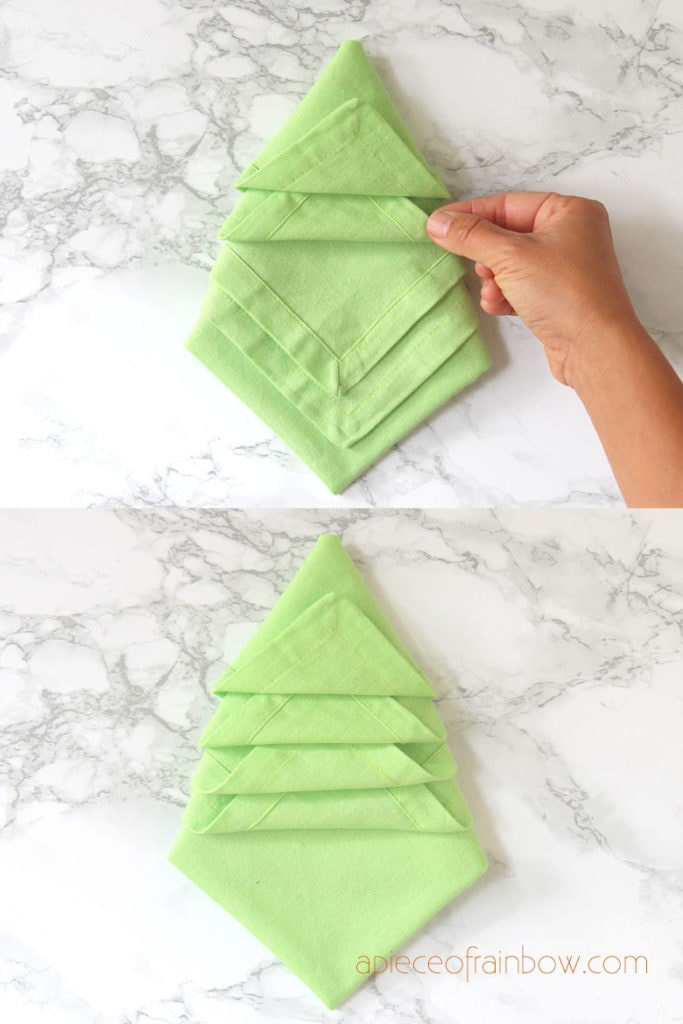
Step 3: fold the napkin into a Christmas tree
Carefully sandwich the folded napkin between your hands, and flip it over. Now we see a diamond shape with the tip pointing down.
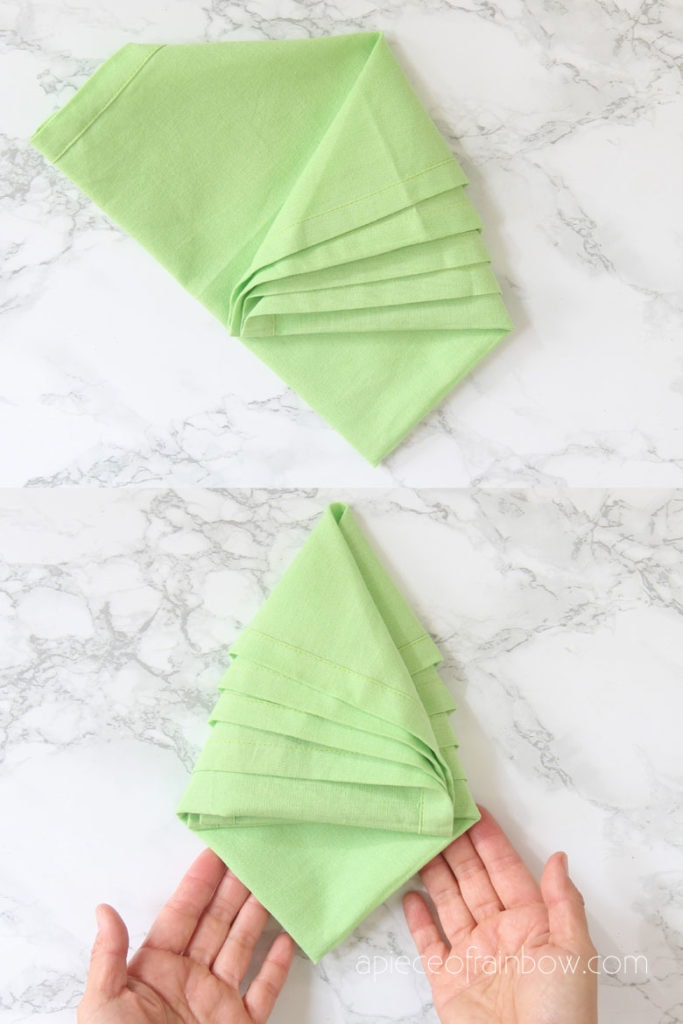
Fold the left third towards the center, then fold over the right third, like shown in photo above.
Flip the folded napkin over again.
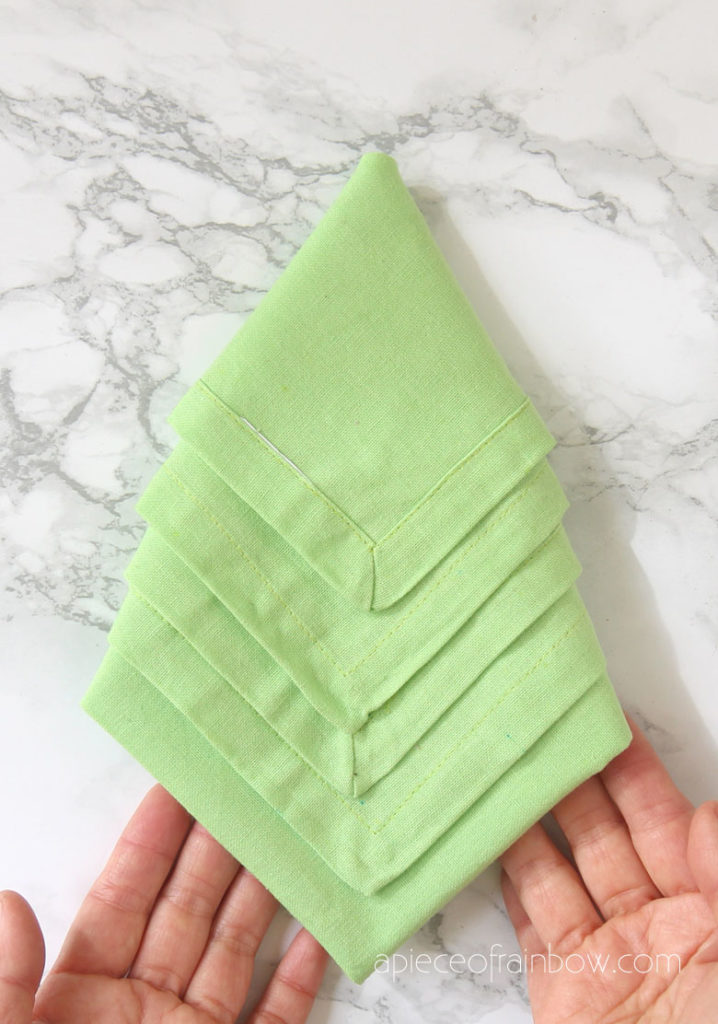
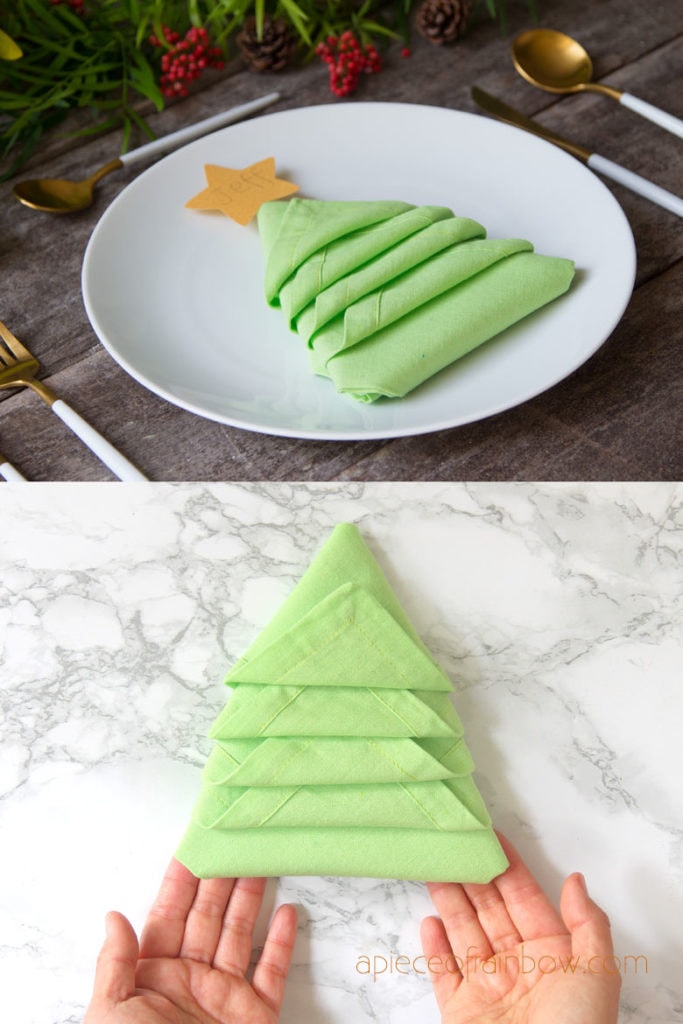
Starting at the top, fold each flap over so they are pointing up. Tuck the second flap up under the one above it. Do the same with the next two flaps.
You can fold the final triangle flap over or under. I wrapped it under as show in photo.
You can also fold all the flaps inside. The tree will look slightly different. See video tutorial for this variation.

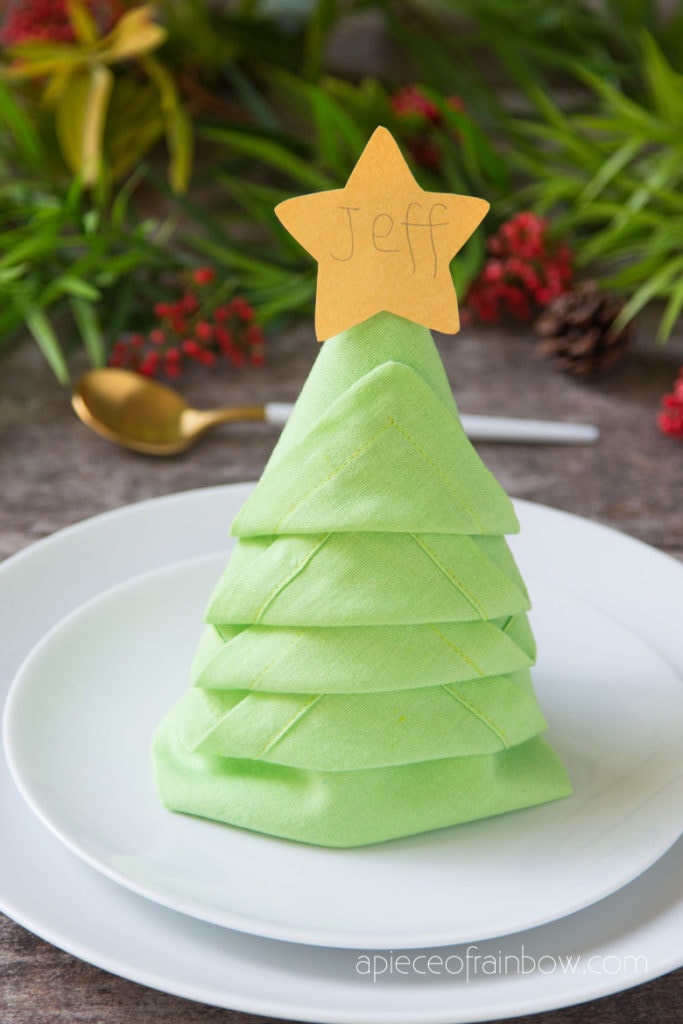
This Christmas tree napkin folding looks beautiful laying flat on a plate. There are many ways to embellish this napkin Christmas tree: try adding a small ornament, a star or a name tag made from gold card stock or paper, or a piece of candy!

In case you are wondering, we got these super cute gold flatware from Amazon. 🙂
3D Standing Christmas tree napkin fold
You can also make it stand vertically to create a 3d Christmas tree napkin fold. Follow the same steps for the 2D Christmas tree napkin folding, and just roll the back flaps a bit to form a more stable base like in photo below.

I cut a star using gold paper, and glued a paper tab on the back to hold the star on top of our napkin Christmas tree.
You may also love: 27 gorgeous and practically free Christmas centerpieces to DIY!

Happy creating! See you soon!


Thanks sharing this article about the christmas tree napkin folding and help us infromation about the folding
Wow, I will try making this tomorrow, and hopefully have on our dinner Christmas table. Thanks for sharing this beautiful idea. Happy holidays
hi Ivory! it’s super easy and fun! 🙂 happy holidays!!
Thank you for sharing this!!! Can’t wait to try it for our Christmas breakfast table!!
that would be such a wonderful way to start the day! 🙂
Oh, it’s really quick! I thought 3d Christmas tree napkin is more difficult but it really takes 2 minutes