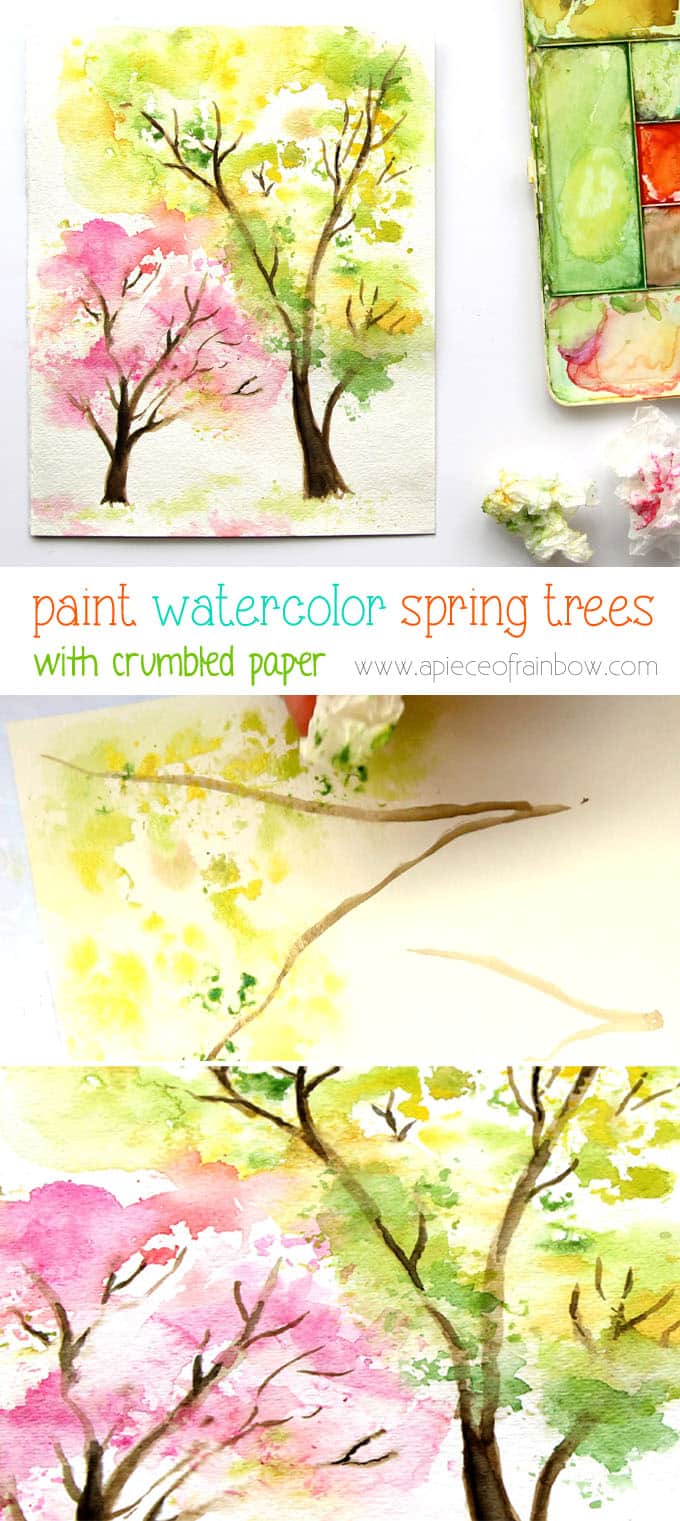
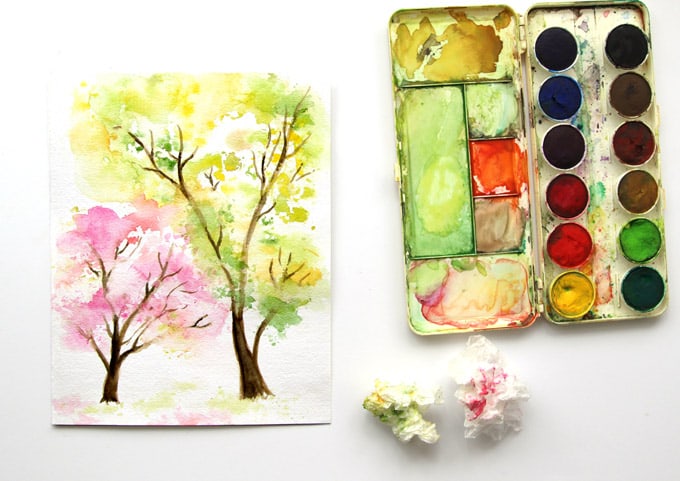
Spring Trees Watercolor Painting with… Crumpled Paper!
Happy spring lovelies! To celebrate the dreamiest season, we are creating a dreamy watercolor painting today…
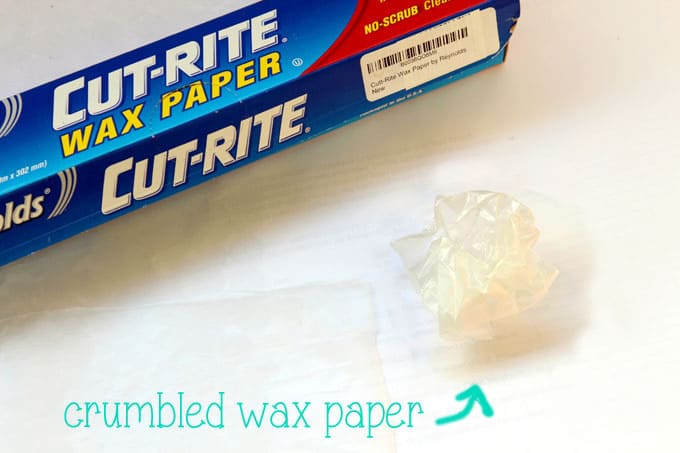
With crumpled paper! And, NO art experience needed!
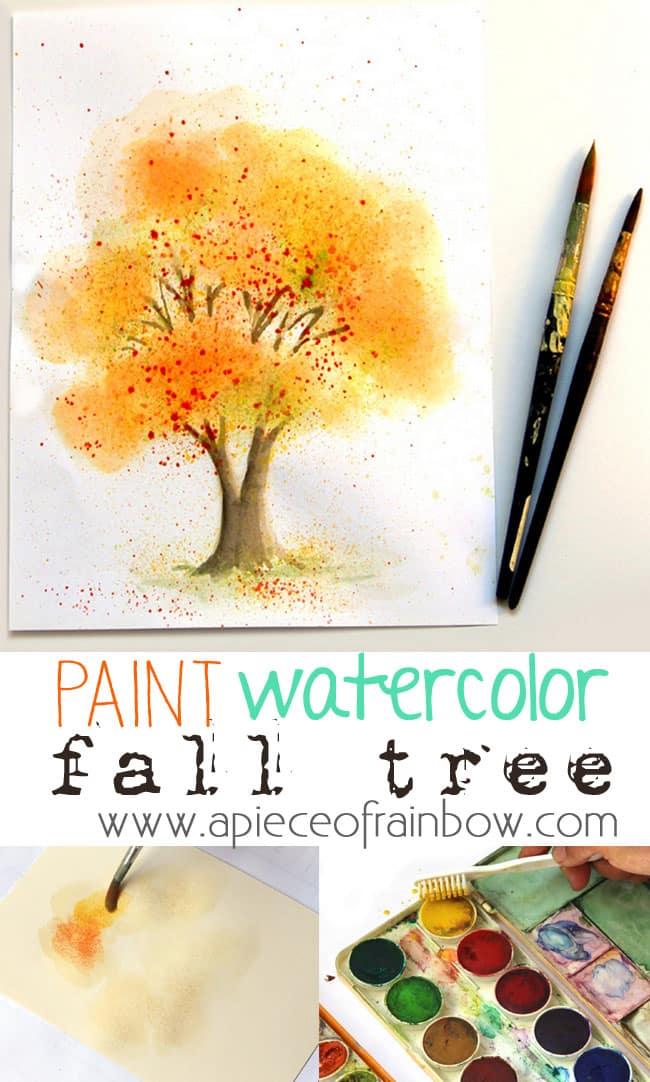
When I published the fall tree watercolor with tooth brush tutorial, I was thrilled by how many of you LOVED to paint trees!
So here’s another fun watercolor painting project – it is SO easy, with the help of crumpled paper.
*Some resources in article are affiliate links. Full disclosure here.
Check out the video tutorial in the article, you will see that anyone can paint this watercolor art! BTW, I am taking next week off for spring break, yay! Will see you in the first week of April!
Material and tools:
( Some of the helpful resources are affiliate links. Full disclosure here. )
- paper : UPDATE- I now only use better quality watercolor paper that doesn’t buckle! I really like this Strathmore and this Canson watercolor paper.
- brushes: I like using brushes with a nice pointed tip for watercolors, they are great for washes, and for finer details
- watercolor paint : you don’t have to buy the most expensive kinds to start painting . There are many good watercolor sets for budding artists. A white plastic plate is also great for mixing colors
a dish to hold water for wetting and rinsing brushes
Here’s the video to show you how easy it is! I will explain the steps with screen captures next.
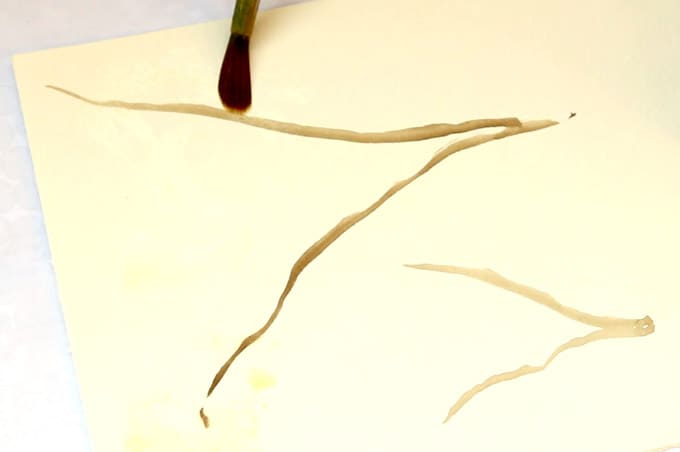
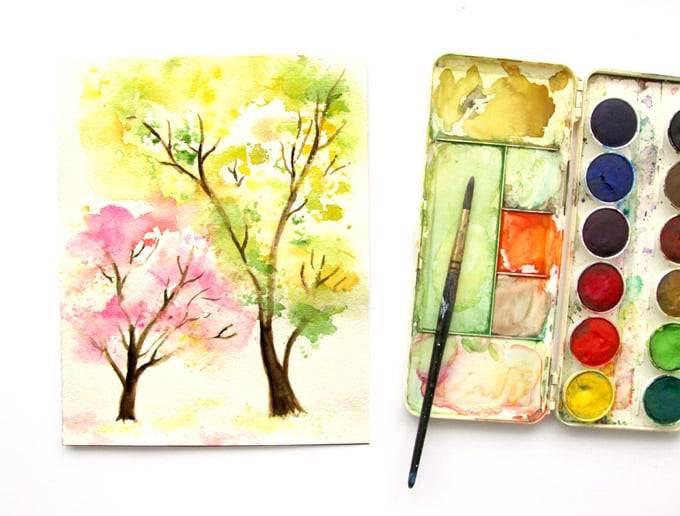
Step 1.
Mark the main trunks of the two trees with light brown color. We can always darken them later.
Load the brush with lots of water and wash the canopy area of the first tree you are going to paint.
Step 2.
Mix some shades of green, yellow, and rust orange colors you see in the first leaves of spring trees. Use lots of water and paint to make little puddles. Dip the crumpled paper into the puddles of colors and dab it gently onto the wet paper.

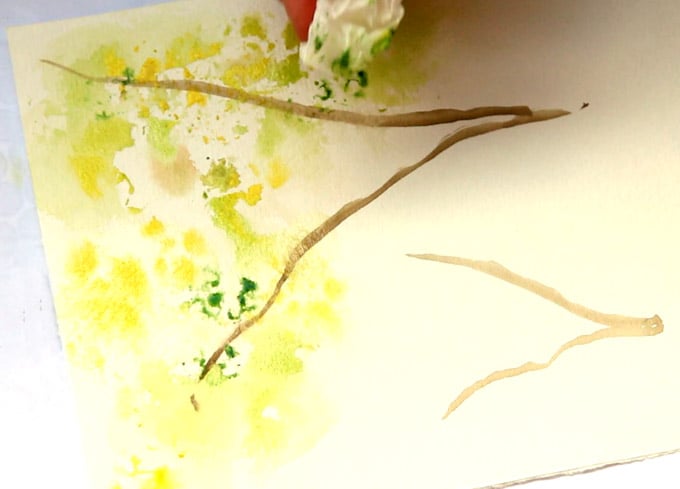
Re-wet the surface if the paper is too dry. the goal is to have the dabs of colors run a bit to create the organic shapes of clusters of foliage.
Do the same with the pink flowering tree. I used diluted pink and red, and added a tiny touch of yellow-green at the end.
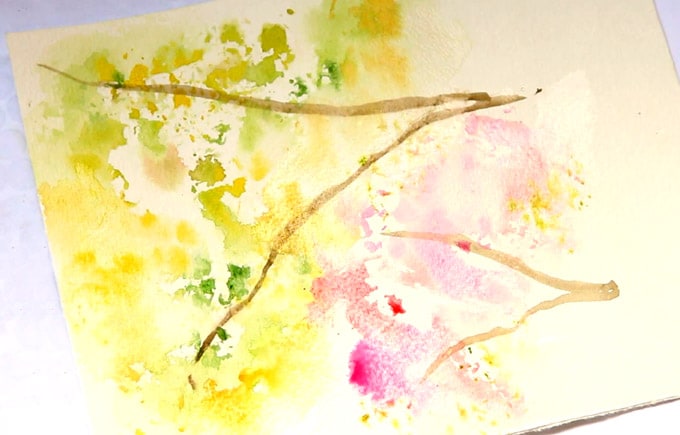
Step 3:
After the canopy dries, paint the branches and main trunks using layers of darker browns. If you are nervous, start with lighter browns, and darken them gradually.
When the trunks dried, I also added light pink and greens on the ground, using the same method as we used to create the foliage.
You may repeat Step 2 multiple times if the foliage need more layers.

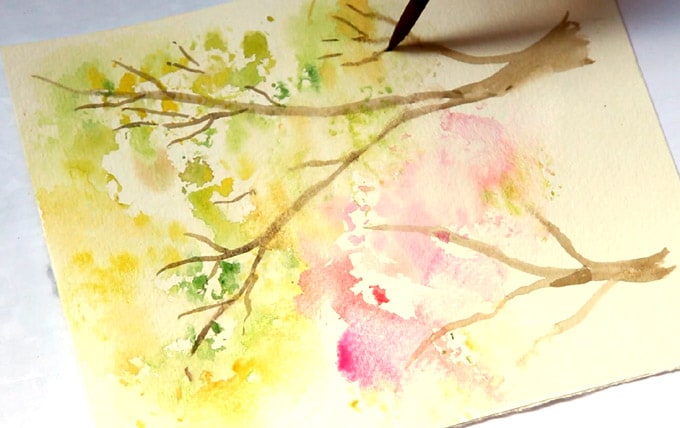
Here’s our spring tree watercolor painting! Below is the video tutorial, again! 🙂
Spring trees are so gorgeous. From far away those tiny leaves and buds look like pink and green mist. When it rains, oh my, can’t stand the deliciousness.
I think this method really captures the character of spring trees and let the flowing quality of watercolors shine!
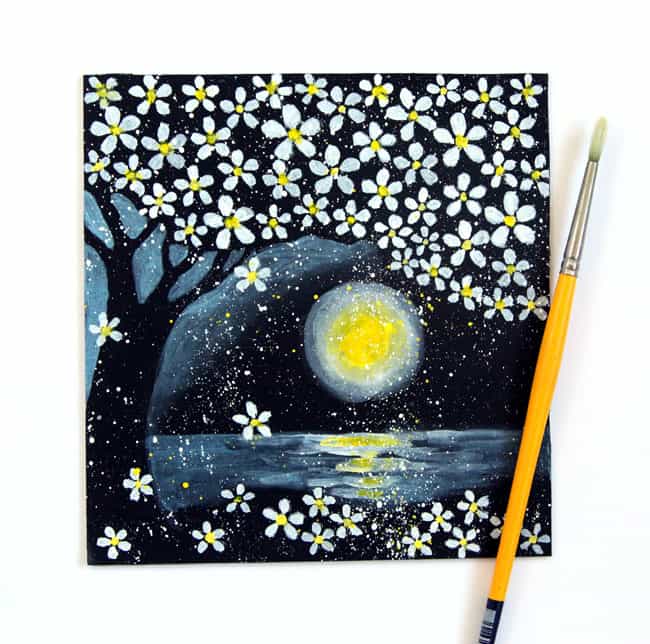
Here are a couple more simple make-your-own-art tutorials inspired by spring- Paint a cherry blossom and moonlight landscape easily on black paper
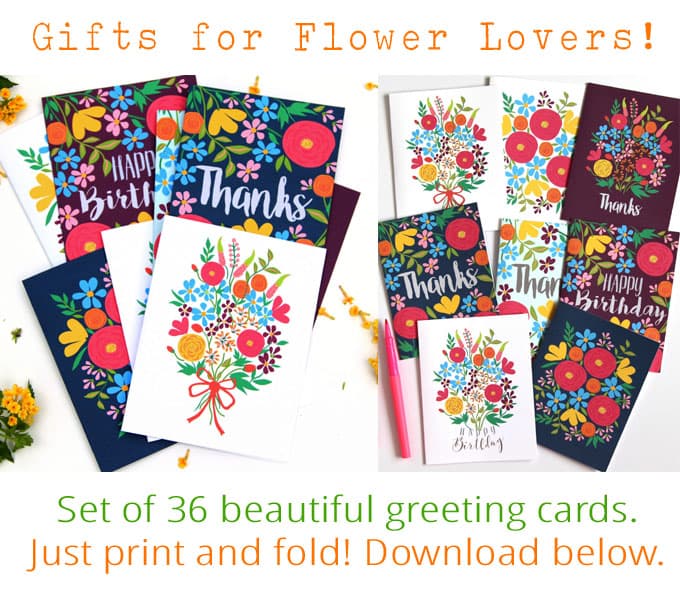
And a little gift / craft project- make your own greeting cards!
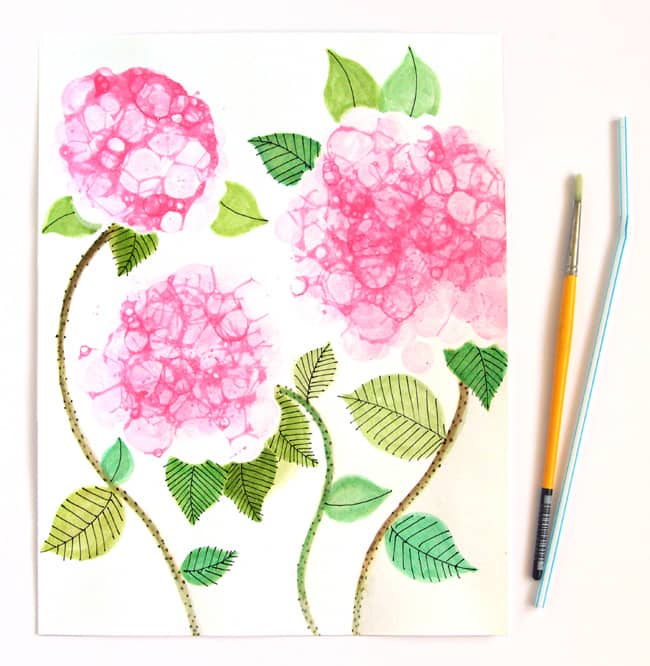
Bubble paint Hydrangea flowers- so much fun!
I am off to enjoy spring break next week! See you in the first week of April!
May your spring days be filled with buds and flowers! xo


I’ve always said I was going to hang watercolor paintings in my home. Now thanks to you, I can! This is great.
thank you Paula! happy painting!
What an inspiration you are…thanks for sharing your ideas!!
Will these same techniques work with acrylic paint? Thanks
hi Jennie! yes they do! just a slightly different but still beautiful effect 🙂
Hi!
The wood wax transfers are great!!! Can this be done on painted or stained wood?
Thanks,
Kathy
hi kathy! if the wood finish is absorbent (not glossy finish ) and the colors are lighter than your transfer image, then yes! 🙂
Looks great. My Firefox and Brave browser can’t find the video link- ‘Here’s the video to show you how easy it is!’ And holding the pointer over every picture doesn’t help. Can anyone post it? Thanks.
hi Frank! i just added our youtube video at the end of this post so that should definitely work! 🙂
Please pardon my pedantry, but I think you will find that you are using crumpled paper, not ‘crumbled’ paper. It’s actually an important distinction, despite people knowing what you mean.
Ooops! thank you so much Margaret! 🙂 i will correct it right now!
Hello. I have already subscribed, but am having trouble accessing any free downloads. How do I do this?
All of these are just amazing & simply creative…THANK YOU I gave my daughter your web link to come back and check these out!! Sending on Pinterest, pictures too! These are creativly A++
thank you so much for your sweet comment! 🙂 so glad to have you here!
Very creative!! I love all your ideas.
You inspire me. I have always wanted to paint my own pictures but, I’ve been so afraid to even try. Thanks to you I’m not afraid now. Your trees are so beautiful. I can’t stop watching the tutorials. I’m going to the craft store next week to get the things I need. Thank you so much.
Wow I just love this ,I am going to try it .Where do i buy the water paints as i know nothing about painting I must try this. Thankyou
hi eileen, i have linked to the paints i use in the materials section ( orange letters) , happy painting! =)
Such a shame that your pretty site has so many ads. I know…….you are trying to make a few pennies. The post pages are not so bad. But when your readers select a page the ads are very annoying and distracting. I know that you have little input about adsense ads.
thank you carol for your feedback! =) i hope to make this blog into a full time income, and i will be figuring out ways to reduce the ads and make it up in other sources. not easy but it is my goal! =)
Thanks so much for this tutorial – looks doable!
I wish you lived closer, Ananda!! I totally want to have a creative/watercolor day together. LOVE this technique! xoxo
This is so pretty! I love watercolor, and I wish I was better with the teqnique.
What a beautiful site and love the fact that you have a different tutorial for fall colors and a different one for spring.
Beautiful!!!
It’s Holi time where I come from Ananda– it’s the Hindu festival of colour to welcome Spring. Your trees look like the sky on Holi when friends get together to play with colour and dance with joy. Beautiful. I always get a breath of fresh here on your blog. Thank you and happy Spring to you:)
SO beautiful!! I’m trying to learn watercolor, so I’ll definitely be using this! Love this!!
How creative and beautiful! It’s the simple things that bring us joy!
Beautiful. I love how this turned out. Going to try this.
Pretty! Makes me so excited for spring flowers! xx
Wow! I’m blown away! I’m in no way any a painter. I can barely draw a smiley face. I think I might actually be able to paint this. How cool, you have no idea!! Thanks for sharing, you blew my mind!!
This is so pretty! My daughter is a little artist. I’m going to have to show this to her. Such a great idea!
I love watercolor but I can never get things to look the way I want. I suppose I need to practice more. Thanks for this!!!
Beautiful! This post and your entire blog. xo Jane
Those watercolor trees are beautiful! I would never have thought of this technique. Thanks for the inspiration!
wow! beautiful — wish i had this talent, and trust me — i don’t! ha! http://www.heartofchic.com
This is beautiful! I’m going to try this with my nieces.
Omg what beautiful water color paintings!!!! That definitely takes a lot of talent!! Fabulous work!
Thatlooks so pretty! I tak painting lessons. I added this to my favourites bar and will come back later 🙂