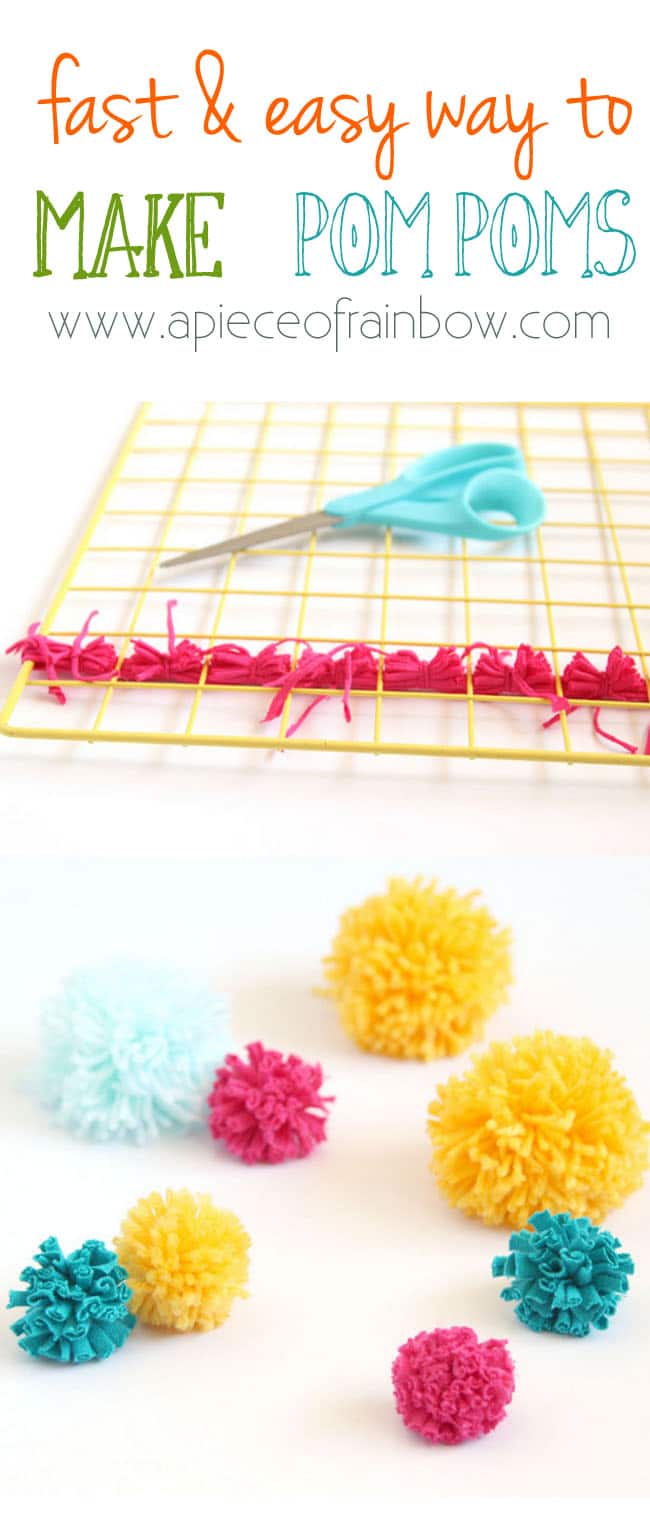
Become a Pom Pom Making Ninja
These happy, whimsical, and dreamy little things! One can never have too many pom poms in life.
If you think that you have to make them one by one, think again –
Today we are going to become pom pom making ninjas who make many pom poms super fast all in one batch!
If you are like me, you probably love pom poms on EVERYTHING!
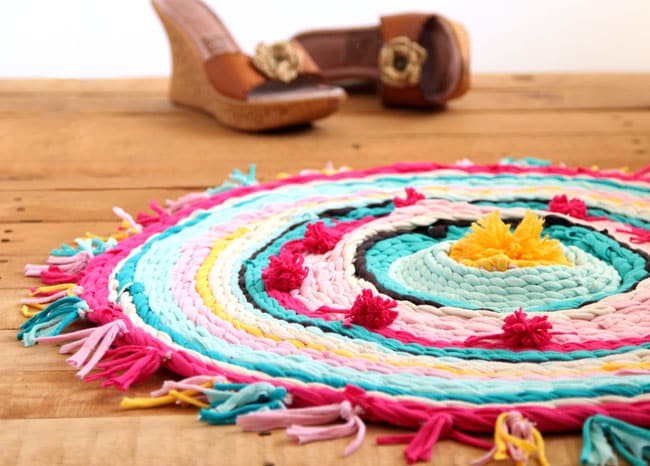
Such as this rug made from old t-shirts –
But I am quite impatient, and as a pom pom lover, I just have to find some short cuts for all future pom pom projects, right? Thanks to Anne, the wonderful talented blogger at Flax and Twine, I learned this method that makes all my pom pom dreams come true. =)
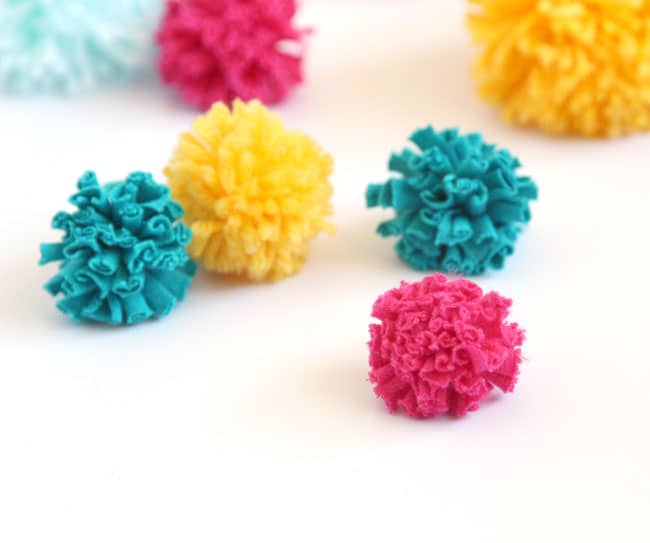
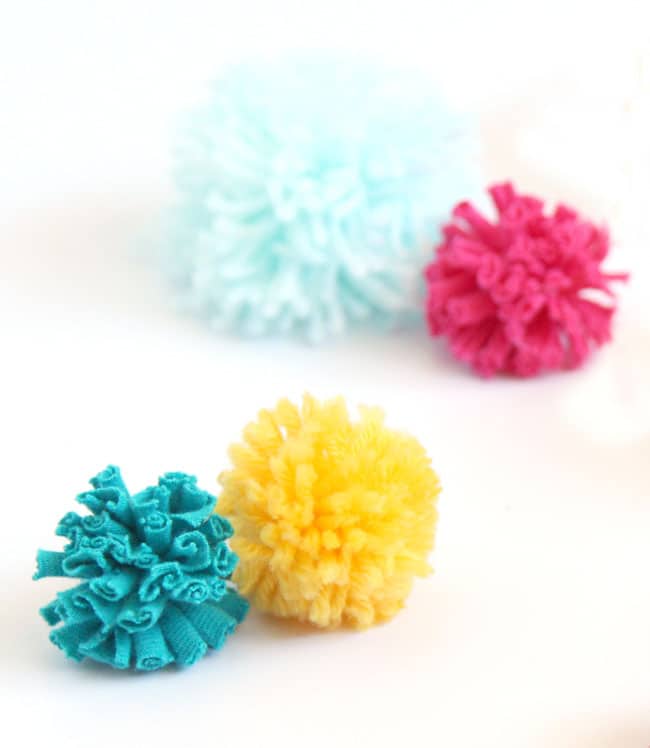
Let’s look at 2 variations of this technique: one is with regular yarn, the other with t-shirt yarn, which is quite pretty as the fabric curls in a beautiful way.
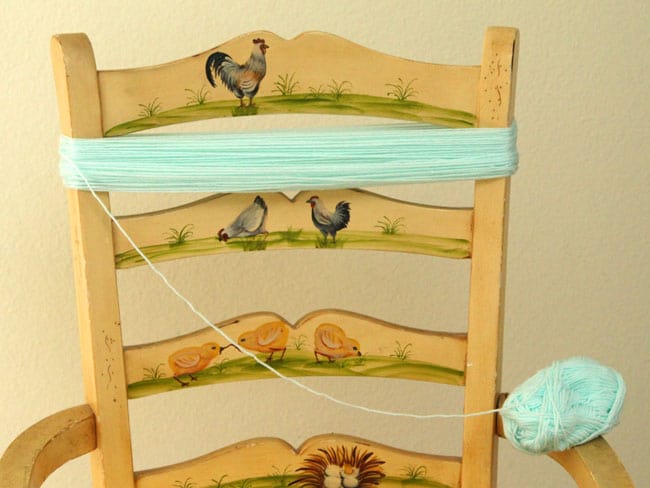
Step 1: Wrap the yarn around a “frame” that is sturdy and hollow in center, such as table or chair legs. Make a knot at the beginning and at the end. How many times to go around will depend on how big the pom-poms are and how full you want it.
Because I was going to use the pompoms on my rug, i did not make them too full, but a good guideline is to have the center at 1/2 the size of the pompom diameter. So for 2″ diameter pompoms, the center would be about 1″ thick.

Step 2: Tie the yarn at intervals equal to the size of the pompoms, so 2″ intervals for 2″ pompoms. Make the knot as tight as you can.
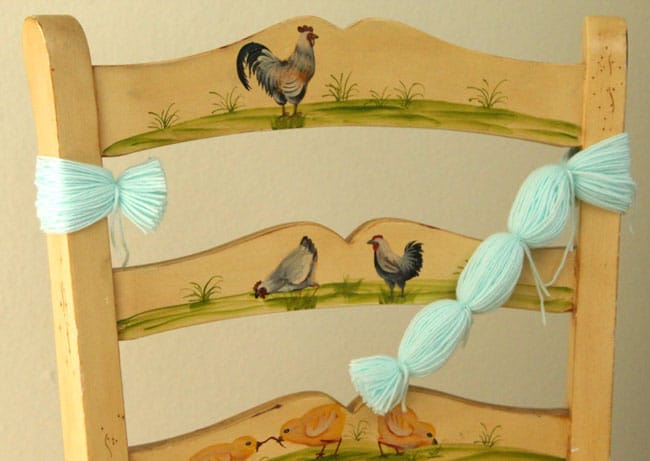
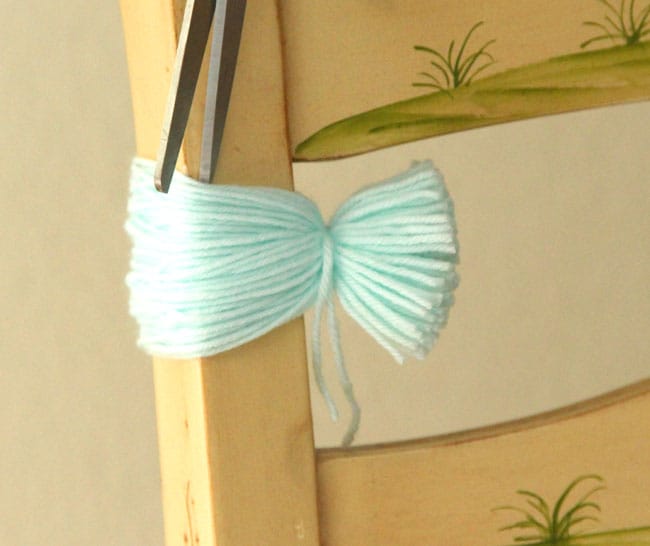
Step 3: Cut the yarn at mid-points between the tied knots. The end piece will be trimmed to equal length on both sides.
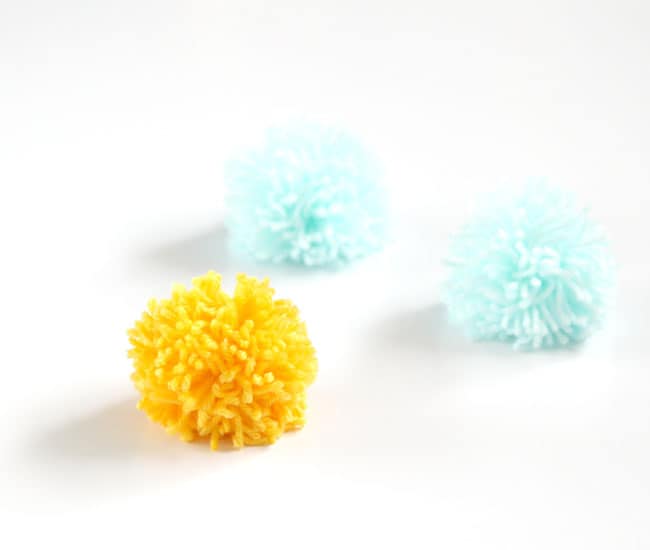
Step 4: Fluff each piece. Optional: add a few stitches at the center to prevent unraveling.
To make pom poms with t-shirt yarn, the key is to cut the t-shirt across the body like shown in drawing below. 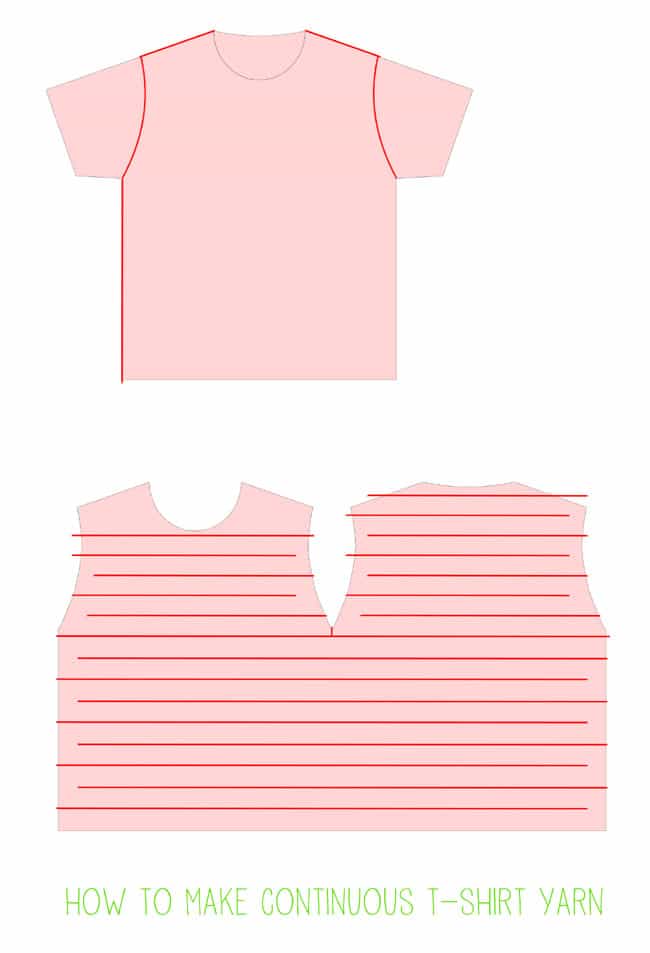
You can check out more details on how to make continuous t-shirt yarn here-
Cut the strips into 0.25″ to 0.5″ wide, depending on the thickness of the fabric, and the look you want.
When you pull the strips tight and release it, the fabric curls into a “C” along the cross section, which is quite pretty!
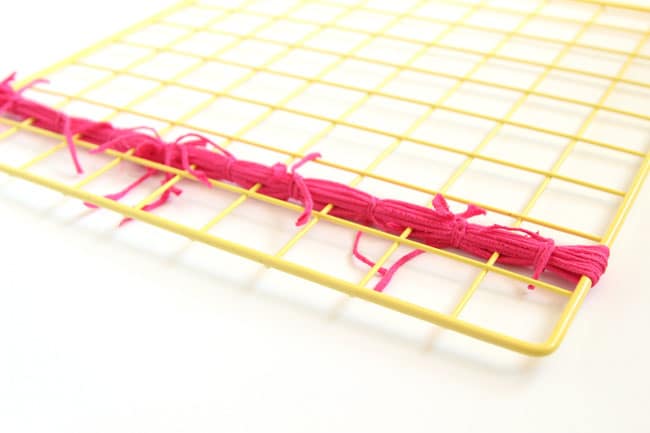
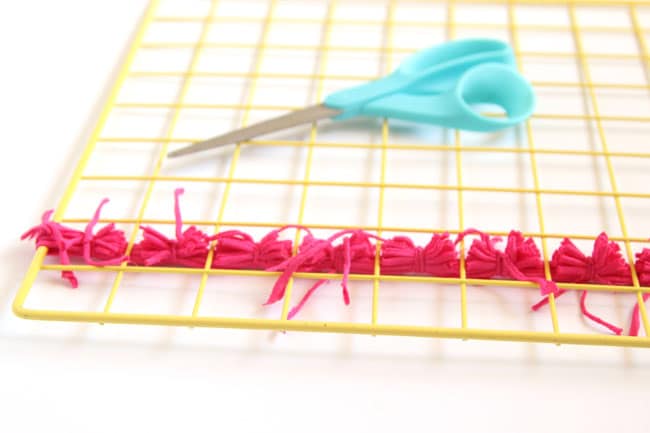
Repeat the above steps 1-4 for regular yarn for the t-shirt yarn pom poms. Here I used a metal grid/ rack for smaller pompoms.

More easy and fun projects in case you missed them-
Instant pumpkins made with … toilet paper!

Dandelion lanterns made from paper and up-cycled plastic bottles-

Happy creating!


I hate the tediousness of making pom poms; this is GREAT! As a child, before pull skeins were so common, my mother had us kids wind yarn using a chair back if a second set of hands wasn’t available. What a great way to use up some scraps, too!
hi kathy! so glad you enjoy this and it brought back sweet memories! =)
very nice
I hate that I didn’t think of this myself!! 😀 Thanks for a great tutorial. Just subbed the blog. <3
happy crafting! =)
What a great tutorial! instead of buying the pom pom maker other DIY sites use 🙂 Now I can make these pom poms for the dress DIY I’m working on for hapinesswherever.com 🙂
You had me at… ninja. LOVE this idea, and who couldn’t have enough pom poms? Too cute!!
You always have the best DIY projects! GENIUS!
I love pompoms!!!! It is colour and joy and bohemian style in our life!
Tnak’s and have a nice day or nighgt!
This is such a great tutorial. Poms poms are usually my least favorite part of a project. Plus, I’ve always wanted a better tutorial about t-shirt yarn. So, thank you! 🙂
Cute! You take such bright and lovely photos!