How to Compost: Best Methods Compared
How to compost outdoors & indoors, comparing best methods such as bin systems, hot vs cold pile, in-ground composting, Vermicomposting, etc!
First of all, can we give you a big virtual hug for getting started in composting, which benefits not only your home and garden, but also our entire planet earth? When I started designing gardens after college, I became super passionate about composting, and took a 7 week long intensive composting class in San Francisco Bay Area.

Since then, we have tried almost every kind of compost methods and systems in our own gardens, including compost bins, tumblers, in-ground composting, vermicompost with worm bins, and other hybrid methods.
I am super excited to share with you everything we have learned through our years of gardening, and help you choose the best and easiest composting systems for your needs and lifestyle. We will explore the steps on how to make and use compost, and compare the pros and cons of many composting systems for the home and garden. First, let’s look at the amazing benefits of compost!
What is compost?
*Some resources in article are affiliate links. Full disclosure here.

Compost is a mix of decomposed organic materials such as food waste, plant and animal matter. It is rich in nutrients and retains moisture in the soil. Improves soil structure and biodiversity, promotes healthy root systems and plant growth.
Why should we compost at home?
Composting is nature’s way of recycling organic “waste”. Actually, in all the healthy ecosystems in nature, nothing goes to waste. Just look at the life cycles in a forest: fallen leaves, branches and animal matter are decomposed and turned into nutrients in the dark soil that supports new plant growth and animal life.
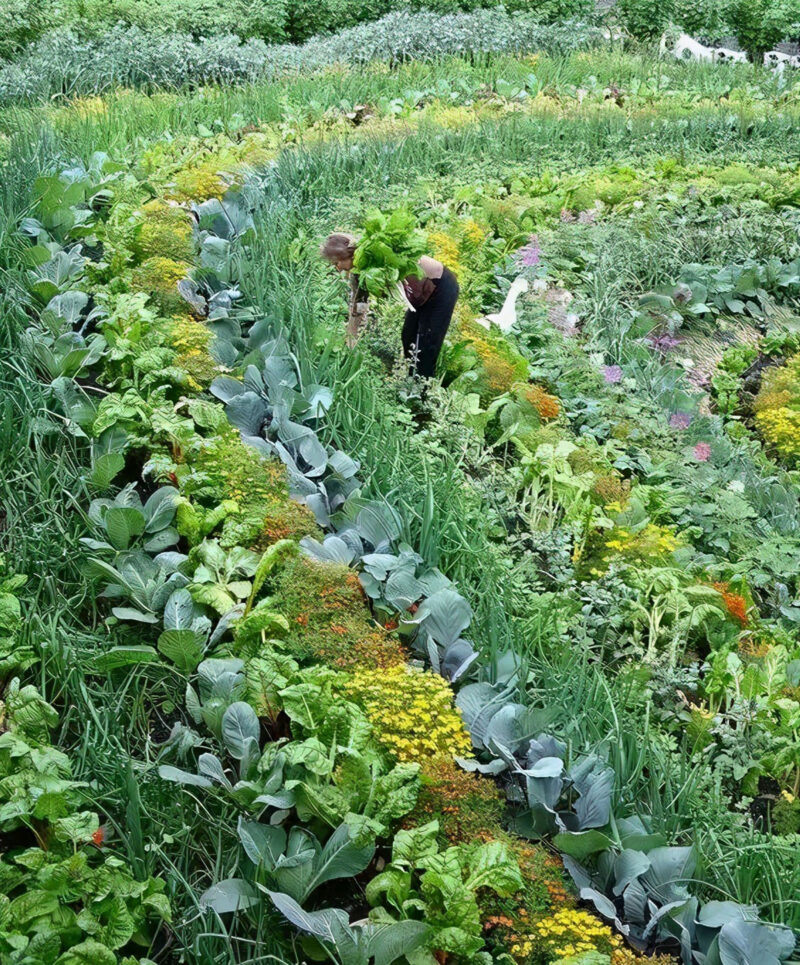
There are so many benefits of composting. When we compost at home, we are keeping food wastes out of landfills, and creating the best free fertilizers to feed our plants and garden, like in this inspiring project in UK.
What can you compost?
To make better compost faster, you will need a proper balance of the following ingredients : ( Source )
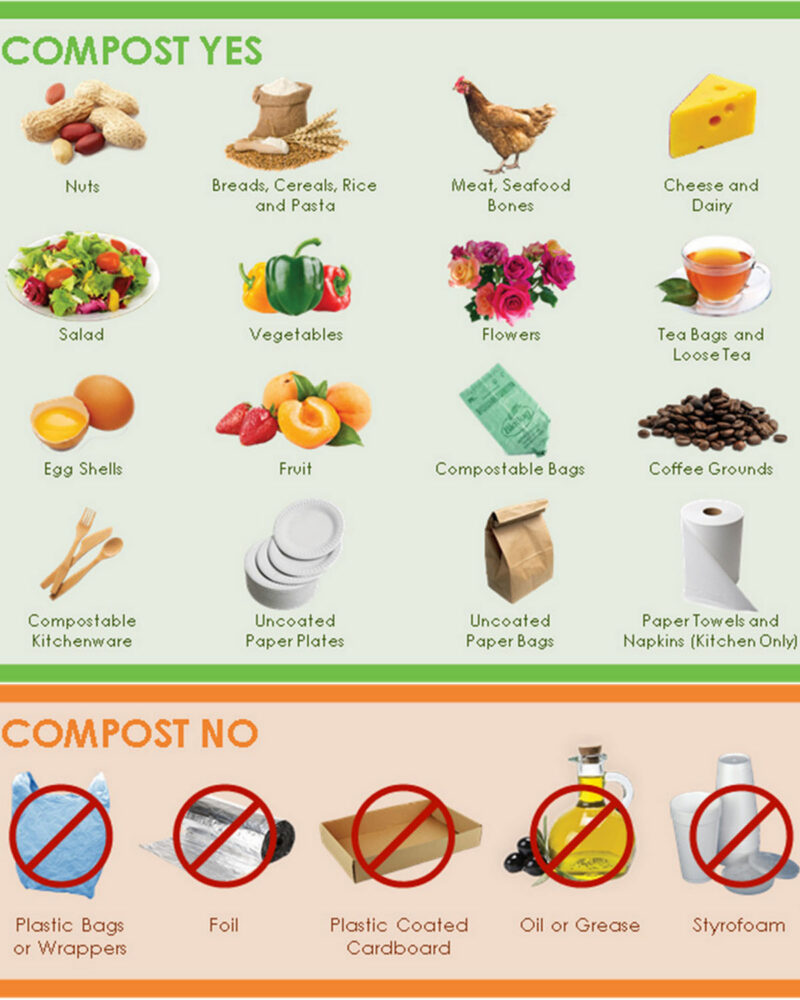
- Browns: Carbon-rich materials such as dry leaves, branches, wood chips, straw, pet bedding, paper and cardboard. Soil can also be considered as browns in some systems.
- Greens: Nitrogen-rich materials such as veggie trimmings, fruit peels, food scraps, coffee grounds, manure, fresh leaves and grass clippings.
- Moisture and air.
The ratio of browns and greens is more important when you want to build a hot compost pile, or when you want to maintain a healthy worm bin, both of which we will talk about more later.
How to make compost?
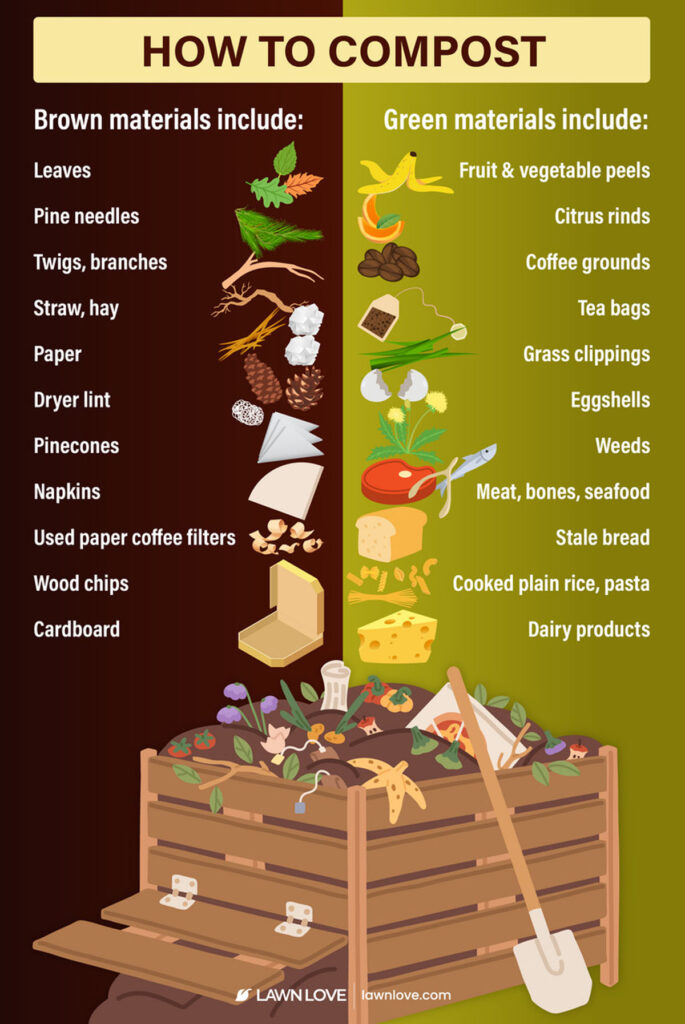
The main methods of composting are passive / cold composting, active / hot composting, and vermicomposting. Less common variations include Bokashi composting, and countertop composting. Image via Lawn Love
Both hot and cold composting are done outdoors either in bins, in an open pile or in a trench. Vermicomposting can be done both indoors and outdoors, using worm bins, buckets, or in ground. Bacteria composting is great for small space indoors. Let’s look at the pros and cons of each method in detail.
How to tell if your compost is ready?

Finished compost should look and smell like dark earth in a forest. Most of the original organic materials should have broken down, except for things like woody branches or eggshells, which take much longer. Check out these 25 best DIY compost bin ideas for more!
Let’s start with our favorite composting method: it is fast, easy, no mess, no fruit flies, and minimal work!
Method 1: passive cold composting
The two main variations of cold composting are no-turn compost piles and in ground composting. Earthworms usually play a big part in cold composting, so this method has similarities with Method 3: vermicomposting
In-ground composting: our favorite method!
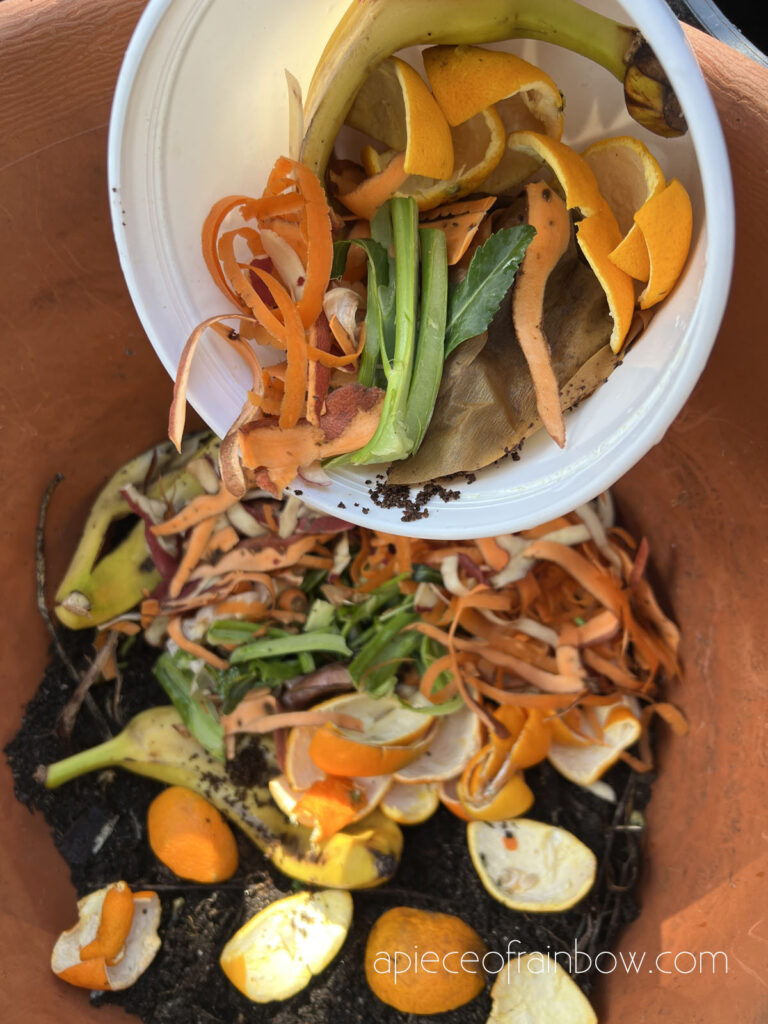
Also know as trench composting, this is our absolute favorite method to make compost with ongoing scraps from our kitchen and garden. It’s the easiest way to compost. The only limitation is you need to have an outdoor space with garden soil, whether it’s your backyard or a community garden composting site.
Here’s how. We eat lots of fruits and vegetables, and we love to cook. So we generate lots of kitchen scraps.
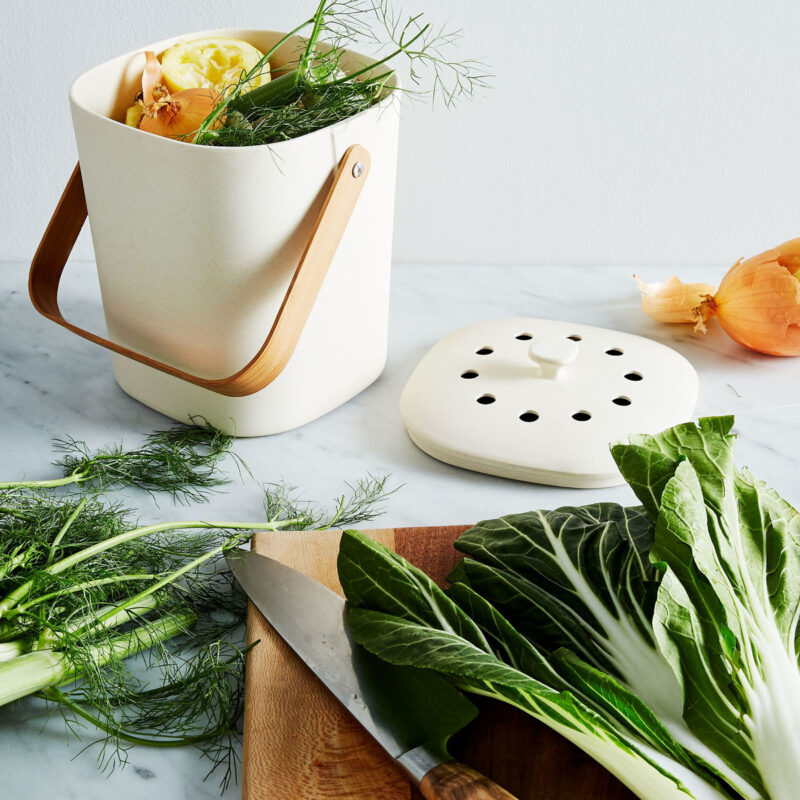
We found the best way is to collect kitchen food waste in very sturdy plastic bags or a bucket like this and store the bag or bucket in the fridge. So there’s no smell and no fruit flies.
Once the bag is full, we take it to the garden. Dig a hole about 10-12” deep, bury the scraps and cover with about 6 inches of soil. No worries about browns and greens ratio!
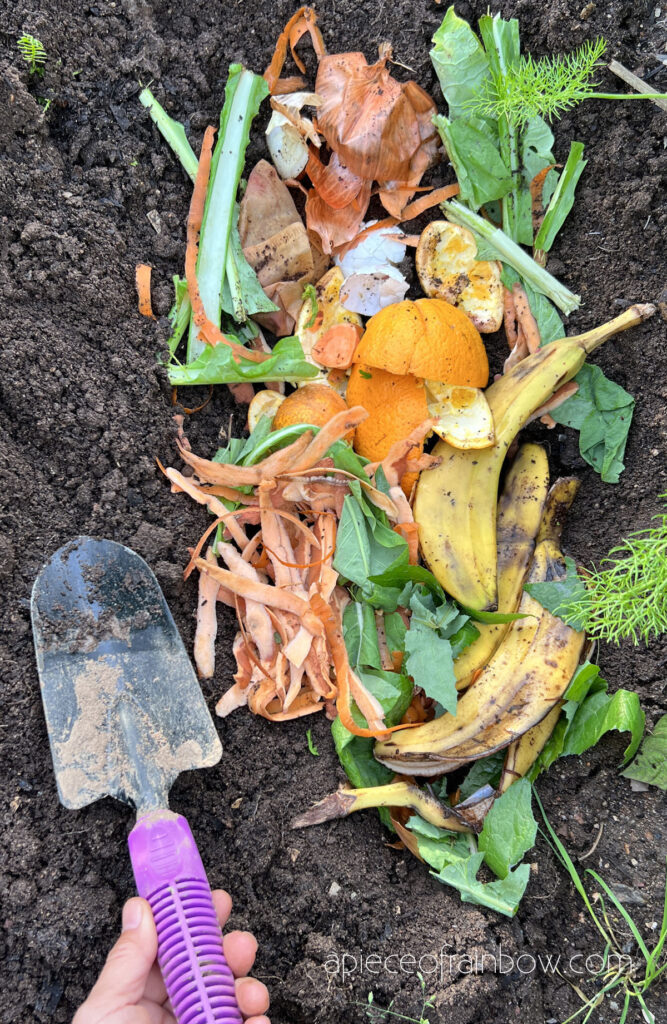
In most weather it only takes 2 weeks for the scraps to break down, thanks to earthworms and healthy bacteria in the soil.
Other ways to passive compost: cold compost pile, lasagna gardening and hugelkultur.
Start with any compost ingredients listed earlier, use a bit more browns to prevent smells as everything slowly decomposes. Do not add weed with seeds or diseased plants to a cold compost pile, because the pile will not reach the high enough temperatures to kill weed seeds and diseases.
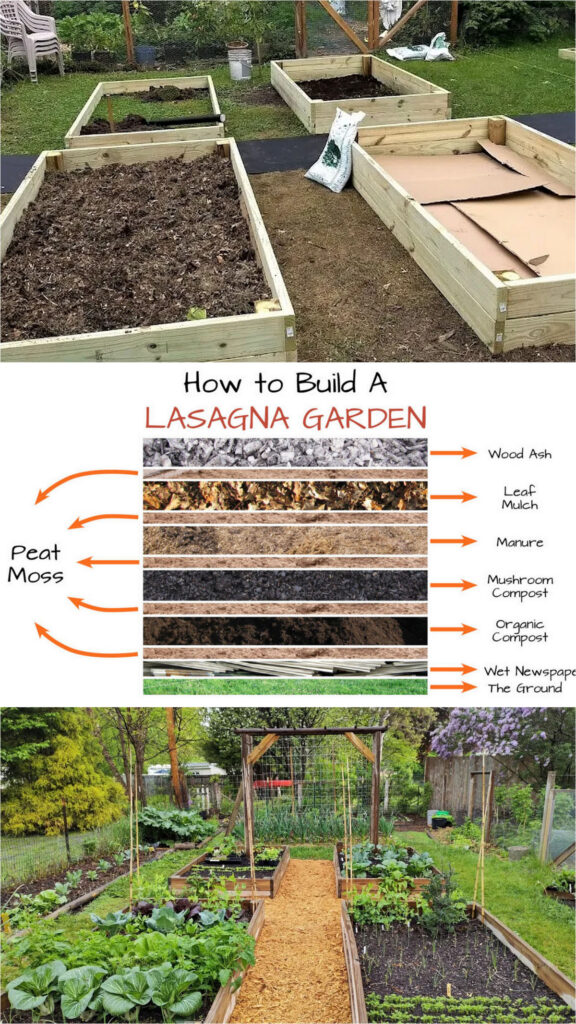
Just add to the pile as you accumulate compostable materials. It’s helpful to add some soil as well. Via Forks in Dirt.
Lasagna gardening and hugelkultur are well known variations of passive composting method.
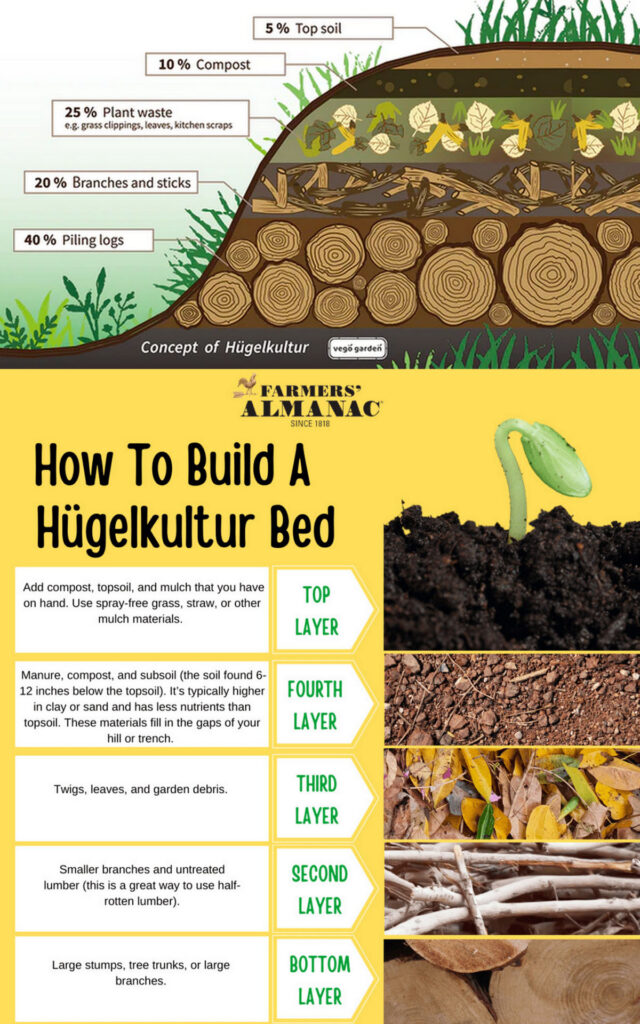
Hugelkultur is a centuries-old, traditional way of building a garden bed from rotten logs and plant debris. The technique helps to improve soil fertility, water retention, and soil warming. Source: 1 | 2.
You can also build Hugelkultur pile in a raised bed garden. Source: Zero Waste Chef
How to keep pests away from compost pile
Always bury food scraps in the center of the pile so you don’t attract rodents.
Turning the pile occasionally will also deter rodents and speed up the composting process.
It’s helpful to have 2 piles so you can start using compost from the older pile while adding fresh materials to the new pile. Source: Spruce
Method 2: active hot composting
This method is great if you have an outdoor space at least 3’x3’ big, and wants to make a large amount of compost quickly for your garden.
To compost small amounts of kitchen scraps or garden waste a household generates daily, the other 3 methods are better.
Billions of aerobic bacteria working to decompose the organic matter causes the active compost pile to heat up to an internal temperature of 110°F to 140°F (43°C to 60°C). The pros of hot composting is that it speeds up the process and kills weed seeds and disease spores. Source
How to make a Hot Compost Pile
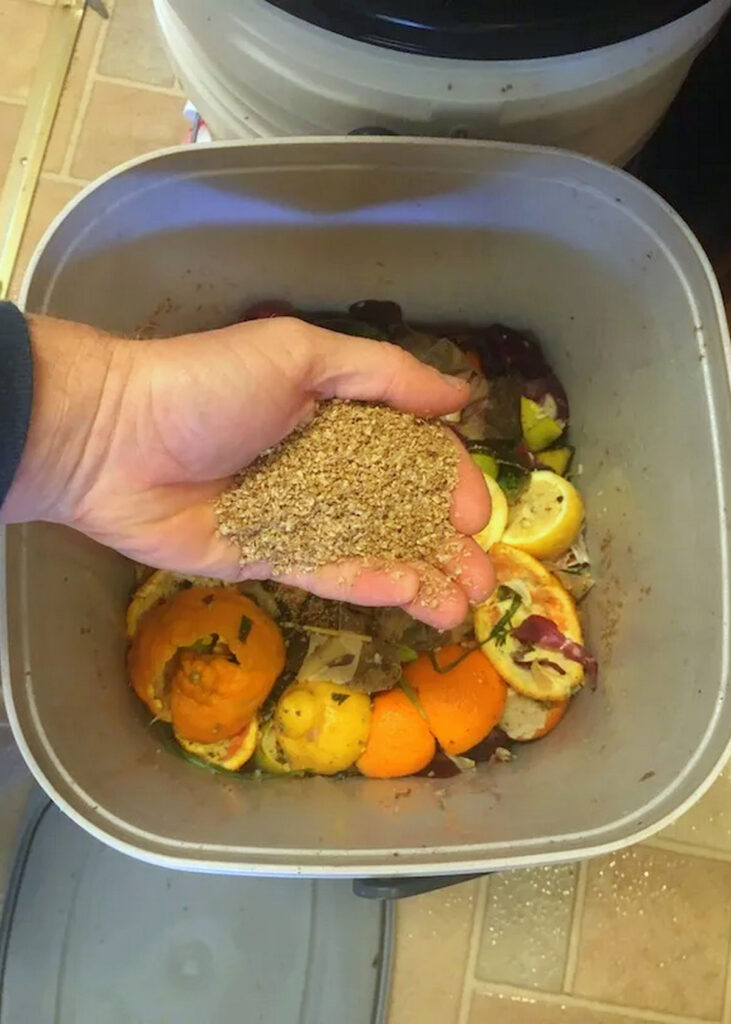
To create a hot compost pile you will need enough materials to build a pile of at least 3’x3’ big.
The ratio is about 50% greens (such as grass clippings, alfalfa meal, manure, vegetable scraps) and 50% browns (such as paper, straw, leaves, sawdust).

You can use a compost bin or just build an open pile.
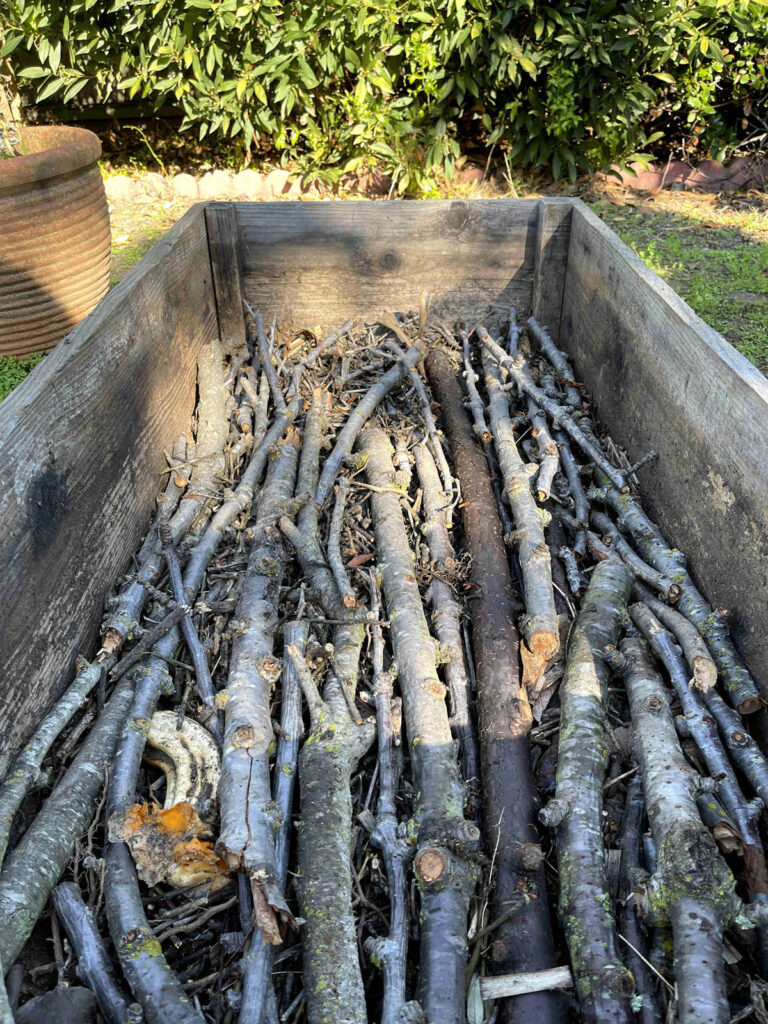
Cutting up materials into smaller pieces helps speed up the composting process. Corn cobs, twigs and branches improve air circulation in the compost pile. Video tutorial below-
Alternate 2” to 4” thick layers of brown and green matter and after every few layers add a thin layer of garden soil for essential microbes. If your materials are dry, sprinkle some water as you build up the layers. The pile should be damp overall but not soggy.
Repeat the alternating layers until the pile reaches at least 3 feet high.
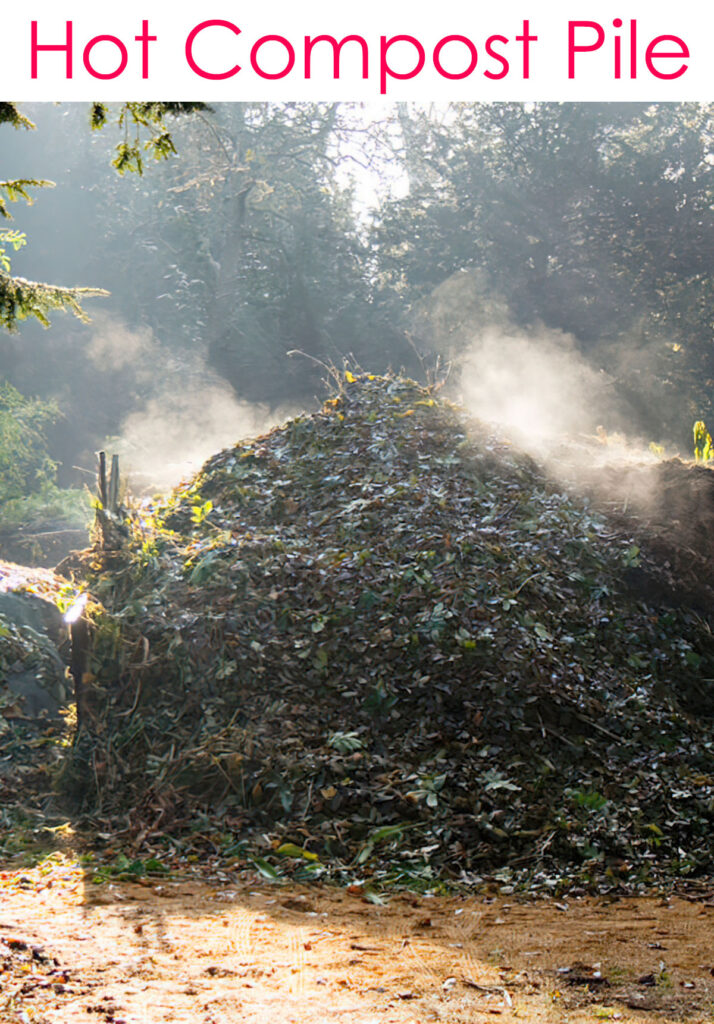
Your compost pile will start heating up in 1-2 days (photo source ). You may notice steam rising and pile size shrinking as the decomposition happens. In the 7-week class I took, we used compost thermometer to check if the pile reaches a temperature of 110°F to 140°F (43°C to 60°C).
If the pile smells rotten, add more browns. If the pile isn’t heating up, it’s usually because of either too much browns, or not enough moisture.
After 3 to 7 days, the center starts to cool down, it’s time to turn the pile. Move the outside materials to the center of the pile as you turn, and sprinkle some water if needed.
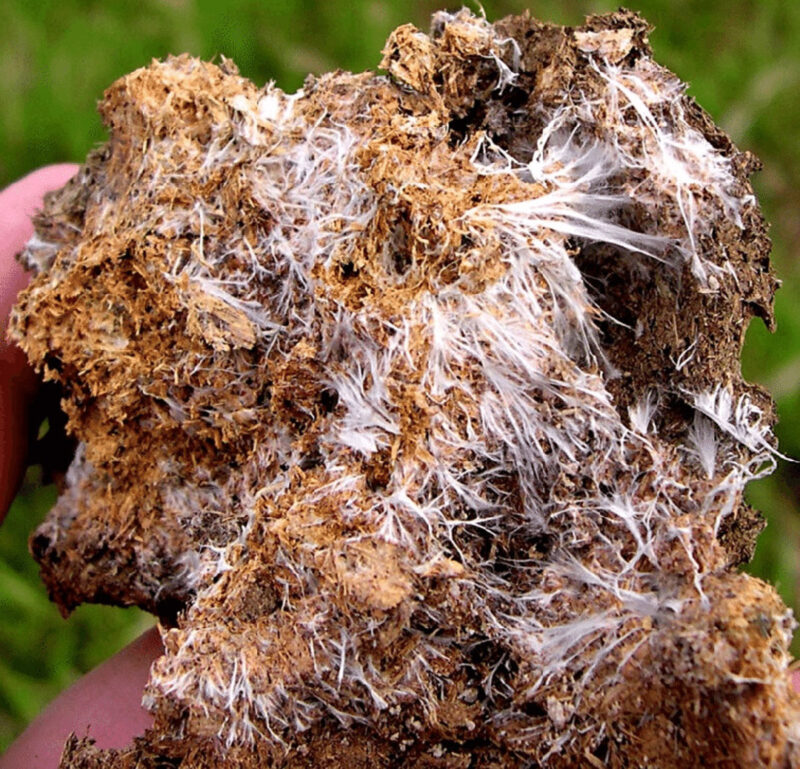
You may see white mycelium which is a great sign of a healthy compost pile!
The beneficial mycelium fungi helps to increase nutrients available to plants and improve water efficiency in garden soil.
Turn the compost pile every 3 to 7 days for the first 2-3 weeks. Let it sit once the pile stops heating up dramatically. Your compost will be ready to use in 1 to 2 months.
Method 3: vermicomposting
Vermicomposting can be done anywhere from a small indoor space to a large outdoor garden.
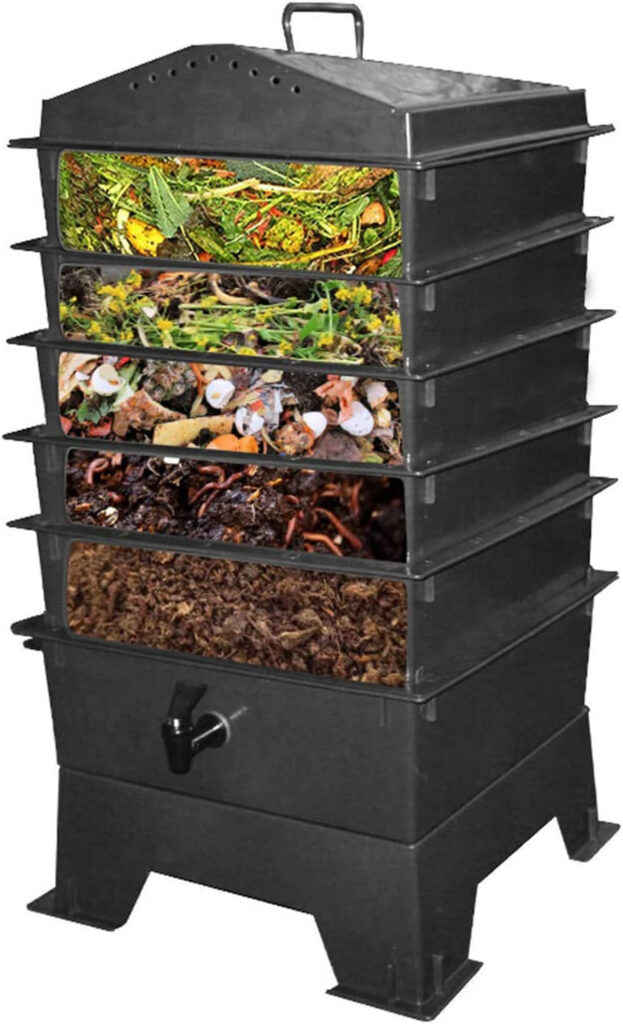
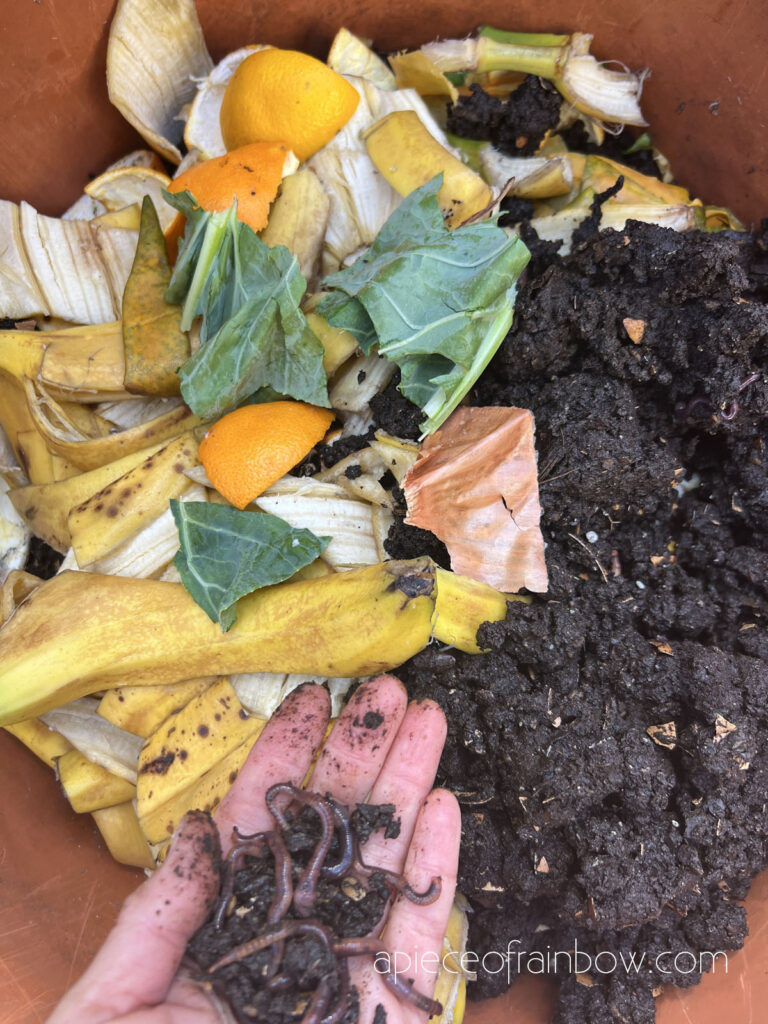
If you read about vermicompost, you most likely would see recommendations to purchased red worms, worm bins like above, and start with kitchen scraps and bedding such as shredded paper, coco coir or pet shavings.
Worms will eat most food waste, and they eat their favorite first, such as melon rinds and anything sweet and juicy. They avoid super acidic kitchen waste such as half a squeezed lemon, until it decomposes more. Indoor worm bins take a bit of fine tuning, this video below explains how to keep a worm bin.
That was how we started. However, we have tried many easier ways with simple setups since then, and we will share everything we learned on how to compost using worms in a detailed guide and link to it from here. Before we finish the guide, check out this video below with a good alternative to worm bins using pots or buckets.
Other methods: countertop composting and Bokashi composting
Countertop composting have gained lots of popularity in recent years. We tried one a few years ago. Here’s the pros and cons based on our experience.
Cons: Overall, we did not think the countertop composter was a good choice for us. Here’s why. The composter grinds and heats everything up using electricity. The finished “compost” is more like dehydrated or baked organic matter than true compost, which go through a bacteria and / or worm decomposition process.
The other downside of countertop composter is the volume. For a household that generates lots of kitchen scraps and food waste each day, one countertop composter may not be enough.
Pros: Countertop composter can minimize smell and bugs. You can take the content to an outdoor compost pile to finish composting.
Bokashi is a great pre-composting method originated from Japan. It is used for composting all organic food waste, including meat, dairy and fats. It. The process uses Bokashi composter with bran which is a complex blend of bacteria and yeast to predigest waste matter and eliminate odors and decreases composting time. Source: 7thGenerationDesign
Maybe some new models of countertop composter work differently now. Our view on countertop composters, as of now, is that both the in-ground composting method we talked about at the beginning, and the stacked pot worm composting methods are so much easier with better results.
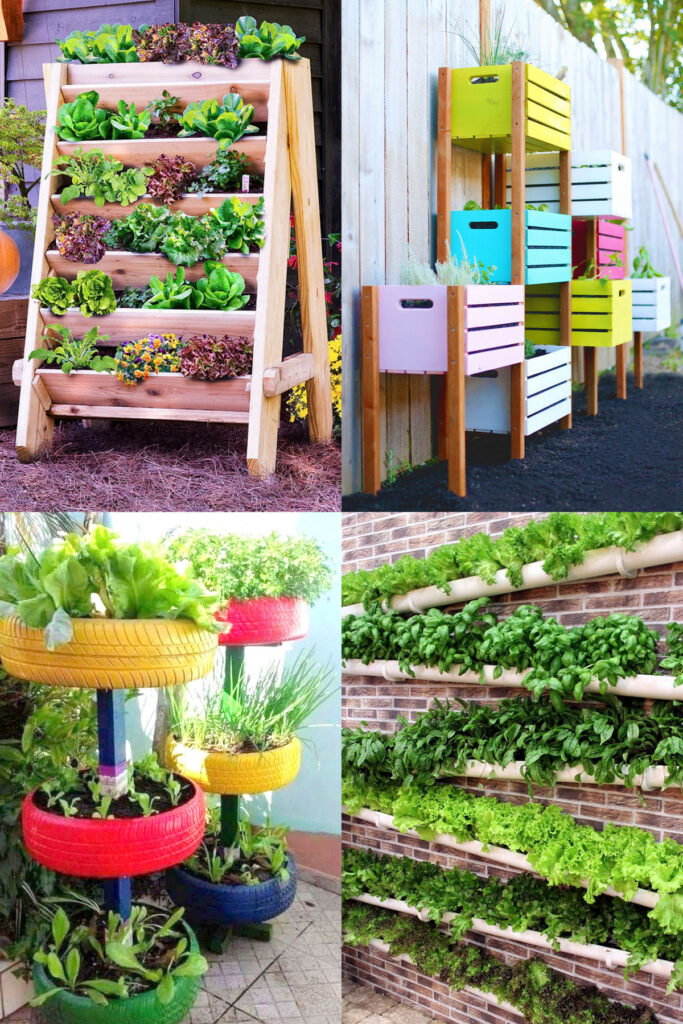
You may also love: 35 creative vegetable container garden ideas.
Happy composting! Wish you a beautiful and abundant garden!


We tried the trench composting method here, it was so easy and worked great! Thank you!
thank you Renee! that’s our go-to method also! 🙂
I live in a condo with not a lot outdoor space. I have a small family. A countertop composter was a good choice for me. I might have chosen differently if my circumstances were different. As it is, I am happy to be composting and able to add a bit to my very small flower garden. Thank you for the post.
hi KJ! i would also try a stacked pots worm compost bin outside if there’s room. it worked great for us when we just had balcony space to garden. 🙂