DIY Star Shaped Clothes Drying Rack
Imagine a functional piece of furniture: not only is it beautiful, but it magically expands like a sunflower blossoming, or a kaleidoscope unfolding…
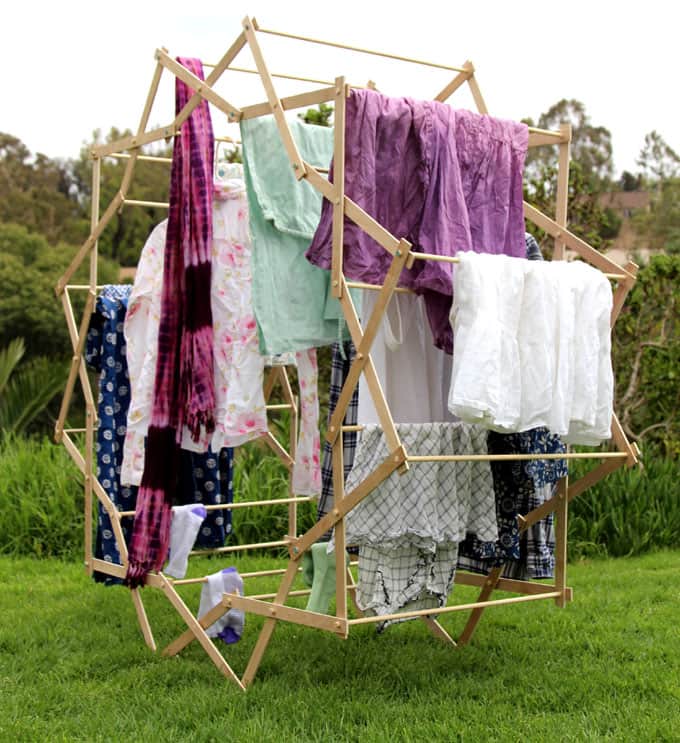
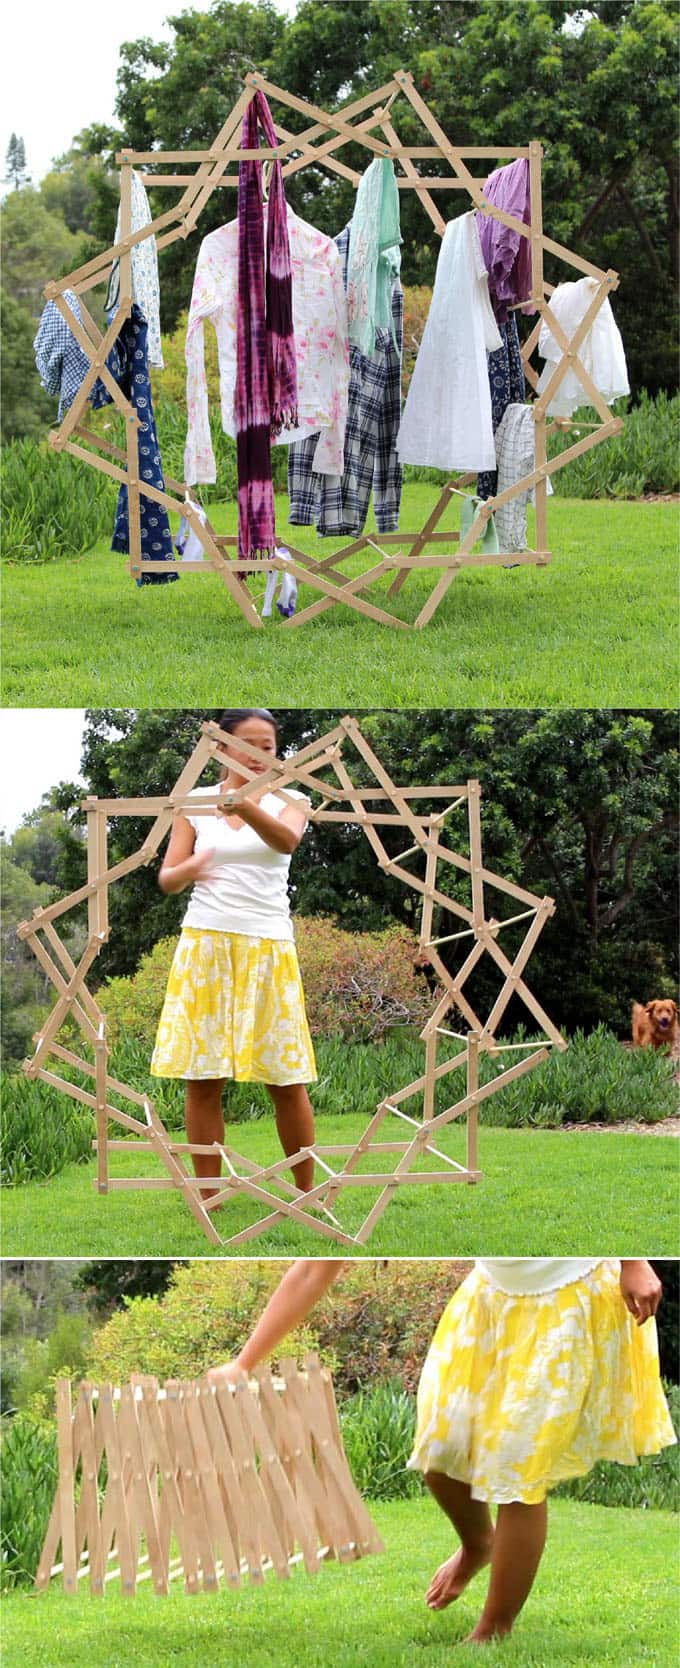
Here it is – a Star Shaped Clothes Drying Rack.
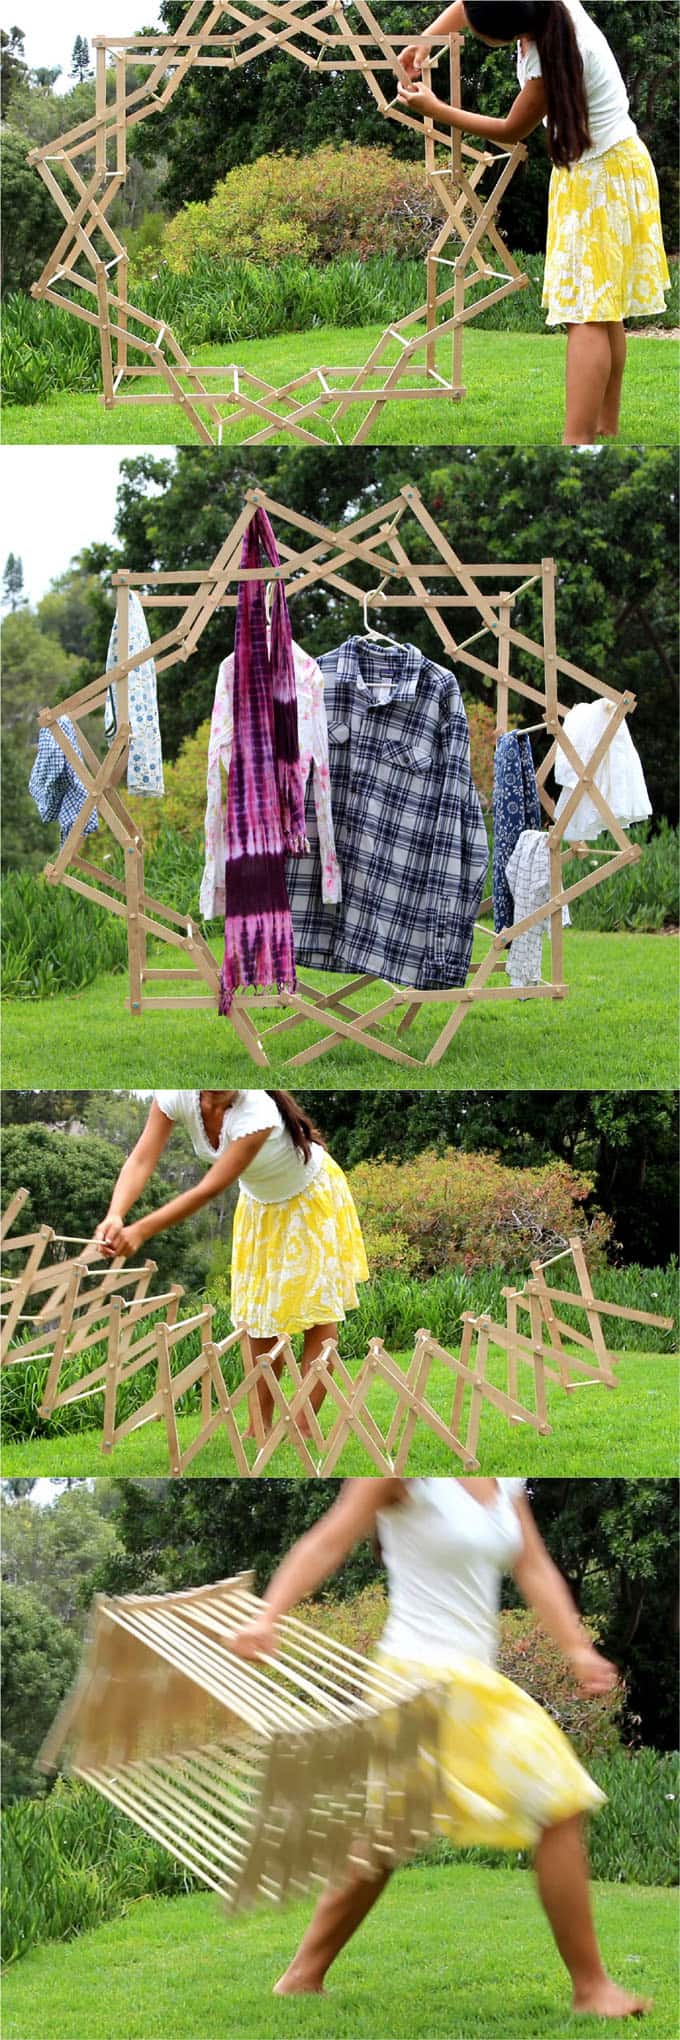
It folds into a tiny footprint for easy storage. It expands to 4.5 feet tall and wide with more usable space than any drying racks we have seen.
The best part? This gorgeous clothes rack takes only $18 to make with two easily accessible materials: plywood and dowels, and very simple tools.
There will be a free plan for you to download at the end! Watch this drying rack in action here-
*Some resources in article are affiliate links. Full disclosure here.
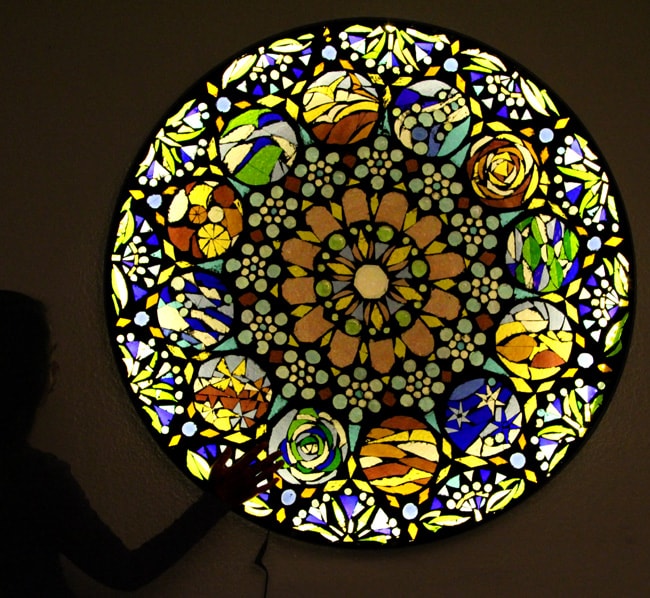
You might know how much I love geometry from this project inspired by the sacred geometry of Notre Dame rose windows: an old glass tabletop turned into a stained glass mosaic wall light.
Here are my sources of inspirations for this drying rack. Amish people have designed a similar clothes horse you can purchase for $150 at Lehmans. UK designer Aaron Dunkerton created the star shaped clothes horse which is in the process of production. I will add a link here once it is for sale. ( Sources 1 | 2 ) I modified the designs a bit to eliminate some dowels that are closely overlapping.
Materials and tools:
( Some of the helpful resources are affiliate links. Full disclosure here. )
- 4′ x 2′ sheet of 1/4 inch thick PureBond Birch Plywood
- 3/8” diameter pine wood dowels
- Because wood expands when wet, it’s a good idea to paint or seal the piece with non-toxic exterior grade paints or sealers such as an Eco Wood Sealer, which lasts a very long time with one application.
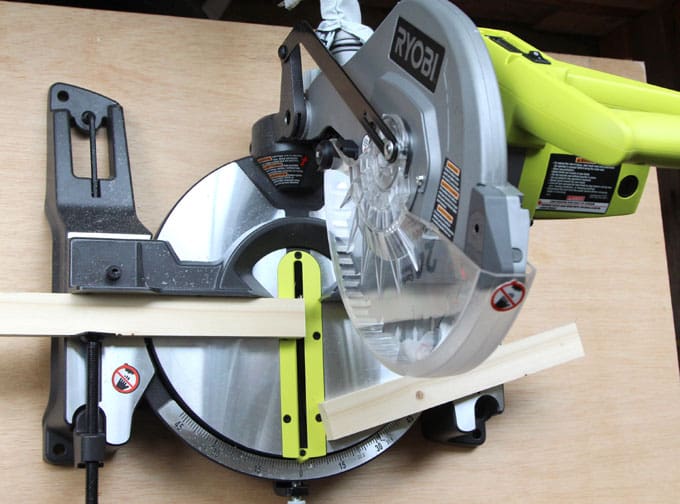
- Circular saw or jig saw, a drill and 3/8” drill bit, optional: miter saw. ( Disclosure: I received the above tools as a gift from the awesome people at Ryobi tools. Thank you Ryobi! )
Please follow important basic safety practices while building. Always wear eye goggles, work on a clean sturdy and flat surface, properly clamp each piece, and learn to use tools properly.
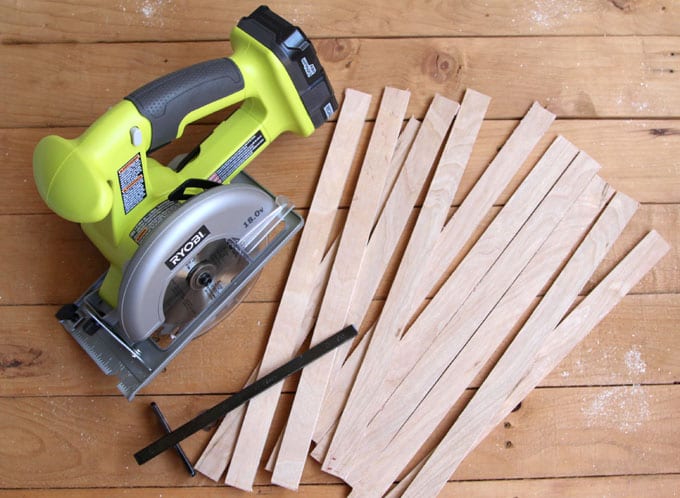
Step 1:
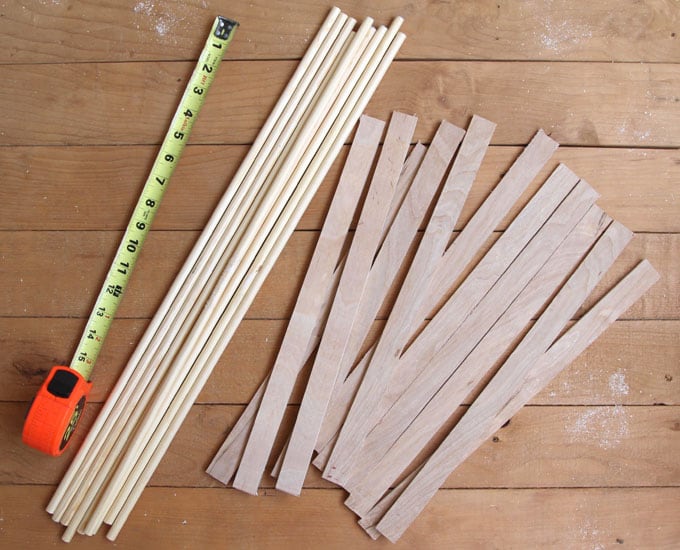
Cut plywood into (48) strips of 16” long by 1” wide. Table saw is best for this, but you can cut these nicely with the help of a saw guide attached to a circular saw or jig saw.
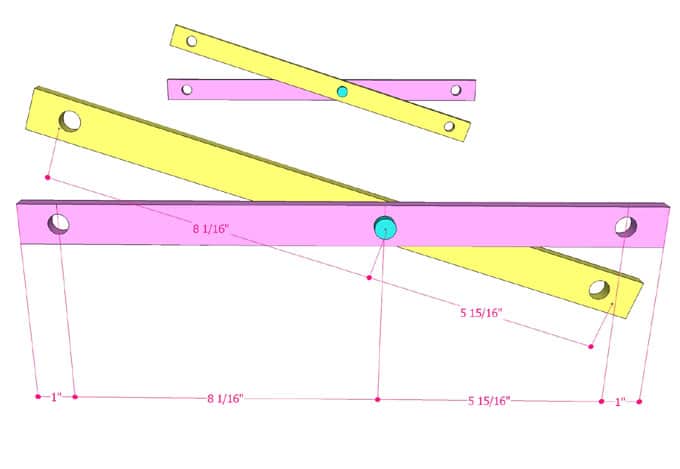
Step 2:
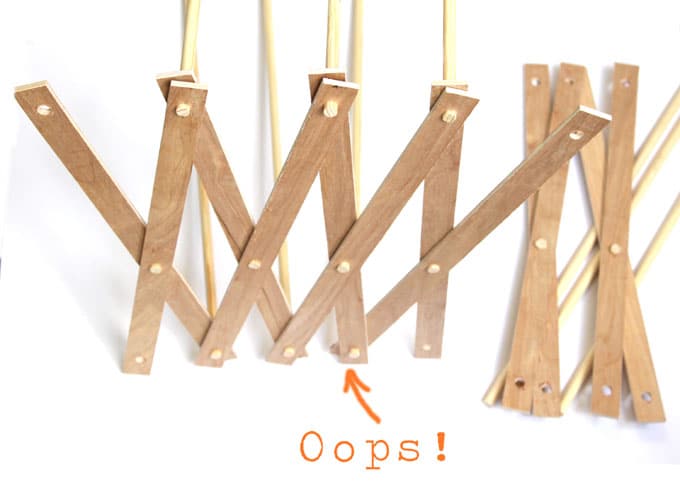
Mark center of three 3/8” holes on each plywood strip as shown in the dimensions below. It is VERY important to be as accurate as possible in this step.
The more accurate you are, the more smoothly the whole structure expands and folds when everything comes together.
Since we do not have a drill press YET, we clamped a few pieces together to reduce the amount of marking and drilling. A drill guide can help the drill stay vertical through the holes.
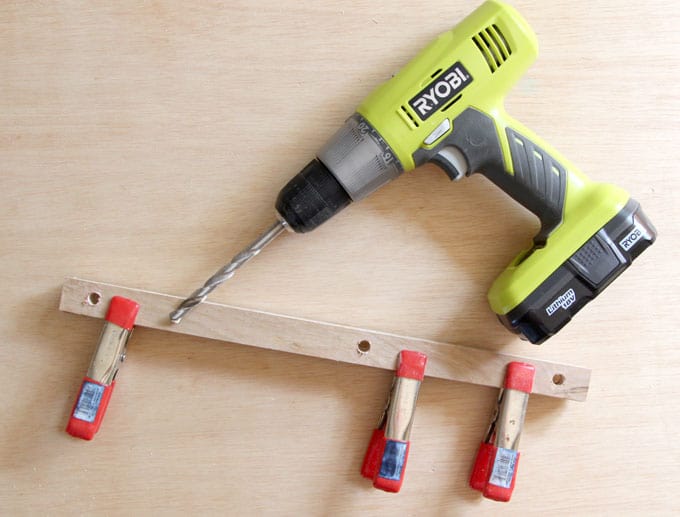
The dowels will fit tightly into the holes. This will hold the plywood strips in place, while allowing them to rotate easily.
Step 3:
Cut (12) 3/8” x 48” long dowels in half into 24” long pieces. Cut (1) 3/8” x 48” long dowel into (12) 1.5” sections.
Sand all the cut pieces. Now we are ready to assemble!
Step 4:
Assemble (2) plywood strips with (1) 1.5” long dowel through the middle holes.
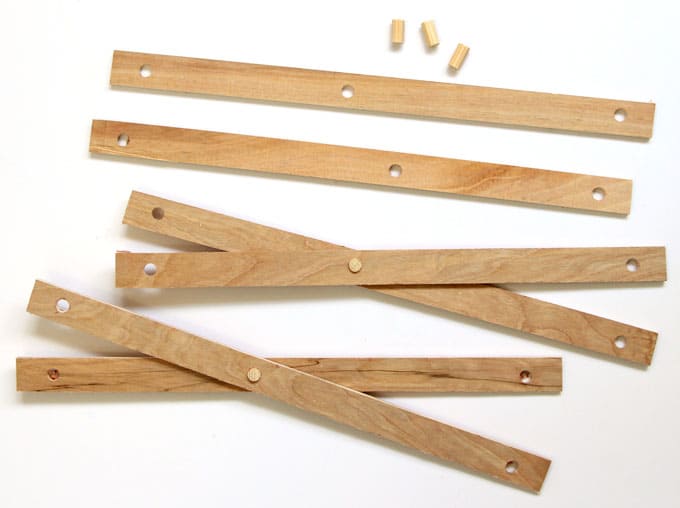
This will be our basic Module A. You will end up with (24) Module As.
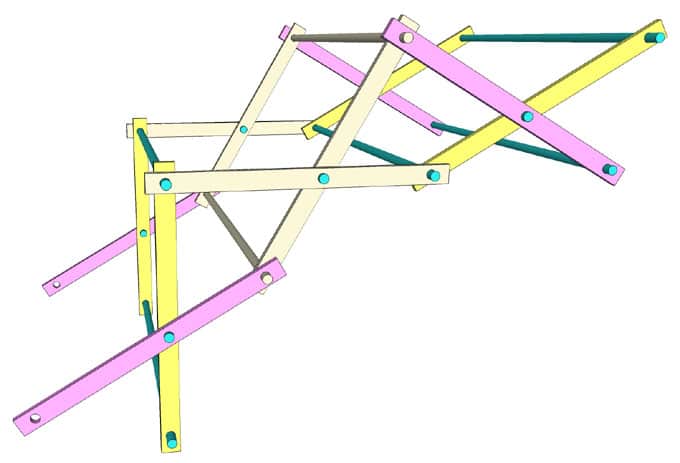
Step 5:
Take (2) modules, mirror them as shown in diagram: yellow strips inside, pink strips outside. IMPORTANT: rotate the outside strip so the longer section between the middle and end holes are all pointing the same direction.
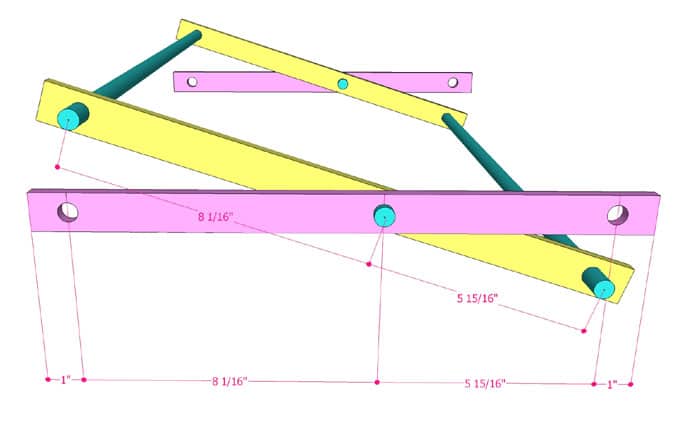
Connect the inside strips with (2) 12” long dowels, through corresponding holes.
Make (12) of these. We will name them Module B.
Step 6:
Start with one Module B, add the next one by snapping the (pink) outer strips onto the dowels connecting the inner strips, always keeping the longer section between the middle and end holes pointing the same direction.
When you reach the last one, it is time to test your star-shaped clothes drying rack.
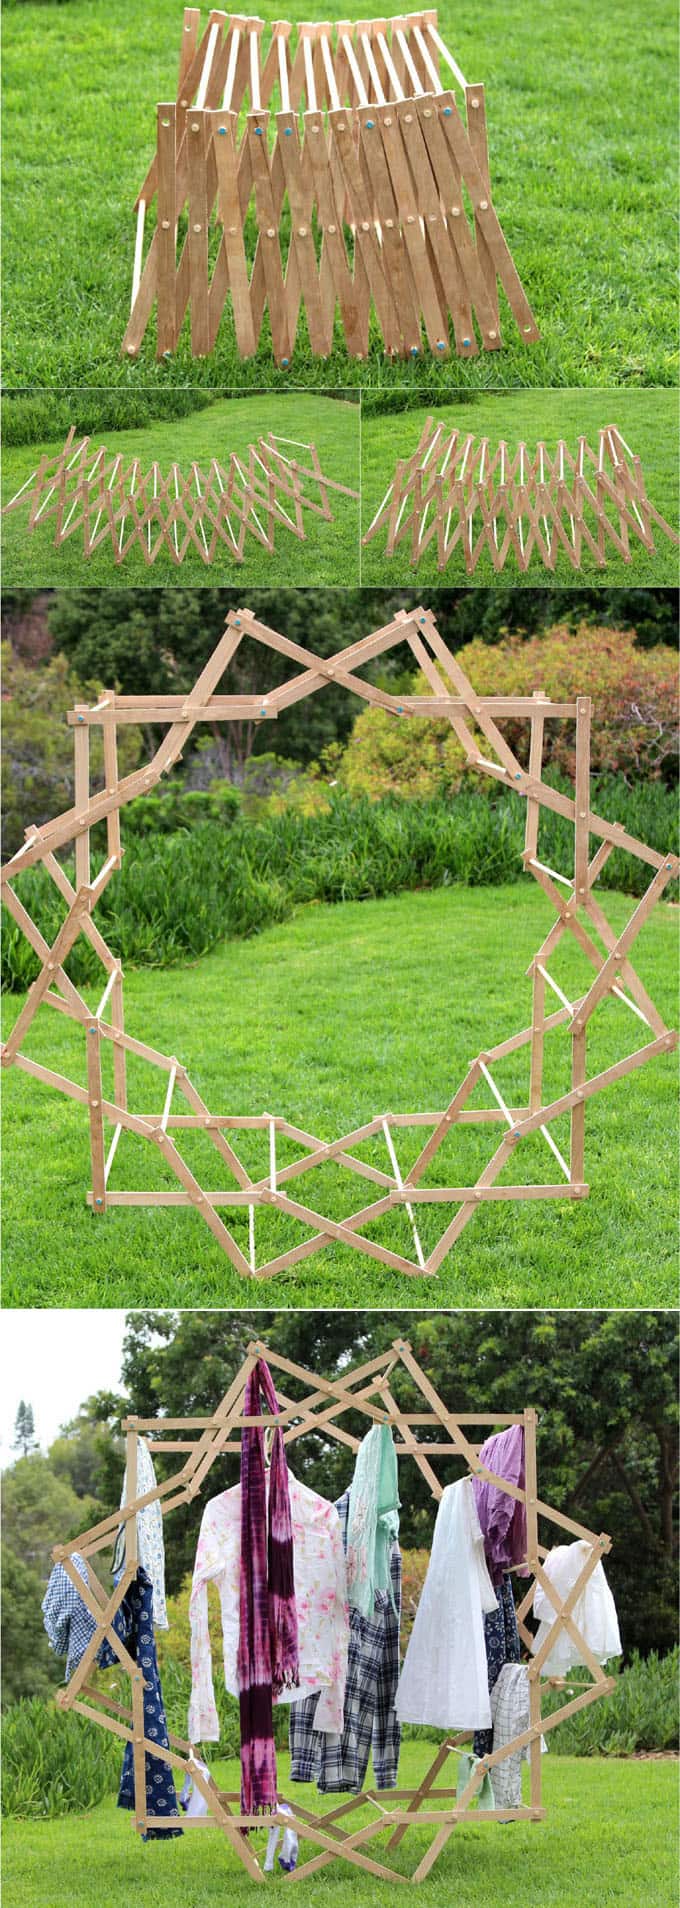
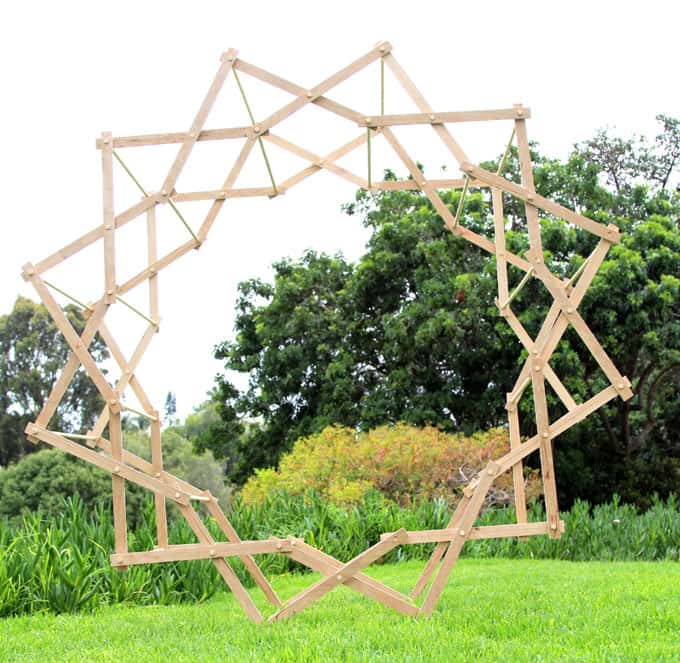
It is truly a magical moment when the 12-pointed star takes its shape. Snap the last outer strips onto the corresponding dowels to hold the star in place. Pop them off to collapse the structure.
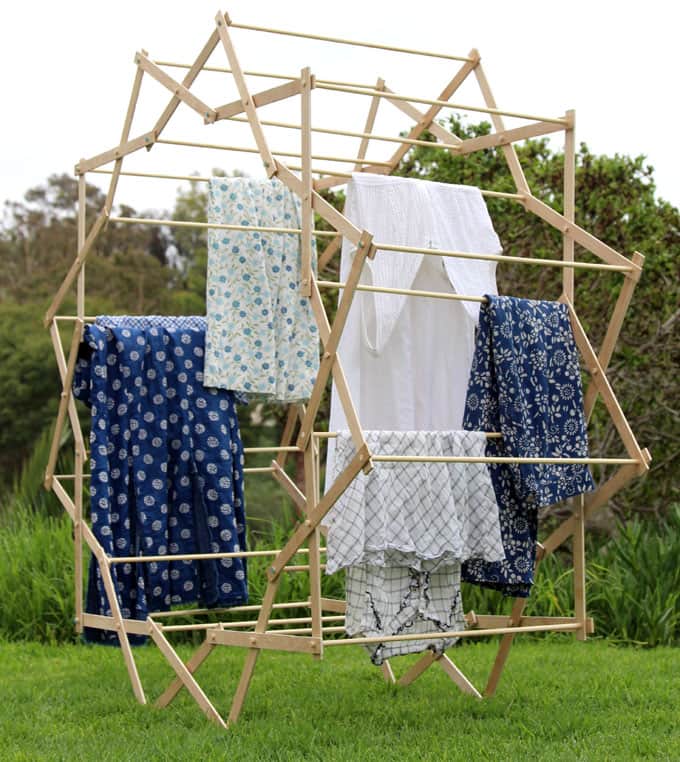
Now we have a drying rack that will make clothes drying so much fun!
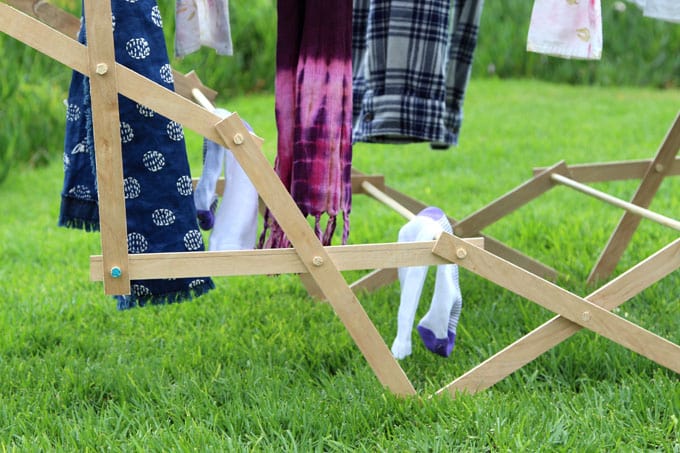
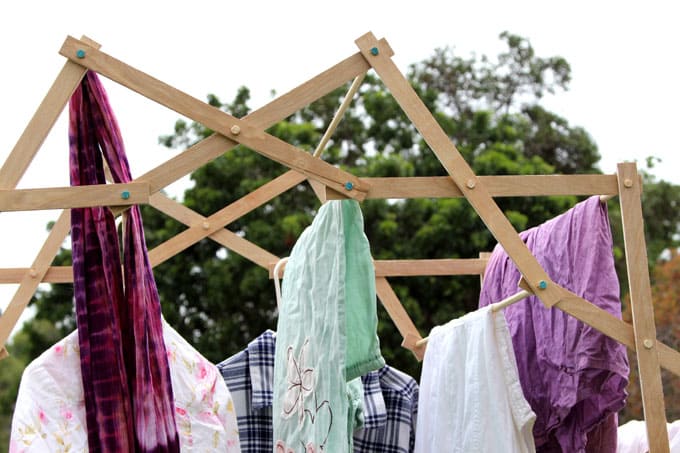
It measures 4’6” tall and wide. In the photo below, my husband’s shirt size is men’s extra-large, and mine is women’s small – just to help you get a sense of how much the drying rack can hold, which is quite a lot.
Are you ready to build one? Go for it, it is so worth the effort!
I made a set of free plans with 7 important tips, variations and improvements for you, which you can download below:

If you take the time to be as accurate as possible in each little step, you will amaze yourself with what you can build with just a few simple tools and materials!
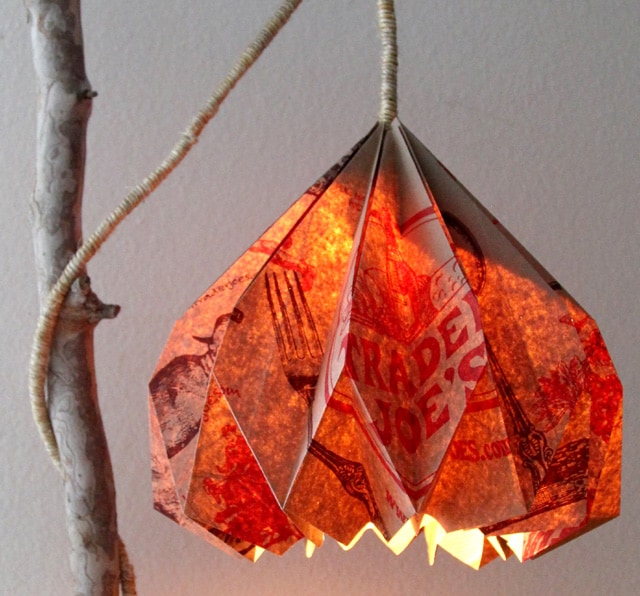
Love geometry? This pendant lamp also expands magically, and you can make one from paper grocery bags!
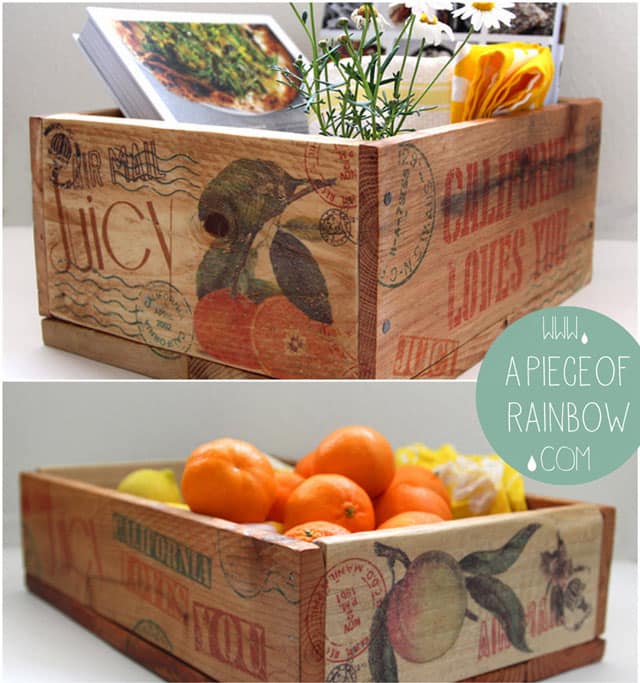
A couple of useful and beautiful things to build for the home – Pallet wood crates with a super easy image transfer method
Rope shelf you can build with just a drill.


so glad to know! thank you Jade and happy building! 🙂
I LOVE THIS! I’m making it soon! I have a question though:
On step 5, shouldn’t the dowels each be 24″ long (except the one that was cut into 1.5″ pieces) …..not 12″??
Thanks for the help.
-Carol
hi carol! the dowels need to be the same length, anywhere between 12″ to 24″, which will be the width of the rack. ours is 12″ and it feels plenty big! 🙂
I’m going to have this built for me, however, I’m going to use it for my hanging plants.
Page 7, of the downloadable instructions and tips is “messed up”. Some of the words are running together, or on top of each other. I’d really like to make this but would like these TIPS also. HELPPPPPPP! 🙂
hi carol, we just checked and the pdf page 7 looks good here! 🙂 maybe try download it or open it on a different computer or tablet? if you still have trouble let us know!
Amazing! Thanks for sharing. It’s a pinterest projects I might actually make.
That’s really impressive! Do you think, at the cost of final appearance, it would still fold away nicely if cheap off-cuts were used?
Wait…cut one dowel into 12 but you have 48 strips … shouldn’t you have 24 1.5” dowels ?
hi paul, not sure which step you are referring to. please clarify! =)
Can you tell me the approximate weight of the finished product? I want to build one for someone who is elderly and weight is a factor.
Also, using such thin plywood, have you seen any problems with side impact on the rack?
it is quite light because of the thin plywood, and the plywood holds up. if you plan to keep the rack outside or in a humid climate, i would seal them first. 🙂
I am so overwhelmed, looking at all your projects love them all, you are so very creative, OMG. Wish I was, have to try at least one, thanks so much for sharing.
thank you daisy for your kind words! if you get behind the scenes, you will see my clumsy side! =)
I love this!!
Here in NZ all the drying racks you can buy are expensive and very poorly made.
Lots of linear feet of hanging means lots of room for babies clothes, which is also nice.
Thank you. I’ll post if/when I’ve made it.
Am going to make one of this next summer. Since neither I nor hubby are very good at straight cuts even with a table saw, am wondering if 1/4″ thick lath would work. Probably a bit more expensive than the plywood.
it should work, but it is super easy to clamp a 2×4 as a guide when you cut plywood! =)
Hello there I LOVE LOVE LOVE THIS! Would it be possible for me to buy one ? i.e. could you make one for me?
How do you keep the dowel rods from coming out (especially the short ones) ?
hi travis, the rods fit pretty tight in the holes. if the short ones are 1.5″ or longer,they don’t come out. =)
Wowzers! So excited to begin this DIY. Unfortunately, the link provided for the pdf plan download does nothing when I select it. Would you please provide another link (either in article or emailed to me)?
hi amber, i had some friends testing it- it should be working and give you a 7-page pdf, which you can save. maybe email the link to some friends and have them save and email the file to you? =)
I would love to build one of these Star Shaped Clothes Rack, however, I can’t find the link that allows me to download the plans. Could you please tell me what I’m doing wrong? Or send me the plans? I could probably make one from your wonderful blog, but I would rather have the actual plans. Thank you for your kind assistance.
hi jacquie, the download button is towards the end before the last picture of the star rack ! 🙂
This is cool! I’m going to make one for my daughter. Also make a Wishing Well with your 1 x 2. Just get a few more dowels to hook them together and then assemble a roof .
oh those 1x2s! great idea, thank you tonya! =)
way cool! Such a great project 🙂
Waouh!!!!!!!!!!!!!!!!! I love it! Beautiful! Lovely+++++
But i might never be capable to make it so i can just swoon over your photos! And imagine one in my home,my garden…
Tenderness
will you make and sell me a outdoor clothes rack?
This is SUCH a cute idea! I love it!!! I’m not a DIYer, but you’ve inspired me to try!
LiveLifeWell,
Allison
Wow, this is so creative and practical! I need to make one for my parents since their clothesline recently broke.
This is great! What a cool DIY!
You are so amazing and creative!! This is really super awesome!! I love how it folds up too, so clever!
Beautiful and functional!! Amazing idea, you are so creative, love it!
This is so awesome!! I can’t tell you how much I enjoyed looking at your pictures of this amazing creation. I really love that it is a needed item that’s pretty and it’s great that it folds up for storage. I really could use one of these and after reading your post, I think I could make it.
Wow, girl! You amaze me with how your creative mind dreams up such amazing projects! This is not only functional, but beautiful too! XO
Such a cute project and I love the big star that it opens into!
Wow!! That is a really clever plan and I love how the drying rack turned out! It is a great space-saver and economical to build, as well…
I’ve not seen a clothes rack like that before, but it looks amazing. So much nicer than the standard ones out there!
Just bought ine but this is so much nicer! love it!
This is great! I’m going to show my husband. We need an outdoor drying rack, and this would work so well.
Wow, impressive and very clever! Love the portability and the amount of clothes you can hang on it. Thanks for the excellent tutorial and building plans. Well done!
So cool! Adds a bit of style to your drying! 😉
Laundry is a drag, but that drying rack is just so pretty and fun looking. It would be like having a grown up slinky that is functional!
Did I overlook the link to download or what? I didn’t find it when I went to your website. I just love this and would be perfect for my private patio. Very creative and talented person you are. I like to make things and use my hands. I have to be doing something with my hands all the time. Thank you for sharing.
hi Bonnie! the link is always included- a red button in each week’s newsletter 🙂
Oh my! I am amazed and impressed with your skills! This would be a math nightmare fore me to figure out.
Super tutorial and instructions, I love how easy it looks to use, and it’s PRETTY too!
pinning!
gail