DIY Wall Art & How to Transfer Image to Wood
It is super fun and easy to transfer image to wood!
These beautiful wooden wall art pieces take less than one hour to make. They are very easy to assemble, because they do not require any frames.
This simple technique also works great to transfer letters, stamps, and other motifs.
Once you learn to transfer image to wood, you will be able to make all kinds of printed wood art, home decor or gifts for loved ones.
UPDATE: We just found an even better method to transfer images to wood! Here’s the tutorial! And look at the amazing details on that pineapple! 🙂
*Some resources in article are affiliate links. Full disclosure here.
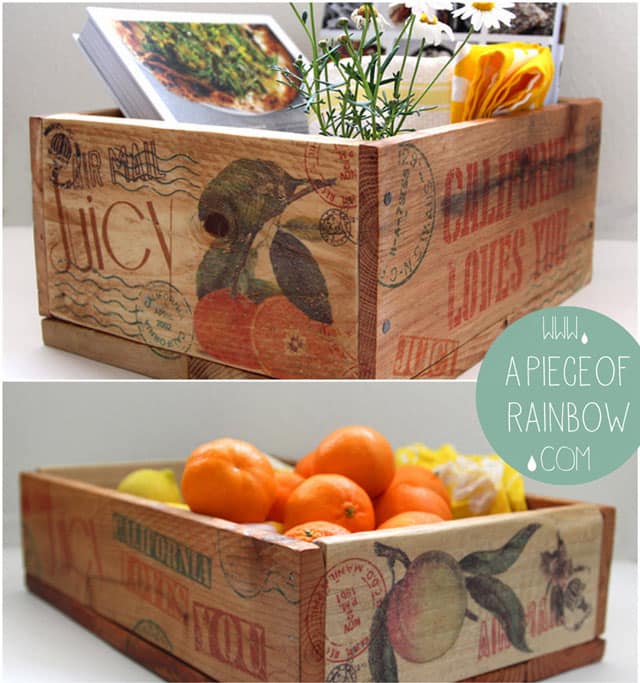
Remember these wooden crates inspired by vintage farm and orchard crates? I made them using the same method!
Materials and tools:
- wood: any kind of wood with a smooth surface will work. I used 1″x8″ common pine board from Home depot. If you cut the wood, you will need saw and sand paper. Remember to wear eye goggles!
- wax paper , or other kinds of smooth and non-absorbent paper such as the glossy backing paper for labels or stickers
- a inkjet printer ( most home printers are inkjet)
- saw-tooth hangers like these for hanging, and some bees wax and olive oil for the luscious home-made furniture wax finish
Here’s a quick video tutorial –
Here’s an outline of the process. Check out the crate tutorial for more detailed photos plus my 3 failures when I first learned this technique.
Step 1: Cut wood and sand edges. For this project we cut 1″x8″ common pine board into 8″x8″ pieces.
Step 2: Print image on wax paper.
Fold and tape one end of the wax paper onto a piece of regular 8.5″x11″ paper, this will be the end that first go through the printer. Leave the rest of the paper loose. Print your image so the ink goes on the wax paper or the glossy side of the backing paper for labels or stickers . Be very careful not to touch the printed surface.
Check out the wood crate tutorial for more detailed photos for Step 2 & 3.
IMPORTANT: flip the images if it contain words – remember they are going to be transferred (mirrored)!
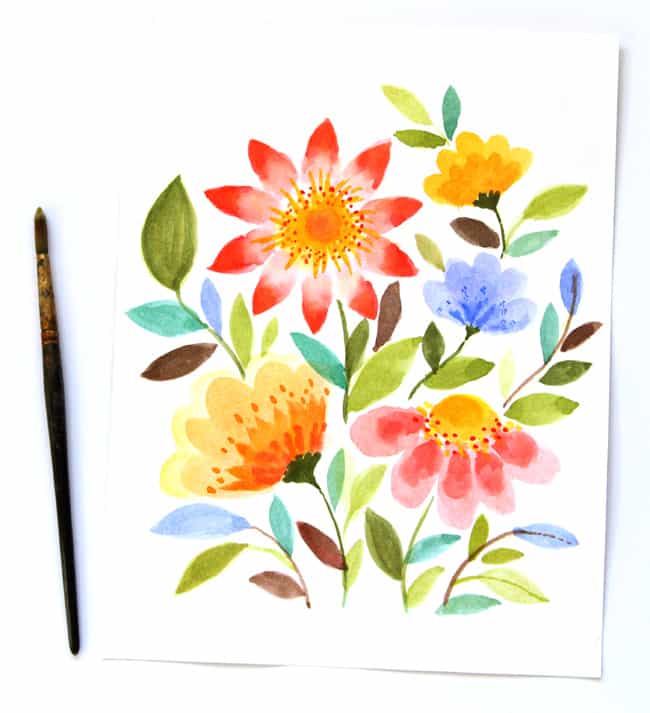
You could also create your own art and transfer it to wood. Here’s a tutorial on how to paint watercolor flowers easily with no art experience!
Step 3: Transfer image to wood.
Take a wet piece of dry sponge or rag, wet the surface of the wood you are about to print on, then use the dry sponge or rag to absorb the water a little. The goal is to get the wood to absorb the ink, but if the wood is too wet, the ink would be runny.
You can always test on a piece of wood to get a feel of how wet/dry the wood should be.
Place the design onto the wood surface, try not to shift it once the paper touches the wood.
Hold it down and use a soft sponge or rag to rub the wax paper like you would make a print, and you will be delighted to see how beautifully the image got transferred onto the wood!
You can even repeat this step and keep layering images until you are happy with the result.See how easy it is to transfer image to wood? I made four pieces in no time!
After the image transfer dries for at least a couple of hours, the final step is to protect the image with a nice furniture wax.
This step is optional, the added bonus is that the colors of the wood and images become richer and deeper once you apply the wax.
Check out the wood crate tutorial for the home-made furniture wax recipe.
A reader asked about making these as drink coasters and how to seal them. The wax finish is water resistant. You can also use a clear acrylic spray / sealer like these instead of the wax.
Let sit for 24 hours, and you are ready to use them or give them as gifts!
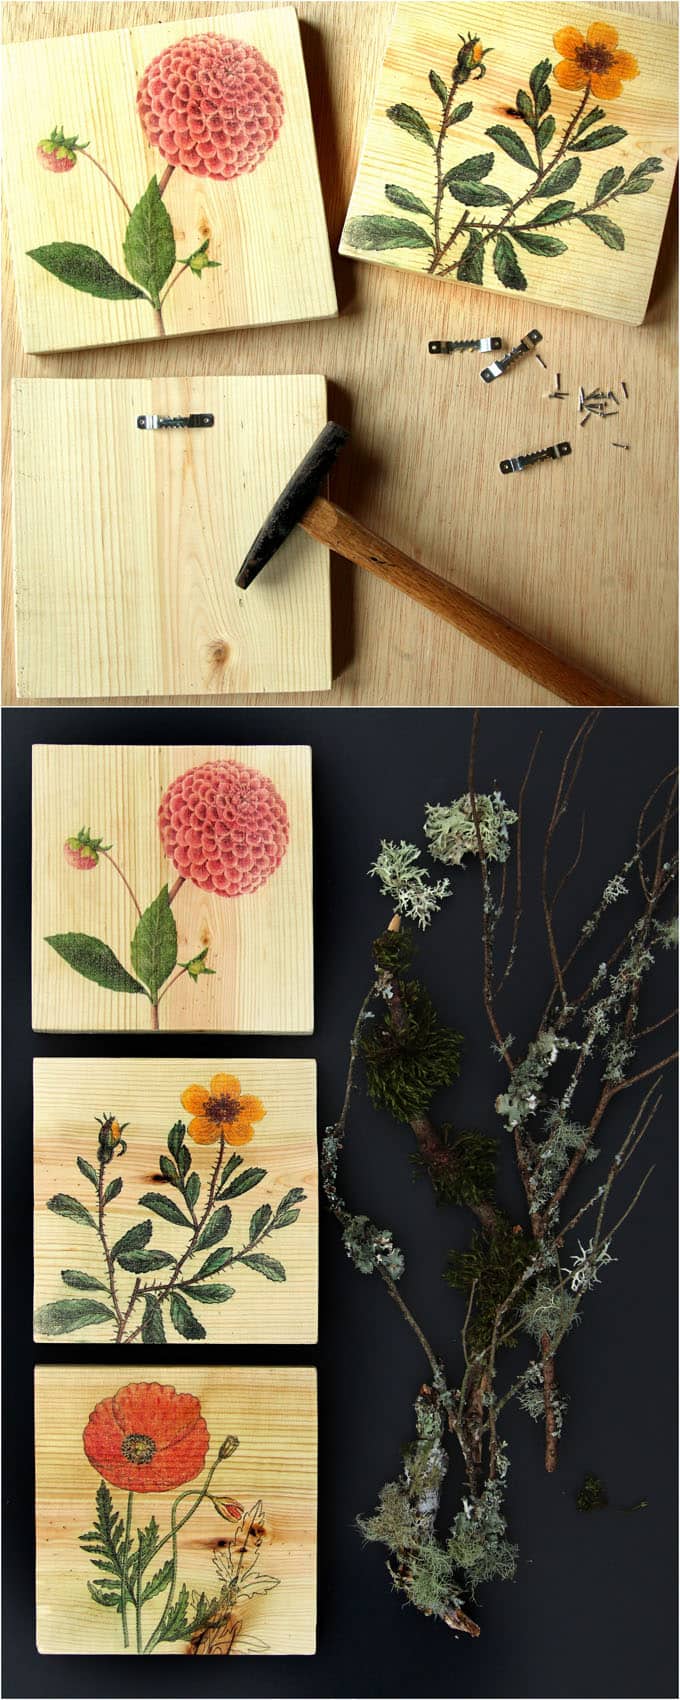
Add saw-tooth hangers like these for hanging.
Now you have some unique wall art : botanical prints combined with the natural beauty of wood!
The gorgeous illustrations are from the fabulous Graphics Fairy . I also have some botanical art from this DIY 2-minute candle holder project for you to download for free .
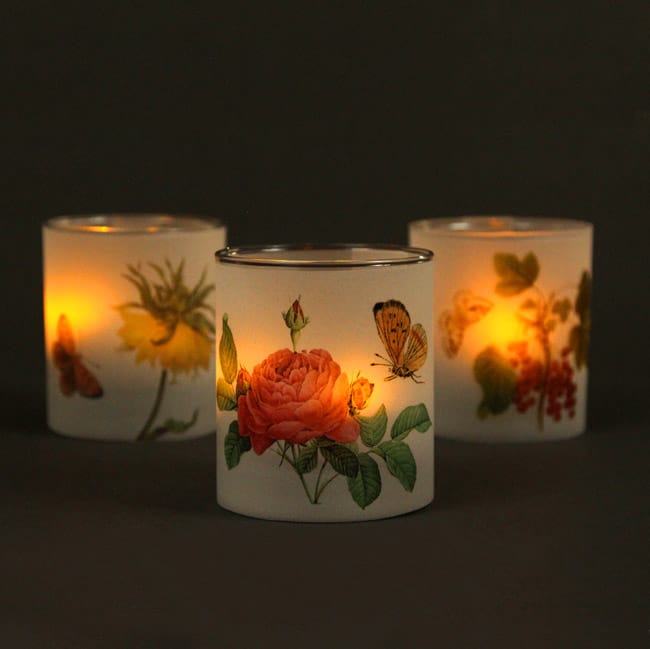
DIY 2-minute candle holders & free printable botanical illustrations.
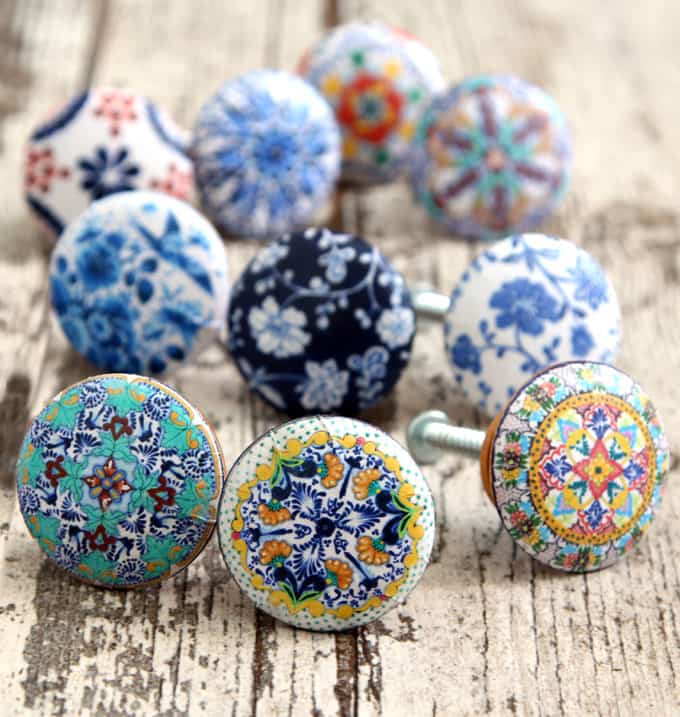
You may also like : 5- minute DIY Anthropologie style cabinet knobs
Happy creating! See you next week!


I would like to transferr a baby picture to a framed blank canvas. What is the best way to do that?
Thank you for any help.
hi Carolyne! this is the method i LOVE- https://www.apieceofrainbow.com/transfer-images-to-wood/
it’s super easy and works like magic 🙂
So this procedure only works on raw wood? You can’t do it on painted wood, acrylic or chalk paint? Thanks
hi! yes this one works best on raw wood however, we just found an even better method to transfer images to wood, and it will work on painted wood and canvas! 🙂 here: https://www.apieceofrainbow.com/transfer-images-to-wood/
I cannot download the pictures for the pallet it keeps sending me back to subscribe to you which I have done. Please give step by step instructions where and how to download. I went under your tutorial. Thank you
hi Janine! the link to all downloads library is in the welcome email and weekly newsletter (comes out on sundays). let us know if you still have trouble 🙂
I love the tip about taping the wax paper to a piece of regular printer paper. I had seen a previous tutorial that said to cut the wax paper to the size of printer paper, but that was difficult and time-consuming. The printer would not accept the paper if it was even a millimeter off. Taping the wax paper to the printer paper works MUCH better. Thank you!
thank you Renee! maybe someday there will be an easy printer for wax paper, tissue paper and all the craft papers we want to print on! 🙂
Very beautiful.
Is it okay to print with a laser printer instead of an inkjet printer?
hi! yes both types of printers work great! 🙂
This is so beautiful
thank you so much Yvonne! 🙂
Can you do the same procedure with a terra-cotta plant pot?
i think you can, since terra cotta is also porous! 🙂
Can this be done with any other ink? I don’t have a printer.
hi! if you are thinking about already printed book pages etc, you will need to use glue or acrylic type medium to transfer. 🙂
My printer bled and smudged when it printed on the wax, the image did not take to the wax paper well. Any ideas? I’m using an inkjet, but have access to a laser would that work any better?
hi kory! i would set the inkjet to print on normal or light / draft or glossy setting. if you print on “best” that would be too much ink. laser print with heat, so i am not sure. let us know if you try it!
Love it! These are beautiful! I just used this method for a wood sign I am making. I did have better luck just threading the wax paper through the printer. Taping it down caused a paper jam! Eek! Other than that, it transferred really well! I might have a new obsession. 😉
These wall arts are so beautiful! Thank you for sharing the method, can’t wait to try it.
These are beautiful! Do you know if it would work for photos?
hi patti, it will work for photos, and photos with simple composition and more contrasts will look better with this method. 🙂
Do you need to have the sponge damp when putting the print on, like on top of the wax paper? I have a picture of my three sister and myself, do you think I could do this with the picture? I would love to make all of us one of these.
hi, the sponge you use to press down the wax paper should be dry. photos with less fine details and more contrast will show up better. i would test on a small piece of scrap wood first. 🙂
Beautiful! Do you think a light stain made from coffee would have an adverse effect on the transferring of the picture? I think it would give the wood a nice warm look to it.
hi barb, yes a light stain would work, coffee stain will fade though, i’d try one of these, diluted with water- http://www.apieceofrainbow.com/make-wood-stain/
Is the wax paper whiney side up or down? Thanks
hi! it works on both sides actually, but i tend to print on the more slippery side =)
This is great! Just wanted you to know: olive oil will go rancid over time, a better choice would be mineral oil. Just a friendly suggestion. I don’t want anybody’s artwork to eventually stink or darken or worse. I think I will use this technique on some of my projects. Thanks for the tutorial! Have a glorious day!
hi jenni, thank you so much for sharing your tips! =)
i think the bees wax have preservative qualities, and i have not noticed anything smell rancid. but thank you for the great input! =)
JUST AWESOME
Will this work with family photos?
hi michelle, yes you can use this technique to transfer photos to wood. photos with more contrast will give better result . =)
Hi thanks for your ideas. I only have a hp printer. Can it work? As we cannot afford a inkjet or laser printers. We do not have the other types of paper.
Your a star.
Thanks
hi! yes it will work! you can use the glossy backing paper that comes with sticky labels to print! 🙂
Is there a trick to getting the image I print out not to run on the wax paper? I followed step 2, but the image keeps getting smeared.
Did you print on normal or best setting? Is the image very densely colored?
Its a normally colored image. I used the best setting.
i would use normal print setting, ‘best’ puts out too much ink for the wax paper.
Commenting again because I forgot to ask a question. Do you have trouble with the wax paper getting jammed in your printer? I had mine get stuck when I tried to print for something similar to this project in the past and I’m afraid of it happening again. Thanks for any tips.
hi adrienne, there’s definitely a good tip here on how to tape the wax paper onto a piece of regular paper. the link is in step 2 ! 🙂
Thanks, Ananda! I did attach the wax paper to a piece of thicker printer paper that is more like cardstock but it still jammed (my printer and I have a quarrelsome relationship!) I think what I need to do is invest in a better printer, which is on my to-do list. Thanks for trying to help!
I’m going to try out this project next weekend. I’m going to pick up the materials tomorrow since I have a Michaels coupon. Thanks for mentioning that raw canvas works as opposed to primed. I want to do mine on canvas.
Love this tutorial so much. Great for people who want to do these kinds of transfers and don’t have a laser printer! Most tutorials call for laser printers. Do you think this method would work on canvas?
Hi rosie, if it’s raw canvas, yes. Primed canvas will not absorb ink well 🙂
Hello!
For some reason mine is not printing vibrantly, and when I go to transfer it’s barely doing anything. I know I can’t be messing this up, it I a fairly foolproof method. or so it seems?
Any advice 🙂
Thanks!!
Jennifer
Hi jennifer! you can adjust the saturation of an image in gimp (free) or similar programs before printing . the key to a good transfer is to have the right amount of moisture on the wood. look through the detailed steps 🙂
How did you seal it so the ink doesn’t run when setting a cold damp glass of my favorite tea on it?
hi stan! the wax finish is water resistant. you can also use a clear acrylic spray / sealer like this- http://amzn.to/2nFsteG which is more water proof =)
I have a question about the wood. Can the wood be treated or untreated to work. My ink bleed when I pressed the sponge to it.
Hi! If the wood is too wet, the ink will bleed. I prefer the wood to be untreated – no chemical, and with a smooth surface 🙂
Wow! This is great information. The technique looks easy to follow. I love the look of art on wood. Thanks
These are beautiful and process looks simple. Do you know if this will also work on painted wood?
hi frances! i don’t think painted wood would absorb the ink very well =)
This is a great idea. Where did you find the images you used in the tutorial? I really like them!
hi rebecca! they are from graphics fairy, which i linked to at the end of article 🙂
What a great project – it looks so easy! I love the crates! Pinning for later.
What an outstanding tutorial to make almost anything you’d like to put on a wall! Thanks so much, have pinned to do!
Beautiful work!! How well does the inkjet ink hold up for you without fading? Does the wax prevent the fading?
Thanks
great question! the crates we made from 3 years ago still look great. those kept away from direct sun look like new. the wax is more for protecting and seasoning the surface of the wood. 🙂
what a fun project – im not sure mine would come out as great as yours look!
I really love this idea! I’m half scared I’d mess up my printer though. So it feeds through without jamming?
there is a trick to prevent it from jamming, see step 2! =)
Wow, that’s easier than I thought! I wish I had the time to make creative things like that.
Lynn N.
http://emmaandrose.com
Pinterest/Twitter: @emmaandrose
Instagram: @emmaandroseblog
Oh neato – this seems easy enough to try! Thanks for the beautiful step by step! I’m definitely gonna add it to my list of crafty things to try.
i was thinking about doing something like this – i’m always seeing sayings on small pieces of wood.
my fiancee loves decorations with quotes – i want to put some on a short 2×4 and see how it looks!
Wow love this look and can’t believe you did this from an inkjet. Saving so I can try this on some wood pieces.
This is wonderful! Thank you for the simple yet detailed instructions.