Transform Paper Grocery Bags into Trendy DIY Pendant Light
Have you see those trendy pendant light photos with $100 origami paper lampshades in design magazines? Here’s the secret: you can make one just as beautiful, for almost free.
There is so much creative potential hidden in those free brown paper grocery bags. You can transform them into stylish Christmas gift wrap, or beautiful storage baskets. Today, we have another fun DIY for you!
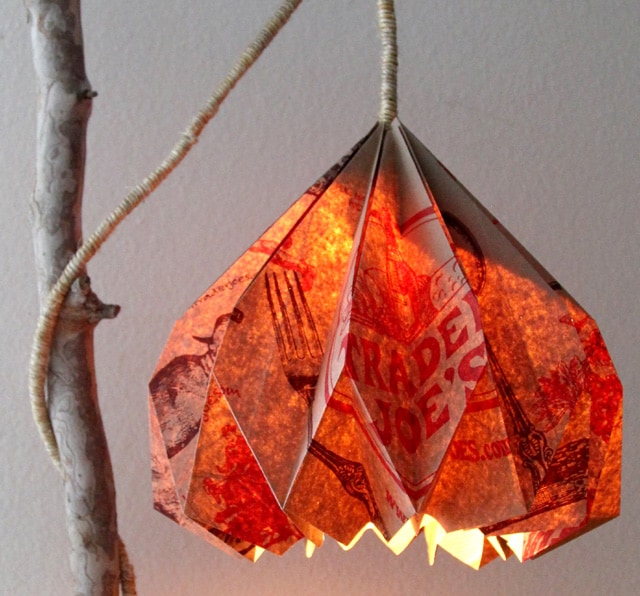
This pendant lamp with DIY lampshade is made with one and a half paper bag. I love these retro style Trader Joe’s grocery bags and the idea of up-cycling. You can use any paper of similar size and thickness. All you need is a little folding!

No worries if you are not familiar with origami, we have an easy-to-understand paper pendant lampshade folding template for you to print and practice! The key here is to get comfortable with the “mountain” and “valley” folds. Mountain folds are towards you, and valley folds away from you.
*Some resources in article are affiliate links. Full disclosure here.
Step 1. How to make a perfect size origami DIY lampshade from two paper grocery bags.
Hope you had fun practicing folding a mini origami paper pendant lamp shade!
To make the big origami DIY lampshade, let’s begin with 2 paper grocery bags you like.
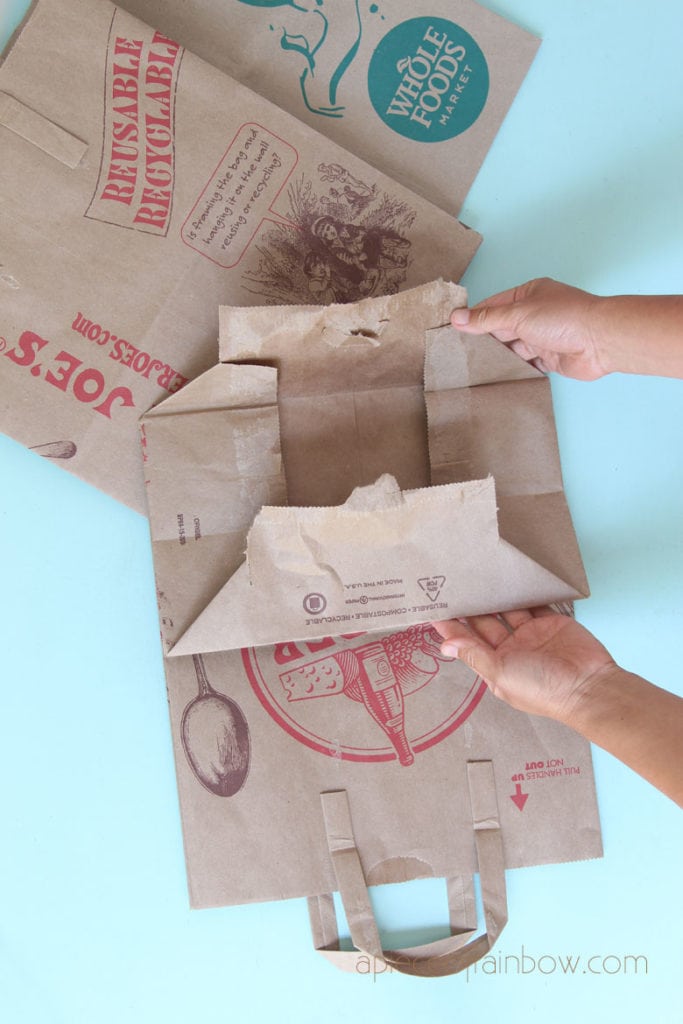
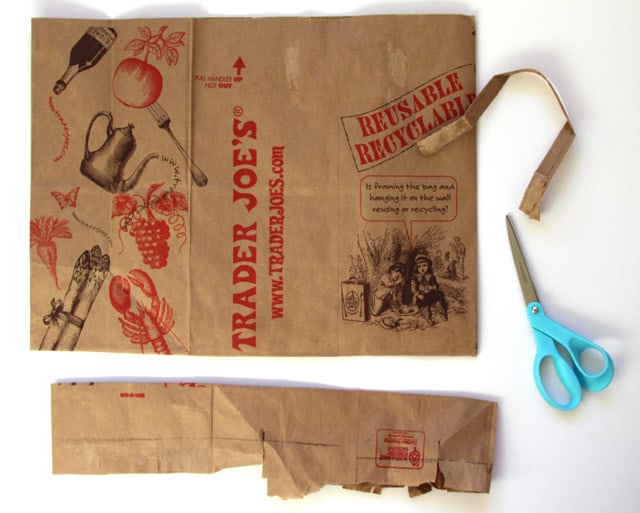
Remove the handles carefully, cut off bottom of the bag and open up the one side that is glued so it’s ONE continuous piece and ready for folding. Use the dimensions in the download diagram as a guide. It does not have to be so exact since your grocery bag might be different in size.
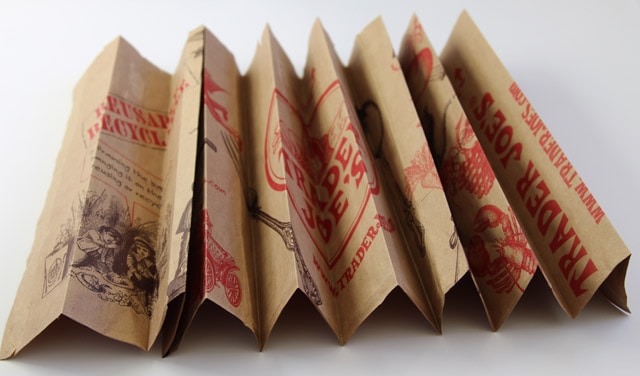
Start with the long ( one full bag opened up) piece. Fold it lengthwise in half, then fold each of the half piece in half, repeat till you dived the whole length into 16 equal parts with these accordion folds. See photo above. Tip: be as precise as possible in this first step!
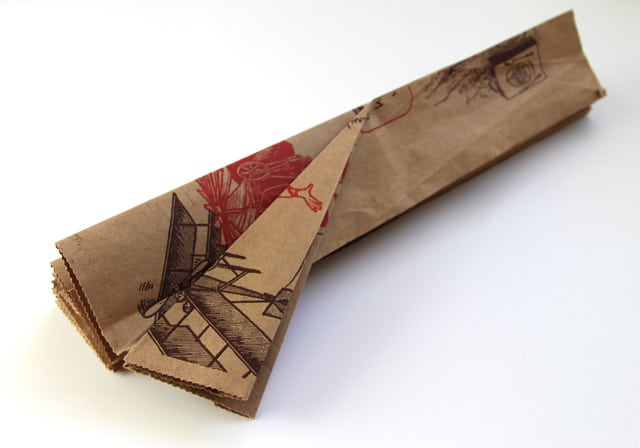
Next, fold the first row of diagonal folds, don’t worry about mountain or valley yet, just make some good creases. You can mark the next folding points with light pencil marks if that helps.
After all the creases are made, fold them according to the diagram, the photos below might be helpful as well.
This is what it will look like after all the folds.
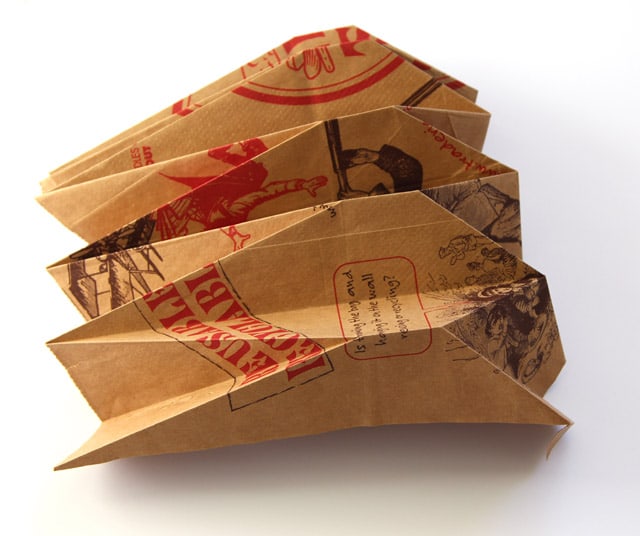
Next, cut the second bag to half the length of this piece, and start with the accordion folds, this time into 8 equal parts since it’s half the length.
Repeat with all the folds. Pay attention that the accordion folds start and end differently than the first piece, this is not required but will make the gluing a bit easier.
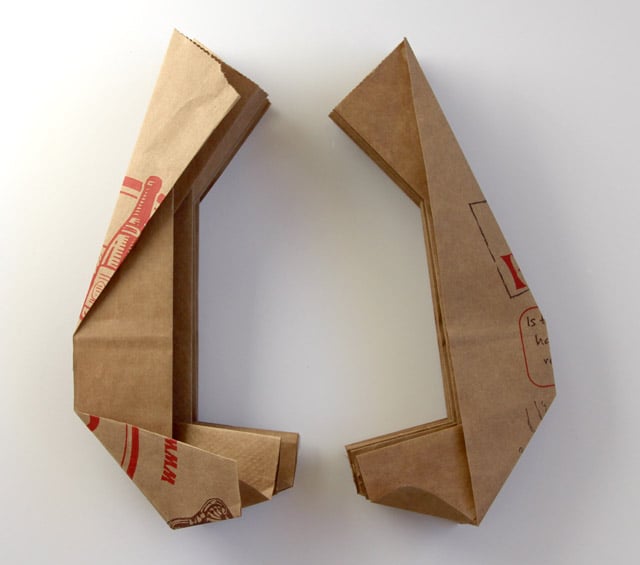
Join the 2 sections together using either glue or double sided tape. Just find the parts that matches, overlap them, and glue them together.
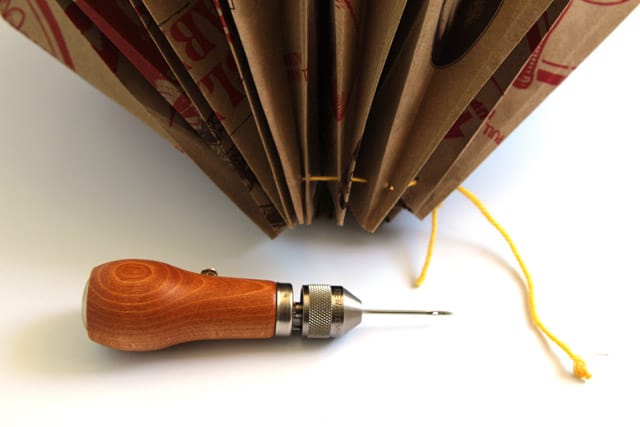
The final step of creating the origami paper pendant lamp shade is to poke holes at the top tip, and thread a string or yarn through the holes.
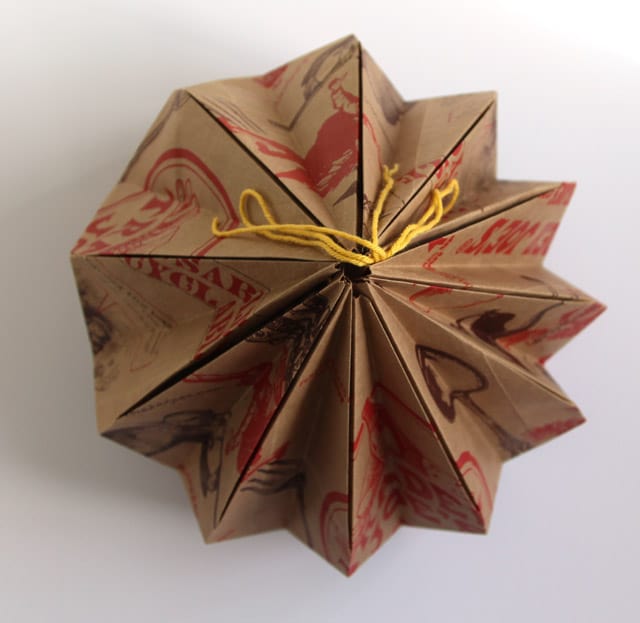
As you tighten the string, gently form a swirl by pushing the tabs on the inside, like in this photo above.
Tie a knot that can be loosened so you can insert a pendant cord easily.
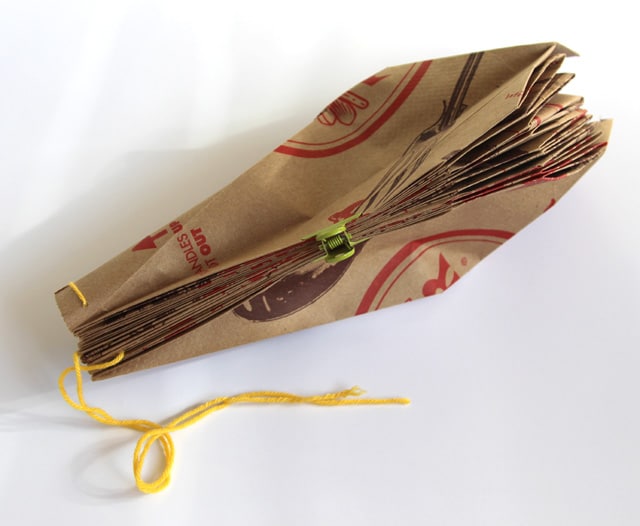
This origami paper pendant lampshade can “shrink” to a tiny size for storage – magic or origami!
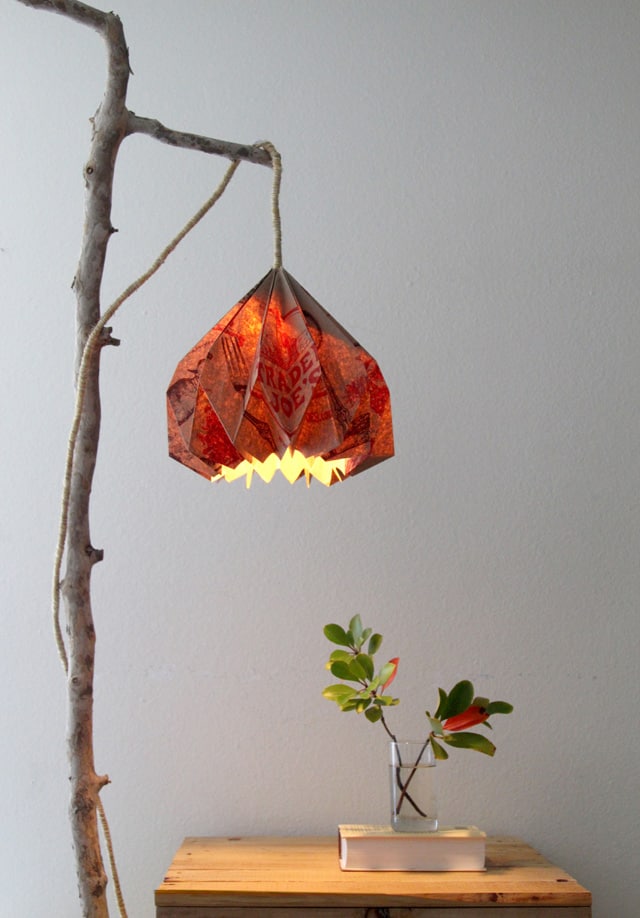
Step 2. Choose a pendant light kit and customize it.
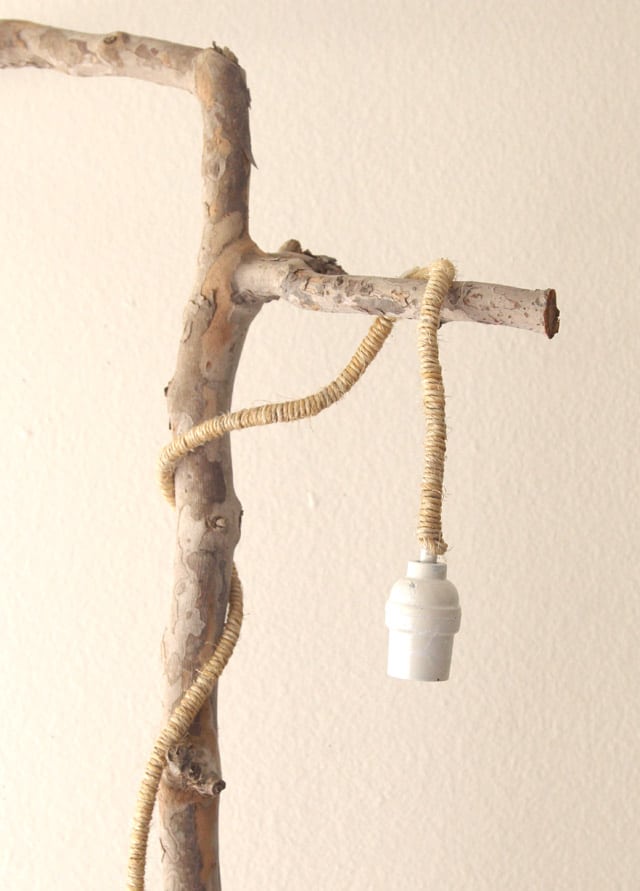
A plain pendant cord can easily be transformed into a charming one by wrapping twine or yarn around it.
Remember, when creating paper lighting projects from paper lanterns to paper houses, always choose LED lights with low wattage, which is much safer near paper. For this light, a LED bulb between 5 and 10 watts offers perfect brightness.
Step 3. Assemble the hanging pendant light

There are many ways to support the pendant light and cord, such as wall mount wood brackets, stands, or a tree branch, like this one from the lovely tree trimming people I happened to walk by in our neighborhood.
This tree branch is securely sandwiched between our desk and the wall behind it. You can also make a wood or concrete base for it. Now you have a designer pendant light for almost free!