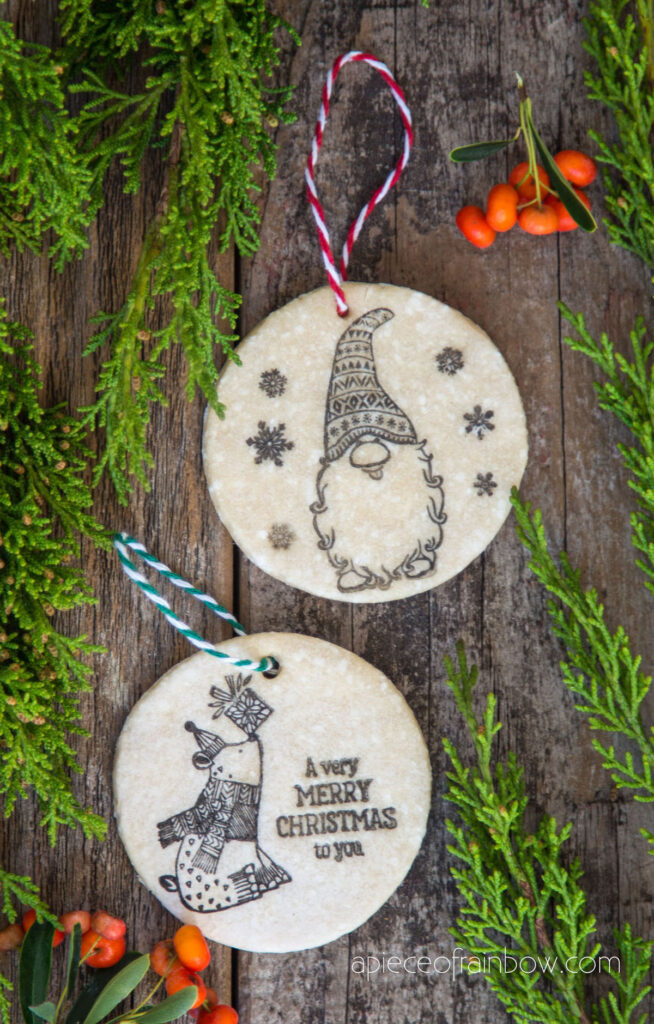
Make Easy Salt Dough Christmas Ornaments & Gift Tags
Make stamped salt dough Christmas ornaments & gift tags! Beautiful vintage farmhouse decorations & easy DIY crafts ideas with best recipe!
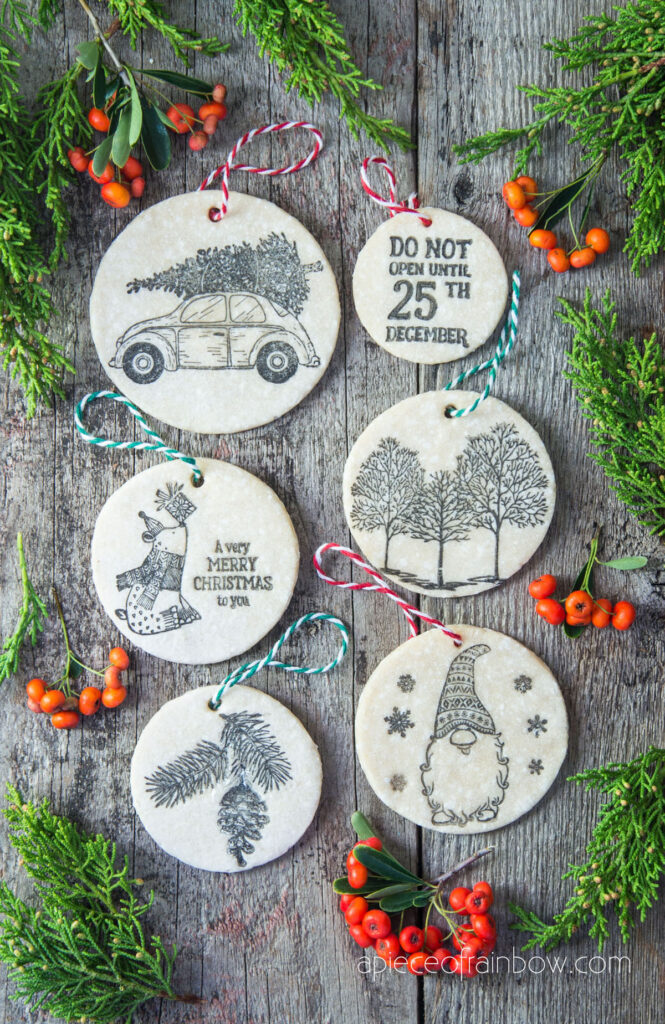
If you love salt dough as a craft material, and stamps as wonderful tools to create vintage farmhouse or modern boho designs, you will love this project: we are making stamped salt dough Christmas ornaments and gift tags 🙂
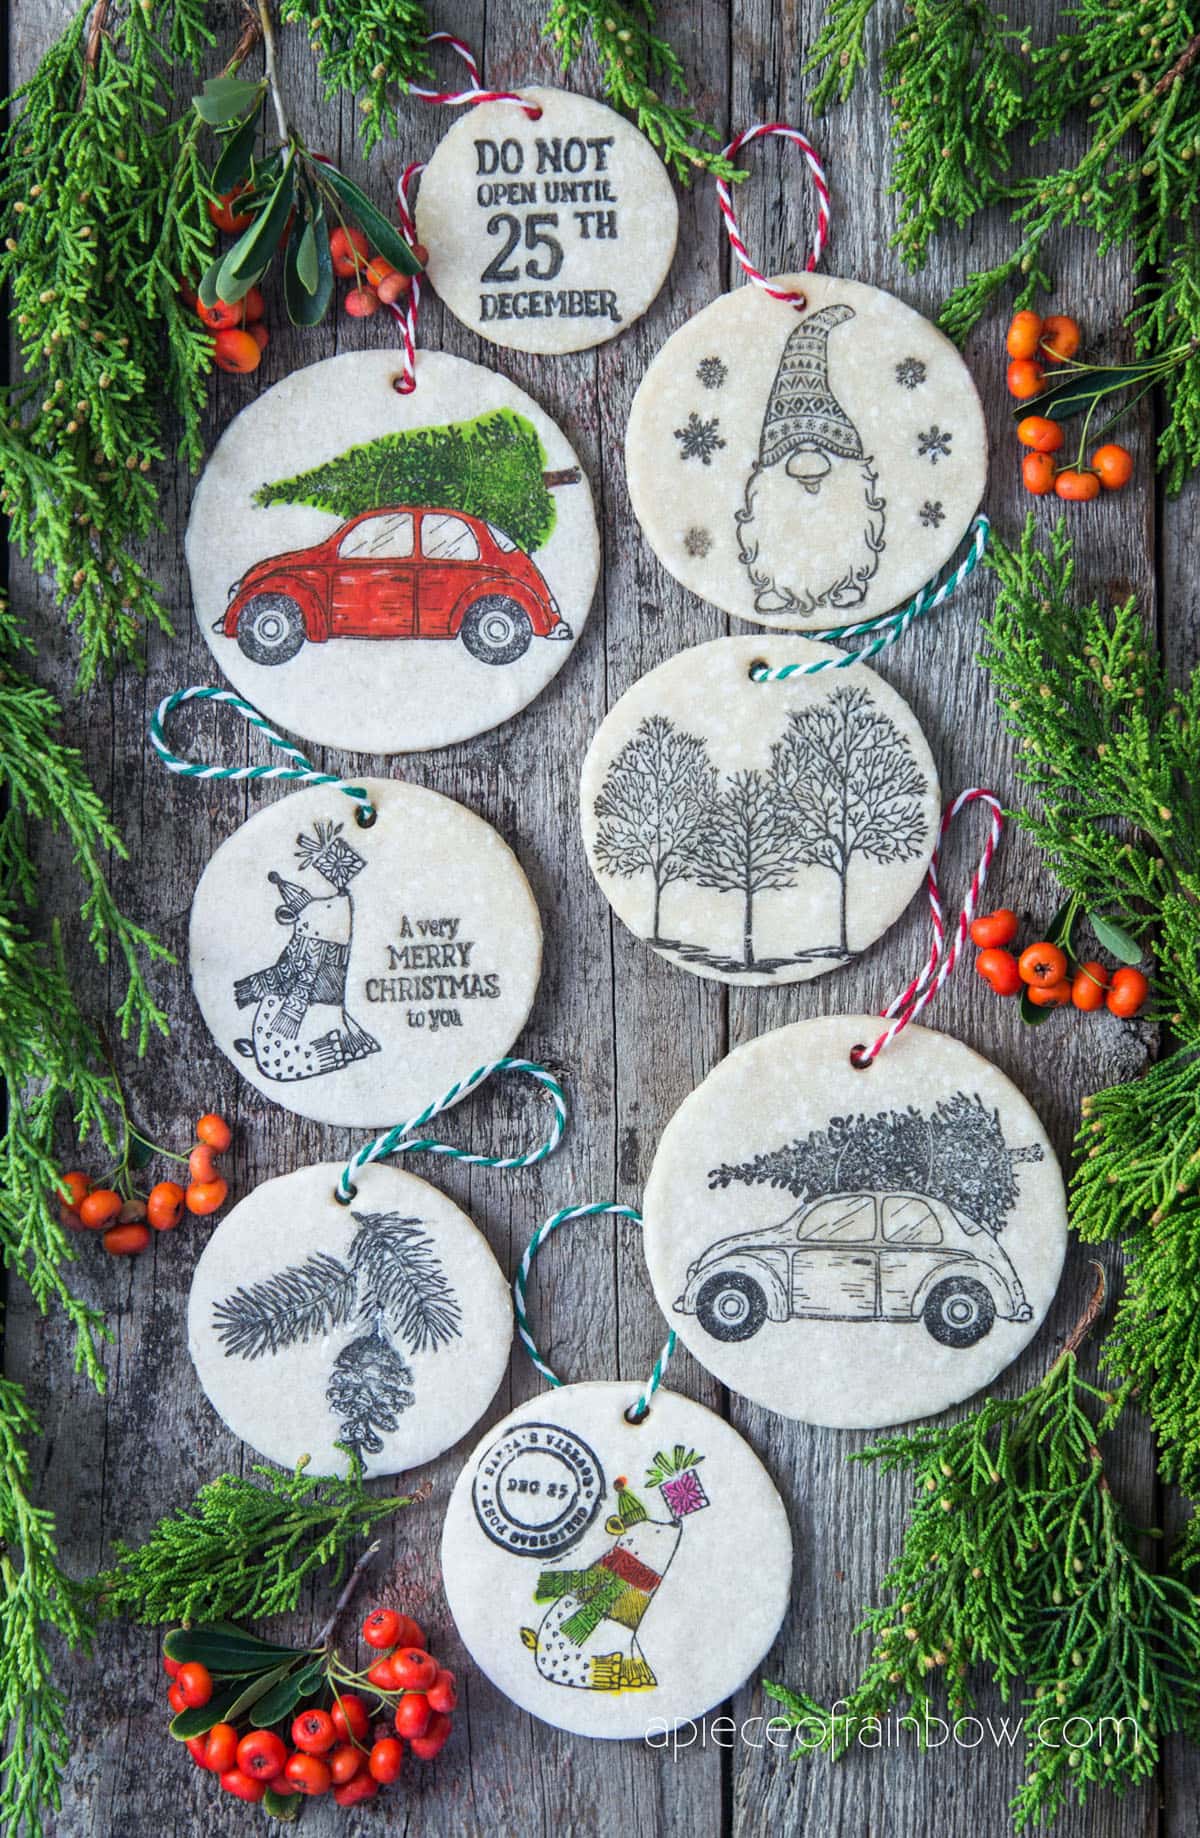
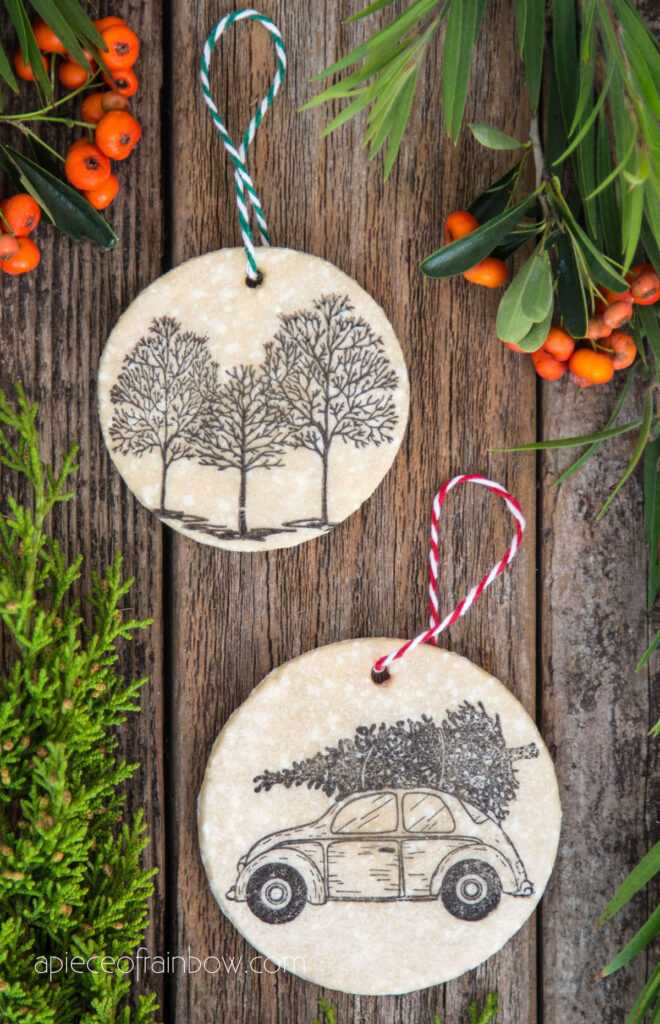
I have seen stamped letters on salt dough and really wanted to try stamping images on salt dough. The stamping really brings out the vintage farmhouse charm of the traditional craft of salt dough ornaments. Look: are you loving the beautiful results?
I am really excited to share with you this salt dough craft idea and easy technique today. Imagine all the gorgeous designs you can create with all kinds of stamps! You can even color these stamped salt dough Christmas ornaments and gift tags. The possibilities are endless!
*Some resources in article are affiliate links. Full disclosure here.
Check out the video tutorial or skip to written tutorial below!
Materials to make stamped salt dough Christmas ornaments and gift tags
- Salt dough: see recipe below. And some Christmas twine to hang your ornaments. You can also color them using watercolors or brush markers.
- Stamps and ink pad: I got this set of clear silicone Christmas stamps that have 6 sheets of nice mix of images and phrases, and these stamping blocks mount the stamps on. Pigment ink pad is preferable on silicone stamps to get better detailed impressions, or if you want to color the ornaments later because pigment ink doesn’t bleed like dye ink would.
- Round cookie cutters: this set comes in all sizes from1″ to 4.4″, which is perfect!
Easy salt dough recipe
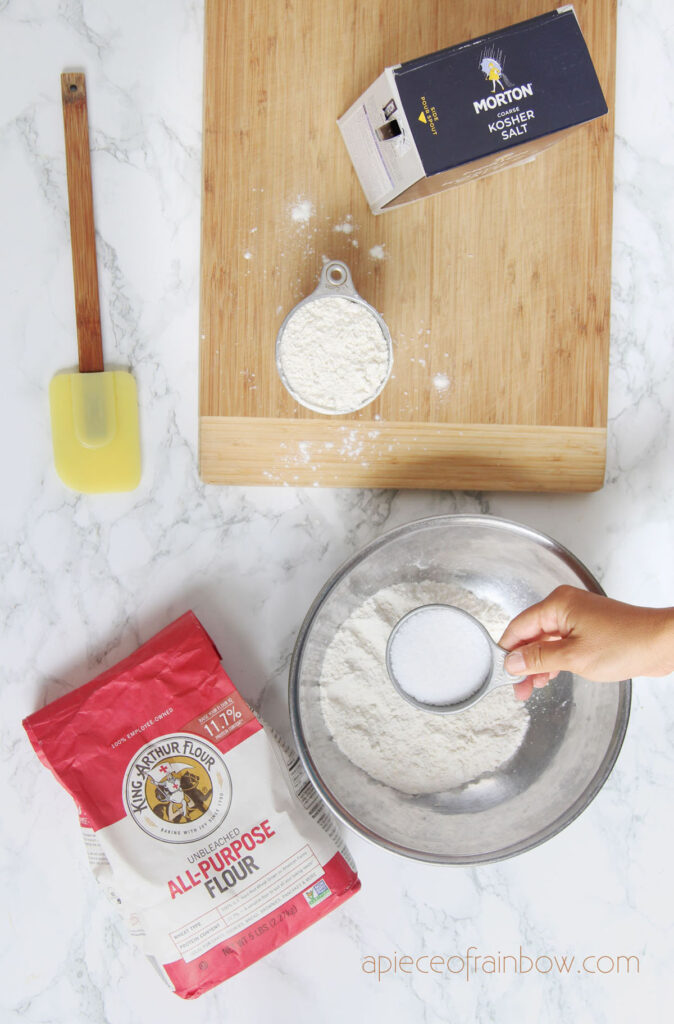
Mix 2 cups all purpose flour, 1 cup salt together, add 3/4 to 1 cup water. Knead until everything is incorporated and the salt dough should be easy to work with, not too stiff or too soft and sticky.
I find that coarse kosher salt gives that dough a little more speckled look vs fine salt. Keep the dough wrapped to prevent it from drying out.

Salt dough has a natural ivory white color, If you want really white ornaments, try our air dry clay recipe made with baking soda and cornstarch here!
How much salt dough do I need?
If you roll the dough between 1/4” and 1/8” thick, this recipe above will yield 12 to 16 4 inch round ornaments, or 16 to 20 3 inch round ornaments.
Step 1: roll out salt dough
Have some extra flour for dusting the surface when you roll and cut the salt dough.
Take a piece of dough, roll it on a flat surface dusted with flour.
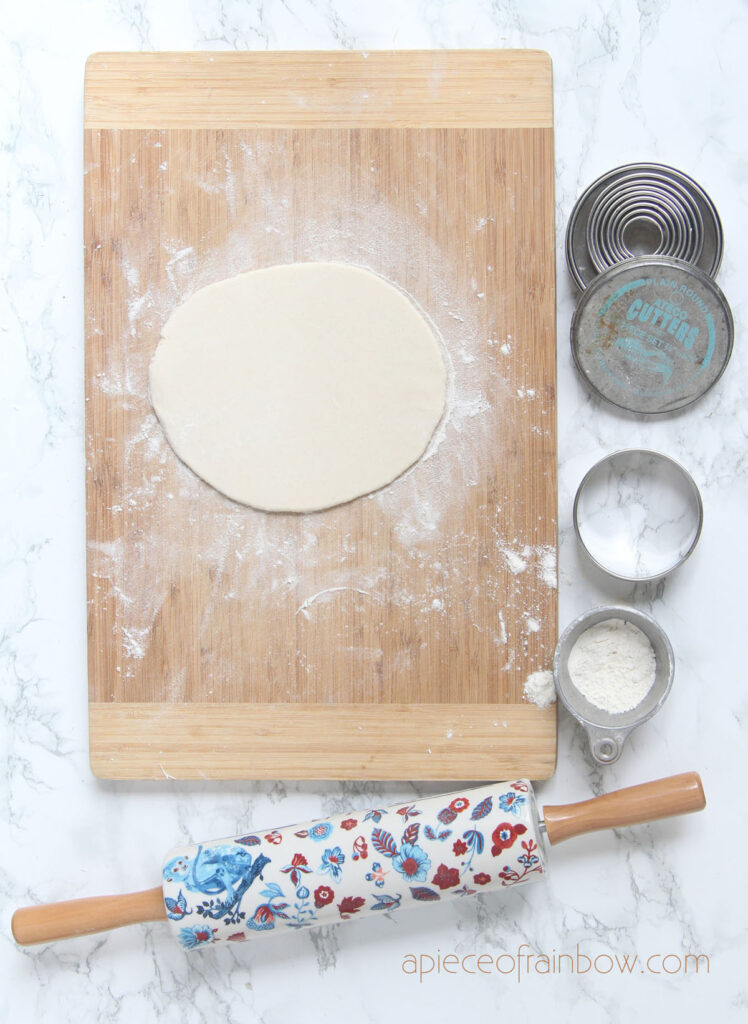
I find the best thickness to roll the salt dough is between 1/4” and 1/8” thick.
Dust more flour on the the dough as you roll it out if it gets sticky.
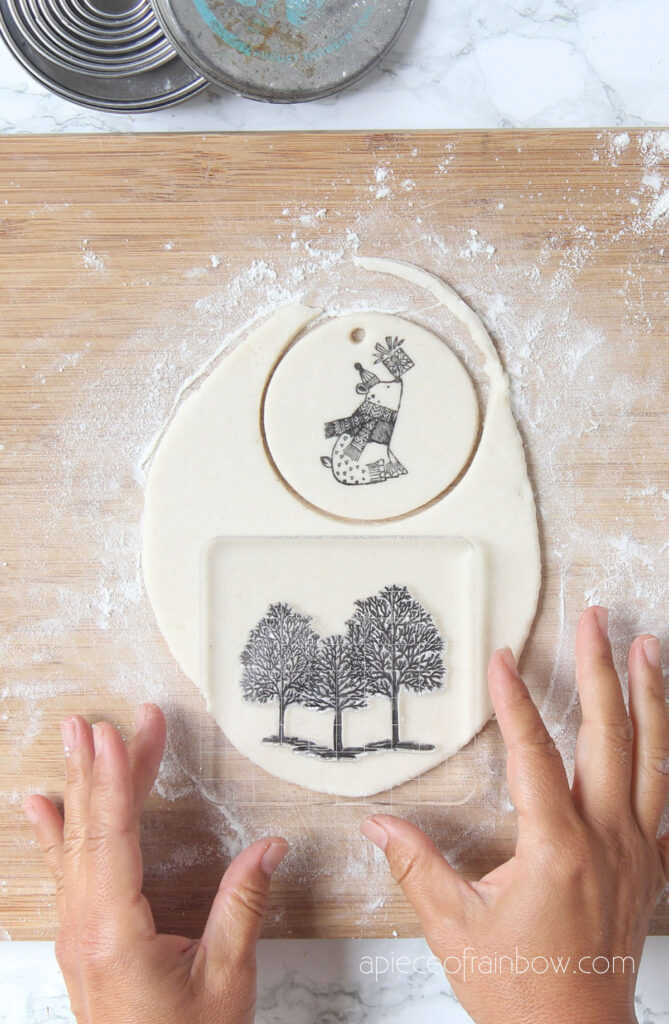
Step 2: stamp and cut salt dough Christmas ornaments and gift tags
Tip: It is easier to stamp the ornaments and gift tags first, then cut them to create the best compositions.
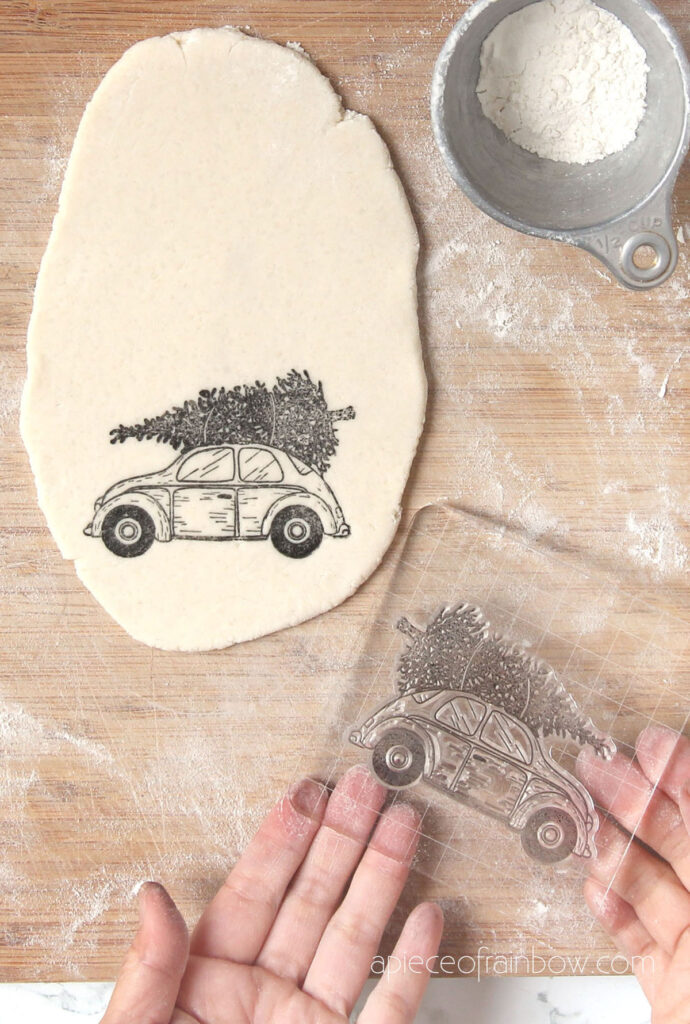
For best results, stamp the salt dough right away before the surface starts to form a crust and dry out.
As mentioned earlier, pigment ink is long lasting, and gets better detailed impressions. If you want to color the ornaments later, pigment ink doesn’t bleed like dye ink would.
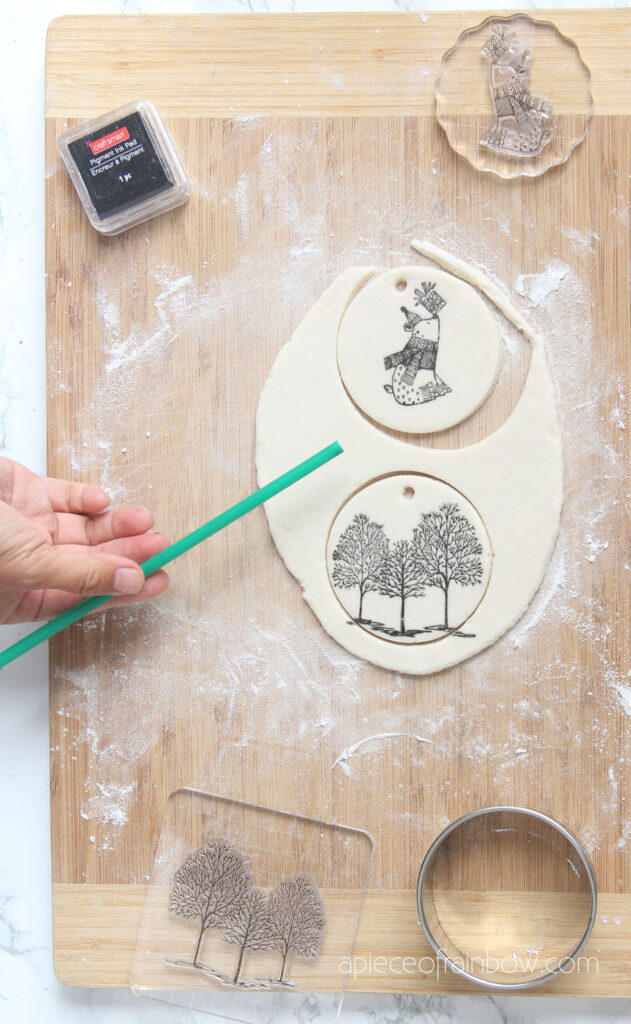
Ink your clear silicone Christmas stamp , then carefully press the stamp onto the salt dough surface. Use gentle but firm pressure, then lift the stamp quickly. You will be so thrilled to see a beautiful design appearing on your salt dough!
Take a round cookie cutter to cut the circle or other shape with the design nicely centered. Use a straw or stick to make a small hole at the top for hanging the ornaments and gift tags later.
Repeat the stamping and cutting process to make more tags and ornaments. It’s so much fun I really didn’t want to stop! 🙂
Carefully transfer them to a baking tray.
Step 3: bake salt dough ornaments and gift tags
To prevent your salt dough from puffing up, it’s a good idea to bake salt dough at lower temperatures for longer time. 200 degrees Fahrenheit ( 93 Celsius) worked best for me. When I tried to bake my salt dough ornaments at 235, they started to get puffy.
Depending on thickness, bake the salt dough ornaments at 200 degrees Fahrenheit ( 93 Celsius) for 3-5 hours. Flipping them a few times especially during the first 2 hours will help keeping them flat with less bulging.
You can also bake them for 1-2 hours at 200 F till they are no longer too soft, then air dry them over the next few days if your indoor environment is warm and dry.
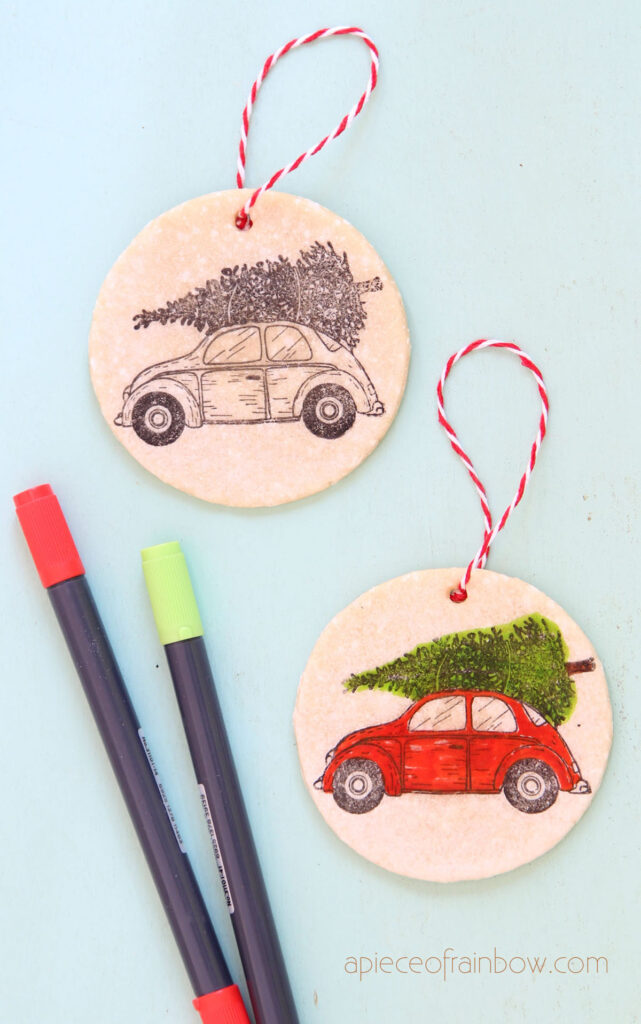
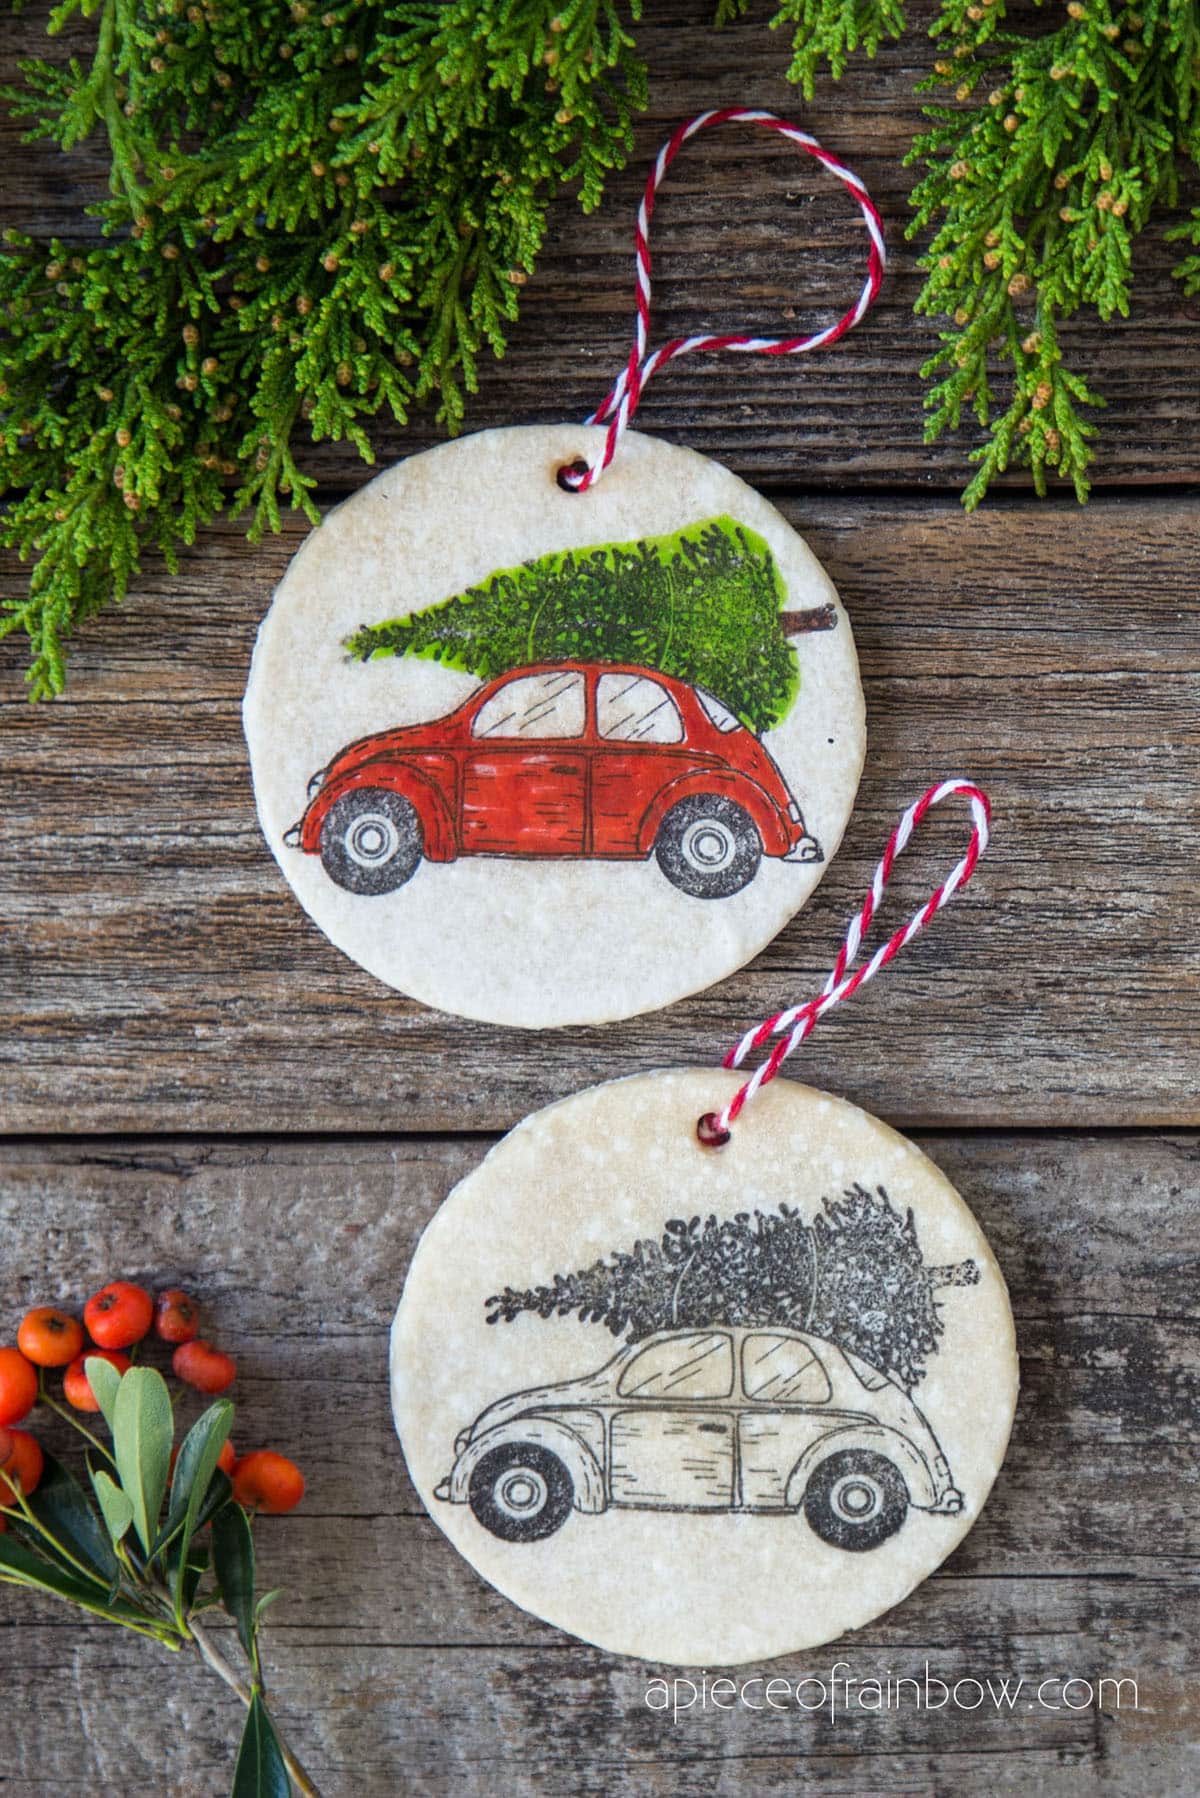
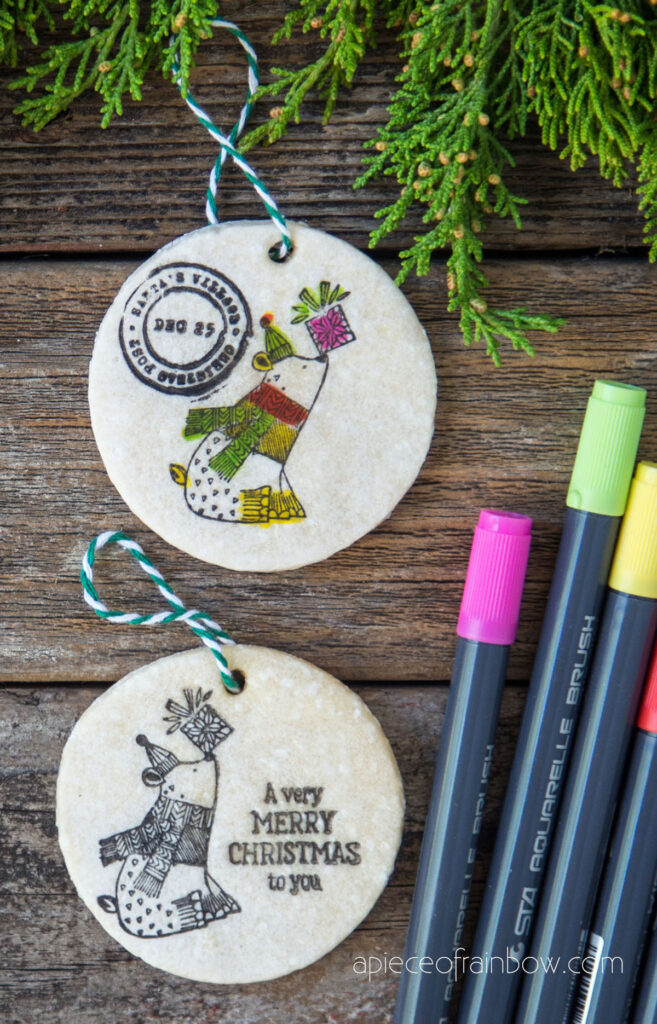
I love these salt dough ornaments in black and white, but you can also color them using watercolors or brush markers.
I colored a couple of them, it’s really easy, and the pigment ink doesn’t bleed at all!
Another thing you can play with is to layer different stamps on one ornament, like the same bear stamp above combined with a Santa’s village stamp, or a Merry Christmas stamp!
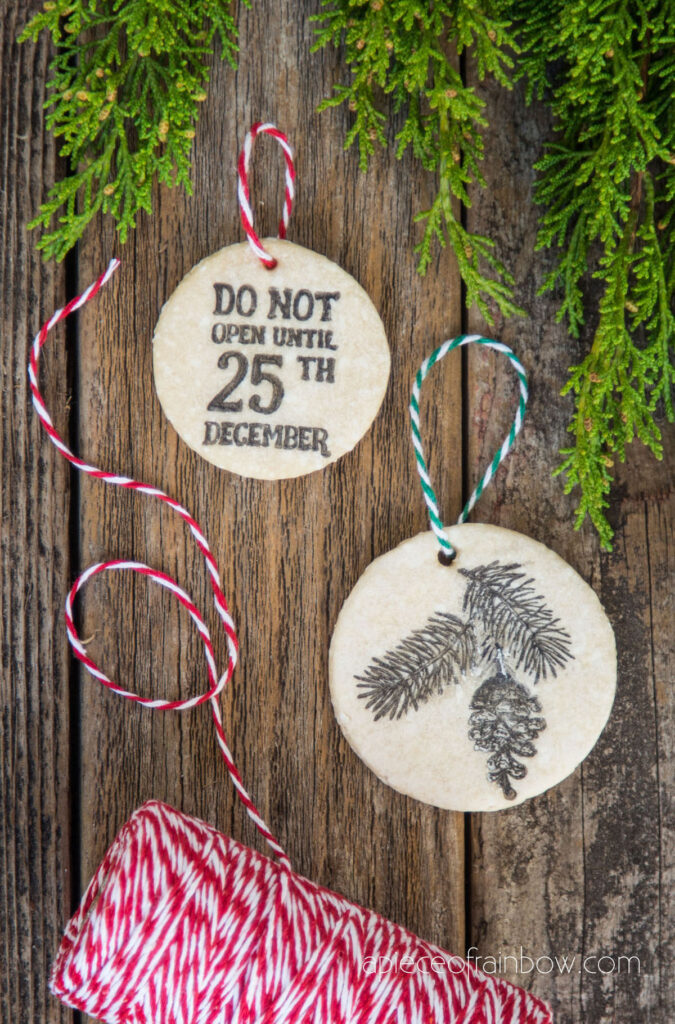
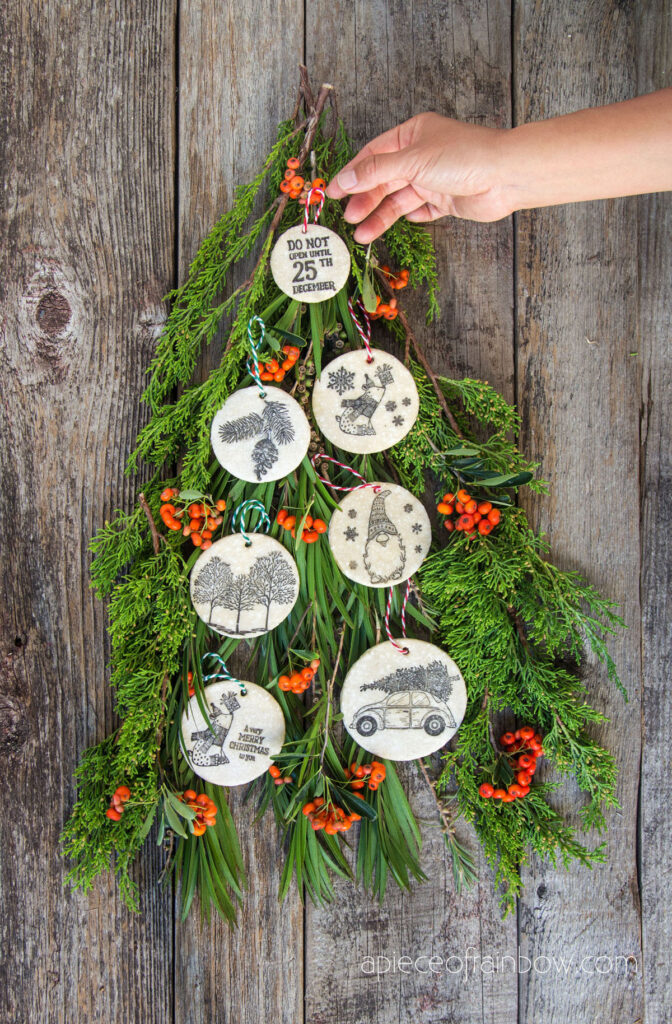
To finish your salt dough ornaments and gift tags, add some festive twine for hanging on your Christmas tree or gift packages.
Want more Christmas ornament ideas? Try these gorgeous & easy DIY paper Christmas ornaments and these no-sew felt donut Christmas ornaments!

Happy creating! See you soon! 🙂


When I saw this, it thought they were cookies; I realized they were not, but with food coloring gel and a clean stamp, I bet it might work!
hi Barb! that is a great idea!! have a wonderful 2024! 🙂
Hi Ananda, love these ideas! As a new mother, I have a lot of time to engage in DIY projects and create handmade items. Btw. I’ve never heard of pigment ink before! 🙂
I love the stamped ornaments. I don’t see a video or a link to the video. Am I over looking it?
hi Tawn! the video is right before the materials list section. if you still don’t see it, let us know! 🙂
What exactly are pigment paints? It can’t be acrylic paints?
hi Betty! acrylic might work, but i think the images would look sharper with ink. pigment ink lasts much longer than dye ink, which can fade overtime. 🙂
Thank you for your salt dough ideas, I enjoy making different things with the children and this sounds like we will
really enjoy making our personal decorations.
thank you Denise! it’s that time of year again, happy crafting! 🙂
What type of results will you get if you use the traditional wood / rubber stamps, rather than the acrylic?
I love this idea!! Thank you!
hi ellen! you will get the same results! i just happen to really like lots of designs in this whole set! 🙂
You have the greatest ideas! I do have a question about these ornaments, though. Can I decoupage them? Would they need a sealer first? Thanks for all the inspiration.
thank you Alice! i am testing some decoupaged ones and will have lots more to share on that soon! 🙂 shorter answer is yes you can, and they don’t need sealer first.
Question: Do you brush paint them before you bake them? These are beautiful!
thank you Tammy! 🙂 no paint needed in this project. you can paint them, i would do it after baking!