Regrow Green Onions / Scallions from Kitchen Scraps: 2 ways!
How to regrow green onions (aka scallions, spring onions) from kitchen scraps infinitely! Two fast & easy ways to grow cuttings in water or soil indoors or outdoors for endless harvests!
We have been regrowing store bought green onion cuttings for several years now, and they are truly some of the easiest and most rewarding kitchen scraps to regrow!
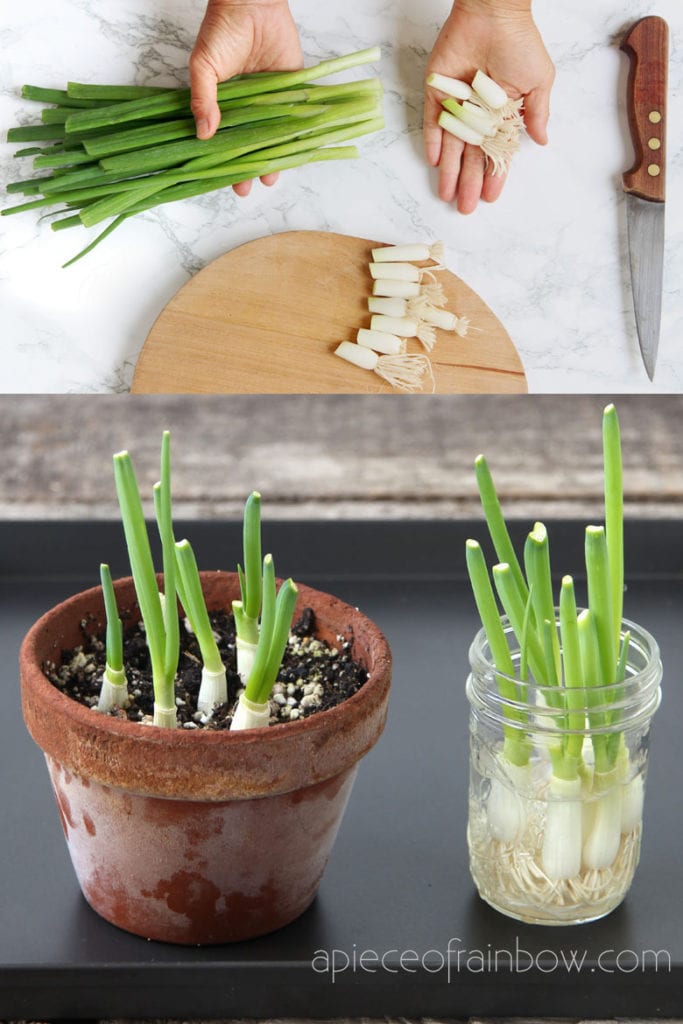
Green onions are also called bunching onions, spring onions , and scallions. They are perennials that keep coming back year after year, which means you can have an endless supply of fresh scallions grown from free kitchen scraps!
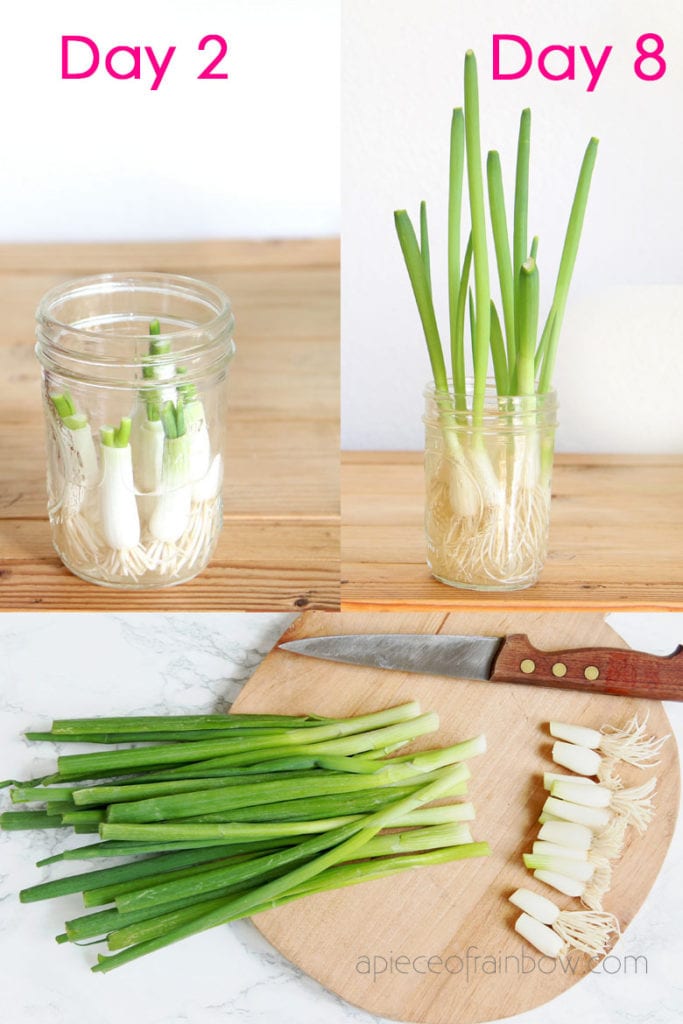
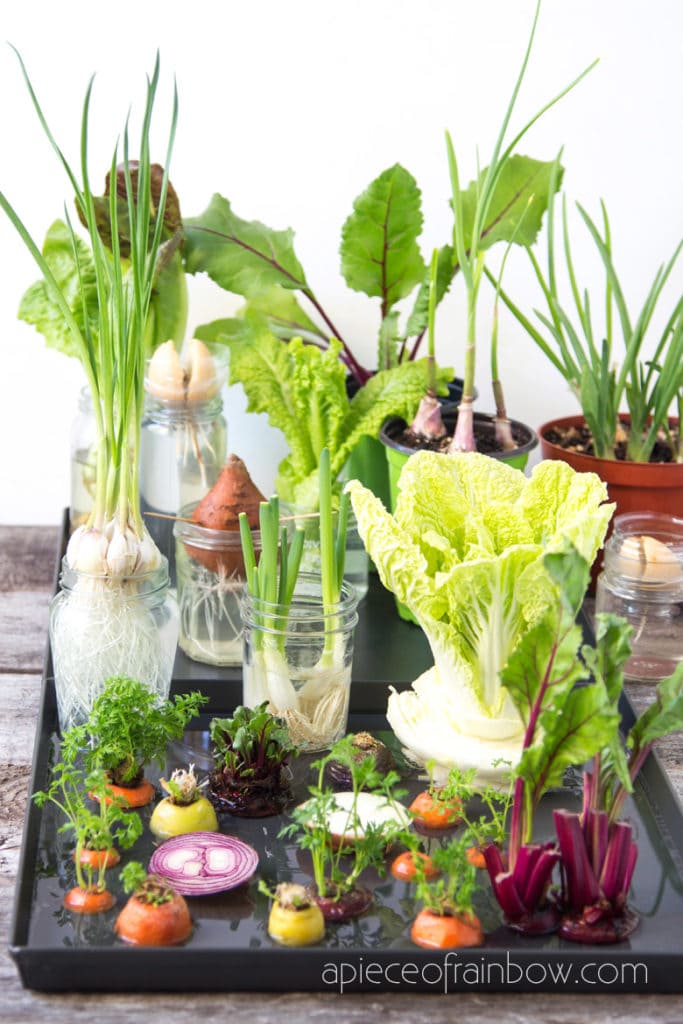
After sharing with you the 12 best veggies and herbs, and 8 free house plants you can regrow from kitchen scraps, it’s time for a more detailed tutorial on how to regrow green onions (aka scallions) from kitchen scraps in water vs soil, indoors vs outdoors.
*Some resources in article are affiliate links. Full disclosure here.
We will compare the pros and cons of each method, so you can start your productive kitchen scraps garden today!
Step 1. Choose healthy green onions (aka scallions) to regrow from kitchen scraps
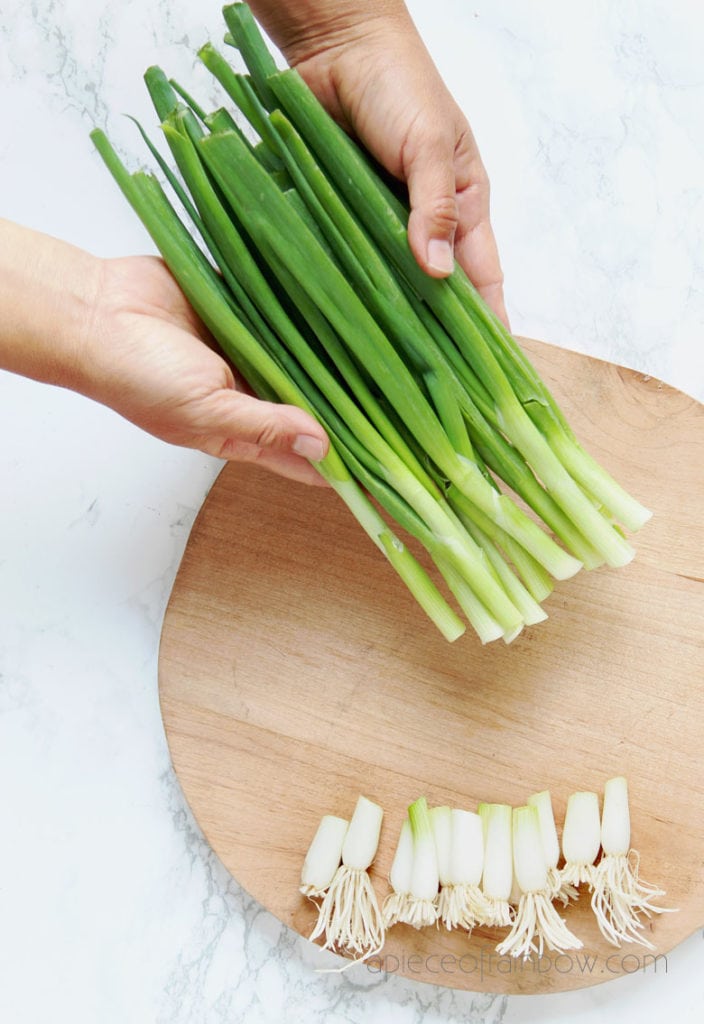
When you buy green onions/ scallions from the grocery store, they usually have some roots at the base, which are cut off before cooking.
The first secret is to choose green onions with healthy roots, because the more roots each sprig has, the faster and easier they would regrow. I always try to choose the scallion bunch with the fattest roots! 🙂
Step 2. How big should the cuttings be when you regrow green onions
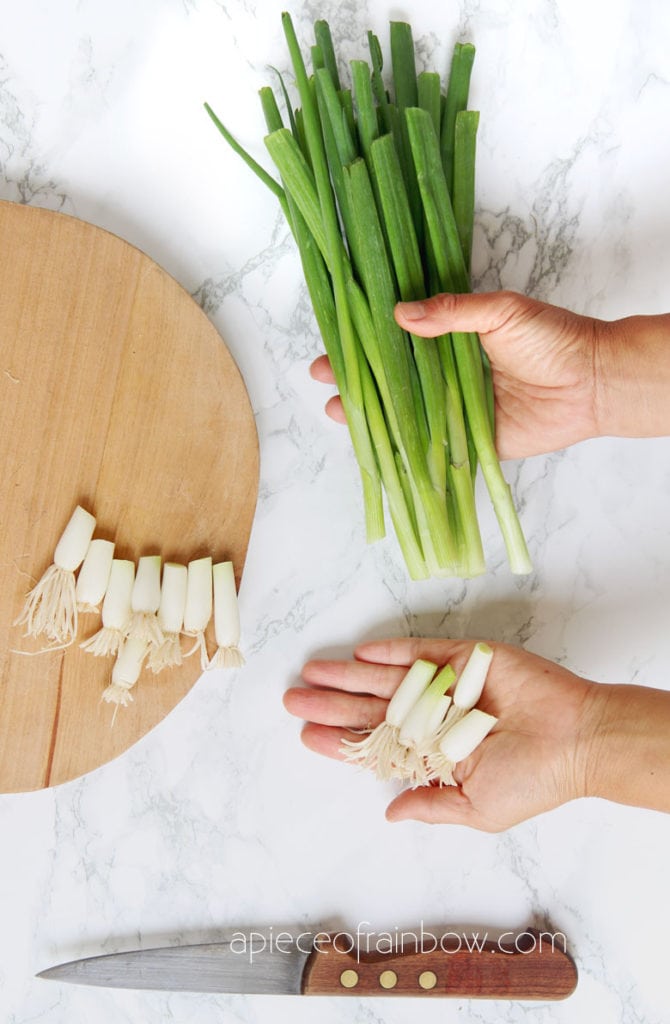
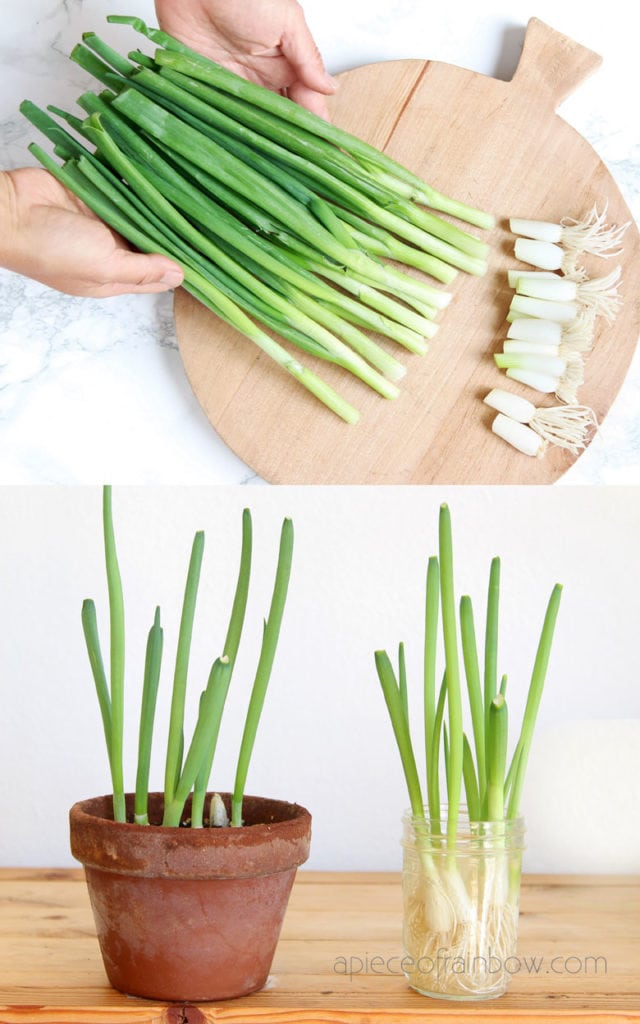
Measure from the base where the roots start, cut each sprig of green onions so you have 1″ to 2″ of stem attached to the roots. This will be plenty for the green onions to regrow.
Next put these cuttings with roots in water or plant them in soil. Let’s first look at the water growing method.
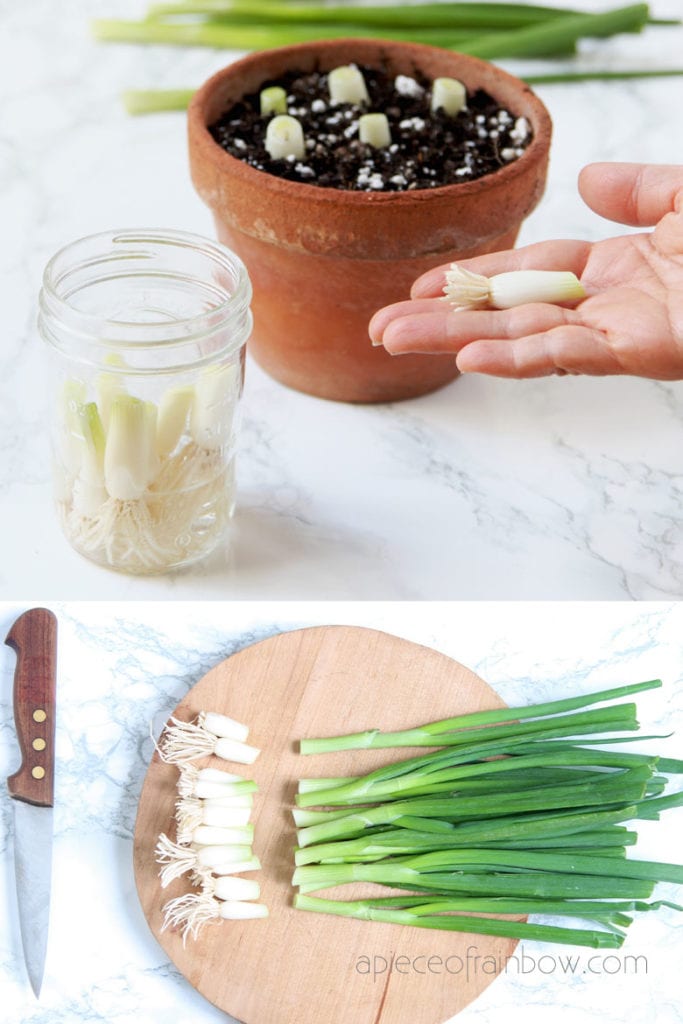
How to regrow green onions in water
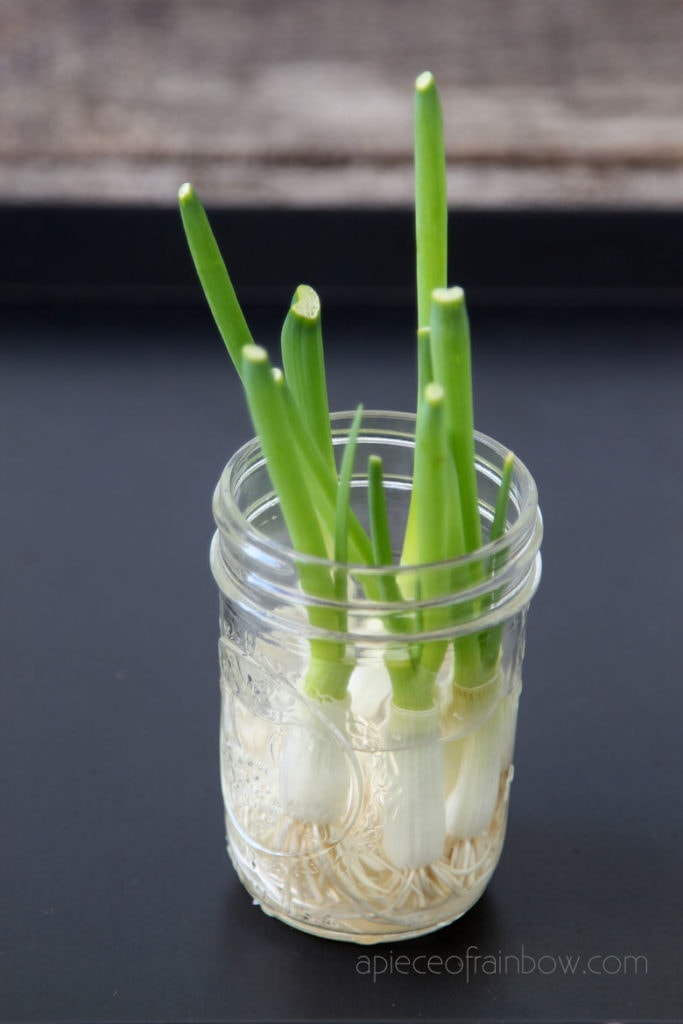
Fill a clean jar with a small amount of water. Place the trimmings in the jar. Keep them standing so the roots are submerged in water, and the very top of the stems should stay above water.
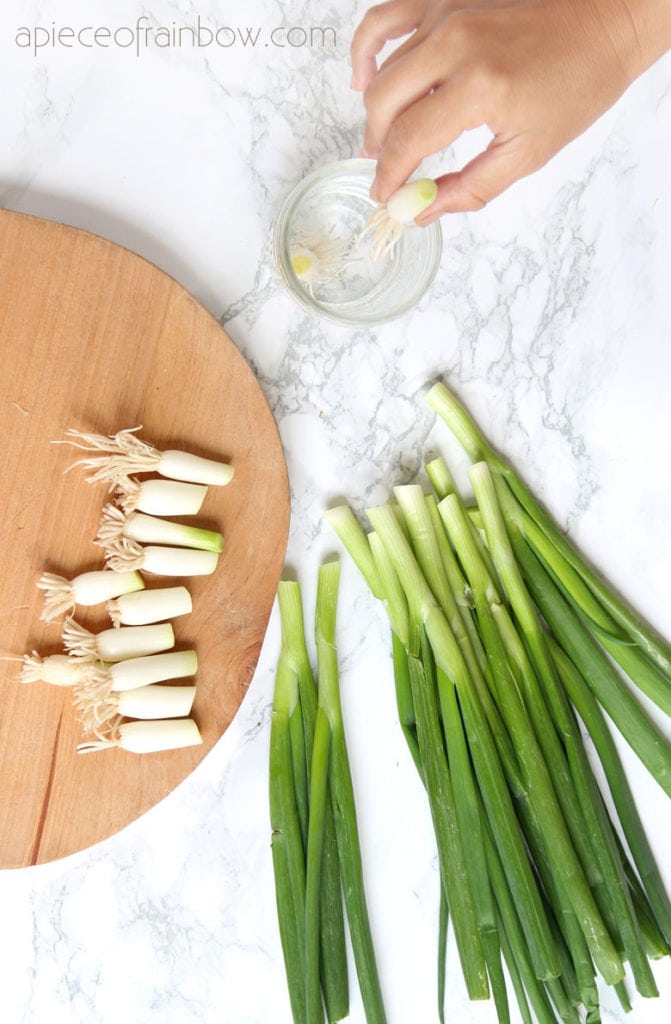
Place the jar in a very bright spot. Avoid too much direct sun because it will cause algae to grow in the water. If your spring onion cuttings are fresh and healthy, you will not need to change water at all. Otherwise change the water if it looks a bit cloudy.
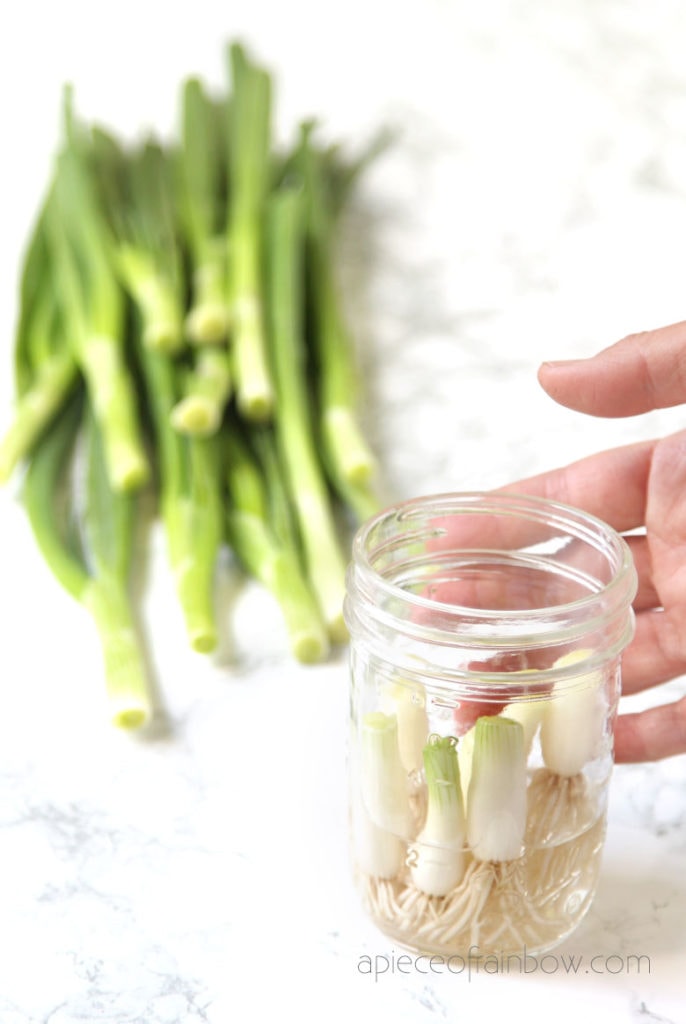
New growth will start in as little as 3 days! Keep adding water every few days so the roots are always submerged.
You can keep trimming the new green onion tops and use them in your cooking. They will continue to grow more new shoots.
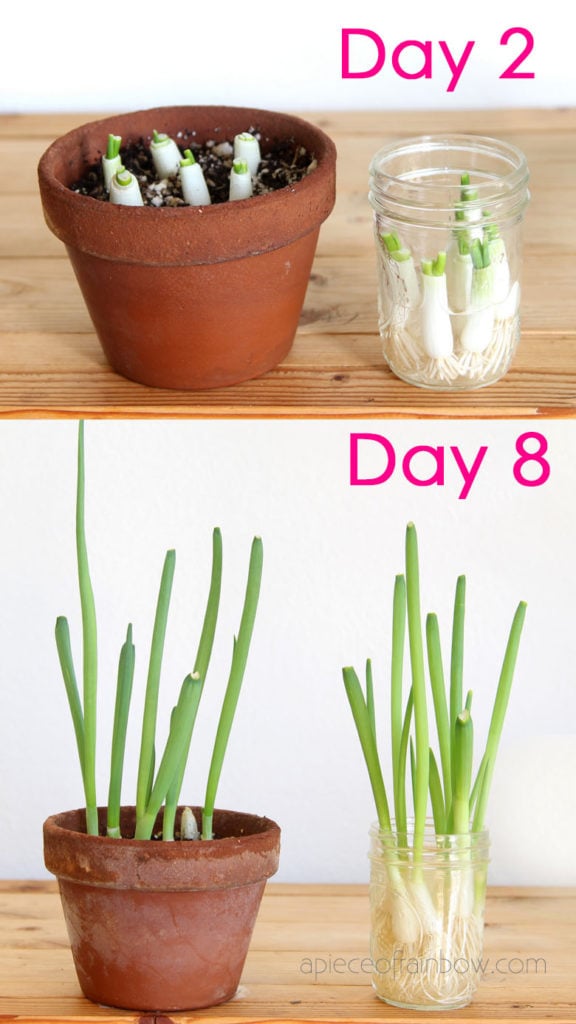
To really maximize your harvests, you can add a drop of diluted organic liquid fertilizer like this every week or two, or plant these trimmings in soil.
How to regrow green onions in soil
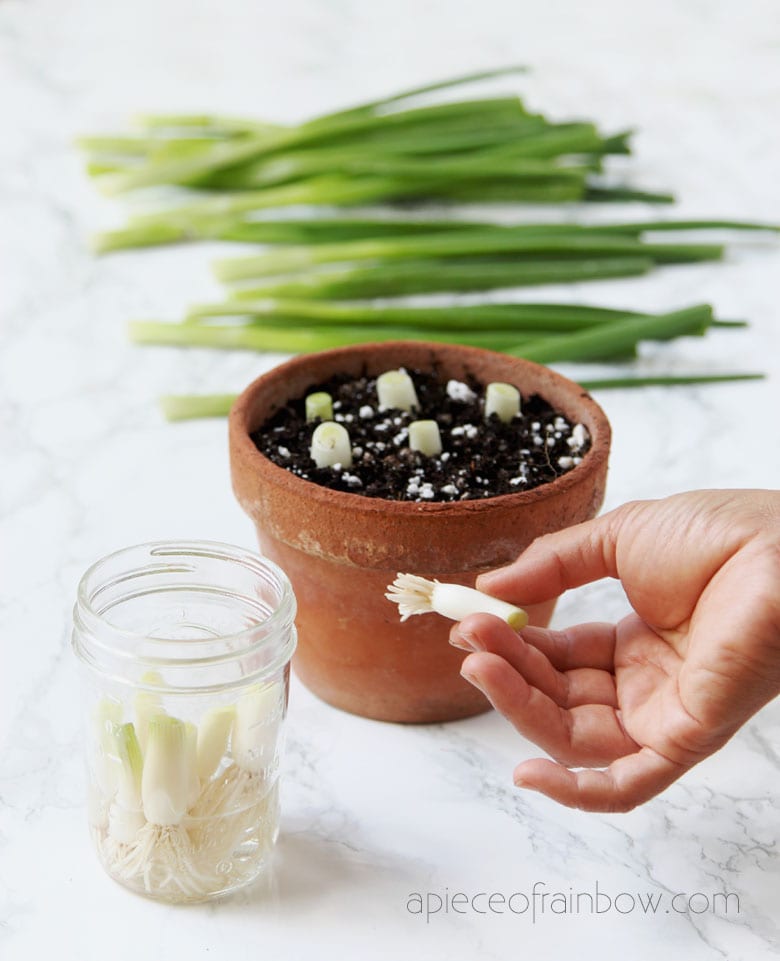
If you want continuous harvests over a long period of time, growing green onions in soil is the way to go. After trimming the scallions (in Step 2 above) plant them in a garden bed or a pot filled with good quality soil.
You can also add some organic fertilizer especially when using a small pot. The top tip of each stem should be above soil. Keep the plants in full sun or at least half day sun, and water regularly.
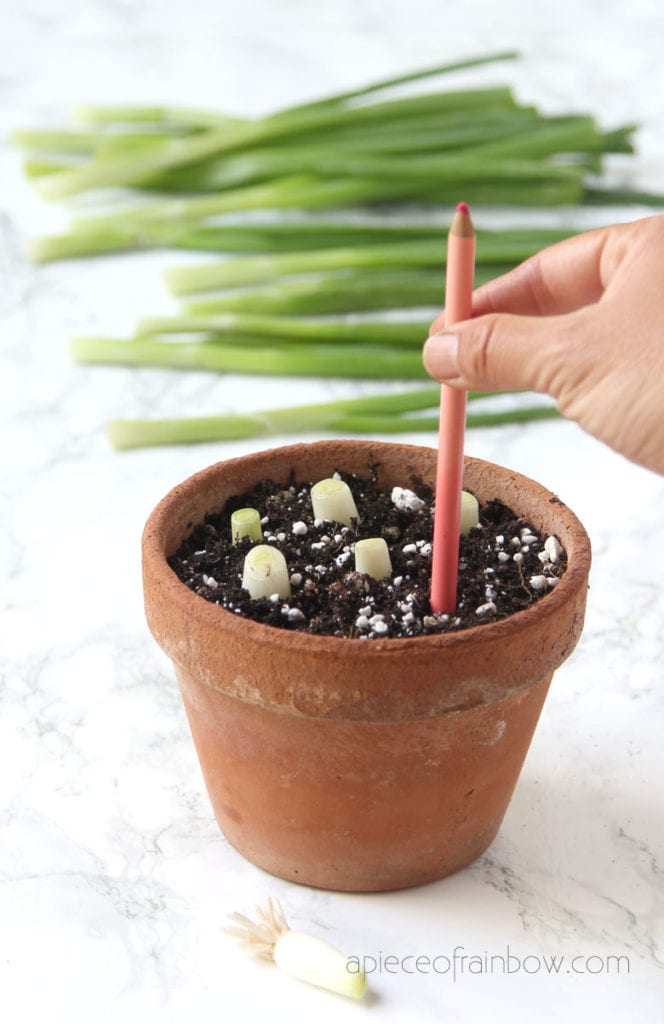
Use a stick or pencil to poke holes in the soil, and place the green onion cuttings in the soil.
Many people assume that if a plant grows in water, then soggy soil must be ok. The answer is no.
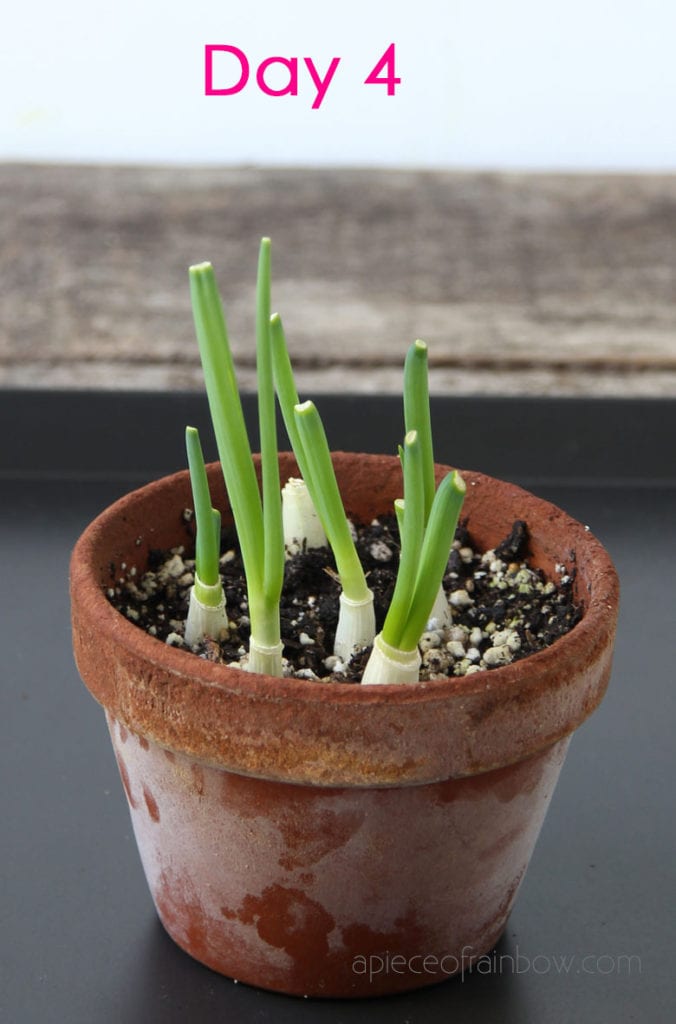
Soggy soil can breed bacteria, and cause root rot. So the most important thing to remember is to never let the soil get too dry, or too soggy by sitting in a tray of water for more than a day.
Green onion scraps planted in soil can grow to huge sizes and give lots of harvests. They keep growing back as you cut them. If you protect them from snow and frost, they will keep growing!
Comparing green onion cuttings grown in water vs soil

Regrowing green onions in water is super fast and easy. You can see the roots growing, and it is a fun projects for children, older kids, and really, everyone in the family.
The soil method takes slightly more time and more work, but the ability to plant in sun and soil full of nutrients will produce much bigger plants.
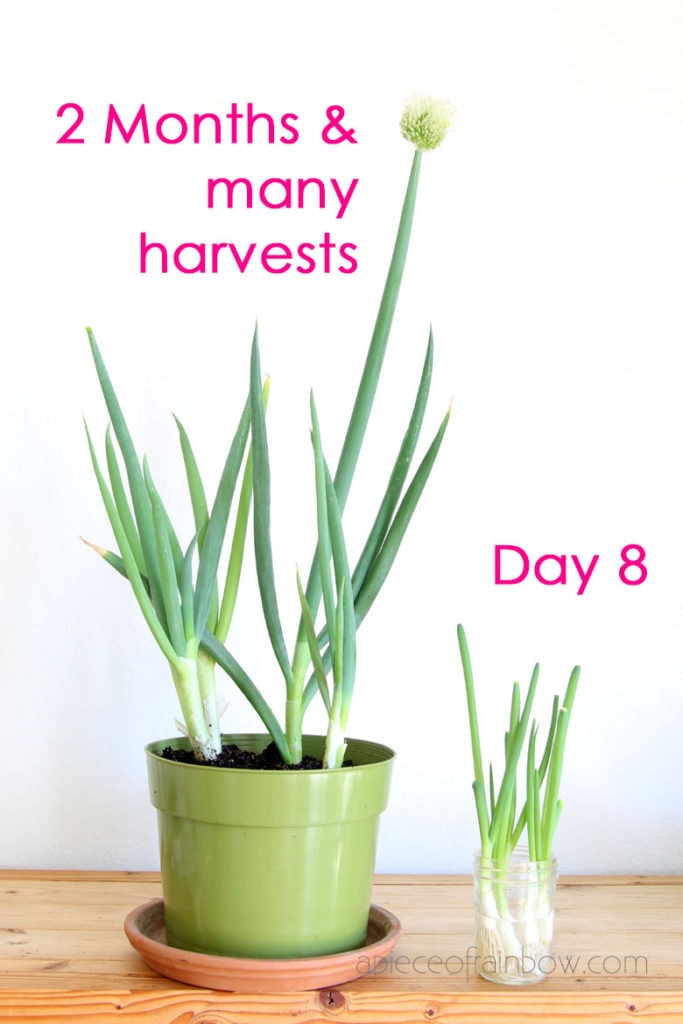
We like to jump start our scallion scraps in water, then plant them in soil after a couple of weeks. This way we get continuous harvests over a long period of time.
Additional tips
Pest control: Green onions have few pests. Although rodents don’t harm established plants, they have eaten all our freshly planted young stems and roots a few times. The solution is to start the cuttings inside in water or soil, then plant them outside once they are at least 6″ tall.
If your scallion plants outdoors are not watered enough, you might see aphids on the green shoots. Hose or wipe them off, and keep the plants well watered.
Grow green onions from seeds:
When your green onions grow to large size, they will send flower stalks followed by a large seed head. Onion flowers are globe shaped and quite pretty. The seeds will mature and turn black. You can plant green onions from seeds in spring to grow many more plants!
They are also some of the best vegetables you can grow in containers!
Happy planting! See you soon!


Ananda thank you for this excellent tutorial. I’ve been growing scallions in mason jars for just a few months and have had questions which your article has now answered. Your description of how much stalk to cut was very helpful. Thank you again!!
thank you Frank for sharing your experience! happy growing! 🙂
When growing the scallions indoors over the winter, can grow lights be used if there’s not enough sun?
hi Lori! yes, grow lights are great for this purpose! 🙂
I do this! We use plant halos found on Amazon. They work fantastic! We use them for indoor herbs and plants that need full sun too!
Hello
I’ve tried twice putting the green onion stems in soil and have had issues. Here’s what happened: at first they grew well until 10 days or so they become pale, floppy, limp, and the tips become brown. The white stem base becomes wrinkled. Do you have any tips for me?
hi Grace! could you tell me more about how much sun and water they got, and what temperature is the growing space? 🙂
Agnes,
I had the same issue with smelly, mushy and green colored roots. With some experimenting I discovered that too much water is the cause for the mushy stems, cloudy water and oniony smell.
Rinse your onions off using your fingers to lightly separate the roots to allow running water to flow through. Again, using your fingers, carefully remove the mushy parts. If there is any stem left, that will easily continue to grow. Be sure to rinse out your water vessel well before returning the cuttings to the jar.
Now, place your cuttings into the vessels, eyeball about to where the roots end and the whites begins. That is your water line.
Fill with fresh water to just the top of the roots. Its ok if just a little of the whites are in the water.
My tips:
I put a barely there sprinkle of cinnamon in the new water to help against mold. I believe cinnamon is a great antifungal to use on plants. But too much can be harmful also, so use sparingly.
I let my water sit out for at least an hour, but usually for 24 hours before watering my plants. I believe this allows the chlorine to dissipate for healthier waterings.
thank you SO much Evvie for sharing these great tips! Happy new year! 🙂
How long will they continue to grow in water? 6 mos? 1 year? Several years?
hi Pat! those in water won’t grow much longer than a couple of months. if planted in soil, they can grow for 6 months to a year, eventually flowering and producing seeds. 🙂
I thought I would experiment. The root ends I planted in fresh potting soil were not very big. I had already cut them off the onions I sliced up. They were barely 1/2″ from root to top.
I thought what the heck and went ahead and planted the tips of 8 green onions.
Low and Behold about 8 days later I have at least 5 green shoots sprouting. One of them in just a matter of days it seems, is almost 2″ long already.
This is exciting! Who knew? I used your methods with my scraps and they are growing!
thanks Thomas! scallions are truly the easiest and very rewarding to regrow! 🙂
I haven’t starting my scallion yet, l want to know, l live in Las Vegas, Nevada and the sun is harsh on any plants (ex) l had succulent plant outside any the sun burnt the leaves. What do you suggest l grow the scallion inside l know they to get plenty of sunlight.
Thank you
Hi Rita! Yes you can grow them inside, or in an outdoor spot that only gets morning sun would be great!
When trimming for use, where should one cut? Should I cut into the white taking all the green off or leave a little green?
leaving a little green will make them grow faster! 🙂
Thanks. Wasn’t sure being the first time growing from scrap ends
@Ananda, thanks for the GREAT tutorial!
I’ll lengthen my cuttings (3cm, not 1cm) and move to soil when taller (15cm, not 3cm) for better results.
I’ll also try crowding in a narrow vessel, as shown, to keep them vertical. That looks easier than my toothpick&foam water wings.
With an east-facing balcony, and no sun after noon, growth seems to slow after planting outdoors.
Might I do better leaving my onions indoors? … hot-housing a bit, to make the most of morning sun and reduce wind-drying?
@Agnes, my shoots grew easily in Sacramento, but in Jacksonville, many died before I tried bottled water. (Smell from the tap was a hint.)
Your chlorine may vary.
hi william! i would leave them outdoors because the light is still brighter than indoors. you can add a saucer at the bottom of the pot, so the soil would not dry out too quickly after each watering 🙂
We finally tried this last week, and all our green onion scraps have grown a lot in 10 days! Thanks for sharing this tutorial in such details!
@Agnes – A few thoughts:
– If they’re mushy, do you make sure the cut (topside) end is well out of the water? They can’t be fully submerged.
– Maybe your root cuttings are too short. It looks like Amanda cuts off the root end quite short with only the white part of the base. My best results come when I cut the root end to include a bit of the green stem.
– You said you transplant when they are 6 cm tall (2.4 inches) That’s more like the length the root ends should be to start.
– Also, changing the water every couple of days prevents them from getting slimy.
great tips Ellie! thank you so much!! 🙂
I hope you can help me with my green onion problems. I’ve never been success with the scraps.
1. Only a couple of the roots will grow, the rest turns to mush. Should I cut off all roots to prevent this mush cause I’m pretty sure that’s rotting and it eventually just kills everything.
2. The outside layers either dries up or rots even if the inside green is growing nicely. If it turns mushy it can eventually kill everything.
3. I try transplanting after the scraps get to 6cm tall but then everything died. I was trying a hydroponic setup. Seem like the base rotted as the whole leafy part came out and was mushy.
hi Agnes! that’s so odd because green onions are much easier than other scraps! i would only start with firm healthy stems which are what we usually get from the store, and remove any stems that seems to be rotting in water. if you do the soil method, don’t ever let soil get soggy, just moist and not dry. 🙂
Do you use the whole onion after propagating and start all over or use just the stems?
Hi! Either way will work. We tend to keep cutting them for quite a few times! 🙂