Paint Beautiful Watercolor Flowers in 15 Minutes
Easy & beautiful watercolor flowers colorful bouquet in 15 minutes: how to paint simple loose floral in watercolour, a detailed step by step tutorial for beginners!
Have you always wanted to paint watercolor flowers? Today I want to share with you how to make a watercolor flower painting in just 15 minutes! We keep adding watercolor and art tutorials, click to see them all here!

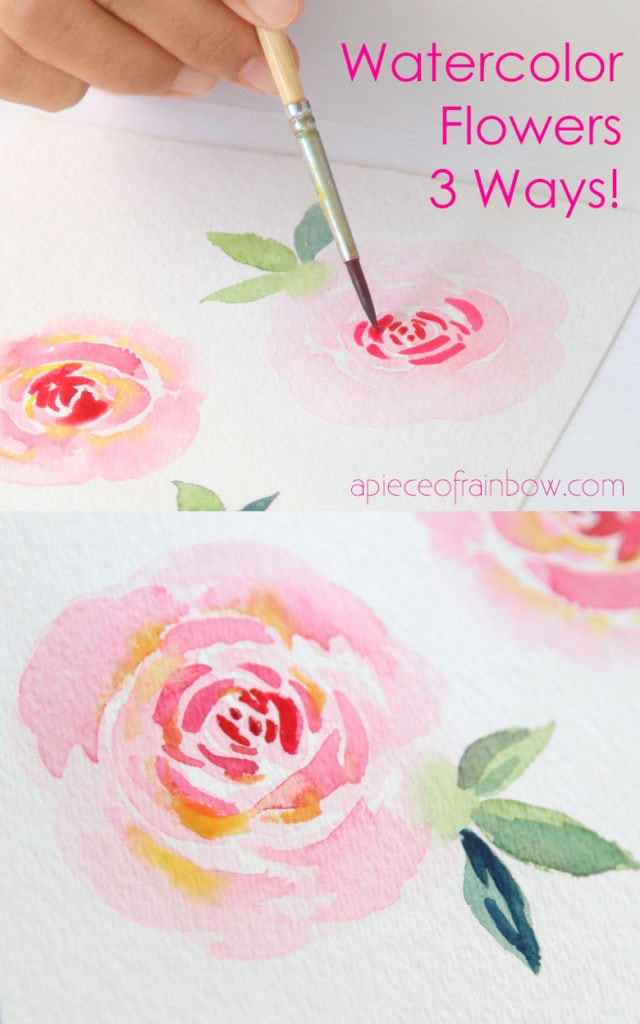
UPDATE: I made a new watercolor tutorial to show how to paint a simple rose in 3 ways using 3 essential beginners techniques including wet on wet, and wet on dry! Check it out here: Paint a watercolor rose in 3 ways!
Once you go through a few simple steps and tips on painting watercolor flowers and leaves, you will be able to improvise on your own, and paint all kinds of loose watercolor floral in no time!
Materials and tools to paint watercolor flowers
*Some resources in article are affiliate links. Full disclosure here.
( Some of the helpful resources are affiliate links. Full disclosure here. )
- paper : (UPDATE- I now only use better quality watercolor paper that doesn’t buckle!) I really like this Strathmore and this Canson watercolor paper.
- brushes: I like using soft watercolor brushes with a nice pointed tip like these , and this set. They are great for watercolor washes, and for finer details.
- watercolor paints: this is a good basic set, and this is a fabulous artist grade set which I LOVE, and a palette that can be used to mix colors. This palette with lid is a great choice too.
- a jar of water for wetting and rinsing brushes
If you need to learn a few essential beginners watercolor techniques including wet on wet, and wet on dry, check out this tutorial first: Paint a watercolor rose in 3 ways!
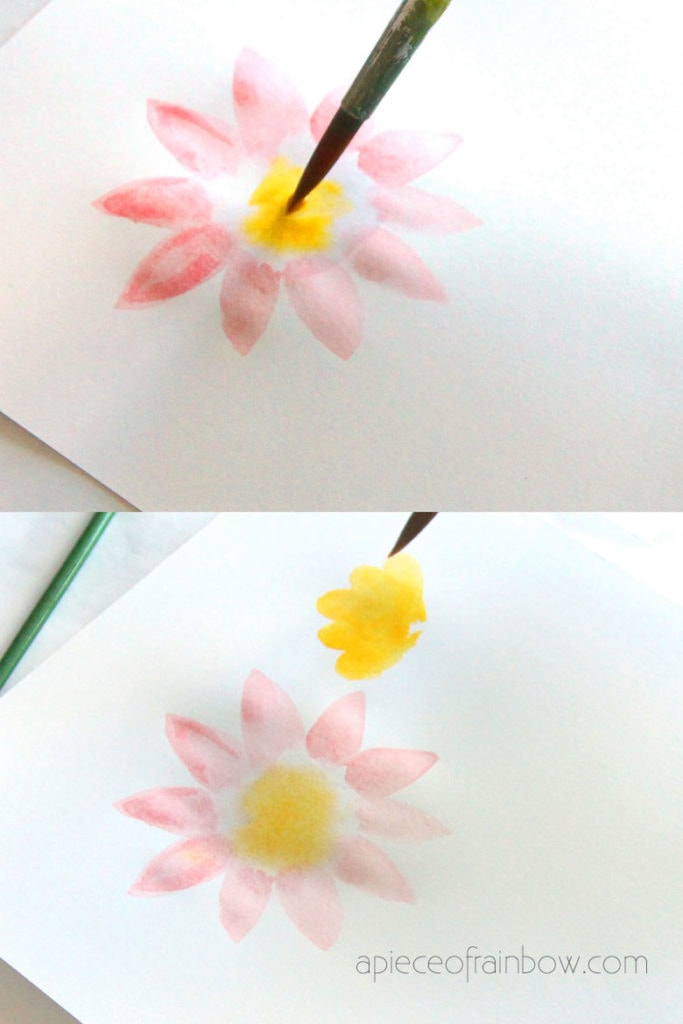
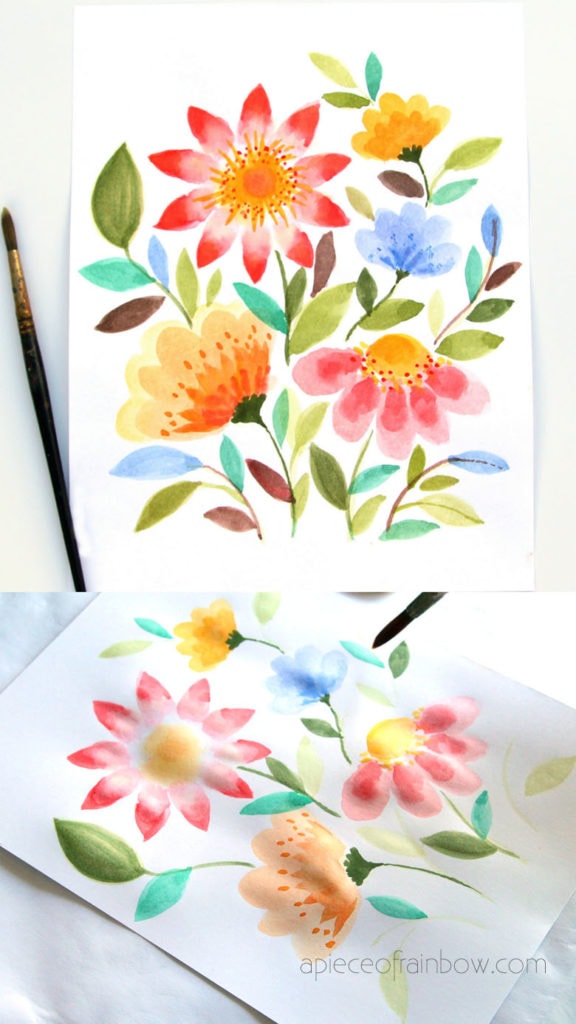
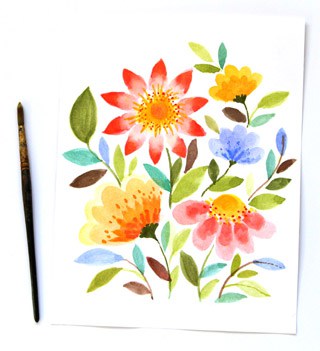
Step 1: Start with flowers in the bouquet.
When I paint watercolor flowers in a bouquet, I like to start with flowers, and paint the watercolor leaves later.
Start with a lighter wash, because it’s easier to go deeper in color later. In watercolor there isn’t really a pink color, it’s basically red diluted with lots of water.

Next we will add the flower center. Dip one of the clean brushes in water, and moisten the paper a bit, then dip another brush in yellow to paint the center. This way the center has a softer edge.
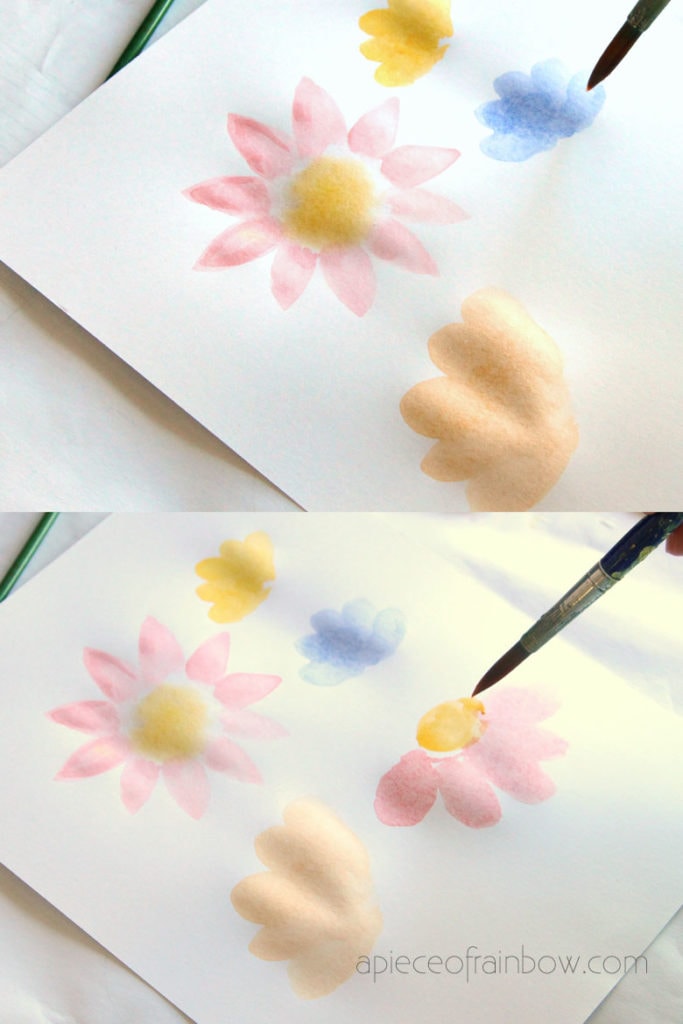
Keep adding more watercolor flowers with different shapes. Oranges and yellows look nice with pinks and reds, and a blue flower for some contrast!
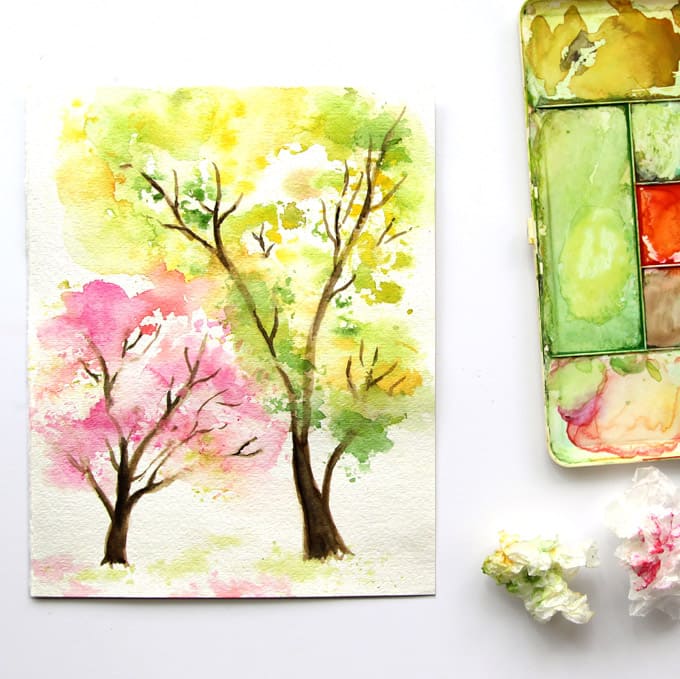
Related Article: How to paint watercolor spring trees with a simple secret! ( Video tutorial!)
Step 2: add details & accents to the watercolor flowers
As you can see the deeper red tips of the petals, the deeper orange at the base of another flower, some color dots, all these add depth and richer details to the flowers.
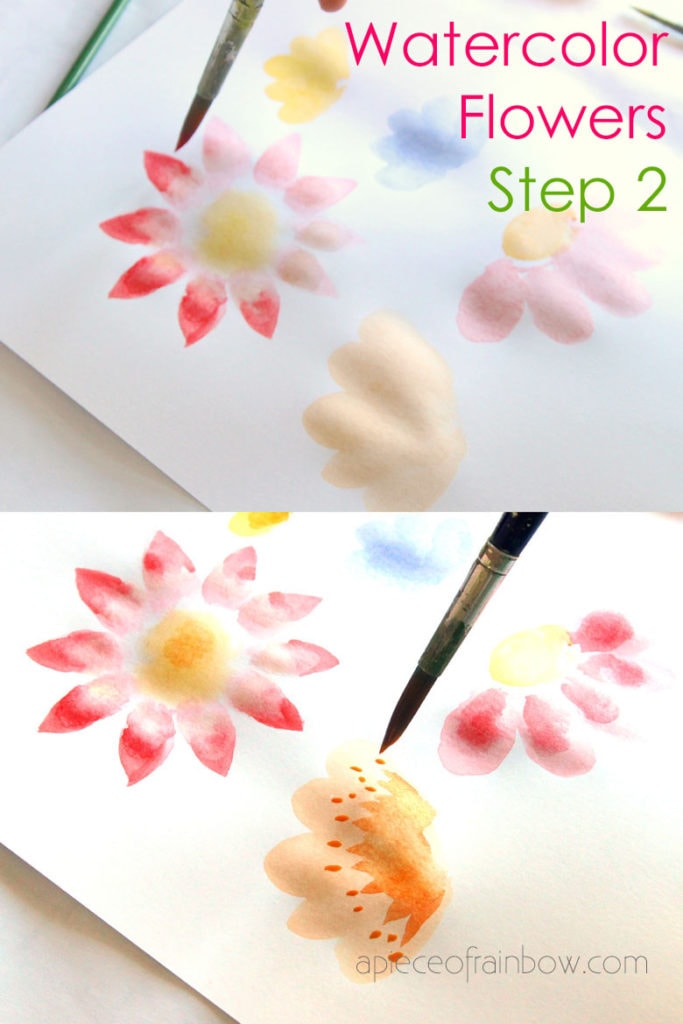
We can always come back and add more details later. Next we paint the stems of these flowers with a pale green, as well as a couple of leaves. I like making the leaves different sizes here.
Step 3: paint watercolor leaves and stems
Then with a deep olive green ( for tips on how to mix a nice olive green, check out the watercolor tree tutorial! ) paint the base of the side view flowers, and a few more leaves in this deep green.
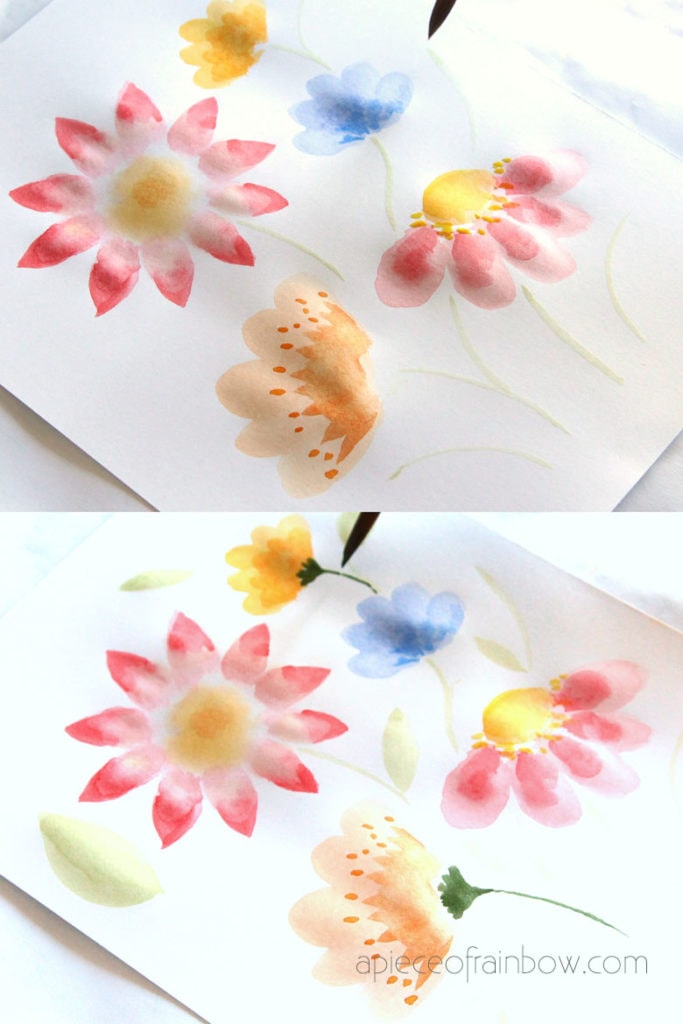
In nature we see all shades of foliage, such as yellow green, blue green, and even browns.
Here we will be adding some watercolor leaves in blue-green, blue and brown, and making some of the stems darker as we paint the darker leaves.
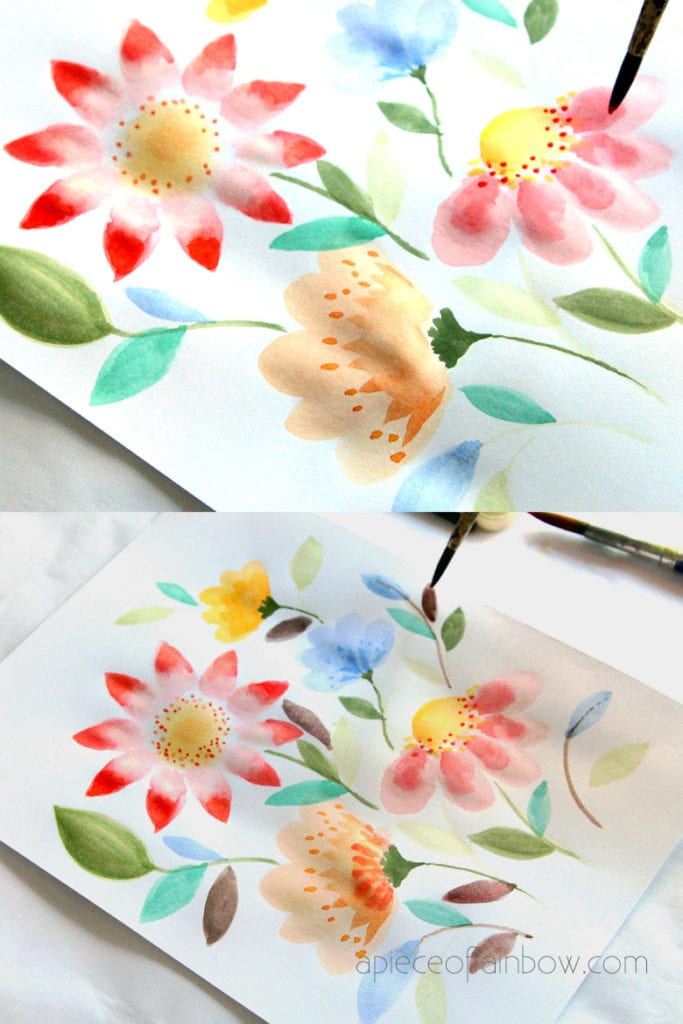
You can omit some of the colors if you prefer the leaves being all green. Just have fun!
At the end, look at the whole painting and add a few final touches, such as adding some dots at the center of the flowers.
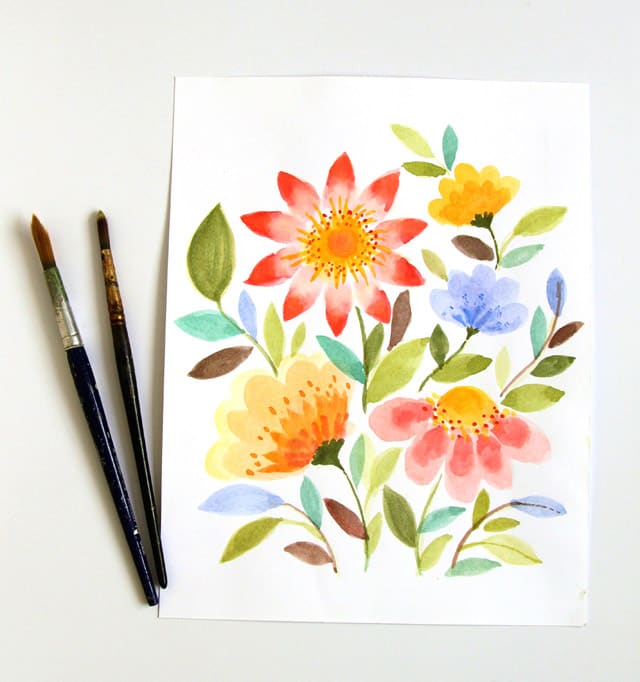
Finished! Not too hard right? After about 30 minutes when the painting is dry, put it under a stack of large books, the weight will help the paper look nice and flat by tomorrow!
Now a little gift / craft project- make your own sets flower greeting cards with these free printable cards!
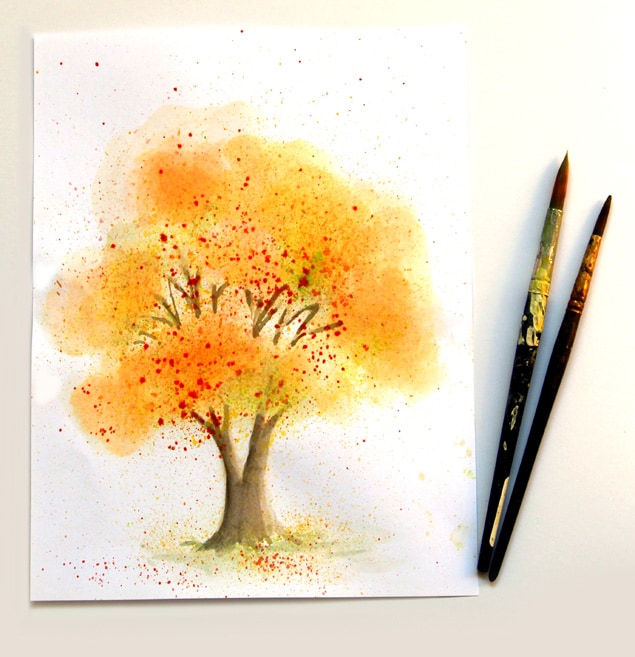
You may also love: Bubble paint Hydrangea flowers tutorial and a tutorial on how to paint a fall watercolor tree in 10 minutes, with a tooth brush!
Free Printable Quote Art – Inspirational Quotes on Life
30 Minute Beautiful Watercolor Flower Painting Tutorial
Paint Cherry Blossoms In Moonlight… On Black Paper!
12 Easy Watercolor Leaves Painting Tutorials
Paint Beautiful Watercolor Flowers in 15 Minutes
Paint Watercolor Flowers – Forsythias!
How to Print on Fabric + DIY Coffee Bean Bag Art Scroll
DIY Beautiful Large Wall Art {$5 & 1 hour!}
3D Paper Birds Christmas Crafts & Ornaments
Watercolor Flower DIY Sharpie Mug {Anthropologie Style!}
Decorating Homemade Clay & Salt Dough Christmas Ornaments
Favorite Hand Lettering and Art Classes to Take Online
Happy painting! See you next week!







Thank you for the great watercolor flower painting tutorial!
Your watercolor flowers turned out amazing! I did struggle with the watercolor paper you suggested b/c it warped and buckled really badly. I’ve learned it’s best to used a paper that is made from 100% cotton. When buying a better brand of watercolor paper, the pad should state it’s made from 100% cotton and the weight will state it’s 140 lbs (300gsm). Arches is a decent brand and will help alleviate the frustration of buckled paper when it gets wet. Save the Canson & Strathmore paper pads for practicing the watercolor flowers. Thank you so much for this awesome tutorial, you make painting look so easy, Uwe!
hi Mary! thank you so much for the feedback! i have had good luck with Strathmore 140 lbs, but i understand that if more water is used, it could cause some buckling. taping that paper also helps! 🙂
Am very new to watercolors (or art of any kind!). Was wondering the brushstrokes you use to create the petals? Mine are just not turning out right :S
hi Sherri! i have 2 video tutorials here which might help 🙂 https://www.apieceofrainbow.com/paint-watercolor-rose-beginner-techniques/ and https://www.apieceofrainbow.com/watercolor-flower-painting-tutorial/
Hey Ananda, super nice tutorial here, thanks for that! I was wondering what is the GSM of your paper? It look like it bubble a little. I’ve recently switched to 300GSM cotton paper (Arches) and the difference is incredible :).
hi Lesly! yes you are right: 300gsm is so much better! this is an older tutorial that i really should update ASAP! thank you so much for the great observation! 🙂
As an art lover I really appreciate this floral painting tutorial with such vibrant colours! Tried it and it came out great. Thank you!
I would like to join your following as I love what I’ve seen already. Please include me too…….Thank you!!
hi Phyllis ,thank you! we just added you to our weekly newsletter list. 🙂
Wonderful colors! These would make lovely gifts – just need a nice frame to accompany it.
Clever idea, fabulous result! I will give it a try! Love it. Thanks 🙂
Olga
Amazing……great job
You could use acrylic paints that are in the craft stores & the variety of colors are unbelievable. They come in a bottle like container, about two ounces but last a very long time. You can find them for under $2.00, some for 99 cents. By adding a bit of water to a couple of drops of these paints onto a paper plate or whatever you use for mixing, they become water paints. Once dried you can use a fine tipped marker & outline the flowers or vase to add definition. If you want.
RE:the tree pic. If you use a stipple brush which is inexpensive & acrylic paints you can get a more lighter look for the leaves. By adding different colored acrylic paint, you’ll get a more texture look with contrast & different shades. Stippling is very easy. You dip the tip of the brush into a small amount of acrylic paint & just tap it onto paper, canvas, even rocks, or whatever. Practice using a bit of water on the brush or added to the paint for different effects. This technique is commonly used for painting a Santa’s beard
The flowers you painted are very pretty & did a great job. When you wrote about lack of pink, thought I’d pass along some hints. The tree you painted came out really nice & like your use of colors very much. Both will look super framed.
thank you so much joyce for sharing these great tips! happy painting! =)
Love the tips of easybasic water painting……will be waiting for more
Great tutorial. Thanks for sharing and encouraging.
hi
thank you so much ananda
very nice…
Thanks so much for your generosity in sharing your skills and knowledge! I totally enjoyed this tutorial and I used your flowers for my latest piece for an instagram challenge – https://instagram.com/p/7slmoGy_XX/?taken-by=shups
Do you have an instagram account?
hi faith, thank you!! it looks beautiful!! =)
yes my insta in on the side bar , @apieceofrainbow! =)
Thanks for this wonderful tutorial. This is the most helpful and easiest to follow. 🙂
thank you poola! enjoy!! =)
Great tutorial. Totally suitable for disaster people like me with painture and drawing. Thanks for sharing!
This is lovely thank you 🙂
I enjoyed this so much I featured it in a blog post I have written recommending watercolour tutorials to my readers 🙂
http://www.jennamichellepink.co.uk/2015/05/19/10-beautifully-simple-watercolour-tutorials/
🙂
Getting the paints out today. . . Love the flowers and after I try the watercolor version, I may try to replicate a few of the blooms with acrylic on a small bookcase I just painted. Thanks for the tutorial!
that sounds wonderful kate!!! =)
Incredible. I love drawing and – sadly – am pretty bad at it most of the time. I have had among my favorite books a drawing and painting tutorial for flowers for quite some time now, but I find it daunting only flipping at the pages. Your post comes with the promise of a possible tomorrow with me, painting 😉
i am sure your paintings will be gorgeous my friend!! xx
So pretty. These would be perfect in my daughters room!
These are gorgeous! Great idea! DIY projects are always so rewarding.
I love this, they are so beautiful. It looks like something I would actually purchase in a store.
I know almost everyone said this. But you make it look so easy! It’s true that we are all born with a gift, yours is clearly the arts! My sister in law would love this going to share with her!
I love this! Thanks so much for sharing it. I’m saving it so I can make some paintings for my own house.
Ananda, your flowers on paper look so beautiful. I always wish for a 50 hour day when I read your posts- only if I could find the time, I would love to try out all your tutorials. Happy Holidays my dear Ananda and hope that 2015 brings you peace and health and lots and lots of creative projects. Love. xx
oh thank you arti!! happy holidays to you too! always a special treat to visit you as well! wish you lots of beautiful travels and creative adventures in 2015! xoxo
Though you have made it look so easy I could not paint anything to save my life. I love how colourful the painting is and just how simple/easy you’ve made it
This is so beautiful! You make it look so easy! I absolutely love it!
Oooooo Ananda, this is one of my favorite posts! Yes, I’ve always wanted to be able to paint – and if I were to do it, I’d want to paint flowers! I really love this! You should do a giveaway with some of your pretty artwork. I know I’d love to win something like this!
thank you kristi! try it, painting is easier that making shrimp pizzas!! xo
Woah! This is so cute! I’m fully not capable of this, but you did an amazing job!
thank you brenda! xx
These are amazing! I’m not even going to try, I’m about as untalented as it gets art-wise!
I really don’t trust my artistic skills to accomplish this, but you did a gorgeous job!! Can’t believe it only took you 30 minutes!
I don’t think mine would look as pretty but I pinned this in case I ever have a baby girl. It would be so cute to have three of those in a nursery!
thank you candace! yours will be very pretty in their own style! =)
So beautiful. I don’t think I would be able to accomplish this with watercolors but it looks wonderful!
You make this look so easy!! Pinned because I’ve always loved watercolour and wanted to know how to do it!
thank you rebekah! i’m sure you can do it – that pvc tree you did was awesome! =)
I adore the colours you used in that tree! I love watercolour but they’re so difficult to keep because I find the colours fade so quickly. Super talented!
Katie <3
thank you katie! i think if the paper is acid free it should last 100 years, not that i need it to haha! =)
That is so pretty, really great job!
I want to try this! I have all the supplies, just not the skill. I GUARANTEE mine won’t turn out as lovely as yours! Ha ha! 🙂
i’m sure it will be gorgeous! =)
so refreshing! You make it look so easy!
Love these! I’m not that talented but would love to give this a try. You make it look easy.
Hi Ananda – I love your tutorial! I watercolor paint, but I really need to take the time to do that because I get so busy. Thank you for sharing the cardstock link. Love it!
Will be sharing your tutorial on my Twitter.
Thanks,
Cara
Wow! These are absolutely incredible. I wish I was better at crafting- truly works of art that could be hung throughout the home!
Hello Ananda,
this is so great !
I wish you a merry Christmas and a happy new year !
Uwe
hi uwe! i tried to comment on your blog – a cool tree you made – but it won’t let me!! wish you a wonderful holiday and lots of great diy fun in 2015!!! =)
Thanks Ananda,
which the comment is not a problem.
I also am always on your answers to my comments with you.
Maybe you try it still another time.
In other commenting to me from the US works for you.
Try it again sometime, if you have time.
Would be happy.
Have a nice time.
Uwe
Wow gorgeous! I think the non artist lil ol’ me can probably pull this off..lol
how pretty! This would be a fantastic idea for DIY Christmas cards!
xo Jen| The Single Diaries
http://www.thesinglediaries.com