In Love With Indigo: 3 DIY Indigo Tie Dye Patterns
If there is ONE color that transcends time and space, that sparks love and imagination, it is Indigo.
Its history is as rich and soulful as the color itself. I too, fell under the magic spell.
After searching high and low for indigo fabric without success, I decided to create it myself, with tie dye.
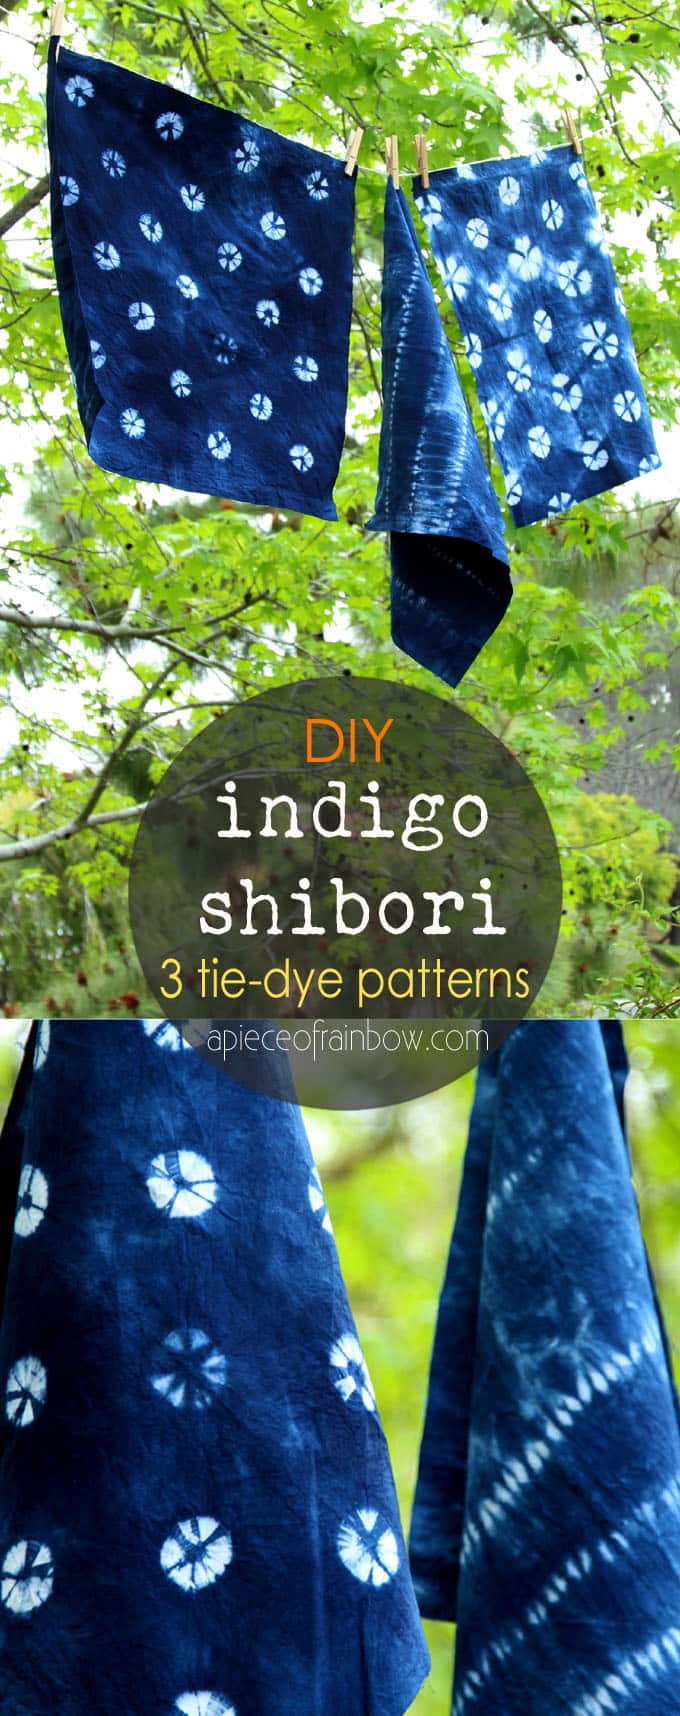
There is no lack of inspirations when it comes to indigo tie dye patterns. I am thrilled with how gorgeous these came out and how easy and fun it is to create your own glorious indigo textiles to use for home decor, fashion, etc.
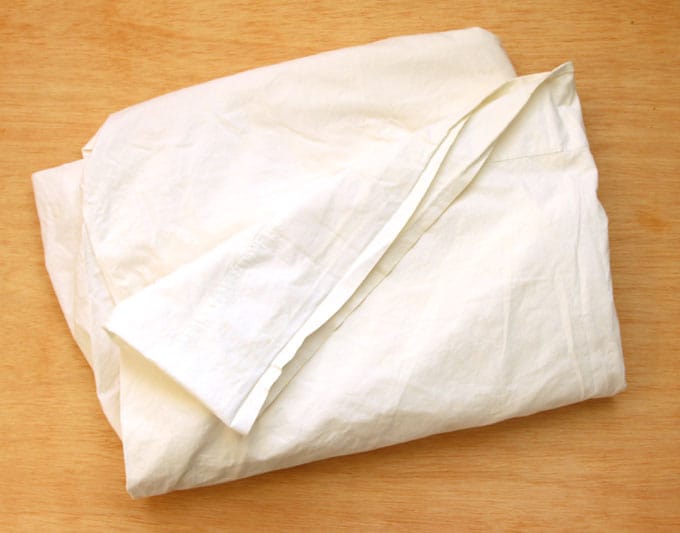
Here is the fabric I started with: ( Some of the helpful resources are affiliate links. Full disclosure here. )
Some good quality 100% cotton white sheets.
There are two choice of dyes to use.
Both will work beautifully, and cost is similar.
Let’s compare them-
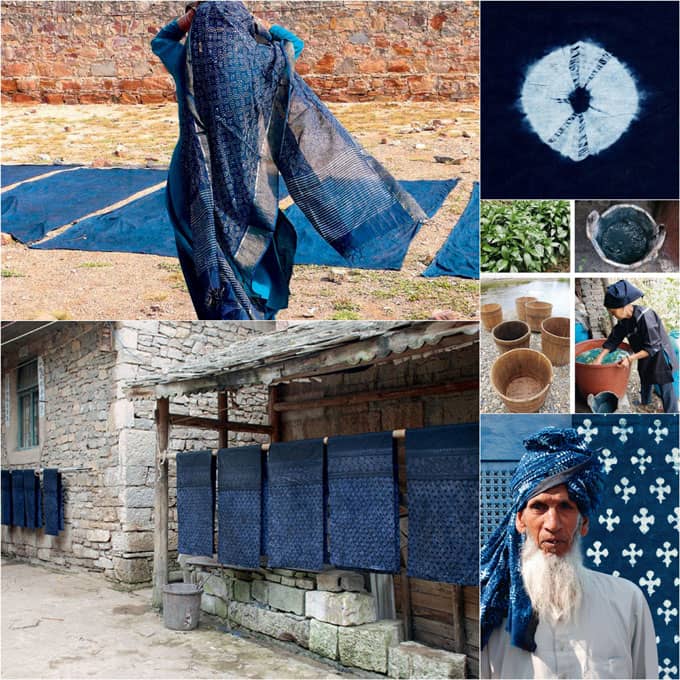
Option 1: Natural indigo dye derived from the plant Indigofera tinctoria.
Most of the traditional indigo textiles are dyed with natural indigo, as depicted in the stunning book Indigo: The Color that Changed The World . (photo © Catherine Legrand / Thames & Hudson)
Pros: Authenticity. Easy to find as an indigo dye kit here.
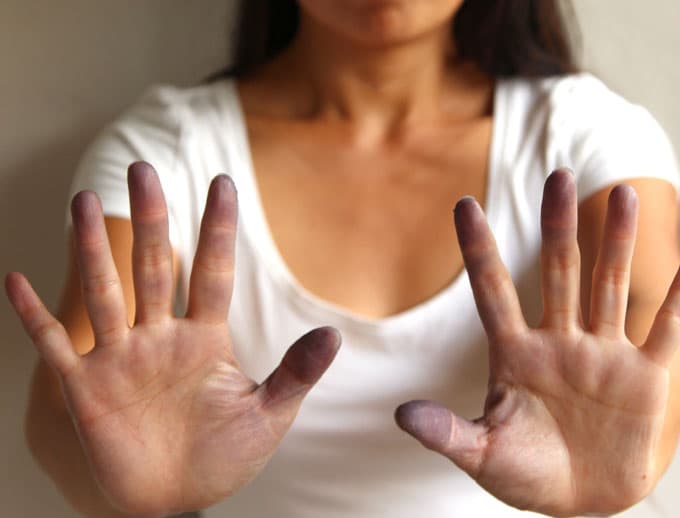
Cons: It can stain other fabrics and skin. The ancient Sahara Tuareg people were known as the Blue Men because they dye all of their clothing with Indigo, and it stains their skin over time.
Option 2: Fiber Reactive Dye
I chose this option because of the raving reviews by so many textile artists. See materials list for the exact dye used here.

Pros: The colors are brilliant and permanent. They are economical, safe, and easy to use. Here is what Dharma Trading says about procion dyes: “When used properly and washed thoroughly, babies can safely chew on fabric properly dyed with Reactive dyes. They also do not fade with every wash, but retain their original beauty long after the fabric is worn out.”
Cons: Can be tricky to find the right blue. If you live outside USA, contact manufacturer that sells in your area and ask which color closely resembles the Indigo.
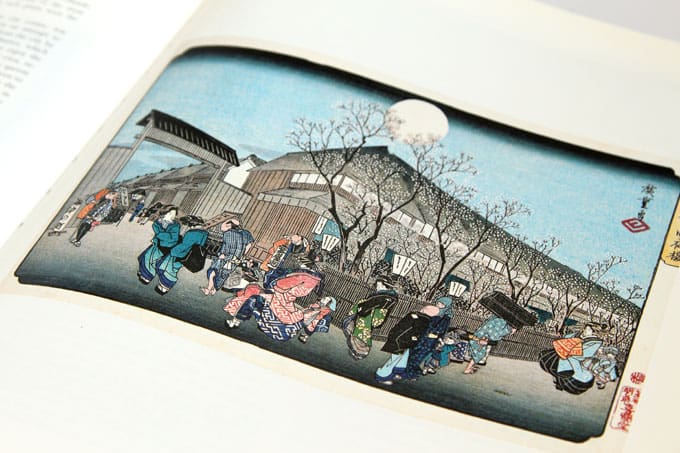
The 3 tie-dye techniques here are a combination of what I have learned from Jane Dunnewold, author of the fabulous book Art Cloth: A Guide to Surface Design for Fabric , and the traditional resist dye technique known as Shibori , which dates from the 8th century in Japan.
Can you spot how many people are wearing indigo shibori in this 1830s wood block print by Hiroshige?
Materials and tools:
- Fabric dye: I used PR168 Indigo Blue procion fiber reactive dye from Dharma Trading and I LOVE IT! There are also Procion dyes on Amazon . If you are wondering about all purpose dyes such as Rit-dye, my honest opinion after trying them is that their colors are not nearly as brilliant, and the colors can still bleed after many washes.
- Fabrics: Choose natural fiber such as cotton, rayon, hemp, or linen. If you want to use natural / poly blends, it is a good idea to test a small piece first. Pre-wash fabrics to remove oils, dirt or anything else that might affect the dye. Let dry and cut into desired size.
- Soda Ash Dye Fixer: it “fixes” the dye to the fabric and makes the colors long lasting. You will need 1 cup per gallon of water( enough for 12 XL tee shirts, so a little goes a long way!) as a pre-soak when tie-dyeing.
- Plastic trays and bottles to mix dyes and hold the fabrics
- blue Dawn dish detergent, Dust mask, eye goggles, gloves: elbow length preferred, the photo below shows you how I learned.
Now let us go through the 5 steps to create your own shibori / indigo tie dye fabrics!
Step 1: Create resist tie dye patterns
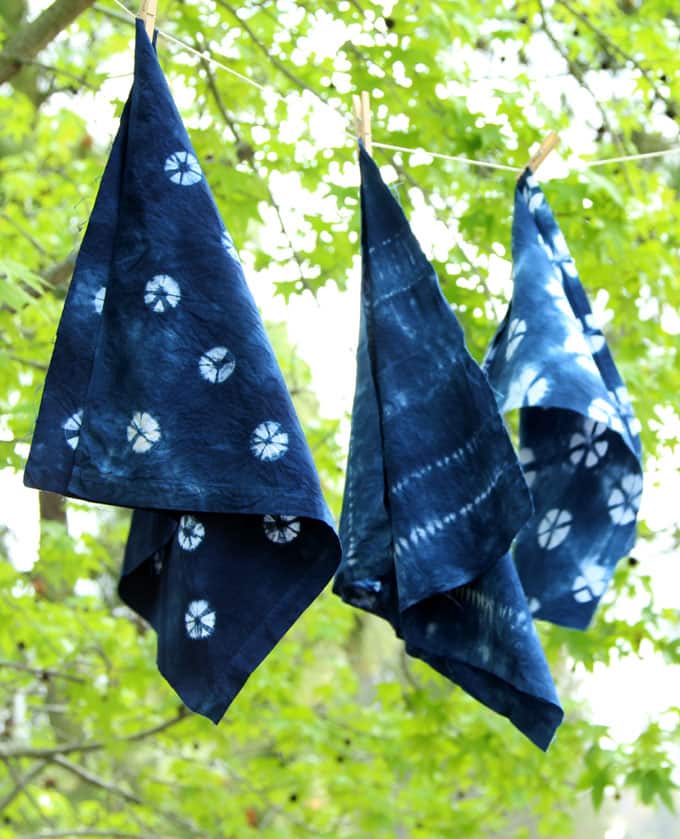
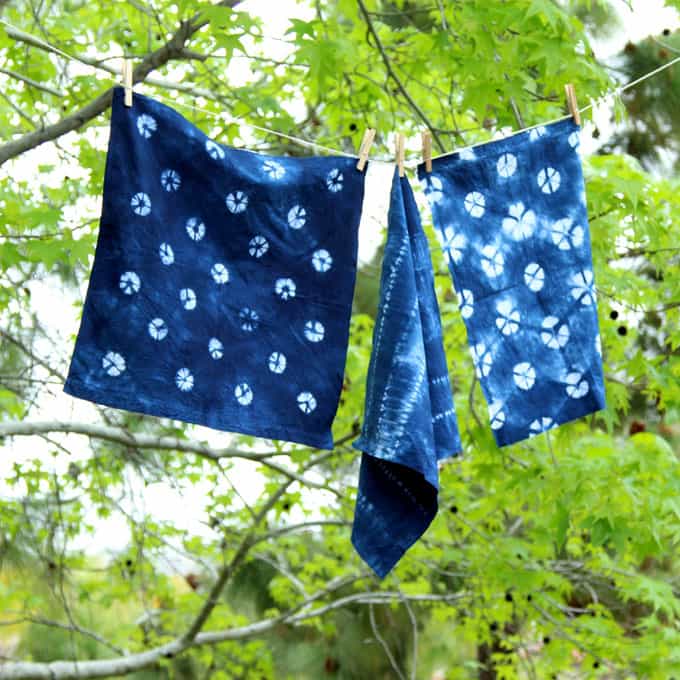
I tried 3 indigo tie dye patterns.
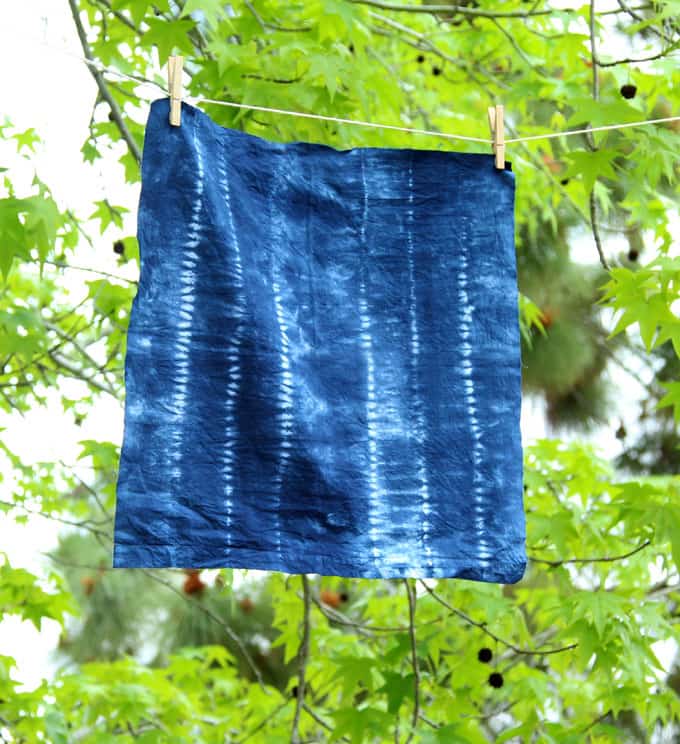
First tie dye pattern technique is several rows of running stitch gathered and pulled tight at the ends.
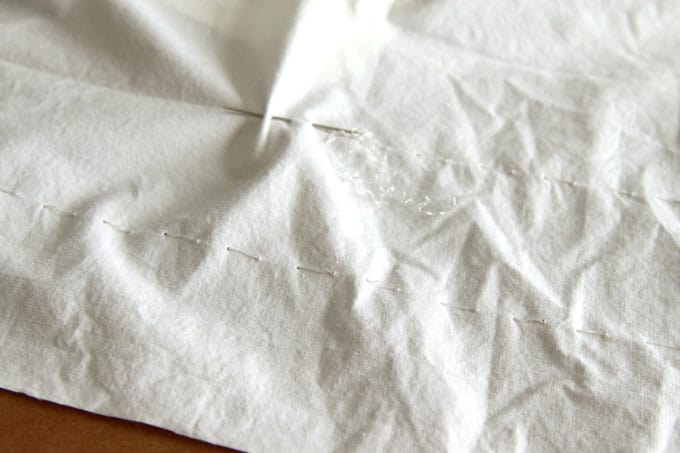
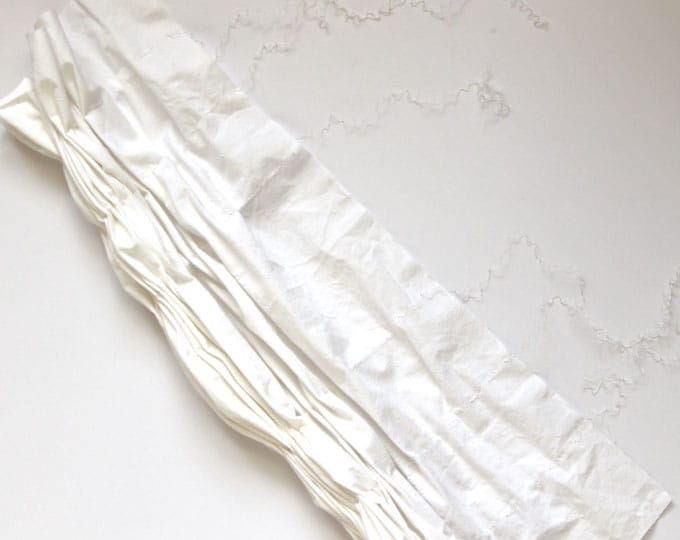

Use extra thread to tie each gathering spot really tight. This method creates a stripes design.
The second tie dye pattern method starts with marking some circles lightly on fabric with a pencil. Gather from the center of each circle, and wrap each “cone” really tightly with threads.
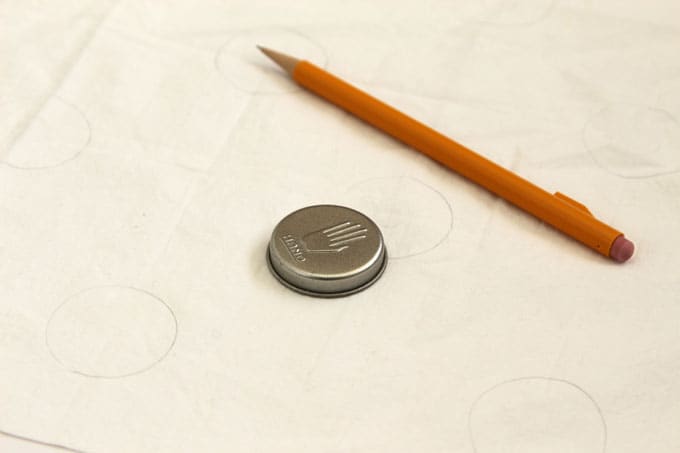
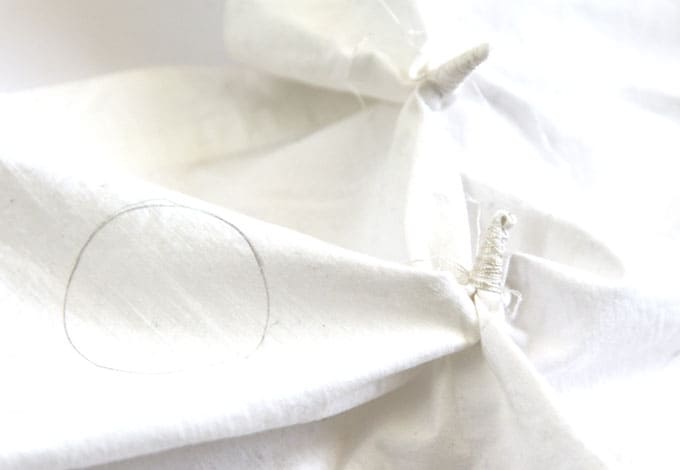
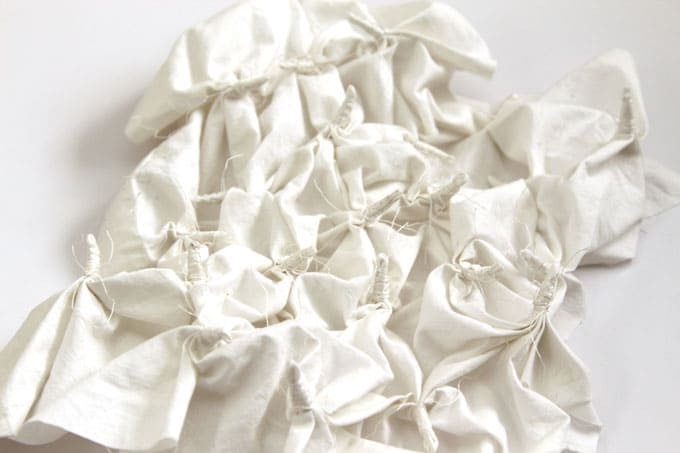
This one create a beautiful design with circles.
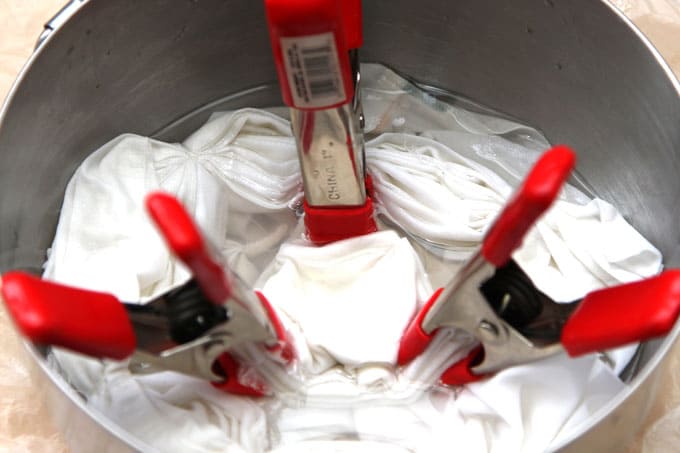
The third tie dye pattern method is the quickest one : make accordion folds, then triangle folds back and forth along the whole length.
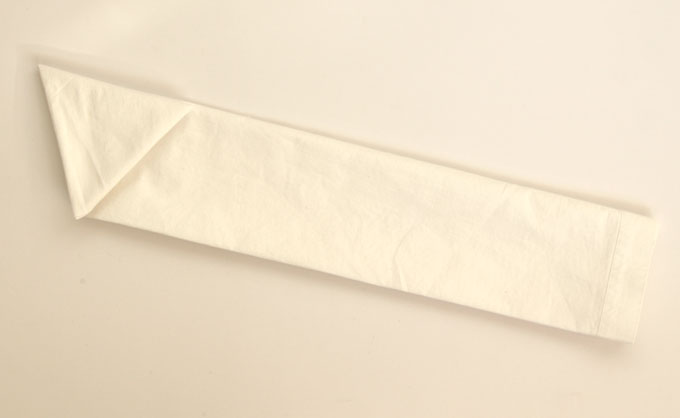
Clamp the 3 corner with spring metal clamps. The clamps will create a resist pattern. Instead of calling this tie dye, maybe we should call it “clamp-dye”?
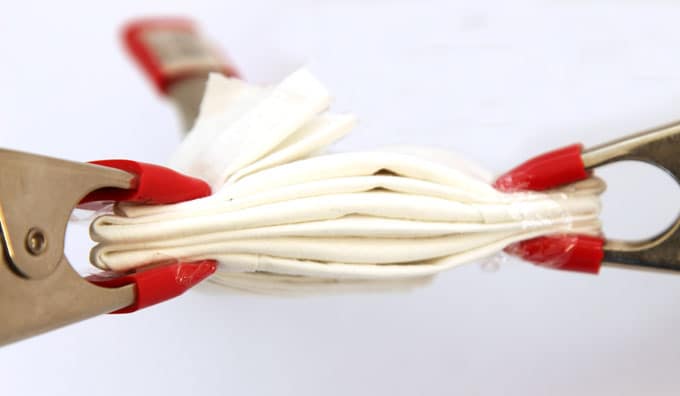

Because we use these clamps in woodworking a lot, the tips have some glue residue. The pieces of plastic wrap helps to keep the fabric clean.
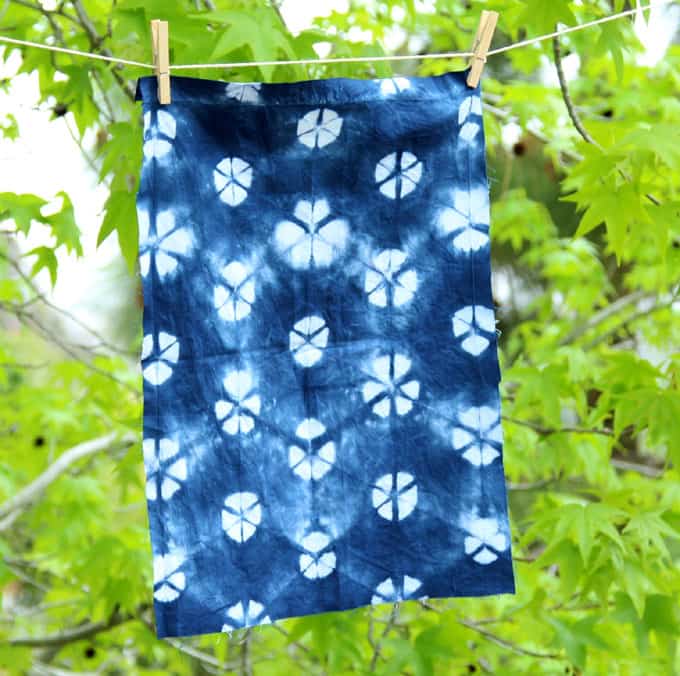
The design: six fold flower-like shapes.
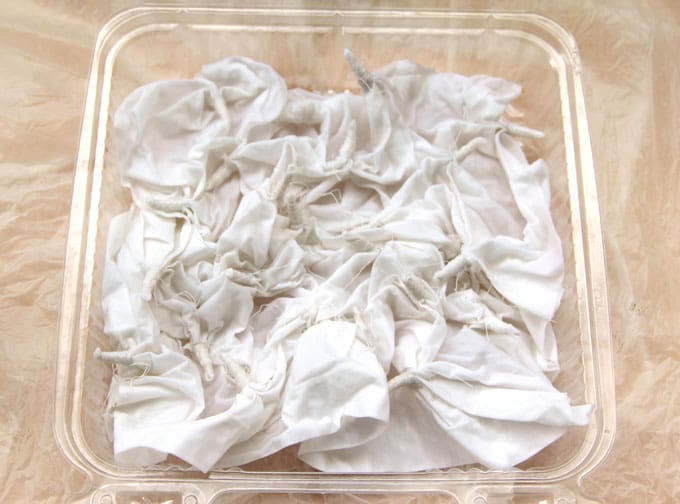
Step 2: Soak fabrics in soda ash solution
Use 1 cup (8 oz.) of Soda Ash Dye Fixer per gallon of warm water. I only needed 1 pint of soaking liquid.
Add soda ash to water gradually and dissolve. Soak the tied fabrics about 5-15 minutes. Squeeze out the excess liquid so it is damp but not dripping.
You can reuse this soda ash solution. Just store it in a container with a tight lid at room temperature.
Step 3: Mix and dye
Use this guideline for tie dye amounts:
2 tsp (about 4 grams) of dye dissolved in 2 oz ( about 57 grams) of water will result in a very dark indigo blue. 2/3 to 1 tsp of dye dissolved in 2 oz of water will give a rich medium indigo blue. All 3 pieces shown here are withing these ratios.
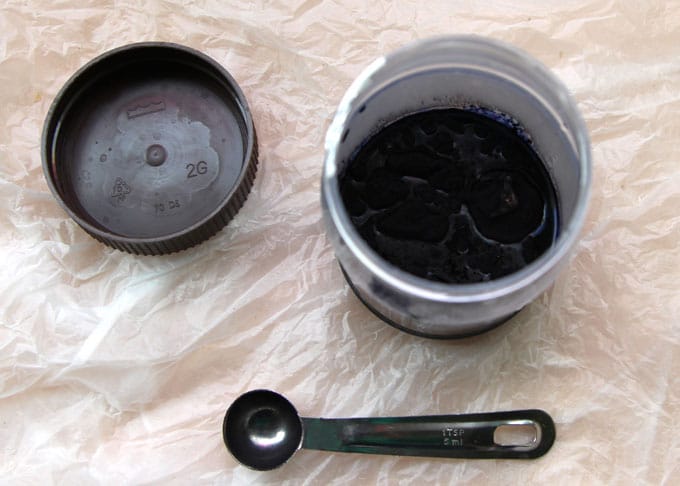
The dye works best in lukewarm water. Shake the dye and water mixture so it dissolves thoroughly.
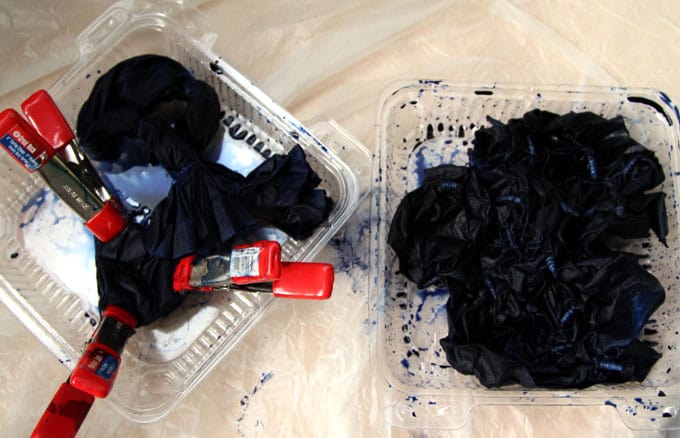
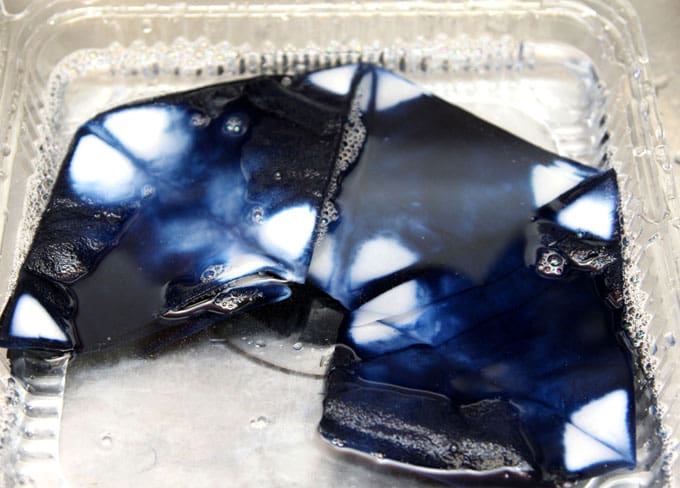
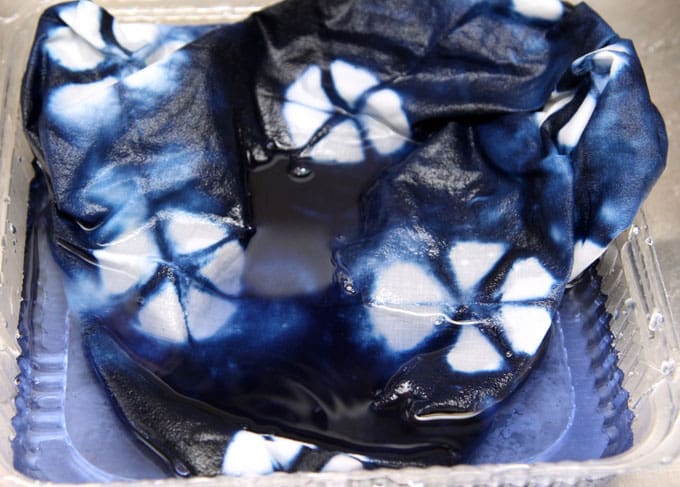
Pour the dye liquid over the fabric pieces. After applying dye to one side, flip each piece over and repeat the process. The fabric will look much darker when wet, don’t panic! =)
Step 4: Let cure
Put a lid or plastic bag over each tray to keep it damp. Let cure in a warm place for 24 hours for the best colors. In temperatures below 70º F, it will take longer. Use a heat mat if the room is too cold.
After 24 hours the reaction is mostly complete, and the fabric would not absorb much more dye.
Step 5: Wash fabrics

Here is a secret I learned from Jane Dunnewold’s Art Cloth: blue Dawn dish detergent works amazingly well for washing the dye, so no need for expensive textile detegent!
Leaving ties on, rinse in a tub of cold water and a squirt of detergent to stop the dye reaction.
Next rinse in warm water while you open the folds and clamps, keep rinsing until water runs almost clear.
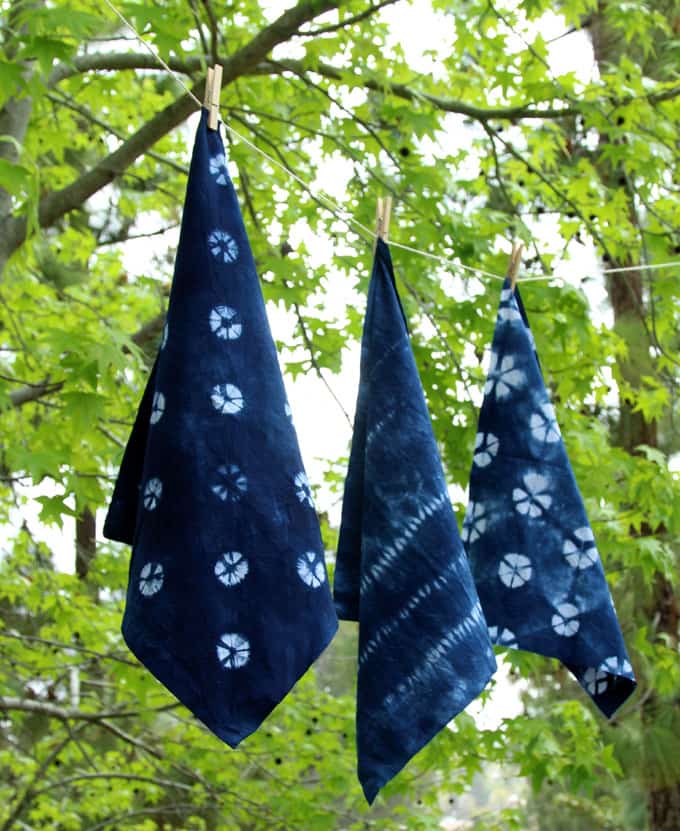
Hang the fabrics to dry, and see what you can create with them. I will share mine in 1-2 weeks =)
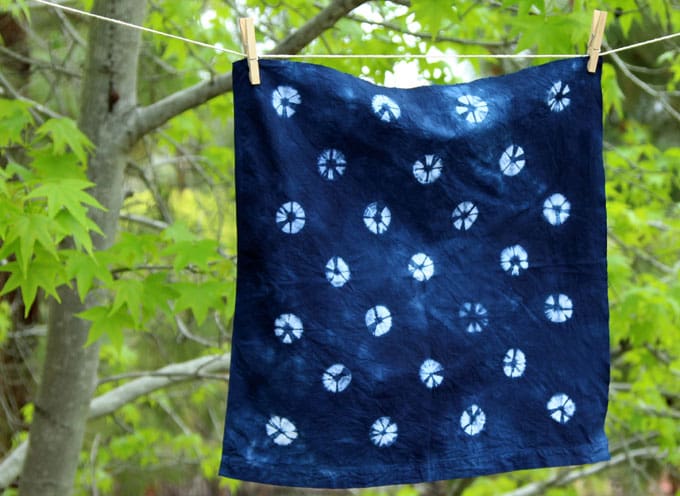
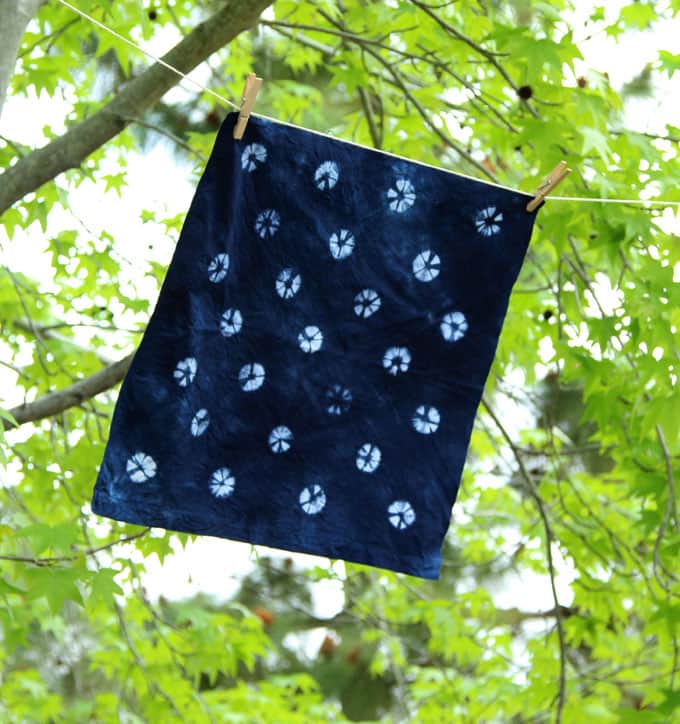
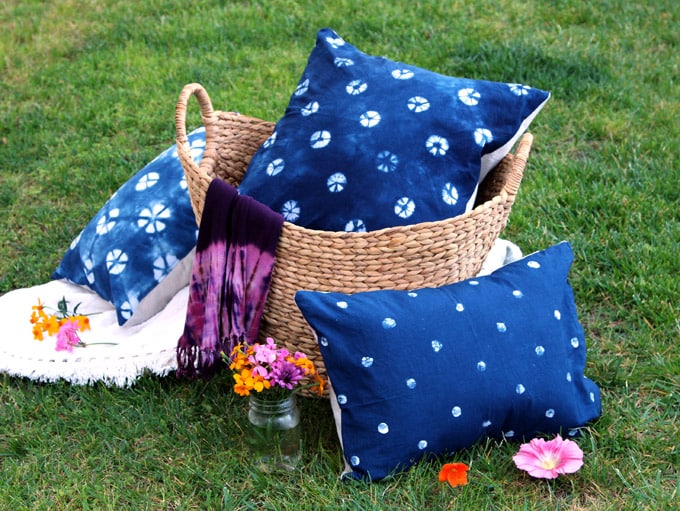
If you are wondering about how to create the polka dot pattern shown earlier in the article, I am experimenting with more fun indigo shibbori / tie dye techniques. There will be more indigo projects coming!
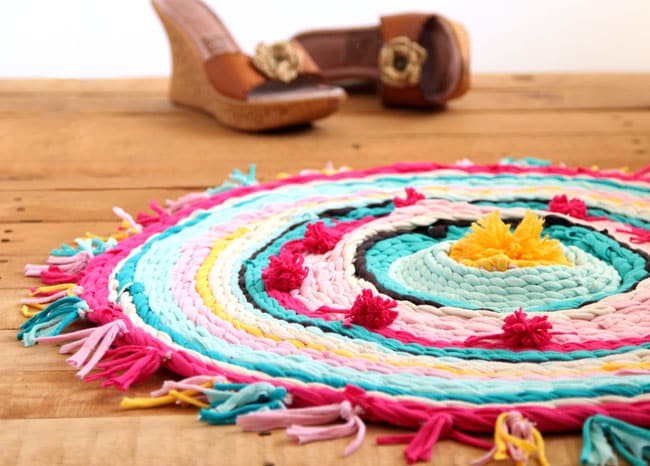
A few other fabric projects you may enjoy: weave a rug with t-shirt yarn and hula hoop
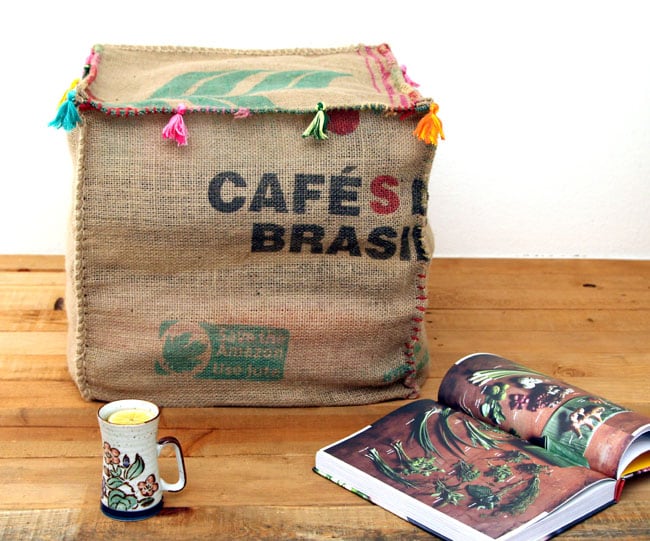
Make an ottoman from burlap coffee bean bags
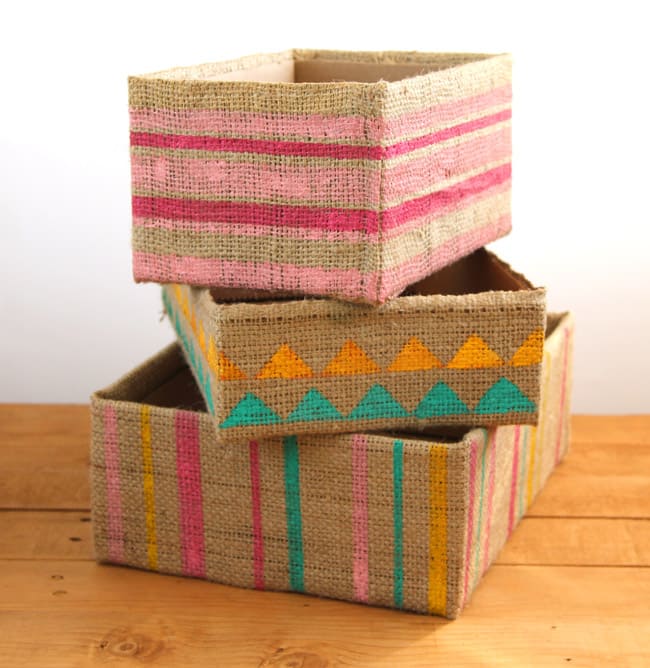
Super easy burlap covered storage boxes
Update: Here is what I made with them- super easy 10-minute throw pillows!
Happy day dreaming! xo


Indigo is a beautiful color! I remember reading that William Morris was very emphatic about the proper shade of indigo in his tapestries… one time the man who supplied him with the dye brought him a shade that he wasn’t fond of and he tossed all of it in the river. It has to be just right!
hi linda! yes indigo is such a stunning color and has to be just right! 🙂
beautiful! did you ever show how you got the dot pattern?
I love tie dye so much! And I adore natural indigo. It’s so pretty!!
Oh yea!! Definitely drooling over these shades of indigo too!! They have so much personality, and I just love what you’ve done with these amazing tie-dye creations. Gorgeous!!
Gorgeous. I’ve been wanting to do our curtains with this technique for a while now and finally have the incentive I need to get going on them after reading this post. Great tips on execution also, I’ve done a lot of tie-dye and have learned a lot of the same things through trial and error!
This brings back so many memories from when I was in Elementary school – we made a lot of tie-dyed t-shirts. This would be something fun to do for the Summer!
xx
Amanda || http://www.fortheloveofglitter.com
These are so beautiful and amazing. Indigo blue is my favourite colour, I have it in a bathroom upstairs with indigo blue floor tile and some fab blue glass jars I’ve collected over time which look great against sparkling white wall tile. I don’t think I could make those amazing fabrics you have made here but if I could they would make beautiful curtains on the big window in that bathroom. At the moment they’re white so I might just try!!.
Great tutorial. Thanks:-)
Marie
You did a beautiful job. I love indigo.
I haven’t tie dyed anything in a long time but now I want to! This came out so beautiful. I remember doing shirts in middle school.
Really pretty designs! I’ll be excited to see what you make with the fabric!
These are really cute! You did a great job with them and I love the color!
Molly and Stacie
This is gorgeous! I could never do something like this, but yours turned out so well!
The blue is so bright and beautiful. Tye dyeing is so fun. Might have to try this.
So beautiful! I love the look of the indigo dye and the polka dotted is my favorite. How will you be using the fabric?