How to Grow Potatoes: 5 Steps to A Big Harvest
How to grow potatoes in garden soil, pots, or containers easily with big yields! Great tips & best ways to plant, harvest & store potatoes.
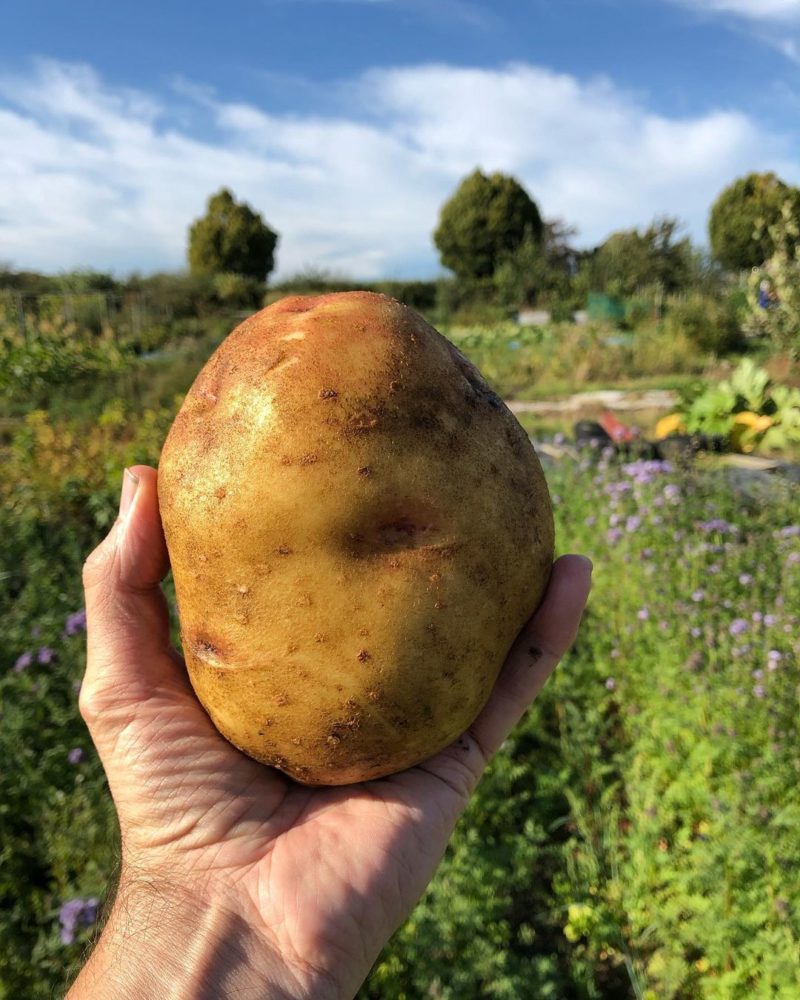
Potatoes are such productive and easy plants in the vegetable garden! We have learned a lot about growing potatoes from many gardening friends and experts.
We are excited to share lots of tips with you, plus some of our favorite tips, photos and videos from these great gardeners so you can check out their Instagram or YouTube channels!
First, a couple of FAQs on how to grow potatoes:
How many potatoes can you grow from 1 potato?
*Some resources in article are affiliate links. Full disclosure here.
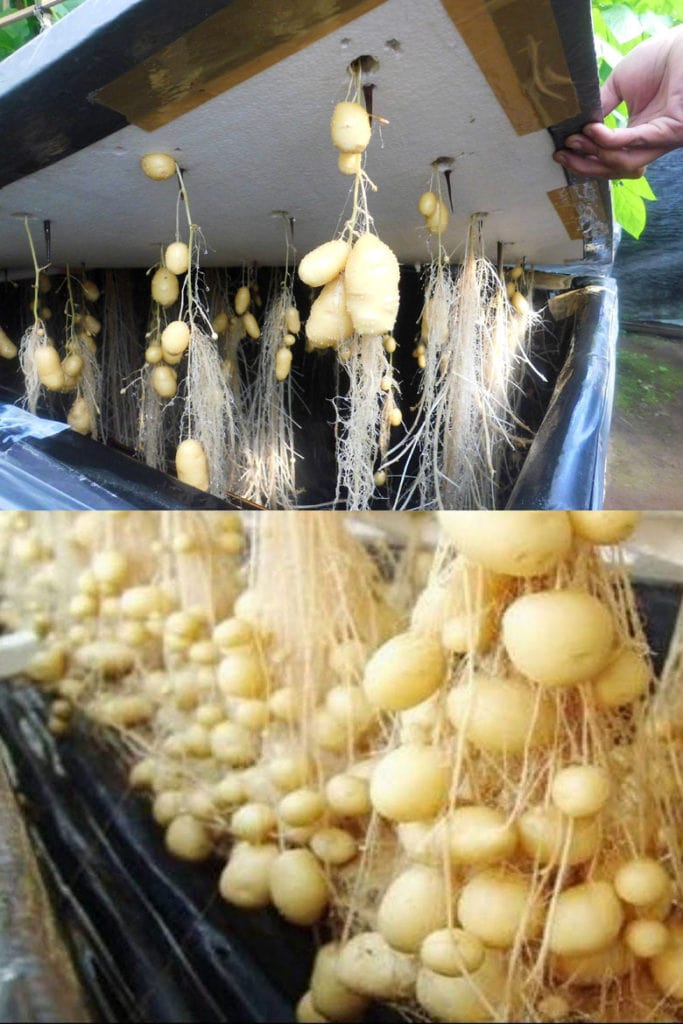
These fascinating hydroponic and aeroponic photos show us how each potato plant can produce many new potatoes on the roots!
Potatoes are really rewarding to grow at home. Given good soil and the right growing conditions, you can grow about 10 potatoes from 1 potato. Some varieties such as fingerling potatoes can produce 30 to 50 potatoes from 1 seed potato!
Can you grow potatoes from grocery store potatoes?
Yes! We have successfully grown lots of potatoes from store bought potatoes. The key is to buy organic potatoes from store or farmers markets. They are free of growth inhibitors.
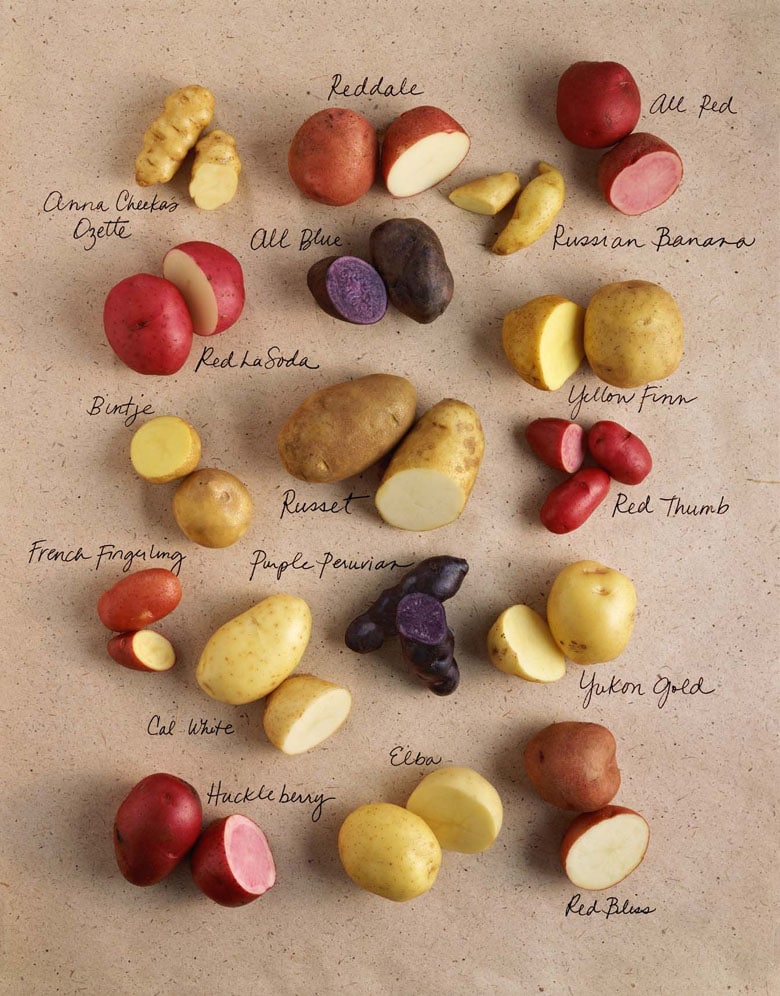
There are also many benefits to buying seed potatoes: they are disease resistant, and come in hundreds of great varieties, as shown in this Potato varieties chart. You can also save your own seed potatoes from your garden harvest.
When is the best time to plant potatoes?
In very cold climates, you can plant potatoes in April, 6 to 8 weeks before the average last frost date or temperature of the soil is at least 43°F (6°C), ideally 50°F (10°C).
In mild winter climates, potatoes can be grown as a fall crop in September and spring crop from January through April. However, I have read articles from gardeners in zone 5 planting potatoes in fall with a deep mulch system to get the roots growing through winter!
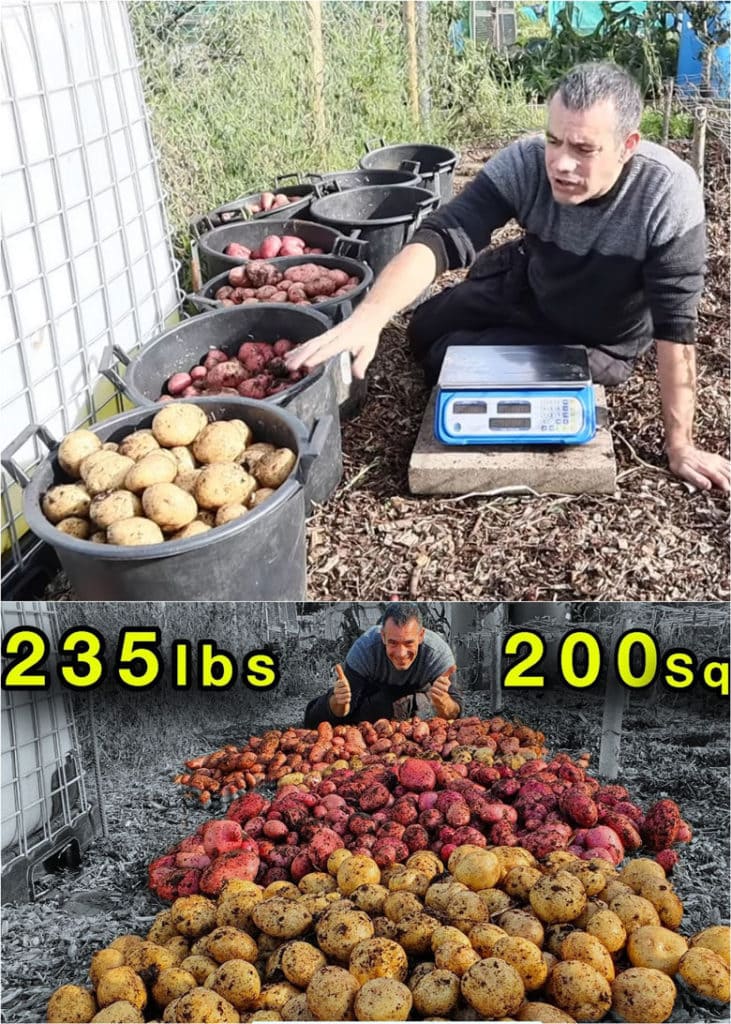
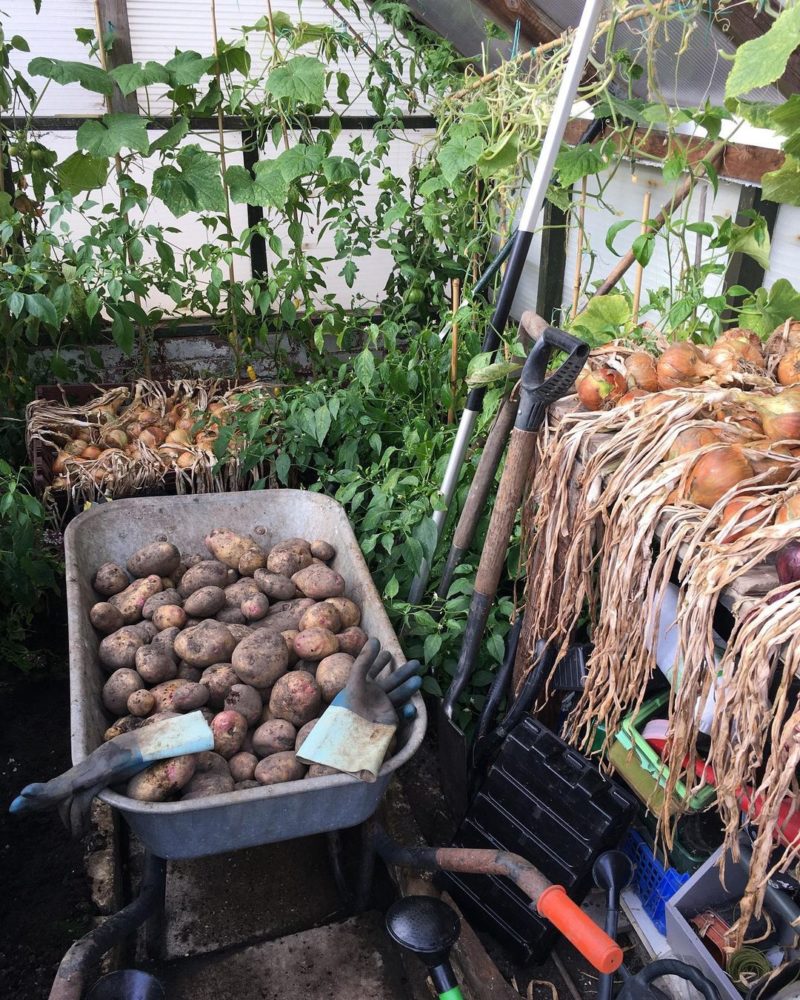
My friend Steve in a fabulous gardener in UK. Look at his 20′ of abundant potato harvest! He gave me a lot of great tips for this article. You can follow him here!
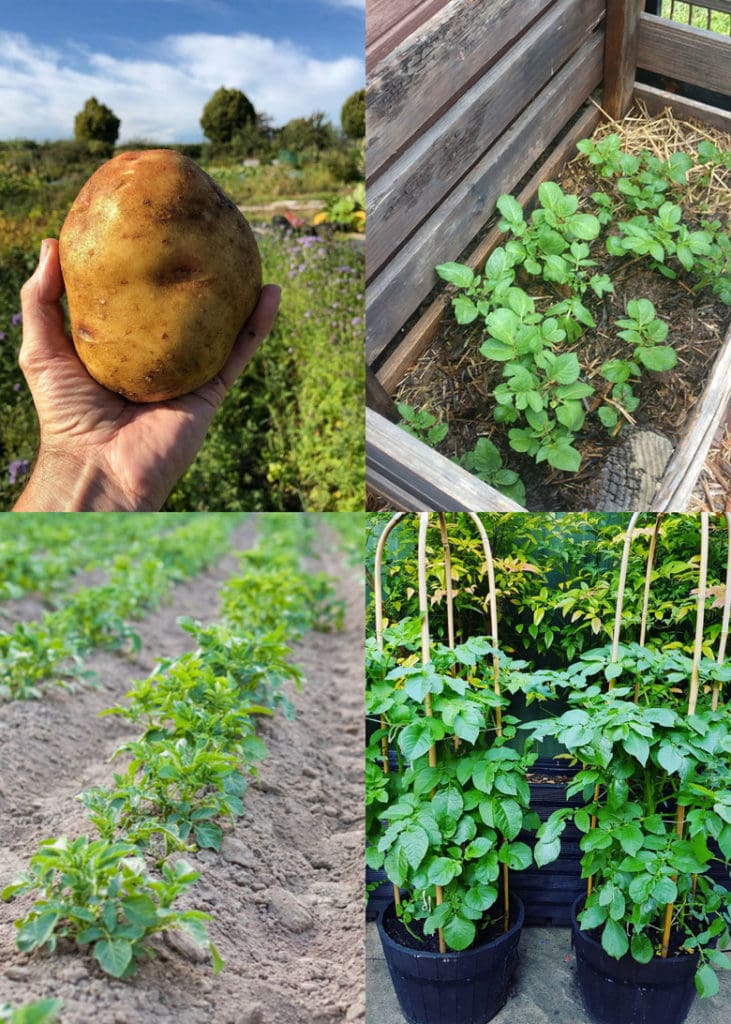
Step 1: choose the right varieties for your garden
Potatoes come in early, mid and late season varieties. People often ask: “How long does it take to grow potatoes?”
Early varieties can be ready to harvest 50-70 days after planting. Mid season varieties take 70-90 days. Late season and fingerling varieties can take 90-120 days to mature.
Mid and late season potatoes are called the “main crop” because they often produce more, and are better for longer storage because of their thicker skins.
When planning your potato planting, it’s good to mix these varieties so you can try great new flavors, have a long harvest season, with surplus for storage!
Step 2: Sprouting potato eyes
Pre sprouting (aka chitting) your potatoes can advance your first harvest by 1 to 2 weeks! Great idea of chitting potatoes in egg cartons by my_allotment_story.
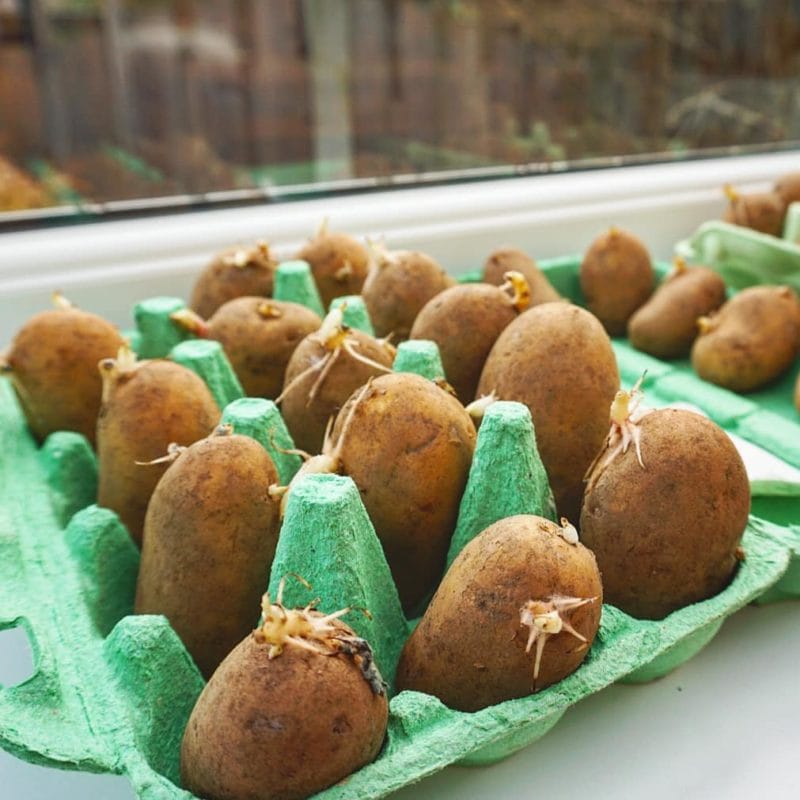
2 to 3 weeks before your planting date, place your seed potatoes in a bright (not direct sun) area in your home. The potato eyes will start to produce strong short green sprouts which will be ready to grow into plants as soon as you get them in warm soil.
Some gardeners cut potatoes that are bigger than 2” diameter into smaller pieces, and let them callous for 3 days before planting. This is entirely optional. Many great gardeners prefer to plant whole potatoes and get huge harvests as well.
Step 3: how to grow potatoes in the ground or in pots
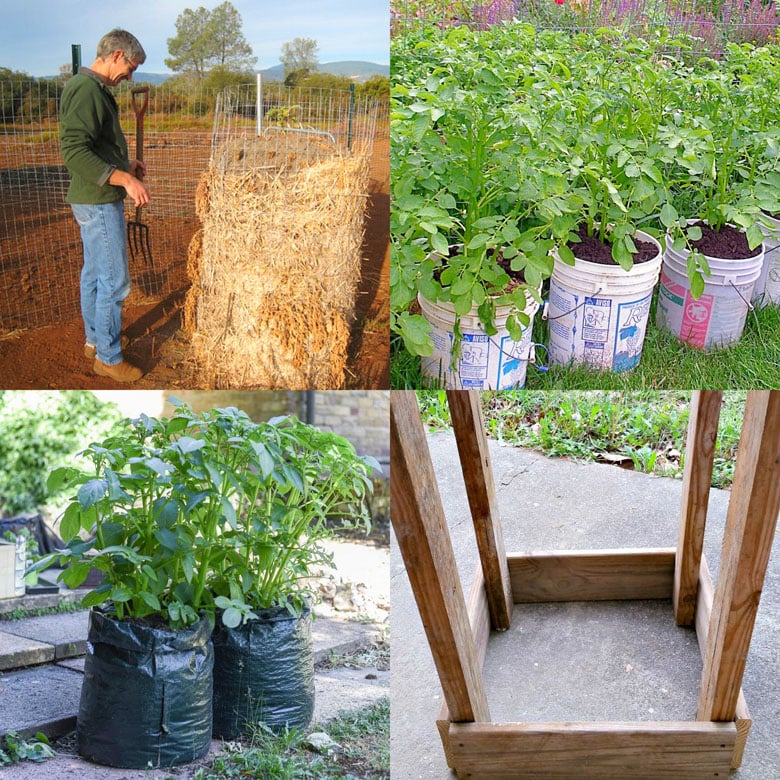
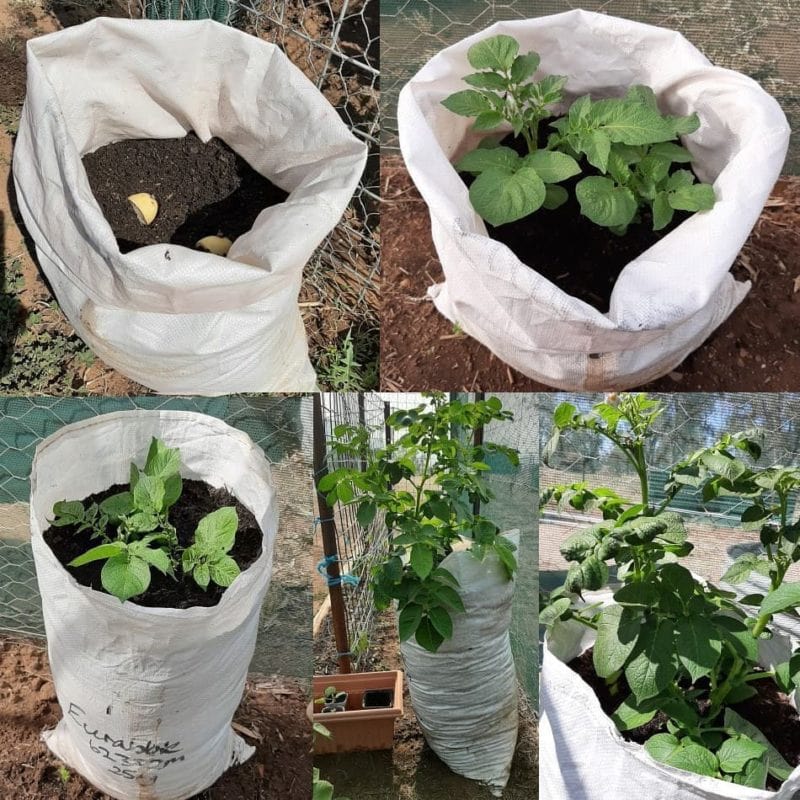
If you want more info on potato planters, check out this detailed guide on on how to plant potatoes in containers, and choosing the best grow bags, buckets, pots, boxes, etc!
Potatoes are heavy feeders. The best soil to grow potatoes should be loose, well draining, and contains lots of organic matter such as compost that holds moisture well. Here are some of the best ways to make compost for your garden, and 35 great DIY compost bin ideas.
Tony shares his amazing potato growing tutorials on Youtube, see video above. If you love gardening, you would love his channel here!
Instead of ongoing fertilizers, most gardeners like to mix some good fertilizers into the soil at planting time. Best organic fertilizer for potatoes is a mix that is balanced in the 3 essential nutrients, indicated by the 3 numbers on the bag: nitrogen-phosphorus-potassium.
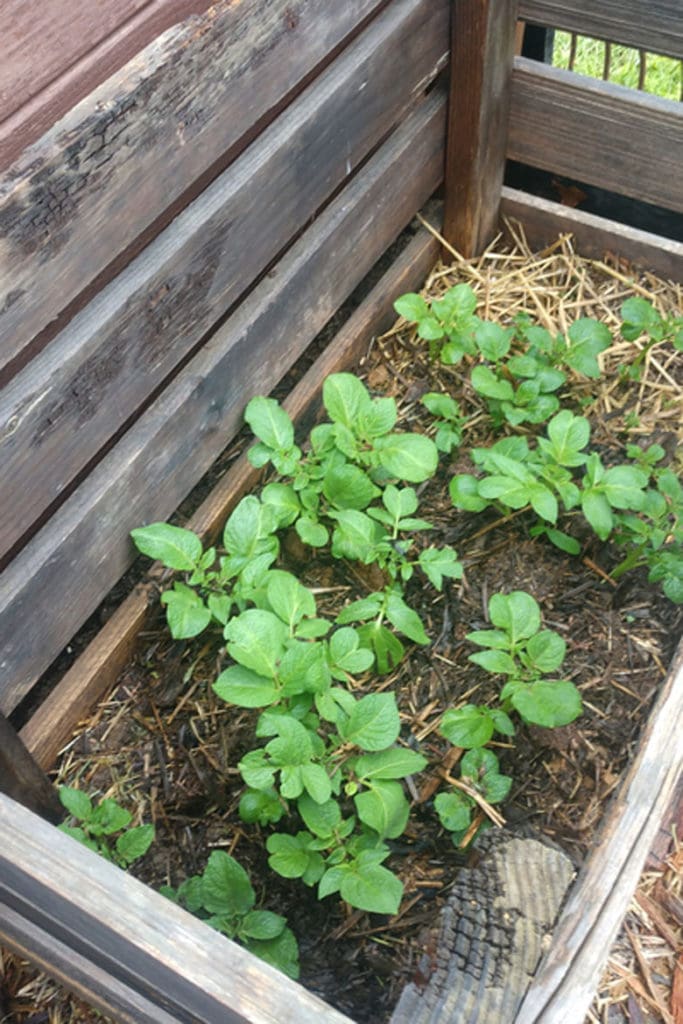
If you grow potatoes in pots, Tony recommends these 10 gallon plastic or fabric pots which is the best combo of productivity vs size. Plant 2 to 4 potatoes in each pot at a depth of 6 to 8 inches, and add a 2 to 3” layer of straw or mulch on top.
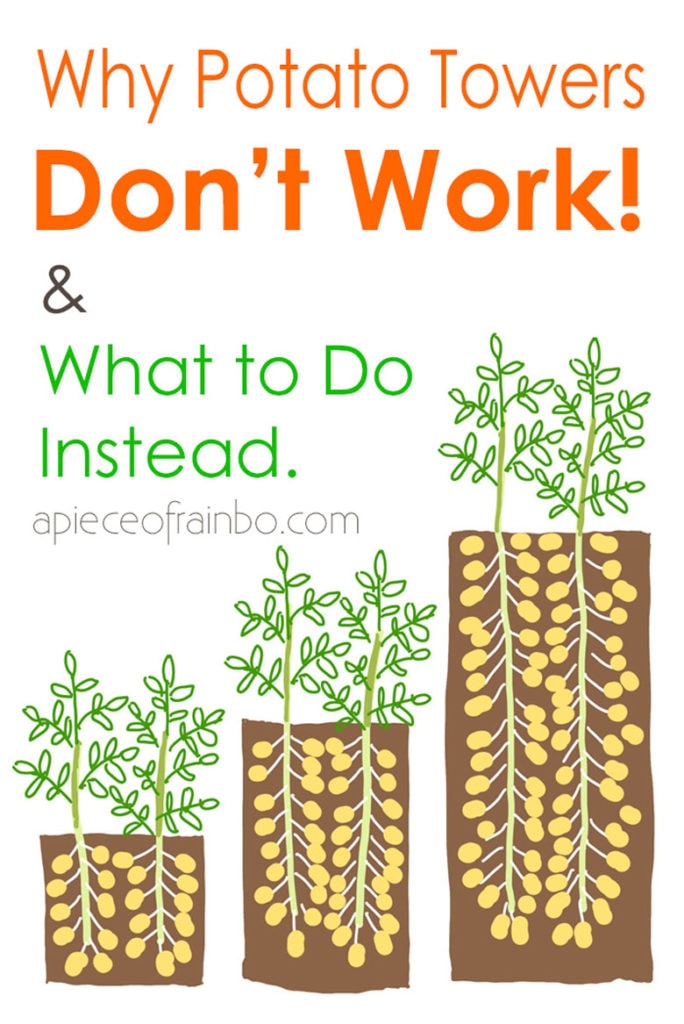
You can grow lots of potatoes in pots, grow bags, raised beds, or garden soil. You might be tempted by those pictures, but DO NOT grow them in potato towers! Here are all the reasons why potato towers don’t work!
If you are planting potatoes in the ground , you can either dig a trench or individual (aka the no dig method) at 6 inches deep. Early season varieties are generally planted 8″ to 12″ apart. Late Season Varieties & Fingerling Varieties should be planted 12″ or more.
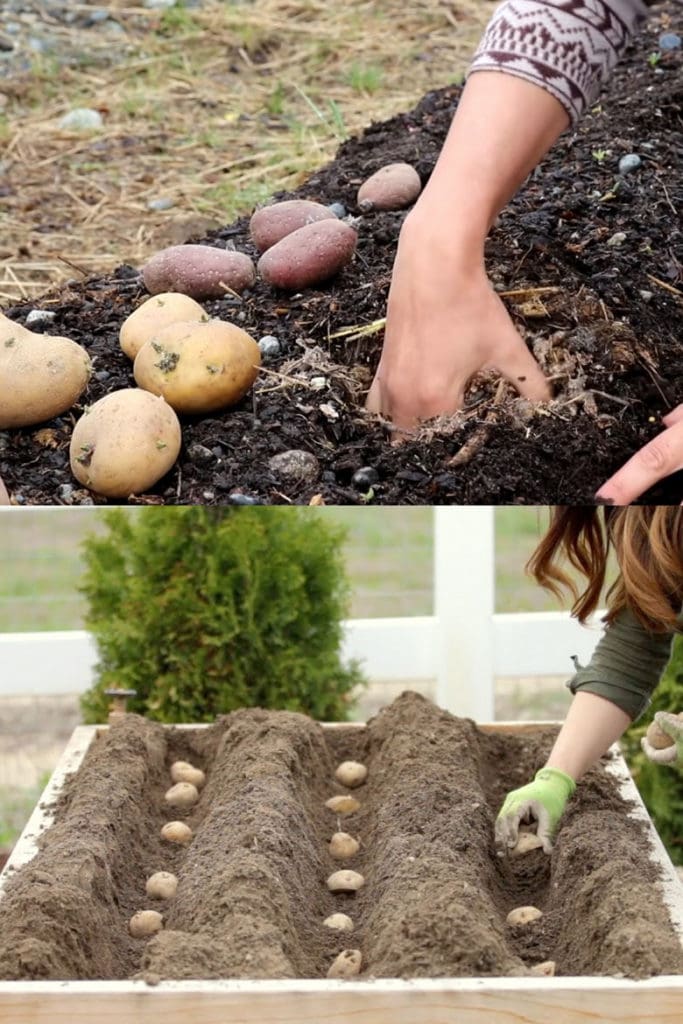
Cover the holes or trenches with soil. Water thoroughly. Images above and video tutorial below by Simple living Alaska and garden matter.
Straw and other types of mulch also help conserve moisture in the soil. More on this in next step.
Potatoes do not grow well in dry or soggy soil. Water them regularly when soil gets dry. They tend to need more frequent watering in summer and less in cooler weather.
Step 4: the right and wrong ways to hill or mound potatoes
You probably are familiar with the myth “the more dirt or straw you mount around the potato plants, the more potatoes will grow from the stems”. This is actually NOT true!
Like tomatoes, potatoes also come in determinant and indeterminate varieties. Determinant potatoes (such as Yukon Gold) only form new potatoes in a single layer right above the seed potatoes. Indeterminate potatoes keep forming new tubers but no more than about 12” above the seed potatoes. Photos above and below by Old World Garden Farms.
So when you plant seed potatoes at 6” or deeper, you will not increase production by hilling dirt or straw to more than 10” high mound.
In fact, when the straw mulch or soil mount is too high, it will decrease production by reducing the green foliage that feeds the roots through photosynthesis, which is why potato towers often produce dismal results.
The main purpose of hilling is to protect the newly formed potatoes from being exposed to sun light, turning green, and becoming inedible. Photo above by Grow Create Save.
Once the potato plant stems and leaves are 8 inches out of the ground you can start to hill up dirt or straw around the stem a few inches at a time over a two month period until your mound is 6-10 inches tall and 12-18 inches wide.
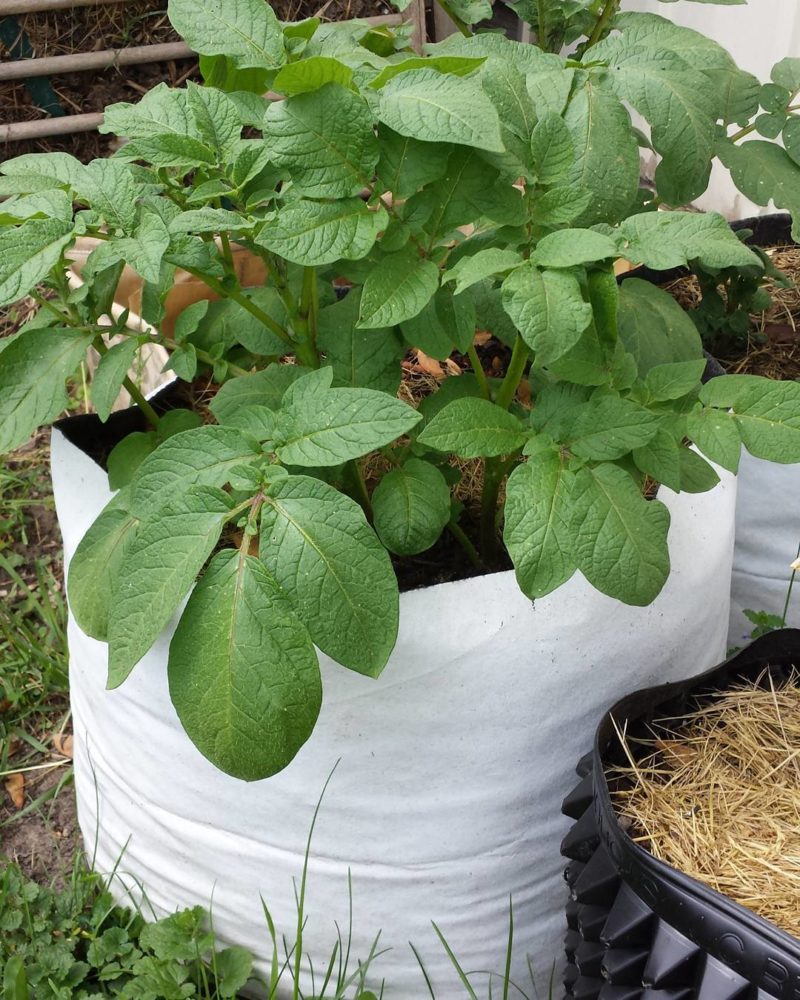
In a container or grow bag , simply plant the potatoes at 6″ to 10″ deep, and add 2″ of straw mulch to keep the soil from drying out too fast. Photo by the Wisconsin vegetable gardener.
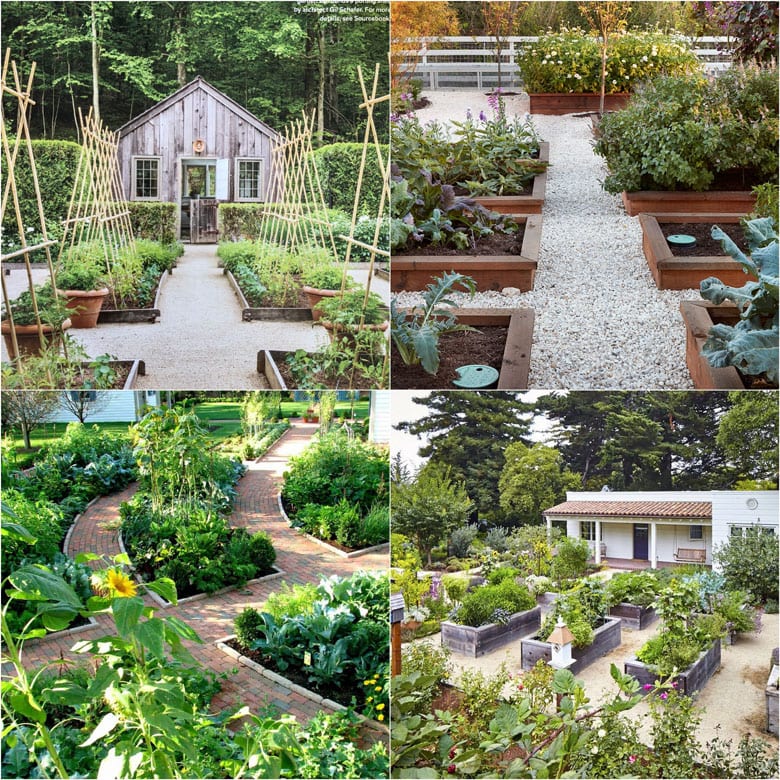
You may also love: 7 best vegetable garden layout ideas and designs!
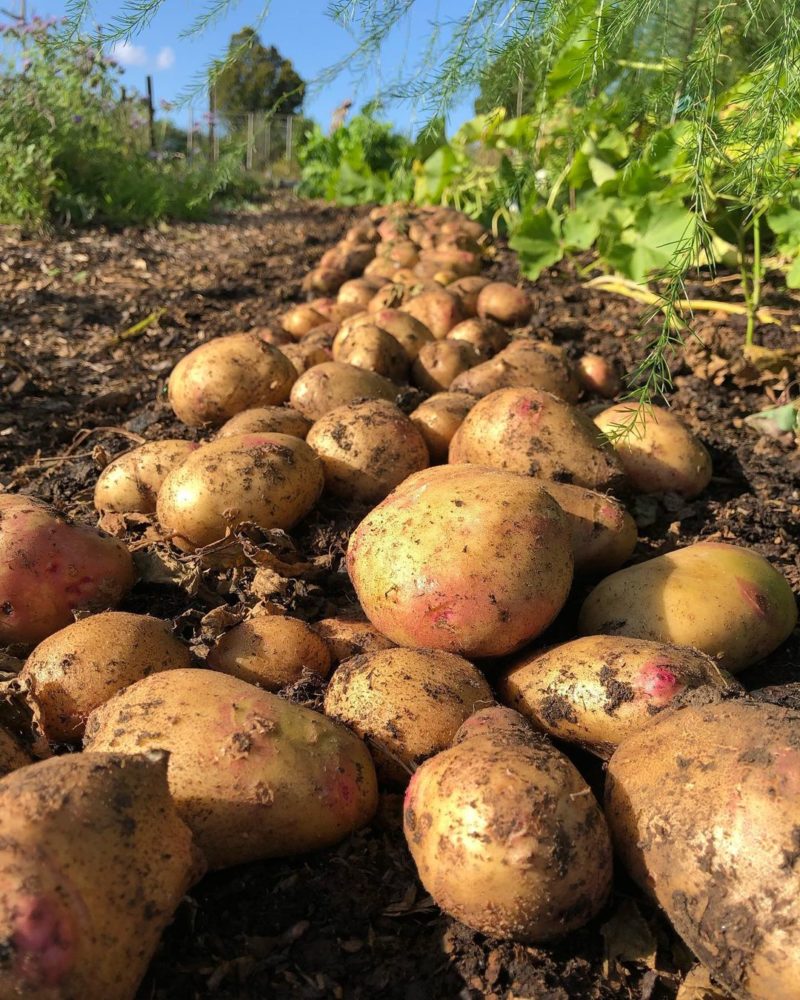
Step 5: when to harvest potatoes & how to cure and store potatoes
Some say that you can harvest potatoes when they flower. You can actually reach into the soil and get a potato here and there at this time. However, if most of the leaves are still green, it means that the potatoes are still getting bigger.
Potatoes are ready for harvesting when more than 50% of the leaves have turned yellow.
Stop watering about 2 weeks before harvest. This will help cure the potatoes for harvest.
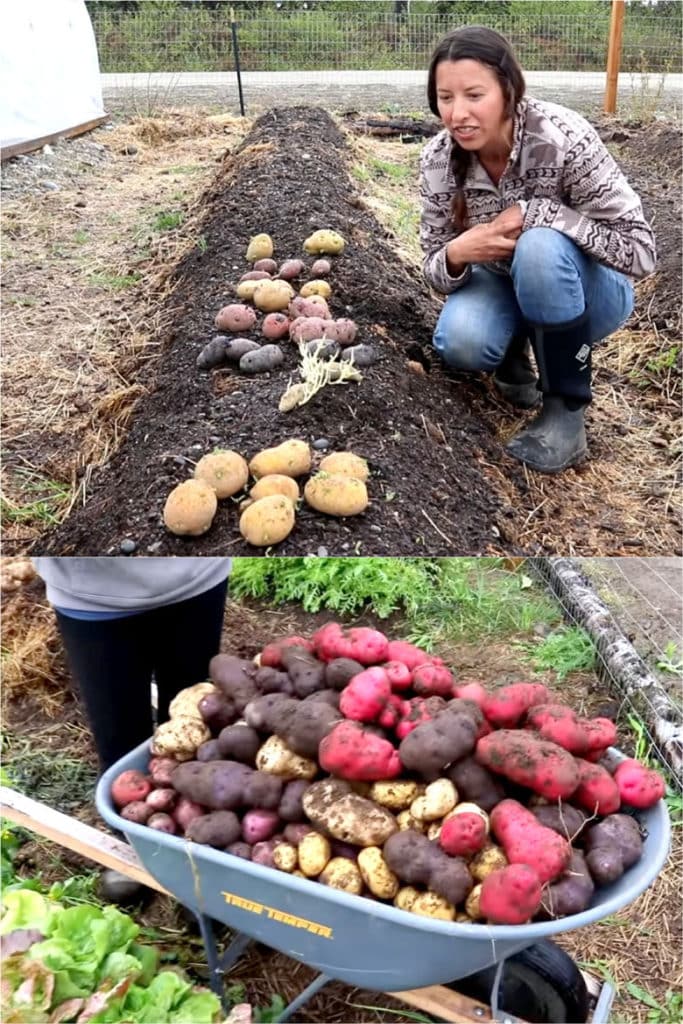
Dig up the new potatoes by hand or with a fork or shovel. Photo below via facebook.
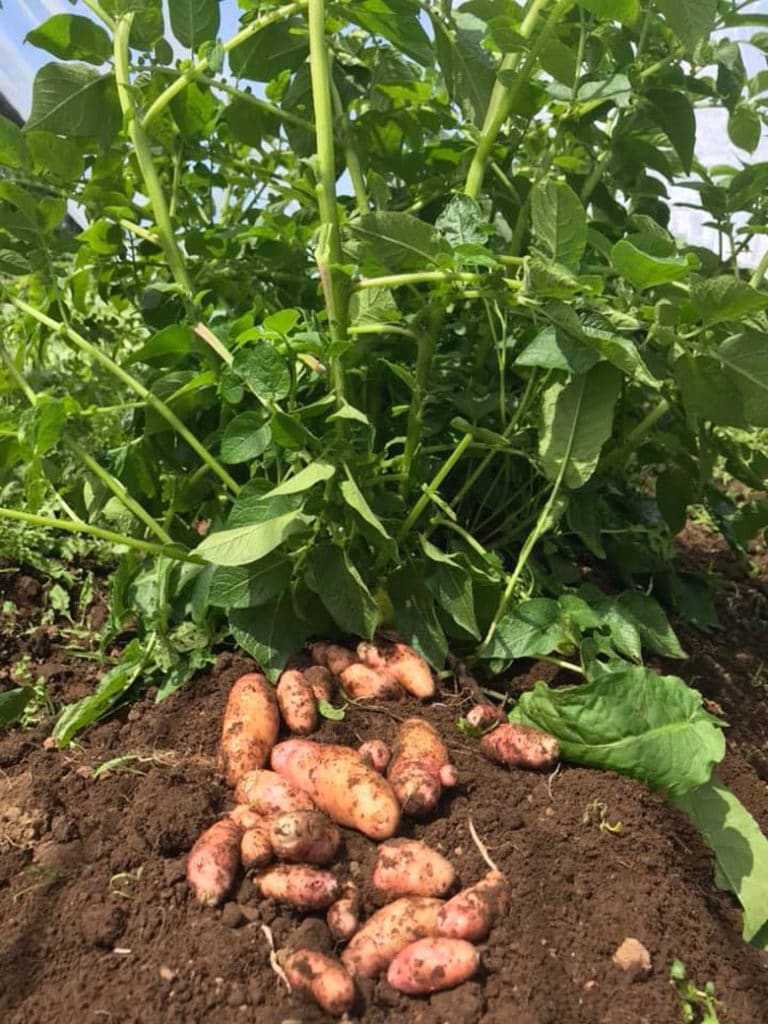
Gently dig 8 to 10 inches away from the base of each plant and lift the soil up with the stems. Sift through the upturned soil and roots to find all the new potatoes.
Do not scrub the potatoes too much. You can gently dust off some soil or give them a light rinse and let dry.
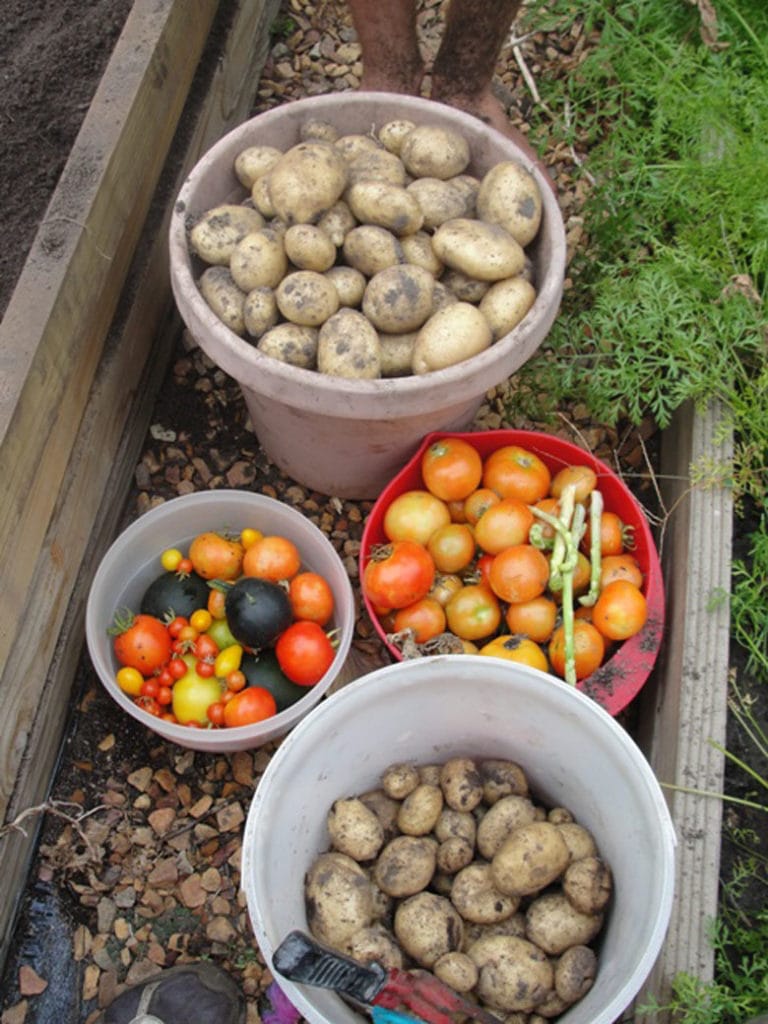
Eat those potatoes that are damaged by shovel first! 🙂 Harvest photo below from Urban Homestead.
Cure newly dug potatoes for 7 to 10 days in a dark, well-ventilated and sheltered area. The potatoes skin will get thicker and they will last longer in storage.
Potatoes store very well in a dark and cool place between 45°F (7°C) and 55°F (13°C).
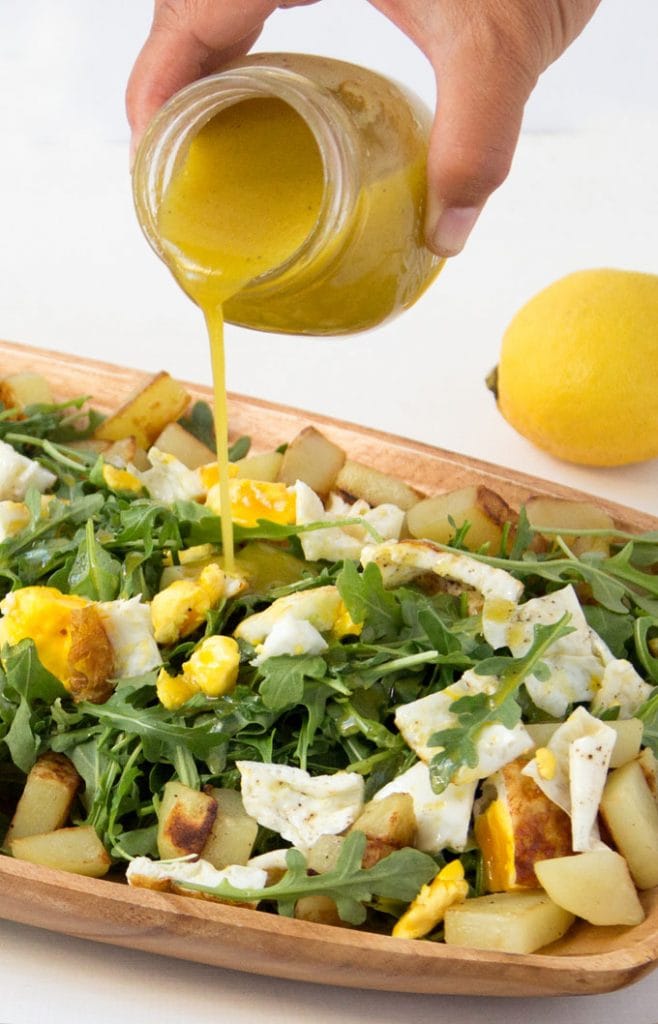
One of our favorite potato recipes is this super easy and yummy golden potato salad with eggs and fresh greens!


Hi! This was so informative. I actually have some potatoes that I’ve forgotten about that already have chitting. I have an unused tractor tire just laying around. What would be the best way for me to plant potatoes in there if that’s possible.
hi Elena! thank you! 🙂 i would use the tires like a planter, no need to stack them if the bottom is open to the soil. more details on spacing etc can be found in this article- https://www.apieceofrainbow.com/grow-potatoes-in-containers-bags/
I tried last year to grow potatoes in a grow bag and pretty much got nothing. Thank you for the info on how to do it the right way this year. Hopefully I will be able to share some pictures of the abundance of potatoes. Just in case anyone wants to keep tomatoes doing good remember to take out the suckers from in the middle of the branches.
hi Amy! good luck this year! we often got the best results by just planting them at the right depth and not keep adding soil so much later. 🙂
I am brand new to gardening. I planted seed potatoes in grow bags in January here in Florida.
The leaves have all turned yellow, and just this morning I harvested one bag and all my potatoes are tiny. What do you do with the yellow leaves? And can I replant any of the potatoes that I just harvested?
hi Larissa! yes you can plant these potatoes. this post has lots of inspiring examples of how to get a good harvest when planting in bags and pots, 🙂 you might find it helpful – https://www.apieceofrainbow.com/grow-potatoes-in-containers-bags/
Garden websites generally do not care about/grow in FL, and we are NOT like “other” states!! Yes you can replant your harvested “babies”. Call your local college horticulture dept – University of FL is quite helpful (central FL) on soooo much garden info from plants to bees, “worms” etc. FL IS a unique gardening challenge HA but possible. 60 years and still learning/producing!
so true! even northern and southern California, coastal or inland, can be quite different too! 🙂
Towers not working??? It’s the only way I have room to grow, and get over-abundant crops for just one person- enables me to share with others. Large plastic container- (NOT burlap bags) cut out bottom- put around plant when above ground, and just add dirt/grass clippings as plant grows. Potatoes grow and fill in to edges. Watering is the basic necessity- like all potato plants require. Harvest- just tip over the container!
hi karen! i think that when you compare the method of keep layering dirt/clippings, vs just planting the potatoes in pots like this- https://www.apieceofrainbow.com/grow-potatoes-in-containers-bags/ , you can see that the mounding process actually can reduce productivity! most gardeners get a bigger harvest just planting potatoes in pots at the right depth, without continuously burying the stems! 🙂
I just landed on your blog through search and I’m impressed how wonderfully you have described growing vegetables at home. Do you have a blog related to how to grow tomatoes at home?
thanks Amber! 🙂 we do have one on tomatoes: https://www.apieceofrainbow.com/grow-tomatoes-100-lbs-20sf/