Design & Install Your Dream IKEA Kitchen: An Ultimate Guide!
Detailed step by step guide on how to design and install your dream IKEA kitchen with lots of helpful resources and tips we learned through our DIY modern farmhouse kitchen remodel!
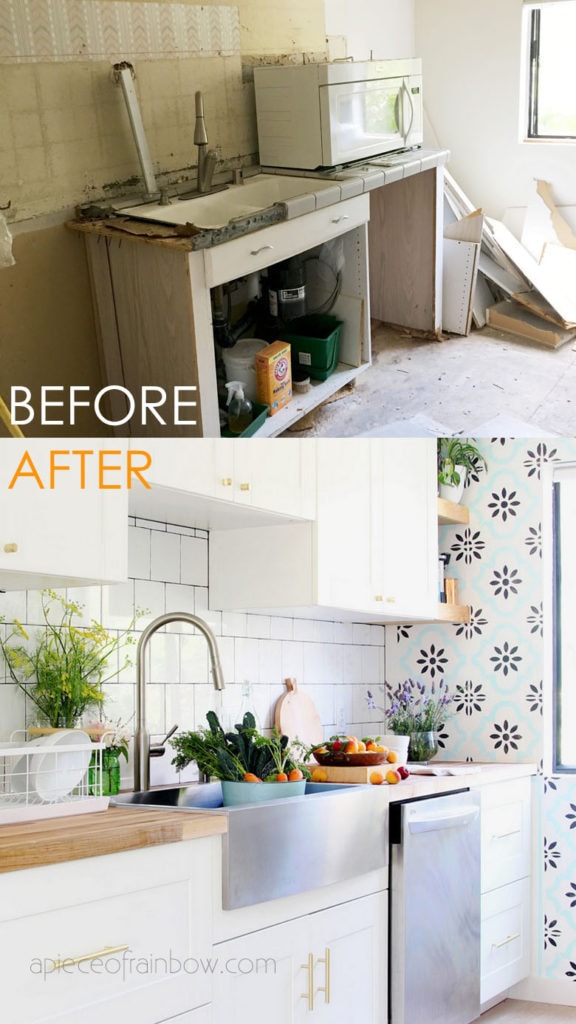
When we bought our house earlier this year, we never thought that we would be diving into a complete kitchen remodel in just days after closing, thanks to an unexpected flooding!
So we designed and installed an IKEA kitchen (mostly DIY using IKEA Sektion kitchen cabinets), and we are in love with it!
We have so much to share with you about DIY kitchen design and remodel in this epic guide! It is truly empowering to be able to create an entirely new kitchen mostly on our own. Anyone can do it!
Now let’s look at the 8 steps it takes to design and install an IKEA kitchen from start to finish! Some of these steps will require a more detailed tutorial on its own, and I will link to them as they are published in future. Join us and get weekly creative home and garden tips and tutorials!
*Some resources in article are affiliate links. Full disclosure here.
- Our modern farmhouse IKEA kitchen remodel before and after, with 8 best tips!
- How to design and install your own IKEA kitchen from start to finish!
- How we gave our old dated fridge a beautiful $2000 new look! 🙂
- 100 day review of our stainless farmhouse sink.
- 2-Ingredient natural DIY butcher block countertop & cutting board oil conditioner recipe.
- How to paint kitchen cabinets, and #1 mistake to avoid.
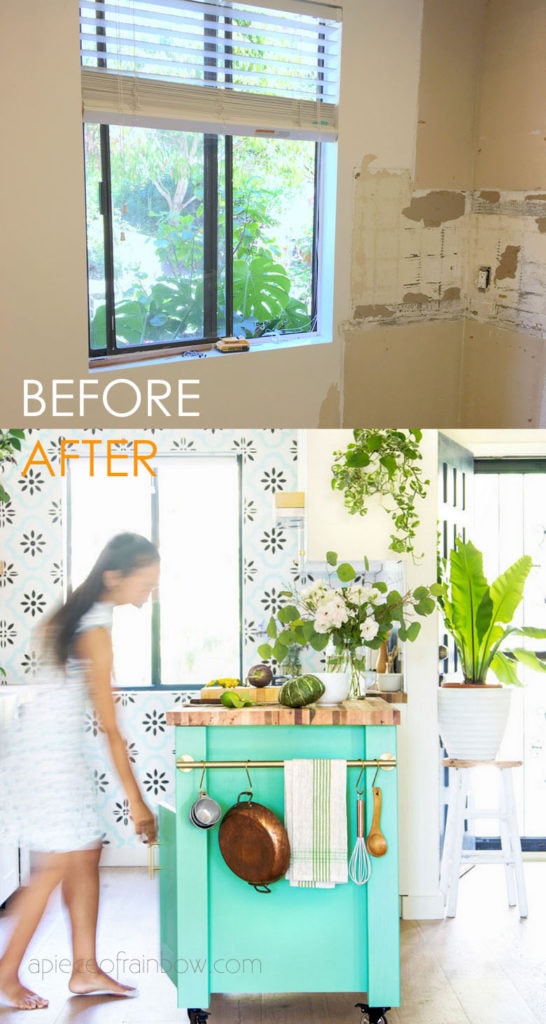
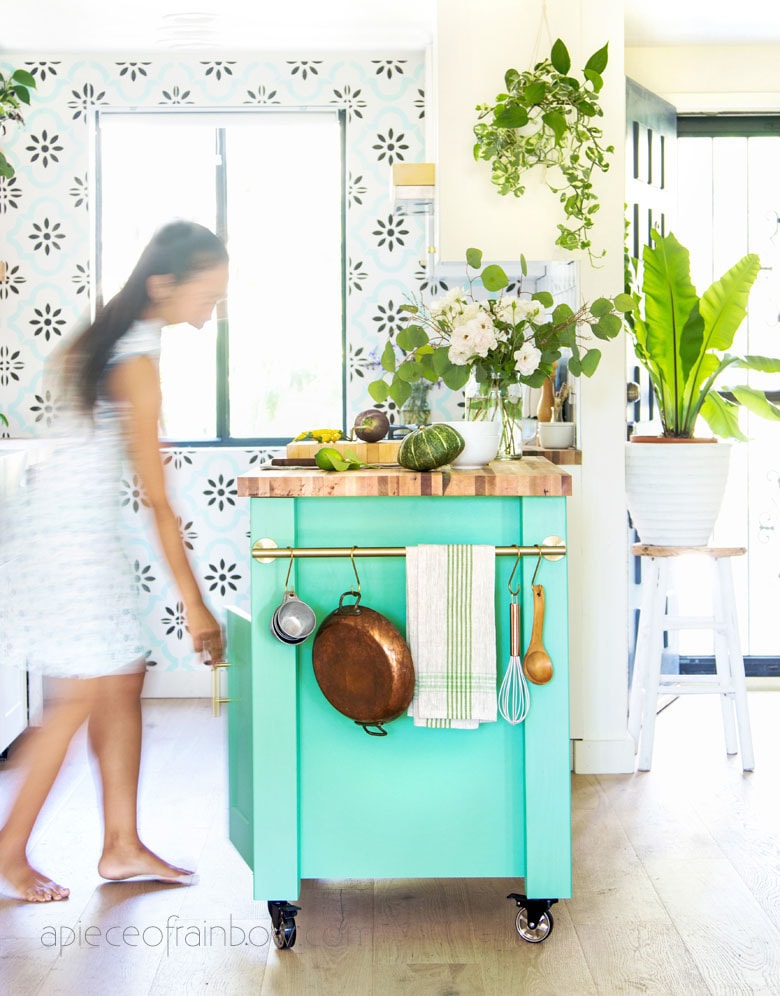
- Boho farmhouse DIY kitchen island: an IKEA Hack!
Why we chose an IKEA kitchen
IKEA kitchen cabinets are smartly designed and very well made. They are such a great value compared to custom cabinets, and they offer lots of flexibility for creative kitchen design and layout.
How much does an IKEA kitchen cost?
Our IKEA sektion kitchen cabinets (we did the installation ourselves) with lots of drawers cost about $4000 for our 12′ by 7′ kitchen. If we were to hire contractors to install custom cabinets of similar quality, it could cost $10000 to $15000.
How hard or easy is it to install your own ikea kitchen?
If you can put together a few pieces of IKEA furniture, you can do most of it. It is super easy to assemble cabinet cases. It takes patience and precision to hang ikea kitchen cabinets and keep everything really level.
The things we did not DIY in our IKEA kitchen: demolition, floor, electrical, plumbing and appliances, countertop, and tile backsplash. However, I would definitely DIY a kitchen tile backsplash in future, and the butcher block countertop is also something we would consider to DIY.
Our favorite tools for DIY kitchen remodel:
- cordless drill, screw driver, hammer,
- stud finder, levels: a shorter 12″ level is very handy, and a 48″ or longer level is must have for kitchen cabinet installation, drywall anchors and screws, cabinet hardware jig
- a hack saw to cut metal rails, jig saw to cut openings in the back of sink cabinet.

Step 1: design your IKEA kitchen
The two main things to focus on during the design phase are space planning and material selections.
A kitchen remodel should start with analyzing current space layout, challenges and opportunities. You can refer the 8 most helpful tips on how we changed our kitchen here!
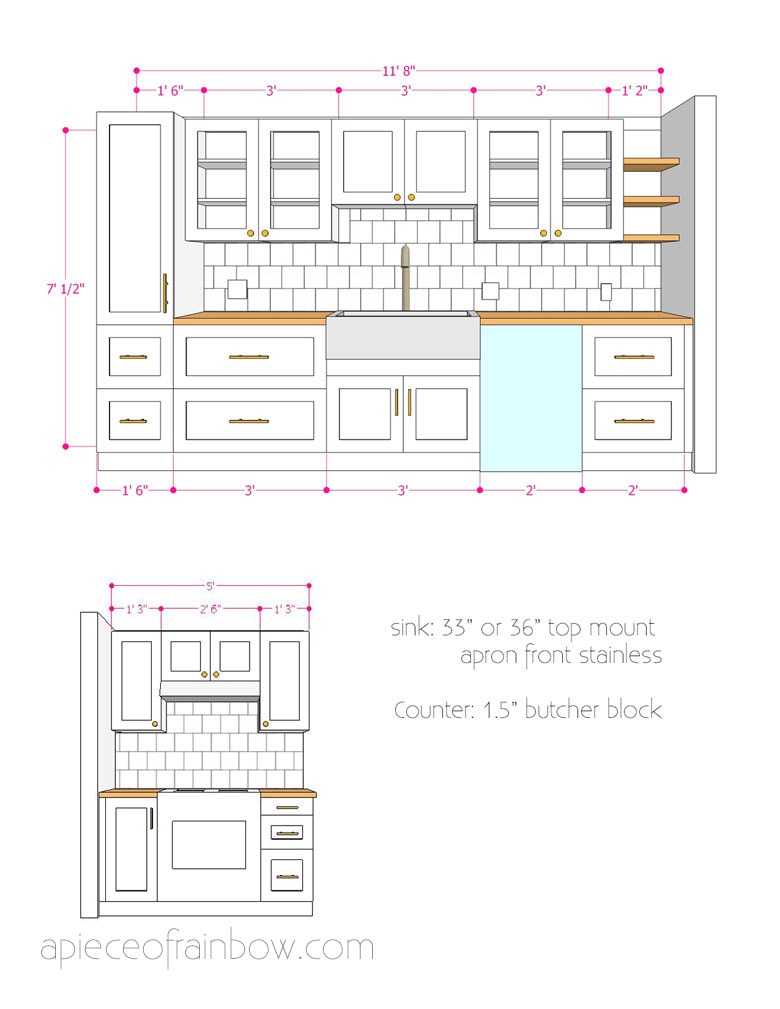
We used IKEA kitchen design software to create the basic kitchen layout, and used Sketchup to fine tune the details like open shelves, hardware, etc.
Ikea kitchen design software is a bit clunky to use, but it is super helpful in many ways. You can drag and drop the exact cabinets into the kitchen and quickly see how everything works.
Step 2: kitchen demolition & prep
After designing your kitchen and figuring out a schedule, the next step is kitchen demolition and preparation.
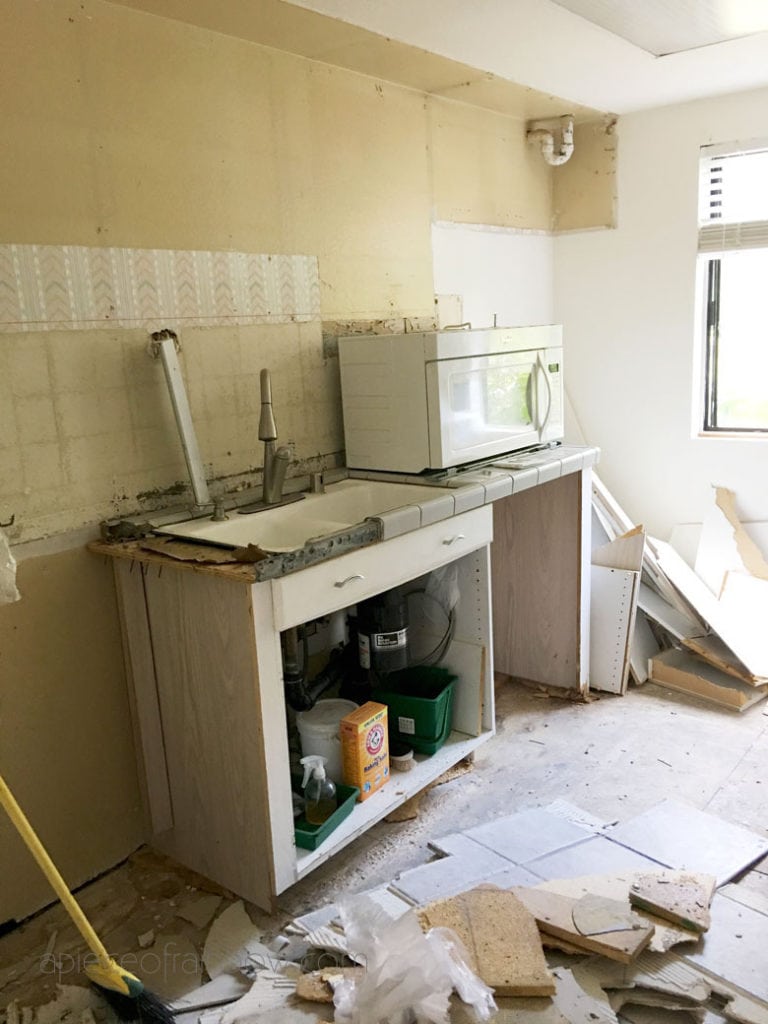
In our case almost everything got removed. If you need to change any plumbing or electrical, it is a good idea to do it before repairing the ceiling, drywall and floor.
Our kitchen cabinets sit on the sub-floor. They can also be installed on finished floor. The walls should be relatively flat and primed, so they are water resistant, and good for tiling at the end.
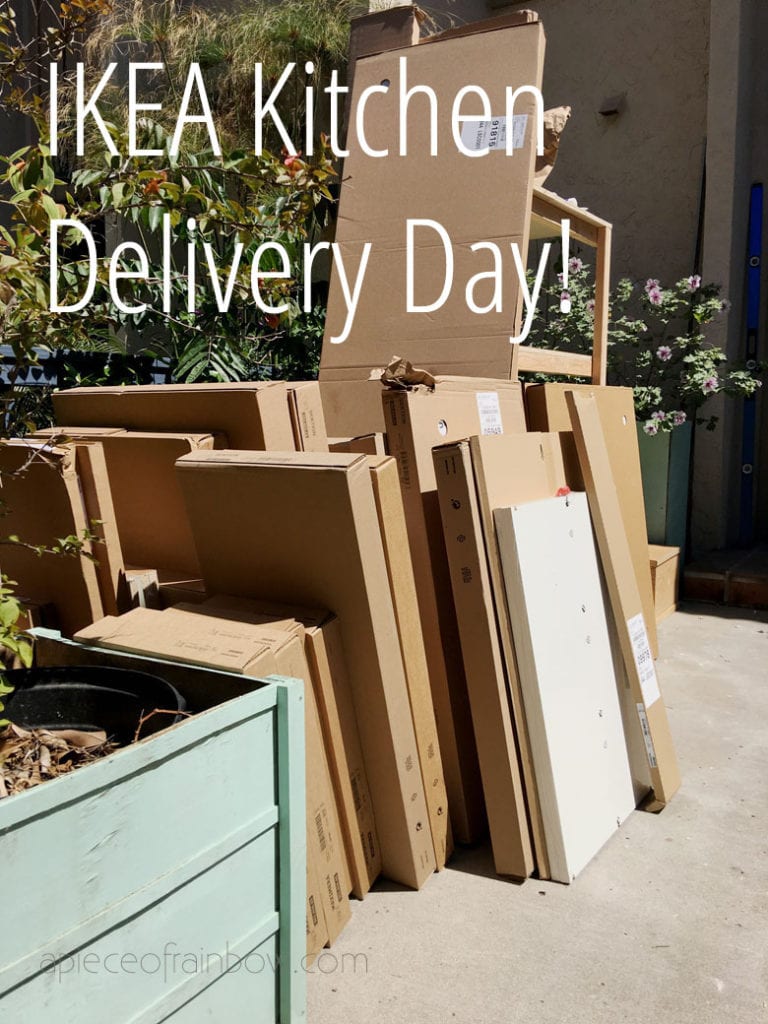
Step 3: IKEA kitchen cabinets order and delivery
You can purchase your IKEA kitchen cabinets (and appliances) online or in store, either way, make sure to check the plan carefully for mistakes.
We went to the store to order everything, and a helpful staff member checked our plan and made sure we ordered everything we needed including toe kicks, filler pieces and side panels.
You can schedule a delivery date to be a few days or a few weeks after the order date, or call to change your delivery date which is very helpful!
Delivery day was such an exciting day! We sorted the 100+ boxes by items, and checked them off our order list. Always plan for Ikea delivery mistakes that might delay your remodel! We found 2 wrong items. We called IKEA (very long holding time) and they came back with the correct items and picked up the wrong ones.
Step 4: assemble IKEA Sektion kitchen cabinet cases
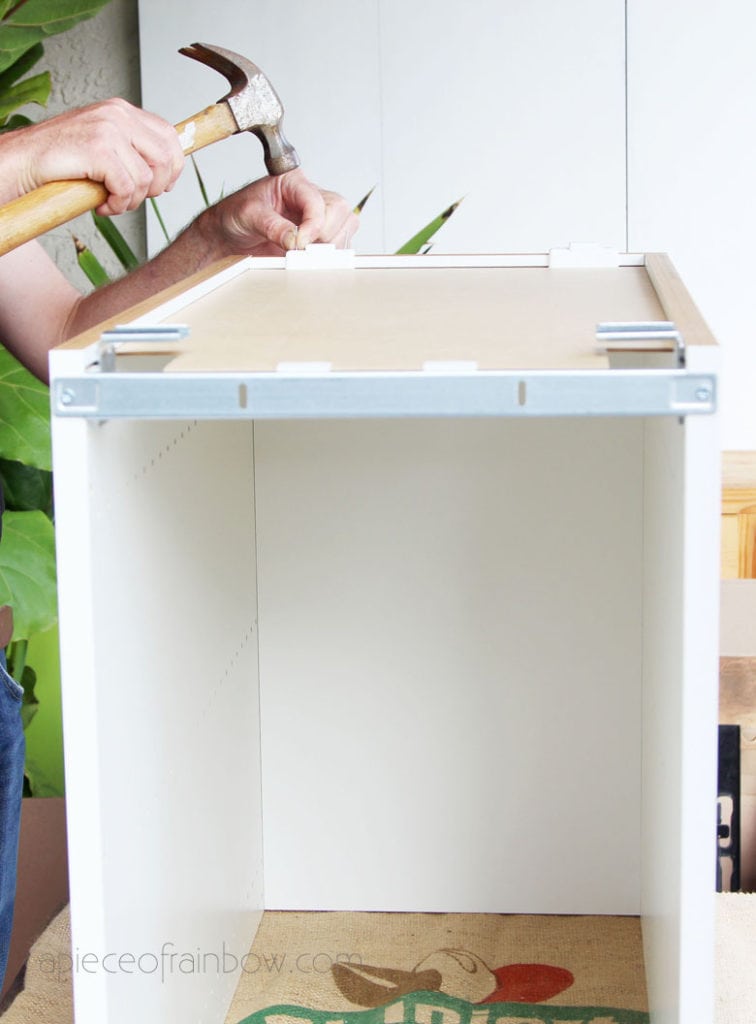
Theoretically you should hang the IKEA Sektion suspension rails first, then assemble IKEA kitchen cabinet cases and hang them in place, so you don’t end up with cabinet cases everywhere in your house.
We were nervous since we have never done a kitchen remodel before, so we started with a couple of cabinet cases to build some confidence, then installed the rail, which is a bit more challenging.
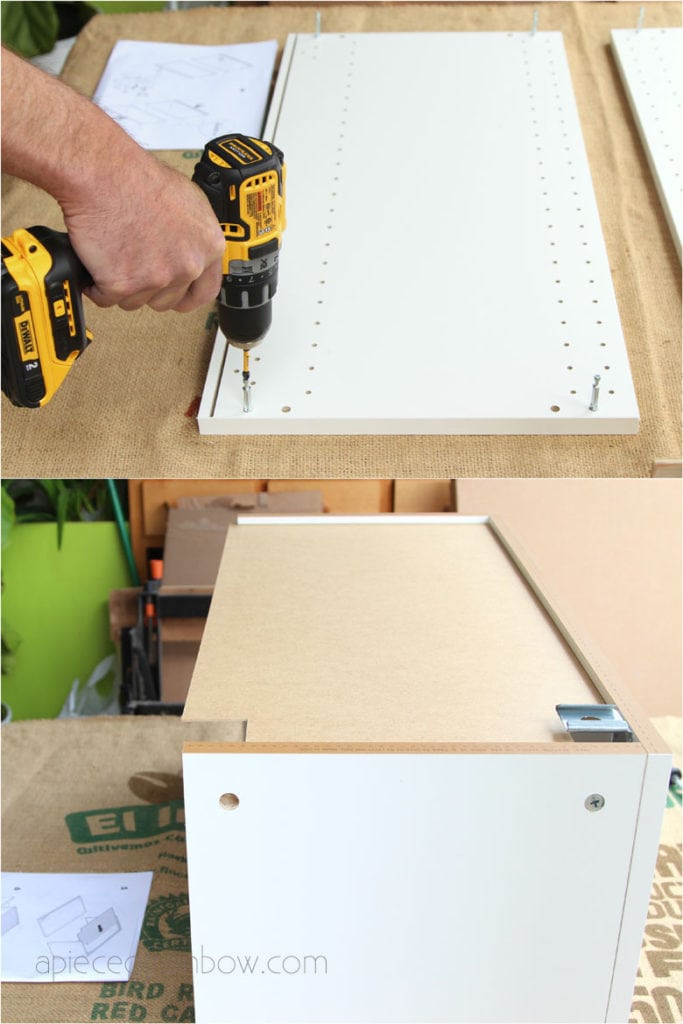
If you are new to this, I highly recommend starting with assembling kitchen cabinet cases, because it was super easy and fun to do. We got into such a groove that we were able to put together each case in 10 minutes!
Step 5 : install Sektion suspension rail and hang kitchen cabinets
The most important thing in this step is to keep the rail and all the cabinets as level as possible, especially along the lower cabinets, because your countertop needs a level surface to support it.
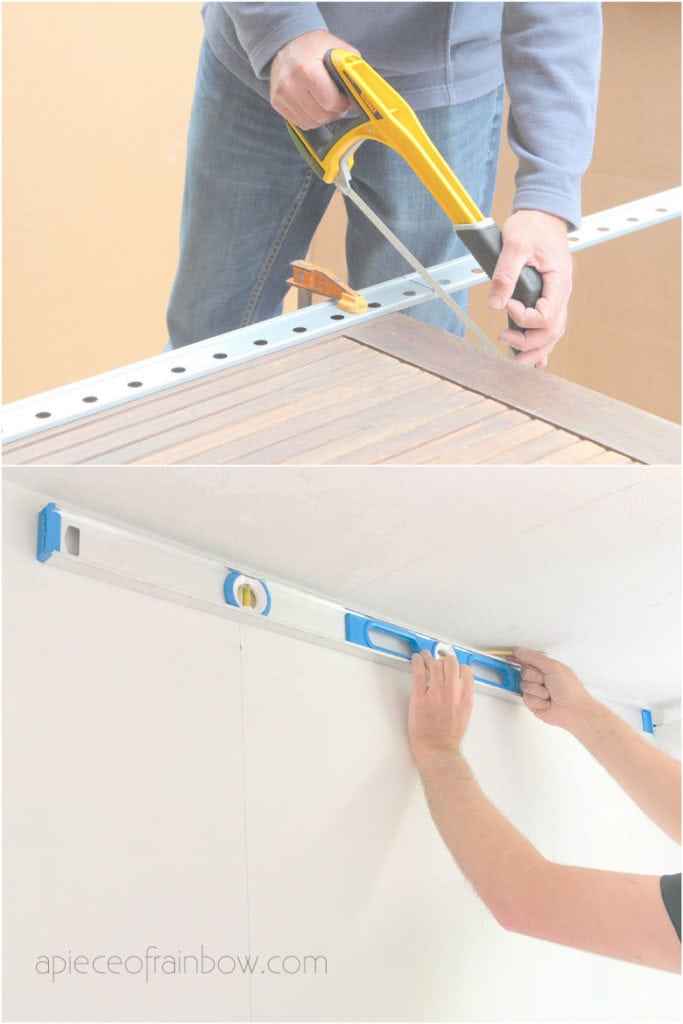
Locate and mark the studs with a stud finder . Hubby used a hack saw to cut each IKEA Sektion suspension rail easily in just a few minutes!
Draw two level lines using a 48″ or longer level for upper and lower cabinets, at the heights indicated in the IKEA installation guide. You can modify the upper cabinet rail height. The main thing to remember is to have at least 18″ between the top of kitchen countertop and the bottom of upper wall cabinets. We have 21″ and love it!

The rails have lots of holes for the screws to go through. Try to use as many studs as you can. You will most likely need a few extra screws to go into the drywall because of the spacing requirements that came with the rails. Make sure to use high quality drywall anchors and screws!
IMPORTANT: If your wall is wavy you will need to shim the rail to keep it in a straight line so your cabinets will be hung along a straight line.
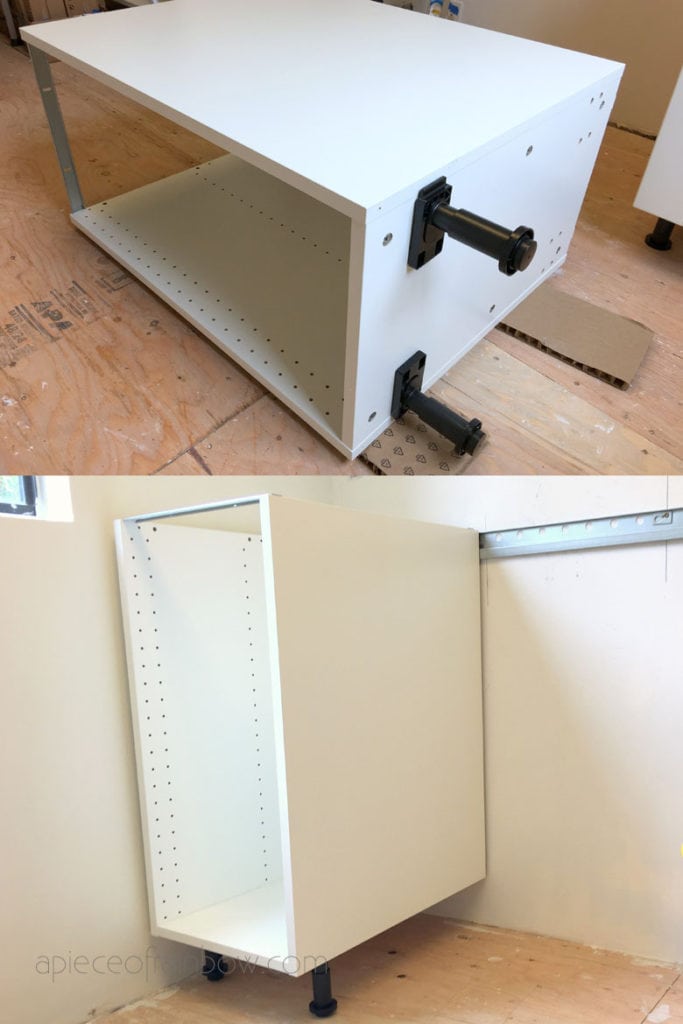
It is super easy to hang the cabinets. The legs on lower cabinets are adjustable. Check to make sure they are level front to back and side to side. After all the cabinets are in place, you will fasten the cabinets into the rail, and join adjacent cabinets per the IKEA booklet instructions.
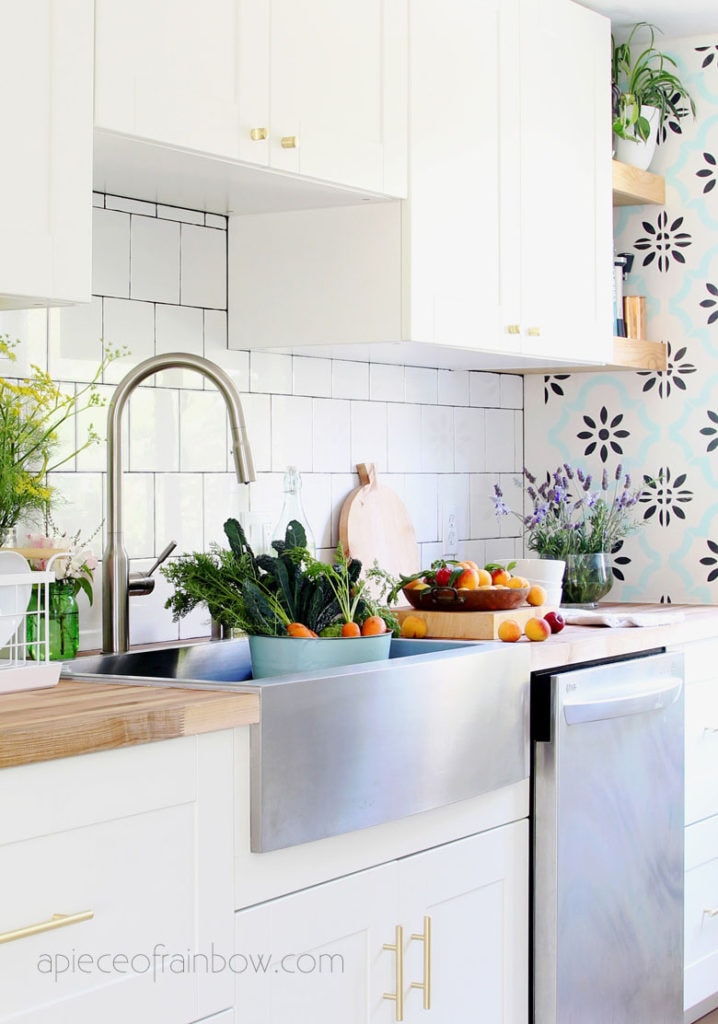
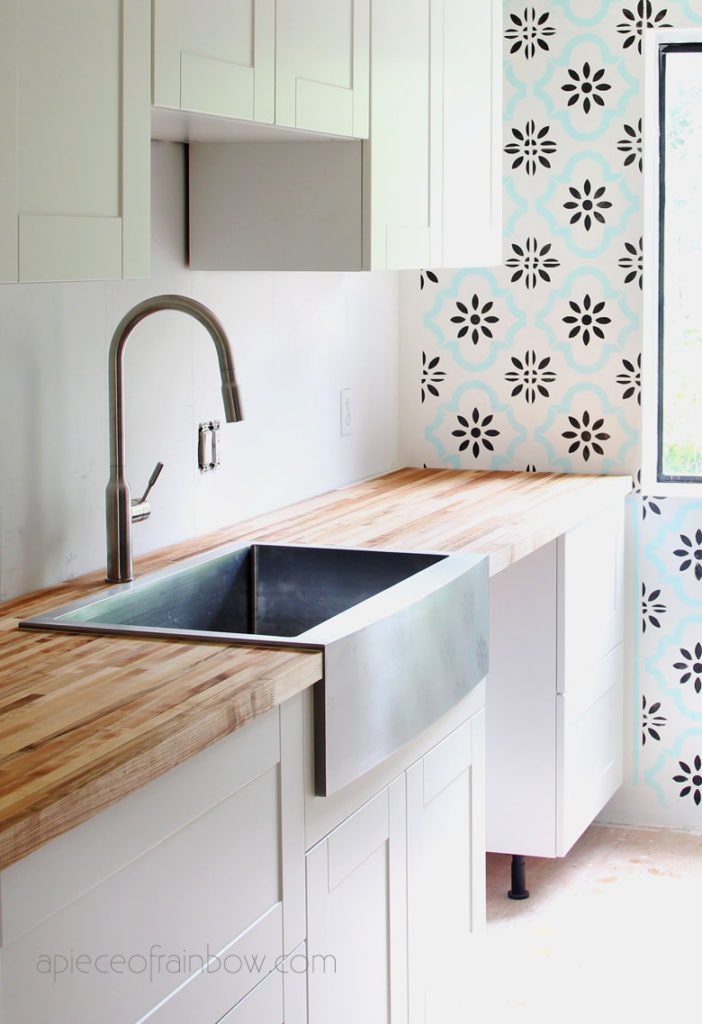
step 6: install butcher block countertop, farmhouse sink, faucet

Because we have a very long continuous piece of countertop, we had contractors installing our butcher block countertop. Now that we have seen the steps, it is not too difficult to DIY. We will share a tutorial soon.
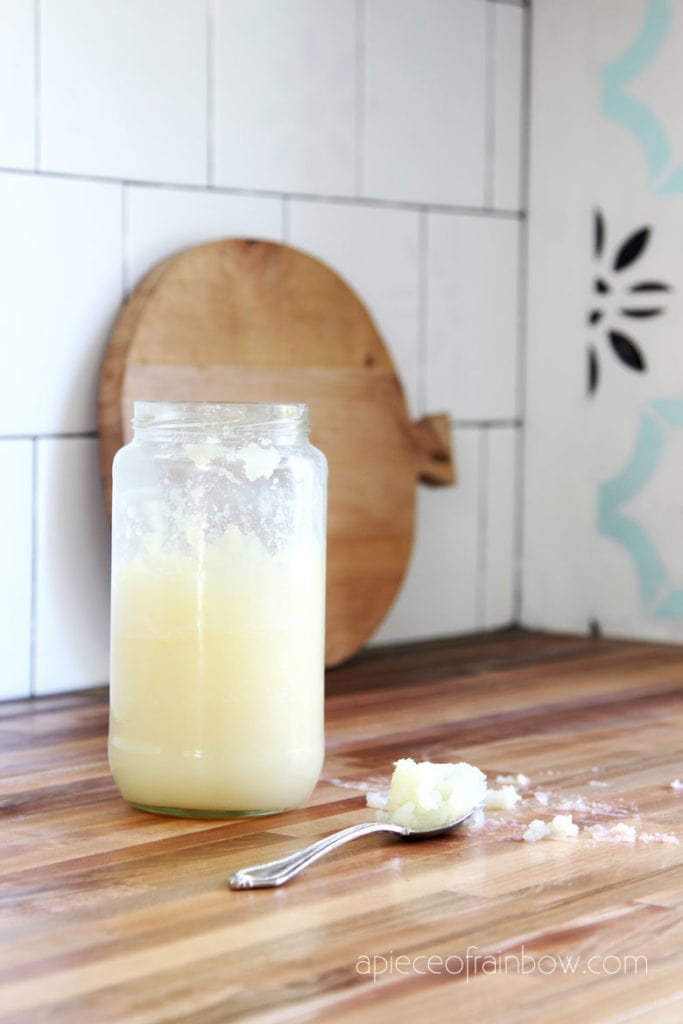
Make sure to finish your countertop surface before using! We use our easy DIY butcher block countertop oil and wax mix that has worked great! Tutorial and recipe here!
It is always a good idea to have trusted professionals do the plumbing and electrical work. For example : you can install the sink on top of the sink cabinet, but have a plumber connect all the plumbing to the sink, dishwasher, garbage disposal, etc.
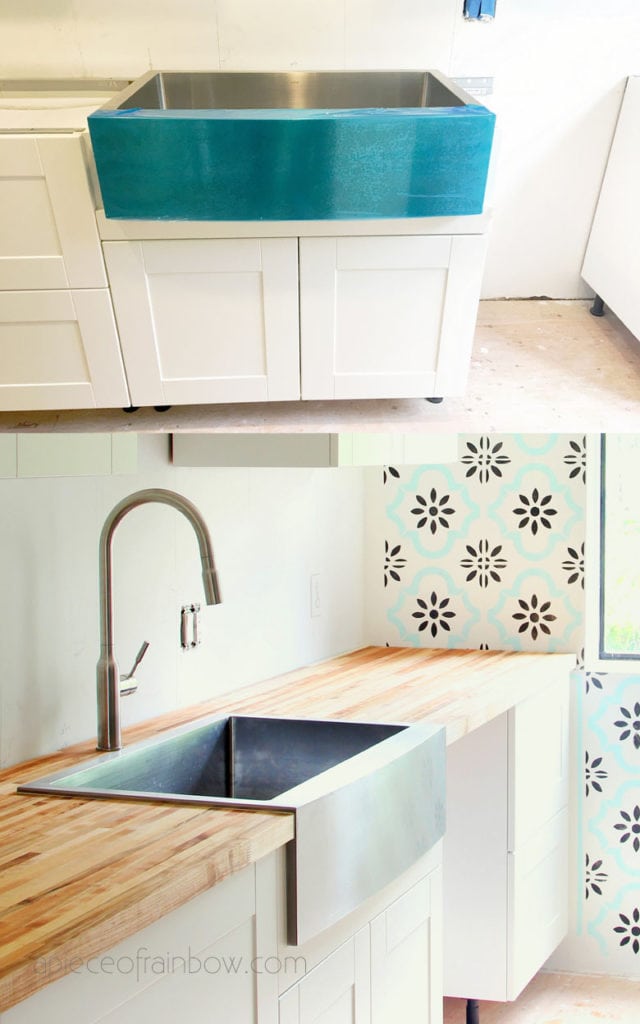
We chose this 33″ stainless steel farmhouse sink to go on our IKEA 36″ base cabinet. It was very easy to install. Tutorial coming soon! 🙂
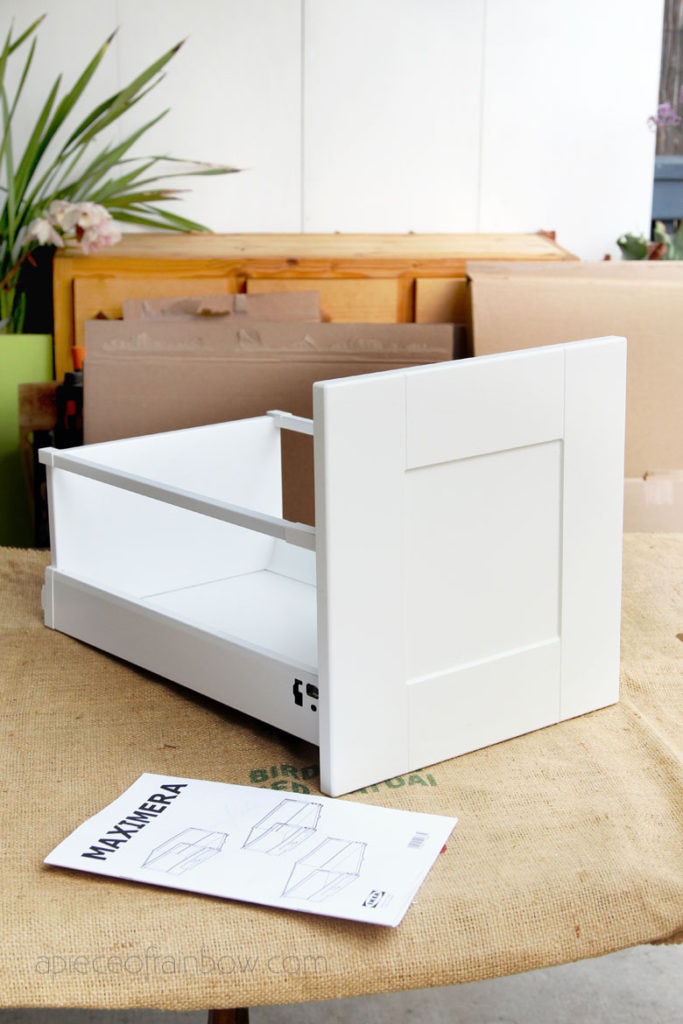
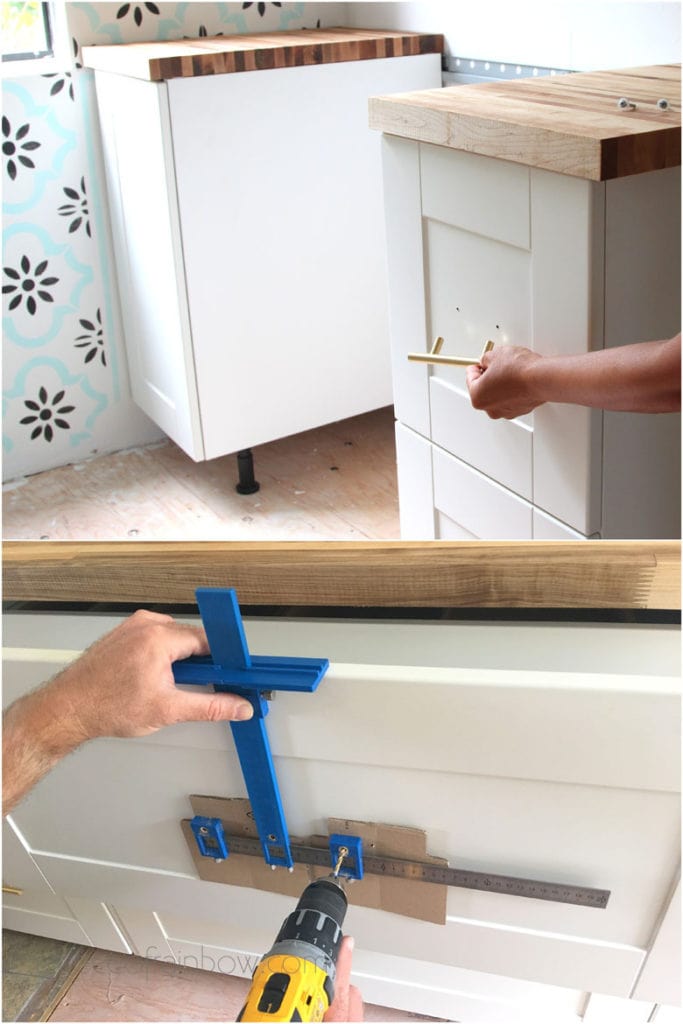
Step 7: cabinet doors, drawers, hardware
IKEA cabinet drawers and doors are very easy to assemble. Just pay attention to the small differences between top middle and lower drawers. We chose their Grimslov collection because we like the design and color of the cabinet fronts.
We used a cabinet hardware jig which makes it much much easier to install these drawer pulls, handles, and these gold knobs which we got on Amazon. This jig will help you set the hardware at the perfect spots on the cabinet and drawer fronts
At this point your kitchen is functional and you can start using it! There are just a few finishing touches left to do.
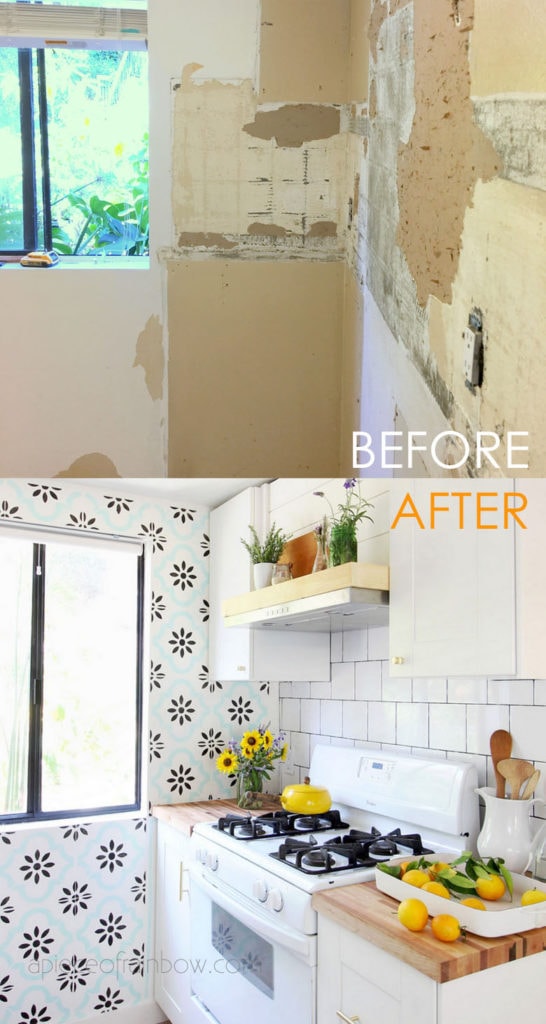
Step 8: finishing touches: trim, toe kick, backsplash
These items will not delay you to start cooking in the kitchen, but it is nice to finish the kitchen renovation completely!
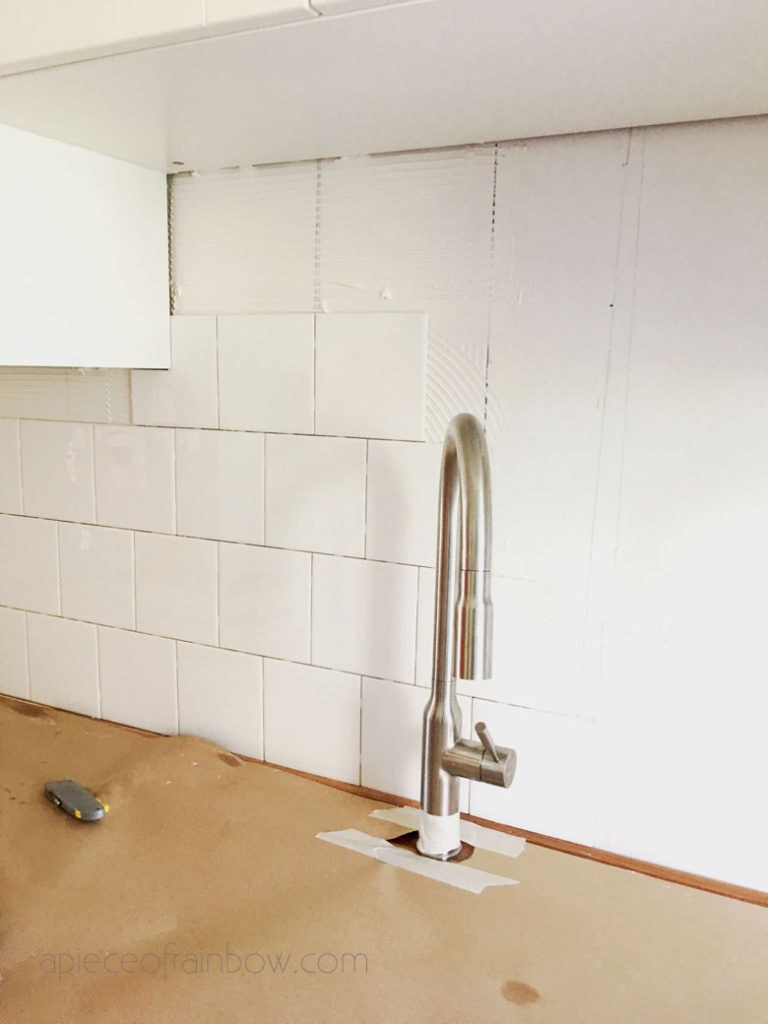
You can paint all the exposed kitchen walls with a high or semi gloss paint that is easy to keep clean. We love tiles, so we chose a square subway tile backsplash with 6″x6″ white tiles and charcoal color grout.
We had a tile contractor do the backsplash and documented the steps. It is something we would happily buy a tile saw to do it ourselves in future . We will share the steps with you soon!

When you order your IKEA kitchen cabinets, their helpful salespeople would automatically add toe kicks (aka plinth) and trim pieces and panels for you.
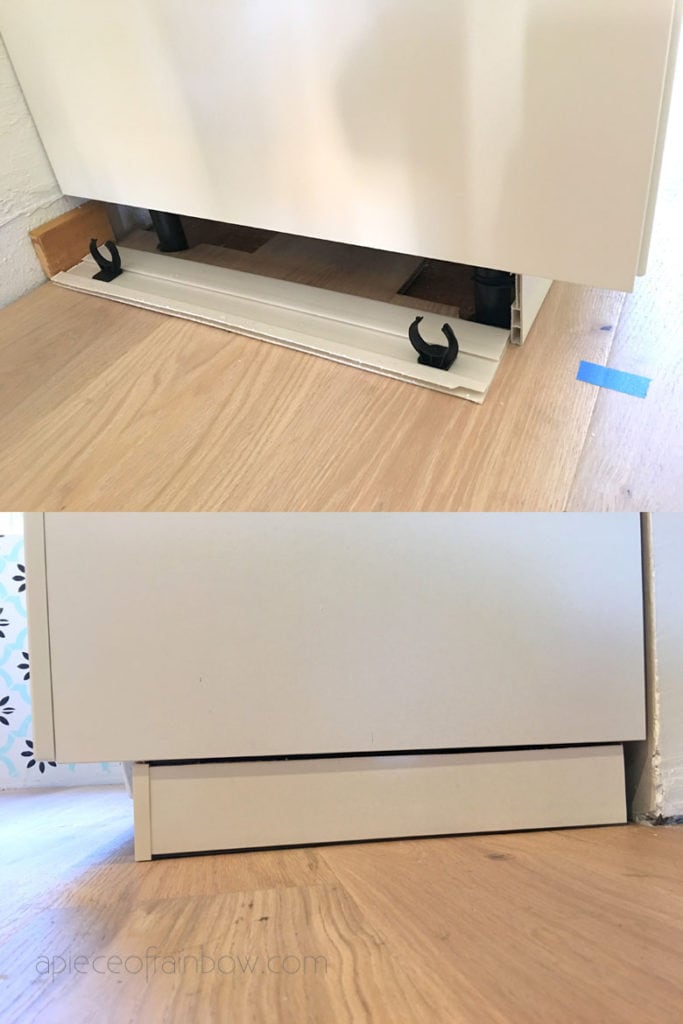
The toe kicks will snap onto the IKEA Sektion cabinets legs. The trim panels are used to cover the exposed cabinets case sides, and any gaps between cabinets or where cabinet meets the wall.
Throughout the process, we have learned a lot from other DIY IKEA kitchen tutorials such as Sara’s, John’s, and Abby’s. So thankful for their sharing!
These are the basic steps to design and install your IKEA kitchen! This post is already quite long, so we will be adding and linking to lots of tutorials including the sink & range hood installation in the coming weeks which will show you each step in more detail, with many videos too! Below is our current list!
- Our modern farmhouse IKEA kitchen remodel before and after, with 8 best tips!
- How to design and install your own IKEA kitchen from start to finish!
- How we gave our old dated fridge a beautiful $2000 new look! 🙂
- 100 day review of our stainless farmhouse sink.
- 2-Ingredient natural DIY butcher block countertop & cutting board oil conditioner recipe.
- How to paint kitchen cabinets, and #1 mistake to avoid.
- Boho farmhouse DIY kitchen island: an IKEA Hack!


Hi! Question – what Ikea cabinet doors did you go with? We’re in the process of redoing our kitchen now! And It looks like it’s grimslov, but that off white and yours looks white in pictures.
hi hannah! it is grimslov. in different lighting it can look more white! 🙂