How to Finish Butcher Block Countertop: Seal, Oil or Epoxy?
How to finish butcher block countertop & best durable wood finishes! Compare polyurethane sealer, epoxy, vs oil & wax with tips from our DIY kitchen remodel.
Here’s a story of mistake & redemption. You may remember our DIY kitchen remodel project and how we used natural oil and wax to finish our butcher block countertops.
As much as we LOVE natural wood finishes and it has worked beautifully on many other projects such as our DIY vintage inspired pallet wood crates, it proves to be the wrong finish for our kitchen countertop, which we will explain why in a bit.
So we finally decided to seal our butcher block countertops with polyurethane a few months ago, and we are thrilled with the results! Wait till you see it! 🙂
Today we will share with you why our DIY natural butcher block oil and wax didn’t work for us, which kind of polyurethane to use, and how to seal a wood countertop or table with polyurethane.
*Some resources in article are affiliate links. Full disclosure here.
Check out this quick video tutorial or skip to written tutorial below.
Why the natural butcher block countertop oil and wax finish didn’t work for us.
UPDATE: Some readers shared helpful tips with us that although polyurethane is much less maintenance, you should never cut on them. If you want to cut on the butcher bock, then use the wax/oil finish, not the polyurethane!
Many people like using natural wax and / or oil to finish their wood kitchen countertops, tables, vanity tops, etc.
Initially we followed the schedule of waxing our wood kitchen countertops monthly, and our new countertops looked shiny and pretty for the first year. But, life gets busy, and we started skipping the regular maintenance. Then our kitchen countertops started looking worse, and worse.
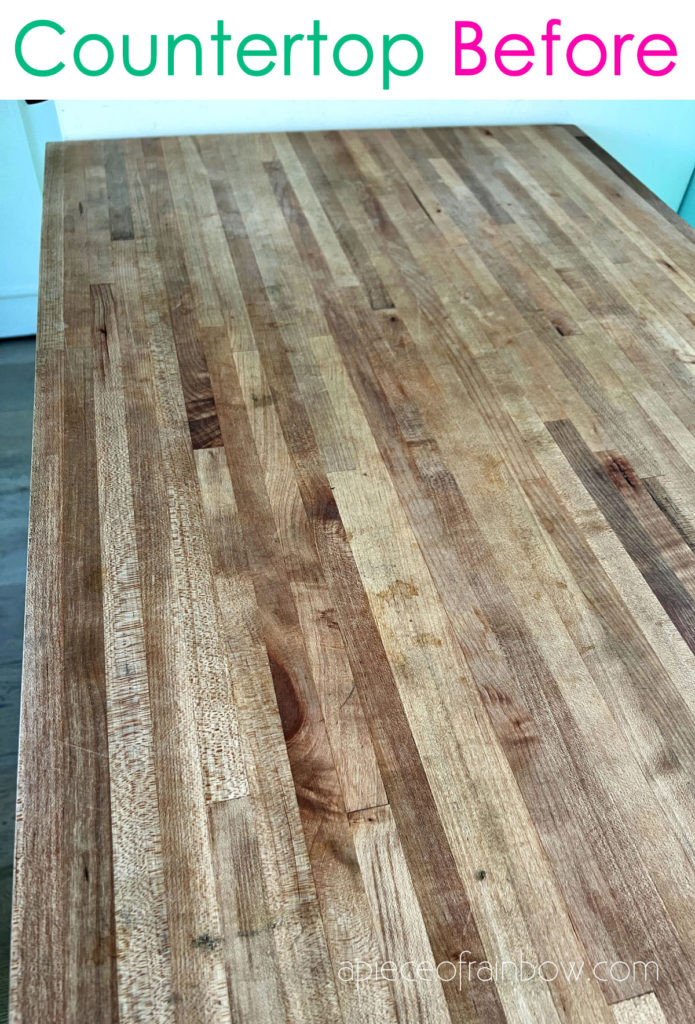
The butcher block oil and wax finish is water resistant, but still it would not protect our countertops from certain stains, heavy use and prolonged exposure to water, or marks from metal cans! ( See this DIY wood stain recipe to understand why metal cans can stain unsealed wood tables and countertops.)
Conclusion : we are super busy (and a bit lazy) and not good with lots of regular maintenance in a house, therefore the wax and oil finishes are just not the right choice for our heavily used kitchen!
Materials and tools to seal butcher block countertop
- Oil based polyurethane: you will need 1 quart polyurethane to seal 300 square feet of countertop with 3 coats.
- The best type of brush for polyurethane is a good quality synthetic bristle brush.
- 120-200 grit sand paper or sanding pad, microfiber towel or tack cloth
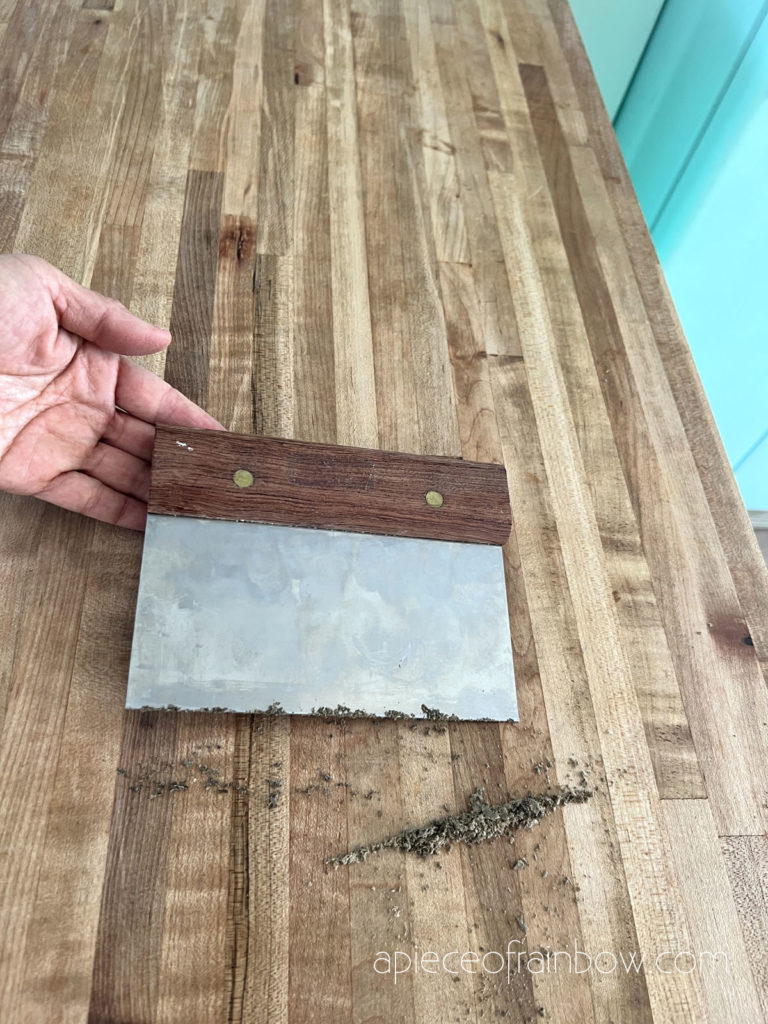
Because we oiled and waxed our butcher block countertop, we used a metal scraper to clean the surface before sanding to prevent the wax and oil from clogging the sand paper.
What is the difference between water based vs oil based polyurethane?
Polyurethane is among the most durable wood finishes for floors, countertops, and furniture.
Water based polyurethane dries faster, doesn’t smell, and is easier to clean up. The finish look and feels like a transparent film.
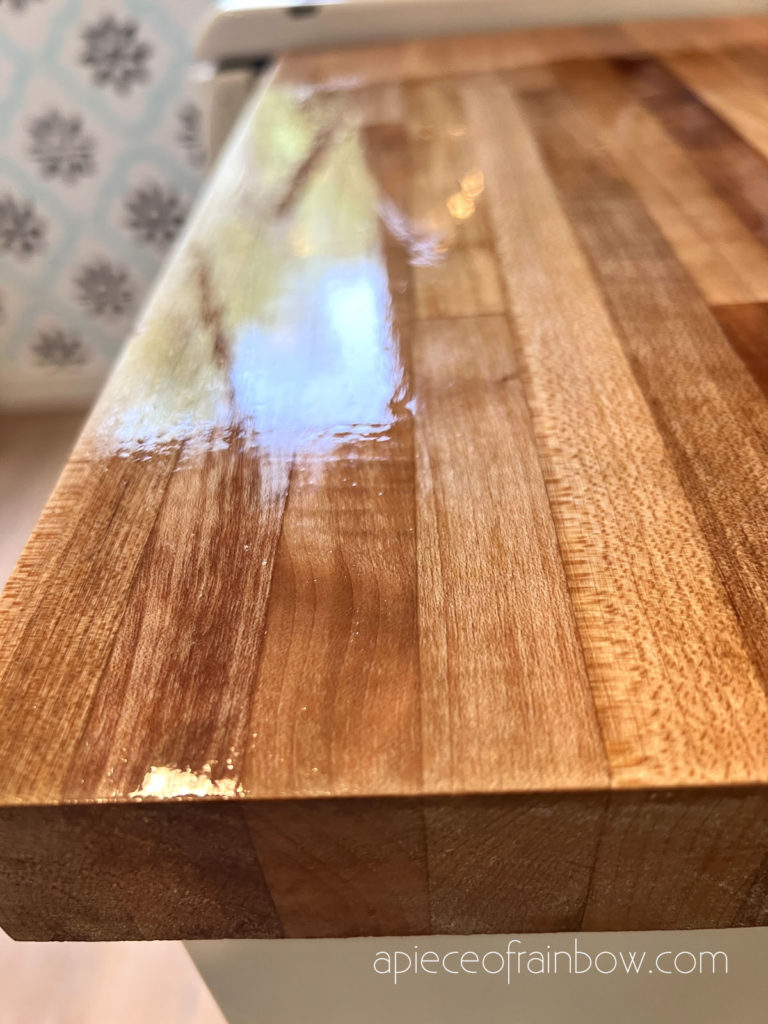
Oil based polyurethane is more durable, and the finish has a richer glow, looks and feels like glass or epoxy. It takes longer to dry, and smells like turpentine for a few hours after you apply it.
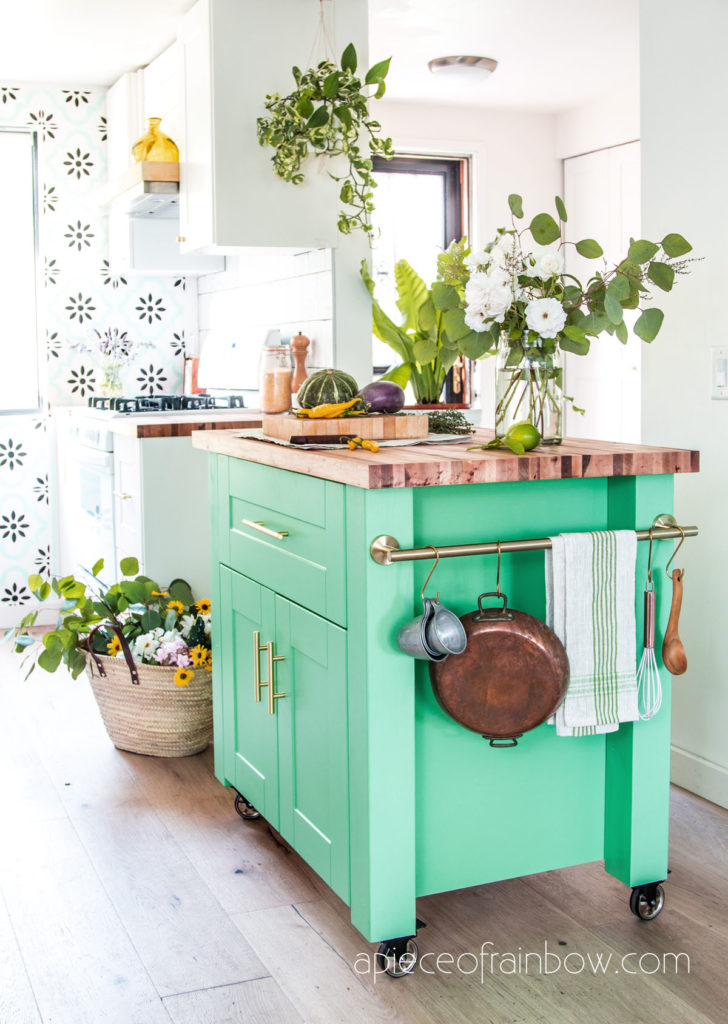
We chose oil based polyurethane on our kitchen countertop and our DIY kitchen island because of the beautiful glow and better durability.
Another consideration in our situation is that because our countertops have been oiled before( we will still try to remove the old finish as much as possible), the oil based polyurethane is more likely to have better adhesion.
How to finish butcher block countertop or wood table with polyurethane
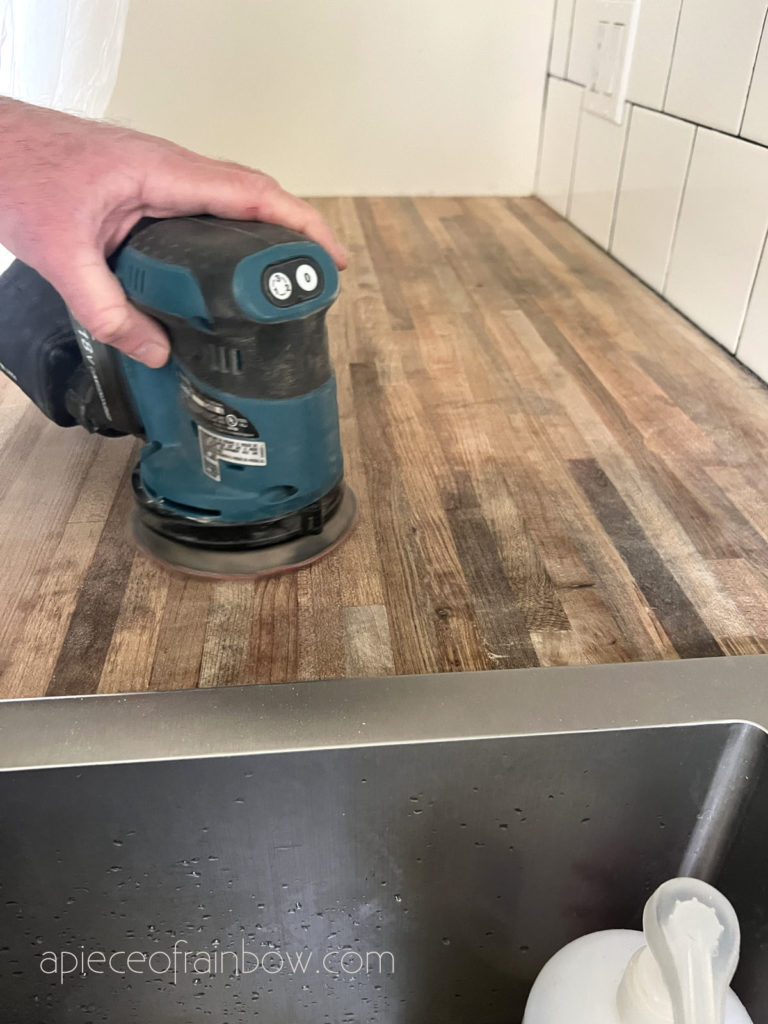
This section will focus on oil based polyurethane. First we used a metal scraper to clean the surface before sanding to prevent the previous wax and oil finish from clogging the sand paper. Skip this part if you have an unfinished countertop.
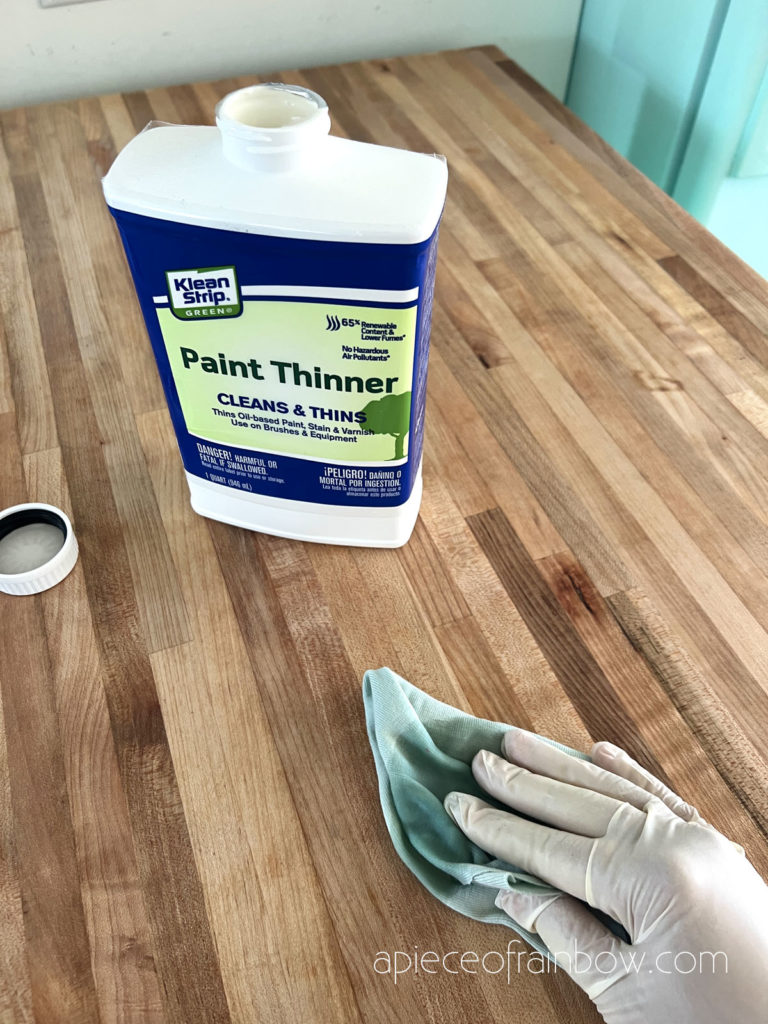
Next, sand any tough stains with 120 grit sand paper, and clean the wood surface with turpentine or paint thinner, and a damp microfiber towel or tack cloth, so it’s dust free.
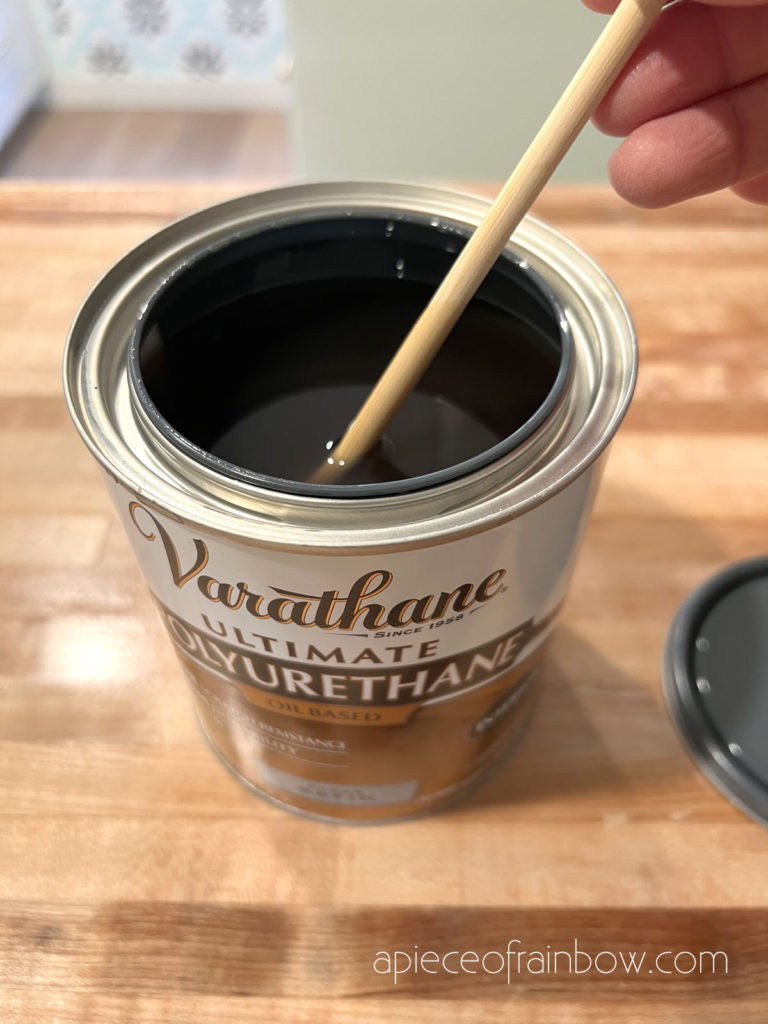
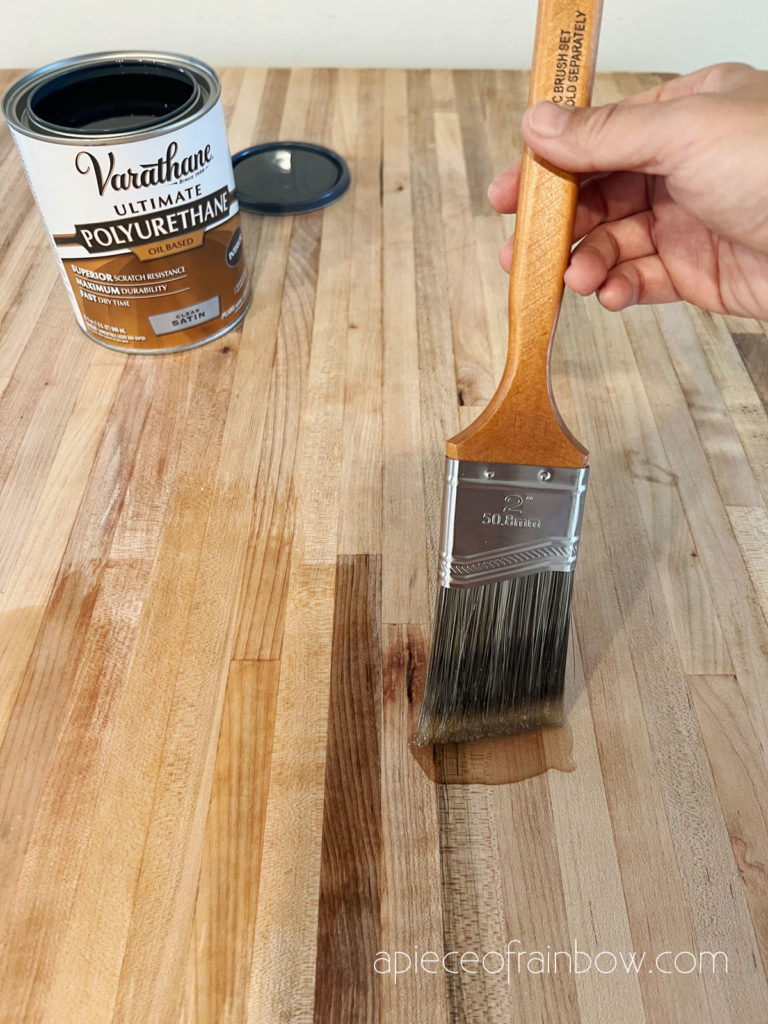
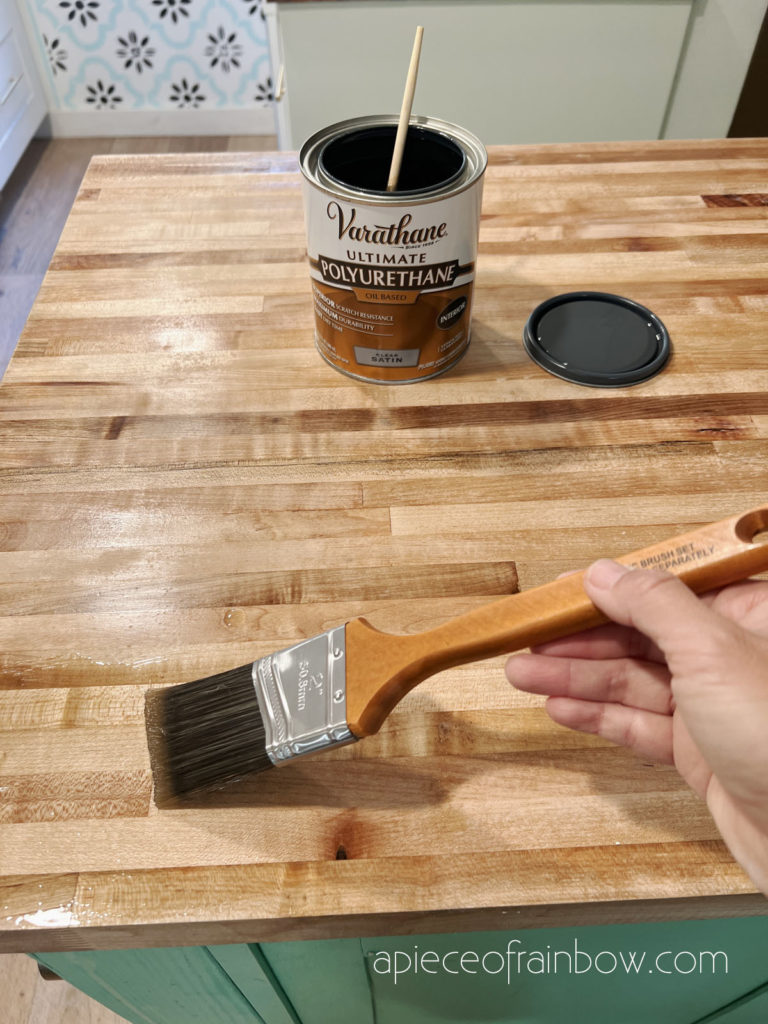
Don’t shake the can like you would with paint, because this would create tiny bubbles in the finish. Use a wood stick to stir the polyurethane thoroughly before you start, and a good quality brush which will not shed bristles.
Dip the brush in the polyurethane and put a generous coat onto the wood surface. Overlap slightly as you go from one section to the next.
Try not to go over the area you already brushed, especially after a few minutes minutes. You can always sand any little imperfections later.
Once the entire surface is covered, let the first coat dry for about 24 hours. It may dry faster, but it’s better to wait a little longer to make sure each coat is ready dry before adding the next coat.
The first coat can look a little blotchy when dried. Don’t worry, everything will look much better after the next two coats!
Before you apply the second coat, sand the first coat with 120 to 200 grit sand paper. A sanding pad is a great tool to have. Wipe off the dust with clean microfiber towel or tack cloth.
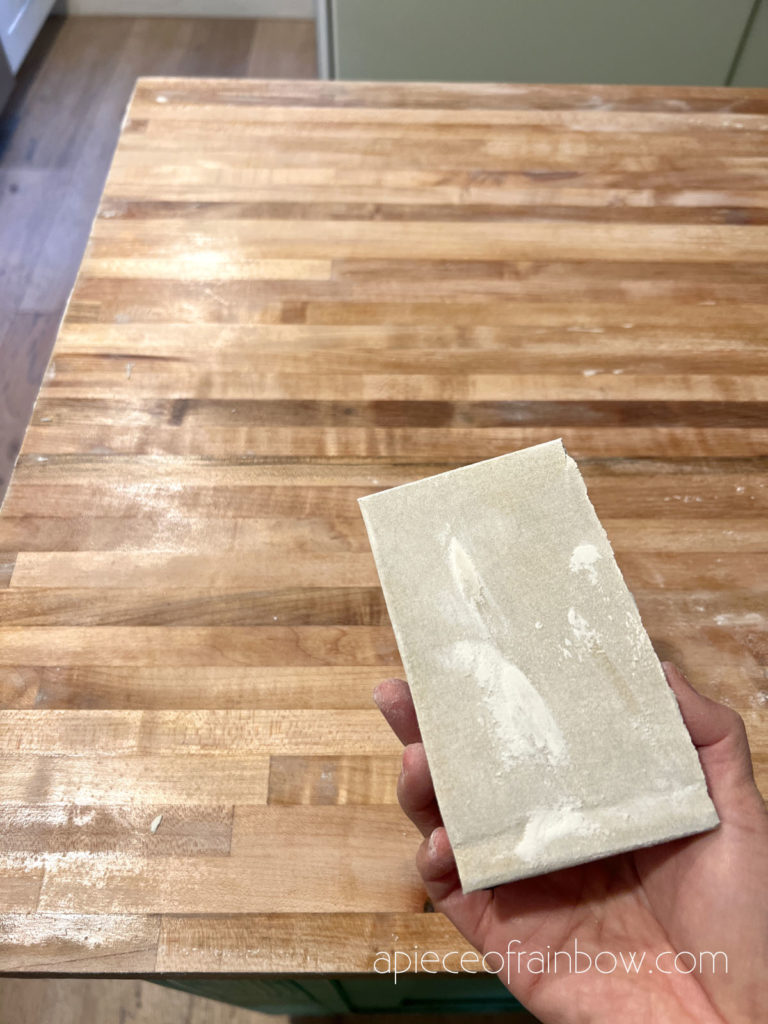
Repeat the coating, drying, and sanding process. We applied a total of 3 coats. You won’t need to sand the final coat.
Some helpful tips when planning your projects:
Oil based polyurethane takes 12 to 24 hours to dry between coats. It can take longer when the temperature is colder.
It is best to work on a dry and warm day when temperatures are 60+ Fahrenheit or higher, and keep good ventilation for a few hours after each coat to let the smell air out.
You will most likely need to apply 3 coats. The final coat needs to cure for 1-2days before light use, and 7 days before normal use. So it’s a good idea to plan ahead.

We did half of our countertops, waited a few days, did the other half, then went on a trip and let everything cure. You get the idea! 🙂 If you make any mistakes such as creating bumps or bubbles, here‘s a good article on fixing common mistakes when using polyurethane.
Epoxy vs polyurethane for countertops
Epoxy is another very popular countertop finish. It is more durable than polyurethane finishes, however, the application techniques are more complicated and best results can be tricky to achieve.
Epoxy comes in two parts: resin and hardener. You will need to mix the two parts accurately, and prepare no more than you’ll use in 30 minutes. The space must be well ventilated with a temperature between 70° and 85°. Always use eye protection and gloves when working with epoxy.
Stone Coat has DIY Epoxy kits and a good intro video tutorial you can check out above.
Epoxy can be colored with acrylic paint or other pigments. It can also be used over a painted surface, such as in this white marble countertop kit.
A common problem many people experience with epoxy is yellowing. Look for products that contain UV stabilizer and/or HALS (Hindered Amine Light Stabilizer), which offer more protection against epoxy yellowing due to UV exposure.
Final verdict: Is polyurethane a good choice to finish butcher block kitchen countertops?
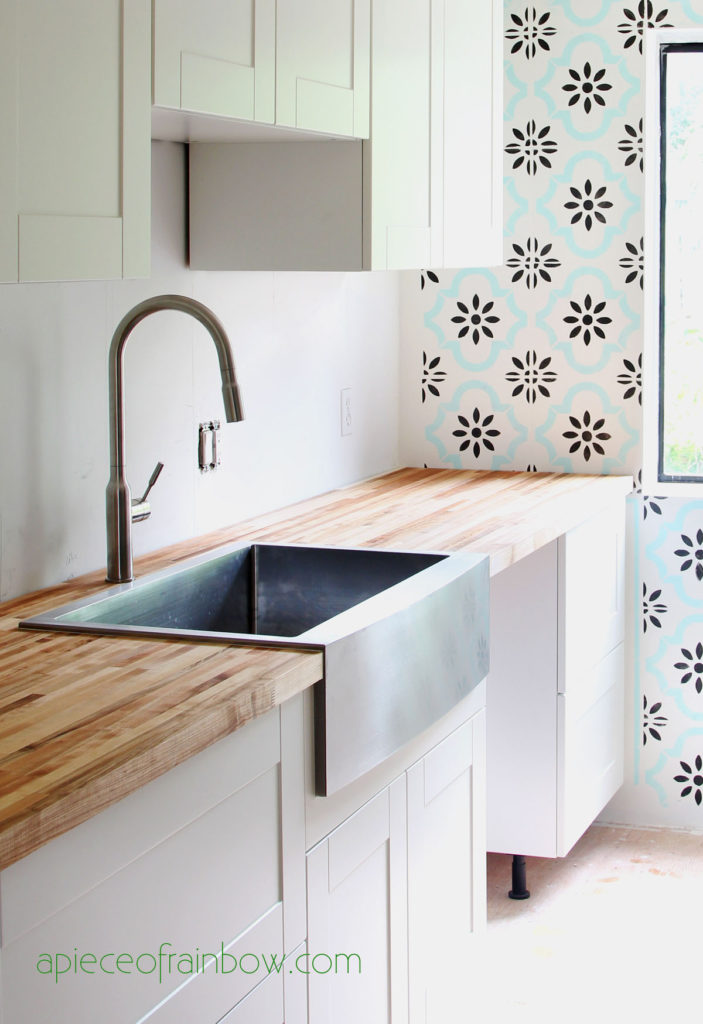
Now it’s been a few months since we sealed our butcher block kitchen countertops with oil based polyurethane, and we LOVE the results so much!!
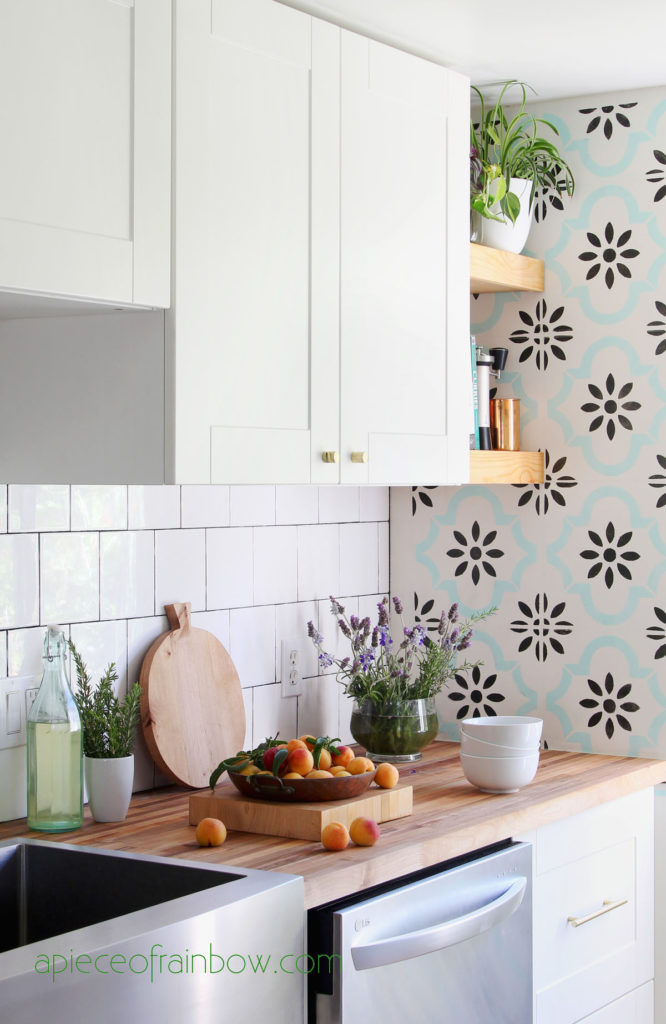
The finish is super durable. It’s not SUPER shiny like glass once dried, but feels like glass or epoxy. The smooth surface is so easy to clean. No more stains from water or metal cans. And no maintenance needed! (If you do want a super shiny surface, you can buff polyurethane to a glass like shine.)
I only wish we did this on day one! But, that’s how we learn in life – from our mistakes, right?
Is oil-based polyurethane heat resistant?
Oil based polyurethane finish can typically withstand temperatures between -80°F to 200°F, or even higher temperatures. So we wouldn’t put hot dishes from the oven directly on the counter. We keep some trivets handy for really hot pots and pans. But a bowl of hot soup is not a problem.
I can honestly say that polyurethane is now one of my favorite wood finishes! I have also used water based polyurethane on some wood mirror frames and shelves, which I will share soon!


I finished my counter tops 2 years ago. you never said how to fix a dent or scratch. I used clear finger nail polish. Also if you want to cut on your top just build a cutting block and put rubber for feet. When you fix a dent just use a 400 grit sand paper and lightly sand the area. This will rough the area and it will bond better.
thank you so much Richard for sharing this helpful idea! 🙂
Hi! Thinking of using butcher block in my salon, how does oil polyurethane hold up to color stains?
hi Jessi, there’s no issue with our daily coffee stains, but i’m not sure about super strong color stains. maybe do a small test on a piece of wood first?
Hi, first time butcher block user. I have unfinished wood, I will be using it in my kitchen. Just trying to make sure I have my steps right-I need to stain, oil, then add poly?
no oil, just Poly, no need to stain either, because Poly will bring out the colors of the wood 🙂
For all those cutting directly on butcher block, natural oil finish is supposed to be healthy. However, butcher block boards are made with strips of wood GLUED together. What glue? Is it food safe?
I had a new black composit granite sink & butcherbock counters installed by a handyman (that was my 1st mistake). The butcherbock counters are made of Rubberwood from one of the Big dyi stores. The handyman could not get the sink mounted flush to the counter..said butcher block could not be cut in a manner to sit the sink fluch..therefore there is a 1/8″ gap all around the sink so he filled this gap with clear sycilone which so far keeps water from running under the sink. With that said..I’m tired of using oils & bees wax! I never ever cut on the counters so I want to seal them with water based polyurethane as I can not tolerate the smell of oil based. Long story short..my question is, will there be any issue or reaction using the water based poly up against the clear silicone.
hi! i don’t think there would be any reaction using the water based poly up against the clear silicone. just make sure not to damage the seal if you sand the wood, or re-seal the gap again with silicone once counter is dry!
Are water base polyurethane okay for finishing? I like the faster dry time and next to no smell. We are having new butcher block installed and are concerned about finishing the underside, while the pros are still here. Can you mix finishes, with water poly on underside and conditioner on top, or stain then poly? Thank you.
hi Mike! the underside isn’t so damage-prone, so i would use the same finish you use on top, or an easier one, and just one coat. if it’s really high use, i would use the oil poly. if it’s medium use, water poly is fine (we used it on the powder room countertop). 🙂
I love reading an article that gives me more knowledge because I love carpentry and anything that will improve my home. This is an excellent help to us. Keep on posting!
I love your countertops. I read in a different post that you got them from Lumber Liquidators. Do you remember what type of wood they are made of? They are gorgeous!
Thanks!
hi Ellie! thank you! 🙂 it’s maple, the color was much lighter before the finishes. 🙂
Thank you so much!
Hi, can you tell me the name of your stain color? It’s not quite visible on the can in either picture.
hi Lindi, it’s oil polyurethane, no color added, just a natural warm tone. 🙂
We polyed our butcher block with three coats. Sanded in between. It was absolutely stunning, but it has a few huge scratches already. My daughter set her laptop on it and there’s a 5” gash from her scooting it. I pushed a paint can and there’s a 12” gash in the other end. Is this typical? I’m so disappointed in this. We never cut on it, so that’s not a problem. But the scratches are killing me. Any advice besides give up and go with epoxy?
hi Stacie! ours have not gotten any scratches so far and we aren’t the careful type! if the scratches are not very deep, you can use 400 grit sand paper to smooth them out, then a buffing pad to make it shiny again. if the scratch is really deep you can touch it up with a tiny brush, then sand it when completely dry. 🙂
2 part epoxy resin takes temperatures up to 500 degrees very strong product against scratches. Should be far superior to poly.
hi Mike! thanks for the feedback! 🙂 i think that poly is much easier to apply with chances to go wrong for beginners especially. i agree that epoxy is stronger if done properly!
Really great article thank you! For countertops with sinks, would you remove the sink and then finish or ok to work around the edges of the sink?
hi Russ, sorry this comment somehow got lost somehow. i would tape it carefully and work around the sink 🙂
Hi there,
When you refer to the first finish you used as ‘wax and oil’ I don’t know exactly what that was—can you be more specific?
Thanks 😊
hi Alan! it’s this DIY wax and oil finish – https://www.apieceofrainbow.com/diy-butcher-block-cutting-board-oil-conditioner/
How has the poly. held up with water, specifically behind the sink? You guys did a great job! We have butcher block counters that we were thinking of covering with clear epoxy, so there are no issues with water. Thanks!
hi Laura! we are IN LOVE with this poly finish!!! it is holding up perfectly, so smooth just like epoxy, but easier imo. 🙂
Is the poly ok to cut on though? We use our huge butcher block island for food prep, which includes lots of duty as a cutting board.
hi Jared, if you want to cut on the butcher bock, then use the wax/oil, not the poly! 🙂
First, you can’t get REAL oil-based polyurethane in some states. It might say, “oil based” on the can but you better look again and do some research. If you live in a state where it’s banned, that “oil-based” label is actually a marketing work-around and not 100% accurate. It’s not real. For instance, you flat out cannnot buy real oil-based polyurethane in California. It is illegal to sell it. So anything labeled “oil-based” is actually a less effective product that will not last as long and exhibit more issues over time than what real oil-based polyurethane has. If you’re gonna go with oil-polyurethane, make sure to find a way to acquire the right stuff.
Second, if you cover a food prep area with polyurethane, yes it is more durable than oil, but if someone cuts on that surface it can scrape bits of toxic polyurethane into your food. So DON’T EVER CUT ON TOP OF IT. Remember the paragraph above? Yeah, there’s a reason oil-based polyurethane is illegal in some states. It causes cancer. While the FDA does approve polyurethane to be used in kitchens once it’s FULLY CURED, the last thing you want to do is cut on it and chip some of that plastic into your food. If you have kids, make sure they understand to NEVER cut on the counter.
And lastly, while polyurethane is much more durable and easier to maintain than oil/wax, the real benefit to a oil/wax surface is the ability to refinish it or fix issues easily should they pop up. With polyurethane you are literally dipping all the wood in plastic. So let’s say someone does accidentally set a hot pot on the counter and burns/stains the surface. With oil you can just sand that little spot down and refinish it! Fixed! With polyurethane, you have to strip ALLLLL the plastic off the ENTIRE counter and redo the whole slab. So while polyurethane requires less maintenance and upkeep while in use, there are hidden benefits to oil/wax when it comes to fixing small issues that pop up. It’s also easier to refinish your counter and bring new life into it later on.
hi Derek! thank you for sharing these helpful tips! i will add to the post that if people want to cut on the butcher bock, then use the wax/oil, not the poly! 🙂
Thanks for this advice. A close look at the can shows you used Satin finish poly. What I would probably choose. As mentioned, smooth, but not so shiny as glass. For those wanting a super high gloss finish, the Gloss finish poly would give that without any need to buff. My question would be how well this finish stands up to hot pots. Thinking if you burn it, or it peels, it can always be sanded and re-coated.
hi Richard! i had the same question also about hot pots. i read that oil based polyurethane can typically withstand temperatures between -80°F to 200°F, some higher. so we wouldn’t put and hot dishes from the oven straight on the counter. but a bowl of hot soup is not a problem 🙂
What in your opinion would you use to finish the butcher block if you want to roll out some dough?
hi Kathleen! the butcher block counters in bakeries are always finished with the oil/wax finish. however, they don’t use the countertop like a home kitchen, where water and other stains can be a problem.
the best solution in my opinion would be to use the oil based poly for high use countertop, and wax finish for a separate island, cutting board or low use section to roll dough, especially if it involves cutting and scraping. 🙂