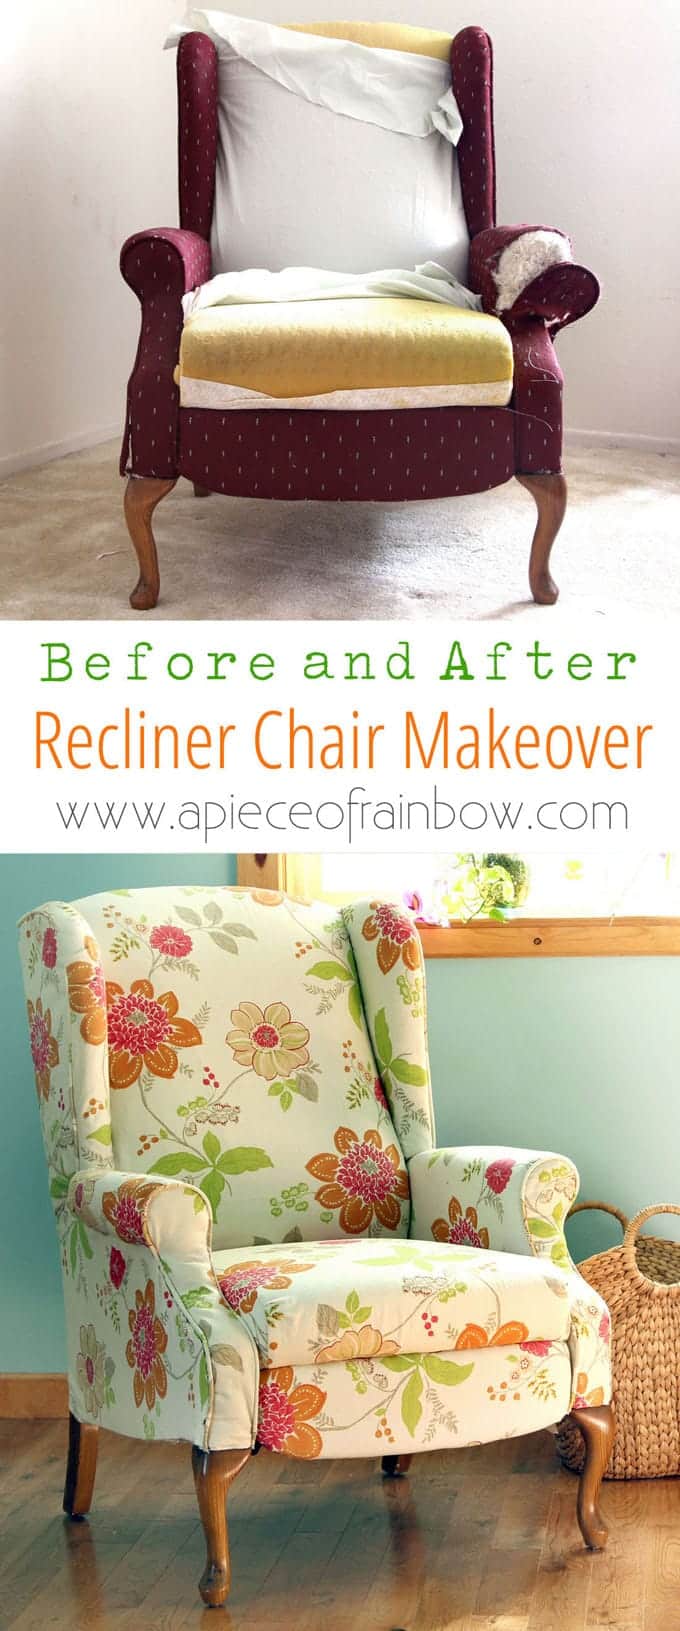
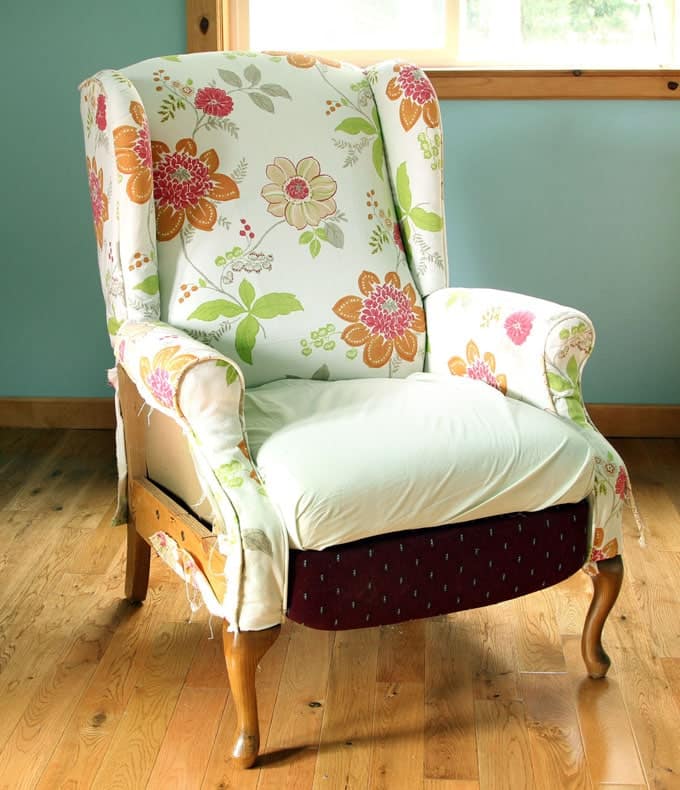
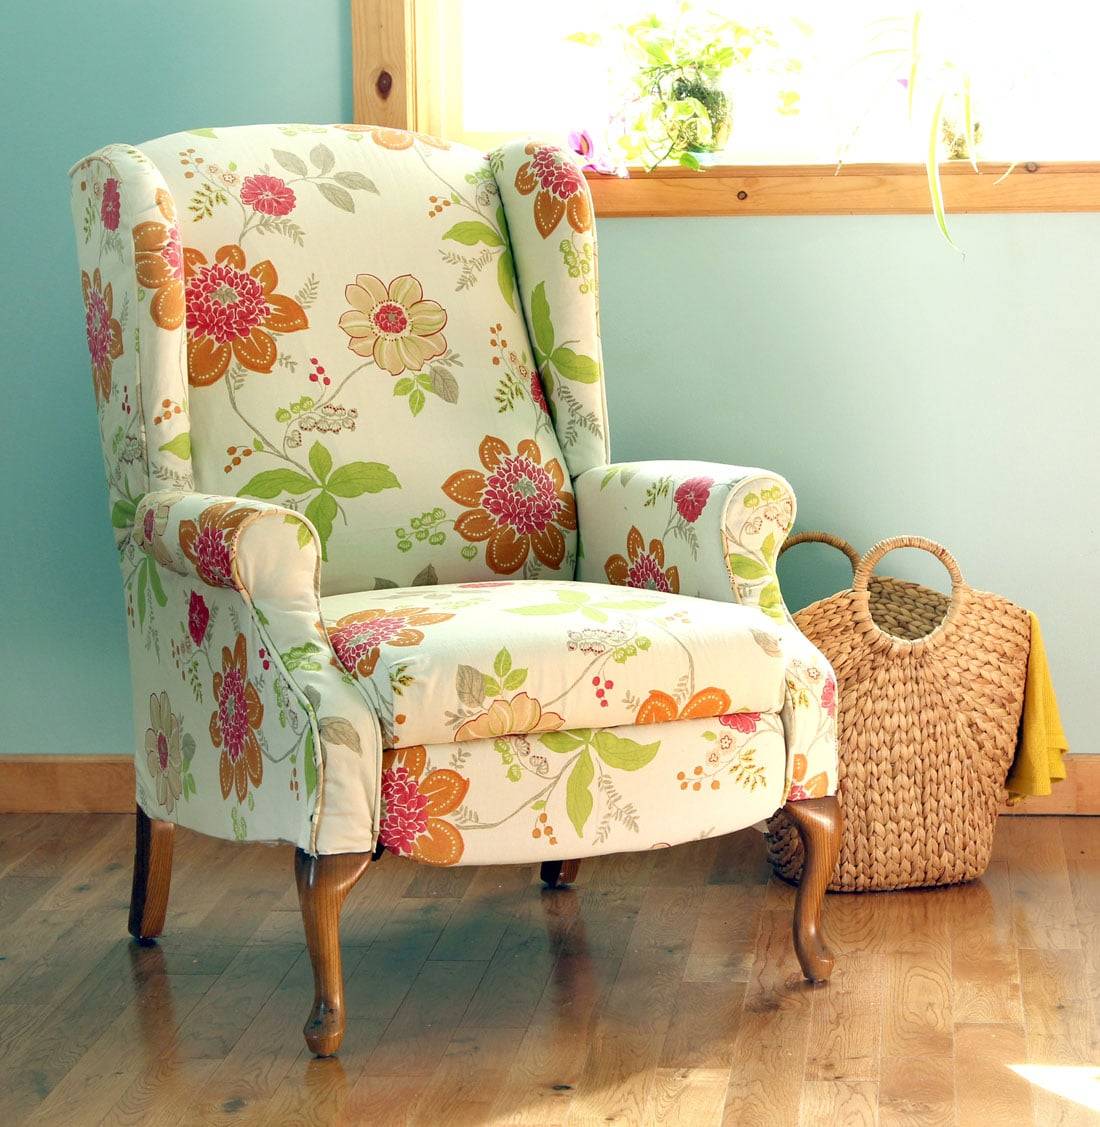
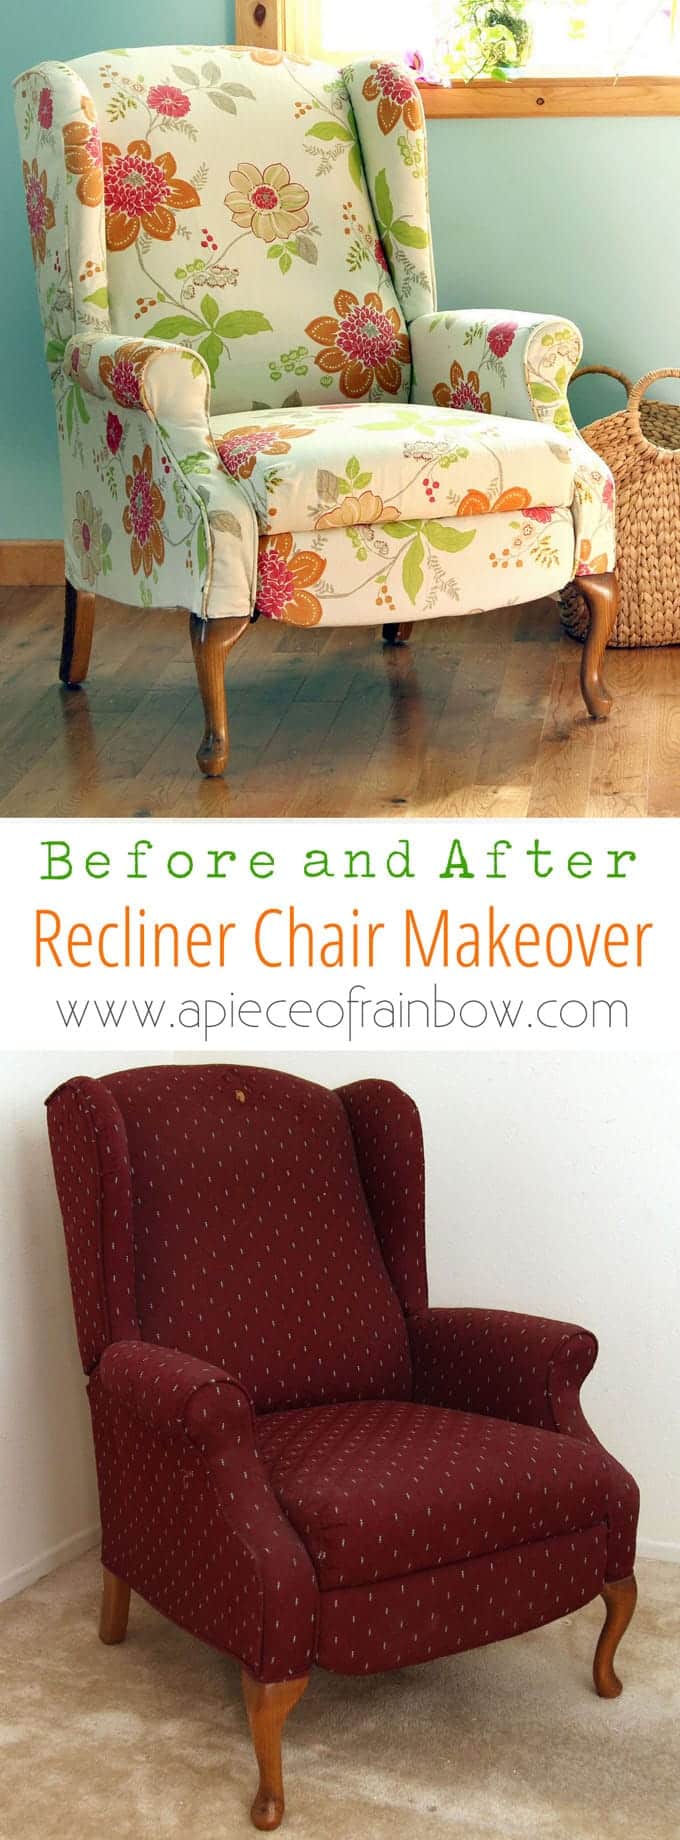
Fabric Chair Makeover Before After
This before after is my very first attempt at a fabric chair makeover.
OK, it’s not just a fabric chair, it’s a wing-back recliner! Oh my, what did I get myself into?
To be honest, I had to face my doubts and fears before jumping into my first ( and not-so-beginners’ ) re-upholstery project.
Totally worth it: we love the fresh new look of this makeover, and it was quite a fun learning process!
In this step by step tutorial , I will share with you an overview of everything I have learned about how to makeover an upholstered recliner chair, and lots of helpful tips for beginners . If I can do it, so can anyone!
The beginnings: this wing-back recliner chair was a Craigslist find. Although it is a well-made chair, I never liked the fabric.
It sat in our guest bedroom until we started our epic decluttering a few months ago. The rule for us was: only keep things we truly love, and let go of the rest. ( More on that in another post!)

So a decision has to be made: should we donate it, or transform it into a chair that spark joy every time we see it?
You know I can’t resist a potentially fun before after DIY project. When my dear mom happened to send me some beautiful floral home decor fabric, I took a deep breath, and dived in.
Note: please check out a list of very helpful tips at the end before you start – tips such as : take photos of each step when you remove the fabrics, so you can reverse the steps when putting new fabrics on!
IMPORTANT: follow basic safety rules when working with tools and sharp objects! Learn to use each tool properly. Use caution and work safely. Wear good quality working gloves and safety eye goggles when needed.
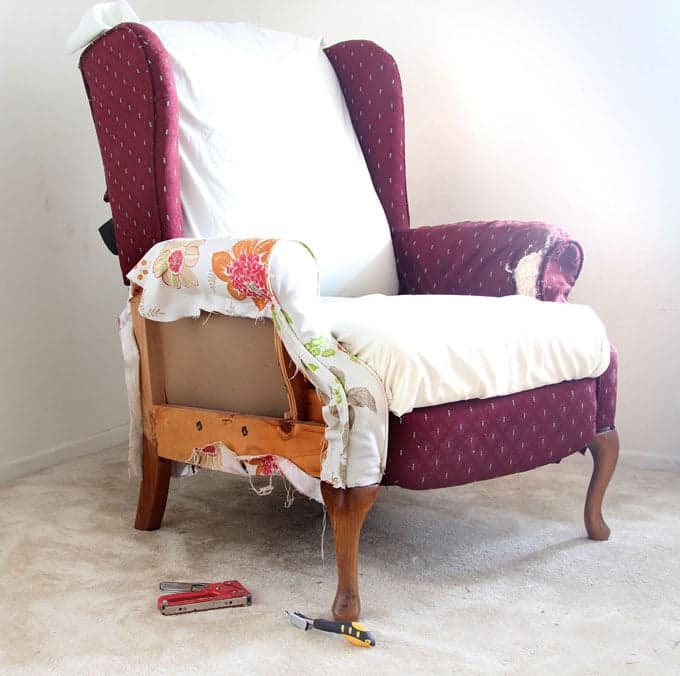
The essential tools needed for removing old fabric: ( Some of the helpful resources are affiliate links. Full disclosure here. ) a flat screw driver to remove strip tacks, an upholstery staple remover , and safety eye goggles to protect yourself from potential flying staples!
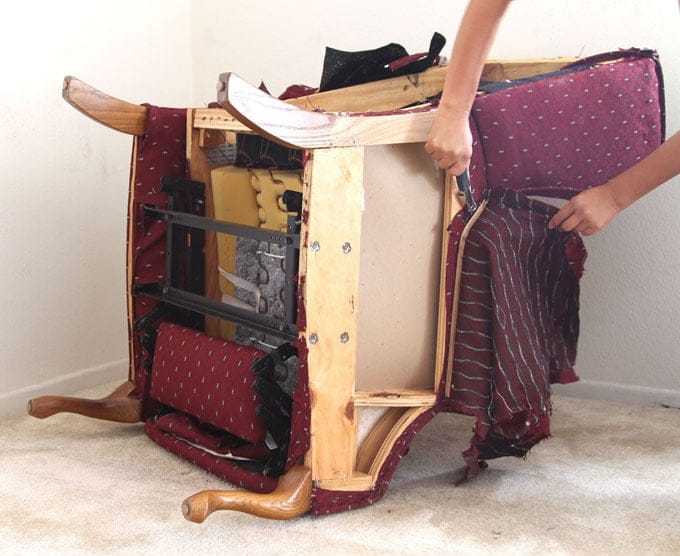
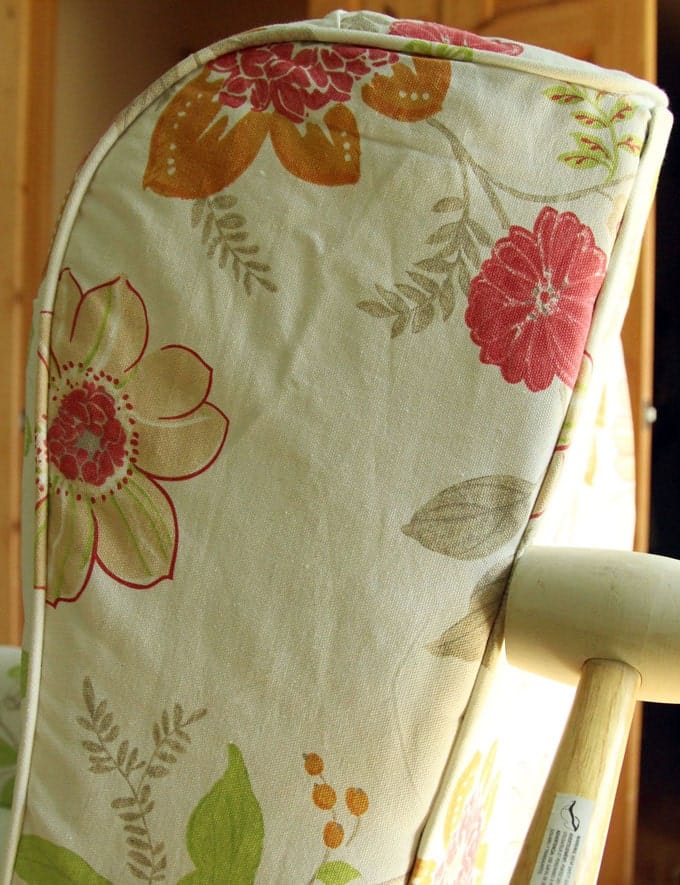
Step 1: start from the back
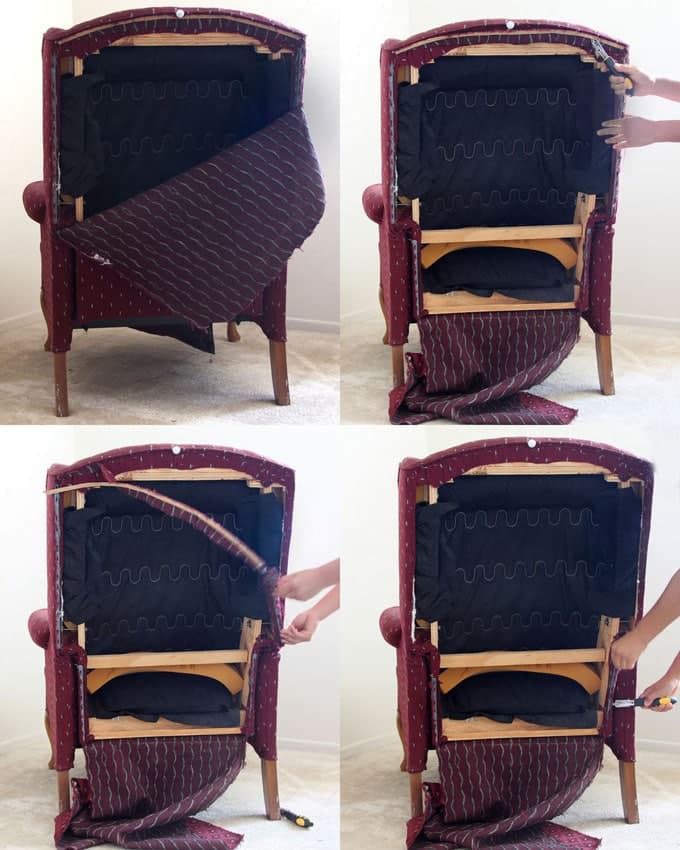
The back piece is held in place by cardboard strips and upholstery tack strips. Once we remove the back fabric, we get a clear view of how the other pieces are held together so we can begin to remove them.
The upholstery staple remover is such a great little tool that makes the job so much easier. All the staples come up pretty easily with the help of this tool!
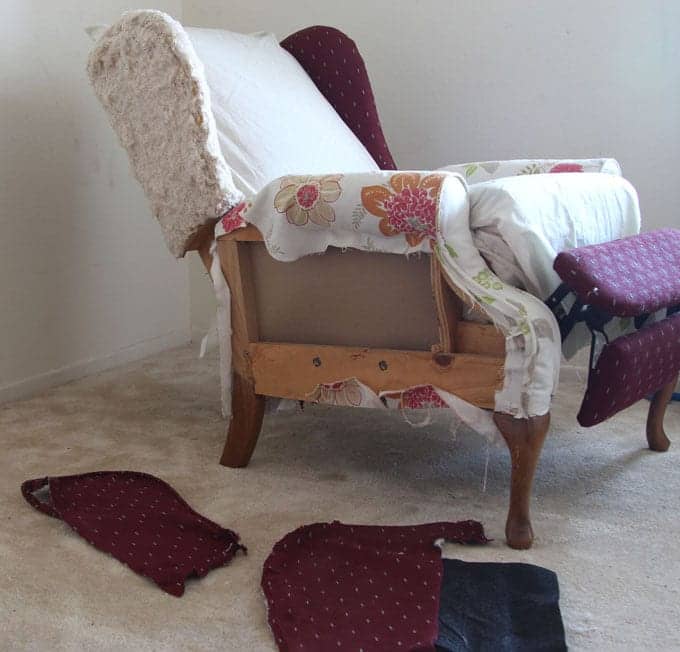
Step 2: remove front fabrics
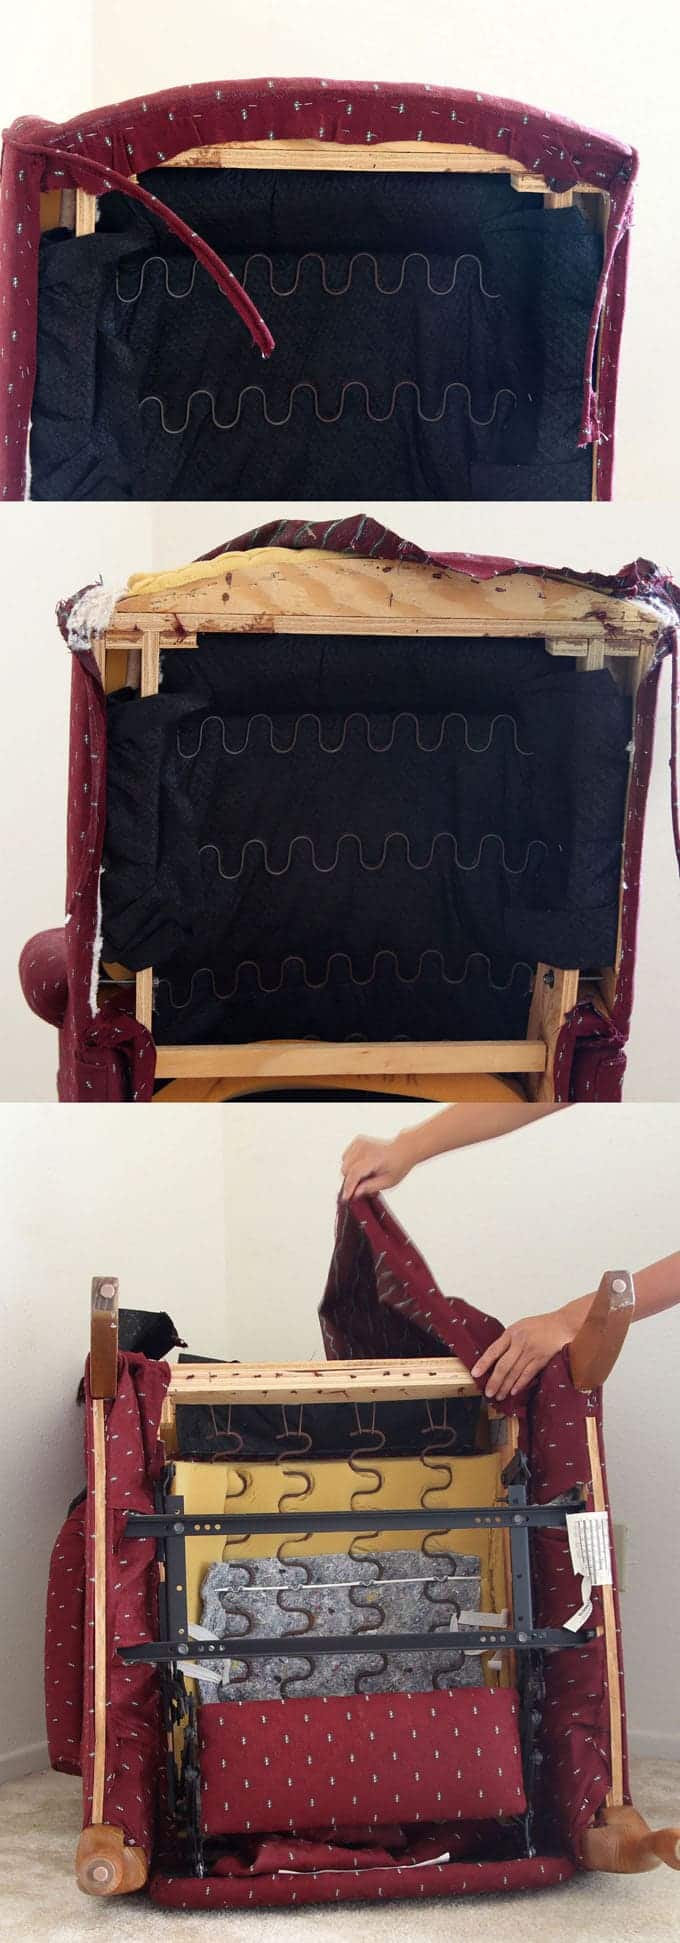
Don’t strain yourself. Turn the recliner chair over when working on the bottom side.
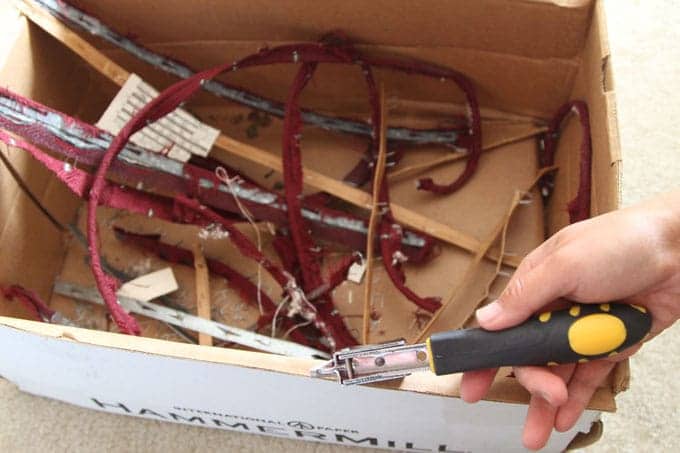
IMPORTANT: put all the loose staples and tack strips in a box so no one steps on these sharp debris!
You can save the piping cords and cover them with new fabrics later.
Related article: How we “remodeled” an outdoor patio using pallets, as renters!

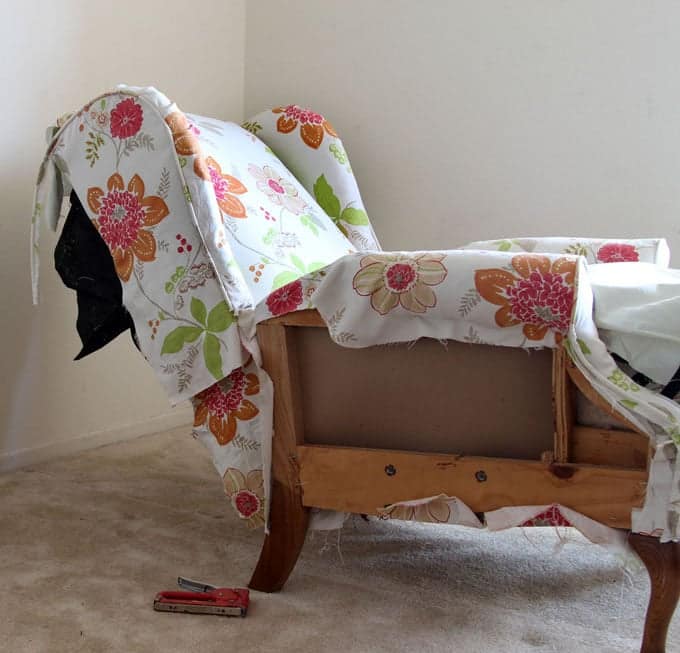
Step 3: remove side panel fabrics
Pay close attention to how the side panel fabrics are attached to the recliner chair frame. Take LOTS of photos for later reference!
I found this area to be the most challenging part of the whole project.
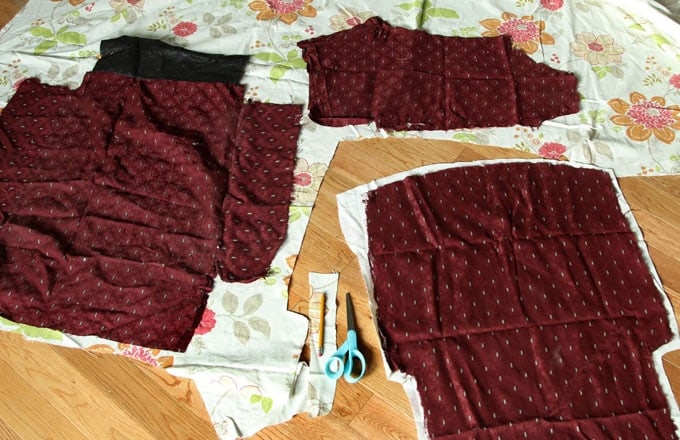
Tip: use the removed fabrics as patterns. Trace them onto your new fabric using a water erasable fabric marking pen or a pencil.
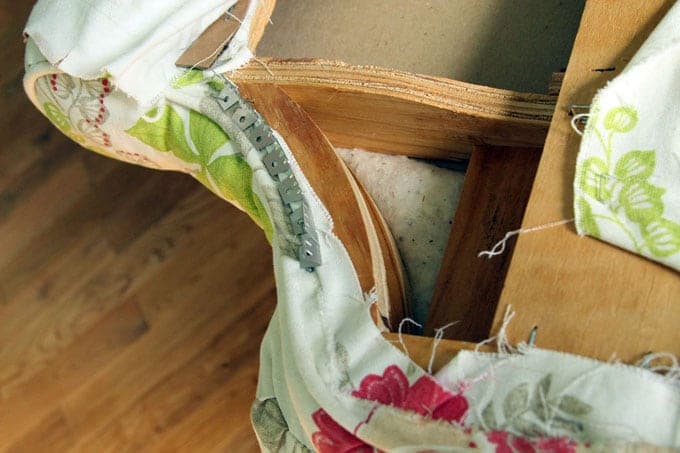
I had planned to remove all the old fabric, then start adding new fabric. But something unexpected made me change my plans.
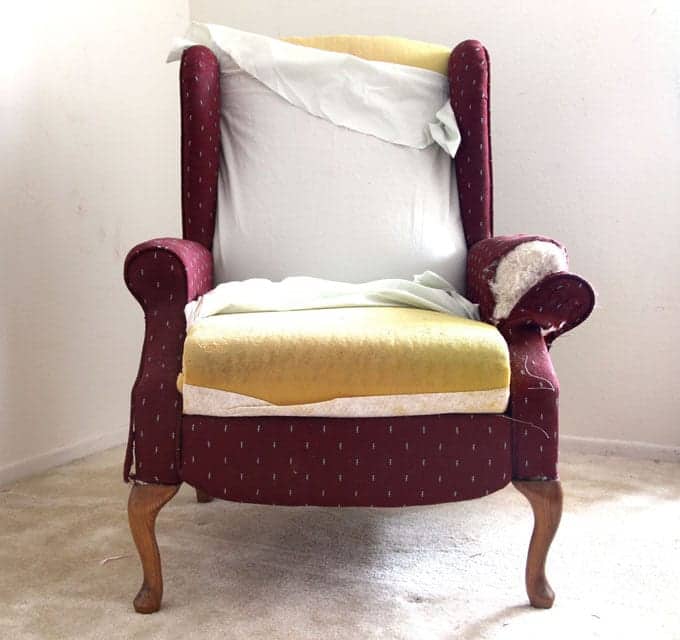
When I started removing fabrics from the arms and side wings, I discovered cotton lining!
I don’t know if this is the pro way, but I decided to remove the fabrics carefully, keep the cotton padding materials in place, and cover them up with the new fabric right away.
I also added extra pieces of lining fabric to give extra protection to the foam cushion on the seat and back.
Tools needed for putting new fabric on the recliner chair:
- fabrics, water erasable fabric marking pen, and scissors
- an upholstery stapler: I used a staple gun which I already have, but an upholstery stapler would work better in this case.
- sewing machine, piping cords (I reused the old ones )
- upholstery tack strip, flexible upholstery tack strip, ( these may look intimidating, but they are not that hard to use!) a rubber mallet for hammering, and a pair of good quality working gloves when working with tack strips.
Step 4: cover side arms and wings with new fabric
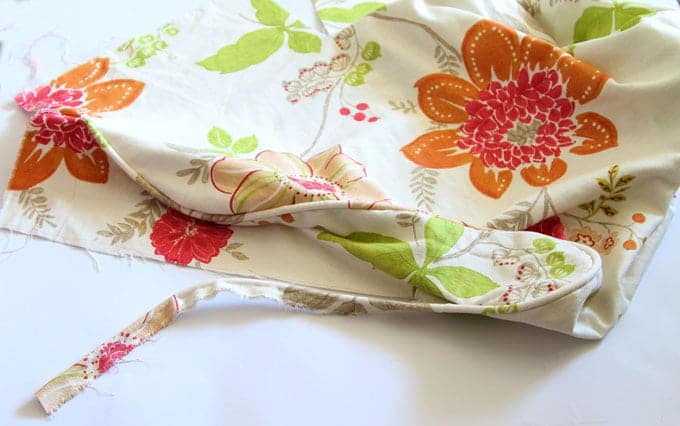
The sewing went quite smoothly even for a beginner like me, it really helped a lot to use the old fabric pieces as templates and reuse the piping cords.
I used a staple gun which I already have, but an upholstery stapler would make the work a lot easier! Be careful when working with staplers or staple guns. Wear safety goggles and learn to use the tools correctly.
Step 5: cover front and back with new fabric
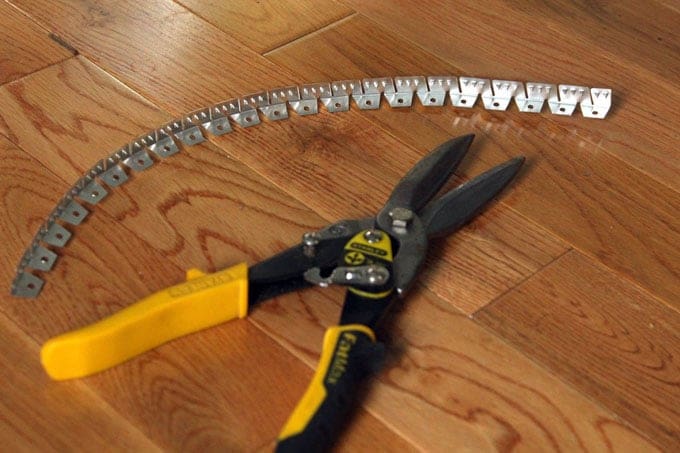
In these final two steps of the makeover, we will need to use some scary looking upholstery tack strips and flexible upholstery tack strip.
They are actually easier to use than you think. Wear good quality working gloves and follow basic safety rules. These tack strips can flap around when you try to break them. Use caution and work safely.
I find it easier to break the tack strip into the correct length using pliers. After bending it back and forth a couple of times, it breaks easily.


Use a rubber mallet for hammering, it’s much gentler on the fabrics than a metal hammer. Below is a great video tutorial on how to use upholstery tack strips.
Step 6: finish side panels, etc.
The side panels are the most challenging part of the process. The flexible upholstery tack strip is a lot easier to cut than the straight ones.
The video below shows how to work with flexible tack strips.
By setting the chair into a reclining position, we can cover the foot rest easily. Can you believe we are at the end of the before after makeover project?
Now a recap of some helpful and important tips of this recliner chair makeover project:
- Take photos of each step when you remove the fabrics, so you can reverse the steps when putting new fabrics on!
- Follow basic safety rules when working with tools and sharp objects! Learn to use each tool properly. Use caution and work safely. Wear good quality working gloves and safety eye goggles when needed.
- When removing old fabrics, put all the loose staples and tack strips in a box so no one steps on these sharp debris!
- You can use the old fabric pieces as templates and reuse the piping cords.
You may also love: 12 Easy DIY pallet sofas and coffee tables

Easy custom furniture with 18 beautiful IKEA hacks.

Happy creating! See you next week!


Very pleasing to look at as well. Where does the tack strips come from, home depot store or specialty store?
hi tori , these are from amazon: upholstery tack strips and flexible upholstery tack strip. 🙂
I have the exact, same chair, same color and everything. The chair is still in great shape but I don’t care for the cranberry color upholstery. Can you estimate how much fabric it took? Thanks.
hi kevin! i’d say about 60 to 80 square feet 🙂 i never loved the color either!
I just got a chair like this and trying to figure out how many yards of fabric to buy. How much did you end up using for this project?? Looks great by the way!
hi nicole, i didn’t measure the total because i had a big roll of fabric. you could use scrap paper or fabric to make a pattern / template. it would also depends on how the print lays on the finished chair! 🙂
Hi. I realize this is an old post; however, I have this exact same chair. I think. The seat is not removable and the top of the front facing back flips over and the bottom is attached. Is this the case for yours? If so, how did you upholstery these pieces? Thank you
hi! i covered the seat and secured the fabric at the bottom. not sure about what you meant “back flips over” though 🙂
This is very helpful tutorial and good diy project to make… Thank you for your post
I have the exact chair and I would love to reupholster it. And I love rhe fabric you used! Where did you get it??
hi robyn! my mom got it for me several years ago from overseas, sorry can’t give you a source on it! =) i would look up white floral home decor fabric on google!
Beautiful project and wonderful instructions. We have a chair exactly like that (but not a recliner)…how much fabric did it take to cover??
hi melissa, my mom gave me a huge amount of this fabric, so i never measure the square footage! =P i would can use a bed sheet or big sheets of paper to help with a rough estimate.
Inspired! I have my Grand Mothers favorite chair. It is in serious need of recovering. I have almost thrown it out a few times thinking I would never b able to recover it. Now I have an idea of how to proceed. Thanks, I really wanted to give it new life. Now maybe I have a good shot! Thanks for sharing your way of life.
You are living the dream!
thank you terri! it does take some time and patience, but well worth it! =)
omg that looks so good! I wish I was such a DIY pro !
Awesome! I think you have given me the courage to try this for myself! Thanks for sharing!
Very pretty re-do. You mentioned the cotton fabric covering you found under the upholstery fabric. The purpose of this is to protect foam and padding from the “sandpapering” effect of the heavier outer fabric. No special fabric has to be purchased. A twin 200 thread count sheet will work well. One trick I learned was to place some plastic under the cotton fabric covering the arms, seat and head area. This allows you to really clean these areas without worrying about soaking the batting or foam. No mold or mildew! I use a heavy garbage bag in my projects involving dining room chairs.
hi crystal, thank yo so much for sharing these great tips! 🙂
Wow….the skill level, patience, and all around fabulous taste displayed here is beyond compare. What a beautiful fabric……..so glad the chair survived the moving rule 🙂
hi phyllis, thank you so much! this rule has been one of our best decisions! hugs!!
You rock…nice job! Brave for trying something out of your comfort zone
thank you so much candice! it was a bit scary for sure! 🙂
Beautiful work love the fabric
Mercy me! You have a LOT of talent and patience for doing such a detailed project…and doing it so well! Beautiful transformation.
thank you sue! you are so kind! =)
I love the fabric you chose for the new upholstery! It’s gorgeous! What a great looking chair now! Thanks for all the great “how to” photos. One needs to know these things…………
thank you barb! it really could be a book with all the steps! =)
Ananda – you never cease to amaze me!!! ??
thank you ann! i barely pulled this one off lol! =)
Wow! I’ve always wanted to re-do a chair like that! Thanks for sharing the steps!
omg that looks so good! I wish I was such a DIY pro haha!
oh wow! that looks incredible! I love the step by step photos. Great to know how to do if you find an awesome chair that just needs a new coat of paint 😉
What an amazing transformation! You did such a great job with that chair. I love the fabric you chose, it’s just beautiful!
How gorgeous! You did an amazing job! i love it!
Gosh, you did such a fantastic job! Looks fabulous!
Wow! You did such an amazing job! I am in love with the after, it looks so professionally done. I’m also loving the palette patio DIY makeover!!
Oh wow! I love the new look! Awesome job on this makeover!
Belle | One Awesome Momma