Easy DIY Wood Wall Art with Hand Lettered Quotes {Double Sided!}
Wood wall art with hand lettered quotes are some of my favorite styles of home decor. I love having more varieties of DIY wall art for our home so we can to change things up often, but I don’t like the idea of things taking up more and more storage.
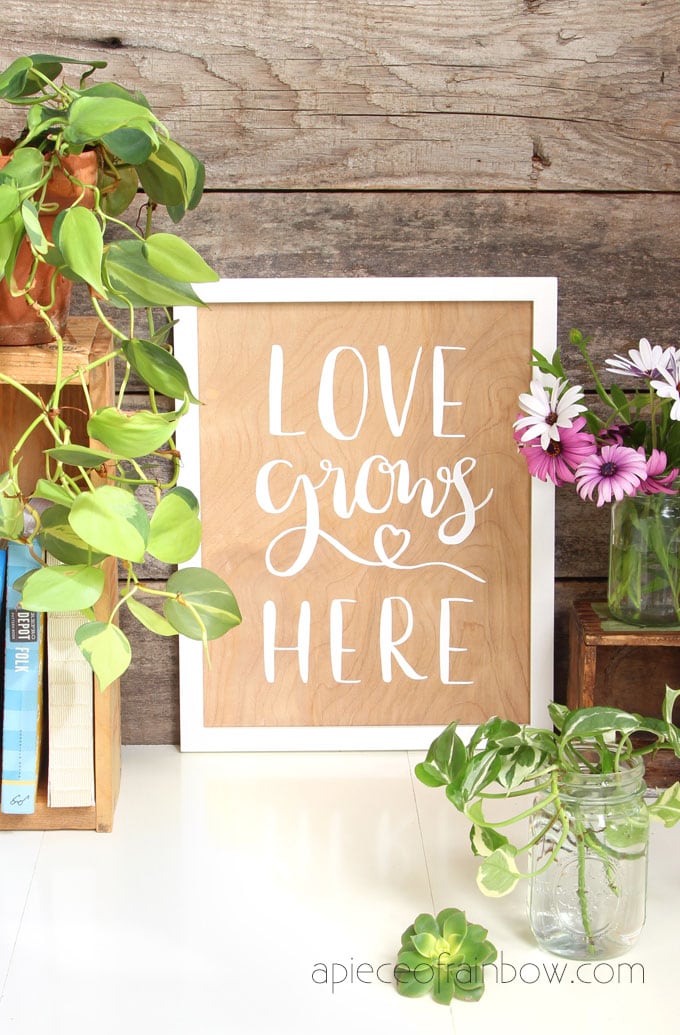
For example, when it comes to wood wall art with hand lettered quotes, if we love gold letters on white wood, and white letters on natural wood, is it possible to have both styles in one piece?
The answer is … … YES!
In today’s tutorial, I will share how to make a double sided easy DIY wood wall art with my own hand lettered quotes, using a picture frame you can even find in thrift stores! This 11″x14″ wood sign looks beautiful in just about any interior design style, such as farmhouse, modern glam, bohemian, etc.
In addition to the free svg designs to use with Cricut, I am also including the two hand lettered quotes as free printable 8″x10″ prints that you can download at the end for instant gratification! 🙂

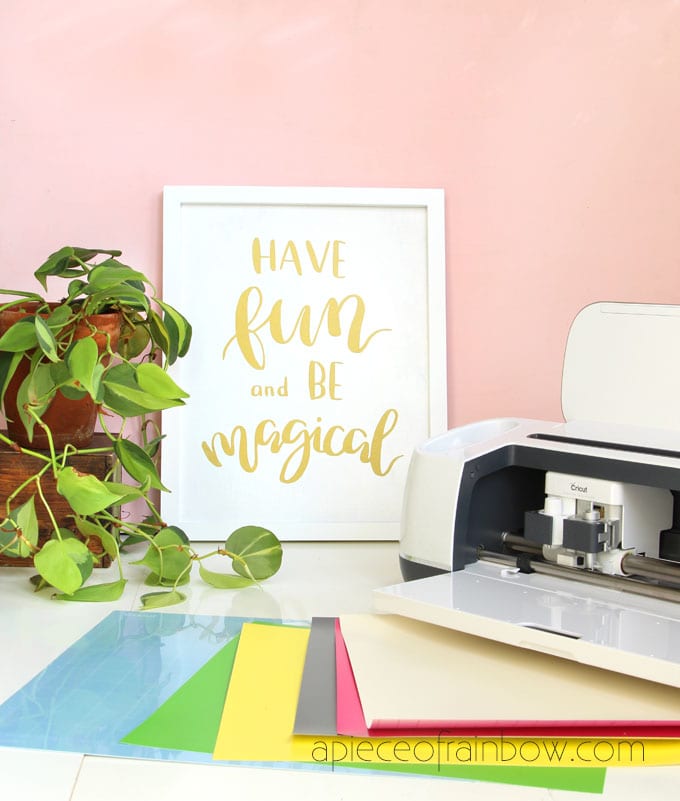
There are many ways to make DIY wood wall art, and I will be sharing more tutorials with different techniques in the coming months. Today I am sharing one of my favorite techniques: how to use Cricut smart cutting machine and vinyl to create beautiful wall art in less than one hour!
Disclosure: I received the Cricut Maker and other related tools as free gifts for my honest review after trying the products. I only endorse products that I would sincerely recommend to our friends and family. Some of the helpful resources are affiliate links. Full disclosure here.
Although it is possible to hand trace the designs and cut it with an Xacto knife, the Cricut Maker or Cricut Explore Air makes the process super fast and easy, and the results are so clean and beautiful. It is definitely a fabulous tool I have grown to love after my first few projects. Just imagine all the crafts, gifts and decor you could make!
Materials and tools to make DIY wood wall art with hand lettered quotes
- I used the Cricut Maker (love it!) The Cricut Explore Air will also be great for this project.
- Cricut vinyl transfer tape, and this Sampler pack of 12″x12″ Cricut vinyl has white, balck, silver and gold, which is perfect for quote art projects. I used the Cricut light grip mat for vinyl and it worked perfect.
- picture frame and a small piece of 1/4″ thick plywood
- optional: paint or stain for wood
Step 1: prepare the frame and wood
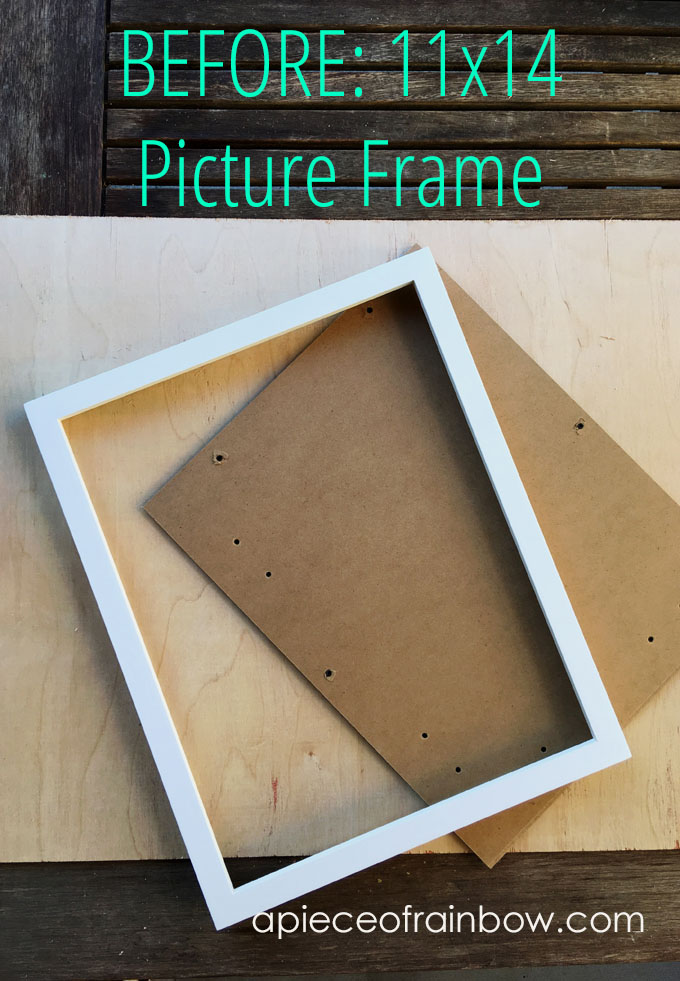
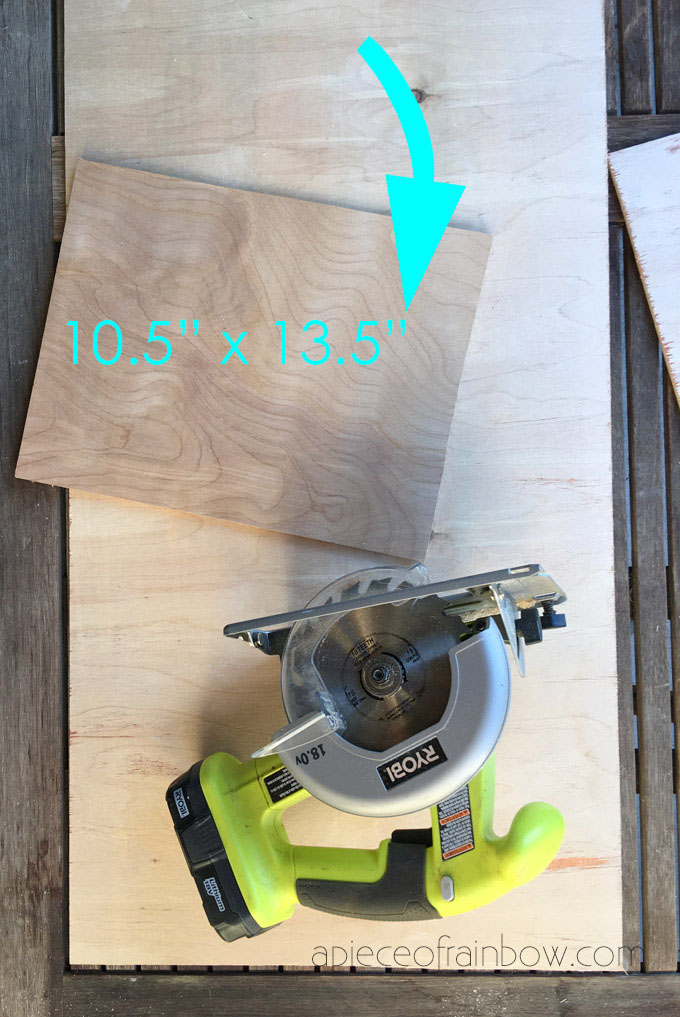
I started with an 11″x14″ (outside dimension) picture frame like this, or this one. You can find lots of frames in thrift stores too.
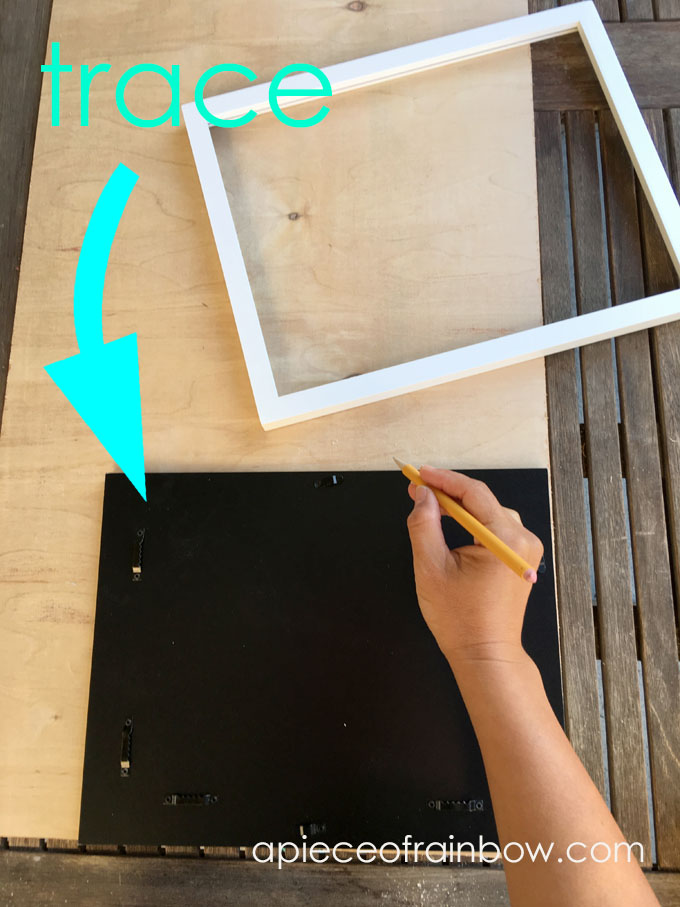
Take out the glass and mat board. We will only be using the frame and back board. Trace and cut plywood to the same size as the glass and backing inside the frame. Sand the cut edges to prevent splinters. I also painted one side white using acrylic paint.
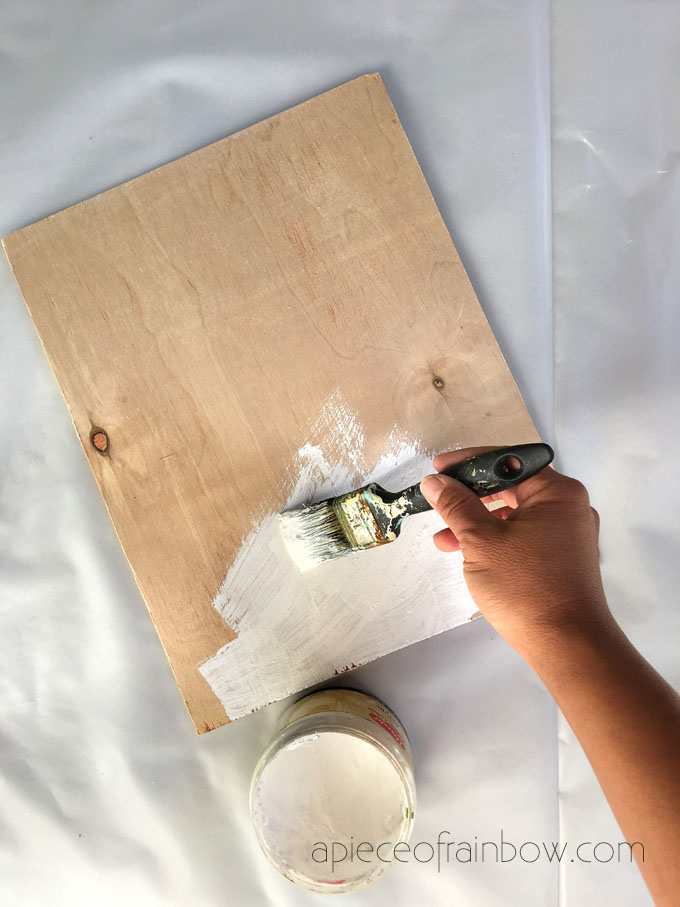
If you live in a humid climate, or plan to use this in a high humidity area such as a bathroom with showers, it is a good idea to seal the unpainted side with a clear acrylic sealer like these.
Step 2: cut and weed vinyl designs
Upload your svg (or download ours at the end!) to Cricut design space. If you need more details on this process, you can refer to this tutorial: Create Your First Cricut Maker Project in 20 Minutes!
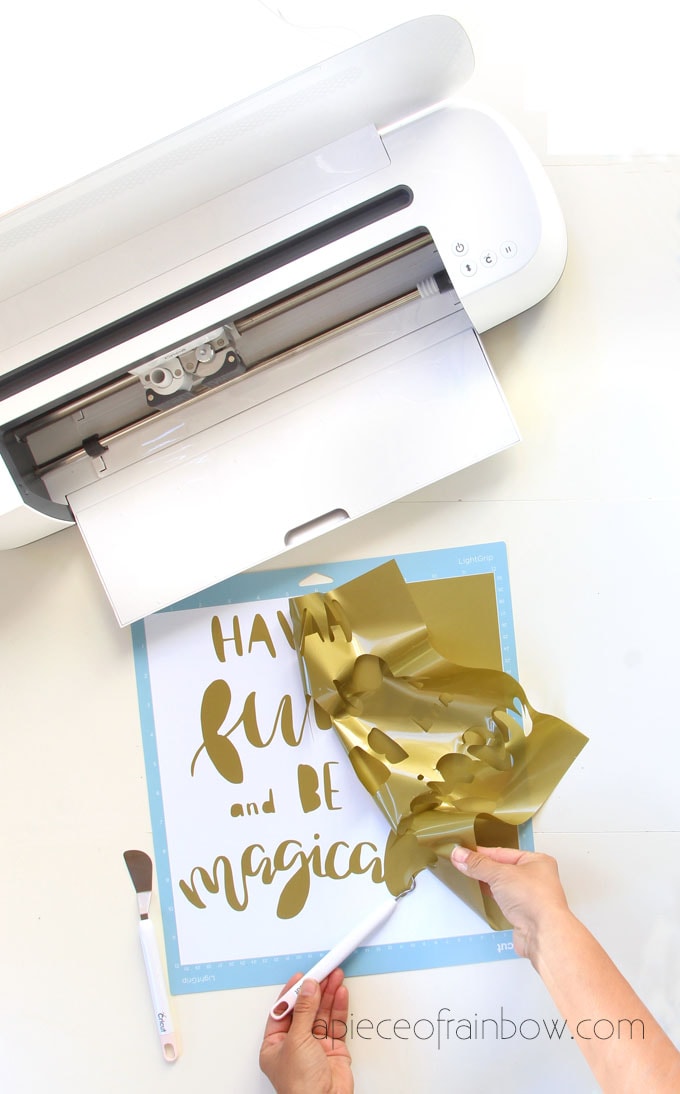
Place a sheet of vinyl onto the Cricut light grip cutting mat with the backing side down. Make sure it is flat on the mat with no bubbles.
Select vinyl as the material, upload the mat and press cut. Once the cutting is finished, remove the mat and weed the design by peeling the excess vinyl off the backing material.
Do it carefully to prevent tearing. Use the Cricut weeding tool to prop up areas that don’t come up easily, then peel the piece off. This Cricut Tools Basic Set is amazing: it includes the weeder, scraper, and spatula which I already love, and more!
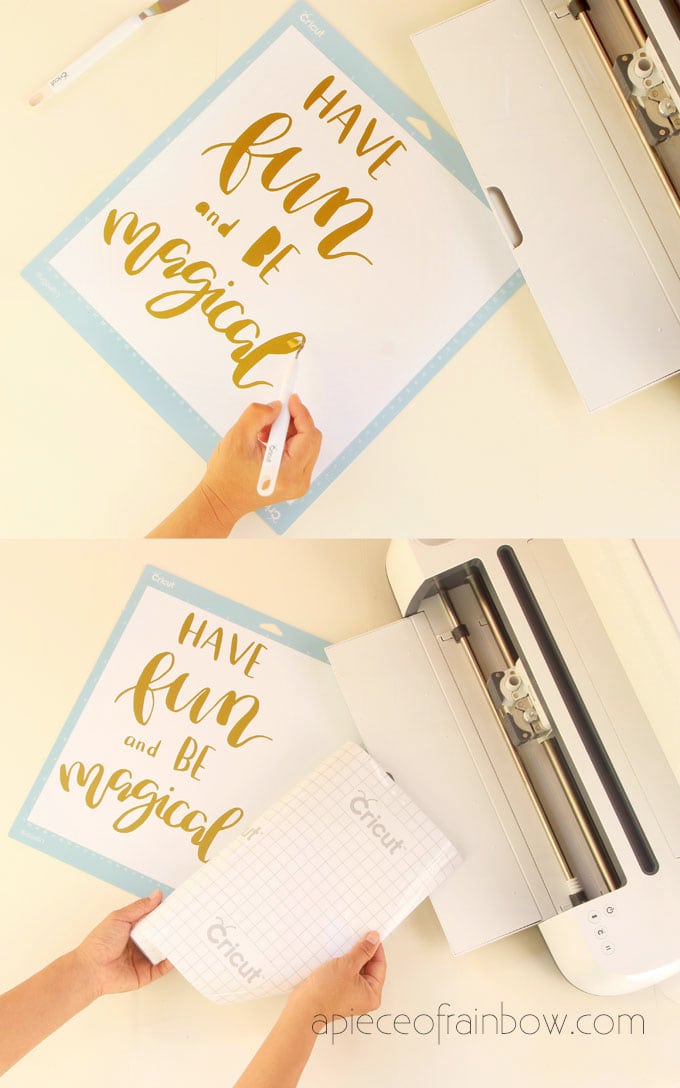
Step 3: transfer Cricut vinyl designs to wood
Cut a piece of transfer tape large enough to cover the designs. Keep the backing paper! ( See below for a super cool tip!)
Peel off the backing just a little from one end and press it down onto the vinyl sheet. keep peeling as you press the tape down.
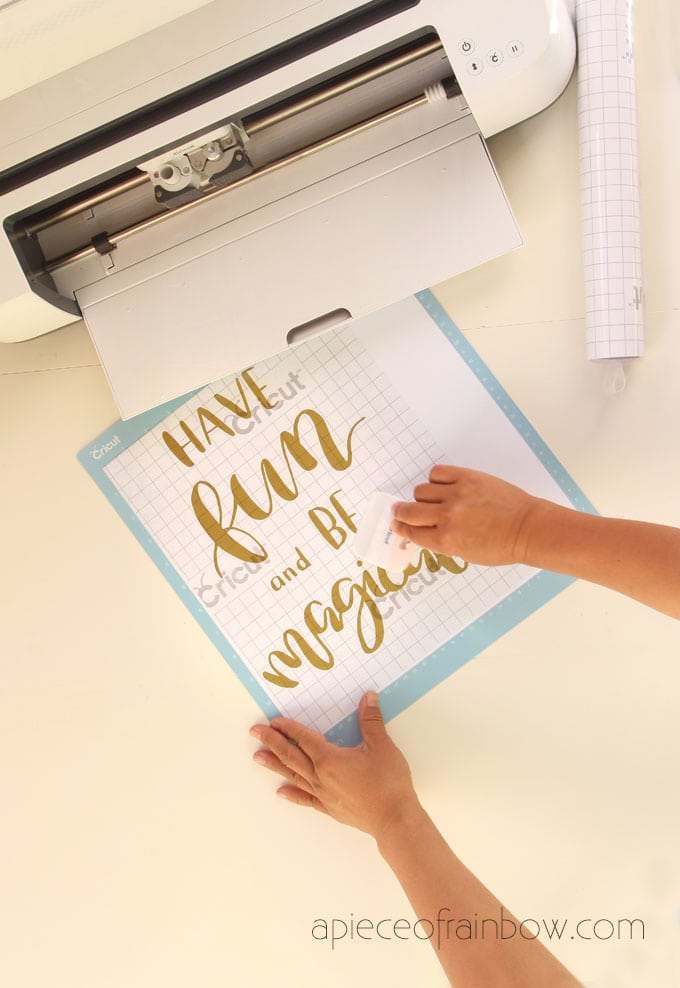
Once the transfer tape is covering the designs, take a scraper and press the tape onto the designs. The goal here is to have the designs stick to the tape, so use a lot of pressure!
Next, peel the transfer tape with the vinyl designs attached onto it. Use the Cricut weeding tool to prop up any vinyl that are not coming up, and help it stick to the tape.
After getting all the vinyl designs onto the transfer tape, center the piece gently onto the wood surface. Don’t press on it yet. You can adjust the position until everything looks centered.
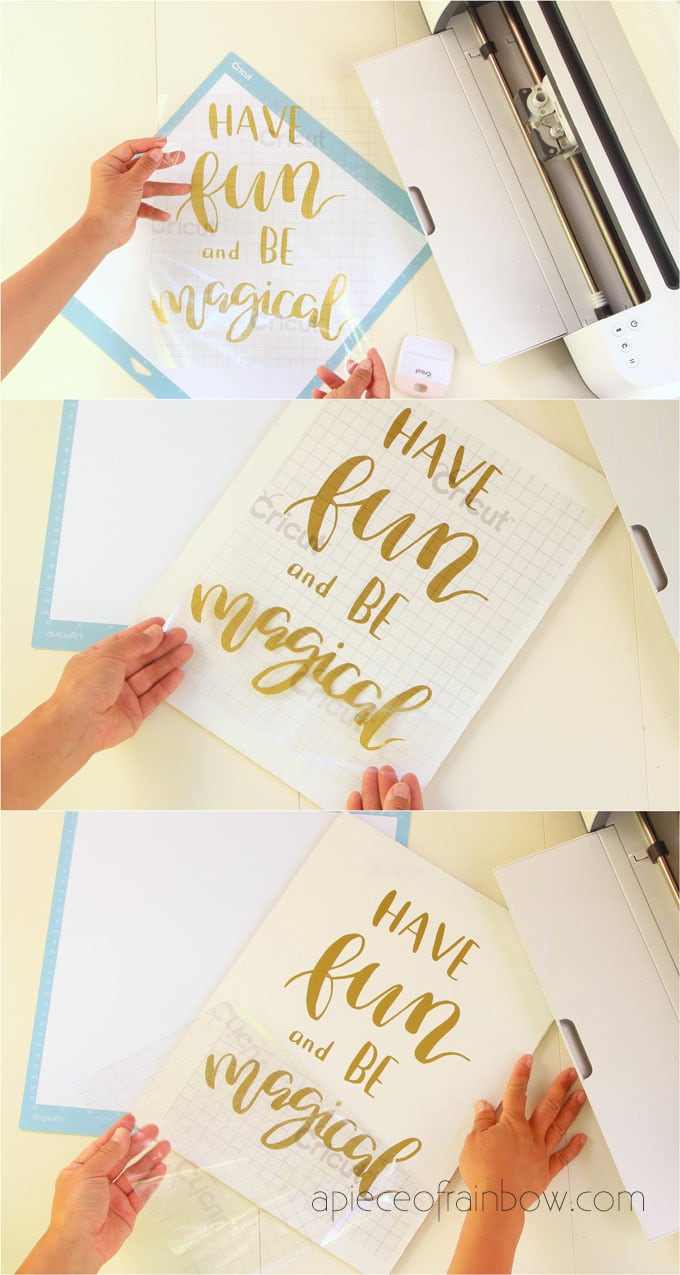
Now press the transfer tape down and use the scraper to press the designs onto the wood. Peel off the transfer tape. This part was easier than getting the designs onto the tape in my opinion!
Two helpful tips on how to use Cricut transfer tape for vinyl designs:
The only tricky part I found while learning to use transfer on vinyl designs is that sometimes the designs won’t come off with the transfer tape. The key is to put lots of pressure on the “tips” of the designs: those areas where a connected piece of design comes off first. So if you peel the tape from the top, then put extra pressure on the top tips of each letter.
You can reuse Cricut vinyl transfer tape ! Remember we suggested that you keep the backing paper? You can put the transfer tape back and reuse it again for several times. I used the same piece to transfer both quotes onto the wood wall art!

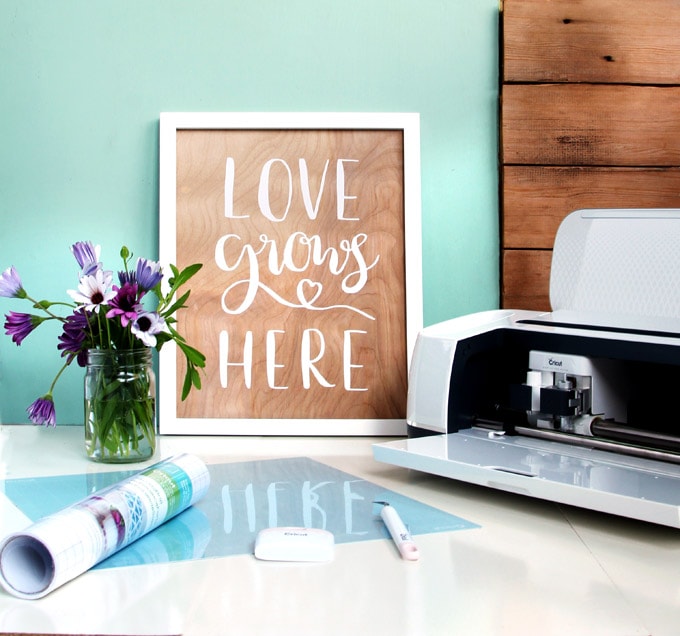
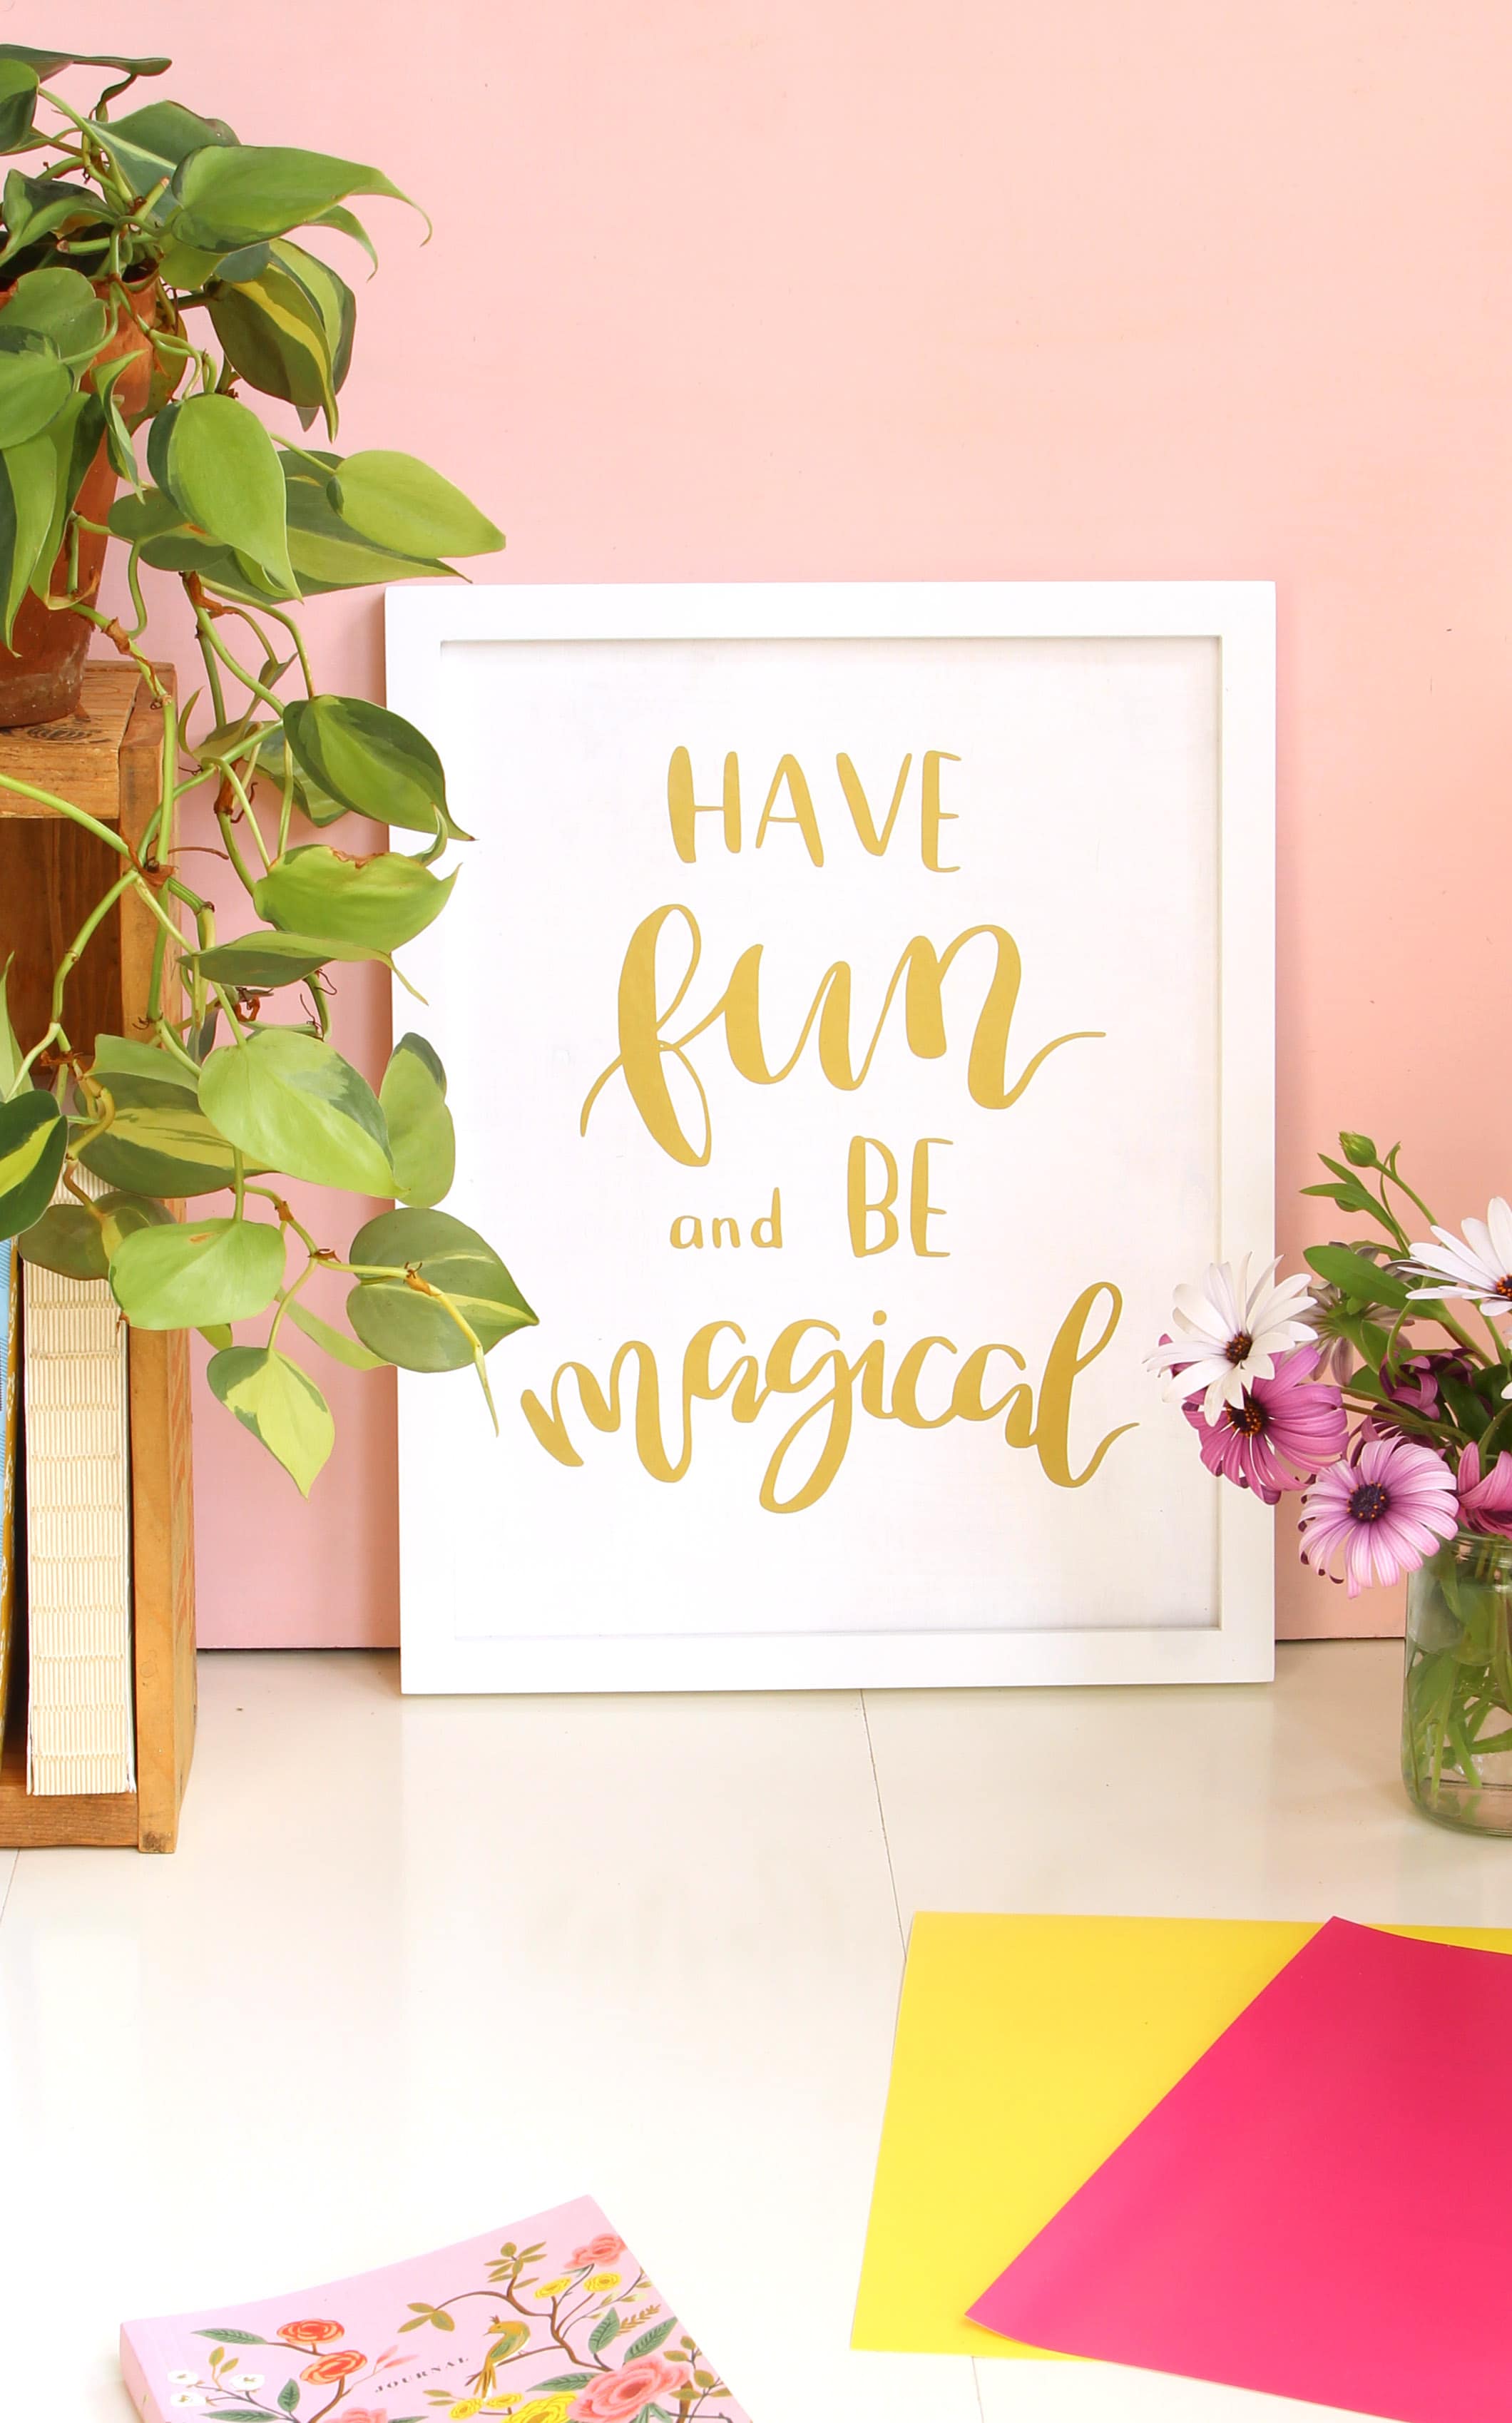
If you want to make double sided art, repeat step 2 and 3 with the second design. I love having two of my favorite quotes (one of which I made up) in the same DIY wood wall art. All it takes is to flip the wood and it’s as easy as changing out a picture.
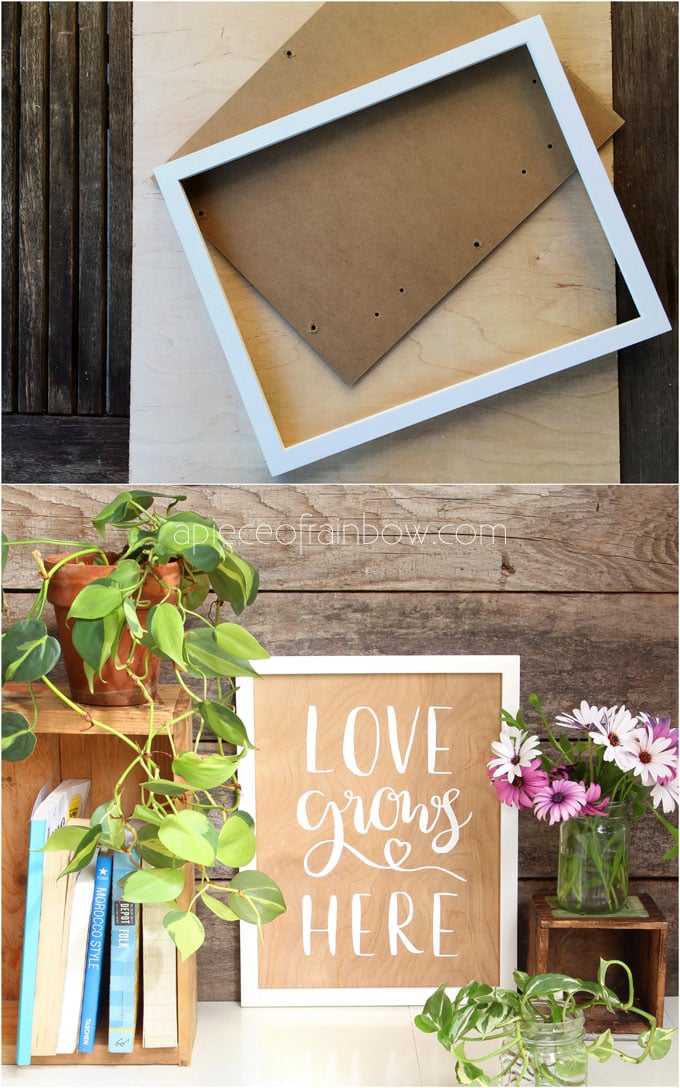
Since we are replacing the glass and mat board with the thin plywood, now we can add the backing of the frame and everything will fit perfectly and ready for hanging!
To download free designs for this project and tons of other goodies, click button below!

Love wood wall art? You have to try this super fun and simple technique of transferring images to wood using something from your kitchen!

Simple low-tech technique of transferring images to wood!
Can’t get enough Cricut projects? Here’s how to transform a blank canvas tote into something beautiful!
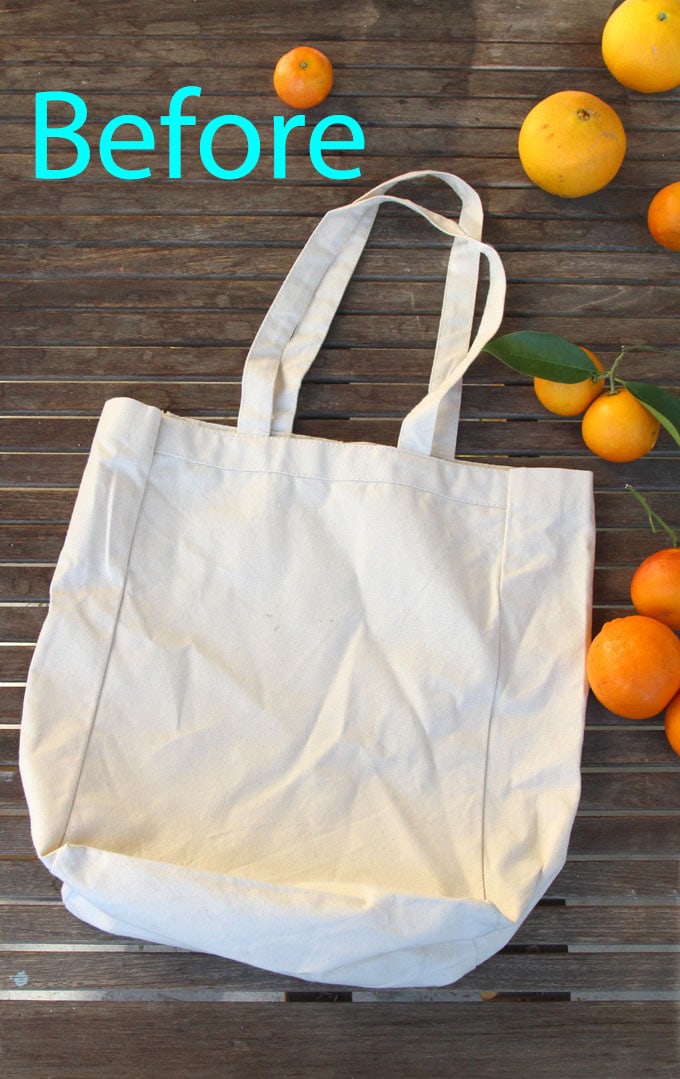
Check out what this blank canvas tote look like now!
Happy creating! See you next week!
This is a sponsored conversation written by me on behalf of Cricut. The opinions and text are all mine.


I’m receiving your emails and am trying toget the downloads. There is no large button to push. Just a big gold rectangle and when I push it, all I get is the subscriptionnotice. I’ve already subscribed. I’ve tried several times to get a pattern and nothing is working. Please give me a suggestion.
Judy
h judy! if you scroll down a bit here- https://view.flodesk.com/emails/5e977b44deb003002666703c do you see a red button? this would be where it is in our newsletter 🙂
Such an amazing tutorial. These look really incredible. I think it’s a great way to change up your decor in your home. I will try it for sure. Thank you so much for sharing such an incredible project with all of us.
I’m really keen to have a go at your fabulous project – where can I find the downloads? xo
whoops! thank you janelle for catching that! i will add the links by tomorrow! 🙂
These look totally amazing. you clearly have an artistic edge and these look like shop quality. Great idea for gifts xx
Sigh. I feel like I kind of need a Cricut. This is way too cute and such a good way to change up your decor in your home.
Those look so amazing! And thanks for the great tutorial!
What a great tutorial! And how rad is that Cricut! I really need to give this a go! Now to find a quote to try this on!
What a cute idea! I don’t have a cricut machine, but I am really good at freestyle writing letters so I could do something similar with paint! We always have extra wood laying around from various projects.
This is so cute! And it doesn’t look that hard to make as long as you have the right tools!