Easy DIY Pendant Light with Origami Lampshade
There is so much creative potential hidden in those free brown paper grocery bags. You can turn them into stylish Christmas gift wrap, or beautiful storage baskets. Today, we have another fun DIY for you: a pendant light!
Have you see those gorgeous pendant light photos with $100 origami paper lampshades in design magazines? Here’s the secret: you can make one just as beautiful, for almost free. In this tutorial, I will share how to make a stylish DIY pendant light in 3 easy steps:
- How to make a perfect size origami DIY lampshade from two paper grocery bags ( or any paper )!
- How to choose a pendant light kit and customize a pendant light cord.
- How to make a hanging pendant light easily with you origami lampshade and pendant light kit.
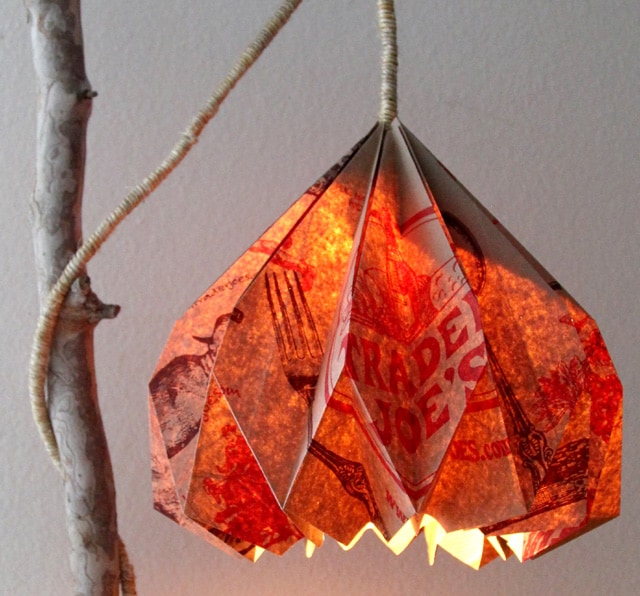
This pendant lamp with DIY lampshade is made with one and a half paper bag. I love these retro style Trader Joe’s grocery bags and the idea of up-cycling. You can use any paper of similar size and thickness. All you need is a little folding!
*Some resources in article are affiliate links. Full disclosure here.
No worries if you are not familiar with origami, I have an easy-to-understand folding template and diagram for you to download and practice so you can make your own origami paper pendant lamp shade!
Print it out on a piece of letter size paper and practice a little. The key here is to get comfortable with the “mountain” and “valley” folds. Mountain folds are towards you, and valley folds away from you!
Add your name to form below to download folding pattern for this paper lamp shade :
Step 1. How to make a perfect size origami DIY lampshade from two paper grocery bags ( or any paper )
Materials and tools:
- Pendant cord: here are a few of my favorite, in case one of them sells out- a super cute black and white cord , a white pendant cord, Ikea Hemma cord in black or white, and a two pack white pendant cord with on-off switch!
- Important: when choosing bulbs, it’s important to choose those that does not generate too much heat, such as these LED Light Bulbs: they are 7.5 watt but light up like 40 watts. If you want something brighter for a larger room, these 10.5-watt LED Light Bulbs will light up like 60 watts! We prefer the 7.5 watt LED bulbs for over a desk area. NO incandescent bulbs should be used near paper!
Hope you had fun practicing folding a mini origami paper pendant lamp shade! =)
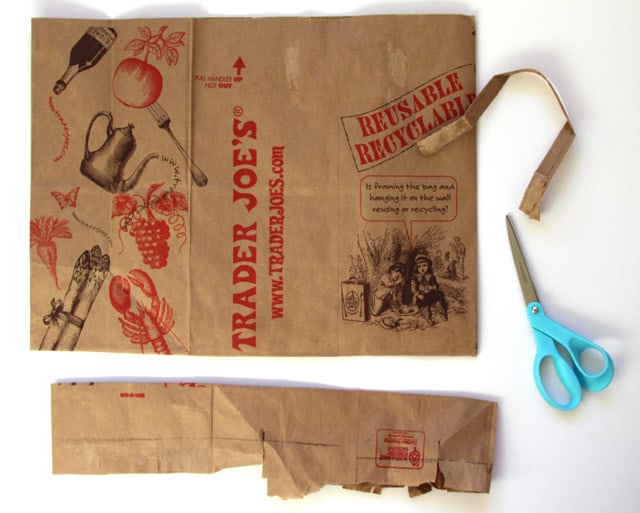
To make the big origami DIY lampshade, let’s begin with 2 paper grocery bags you like.
Remove the handles carefully, cut off bottom of the bag and open up the one side that is glued so it’s ONE continuous piece and ready for folding. Use the dimensions in the download diagram as a guide. It does not have to be so exact since your grocery bag might be different in size.
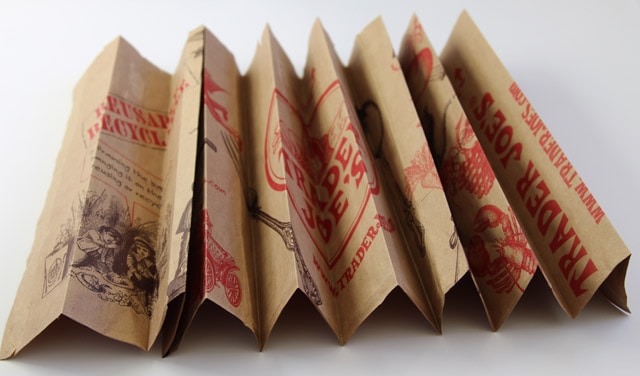
Start with the long ( one full bag opened up) piece. Fold it lengthwise in half, then fold each of the half piece in half, repeat till you dived the whole length into 16 equal parts with these accordion folds. See photo above.
Tip: be as precise as possible in this first step!
Next, fold the first row of diagonal folds, don’t worry about mountain or valley yet, just make some good creases. You can mark the next folding points with light pencil marks if that helps.
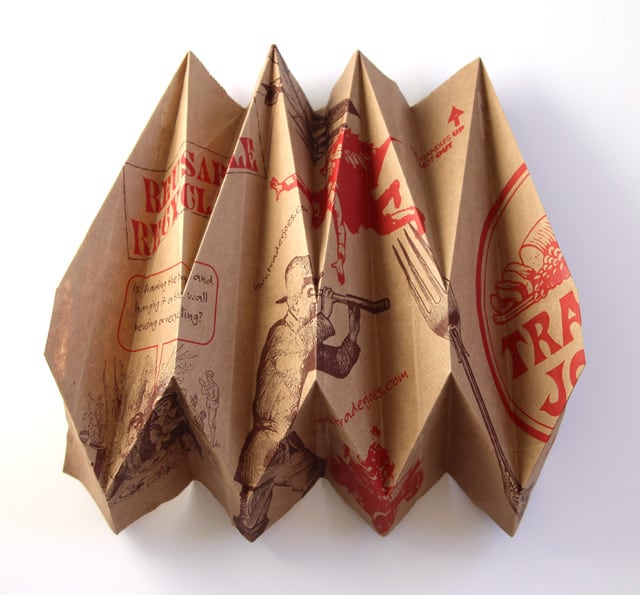
After all the creases are made, fold them according to the diagram, the photos below might be helpful as well.
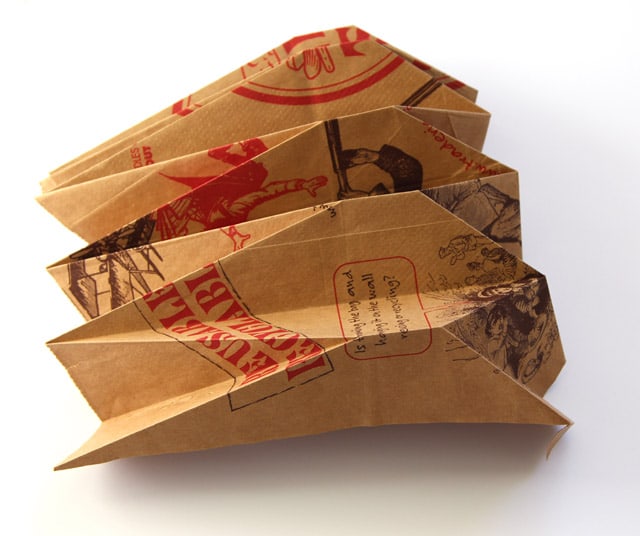
This is what it will look like after all the folds.
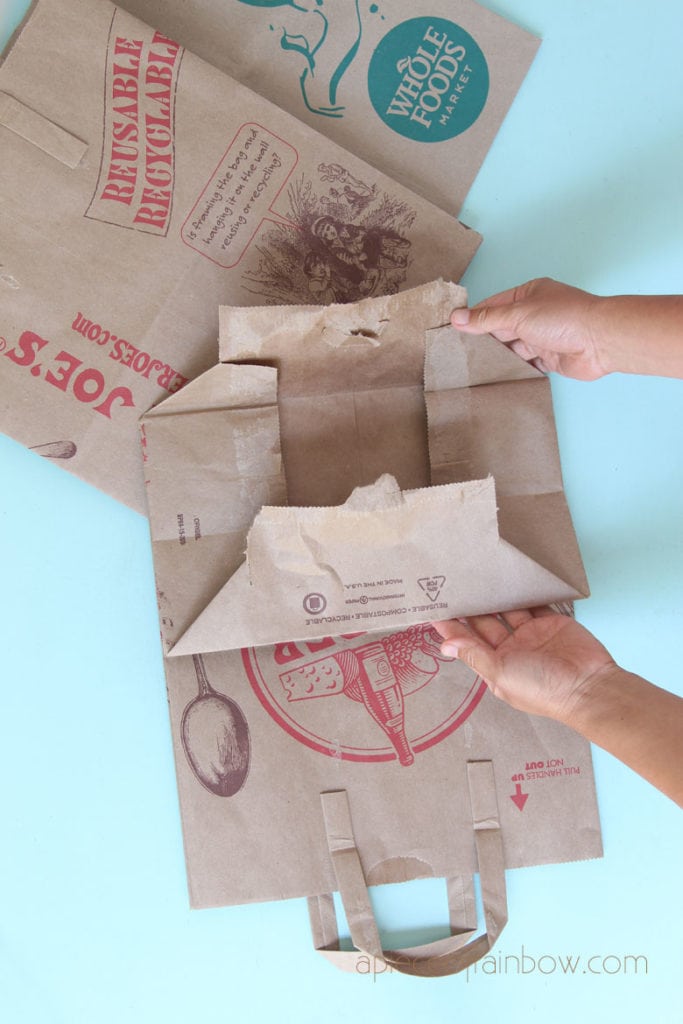
Next, cut the second bag to half the length of this piece, and start with the accordion folds, this time into 8 equal parts since it’s half the length.
Repeat with all the folds. Pay attention that the accordion folds start and end differently than the first piece, this is not required but will make the gluing a bit easier.
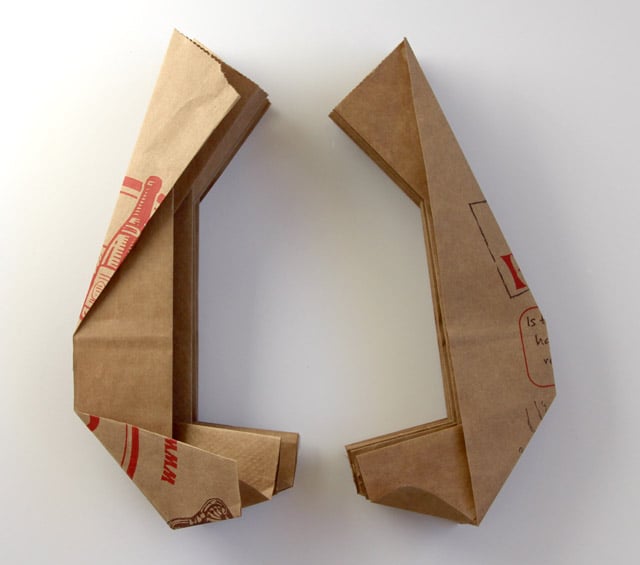
Next step is to join the 2 sections together using either glue or double sided tape. Just find the parts that matches, overlap them, and glue them together.
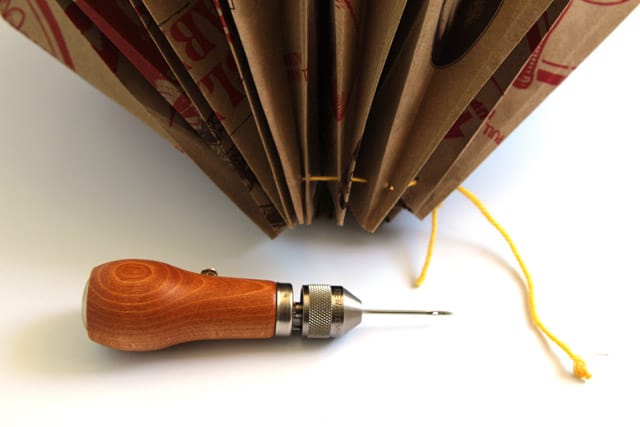
The final step of creating the origami paper pendant lamp shade is to poke holes at the top tip, and thread a string or yarn through the holes.
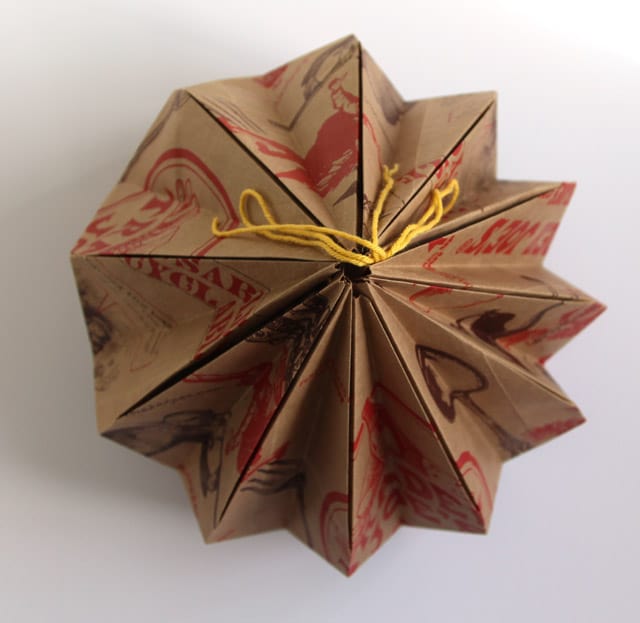

As you tighten the string, gently form a swirl by pushing the tabs on the inside, like in this photo above.
Tie a knot that can be loosened so you can insert a pendant cord easily.
Step 2. How to choose a pendant light kit and customize it to look even more beautiful.
Pendant cord: here are a few of my favorite, in case one of them sells out- a super cute black and white cord , a white pendant cord, Ikea Hemma cord in black or white, and a two pack white pendant cord with on-off switch!
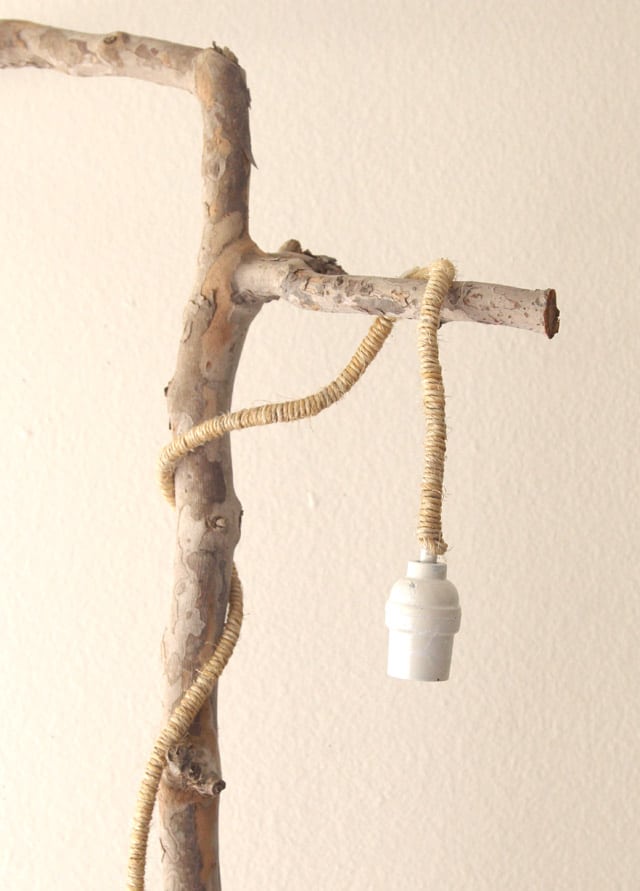
A plain pendant cord can easily be transformed into a charming one by wrapping Sisal Twine, yarn, or Hemp Twine like these around it and hot gluing the ends.
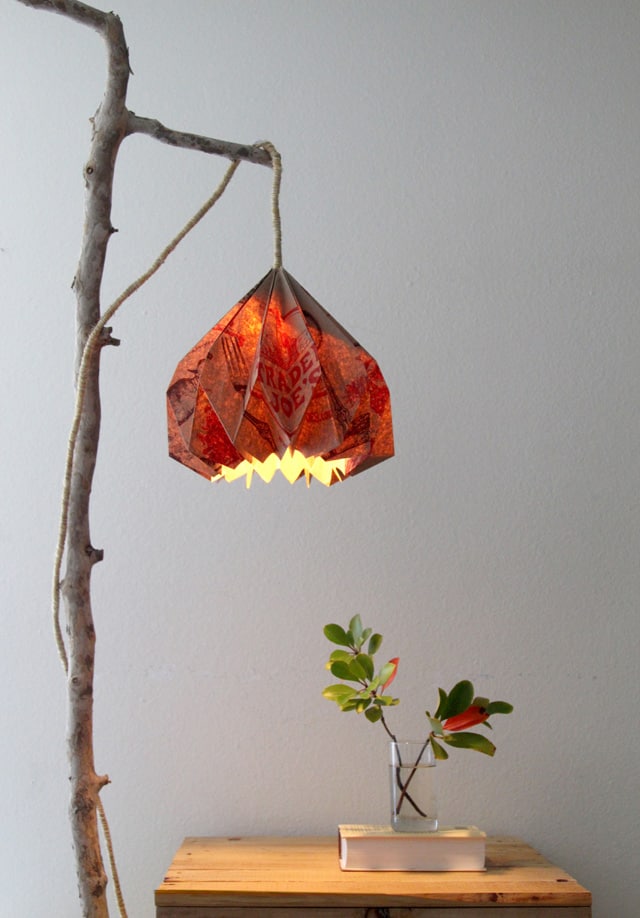
Step 3. How to make a hanging pendant light easily with you origami lampshade and pendant light kit.

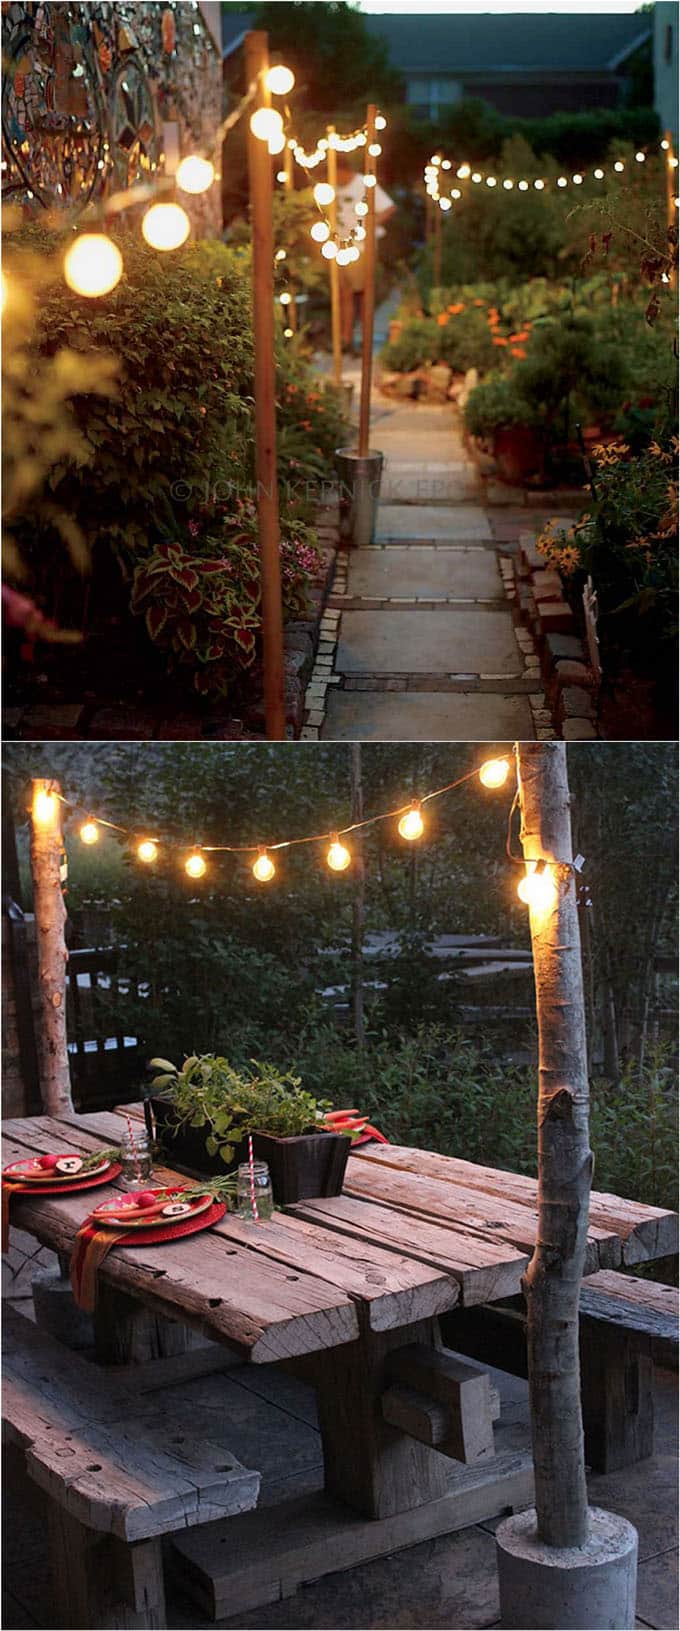
There are many ways to support the pendant light and cord, such as wall mount wood brackets, stands, or a tree branch, like this one from the lovely tree trimming people I happened to walk by in our neighborhood!
This tree branch is securely sandwiched between our desk and the wall behind it. You can also make a wood or concrete base for it like in these outdoor lighting DIY below!
Important: when choosing bulbs, it’s important to choose those that does not generate too much heat, such as these LED Light Bulbs: they are 7.5 watt but light up like 40 watts. If you want something brighter for a larger room, these 10.5-watt LED Light Bulbs will light up like 60 watts! We prefer the 7.5 watt LED bulbs for over a desk area. NO incandescent bulbs should be used near paper!

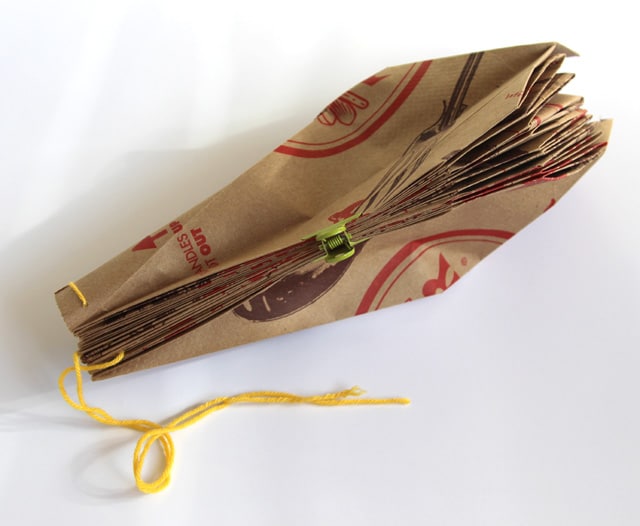
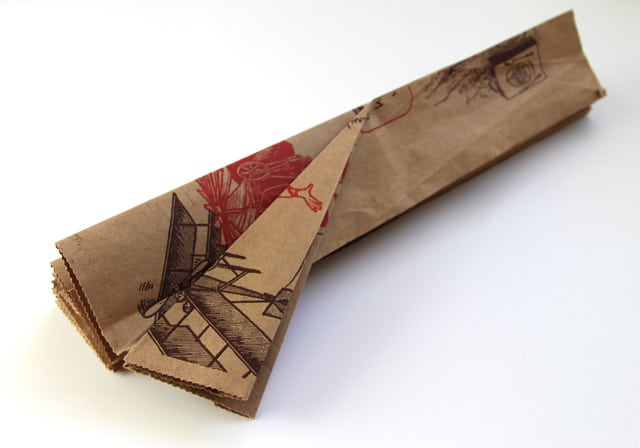
This origami paper pendant lampshade can “shrink” to a tiny size for storage – magic or origami!
Hope you are in love with paper bags as much as I do by now! Again, Important: when choosing bulbs, it’s important to choose those that does not generate too much heat, such as these LED Light Bulbs: they are 7.5 watt but light up like 40 watts. If you want something brighter for a larger room, these 10.5-watt LED Light Bulbs will light up like 60 watts! We prefer the 7.5 watt LED bulbs for over a desk area. NO incandescent bulbs should be used near paper!

Add your name to form below to download folding pattern for this paper lamp shade :
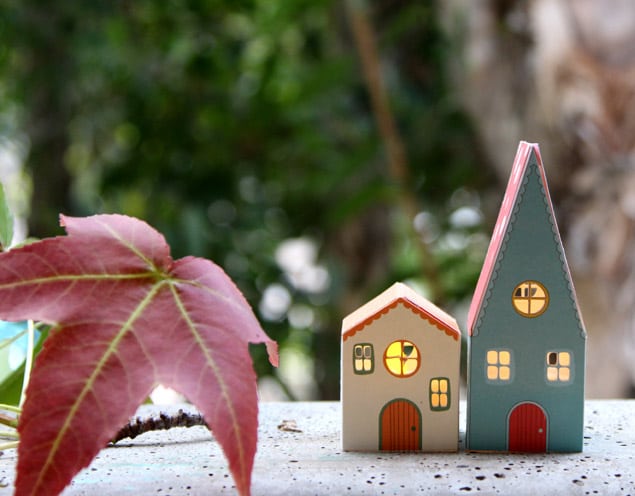
If you love paper lighting projects, you will also love these dimensional paper lanterns and mini tea-light houses!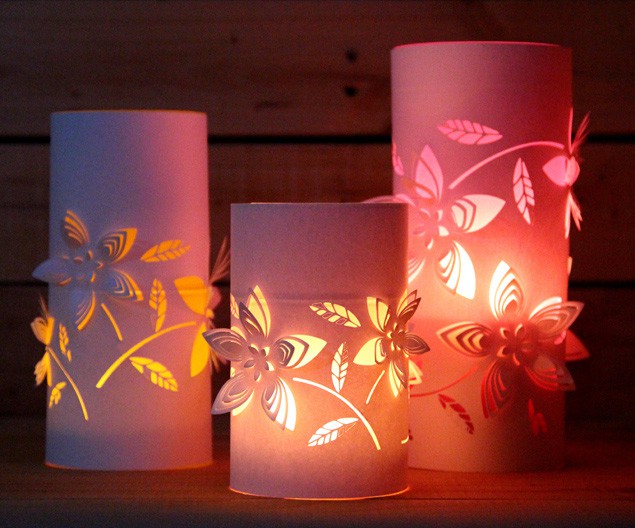
How about painting a plain lamp shade into chic chevron? 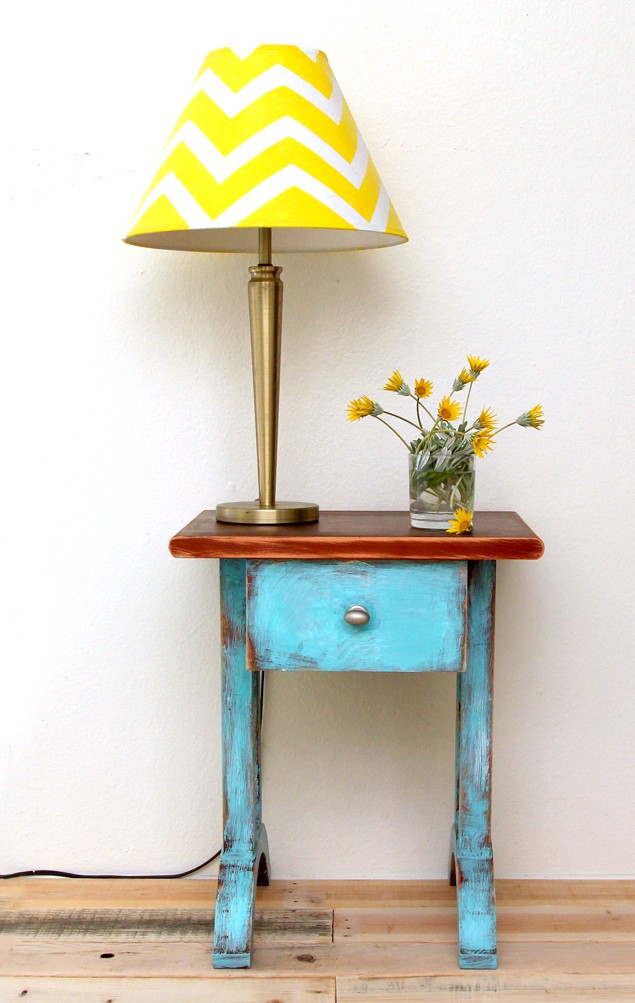
Happy Creating! See you next week!


at this point, how did you just look at a lamp and be like “nah bro I got this. We are gonna make this out of paper bags that everyone keeps and it will look awesome and people will be happy.” So impressive.
thank you so much Kelsey! trader joes bags are quite stylish right?! 🙂
I want to do these lampshades for our daughters room but I am lost. Do you have a video tutorial? Thank you and I love all of your posts! Please, keep them coming.
P.S. Could you paint these with acyrlic paint or spray paint?
hi Laura! thank you! acrylic paint is great for this, i would not use spray paints for bedroom since they can smell. sorry i made this project before starting to do video tutorials 🙂
Hi!
I tried to download the pattern but I could not do it because when I click on the download link it does not open the file. Can you send it to me?
THANK YOU!!!!
Hi veronica, maybe try this link and right click save 🙂 https://www.apieceofrainbow.com/wp-content/uploads/2014/10/paperbag_lamp_template_apieceofrainbow.pdf
I can’t download the template
hi! did you click the red button in our subscribers’ weekly newsletter?
I have been looking for ways to make a origami paper lampshade like this! They are so expensive to buy, now i am really excited to make it. Thank you so much!
What a cute idea! Thank you for sharing the tutorial!! I have never folded origami, this gonna be a nice beginning.
Hi!
I tried to download the pattern but I could not do it because when I click on the download link the vegetable calendar opens. Can you send it to me?
THANK YOU!!!!
greetings from Argentina
hi aida, i have been traveling and will be back this weekend. i will check and update the link. let me know if you still have trouble downloading!
Gracias Ananda!
Amo todo lo que publicas en tu página y es muy útil para mí.
Desde Argentina mi saludo!
thank you Diana for visiting from Argentina! =)
Hi! This is so awesome! I would like to make one but im unsure what kind of pendant cord to use. I tried clicking where it says pendant cord thinking it would link to where i could buy it but it just comes back to the same page I was already on. Thank you in advance for the help!! 🙂
hi amber, thank you so much for letting me know about the glitch! i fixed it and added some new favorite cords. happy creating!! =)
Seriously love this
It looks so great!! I love origamis and homemade decorations, this is just perfect!
Love this idea, especially wrapping the cord around the wood. I was curious as to what you used for the lamp’s base?
hi jennifer! this tree branch stands up on it’s own and rests against the wall, we secured it with a piece of fishing line attached to a screw on the wall so it does not fall over. other good options would be to build a wood or concrete base and secure the branch in it. hope that helps!
Wow, that was hard! I can do origami cranes, dragons, etc., but those particular folds hurt my brain! I just wanted to write in case anybody wants to give up or send angry emails that the template is wrong (as I almost did)! I wanted this lampshade very badly…and it took me about 4 hours until the practice bag fell into place-like magic. I’m now ridiculously proud. Thanks for the tutorial.
Thank’s for the great guidance. Can you tell the size measurement of the Grocery Bag? or the guidance relate to every bag?
Thanks again
hi talia, before opening apart, the bag is about 14″ tall, and 12″ wide, side is 7″ wide. =)
Hello that’s darling, I love paper bags and they’re very useful. But this is awesome, because I was thinking of a different kind of shade. Thank you so much. Linda
Anada please me got to do this for my foster-kids…am sure will luv to have fun with the…just told them. are you on skype so you could talk with ma family soon. great works…
thank you! =) although i won’t be able to work on projects with my readers(over 10k a day) individually, please feel free to let me know if you run into any questions! have fun! =)
EEEEKKKK thankyou so much for this tutorial!! I’m not sure if you know this but there is a brand called Studio Snowpuppe that sells lamps very similar to this, but they’re SUPER expensive! I’ve been searching for a tutorial so I can DIY one of their shades before I bite the bullet and fish out the $100+, I may not even bother now! I printed off the template onto A4 paper to test it out, it looks exactly as I want and I’m grabbing my coat and running to the store to buy some mint green card. Again, Thankyou, your blog saved my life. Ok maybe not literally, but you would think so my smile is so wide!
yay!! thank you so much cailin for your sweet comment! feel free to email or post a photo on my facebook , i’d love to see it! xx
If you don’t want to wrap the cord with 1000 coils of twine, you can also buy nice retro cloth covered lamp cord now in more colors and patterns than you can possibly imagine.
http://www.grandbrass.com/catalog.cfm?category=Wire&subcategory=On%20the%20Roll%20or%20Loose
Sweet lamp! If you were to flip this with the plain side out, it would be more subtle when it’s not lit, but the Trader Joe’s artwork would be revealed when the light came on.
great idea brain! i love your hose cactus!!
The idea is super cool . I had fun making it.:-)
thank you catherine! that is wonderful!! =)
I love what you do! Today is my first time visiting your site. I have set here far too long checking out your projects and thinking “I’ve got to try this!” You have done a great job with your set up… photos, instructions, layout. I can’t wait to get started on a project or 5! Thank you so much for sharing your creative genius with all of us (o:
Oh so cool! I have been wanting to make a hanging lamp from a globe, but hated the look of the bare cord. I love your solution for that and really love the origami lampshade and the branch holder! Thank you for sharing 🙂
Wow. Himself like to create with their hands and those who love to create beauty.
This is soo cute. I might actually try to recreate it
Oh my gosh… this is the coolest thing EVER. Featuring you this weekend on Party Junk! 🙂
Thank you!
Great design! Can you tell us how you did the base of the stick?
thanks donna! this tree branch stands up on it’s own and rests against the wall, we secured it with a piece of fishing line attached to a screw on the wall so it does not fall over. other good options would be to build a wood or concrete base and secure the branch on it. hope that helps!
This is beautiful and unique. Great idea!
Ananda, you are a treasure trove of genius and originality and creativity. The lamp and the cord- poetry in simplicity. LOve. LoVe. LovE. xx
dear arti you are so kind! =)
I have always loved your works! And every post you never fail to surprise me. Miss chatting with you, Ananda!
– love your Decor8 BYB classmate, Peachy.
miss you too peachy! so nice to have you here! =)
Hello Ananda,
this is a fantastic idea !
so great……
Have a nice week !
greetings from Germany
Uwe
hi uwe! i’d love to see what grocery bags you have in germany! xx
Wow, what a great DIY, so creative!
okay, that is so cool! great work!
Oh what a pity that this type of bags are not used around here (France)! I would definitely know what to do wigh them. It is always an utter pleasure to discover your ideas here. And may I say that I also enjoy your every word: technical, precise and new to me “Mountain and Valley folds” 🙂 Have a great creative day Ananda!
i just learned that too my dear friend!! =D
If you don’t have these kinds of bags in your area, you can use kraft paper…a roll of brown paper…that is usually sold in office supply stores. We used paper bags as wall paper in my husband’s office on one wall. When you seal the surface it looks like leather on the wall. Very elegant and inexpensive. I plan to do one wall in the dining room in paper…when I get some time! But the lamp shade does looks fabulous!!! Great job!!!
thank you kathy for sharing!! the wall sound amazing!! xx
This is a great DIY project!! I’ll be keeping this in mind!
You were right, Ananda – I love it! Such beautiful photos too.
such an honor dear ann! =)
Fantastic idea.. Love it.. Did you colour your lamp? Or is that just when a light is behind it?
thanks michelle! it’s the warm white glow of the light! =)
I love how crisp the edges are and the shape. Looks like a drooping flower.
What! How on earth! That is the coolest thing, thanks so much for sharing!
Thanks Erica! Xx
Loving this idea of the rustic pendant lamp. Great tutorial.
This is spectacular – who knew a bag could be so fabulous? I love the way you’ve mounted/hung it… Reminds me of an art nouveau lamp I saw in a museum. Thank you for this!
thank you so much dee! xo
your lamp is amazing!!!!
Whoa I love this!!! So cool! I want to make some things like this for my patio 🙂 Plus it is a great way to recycle bags!
ingenius! I love how the size can be modified!
thank you Kelly! I did not expect that at all while making it! 🙂
Wow! How much fun. I think I will give this a try
have fun dear erica! =)
I love you mini lanterns! And thanks for sharing, I couldn’t believe it was that was easy to make.
thank you pauline! =)
oh my this is the neatest idea ever such creativity I am still loving the lantern you rock.
thank you dear myrabev! xo
Wow! This DIY is crazy creative. Thanks for sharing it!
thank you brenda! xx
um…that is seriously the most creative thing ever!!
oh ruthy you are so sweet! =)
Everything is so cute. I love the lampshade!
wow!! You are so so creative! Color me impressed by the ingenuity.
thank you for your kind words alexis! =)
I pinned it! that’s incredible.
thank you candance! xx
This is such a great idea! I love Trader Joe’s.
wow talk about upcycling! that’s beautiful!
This is such a creative and fun idea! I would love to do something like this 🙂
So cool! I would have never thought of that!
I know just where to put this! Amazing!
now i’m curious! =)
How nifty & Thrifty. . . I would have never thought of anything like this! So cool (:
thank you breanna! =)
This is AMAZING! This is why I LOVE DIY projects! You get to see the beauty in new items! Love those mini tea-light houses <3
thank you agelic! it is fun to discover beauty!
What an awesome project. Beautiful!
thank you angela! =)
This is so cool! Such a great way to reuse, too!
thank you chelsea! love creative reuse! xo
Seriously, this is the coolest thing ever! You are so creative!!
What! I love it! Although I probably wouldn’t take the time to make it, I think it looks wicked!
haha love anything ‘wicked’! xo
Its awesome! What a great lamp!!! I love how you made it!!! And how you’ve fold it!!!
Besos
thank you dear friend! xo
Oh my gosh! This is my absolute FAVORITE of the lamps. I love, love, love the way it looks lit up! I can’t believe you made this with a paper bag! And, the designs on the bag are so perfect when it’s made into a lamp! I love it Ananda! I haven’t done craft projects in a long time, but I need to make this! Pinned to my Crafty Board!
thank you dear kristi! i think you’ll have fun with this one! xo