DIY: Concrete Coasters With Decorative Inserts
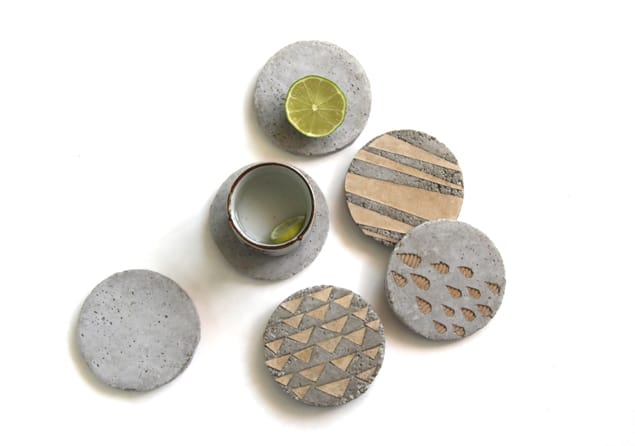
Made with concrete and cardboard inserts, these common household coasters are elevated to modern and chic conversational pieces of table decor!
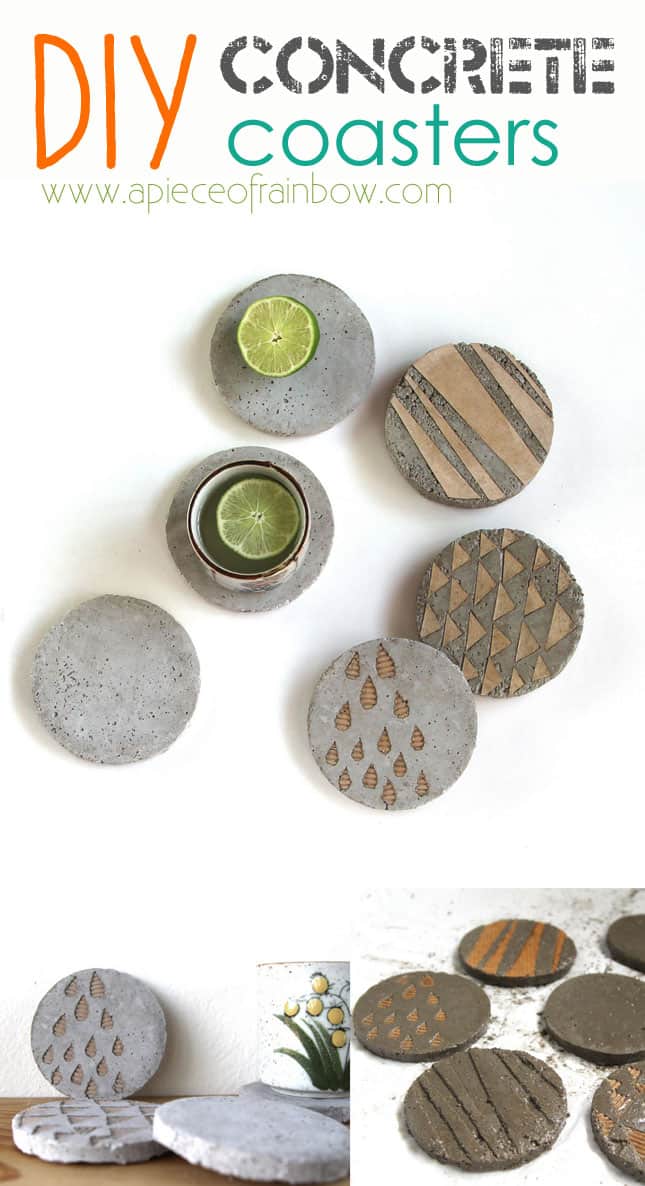
Materials and tools:
- pourable concrete mix, such as Quikrete 3000lb (used here) or 5000lb.
- thick and glossy magazine covers, card stock, or cereal boxes for making the molds
- corrugated cardboard for making the inserts
- plastic containers to mix concrete, plastic bags for curing concrete
- exacto knife or scissors, hot glue and tape for the molds
- gloves, dust mask
Step 1: Make Molds and Decorative Accents
*Some resources in article are affiliate links. Full disclosure here.
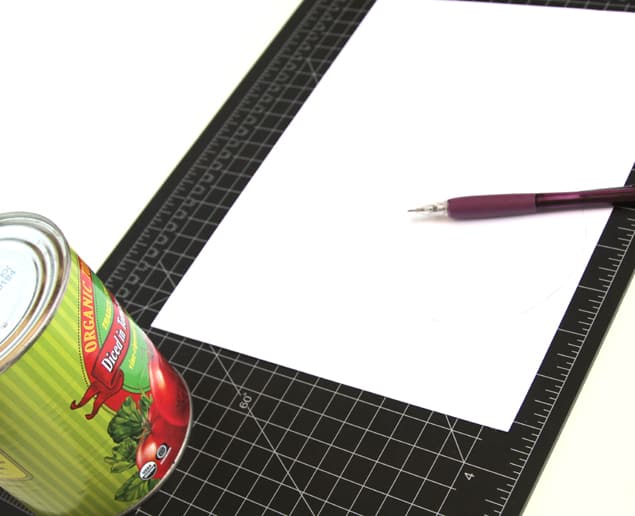
Start by drawing 4 inch diameter circles onto card stock – one more great use for a can of tomatoes! I love the modern graphic elements such as triangles, raindrops, strips, etc.
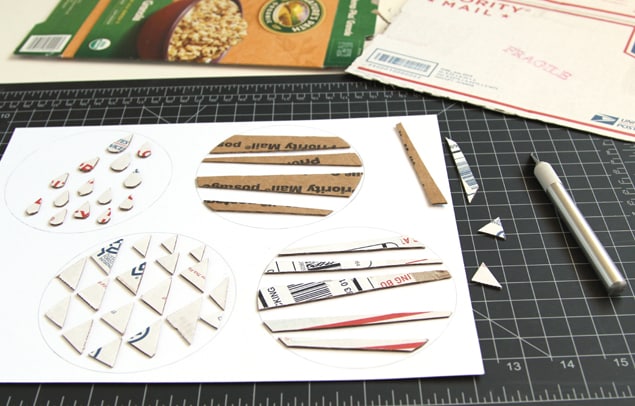
Cut out shapes from the corrugated cardboard, arrange and glue them onto the card stock inside the circles we drew.
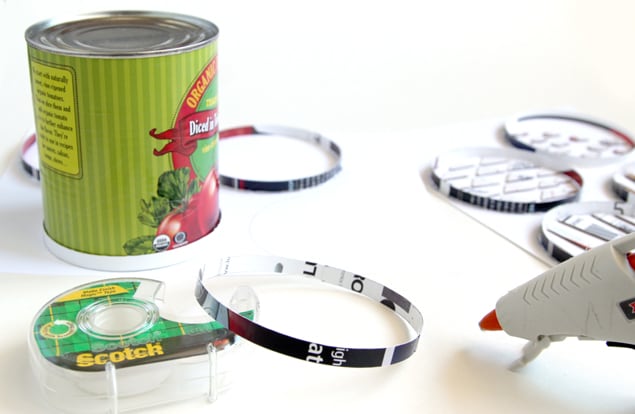
Cut long strips of thick magazine paper at 1/4″ to 3/8″ thick. This will be the thickness of the coasters. Tape the ends together using the can as a guide, and glue them onto the card stock with hot glue.
Step 2: Sift and Mix Concrete
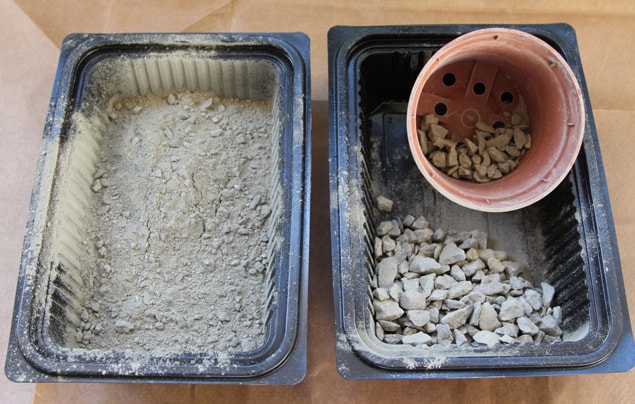
Screen those really big chunks of aggregates out of the Quikrete 3000lb mix- a plastic nursery pot works great, and leave some small aggregates for strength. Mix the concrete following the proportions recommended on the bag, using the screened concrete as if it is the original mix. Wear dust mask and gloves when working with concrete.
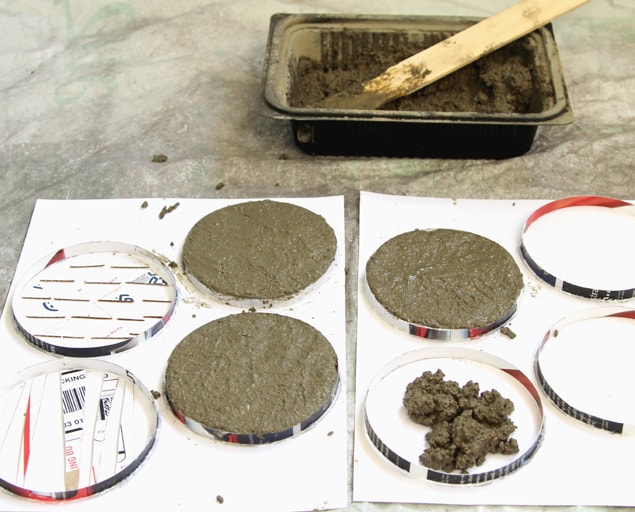
Set the molds on a very flat surface, with a large sheet of plastic underneath, which is needed in the curing process. Pour the mix into the mold till it’s level with the top of the rim. Pat gently to make each coaster as level as possible.
Step 3: Curing Process
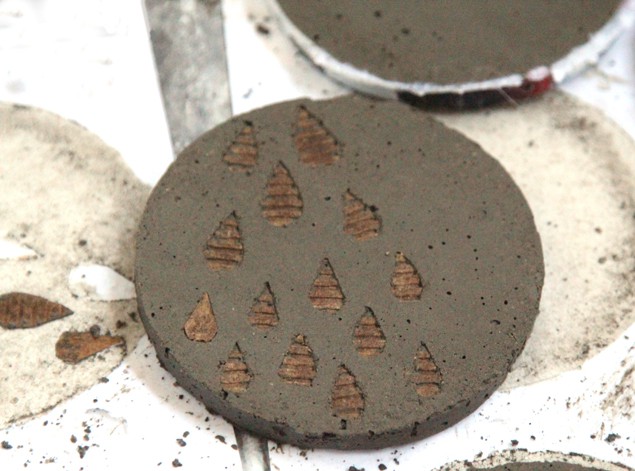
Let the coasters stay in the molds and cure for at least 3 days by misting them daily and wrapping them in plastic sheet. This is a very important step to ensure that the concrete hardens as much as possible so they don’t chip or break. The more moisture you can keep in the plastic wrap the better.
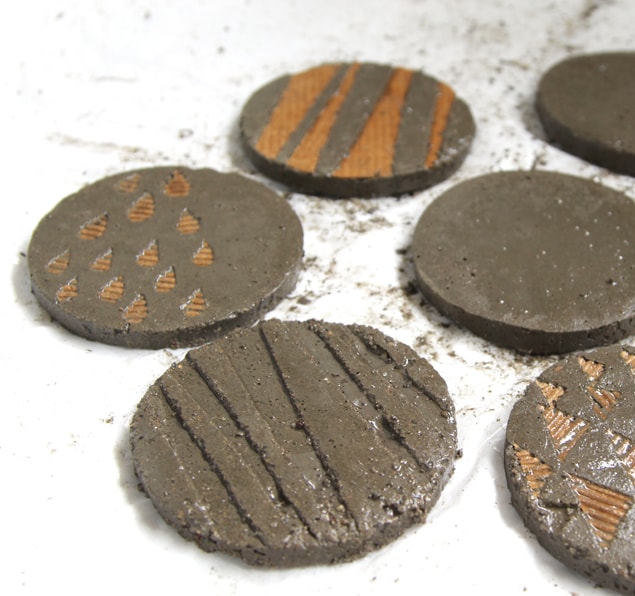
You can take the coasters out of the mold after 36 hours, because it will be hardened by then. But let it cure for another couple of days.
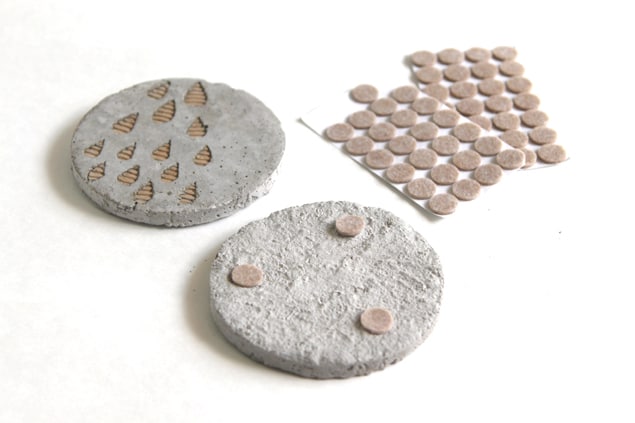
Step 4 : Final Touches
Clean the surface of the coasters. Brush the entire surface with Modpodge to protect them from moisture, stains, and to keep the inserts in place.
Attach 3 mini felt pads on the back side of each coaster to protect your table surface.
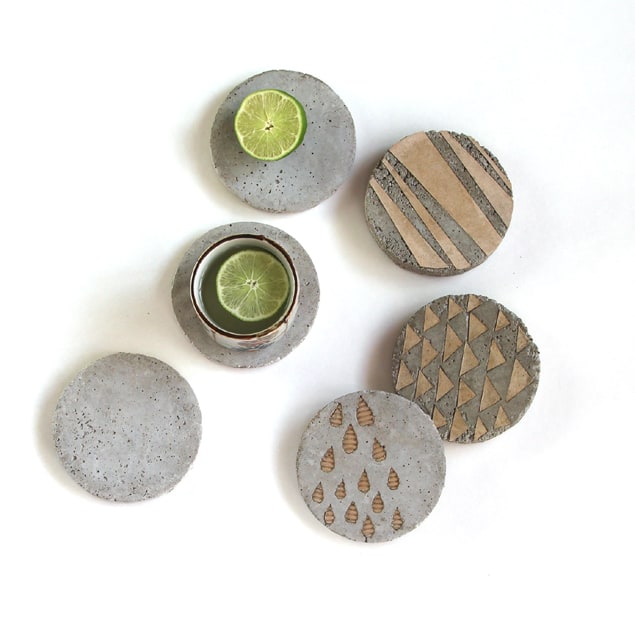
Time to invite some friends over and show off your cool coasters!
As you can see we LOVE cardboard & cereal boxes here, and we’ve used them in many DIYs such as this magical tabletop Christmas tree!
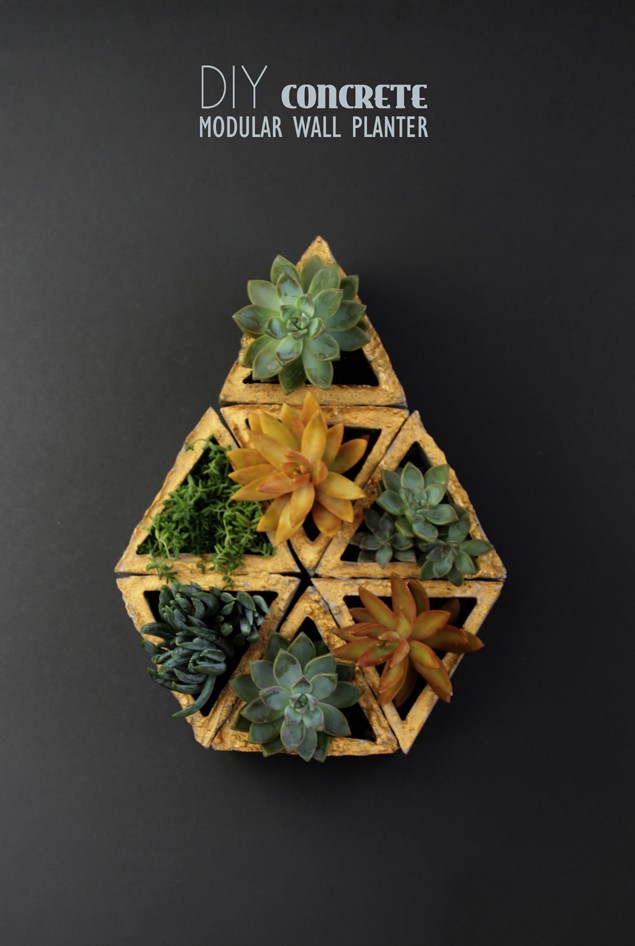
Can’t get enough concrete decor? How about some concrete geometric wall planters ?
Happy creating! See you soon!


Hello! Thank you for this really detailed DIY. Super in love with you showing how to use concrete! The way you teach, truly speaks to how I learn. I am excited to try concrete, which I might ask my son for some haha he’s a framer 😉 just to try first. I love the organic look of everything and that you’re truly not needing to buy a ton of supplies. Thanks again for incredible DIYs
These are amazing and so creative. I would never have thought of doing this idea, it’s genius! Well done.
It is awesome, I will try to make this one or I ask my sister to help me. This is perfect to decorate in my home. Thanks for giving amazing idea.
Love the modern look and the beautiful accents. Perfect for any room in the home! These would also make a great gift idea 🙂
I’ve been following since I found your decoupage knobs and have been an ardent fan since. I love these coasters and am already thinking that I will try embedding monopoly tokens for a friend who is a fan (maybe press in top when still pliable– while using the corrugated cardboard as a beautifully finished bottom), shells from a honeymoon (I may need to add a layer of resin), and trying stenciled burlap as a base. You are a creative genius. I look forward to your newsletter every week.
thank you so much linda for your sweet comment! and thank you for sharing all these wonderful creative ideas!!! 🙂
Hi Ananda,
Great idea with the coasters, I am wondering like Otto, if you glue the cardboard in first on the base won’t is just stay there when you remove them from the mold? Also what are you using as a sealer to keep the cardboard in the coasters. The condensation would ruin them so they must need protecting I would think. Any recommendations?
P.S.
I love your site you have such great information and ideas.
Annette
hi annette, thank you for your kind words! 🙂 the top layer of the corrugated cardboard stayed with the mold, and the corrugated layer stayed in the concrete. my original idea was just to create a pattern in the concrete, but i liked the cardboard pieces so i kept them in there. a krylon acrylic sealer or similar would make it water resistant. hope that helps!
Fantastic ideas!I love the concrete coasters!Thank you for sharing this DIY tutorial!
One more question.
Do you think, if you used twigs or leaves, that you could get them out of there after it cures?
hi brooke! yes it is easy to get the all cardboard out by softening them with water. they did not harden with the concrete. i left some because it looked nice. leaves and twigs can work nicely and should be easy to remove!
Curious,
Do you just leave the cardboard in there? Do you try to pick it out later? Does it get all hard and stay that cardboard color forever? Or does it stay cardboard-y and soft to the touch?
Thanks!
How many coasters can you get from one bag on concrete?
that’s a tough question alec! =) my best guess is : each coaster weighs a little less than 1 lb, so a 50 lb bag will yield over 50 coasters.
Pretty much any project with concrete can be fun and creative. This is a great list of options. Kids love to create with concrete too and parents love to have a keepsake that will last a long long time!
Thank you very much, you are very creative to upcycle things.. Lots of inspiration on your blog.
i don’t understand how do you glue them down and they don’t rip off after hardening? 🙂 do you put the glue in center of the papaer or go around it…. or….
P.S
such an awesome idea with corrugated cardboard, thank you!
hi otto, they are set into the surface, i just add a little glue on top and underside =)
I’ve been wanting to work with concrete but too intimidated. This project looks like a perfect starter. Definitely adding to Pinterest.
Wow!!! These are awesome.. I love your photos!
thank you dear marni! =)
Love love love these! I was super impressed and then happy to fond more diy inspiration via the bottom photo link (for Geometric Wall Hanging Planter)! Unfortunately, it took me to an error “Nothing Found” page? ;( Inwas wondering if theres another way to view that post?.. Thanks!
dear jeanine, thank you so much for pointing that out, it’s fixed now! hugs!
If you use Quikrete’s Sand Topping Mix (which should be readily available at most home improvement stores that carry Quikrete products), there would be no need to filter out the gravel.
thank you amanda! i am going to play with other mixes like you mentioned! another quikrete mix i really want to try is the counter-top mix -harder to find though =)
These are really unique and so easy to personalize! Could you add a child’s handprint or a pawprint to it? (I’m not really sure if wet cement is safe to the touch.)
that’s a cute idea beth! yes you can add that, perhaps wait a couple of hours so the print register better. wet cement is ok if you just do a quick print and wash hand right away, because it’s alkaline. but it won’t burn skin if done quickly. x
These coasters are beyond cool!! I love the handprint idea too 🙂
thank you dear onel! x
Oh my! These are super fun! You did it again! I am such a fan! Happy to share your fun project with my followers!
Amy you are so sweet! xo
These are so creative and cute!
thank you dear meredith! x
These are so cool! I love working with concrete! The first project I did with concrete was AWESOME! i absolutely loved it. I will PM you and tell you about it. Maybe you can try it and post to the site!!! Have a great weekend Ananda!
oh yes kristi please do!!! xoxo
Love, love, love these! Your makes are truly marvellous!
oh thank you dear emma! =)
Amazing, so creative. How do you come up with these ideas? Great job :))
thank you dear mary ann! ideas come from daydreaming all day long! =)
Those are so pretty. I love the striped one the most. I had never thought to create things with concrete. Very creative!
thank you dear alis! concrete is fun to play with!
Lovely! Are they heat resistant? If so can be used as beautiful trivets,yes?
yes they are, great idea! thank you! xoxo
You certainly have a way of turning concrete into a medium full of poetry and surprises, Ananda!
thank you dear donatella! concrete is fun to play with, just wish it’s lighter sometimes! 🙂
Ahh, these are so cool!
You are so good in creating DIY projects. Love them!
Thank you dear Claudia! I’m actually quite clumsy and often remake things ! 🙂