Easy Sliding Collage Photo Frame ( 30-Minute $5 DIY )
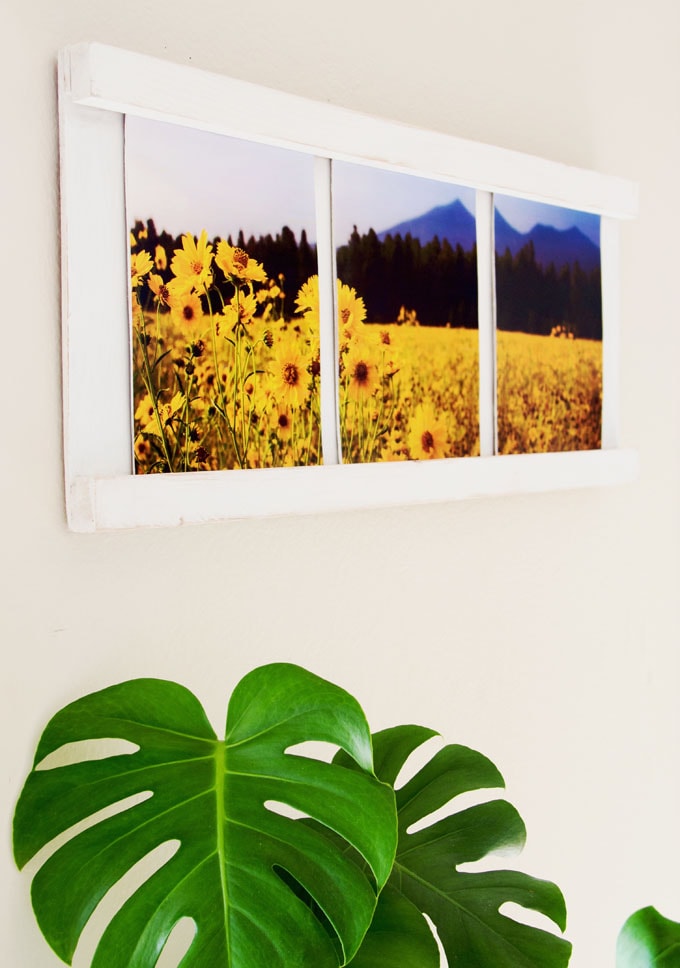
This DIY collage photo frame is a game changer! With a beautiful whitewashed wood finish, it takes only $5 and 30 minutes to make.
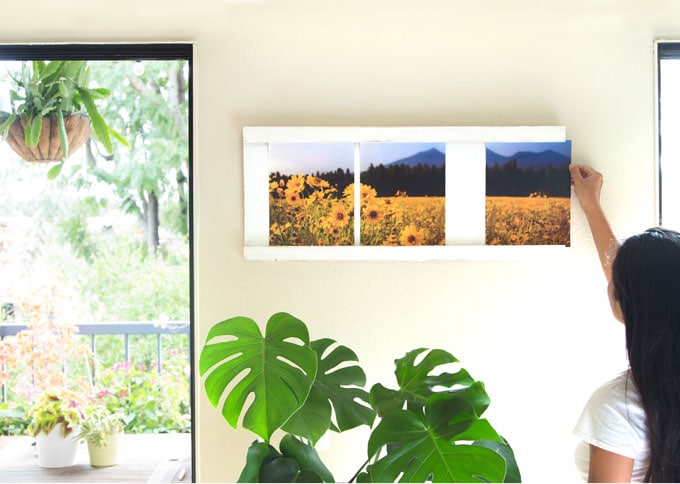
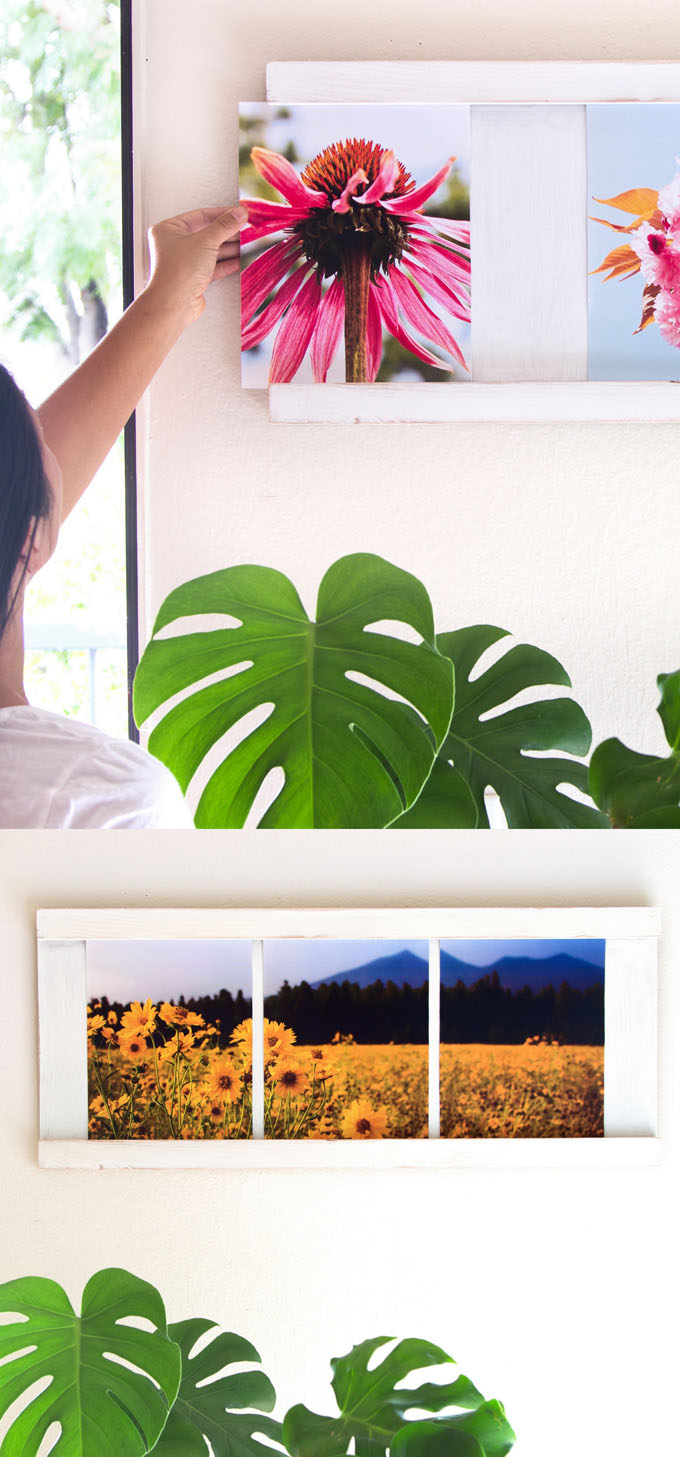
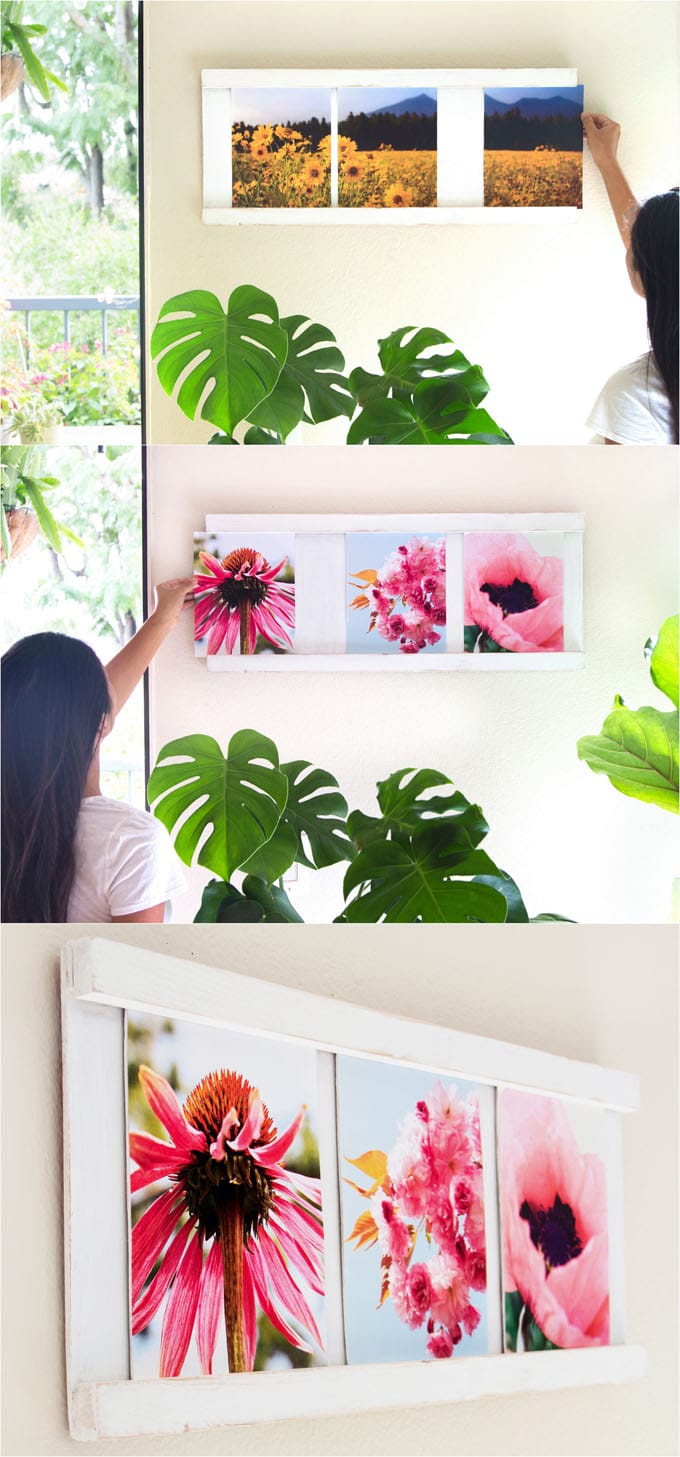
***THE BEST PART is*** : you can change all the photos in less than a minute, without ever taking this picture frame off the wall! ( Check out the video below to see it in action. )

In this tutorial, we will look at:
1 . How to make this photo frame in 3 easy steps.
2 . Super helpful tips I have learned through designing and making the collage photo frame at the end.
3. This frame is designed to hold three 8×10 photos. I will share size & design variations so you can customize it for your home.
First, a video tutorial to show you how fast it is to change pictures , and how easy it is to make this frame –
Materials and tools:
( Some of the helpful resources are affiliate links. Full disclosure here. )
- 30″ x 15″ sheet of 1/4″ thick plywood ( you can also use 3/16″ underlayment ).
- (2) 30″ long 1x2s. You can get a 8′ long piece for about $1 at Homedepot.
- Sawtooth Hangers, these come with nails, to hang the frame
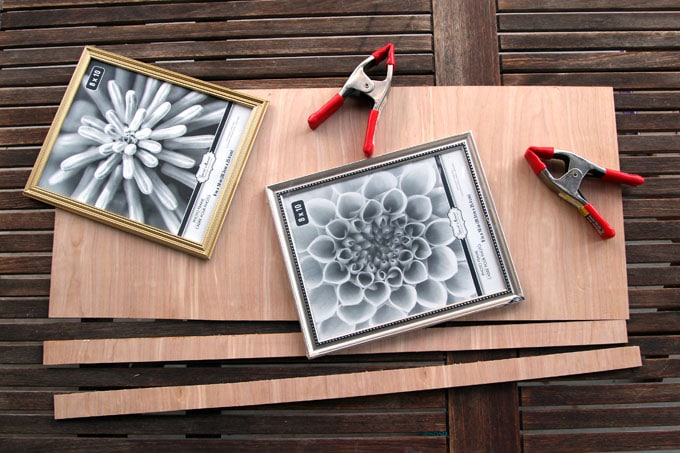
- a drill, (8) 1″ screws, a circular saw or jig saw, a couple of large Spring Metal Clamps – one of my favorite tools!
Optional: if you want glass on this picture frame, get three Dollar Store 8×10 frames and keep the glass.
You can use photo paper to print your pictures, I also love printing on this heavy matte Neenah Paper Exact Index 110 lb Cardstock or similar weight cardstock.
Before we start building, remember safety first! Please follow good practices to build safely and smartly. Follow safety guidelines of each tool you are using. Always wear eye and hearing protection. Work on a clean level surface, free of clutter or debris.

This project is part of our living room makeover. You can view the first part here: how we changed our ugly TV wall to something much more beautiful!
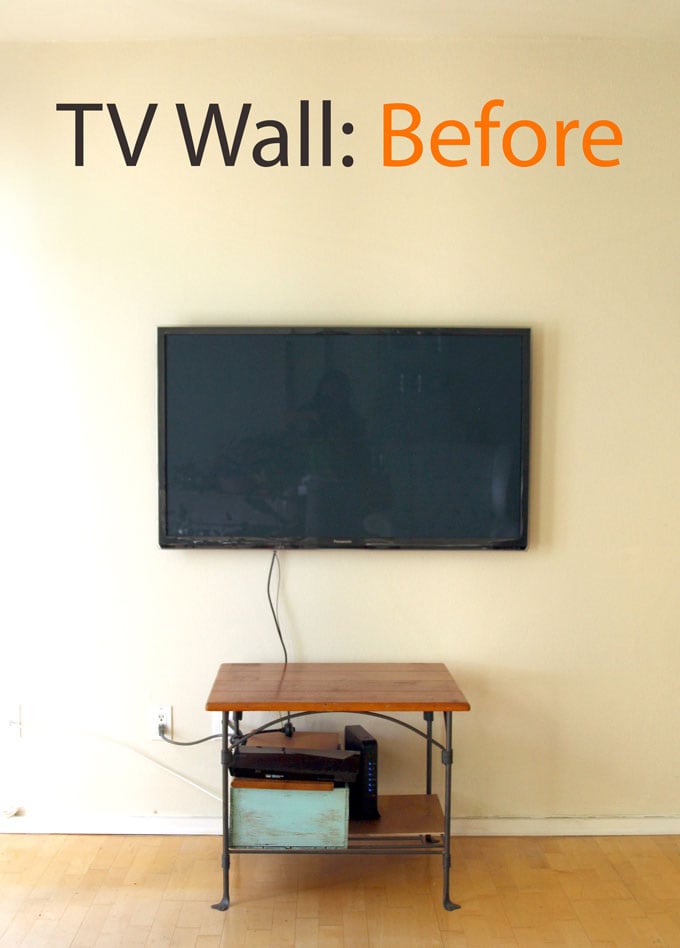
How we changed our ugly TV wall to something much more beautiful!
Step 1: Cut, sand, and assemble
Cut two plywood strips from the main sheet, and two pieces of 1 x 2s ( actual dimension 0.75″ x 1.5″ ), follow the dimensions in the plan below.
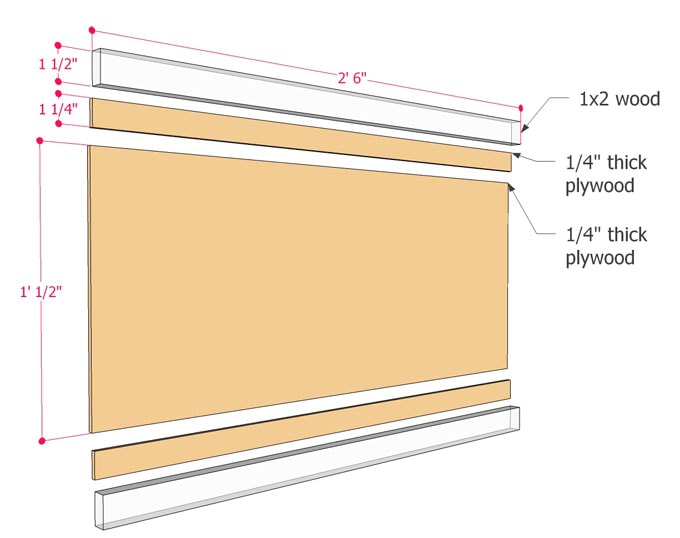
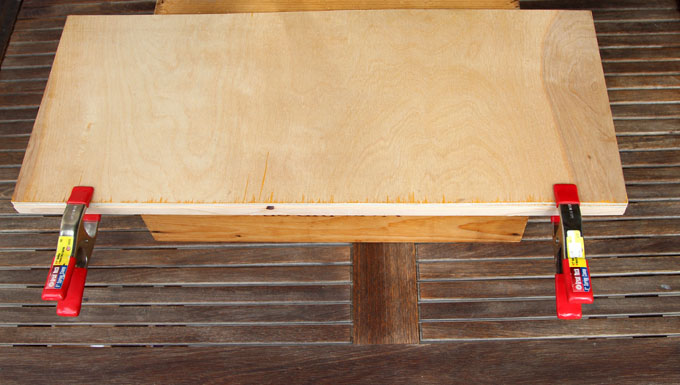
Sand all the rough edges. Clamp the plywood sheet, plywood strips and 1x2s using large Spring Metal Clamps, make sure they are lined up at top edge, and at bottom edge, see plan drawing below.
This creates a 1/4″ x 1/4″ groove which is where the pictures and glass ( if using) will slide in and out of.

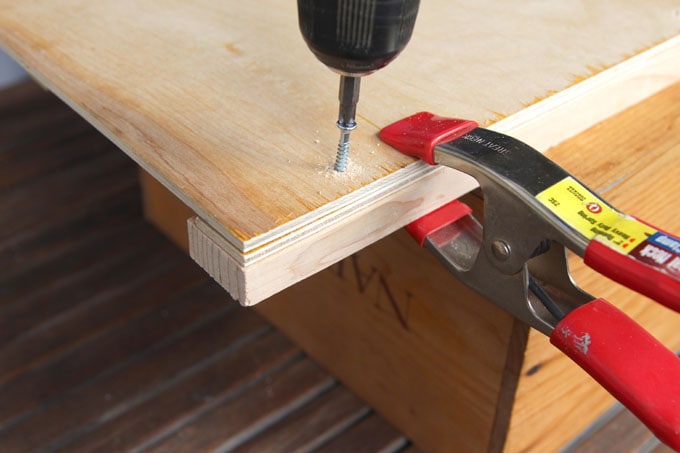
We will start with the top edge of the picture frame. After aligning and clamping the pieces, pre-drill on the back 4 holes along the 30″ long edge, starting at a few inches from the corner, and evenly space the along the edge. Pre-drilling prevents the wood from splitting.
Screw together the plywood back, plywood strip, and 1×2 from the back side using 1″ screws. Make sure the screw don’t go through to the front, be extra careful if you are using 3/16″ thick plywood.
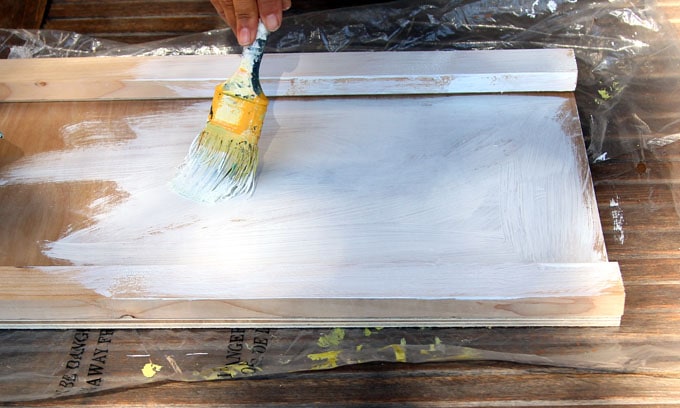
Step 2: Paint the wood picture frame your favorite color
You can leave the wood natural, stain it, or paint it.
Here is a detailed tutorials on homemade natural and effective wood stains-
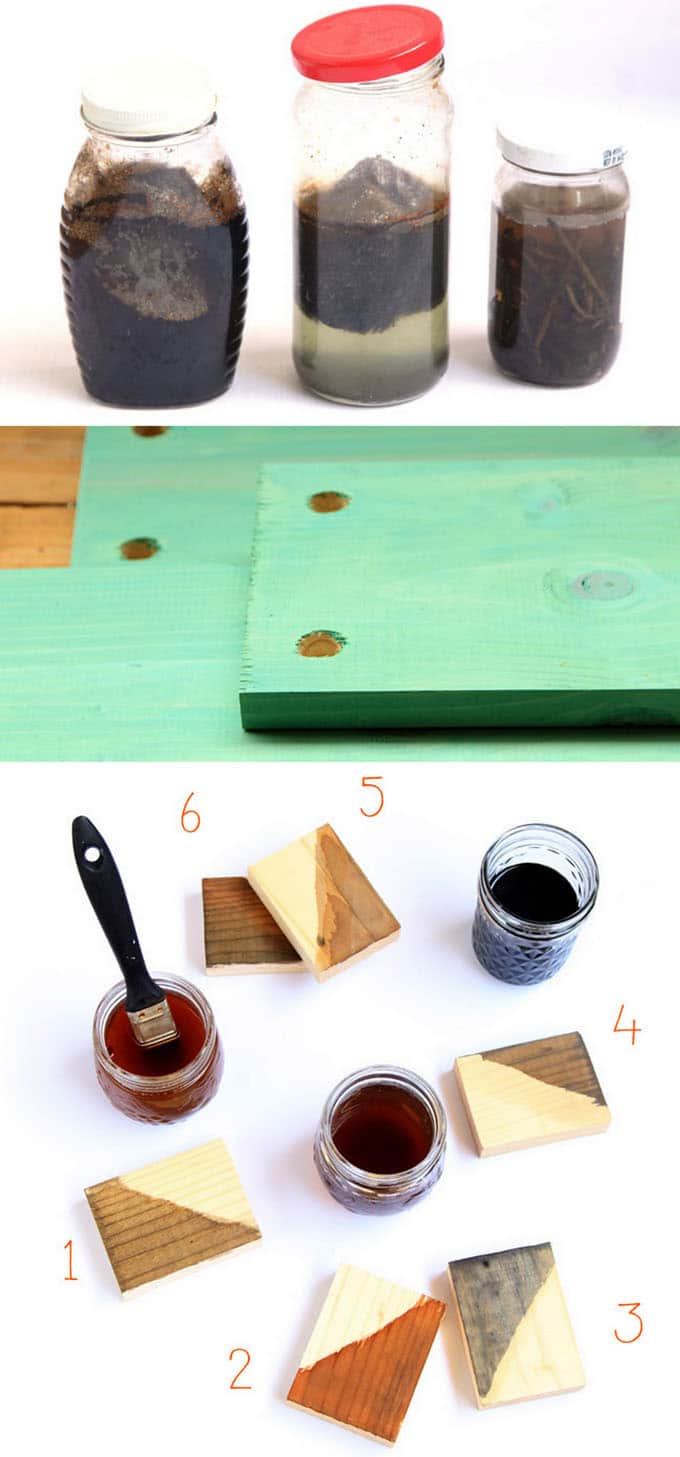
And here is a tutorial on 3 easy whitewashed wood techniques-
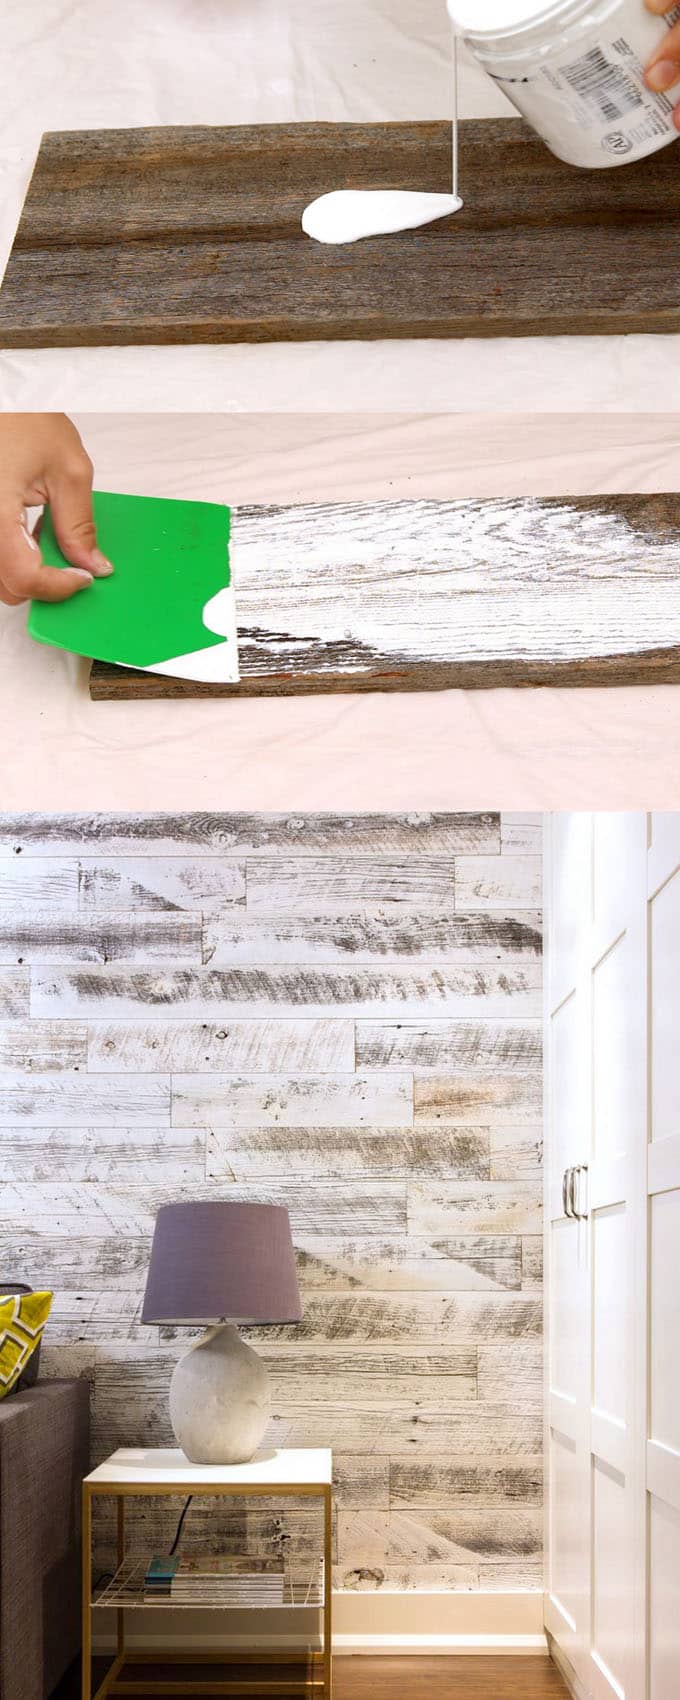
I love the whitewashed look. So I painted it white, and after the paint dried, I sanded the edges quickly to give the handmade photo frame a charming vibe.
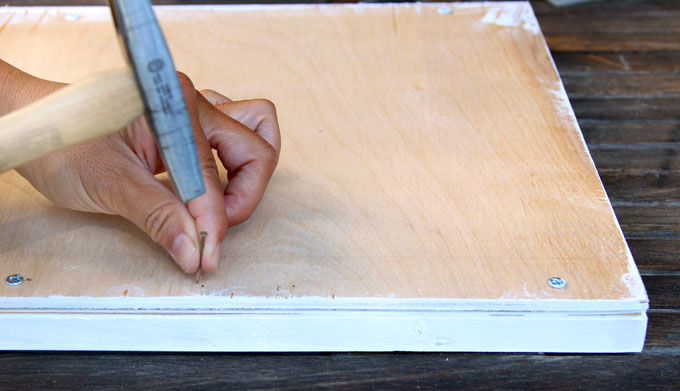
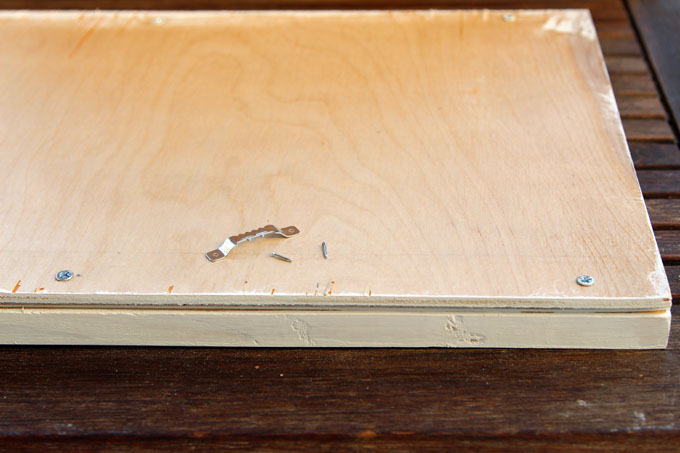
Step 3: Add hangers to the collage photo frame.
We are almost done! Space the two hangers at 18″ to 20″ apart and mark their locations on the back of the frame.
Because the Sawtooth Hangers come with short nails, I find it much easier to create nail holes using a longer nail first, then set the short nails in each hole, and hammer them to secure the hanging brackets.
We love printing our photos on this heavy matte Neenah Paper Exact Index 110 lb Cardstock or similar weight cardstock. You can use this collage photo frame with or without glass over the photos. We use it without glass, because it takes seconds to change photos, and we don’t need to be too protective of pictures we print.

DIY photo frame size & design variations:
- The 1/4″ wide grooves is perfect for glass plus photo thickness if you want to use glass. Just be careful not to tilt it too much and break the glass. The glass thickness can differ depending on the original frame.
- If you use it without glass, you can add chipboard to the back of each photo to make them fit more snugly in the 1/4″ grooves, see image below.
- You can adjust the length to fit more or less photos, for example, make it 20″ long for a double photo frame. You can also make several of these and hang them in a few rows to create a photo collage gallery wall!
- This collage photo frame is designed to hold 8×10 photos, you can easily adapt the dimensions for other size photos.
Helpful tips on this DIY photo frame :
- Sand the plywood strips so the photos can slide smoothly.
- Do a test run: clamp the pieces together and test it with a photo and / or a sheet of glass before assembling everything together.
- As mentioned earlier, if you are using glass over the photos, be careful not to tilt the frame too much when you are hanging the photo frame, as the glass could slide out and break!
Don’t you think this handmade wood photo frame would be a great gift for friends and family? I think of they would love it!
You could also have so much fun creating collage stories with this frame, and changing them up easily with the seasons and occasions.
You may also love: 18 Creative ways to transform your family photos into creative gifts and decor.
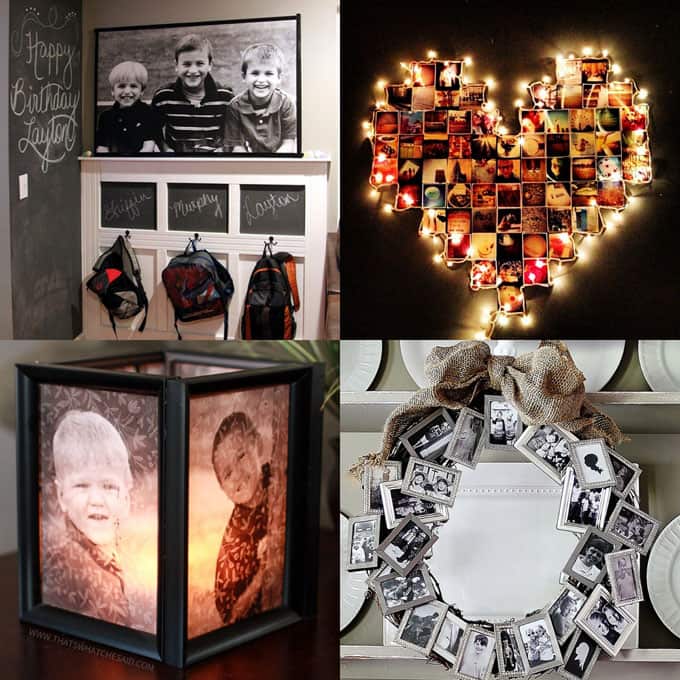
18 Creative ways to transform your family photos into creative gifts and decor.
Happy creating! See you next week! 🙂


Is the plant in all of your pictures real or fake? It’s beautiful and I’m drooling over it!
they are real flowers! =)
I love this. One of the pictures looks like it is one large picture divided. How do you do this?
hi darlene, i used photoshop ( gimp is free and will also do this) to copy sections of a long photo, and paste it to a 8×10 file to print each section. =)
This is a really simple diy project, love your ideas, and these photo frame are so nice!
I love DIY projects and loved the way you made the photo frame with the pink flowers…looks so professional and cute
What a cool idea! I love the white painted wood. And being able to change out the pics is really neat.
Nice! I love creative photo displays! Awesome tutorial! Thanks for sharing…I’ll have to try it.
What a unique idea! I never change my photos because it’s such a pain. I love that you did three photos connecting too!
That is absolutely pretty. I am in love with all DIY projects now, and I have been learning so much since I started blogging. Thanks for sharing.
Very classy. I like these and wouldn’t mind trying to make them. The thought that it’s an easy diy project is amazing. I think I could pull of the whole thing!
Oh my goodness, what a great idea! I hate having to take all the frames down to update the photos. My husband can build almost anything with wood, I’ll have to show this to him!