8 Essential Cricut Maker Beginner Tips and Tricks for Better Crafting
Are you a Cricut Maker beginner feeling excited and intimidated to start creating your first project?
Well, I was feeling the same way just a few months ago. Now I am officially addicted to the Cricut Maker smart cutting machine, and I have lots of tips and tricks to share with you today!
The best way to learn anything is by doing. As you start with a few simple projects and learn more and more basic skills through each project, you will have so much fun and before you know it, you will be addicted to your new Cricut Maker (or Cricut Explore) like I do!
In this article I want to share with you 8 essential tips and tricks learned through my exciting first 4 months, plus a few of my favorite Cricut Maker beginner project ideas which you can start creating right away. Let’s begin!
This is a sponsored conversation written by me on behalf of Cricut. The opinions and text are all mine. Some of the helpful resources are affiliate links. Full disclosure here.
Cricut Maker Beginner Tip 1: Start with a ready-to-make project using simple materials
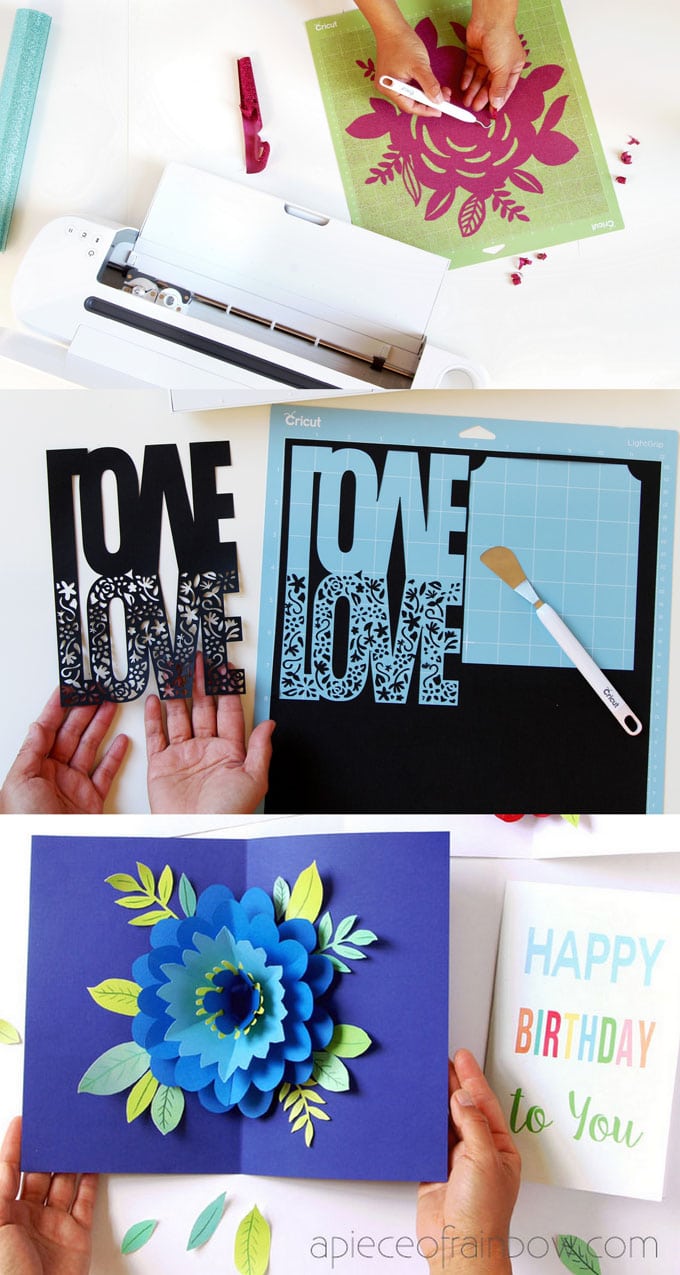
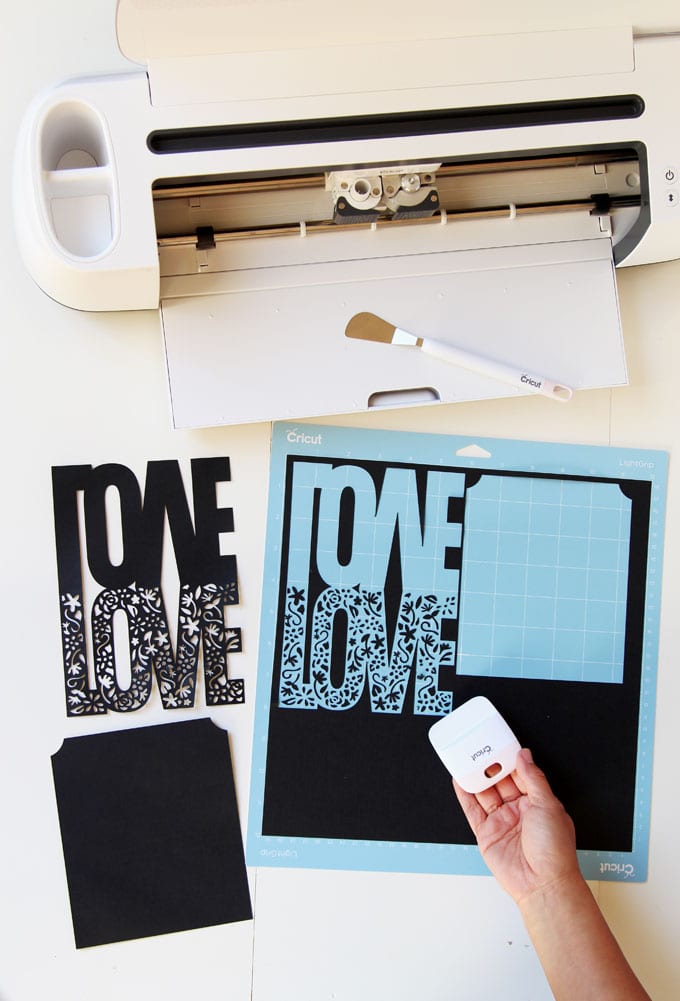
After watching a few introductory tutorials, I took my brand new Cricut Maker out of the shiny box, and made my first Cricut Maker beginner project in less than 1 hour!
I chose a ready-to-make project: a LOVE card using only black and white cardstock. I just focused on getting familiar with the cutting machine, and had no pressure of messing up because cardstock is such an easy to find and inexpensive material.
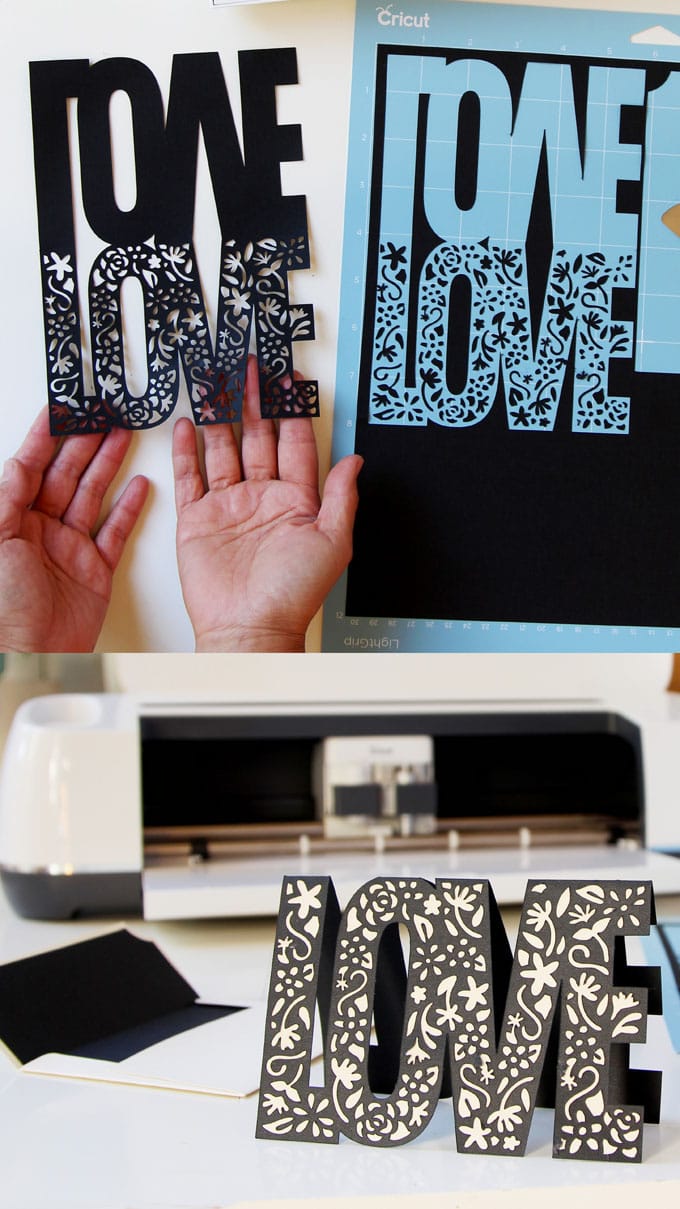
If you love this card, you can follow along my first Cricut Maker project with detailed step by step process here!
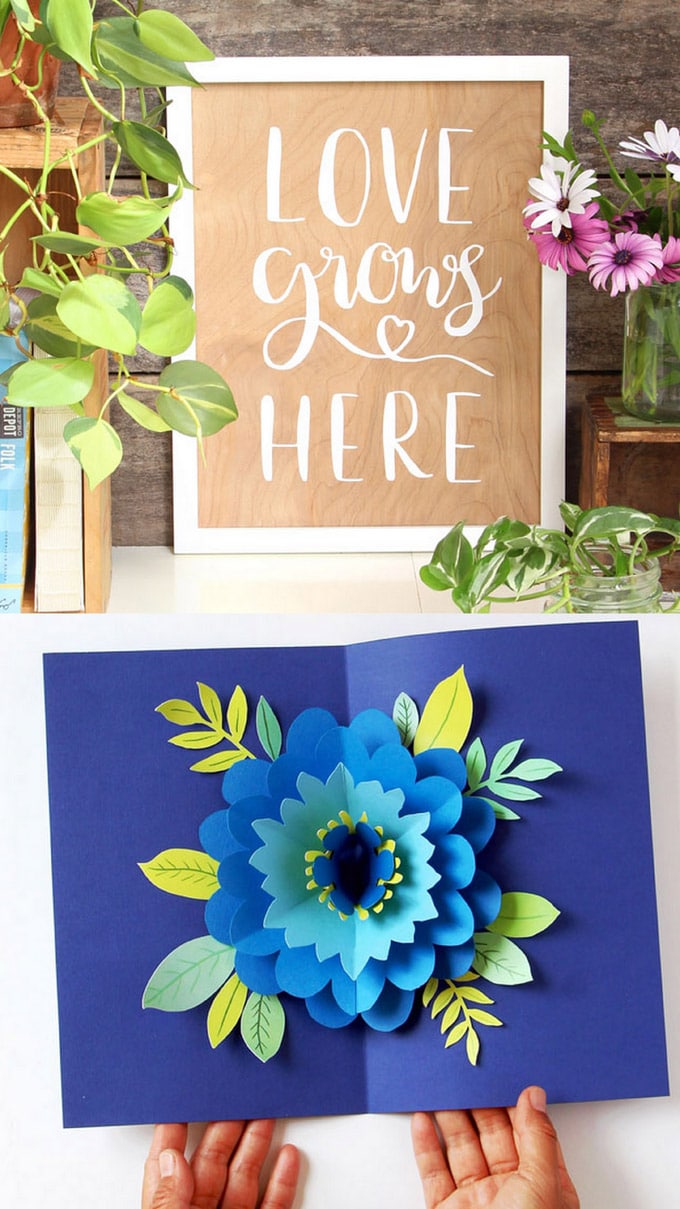
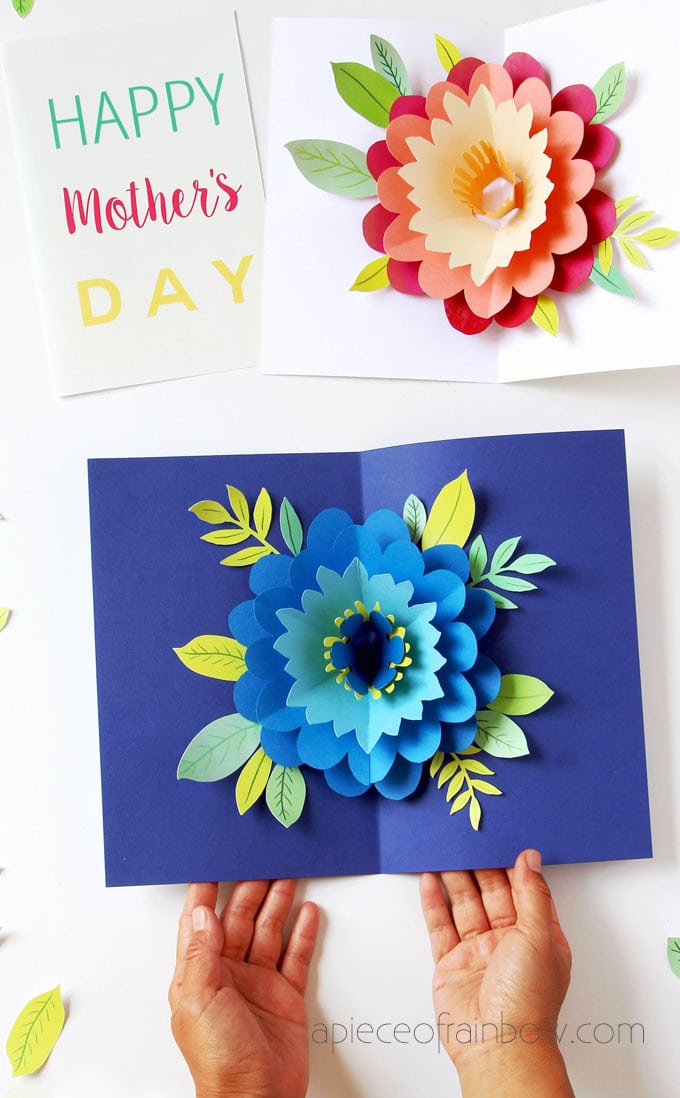
It is such a fun to learn! By the time I made my 3rd and 4th projects, I had already used new materials such as glitter iron-on vinyl, and more advanced features like print-then-cut! You can check out how fun and easy this feature is in our pop up flower Mother’s Day card tutorial.
Cricut Maker Beginner Tip 2: play with design space
Don’t let the name “Design Space” scare you! You can start exploring Cricut Design Space even before getting your new Cricut Maker or Cricut Explore. It’s where you can be inspired by the amazing Cricut communities and creative resources. Below are some favorite projects I saved on my first day exploring Design Space.
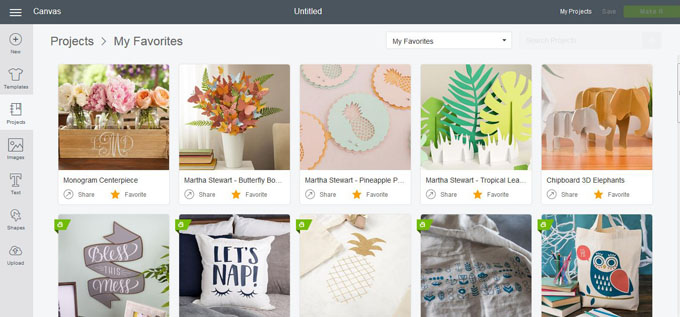
Open up a ready-to-make project and play with moving things around a bit, try some fun colors and fonts. Cricut has a great series of Design Space for beginner tutorials here which will help you get started in no time!
Tip 3: have a set of basic tools ready
You don’t need to have all the supplies to make your first project as a Cricut Maker beginner. However, Cricut designed some wonderful tools that make everything so much easier.
I LOVE all the tools in this Cricut tools Basic set! The weeder, spatula, scraper and tweezers are great in so many uses such as lifting up vinyl and intricate paper designs, applying transfer tape, cleaning scraps off the mat, and more!
Tip 4: use cheat sheets
There are so many fabulous bloggers sharing their free Cricut cheat sheets to make things easier for all of us. Have them handy as quick references!
Here are two of my favorites for the Cricut Maker: Cricut Design Space cheat sheets by Lorrie and Cricut cutting mat cheat sheet by Jennifer
Tip 5: let the prompts guide you
Here’s something really impressive about the Cricut smart cutting machine: it guides you through every step from selecting materials to loading mats to using the right blades!
During my first project, it alerted me that I put in the wrong cutting blade, and showed me what the right one should be!
Tip 6: use the test cut feature
When I made this custom canvas tote bag with glitter iron-on vinyl, it was only my second Cricut Maker project. Having never worked with glitter vinyl before, I chose “vinyl” as my material, and after I unloaded the mat, I realized that glitter vinyl requires a deeper cut. Oops!
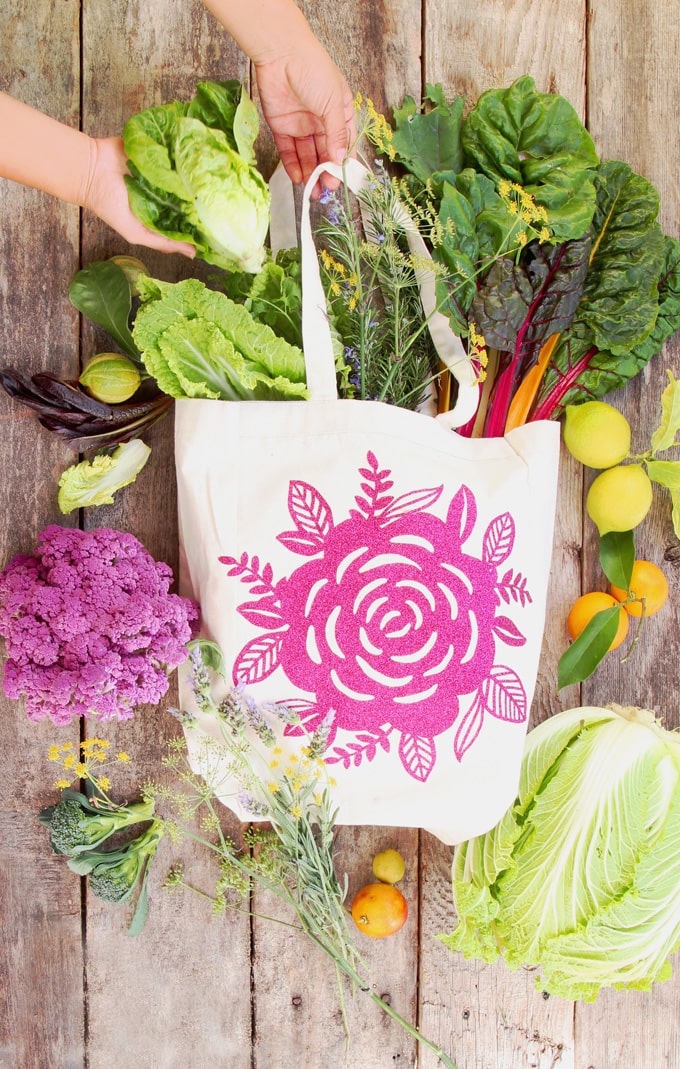
Luckily, there were many pretty colors in the pack, and I ended up using a second sheet. If I had known the test cut feature, I would have tried it on the material before ruining a whole sheet of vinyl! Here’s a great tutorial on how to do a test cut.
Tip 7: minimize waste, make the most out of your craft materials
Cricut Design Space is already very smart, it will move all the shapes closer together on the cutting mat so you will end up with the least amount of waste materials.
There are other ways to reuse Cricut crafting materials. In the DIY double-sided wood wall art with hand-lettered quote project below, I was able to reuse the Cricut transfer tape twice, and it will most likely last through a few more uses.
You can also save large areas of uncut materials left on the mat such as vinyl or fabrics, and cut more shapes from them in future projects.
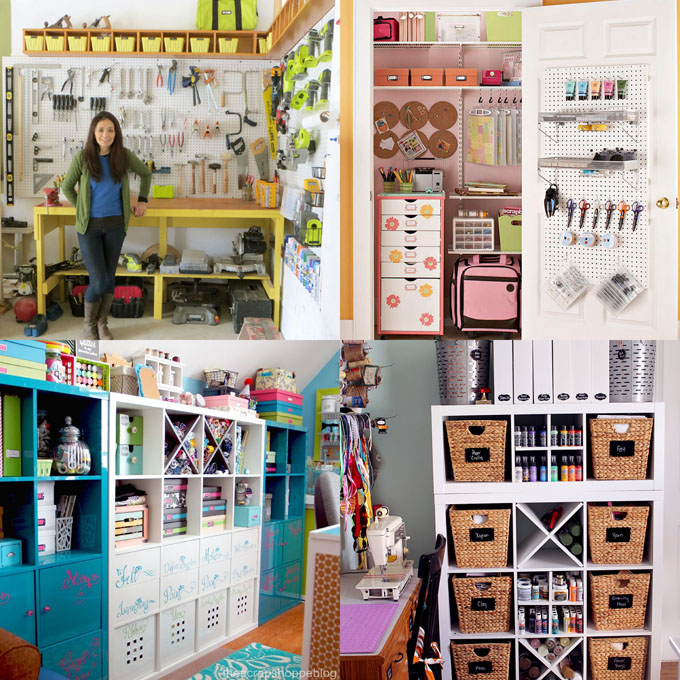
Tip 8: making your crafting space a happy place to be
No matter you are a Cricut Maker beginner or an advanced crafter, it is super important to have all the craft supplies and tools well organized, so that you feel happiness and clarity in your crafting space.
We all know how dizzying it can get being surrounded by paints and ribbons and colorful papers and vinyls, right? 😉

You can find lots of great ideas and inspirations on how to organize your Cricut craft space, create a designated place for everything and make it attractive too. Above are two beautifully organized Cricut craft spaces by Sweet Red Poppy and Something Turquoise.
If you need more craft room organizing ideas, check out these 21 inspiring craft rooms and workshops for creative people!
21 inspiring craft rooms and workshops for creative people!
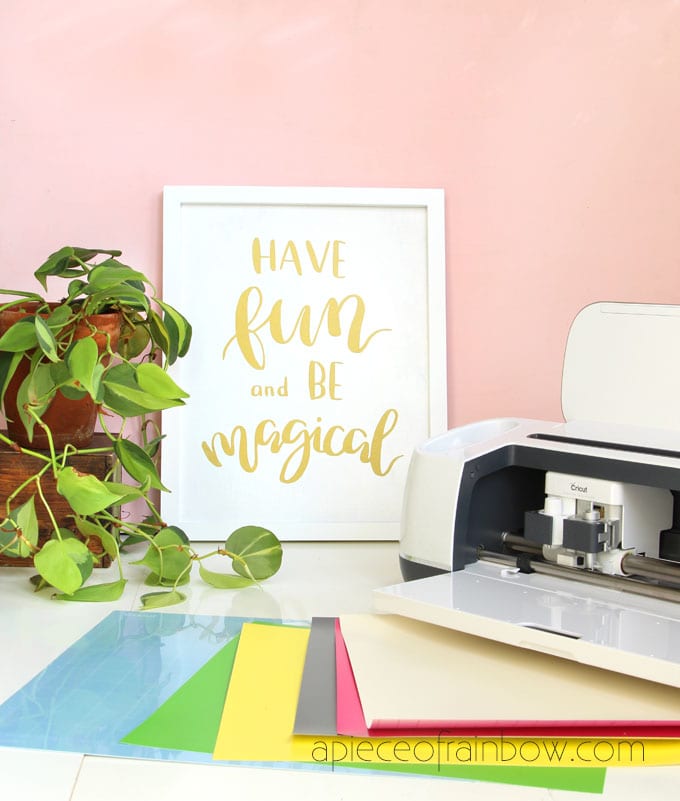
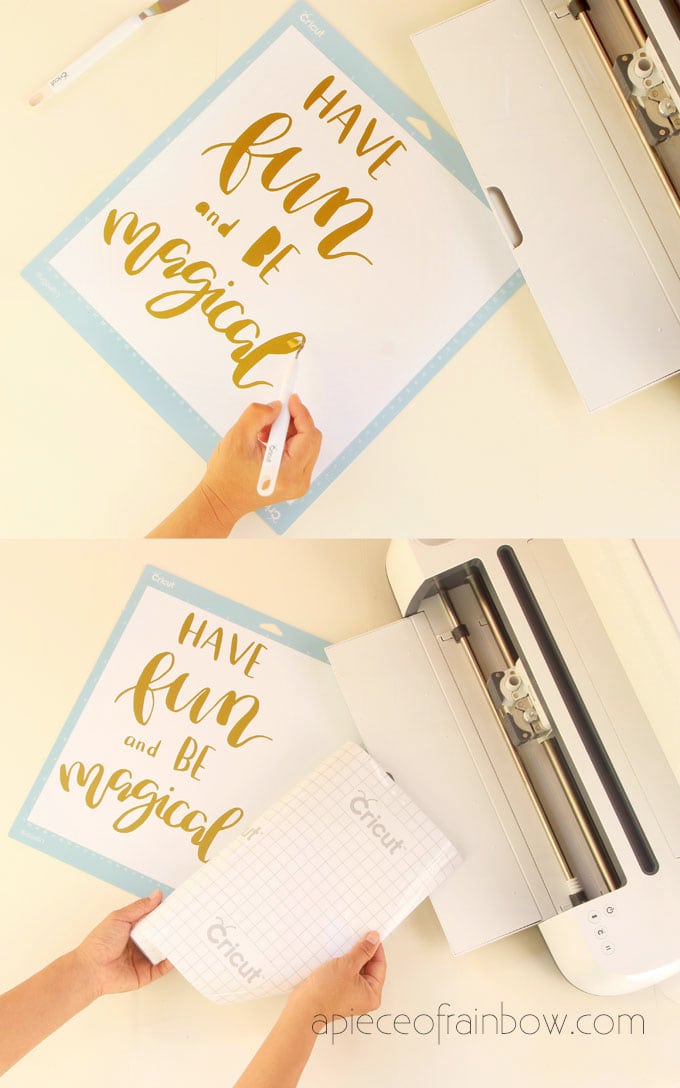
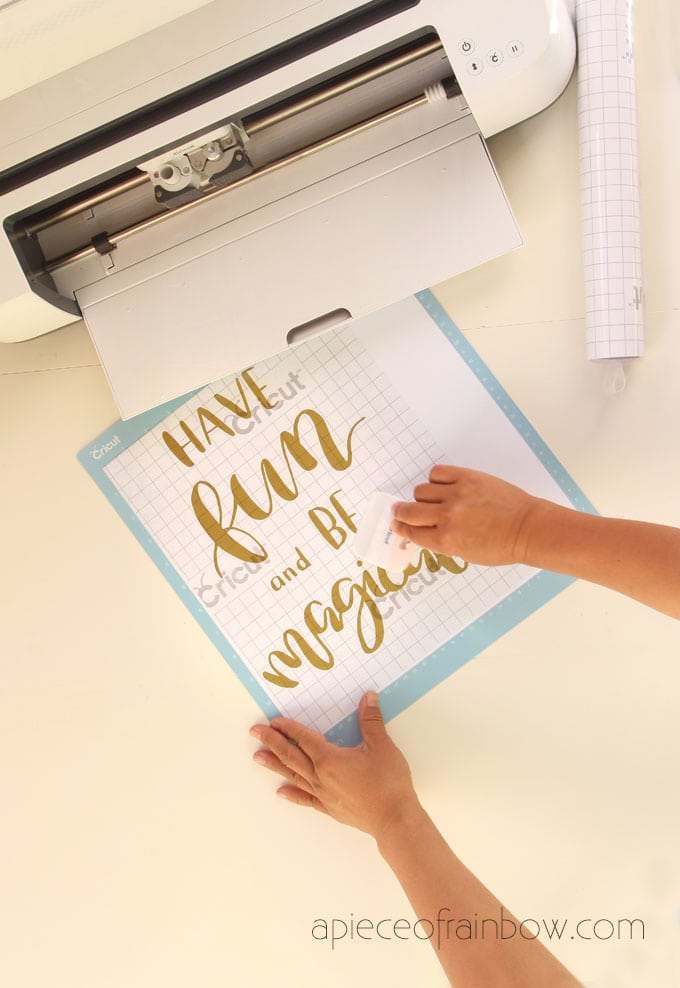
Remember to “Have Fun and Be Magical!” 🙂 Download and make this quote are here!
Happy Cricut-ing! See you next week!


Such great tips and ideas! I am excited to get started on my first Cricut project!
Oh yes! I really love and enjoy doing some crafts and DIY. I am looking at the Cricut machines! This blog is huge of help and tips that may I apply. Thanks for sharing!
There is so much you can do with Cricut! I am new, and love these tips! Lots of FUN craft projects!
You make this look so easy! I am not very crafty and new to Cricut, but feel like I could probably do this. Love how your project turned out!
Thanks for the detailed tips and tutorials! My sister and I love crafting projects. Yes, we are getting a Cricut next, so excited! we recently made an organised corner for crafts only, otherwise it gets so messy that you can’t find anything.
These sound like great tips! I don’t have a cricut, but this makes me really want to get one!
It makes sense to start with ready made projects and work you way up. And I love that it helps you prevent waste.
I’ve always wanted to get one but I feel like it’s so overwhelming! Now I think I will because these tips really helped me see how quickly I can learn it and all the projects are just beautiful!
I have to share these with my mom , she is the crafty one with a Cricut machine in the family and I bet she would love to do a project with me! She recenlty made me a ballerina made from paper, she got the idea on pinterest and i was so touched!