Reclaimed Window Potting Bench
When I saw this stunning potting bench made by my super sweet and talented friend LZ at the Summery Umbrella, it was love at first sight! (Well, I love just about everything LZ makes! )
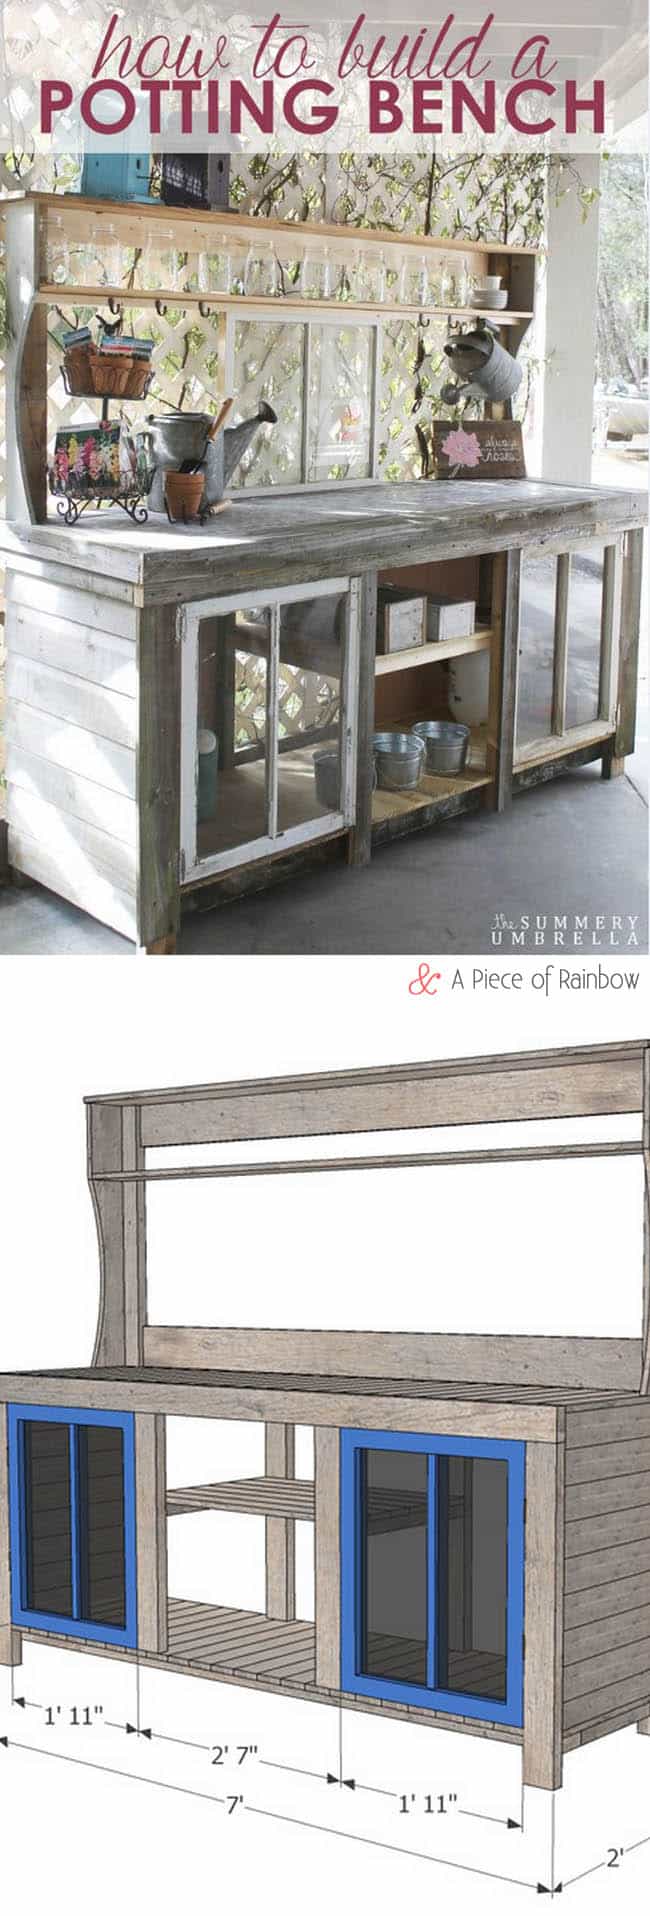
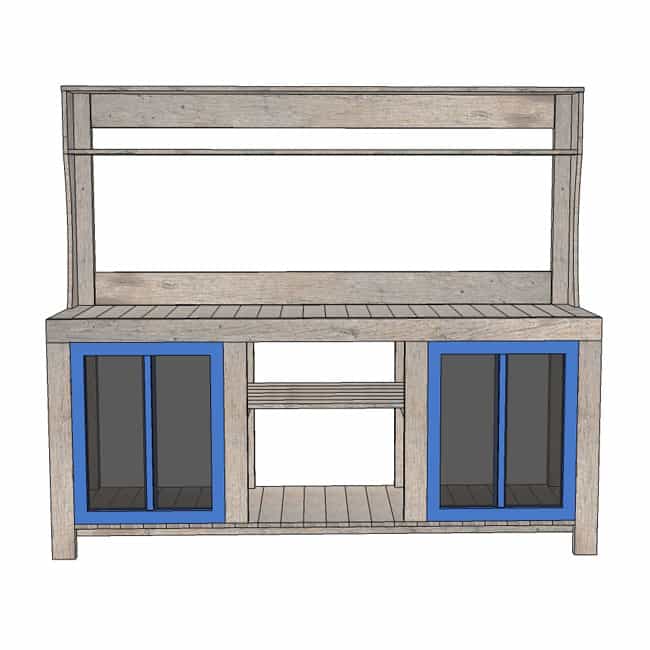
Today I am really excited about our collaboration post: I am going to draw a plan, and LZ will show you the actual building process, so anyone can recreate this reclaimed window potting bench!
( Note: Since LZ made her gorgeous bench with materials she has, I modified the structure slightly in a few places, so you and I can build it easily, even with standard lumber! Keep in mind that standard 2″x4″s are actually 1.5″x3.5″, 1″x4″s are actually o.75″x3.5″, etc.)
Please go through all the steps and determine the components that need pocket holes before assembling!
Step 1:
*Some resources in article are affiliate links. Full disclosure here.
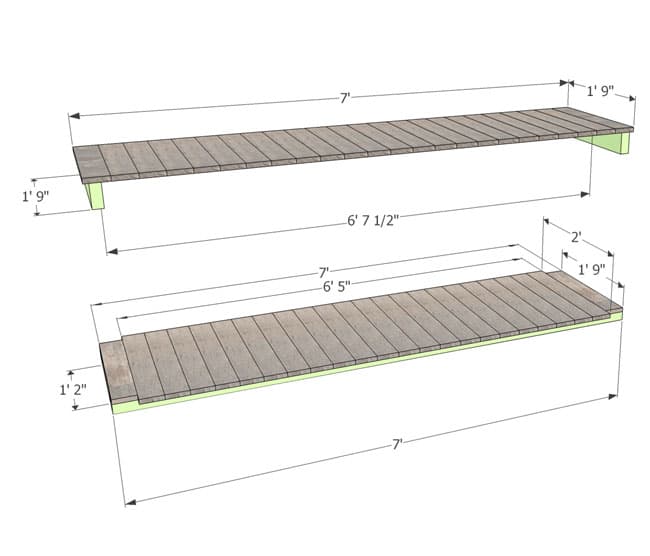
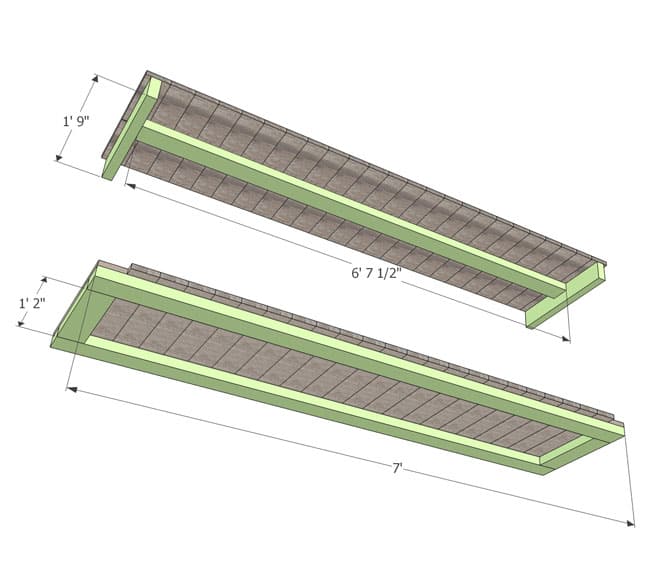
Build the top and bottom shelves with 1″x4″ or 1″x6″ boards, and 2″x4″ braces. The images above show the views from top and below. Notice the end braces for the top shelf are inset in 0.75″. This is to accommodate the optional paneling in the final Step 6.
Step 2: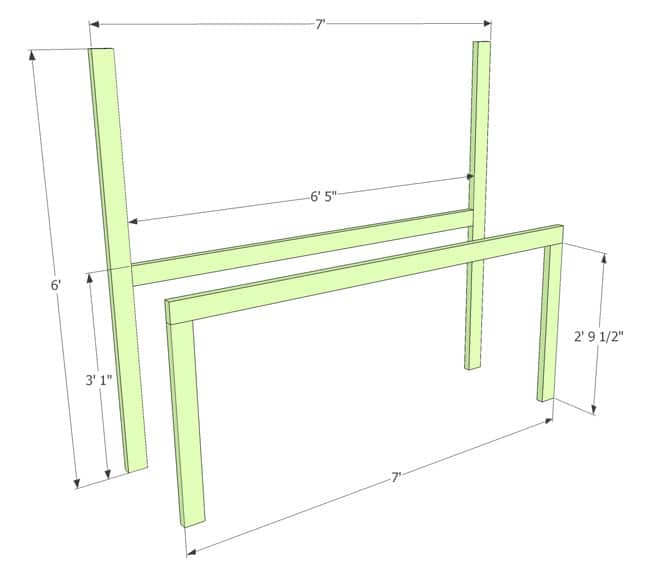
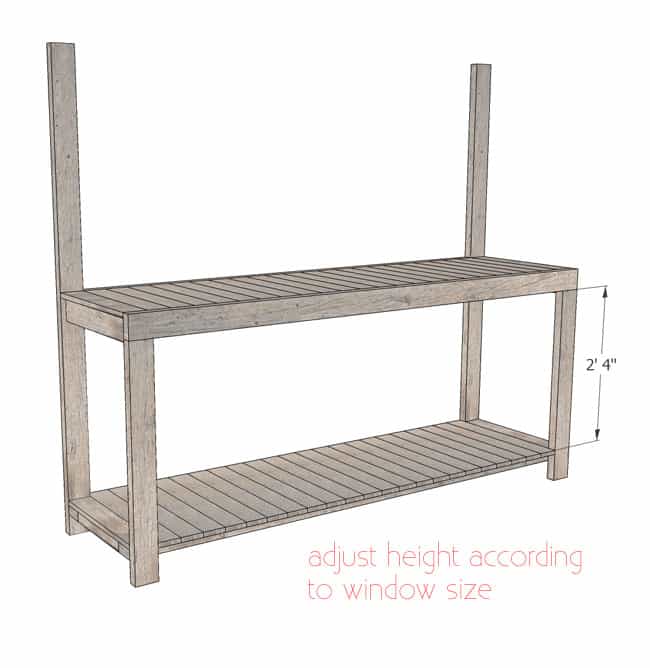
Build the front and back panels with 2″x4″s. The key here is to ensure the bench top will be at 37″ high, a comfortable height for most people. However, adjust the measurements here to your comfort if your height is quite different from most people.
Step 3:
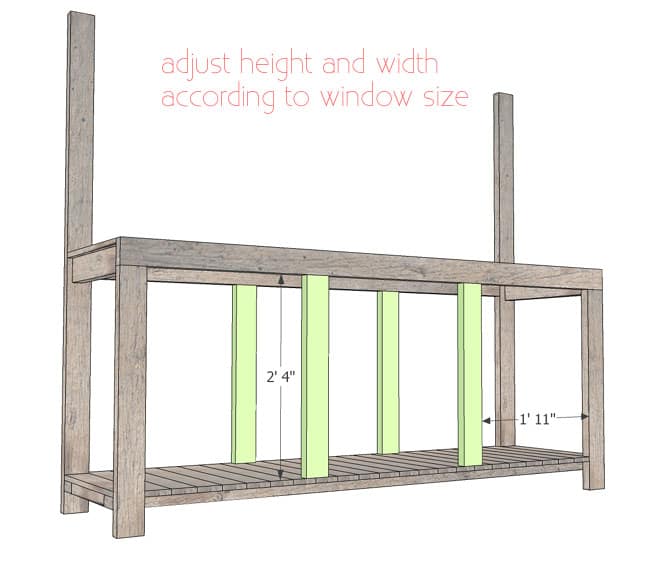
Attach the shelves from Step 1 to the panels / posts from Step 2, pocket holes would be a good option. Use the window height to determine the position of the bottom shelf.
Step 4:
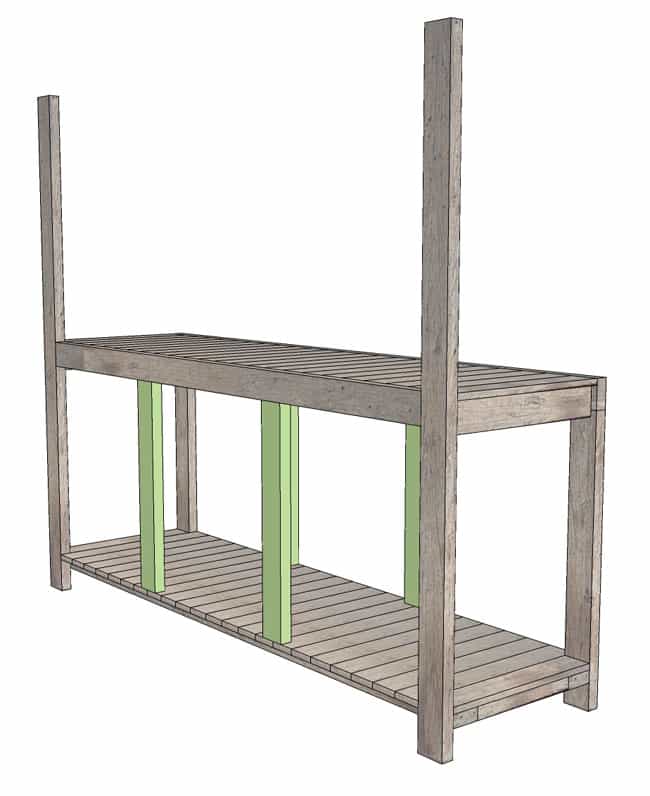
Attache 2″x4″ frame pieces to the bench with screws / pocket hole screws. Use the width of the windows as a guide.
Step 5:
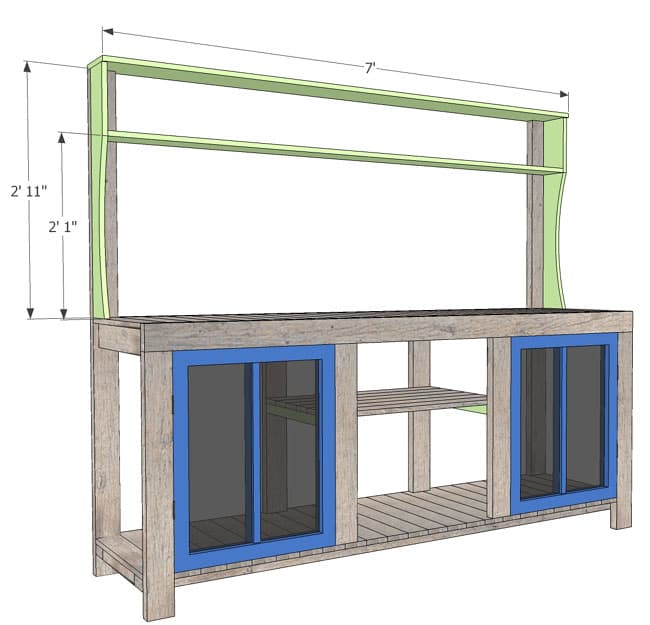
Add the 2 windows and a shelf in between the 2″x4″s. Also it’s time to add some shelves and side panels to the top part using 1″x6″s on the sides and lower shelf, and 1″x8″ as top shelf
Step 6:

Add optional “back splash” and side paneling, plus anything you would like such as back paneling to the potting bench.

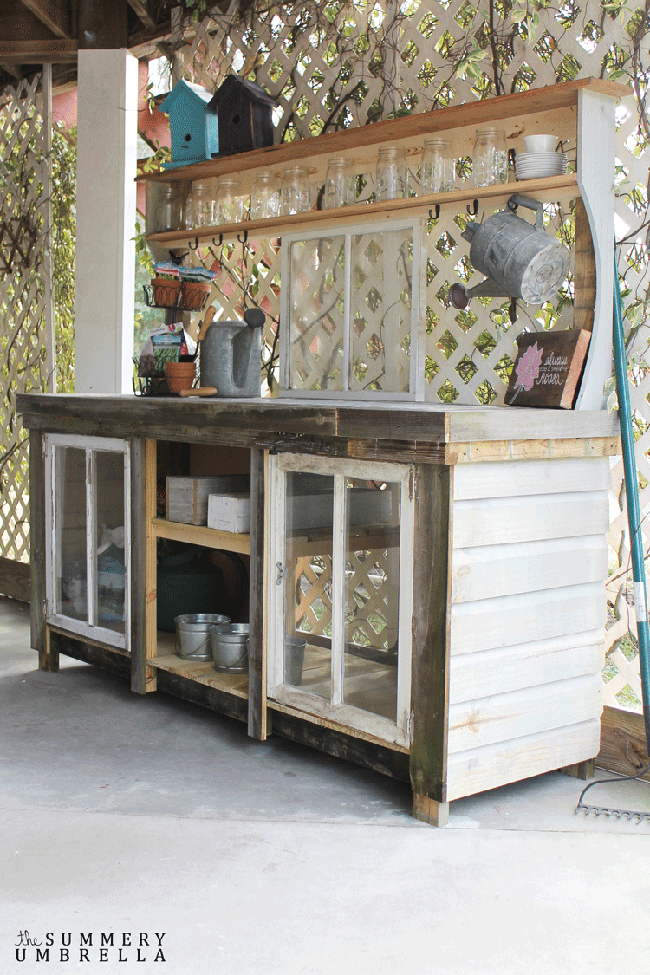
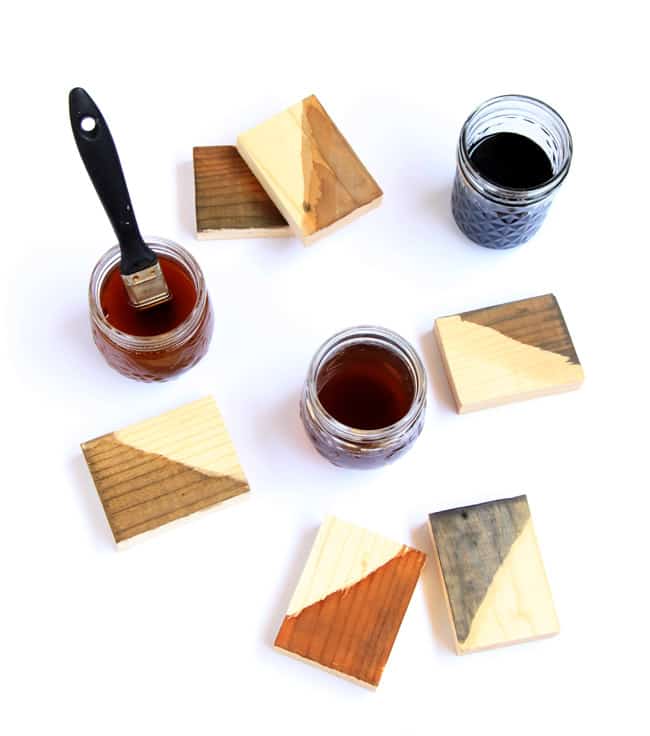
Here’s our lovely potting bench! You can now have fun painting it, or staining it with our all natural home-made wood stains!
…………………………………………………………………………………………………………………………….
You may also love:

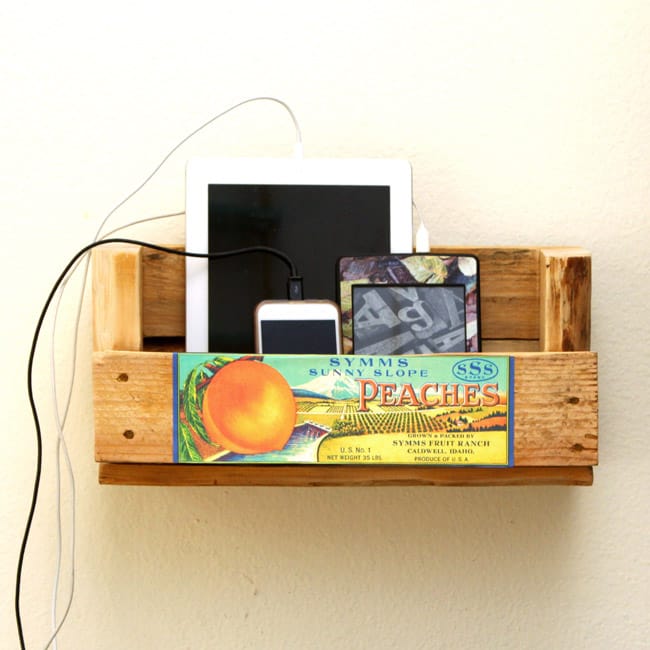
Clear the clutter with a pallet scrap charging station, and free vintage crate labels to print!


How gorgeous! This would be a great one to do a member’s download for, because it would help to be able to print it out and have the instructions beside me as I work.
hi Jane! thank you for the suggestions! 🙂 we are making lots of improvements on our site and although we may not be able to get to this yet, we will keep it on our list!
This is SO gorgeous. My “potting bench” is an old gutted gas grill! No comparison!
LZ is so talented isn’t she! i want her potting bench too! 🙂
For those of us that aren’t so good at building stuff, you could use an old dresser too.
that’s a great idea Shawn! 🙂
This is gorgeous work, very lovely indeed. I really appreciate the fact that you’ve created such a marvelous piece with reclaimed wood. Thanks for sharing it with your readers.
This is SO beautiful! I could never make it in a million years, but I love looking through your beautiful photos and ideas.
You are so sweet Ananda, and I absolutely LOVE your detailed drawings!! You are so talented, and it has been so awesome working with you 🙂