How to Grow Mushrooms in Coffee Grounds and Cardboard ( Simple and easy method! )
Today I am super excited to share with you my latest adventures: how to grow mushrooms in used coffee grounds and cardboard! It’s a very simple technique of growing mushrooms that requires no sterilization or special tools. And it can be done at home indoors or outdoors in any season.
I learned this method of growing mushrooms from an expert ( see more in resources at the end ). I love the simplicity of it, and how it allows everyone to grow delicious mushrooms at home using easily accessible and mostly free materials.
Below is a video of how fast these Oyster mushrooms grew in just 4 days! Ready to come down the rabbit hole with me?
*Some resources in article are affiliate links. Full disclosure here.
Materials and tools to grow mushrooms at home:
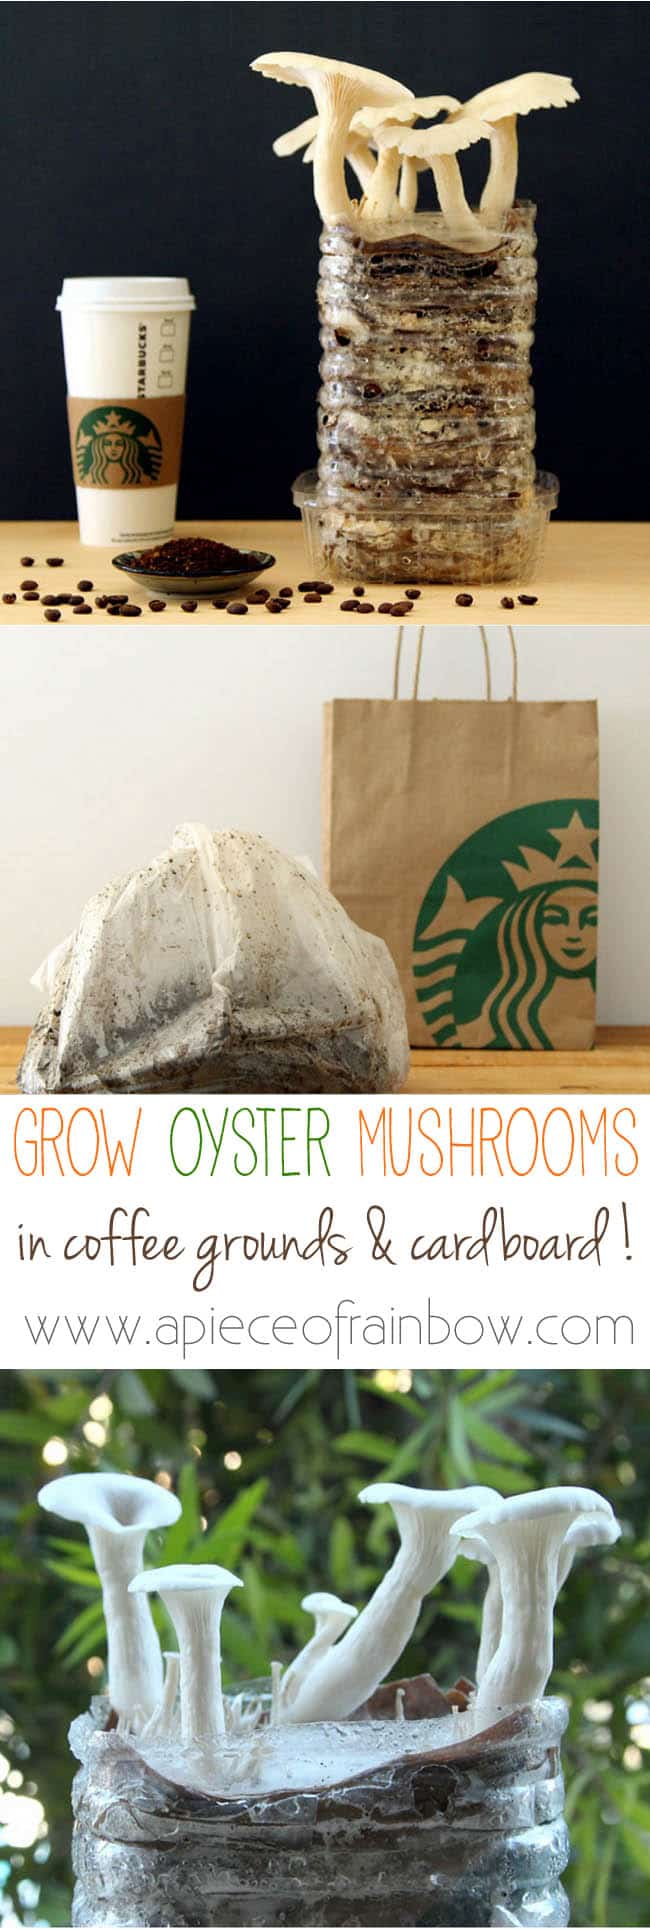
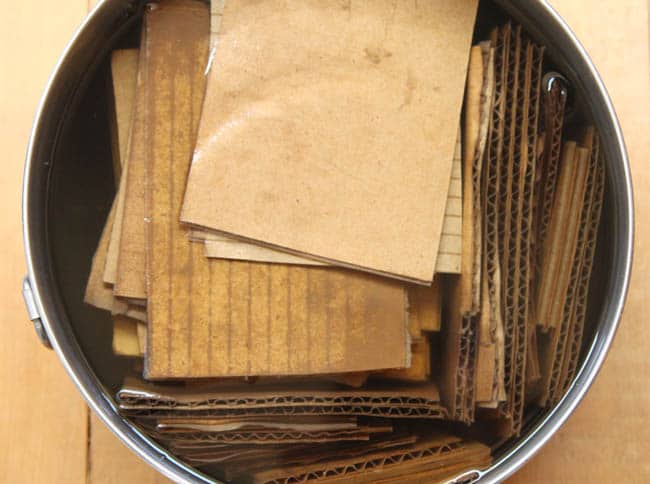
- coffee grounds and cardboard: a match made in mushroom heaven. Coffee grounds are rich in nutrients, but can contaminate easily. Corrugated cardboard is not as rich and delicious to competing molds and bacteria, and the corrugation allows room for air and for the mycelium (mushroom roots) to run.
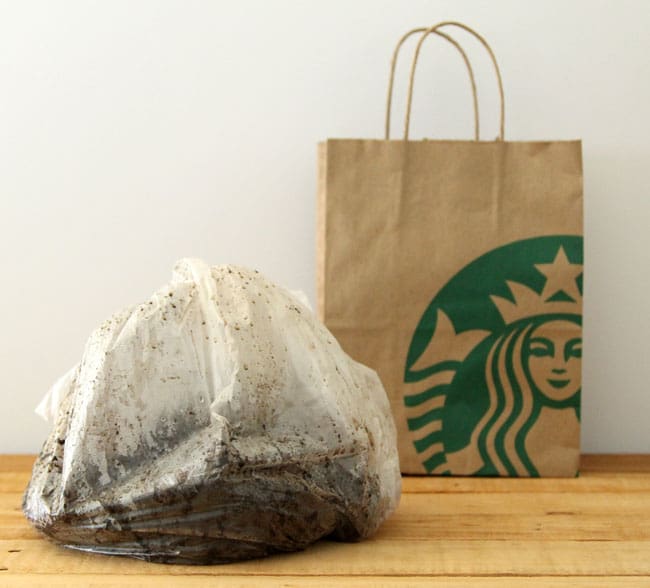
- mushroom spawn: think of them as seedlings for you to grow mushrooms. This beautiful box of Elm Oyster spawn ( Not all kits are spawn! See tips at the end!) came from 100th Monkey Mushroom , a wonderful family run business with many great products and tutorials. Eventually you can learn to grow your own mushroom spawn from mushroom stem base! But you do need great quality spawn to get started! (more on that at the end)
- 13 gallon clear medium size trash bags like these will come in handy throughout the process
- 70% to 99% rubbing alcohol to keep everything clean and reduce contamination
Step 1: prepare cardboard and container to grow mushrooms

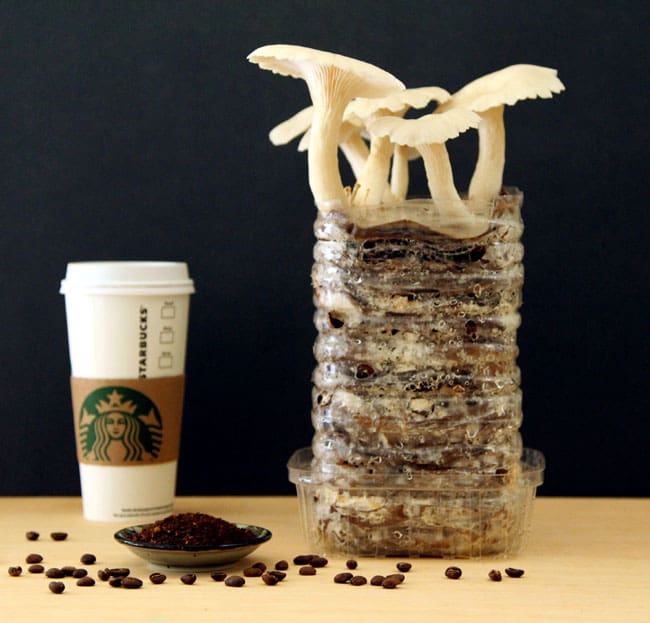
When you have all the materials you need to grow mushrooms, ask for a bag of hot-off-the-press coffee grounds from the fabulous people at Starbucks, and soak some cardboard in water 1-2 days prior. The coffee grounds should be used on the same day, and the long soaking of the cardboard helps to hydrate the material for growing mushrooms.
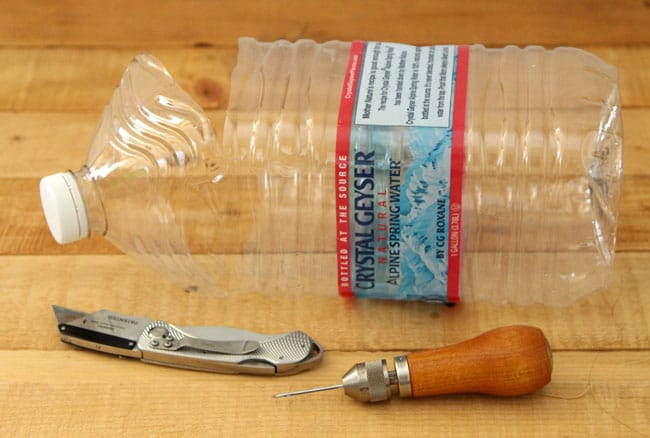
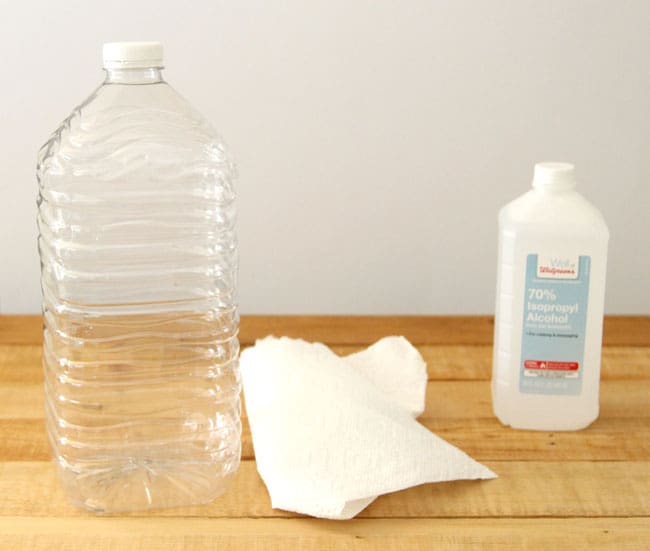
Take a one-gallon plastic container, cut 3 sides of the lid. Poke and cut 4 to 6 small 1/4″ size holes to allow air exchange and drainage on the bottom. Wipe the inside and outside of the container with 70% to 99% rubbing alcohol.
When you try to grow mushrooms at home, the biggest challenge is contamination. So keep the working area as clean as possible, and work fast!
Another fun growing project you may love – How to create a strawberry tower planter with built-in reservoir!
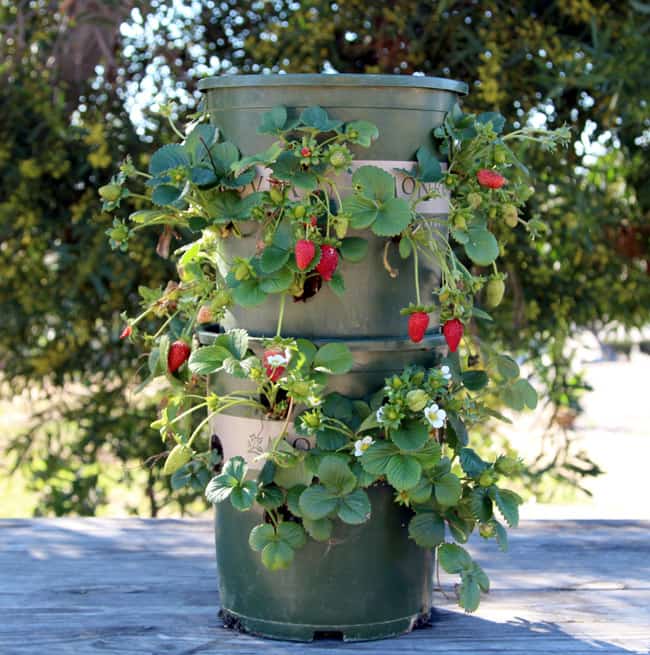
How to create a strawberry tower planter with built-in reservoir!
Step 2: layering mushroom spawn, coffee grounds, and cardboard
Break up 20% to 25% of the oyster mushroom spawn for each 1 gallon container.
Keep some paper towel dipped in alcohol handy, and wipe your work surface, hands, and anything that would come in contact with the spawn.
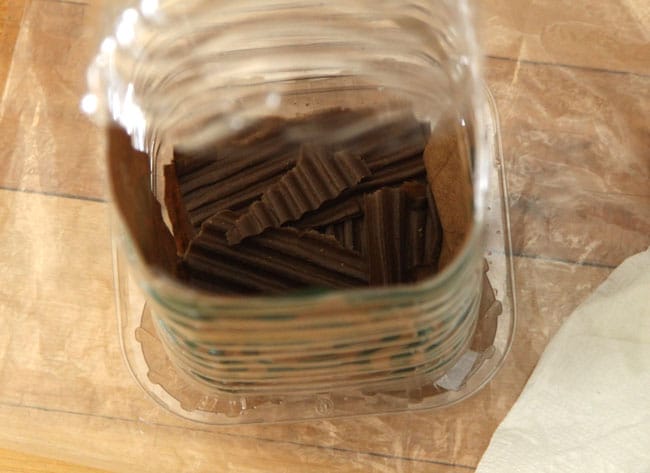
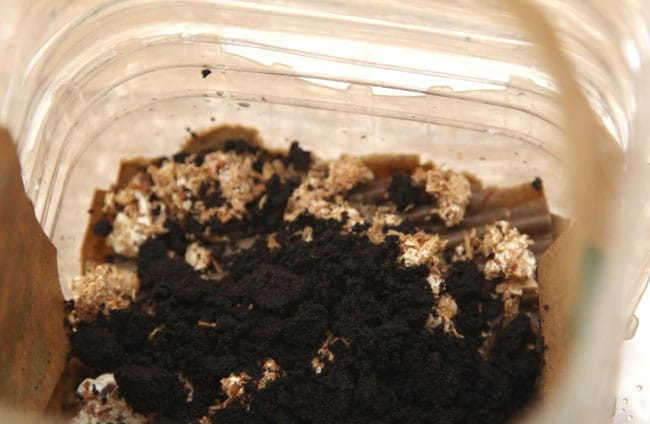

First put down 2-3 layers of cardboard. I put the Starbucks mermaid bag in there for fun, but it’s not required!
Sprinkle some spawn, then cover with a thin layer of coffee grounds. The coffee grounds can be warm or cool, but should not be too hot or freezing cold to the touch.
When in doubt, always use more spawn, because it will give competing fungus and bacteria less chance to establish.
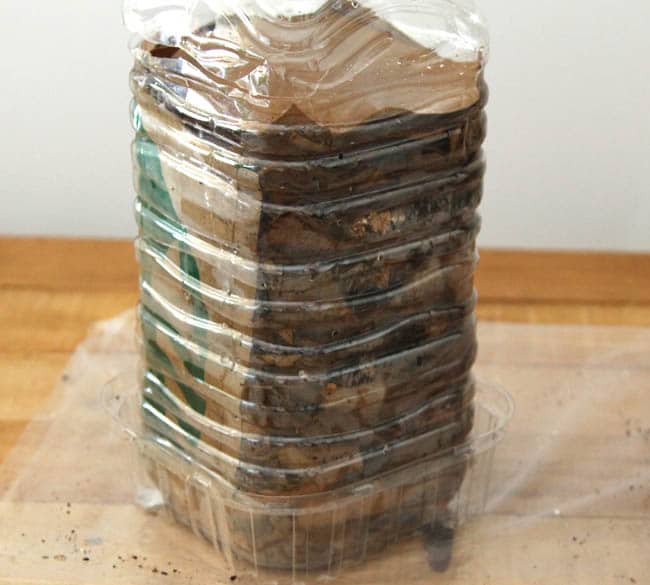
Repeat the layers till the container is filled. Top with a layer of cardboard, and close the lid. Small air gaps are fine.
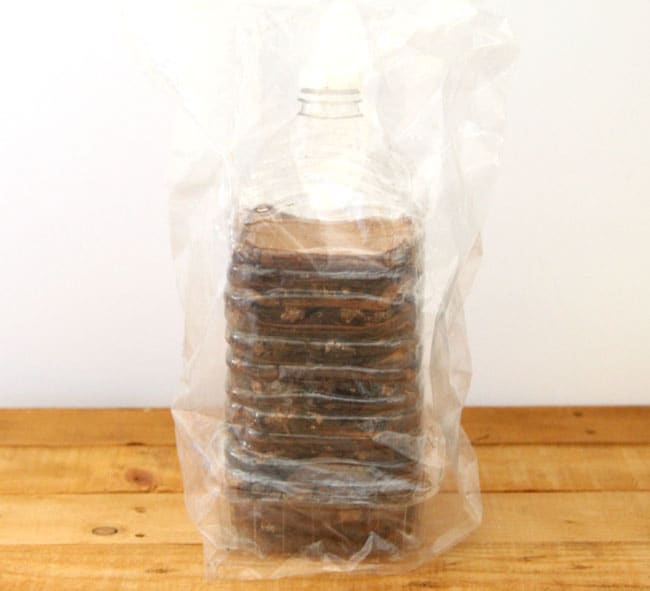
Loosely drape a plastic bag over the container to allow for air exchange, but keep in moisture. The saucer on the bottom is to catch excess liquid, if any, and to pour them out so the growing medium won’t get soggy on the bottom.
Put the container in a dark place for 2 weeks. Check every few days to make sure it’s not drying out. (OK, I checked many times a day, well, too excited! ) Spray water inside the bag or lid of the container if needed.

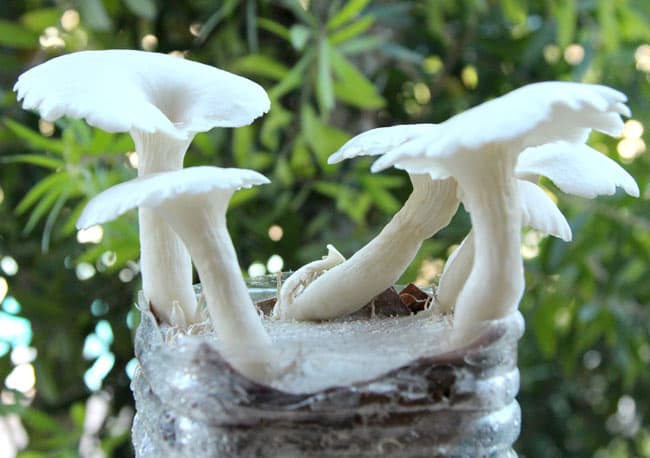
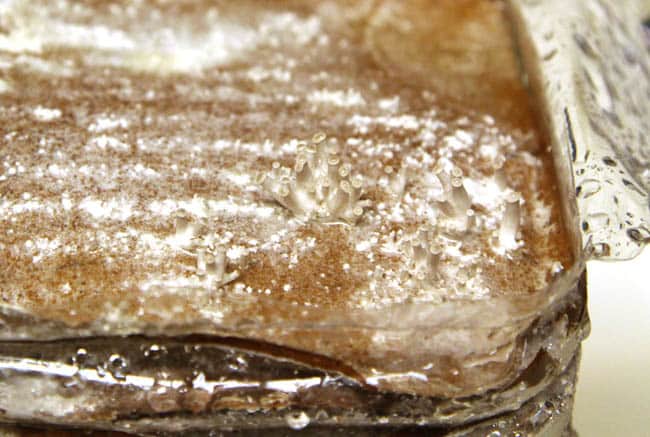
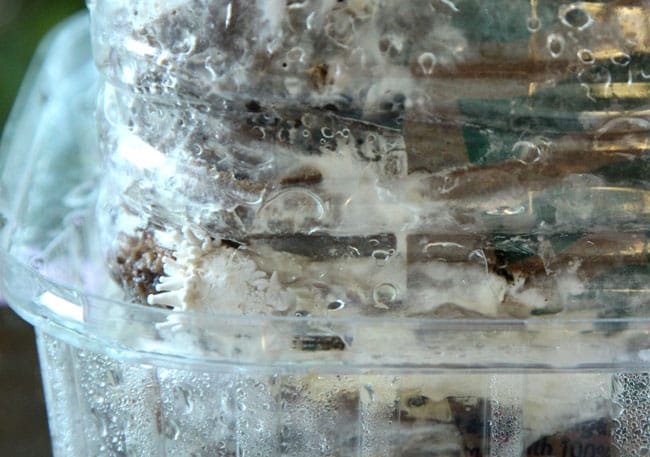
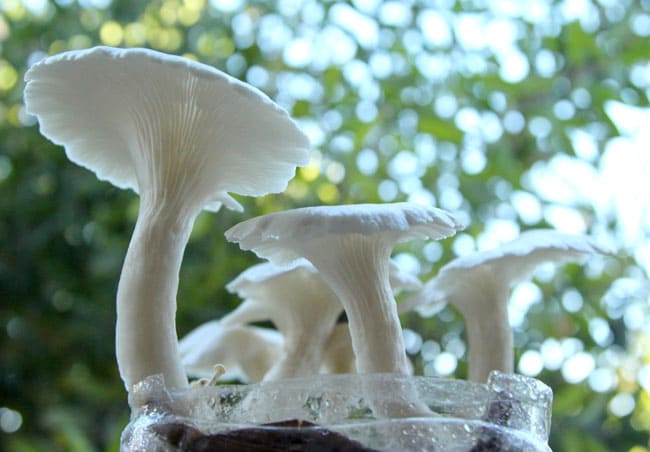
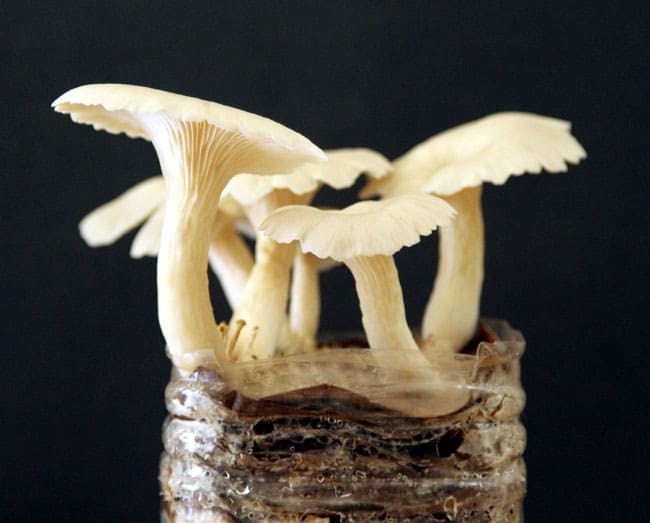
Within just 4 days, the mycelium (mushroom roots) started to grow happily! See photo above. Isn’t it exciting to grow mushrooms?!?
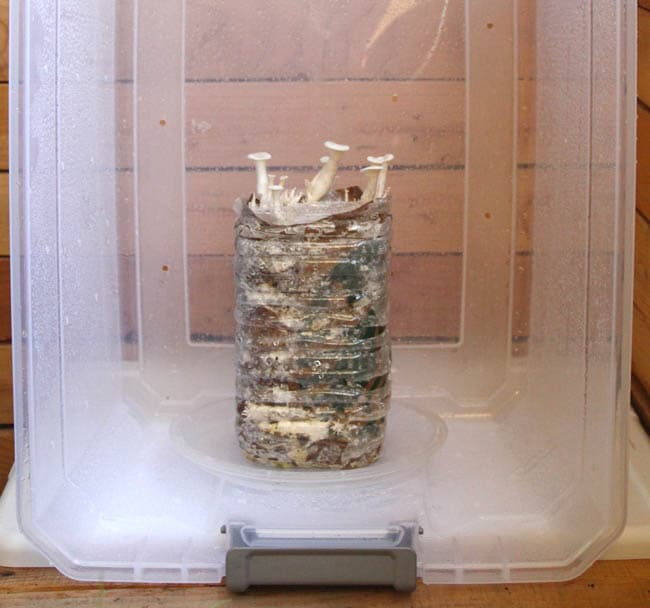
Then the magical day came in about 20 days, when the first baby mushrooms ( primordia ) were spotted!!!
Dr. Seuss little forest!! Can you see them?
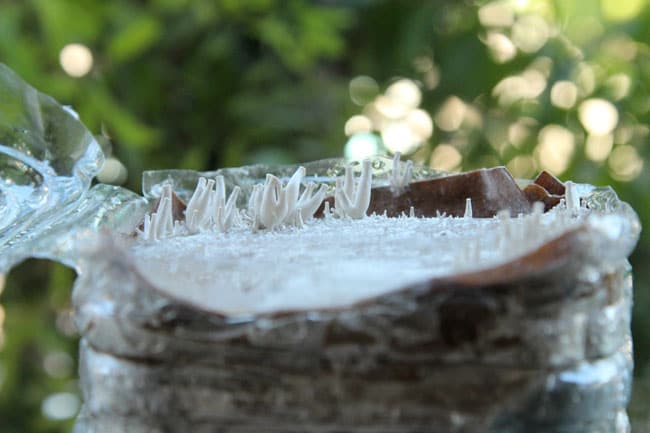
And a cluster popped out on the side too!
Just like on a fruit tree not all little fruits will ripen, the mushroom will decide to abandon some clusters and concentrate energy on other clusters.
Eventually, those on the top took over in this batch.
As soon as you see very dense white areas with little budding mushrooms, usually in about 2 to 4 weeks from the start, it’s time to move the container into a growing environment.
The keys are fresh air, bright light (enough to read in is good, which makes it possible to grow them indoors easily!) but no direct sun, and humidity in the air. Just like how it is after a rain in the forest, where we would see mushrooms coming up.
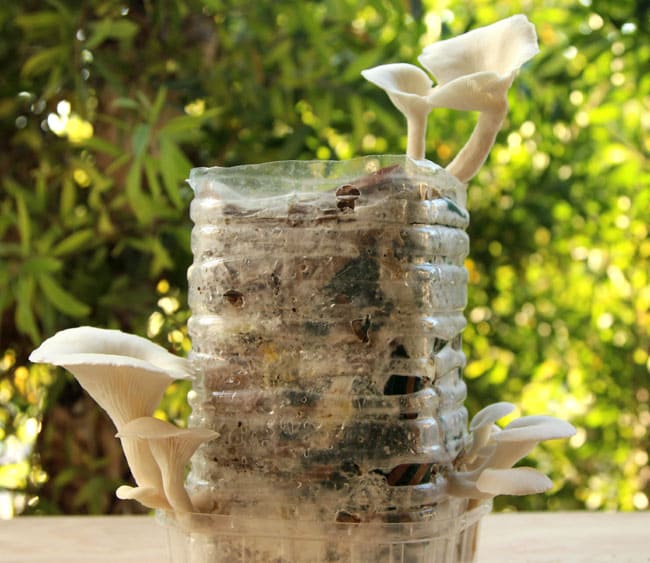
A clear large plastic trash bag with 10-20 small holes all around, propped over the container can be a simple and effective humidity tent for the mushrooms to mature.
If you are crazy in love with growing mushrooms, like I am, you can make a mushroom terrarium which works great indoors and out: drill 1/4″ holes on all sides and lid of alarge clear plastic storage bin, cover with the lid or drape a sheet of clear plastic if the bin is standing on the side like in the case.
Either way, mist the inside of the humidity tent with water 2 times a day in a dry environment, so there are water droplets visible most of the time. Placing some trays of moist Horticultural Perlite can reduce the need for daily misting since it will add moisture in the air.
Mushrooms can also be fruited under the shade of a tree, or in a greenhouse.
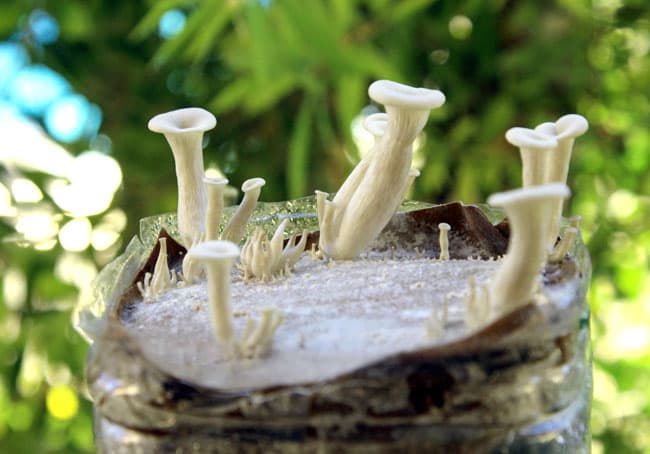
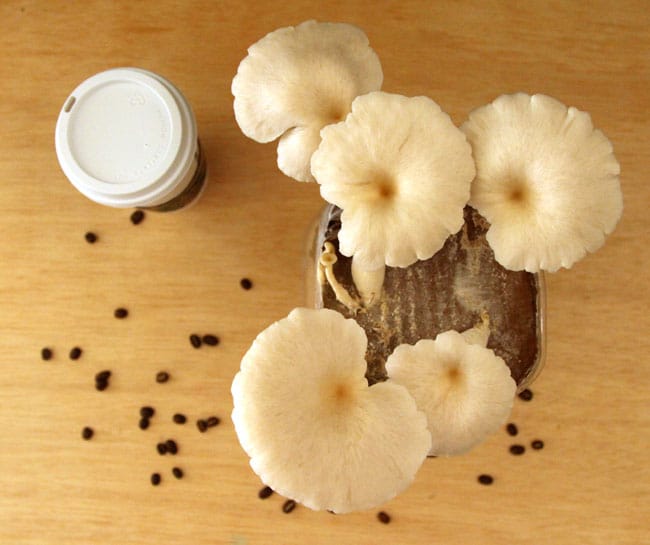
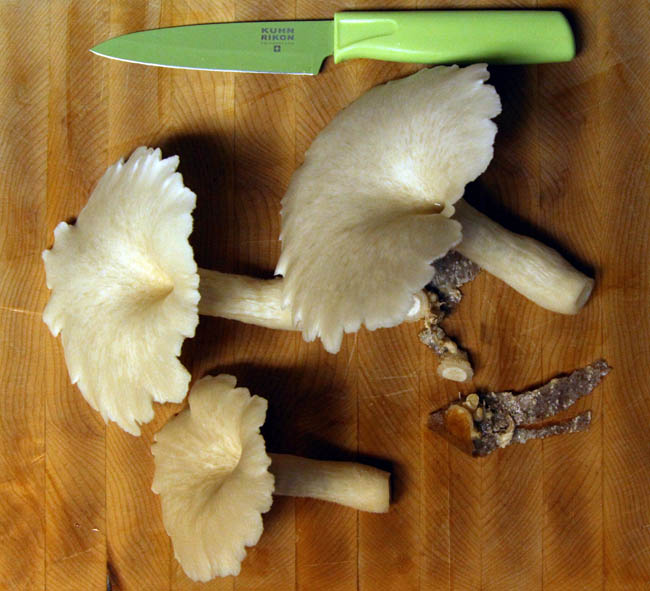
Did you see in the video how fast these mushrooms grow? That was over a 4 day period! In 3-5 days mushrooms can grow from 1/2″ tall to over 6″ tall! And yes they were delicious!
After a harvest, put the container in the dark room again to rest for 1-2 weeks, then move it to the fruiting environment for another flush of mushrooms. This process can be repeated 3 times. Some say 5 times! By the time I am publishing this, a second flush already started. Wow!
The spent growing medium can also be broken up and used outdoors in a garden for a chance of more mushrooms! Elm Oyster and cabbage family plants have a beneficial relationship. I will update you on this in future! ( Elm Oyster mushroom is actually a different species from Oyster mushroom, although tastes and looks similar. Both works great with this coffee grounds method. )
But our mushroom adventure does not end here!
Save the mushroom stem base with some white mycelium still attached, add them to some pre-soaked cardboard in a bag or container. Keep layering as you harvest more mushrooms. With a little patience, practice and good luck, you can grow your own mushroom spawn in a low-tech way.

In his inspirational book Mycelium Running – How Mushrooms Can Help Save the World, Paul Stamets gives lots of details on growing mushroom spawn from mushrooms in simple ways.
I am just starting to experimenting with this, looking good so far! I will give an update in a few months and add a link here.

Helpful Tips and resources on how to grow mushrooms at home:
- A big thank-you to James Wieser whose video inspired me to try this method!
- My favorite book on how to grow mushrooms for the home / hobby grower is Mycelium Running – How Mushrooms Can Help Save the World by Paul Stamets. His passion and knowledge is contagious! He shares lots of fun and low tech ways to growing many kinds of gourmet mushrooms which I just can’t wait to try!
- ready to grow mushroom “kits” are actually spawn with growing medium already gone through the work we did here, and ready to fruit. By starting with spawn (although it might be called “kits”), we get lots more mushrooms and more fun in the learning process!
- if you see contamination such as black or green mold, remove the moldy spots, and spray the area with hydrogen peroxide, which comes as 3%, diluted with 10 times water, which will be 0.3%.
Want more growing ideas?
A great method to start seed in 1/3 of time, with 3x more success!

Dollar Store Hack: Make gorgeous wreaths without wreath forms or fancy supplies!
Happy growing! =)


Great, well-researched, easy-to-follow guide. I absolutely love being able to use recycled materials to create something “fruitful” (pun intended). How many flushes did you get out of this before contamination?
The one note I would add (and this comes right out of the McGill University Microbiology department) – 70% ISO is actually better than 90%+
Water acts as a catalyst and plays a key role in denaturing the proteins of vegetative cell membranes. 70% ISO solutions penetrate the cell wall more completely which permeates the entire cell, coagulates all proteins, therefore killing the microorganism, whereas over 91% ISO solutions coagulate proteins instantly and form a protective layer which protects other proteins in the bacterial cell from further coagulation.
For any other amateur mushroom cultivators out there, I encourage you to give this a try. I noticed a significant increase in my success rate for spawning after switching from 90% ISO to 70%.
Amazing idea! I’m gonna try this at home soon. This is such a low cost technique of growing a mushroom. Im gonna let my niece try this too. I’m sure she will enjoy the process.
Thank you for sharing this tips on how to grow mushroom. It is very helpful for me because I’m planning to grow my own mushrooms in the house. What a great article and experience you had. Planning to do mine.
I tried to grow mushrooms in a coffee can, there is a slightly different process, but I did not succeed and now I want to try your way.
If I manage to grow at least one mushroom, I will definitely share my experience!
Great article!
I love the idea of mixing the coffee grounds with the cardboard. That is such a low cost method of creating a substrate that almost anyone can do right at home.
The only thing they really have to pay extra for is the spawn…but still, it would be a great learning experience for anyone to try at home for low cost.
I will share this article with my friends!
Love this, really want to try it. Just a couple of questions:
1. Have you cut some slats on the side of the gallon bottle/container where some mushrooms have come through?
2.. Do the mushrooms from lower layers work their way up (after you harvest the very top layer) or do they come through the sides?
hi! 1. yes either cut slats or poke some holes with a sharp tool. 2. lower layers come through the sides. 🙂
Can I use a spore syringe for same results??
hi Dylan! i have not tried spore syringe but if it works like spawn, it’s worth trying! 🙂
This is definitely an interesting gardening hack to recycle used coffee grounds and grow mushrooms in it. Got to show this to my mum, the green thumb specialist in the family.
Thank you so much for this instructional! My first container is ripe with mycelium and I’m probably a day away from seeing my first little shrooms.
I wanted to ask – the last step you listed was:
“Save the mushroom stem base with some white mycelium still attached, add them to some pre-soaked cardboard in a bag or container. Keep layering as you harvest more mushrooms.”
Is that just to collect and preserve the mycelium until you have enough to start another bin with cardboard and coffee? You can’t do a second run of this with *just* cardboard, right?
Thanks again!! Excited to feast on some fresh oysters!
hi toby! congrats on your upcoming harvest! 🙂 yes that is to collect and grow the mycelium in a less contaminants pron environment . you will need more nutrients like coffee grounds to grow more mushrooms. experiment and keep us posted, as there’s always ways to improve! 🙂
That’s amazing. They are so helpful. Thanks for these kinds of advice about mushroom gardening.
Very cool that coffee grounds which would otherwise be thrown away can be repurposed and generate nutrition! Thank you Ananda for a comprehensive and easy to follow guide! Cant wait to try this out!
What an amazing article! I have read a lot of articles on growing mushroom but this one is so detailed I feel like I can actually go and try it myself. Great job and I will share this with my list!
Great thanks for the such information about growing mushrooms. I will try this.
I love coffee especially my latte! but using coffee grounds to grow oyster mushrooms is something worth a try! Thank you for sharing and letting the world know about this wonderful and magical use of coffee grounds!!
Amazing. I will sure love to try growing mushrooms in my garden!
Great piece of work you have done.
Thank you for sharing the how to’s in growing this amazing mushroom. I will start my own garden soon.
Hi Ananda, Thanks for all your wonderful project presentations! I have a Q re: this one — does it matter if the coffee is not organic? It seems to me that if pesticides were used in the coffee growing this could affect the quality of the oyster mushrooms.
Also, can one do this same method for shitake?
Thank You!
hi renee, that is a great question. there is a ted talk by one of the best mushroom growing expert https://www.ted.com/talks/paul_stamets_on_6_ways_mushrooms_can_save_the_world
of course organic is always better. from what i have learned, the coffee grounds is like compost in soil, being broken down and transformed into nutrients by microorganisms. i think it is different than putting the original chemicals onto the mushrooms. but i am not an expert scientist to answer this! 🙂
I live in a two bedroom unit. It has no garden space so I grown in pots onions, sage ginger, chillies curumin, pineapples, avocado, strwberries, peas and other vegies.
hi rob! that sounds fabulous! i also think starting a community garden is a great way to grow food and flowers on land we don’t own. 🙂
After your mushrooms fruit, you have 4 gallon containers filled with mycelium. Is this spawn that can be used to start new containers layered with cardboard and coffee grounds?
hi cindy, yes you can do this a couple of times. what i learned is that the “left overs” will be less productive, which is why we need to grow or purchase fresh spawn 🙂
Hi, i am actually interested in teaching this idea of growing mushrooms using spent coffee grounds to the local kids. i actually wanted to prepare some sample for them to pique their interest. do you have any advice on how can i store the coffee ground obtained from the cafe for a few days before actually using them?
hi! store them in freezer and let come to warm room temp before using. good luck! =)
siguiendo tu instructivo salen los hongos o necesito semilla?, interesante, me gustaría probar. gracias
will need seed (mushroom spawn ) for the first batch at least =)
What?!? This is such a great idea! I have no shortage of coffee grounds so I definitely need to get on this ASAP. Thank you so much, Ananda 🙂
I’m so impressed! Really great post and site! I found you on FB GYB page. Let me know if you’d like to collaborate, be a guest writer, or get together to do a giveaway with some other bloggers, just support each other in some way. My site is http://www.4hourbodygirl.com. All the best, Heather
Greetings,
I like your article, but I’m a little confused – under Helpful Tips and Improvements: you note that the use of an “opaque’ plastic bag, but then you include a link to a page with “clear” plastic bags – So, which did you mean – clear or opaque?
Thanks,
jm
hi! if it’s a soft bag, use either one because you can cut openings easily where little mushrooms form (due to light). if it’s a hard container, use opaque because it’s not easy to cut openings like i did.
This is so brilliant. My husband drinks coffee every day and we are always looking for ways to use the coffee grounds. I’m going to make this our project soon.
Hello. It is not clear what your spawn/wet cardboard/coffee ratio is (in weight). Could you share this? Thank you very much!
hi alex, there is not an exact ratio. use a bit more spawn will just improve the success rate. 🙂
My dad would love this! I am totally going to do something like this for his birthday!